Date Published: August 17th, 2020 | Last Updated: August 17th, 2020
Author: Abby |Category: salads, vegetarian
Serves: 4-6 | Prep time: 15 mins | Cook time: 20 mins
Jump to recipe |
In many Chinese households raw vegetables are not very common – if at all. When we moved to Canada it was really strange watching my classmates eat raw carrots and celery as a snack. It was even stranger that someone would bring a platter of uncooked vegetables to a party as their contribution. To this day I’m still not a big fan of raw veg on their own but when it’s paired with a delicious creamy dip or in a flavourful salad, sign me up!…Except for celery. I still can’t eat that shit raw.
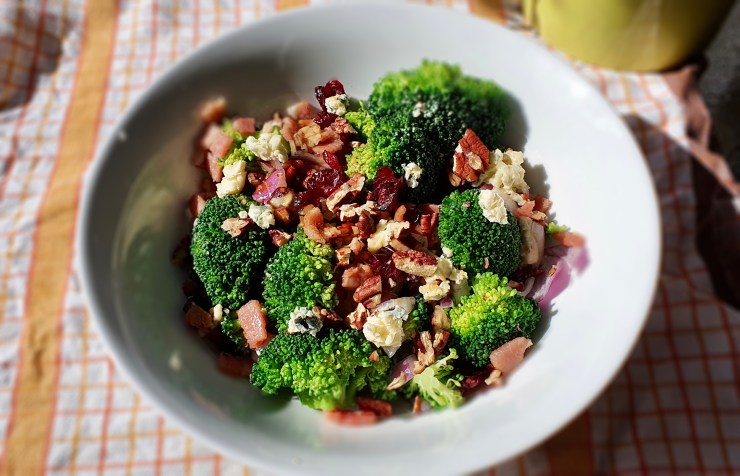
Broccoli was one of the last few veg I came to terms with eating raw. I’ve always loved steamed broccoli especially with some garlic and black pepper, but crunching on it raw just felt so wrong…until I came upon this amazing salad that a friend brought to a party a couple years ago. I was going to call this “Jess’ Broccoli Salad”, but I went with a more descriptive title instead for those of you that don’t know Jess 😜 (who’s also a super amazing baker). If you’re a fan of blue cheese, this salad is definitely for you! The bold blue cheese is offset by the sweet and tart cranberries and juiciness of the red onions, then mellowed out with crispy bacon and toasted pecans, all transported by the humble crunchy broccoli for a super flavourful mouthful.

The ingredients list seems long, but most of it is the balsamic dressing. A freshly made balsamic vinaigrette really does make a difference to tie all the flavours of the salad together, but if you’re in a rush, feel free to take a shortcut and use a store-bought version. There are also a few other shortcuts in the recipe marked as “optional” steps, but I encourage you to take the time to toast the pecans, blanch the broccoli and sauté the bacon to bring out the maximum flavours of the ingredients.
Anyways, without further ado, here’s the recipe! If you have any comments or suggestions, I’d love to hear from you in the comment section! You can follow me on instagram, youtube and facebook to see all the recipes I post!
Happy cooking!
Ingredients you’ll need:
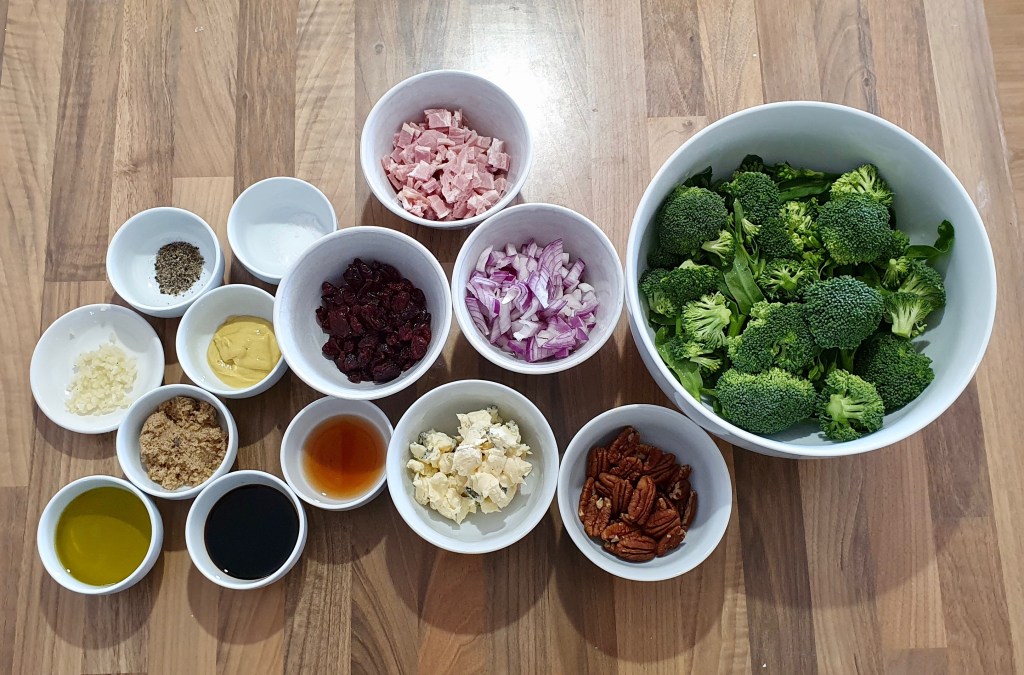
- Balsamic Dressing:
- 2 Tbsps balsamic vinegar
- 1 Tbsp red wine vinegar
- 1 Tbsp dijon mustard
- 2 Tbsps brown sugar
- 1/4 cup olive oil
- 1/2 tsp salt
- 1/2 tsp pepper
- 2 cloves garlic, minced
- Salad:
- 6 cups broccoli, chopped (roughly 3 middle-sized broccoli heads or 2 large ones)
- 1/2 cup pecans
- 1/2 cup bacon, chopped
- 1 cup red onion, sliced or diced (personal preference)
- 1/2 cup blue cheese, crumbled
- 1/2 cup dried cranberries
Directions:
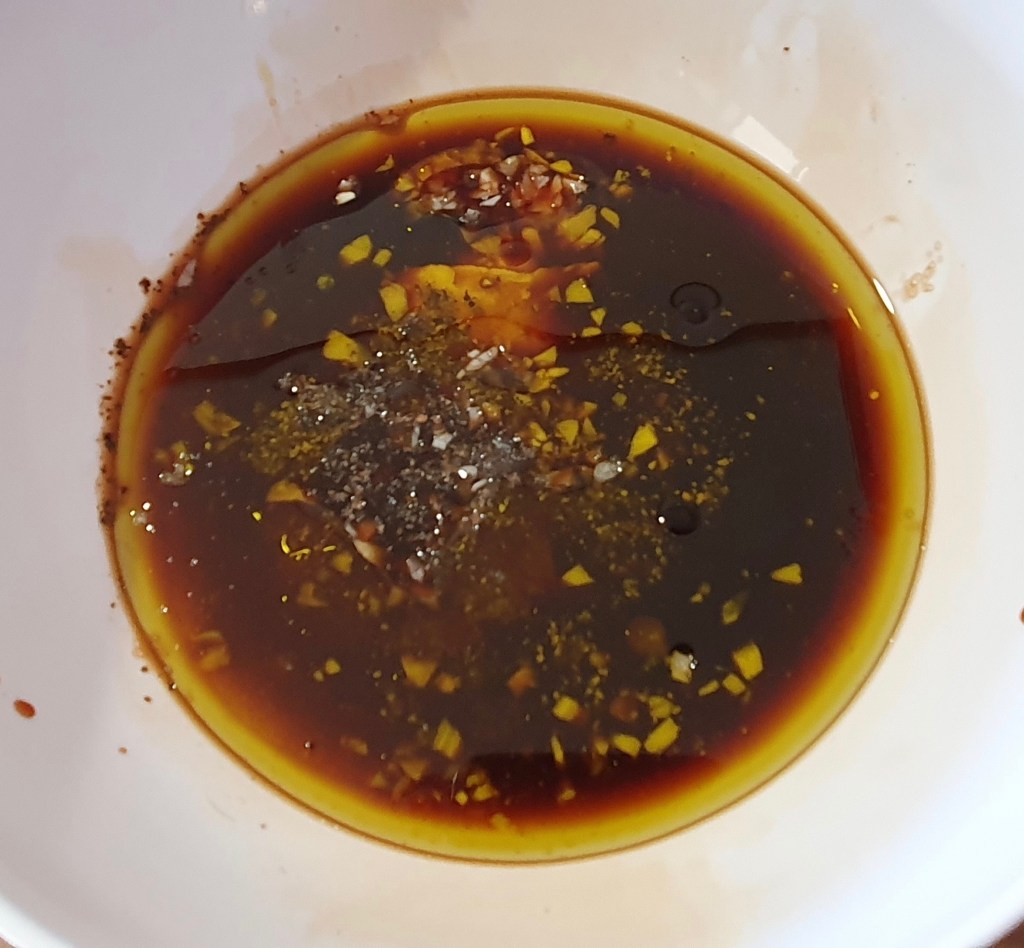

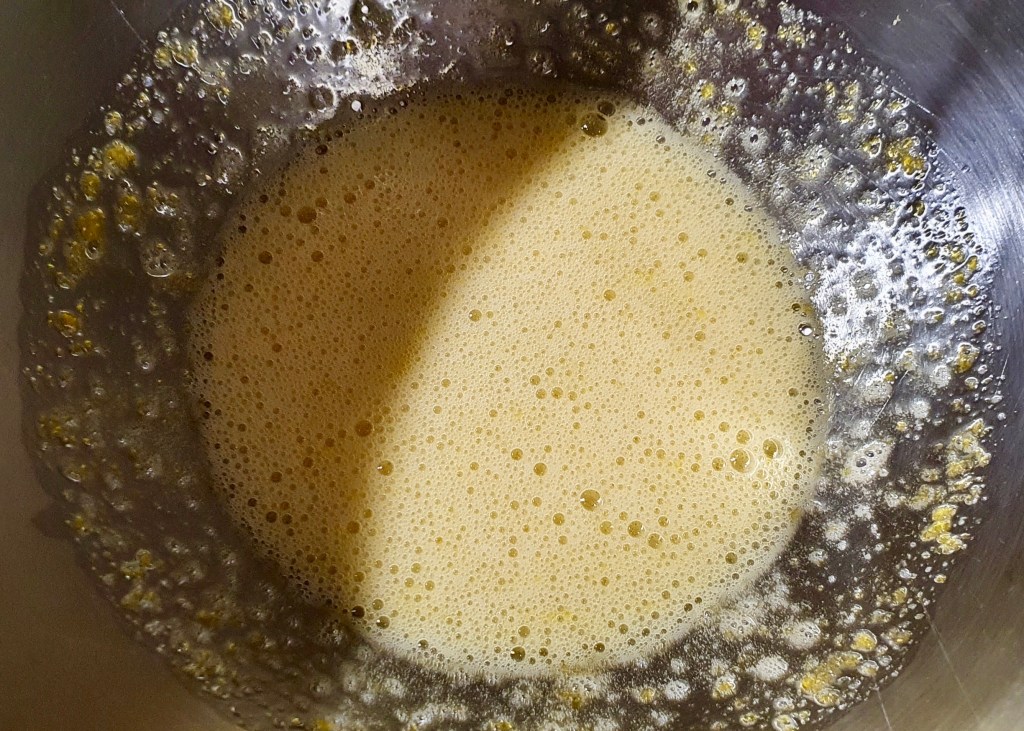
Make the dressing: put all the ingredients for the dressing in a bowl (balsamic vinegar, red wine vinegar, dijon, brown sugar, olive oil, salt, pepper, garlic) and whisk until it becomes a homogenous mixture. Set aside.
(Alternatively, you can put all the ingredients in a mason jar and shake well until all the ingredients are combined.)
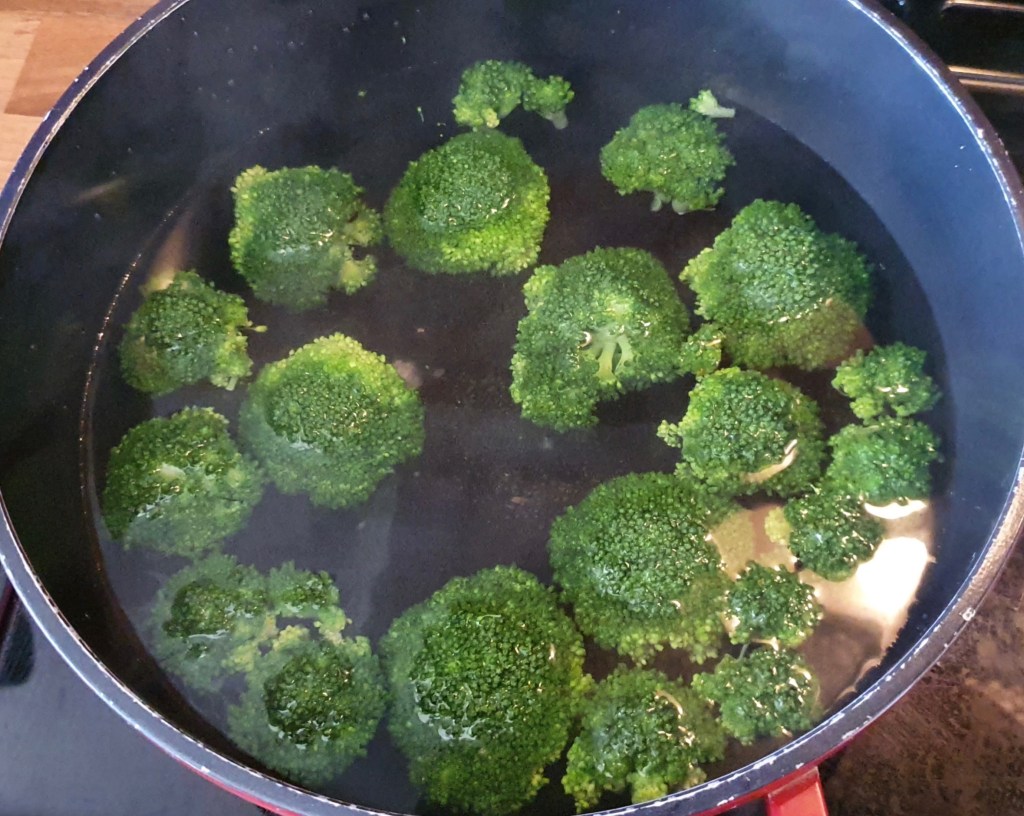
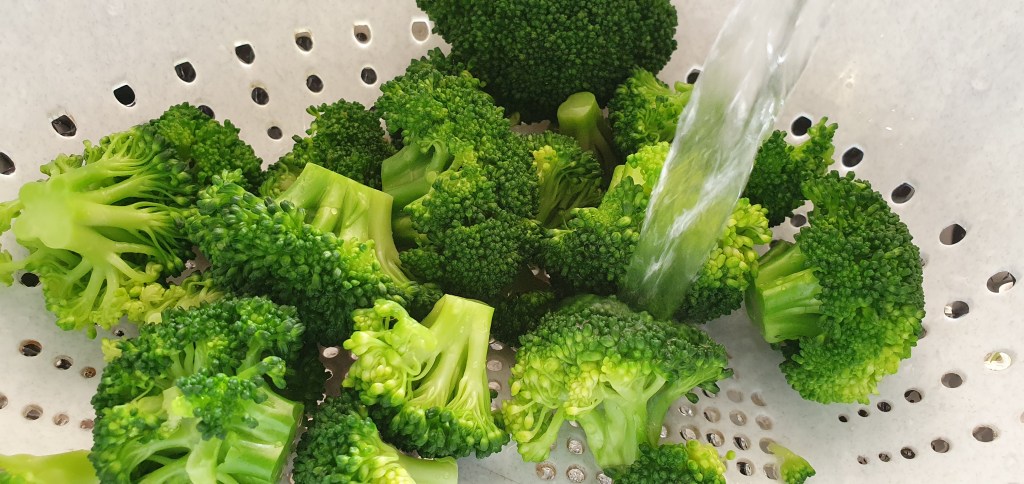
Blanch the broccoli: place the broccoli in a pot of boiling water for 1-2 minutes then drain and run under cold water. Use a salad spinner to get rid of excess water on the broccoli. Set aside.
This step is optional but it helps soften the broccoli a little but and bring out the bright green colours. If you prefer your broccoli raw and crunchy, feel free to skip this step. You can also boil the broccoli a little longer if you prefer it softer.

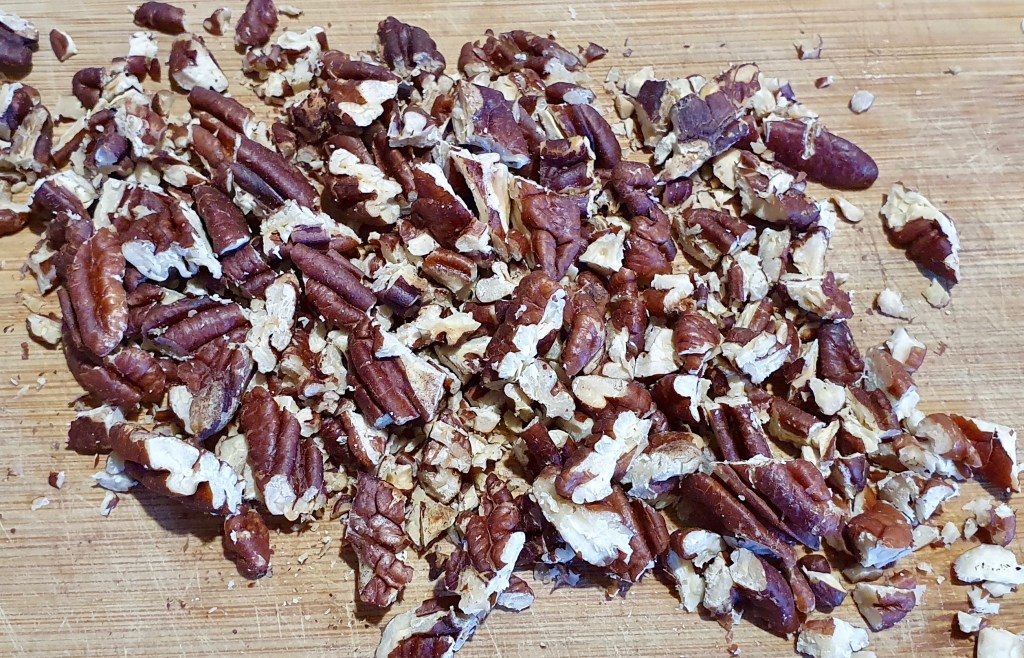
Toast the pecans: Preheat the oven to 180˚C and toast the pecans for 10-15 minutes until fragrant and darker brown, then roughly chop it and set aside.
This step is also optional, but I find toasting the pecans bring out a lot more depth in the flavours of the salad.

Sauté the bacon: While you’re waiting for the pecans to toast, sauté the chopped bacon until light brown and crispy. Set aside.
Assemble the salad: In a large bowl, mix together all the salad ingredients: broccoli, pecans, bacon, red onions, blue cheese, and cranberries. Pour the dressing over and mix well. Serve and enjoy!


Summarized Recipe:
Blue Cheese Broccoli Salad
Date Published: August 17th, 2020 | Last Updated: August 17th, 2020
Author: Abby |Category: salads, vegetarian
Serves: 4-6 | Prep time: 15 mins | Cook time: 20 mins
Ingredients:
- Balsamic Dressing:
- 2 Tbsps balsamic vinegar
- 1 Tbsp red wine vinegar
- 1 Tbsp dijon mustard
- 2 Tbsps brown sugar
- 1/4 cup olive oil
- 1/2 tsp salt
- 1/2 tsp pepper
- 2 cloves garlic, minced
- Salad:
- 6 cups broccoli, chopped (roughly 3 middle-sized broccoli heads or 2 large ones)
- 1/2 cup pecans
- 1/2 cup bacon, chopped
- 1 cup red onion, sliced or diced (personal preference)
- 1/2 cup blue cheese, crumbled
- 1/2 cup dried cranberries
Directions:
- Make the dressing: put all the ingredients for the dressing in a bowl (balsamic vinegar, red wine vinegar, dijon, brown sugar, olive oil, salt, pepper, garlic) and whisk until it becomes a homogenous mixture. Set aside.
- Blanch the broccoli (optional): place the broccoli in a pot of boiling water for 1-2 minutes then drain and run under cold water. Use a salad spinner to get rid of excess water on the broccoli. Set aside.
- Toast the pecans (optional): Preheat the oven to 180˚C and toast the pecans for 10-15 minutes until fragrant and darker brown, then roughly chop it and set aside.
- Sauté the bacon: While you’re waiting for the pecans to toast, sauté the chopped bacon until light brown and crispy. Set aside.
- Assemble the salad: In a large bowl, mix together all the salad ingredients: broccoli, pecans, bacon, red onions, blue cheese, and cranberries. Pour the dressing over and mix well. Serve and enjoy!