Date Published: August 1st, 2020 | Last Updated: August 1st, 2020
Author: Abby |Category: asian, mains, easy, low-cal
Serves: 4-6 | Prep time: 15 mins | Cook time: 30 mins
Jump to recipe |
NOM NOM NOM I LOVE KATSU. When Toby and I head out to a Japanese restaurant, katsu is usually one of our go-to items to order (second to ramen, of course).
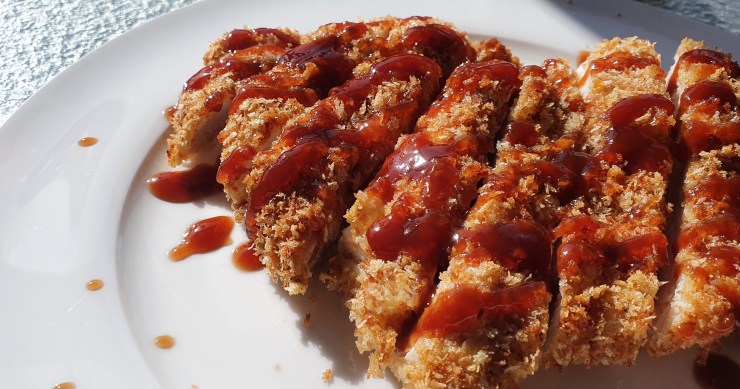
If you’re not familiar with katsu, it’s essentially a Japanese version of a schnitzel topped with an iconic tonkatsu sauce. A katsu is made with either chicken (breast or thigh) or a pork cutlet (called tonkatsu). The breading is made with panko (Japanese breadcrumbs) rather than traditional breadcrumbs which results in a lighter, flakier, and crispier texture.

I’m not a fan of deep-frying things at home because a) you need to use so much oil, b) it pains me to waste all that oil for one dish, c) health reasons, and d) the clean up afterwards from oil splatters. Don’t get me wrong, I love having the occasional take-away fried foods, but I just really dislike deep-frying things at home. This was the reason why I never tried to make katsu at home and save it for restaurant outings until now! I stumbled across this recipe from Just One Cookbook (which is filled with amazing Japanese recipes btw and defs worth checking out) and I was skeptical if it would be as good as the real deep-fried thing. For the sake of science, experimentation, and the quest to making great food, I made both versions: one deep-fried one and one baked.

Top is baked, bottom is deep-fried 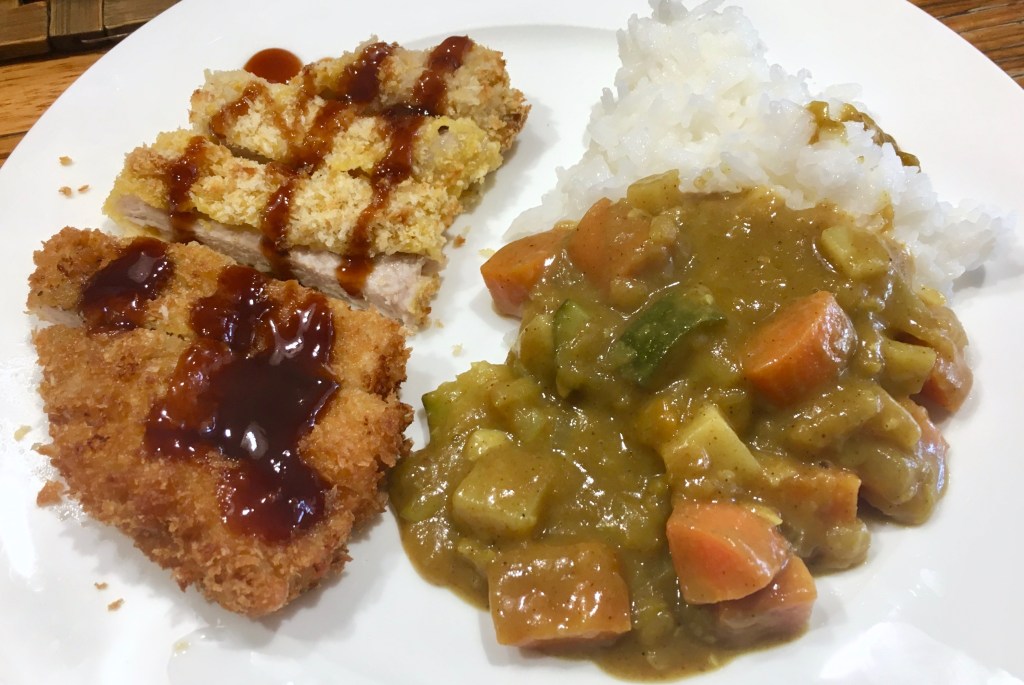
Both version served with homemade Japanese curry!
I’m VERY happy to report that the baked version was unanimously favoured over the deep-fried version. Who would’ve thought!? The baked version had a crispier texture with better crunch and was (obviously) less oily than the deep-fried version. The colour wasn’t as dark, but that’s easily solved by pre-toasting the breadcrumbs for the baked version.
Overall this recipe was surprisingly easy and quick with very minimal prep work. It’s rare that I can cook up a dish without having to do any chopping. Best of all, it’s also relatively low in calories too (under 300 calories per serving!). This recipe definitely makes the top 20 list in my books.
Anyways, without further ado, here’s the recipe! If you have any comments or suggestions, I’d love to hear from you in the comment section! You can follow me on instagram, youtube and facebook to see all the recipes I post!
Happy cooking!
Ingredients you’ll need:
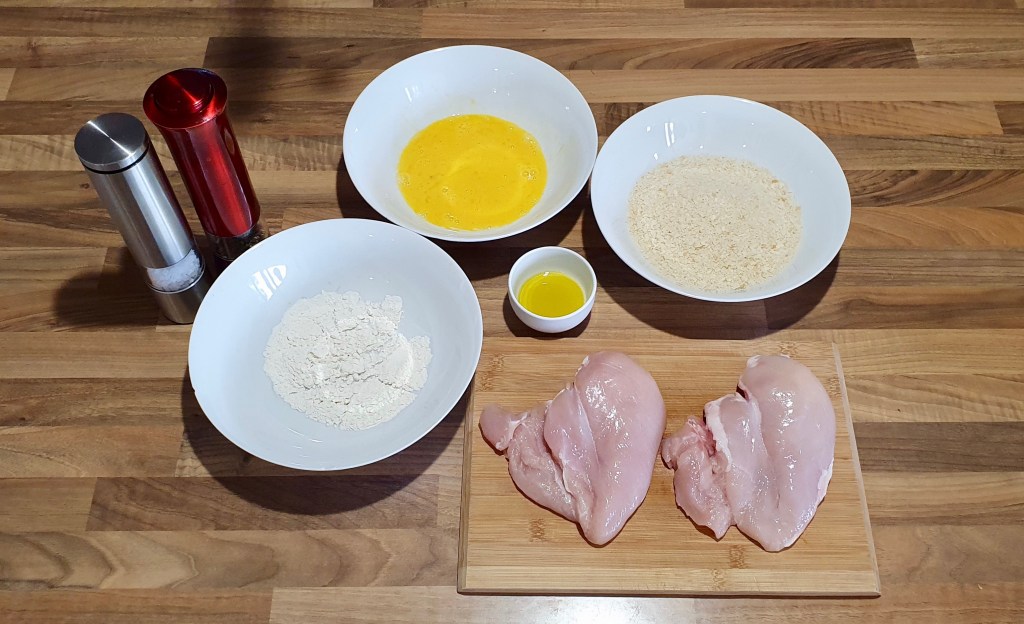
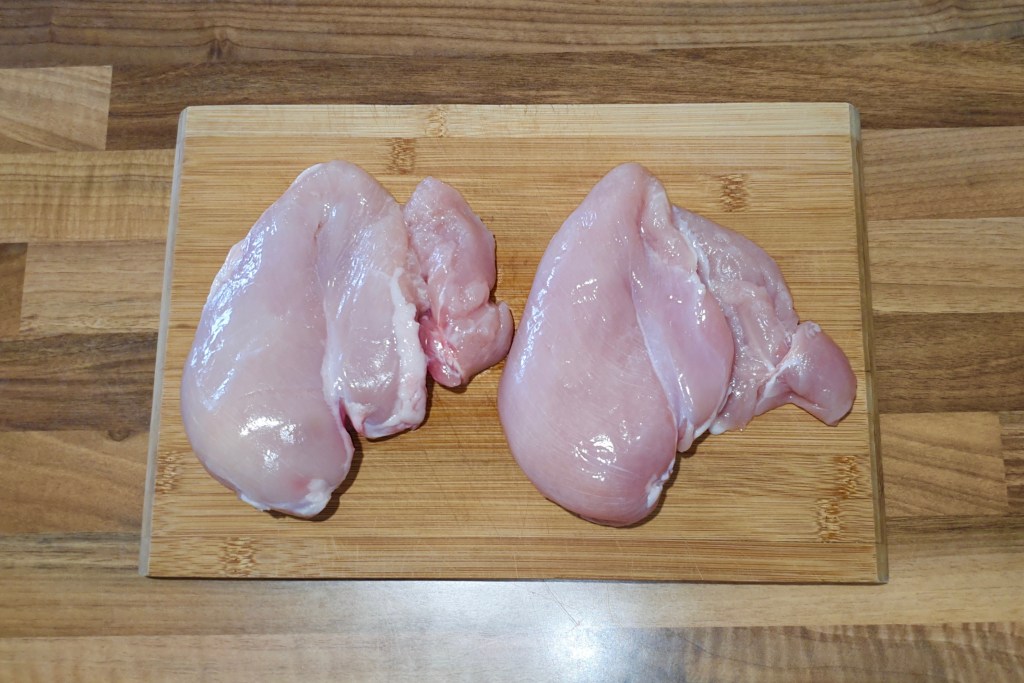
- 4 chicken breasts, butterflied (note: one chicken breast makes a pretty large portion once you butterfly it (see finished photo) so I usually aim for 3/4 of a breast per person (unless you’ve got a big appetite) which is why I’ve written 4-6 servings for this recipe)
- This recipe works well with chicken thighs or boneless pork loin chops as well (pound the chops to ~1.2cm thick)
- salt & ground black pepper
- 2 Tbsp extra virgin olive oil
- 2 cups panko (Japanese breadcrumbs)
- 4 Tbsp all-purpose flour (plain flour)
- 2 large egg, beaten
Directions:
Rinse and pat the chicken breasts dry. If you haven’t already, butterfly your chicken breasts (see photo tutorial below on how to do this or click here for more detailed instructions). Season breasts with salt and pepper. Set aside.
(If you’re using pork cutlets, score the edge where the fat and the meat meet to ensure your cutlet doesn’t curl when cooking and use a meat tenderizer mallet to pound the cutlets to about 1.2cm thick.)
Two chicken breasts 
Cut off the small side piece of meat and reserve it for later use 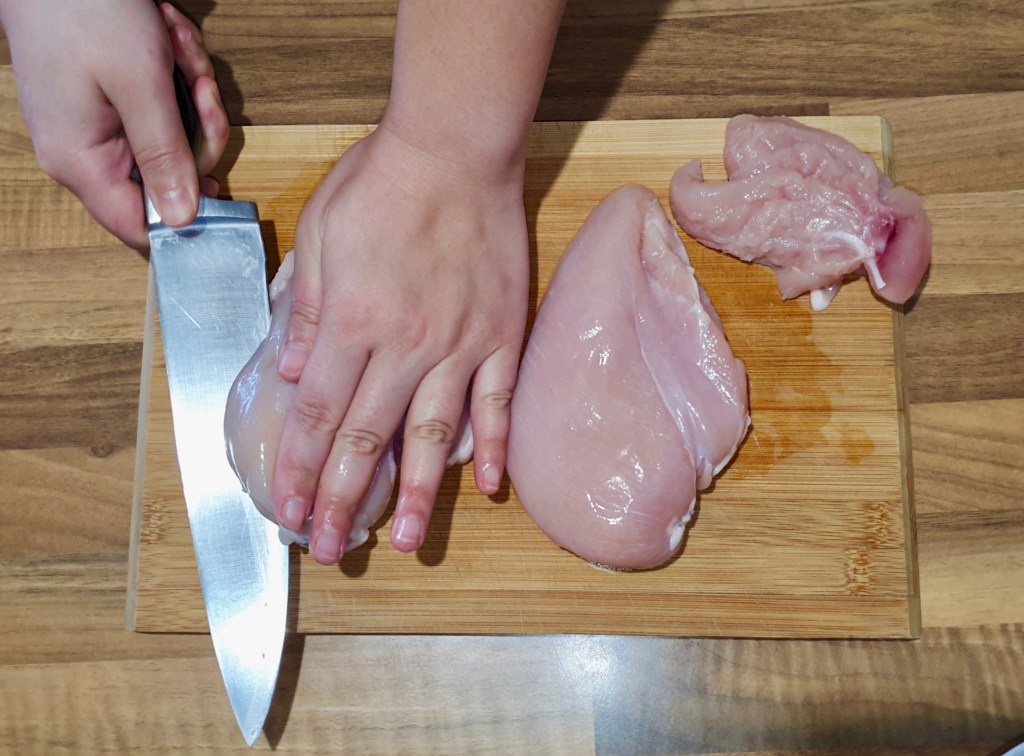
Starting at the thicker side, slice the breast in half, keeping your knife parallel with the chopping board but don’t cut all the way through 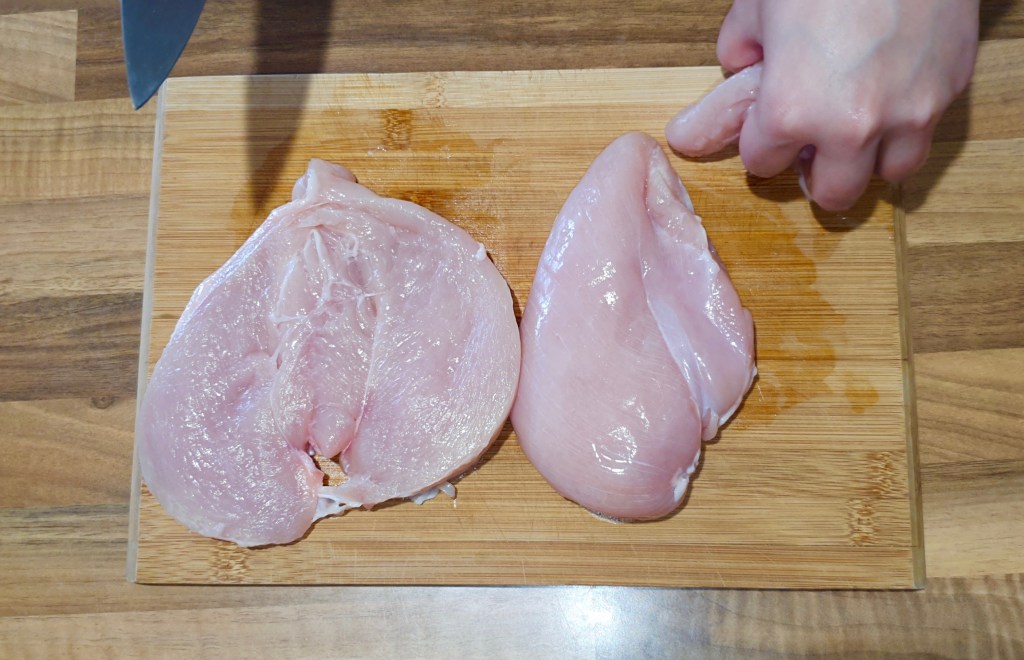
Stop cutting when you get near the end of the breast. Open it up and done! 
Ta-da! Two butterflied chicken breasts
Preheat oven to 200˚C.
Heat a skillet on medium heat and add olive oil.
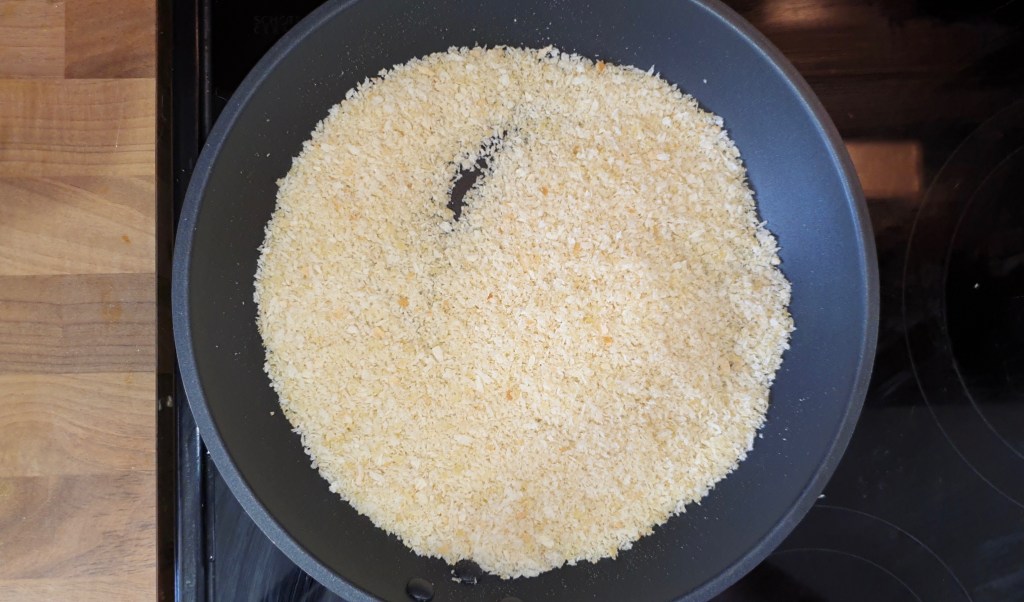

Add in the panko breadcrumbs and stir to combine with the oil and toast the panko until golden brown. Put the crumbs in a large bowl and set aside to cool.
Note: When you bake a katsu, the colour of the breadcrumbs doesn’t change much in the oven compared to deep-frying, which is why this step is important to get that delicious toasty crumb.

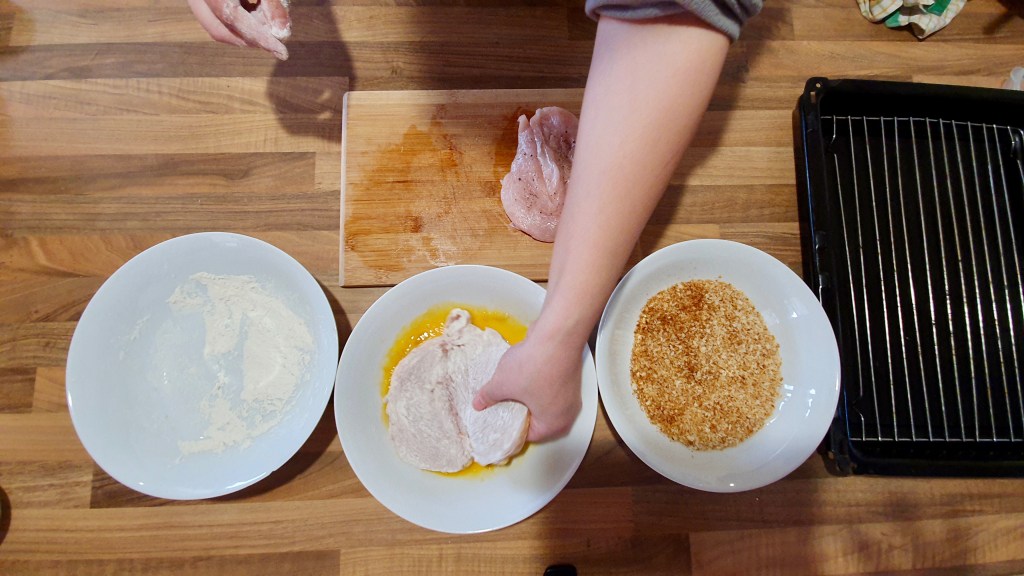
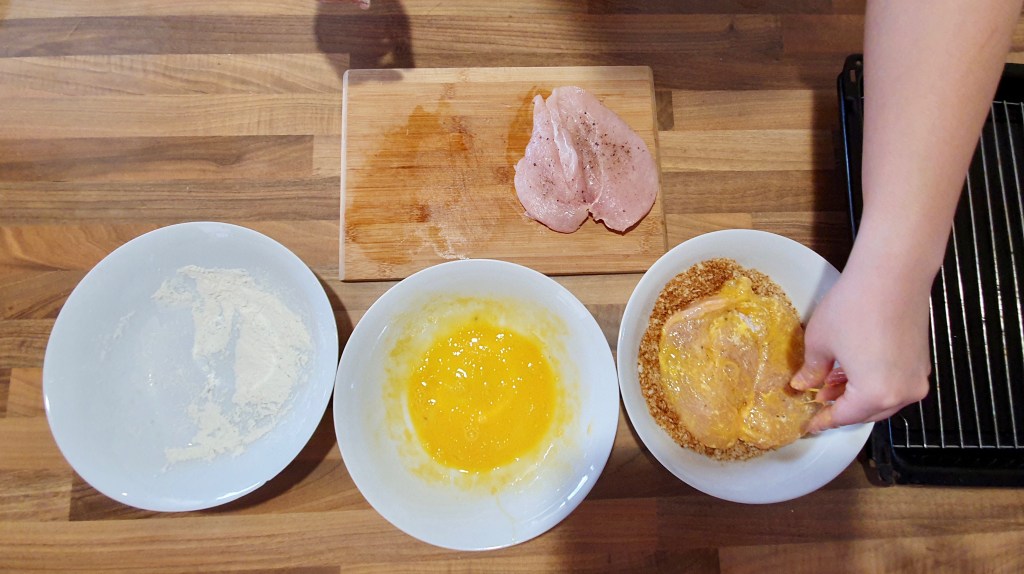
Prepare three bowls: 1) Flour, 2) Beaten eggs, 3) Toasted panko
Dip your butterflied chicken breasts first in the flour on both sides and shake off any excess flour. Make sure sure you cover every crevice. Then dip it in the beaten egg and finally in the toasted panko, pressing the crumbs in slightly to help them stick.

Set your chicken breasts on wire racks placed ontop of a baking tray and bake in the oven at 200˚C for 20-25 minutes, until the chicken juices run clear or a thermometer reads 74˚C in the thickest part of the breast.

While your chicken bakes, you can make the tonkatsu sauce (click to follow link to recipe).
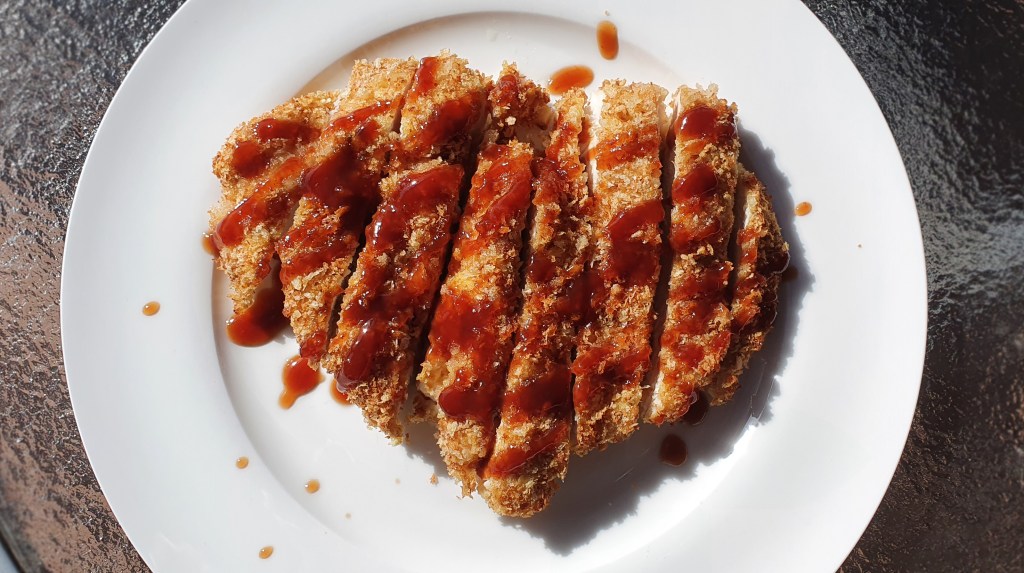
Once your chicken is cooked, let it cool for a couple minutes on the wire rack and serve immediately as whole cutlet or slice it into strips, drizzled with tonkatsu sauce.

Summarized Recipe:
Baked Chicken Katsu
Date Published: August 1st, 2020 | Last Updated: August 1st, 2020
Author: Abby |Category: asian, mains, easy, low-cal
Serves: 4-6 | Prep time: 15 mins | Cook time: 30 mins
Ingredients:
- 4 chicken breasts, butterflied (or chicken thighs or boneless pork loin chops (pound chops to ~1.2cm thick))
- salt & ground black pepper
- 2 Tbsp extra virgin olive oil
- 2 cups panko (Japanese breadcrumbs)
- 4 Tbsp all-purpose flour (plain flour)
- 2 large eggs, beaten
Directions:
- Rinse your chicken and pat dry. Butterfly the chicken breasts (see photo tutorial above) and season with salt and pepper on both sides and set aside.
- If you’re using pork cutlets, score the edge where the fat and the meat meet to ensure your cutlet doesn’t curl when cooking and use a meat tenderizing mallet to pound the cutlet until about 1.2cm thick. Season with salt and pepper on both sides and set aside.
- Preheat oven to 200˚C.
- On a pan on medium heat, toast the panko with the olive oil. Stir to combine and toast until golden brown. Then put your panko in a large bowl and set aside to cool.
- Place your flour on a large plate or bowl for easy dipping and do the same with the beaten egg.
- Now bread your chicken:
- Dunk the chicken breast in the flour bowl to cover both sides. Shake off any excess flour.
- Next coat it in the beaten eggs.
- Finally coat it in the toasted panko crumbs, pressing the crumbs in slightly to help them stick.
- Place your katsu onto a wire rack over an oven tray.
- Bake for about 20-25 minutes on the middle rack until the chicken is no longer pink inside. If you have an oven thermometer, your chicken should be about 74˚C.
- While your chicken is baking, you can make the tonkatsu sauce (click on this link for the recipe).
- When your chicken is ready, serve immediately either as an entire cutlet or you can cut them into strips, drizzled with tonkatsu sauce.

Ohh great recipe….
Thank you!
[…] Served over a baked chicken katsu: […]