Date Published: Sept 9th, 2021 | Last Updated: Sept 9th, 2021
Author: Abby |Category: mains, easy
Serves: 4 | Prep time: 30 mins | Cook time: 1-1.5 hours
Jump to recipe |
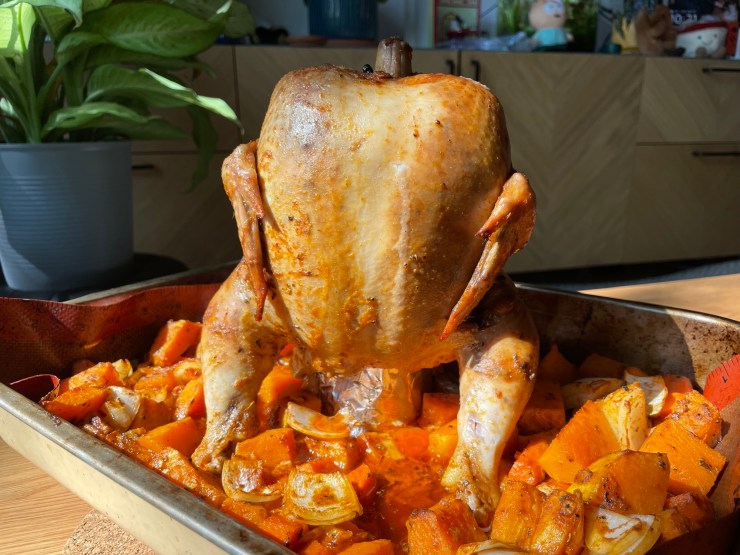
Get ready for the juiciest and flavourful chicken you’ve ever had. The beer can steams the chicken from the inside and makes the chicken super moist. This beer butt chicken recipe is super easy and gets rave reviews every time. The instructions seem long, but it’s actually pretty simple – it just took longer to describe the steps than to actually do it.
The first time I’ve ever had Beer Butt Chicken was at a Thanksgiving dinner with my friends in Melbourne. It was so damn good and moist! It also looked pretty fun to make. Apparently it’s a super common thing for people to make over the fire during camping season – which probably explains why I’ve never heard about it since I’m not much of a camper. This recipe is adapted from AllRecipes and we’ve made it at least half a dozen times in the past couple years with a few tweaks. I think it’s going to be a regular Christmas tradition for us since it always gets rave reviews!
Anyways, without further ado, here’s the recipe! If you have any comments or suggestions, I’d love to hear from you in the comment section! You can follow me on instagram, youtube and facebook to see all the recipes I post!
Happy cooking!
Ingredients you’ll need:
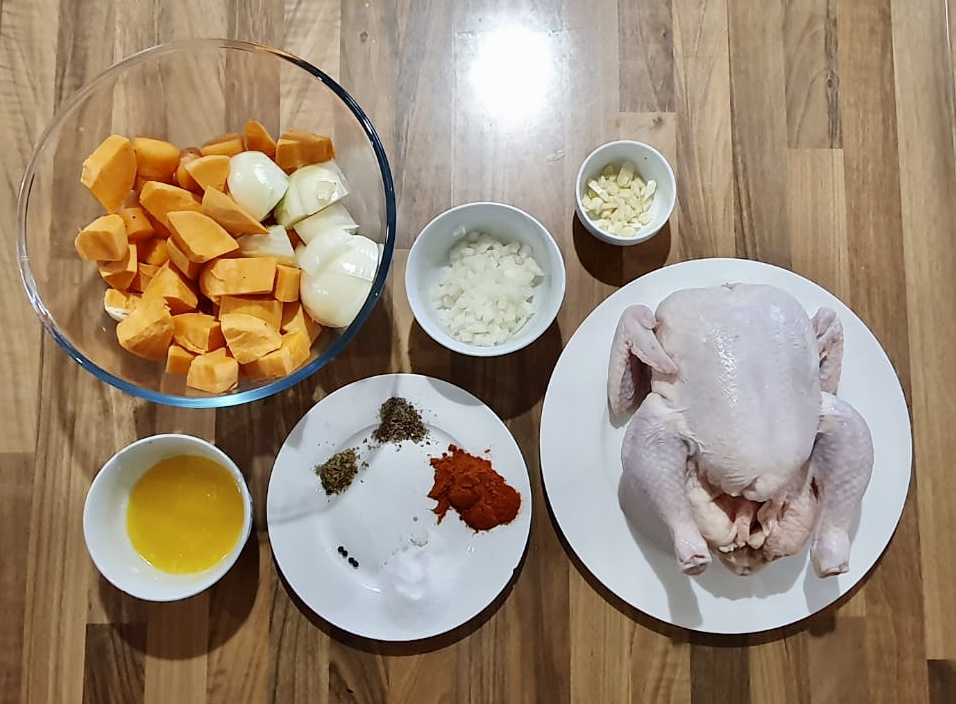
- Half an onion, diced
- 2 cloves garlic, roughly chopped
- 4 peppercorns
- 1 can beer (any beer will do)
- 1/2 stick butter (60g), melted
- 1 Tbsp salt
- 1 Tbsp paprika
- 1/2 tsp black pepper
- 1/2 tsp garlic powder
- 1/2 tsp Italian seasoning (or just thyme or rosemary)
- 1 whole chicken
- Veggies (you can use whatever veggies you like. These are a few of my favs to roast):
- 2 carrots, diced large
- 4 cloves garlic, whole or roughly chopped
- 1 large onion, diced large
- 1/4 Jap/kent pumpkin, diced large
Directions:
Preheat the oven to 175˚C (350˚F). Change the racks around the oven to accommodate the height of the chicken standing upright later.
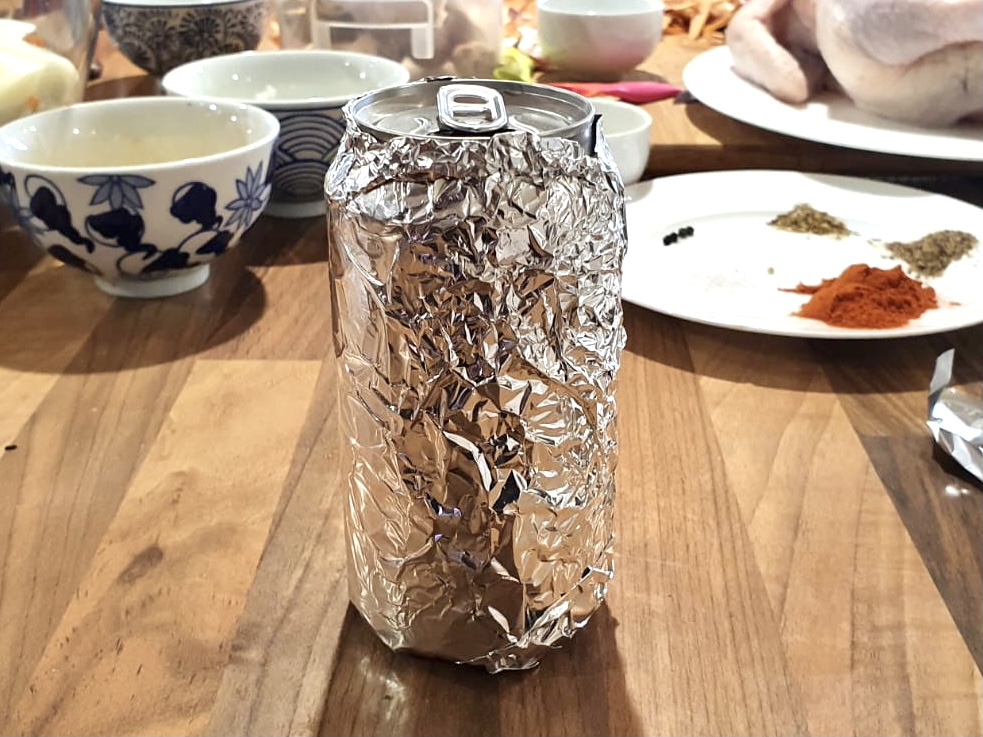
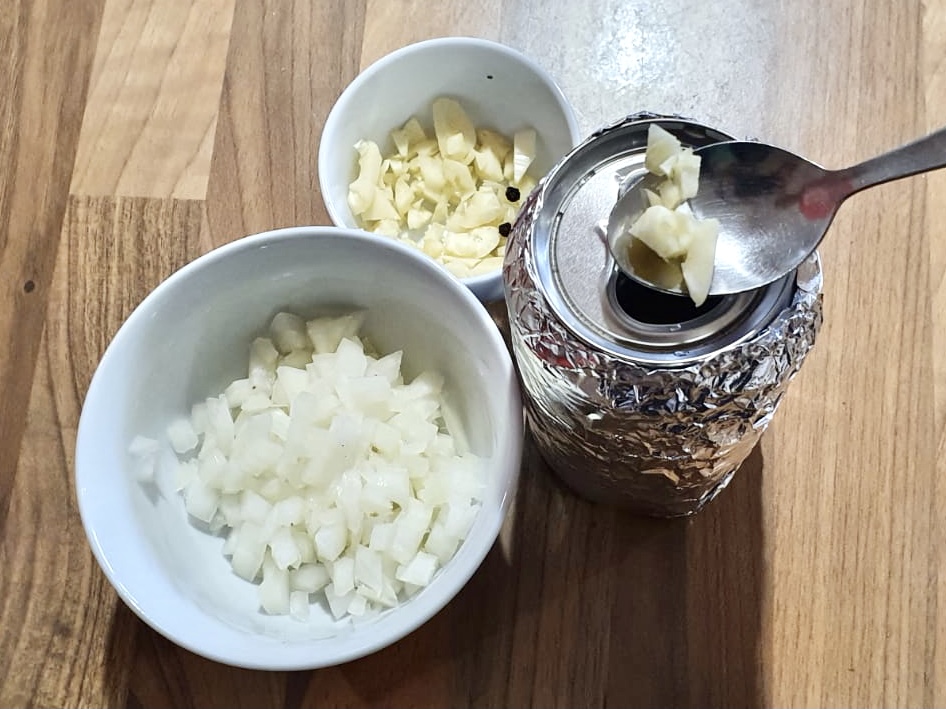
Wash the outside of the beer can and pat dry. Wrap aluminum foil around the outside of the can, leaving the top and bottom uncovered. Open up the beer and drink half of it. Add the diced onion, garlic and peppercorns into the beer can. Gently swish it around to mix it.

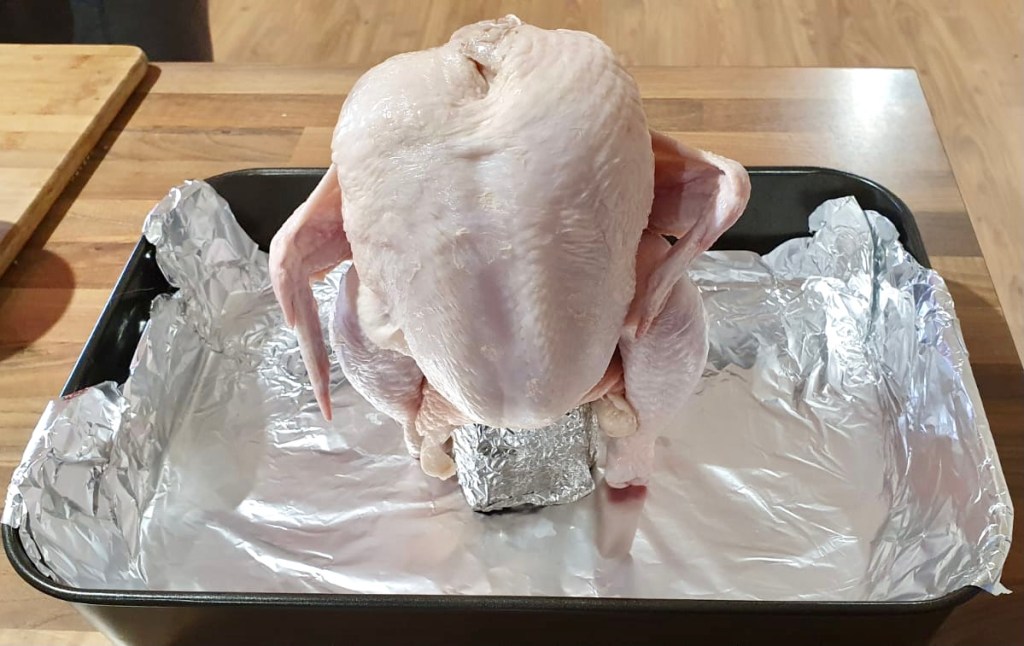
Rinse your whole chicken and pat dry. Grease the outside of the can with some oil (super important step to help you remove the can later). Stuff the can of beer into the butt of the chicken about halfway. The chicken and beer should sit upright. Put the chicken in the middle of a deep baking pan and distribute the diced veggies evenly around the chicken. Use a couple of the veggies and plug the hole of the neck of the chicken.
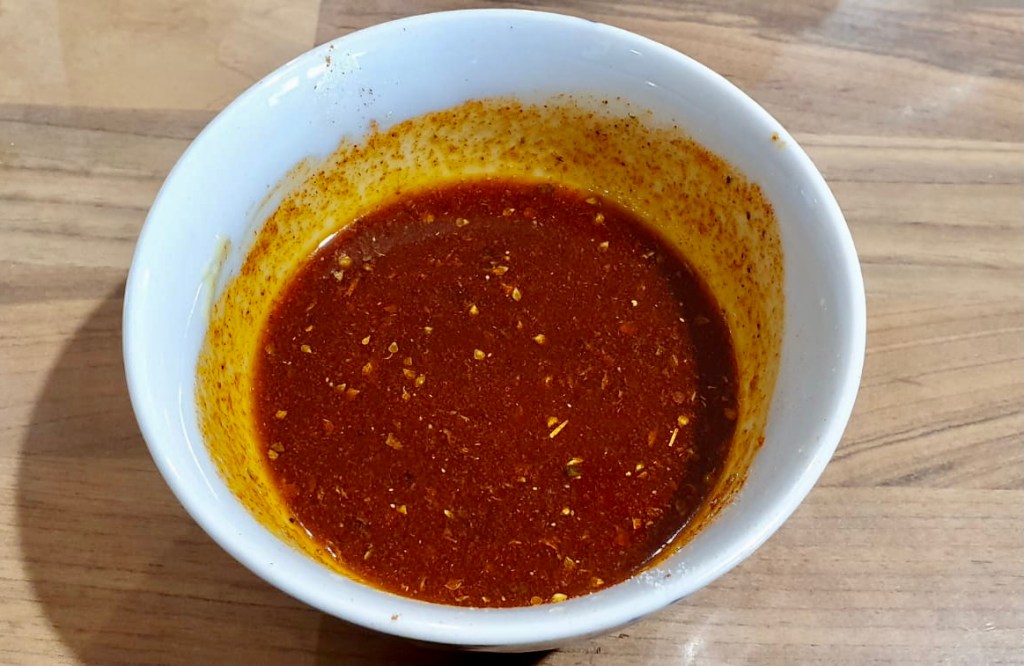
In a small bowl, melt the butter and add in the garlic powder, paprika, salt, pepper and Italian seasoning. Mix well.
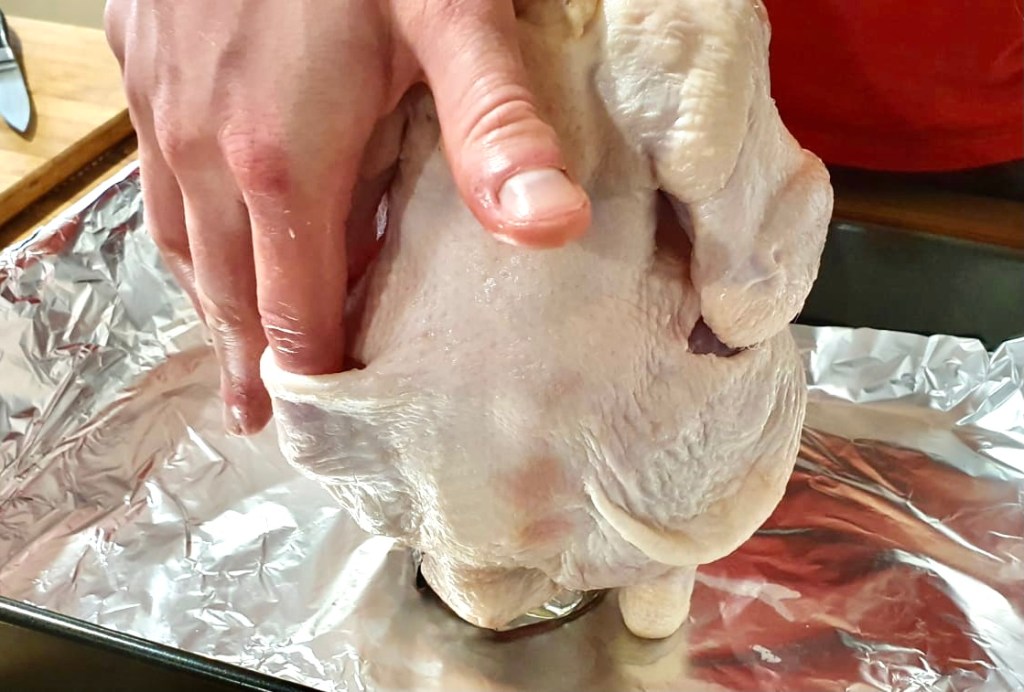
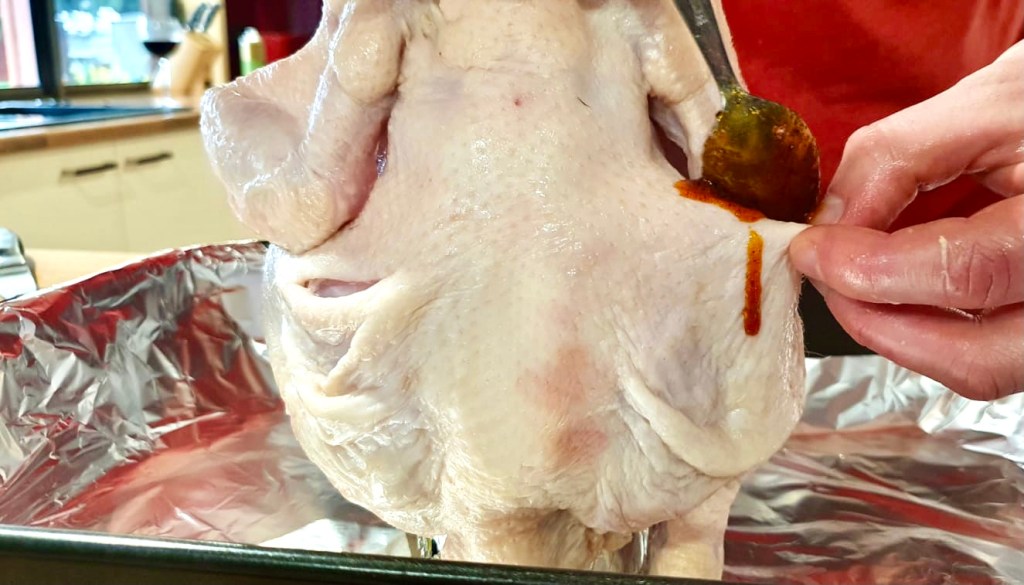

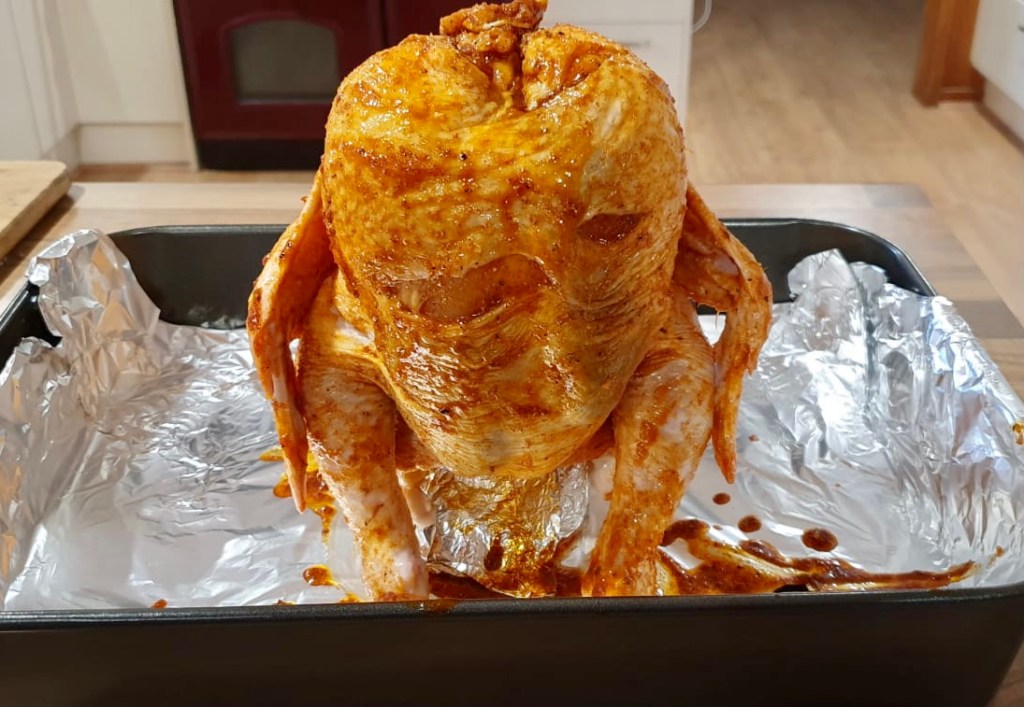
Undermine/loosen the skin around the chicken (especially over the breast and the thighs – you can make small slits in the skin to make it easier). Add 1/2 of the butter mixture under the skin on all sides. Massage the mixture under the skin to evenly distribute around the whole chicken. Rub the rest of the butter mix on the outside of the chicken.
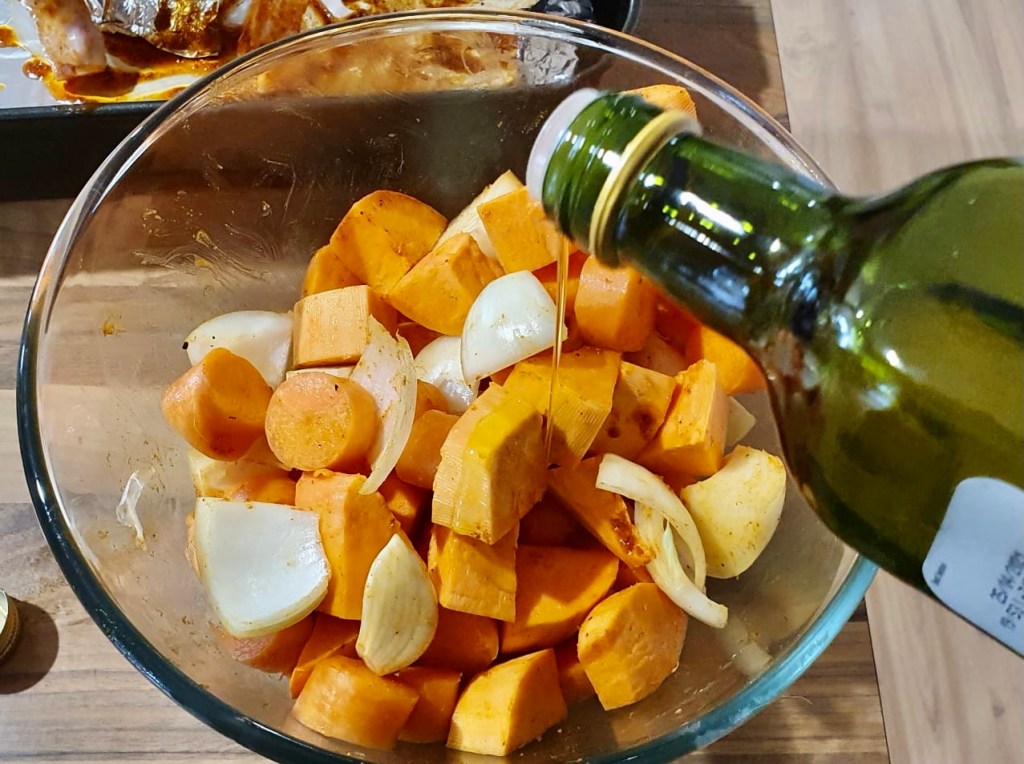

With your saucy hands, rub the veggies in the tray to soak up some of the sauce. Add a drizzle of olive oil, salt and pepper to the veg and mix.


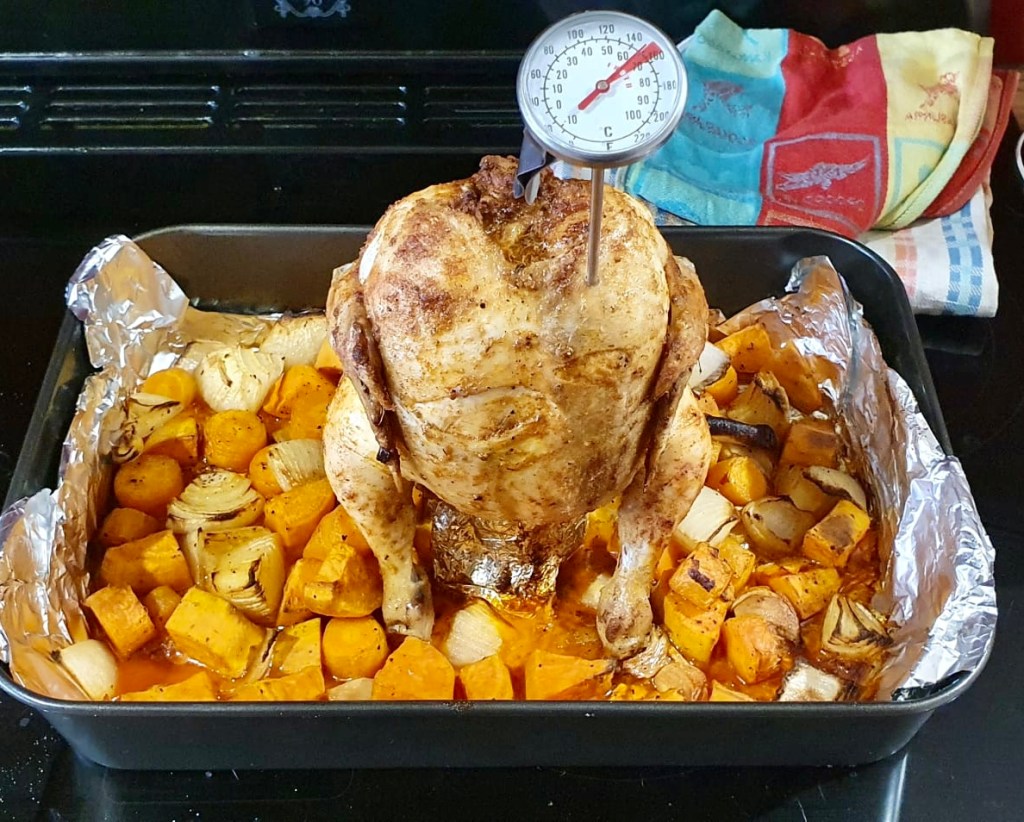
Put the whole pan into the preheated oven and roast until the skin is golden brown and the meat is no longer pink at the bone and the juices run clear. The timing will depend on the size of your chicken. I bought an average sized chicken and it took 1 hour. Larger chickens can take 1.5 hours. I suggest you check on it at 45 minutes in.
An instant-read thermometer inserted into the thickest part of the thigh, near the bone should read 180 degrees F (82 degrees C).
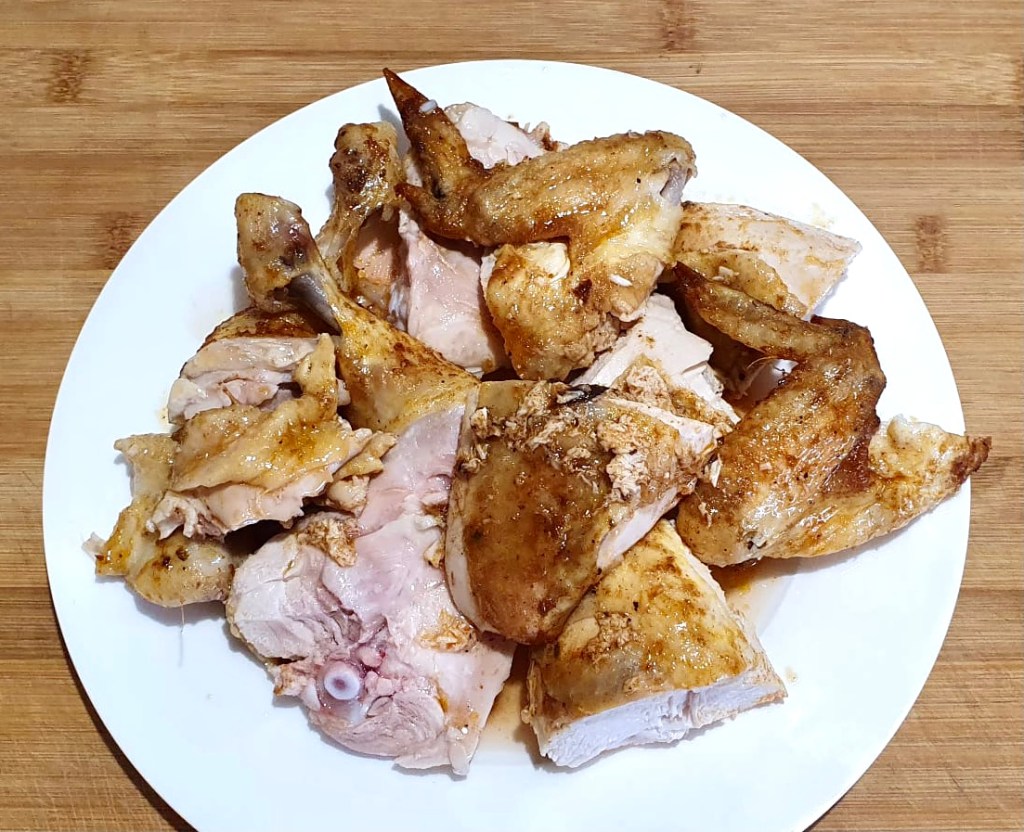


When it’s done, remove it from the oven and let the chicken rest for 10 minutes before carving. When ready to carve, gently remove the beer can – be careful it will be hot! Serve with the veggies. Make sure you drizzle the drippings in the pan over the chicken and veg!
Tip: I find it easiest to remove the can by pushing the chicken downwards onto the can to release the seal around the can and then gently remove it with oven mitts or tongs.
If you slice it when hot, the moisture will evaporate and dry out your chicken. By letting it rest, you’re keeping the juices inside and allowing it to cool at the same time.

Summarized Recipe:
Beer Butt Chicken 🍻
Date Published: Sept 9th, 2021 | Last Updated: Sept 9th, 2021
Author: Abby |Category: mains, easy
Serves: 4 | Prep time: 30 mins | Cook time: 1-1.5 hours
Ingredients:
- Half an onion, diced
- 2 cloves garlic, roughly chopped
- 4 peppercorns
- 1 can beer (any beer will do)
- 1/2 stick butter (60g), melted
- 1 Tbsp salt
- 1 Tbsp paprika
- 1/2 tsp black pepper
- 1/2 tsp garlic powder
- 1/2 tsp Italian seasoning (or just thyme or rosemary)
- 1 whole chicken
- Veggies (you can use whatever veggies you like. These are a few of my favs to roast):
- 2 carrots, diced large
- 4 cloves garlic, whole or roughly chopped
- 1 large onion, diced large
- 1/4 Jap/kent pumpkin, diced large
Directions:
- Preheat the oven to 175˚C (350˚F). Change the racks around the oven to accommodate the height of the chicken standing upright later.
- Wash the outside of the beer can and pat dry. Wrap aluminum foil around the outside of the can, leaving the top and bottom uncovered. Open up the beer and drink half of it. Add the diced onion, garlic and peppercorns into the beer can. Gently swish it around to mix it.
- Rinse your whole chicken and pat dry. Grease the outside of the can with some oil (super important step to help you remove the can later). Stuff the can of beer into the butt of the chicken about halfway. The chicken and beer should sit upright. Put the chicken in the middle of a deep baking pan and distribute the diced veggies evenly around the chicken. Use a couple of the veggies and plug the hole of the neck of the chicken.
- In a small bowl, melt the butter and add in the garlic powder, paprika, salt, pepper and Italian seasoning. Mix well.
- Undermine/loosen the skin around the chicken (especially the breast and thighs – you can make small slits in the skin to make it easier). Add 1/2 of the butter mixture under the skin on all sides. Massage the mixture under the skin to evenly distribute around the whole chicken. Rub the rest of the butter mix on the outside of the chicken.
- With your saucy hands, rub the veggies in the tray to soak up some of the sauce. Add a drizzle of olive oil, salt and pepper to the veg and mix.
- Put the whole pan into the preheated oven and roast until the skin is golden brown and the meat is no longer pink at the bone and the juices run clear. The timing will depend on the size of your chicken. I bought an average sized chicken and it took 1 hour. Larger chickens can take 1.5 hours. I suggest you check on it at 45 minutes in.
- An instant-read thermometer inserted into the thickest part of the thigh, near the bone should read 180 degrees F (82 degrees C).
- When it’s done, remove it from the oven and let the chicken rest for 10 minutes before carving. When ready to carve, gently remove the beer can – be careful it will be hot! Serve with the veggies. Make sure you drizzle the drippings in the pan over the chicken and veg!
- Tip: I find it easiest to remove the can by pushing the chicken downwards onto the can to release the seal around the can and then gently remove it with oven mitts or tongs.
- If you slice it when hot, the moisture will evaporate and dry out your chicken. By letting it rest, you’re keeping the juices inside and allowing it to cool at the same time.