Date Published: July 27th, 2020 | Last Updated: July 27th, 2020
Author: Abby |Category: how-to
Prep time: 5 mins to measure ingredients | Cook time: 15 mins
Did you know that quinoa is actually a seed? This superfood is packed with protein, nutrients and fibre. Best of all, it’s really easy to cook and takes only half the time to make compared to rice. It comes in different colours but white quinoa is the most commonly used and tends to be the fluffiest.
To me quinoa itself doesn’t have much flavour other than a hint of nuttiness, which is why I love using them to bulk up salads to make them more filling and to add some extra nutrients to my diet. They can be a little pricey in regular grocery stores here in Australia, but if you’ve got a Costo membership you can buy them at a pretty good price in bulk and it stores well for a very long time (I’m still using the same bag from 2 years ago!). You can also use quinoa as a rice substitute or eat it as a side dish using recipes that star quinoa such as the delicious tabbouleh that pairs beautifully with a lamb dish.
The directions below are a little wordy because I wanted the instructions to be as clear as possible without any room for confusion, but I promise it’s actually SO easy to make it. You essentially just boil 2:1 ratio of water to quinoa until all the water absorbs and then you fluff it. Done!
I’ll be updating a short video on how to cook quinoa shortly – I just wanted to publish the written version first because I couldn’t wait to share some good quinoa recipes with you guys!
Anyways, without further ado, here’s the tutorial. If you have any comments or suggestions, I’d love to hear from you in the comment section! You can follow me on instagram, youtube and facebook to see all the recipes I post!
Happy cooking!
Ingredients you’ll need:
- Quinoa – quinoa will expand about 3 times its size once it’s cooked, so measure out your quinoa according to how much you want to make (ie. if you want to make 1 cup cooked quinoa, then measure out 1/3 cup raw). Usually if I’m making a big salad for 4 people, I’ll measure out 1 cup raw to make 3 cups cooked.
- Boiling water – you can use room temp water as well, but I find boiling water makes the cooking process a little quicker. You want a 2:1 ratio of water to quinoa, which means if you’re using 1 cup raw quinoa, you’ll need 2 cups of water, or if you want 1/3 cup raw quinoa, you’ll need 2/3 cups of water.
Directions:
Rinse the quinoa and strain out the water (I find it easiest to put the quinoa in a mesh strainer and run it under tap water until the water runs clear).

In a saucepan (or any size pot that will accommodate how much cooked quinoa you want), add your washed quinoa and water. Put the lid on and turn the heat on HIGH until it starts boiling.

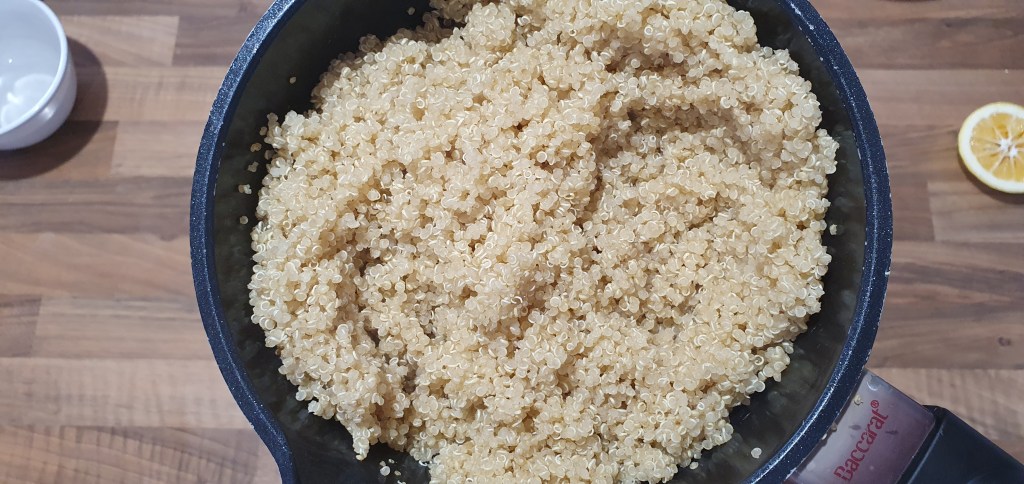
Once boiling, turn the heat down to MED-LOW until all the water has absorbed and the quinoa softens and “opens up” (this will take about 10-15 mins). Make sure you watch the quinoa carefully when the water is nearly gone or else you may burn it.

If there’s only a small amount of water left (just slightly wet at the bottom of the pan), you can turn the heat off early and keep the lid on to let the quinoa soak up the remaining water (~ extra 5 minutes).
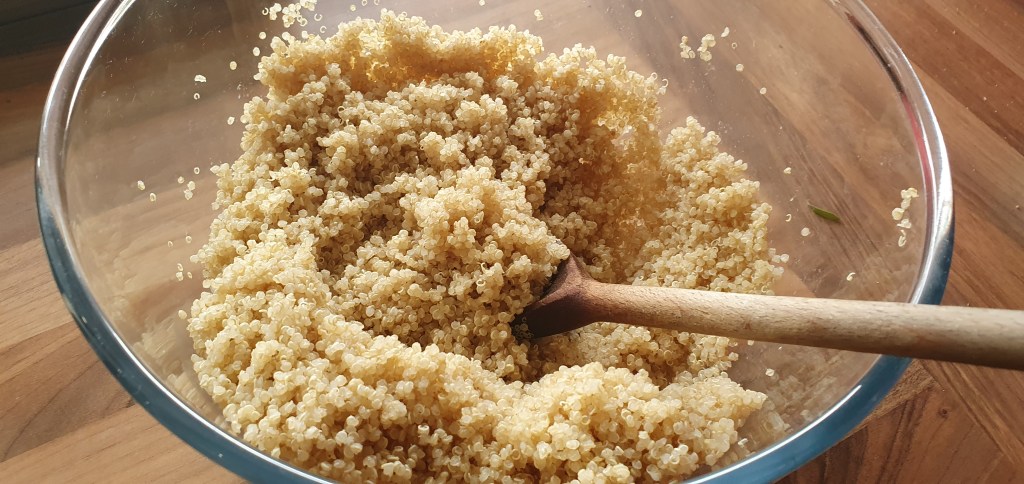
Once all the water has been absorbed, fluff the quinoa up with a fork and add to your recipe! Done!