Halloumi Cheese Pie


Date Published: July 14th, 2020 | Last Updated: August 2nd, 2020
Author: Abby |Category: snacks, vegetarian, breads
Serves: 8 pies | Prep time: 25 mins (without dough) | Cook time: 15 mins

Jump to recipe | Watch the video

Halloumi cheese pies are a common item in many Lebanese bakeries around Melbourne. I was first introduced to them by my partner Toby on one of our first few dates. He took me to a small little bakery in Werribee called ‘A1 Bakery’ that was the size of a two-car garage with only three tables and some chairs. They sold a few common Lebanese grocery items on a small shelf in the back. Toby told me that he used to get cheese pies and ‘oregano pizzas’ (which I later found out was a za’atar manakish) all the time back at home with his parents. I had never heard of either until that day.

I’ll be honest, I never even knew what halloumi was until a few years ago. It was the greatest find ever. It’s got a subtle taste like many white cheeses and it’s squishy – similar to Canadian cheese curds in poutine. My mind was blown the first time I had it grilled. When Toby told me that this bakery makes a pocket of halloumi, I knew I had to have it. It was amazing! It was like eating a pizza pocket but with glorious halloumi cheese. ❤

Back to present day in isolation from the pandemic, on a whim we decided to try remaking the delicious pies and the ‘oregano pizzas’ aka manakish. The results were spot-on and surprisingly easy! All you need is a basic dough and some halloumi cheese. I’ll post the manakish recipe too shortly so keep your eyes peeled.[Edit: The manakish recipe is now uploaded! Click here for the recipe.]

Anyways, without further ado, here’s the recipe! You can watch the video below to guide you through the recipe. If you have any comments or suggestions, I’d love to hear from you in the comment section! You can follow me on instagram, youtube and facebook to see all the recipes I post!

Happy cooking!

Ingredients you’ll need:

  • Basic dough – a full dough will make 8 cheese pies. If you don’t want to make that many, you can halve the dough recipe or freeze half the dough for future use. I frequently make 4 cheese pies and 4 za’atar manakish with one basic dough recipe. Or alternatively, Toby likes to freeze the divided dough balls individually and just defrost one or two a few hours before making a quick late night snack. If you’re feeling lazy, you can also make this with store bought pizza dough.
  • Halloumi cheese, shredded – amount will depend on how full you want it. I usually use about 3/4 cup of shredded cheese per cheese pie.

Directions:

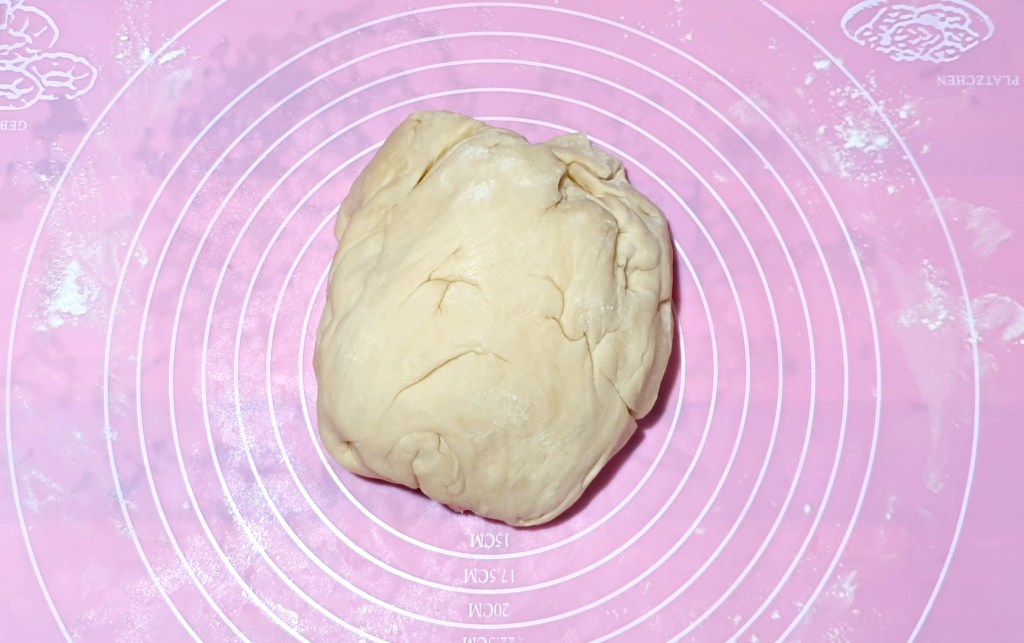
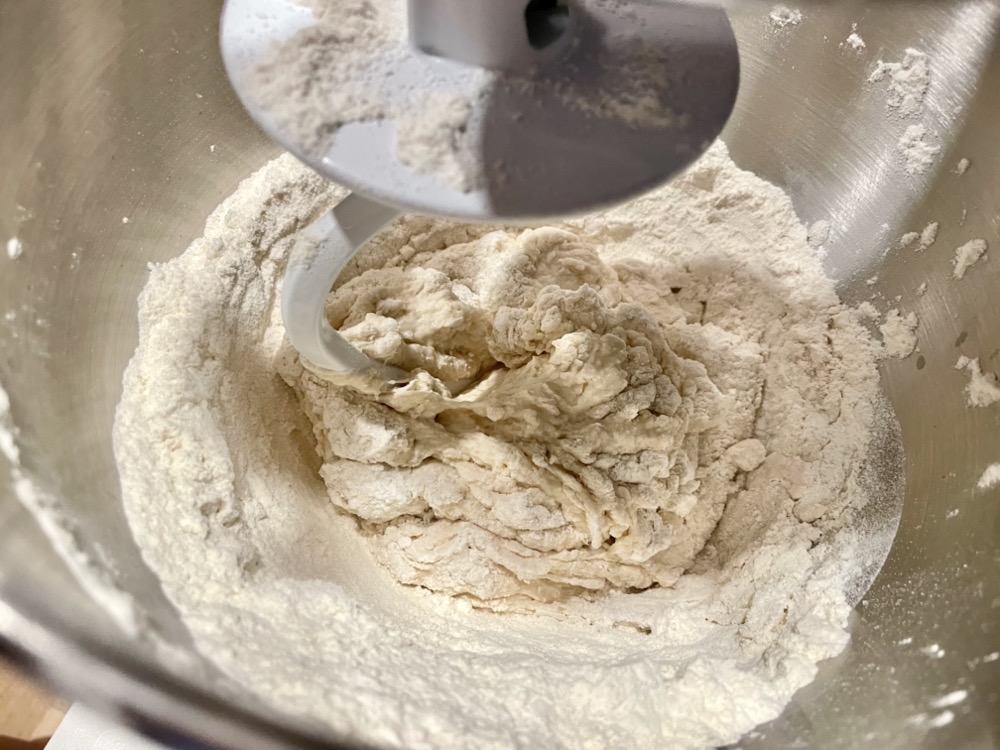
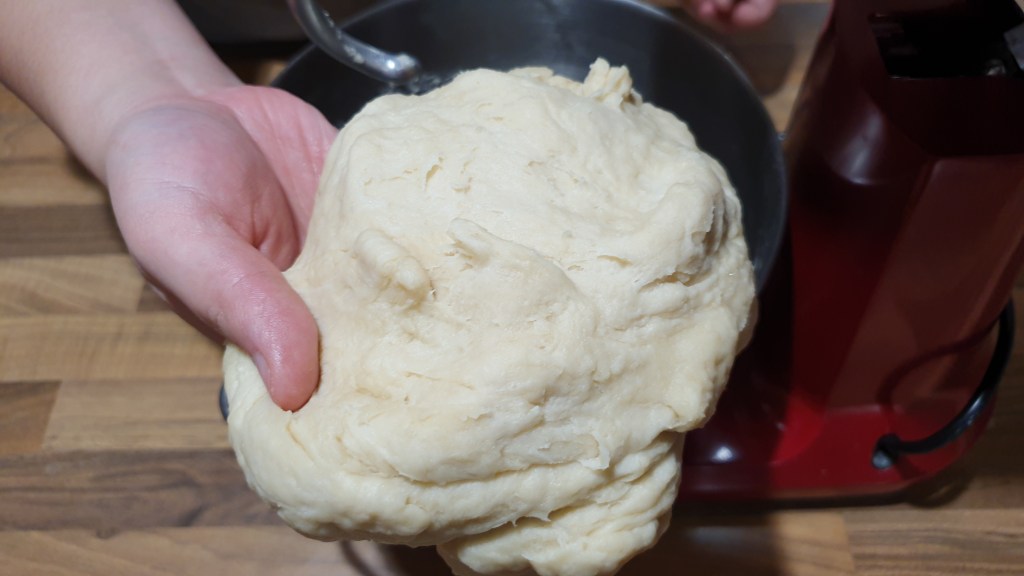
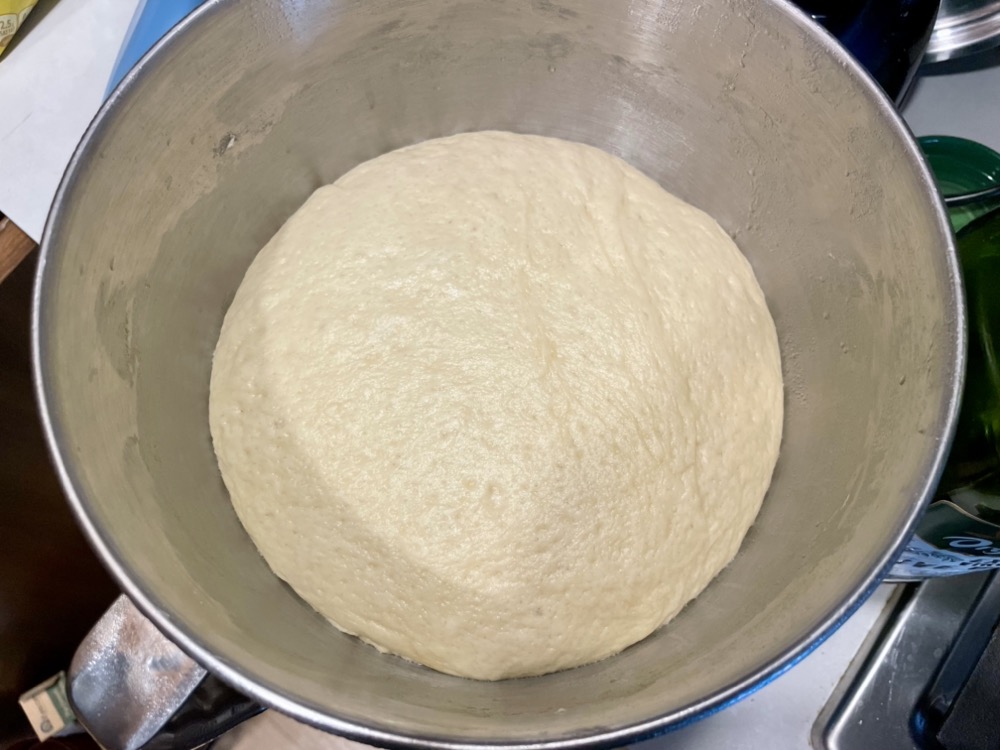
Start off with a ball of basic dough (after it has risen and you’ve kneaded it a couple of times).

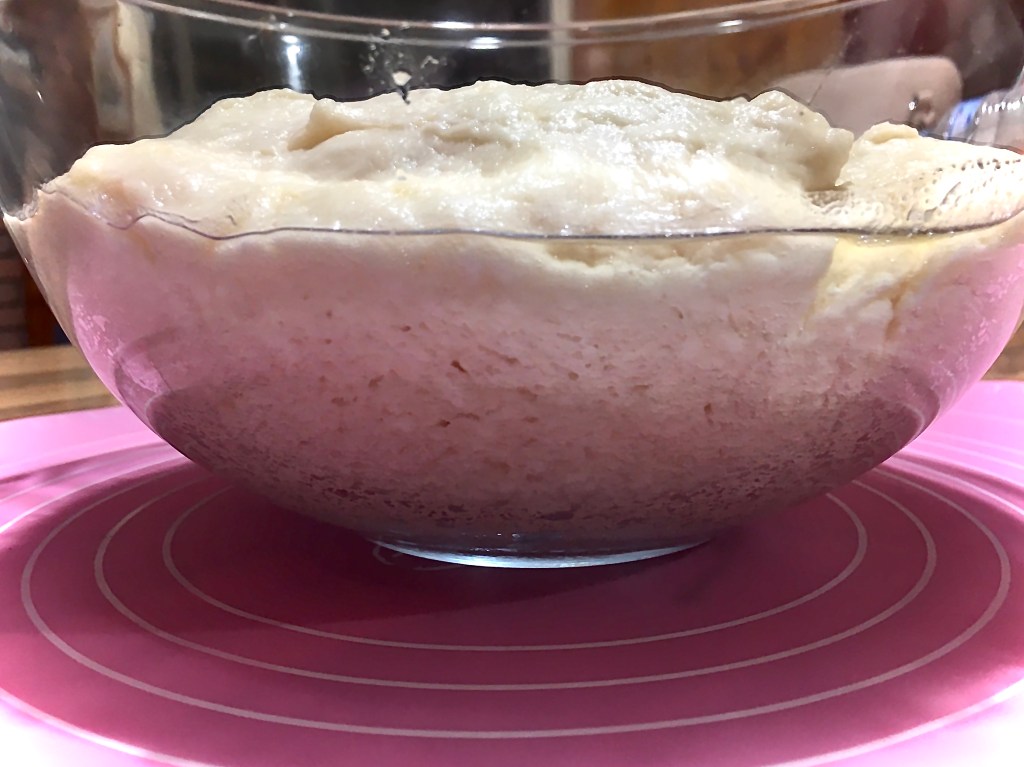
Divide the dough ball into 8 equal portions. Cover with a tea towel and leave in a warm place for 15mins to go through a second rest and rise (don’t worry if it doesn’t rise too much during this process). If you don’t have a warm place, you can use the proofing method in my how-to section.

Note: If you don’t want to make 8 cheese pies, you can wrap up the balls individually in cling wrap and freeze them for future use.

After the balls have rested, take each one out and knead a couple times (to release any new air bubbles that may have formed) on a lightly floured surface, then roll it out until about 3mm thickness. This dough does rise quite a bit so make sure your dough isn’t too thick.

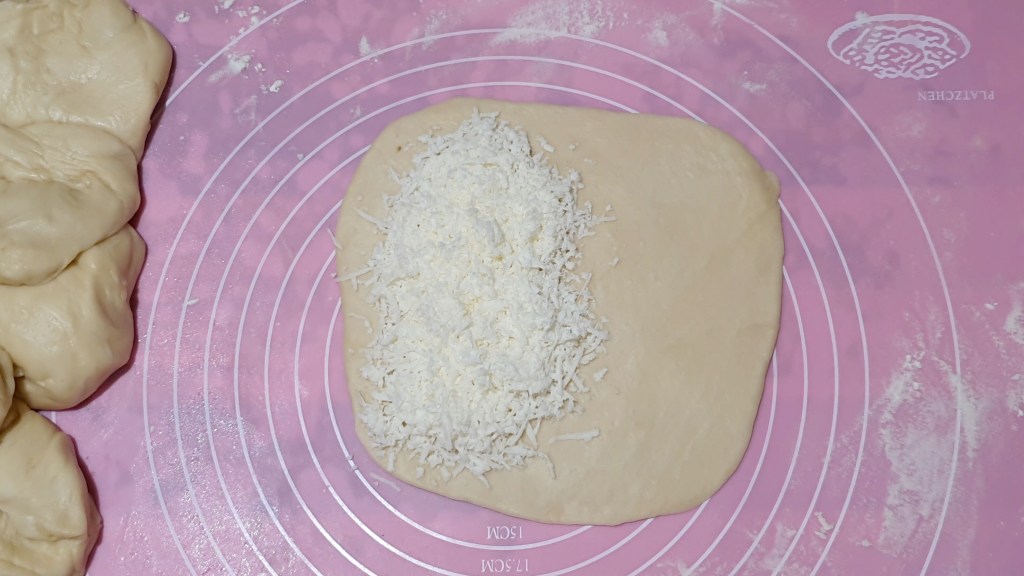
Add shredded halloumi to half of the dough. Leave about 1-2cm away from the edge so you have enough room to seal the pie.

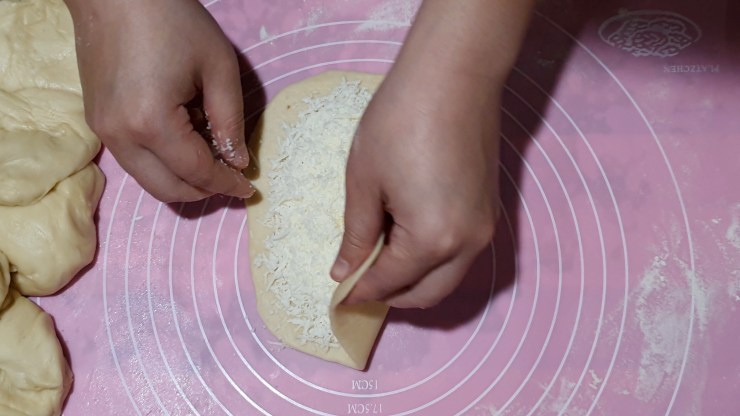
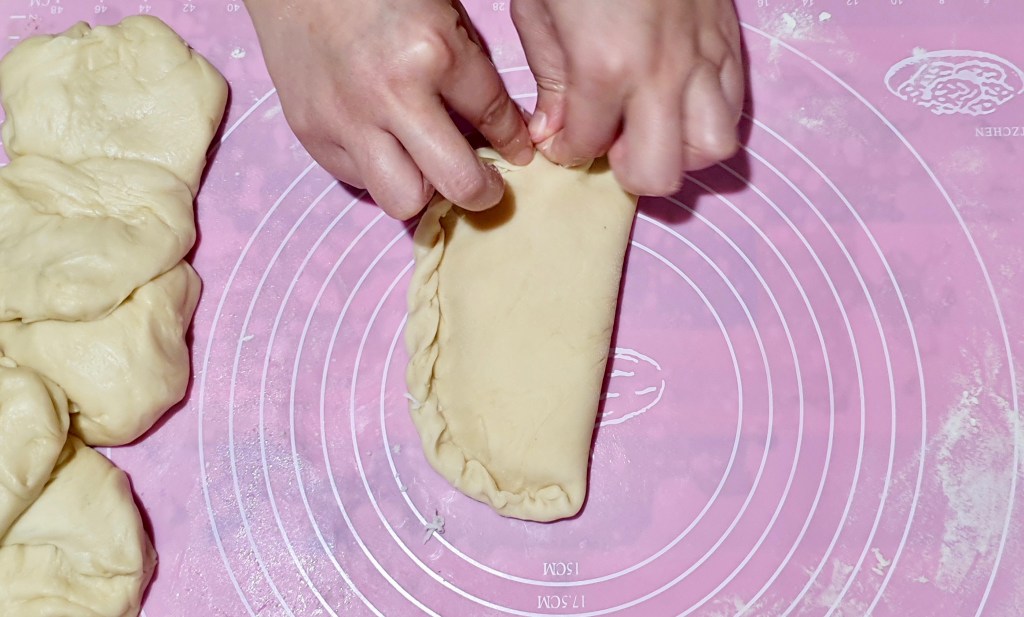
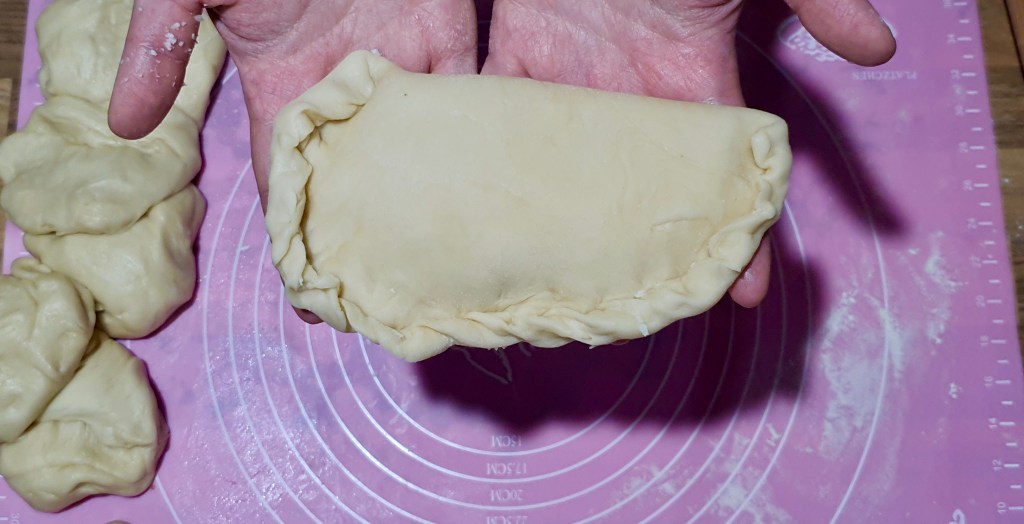
Fold one half over the other and seal the edges together. It doesn’t really matter how you seal it, as long as there are no holes. I pinch my dough edges and fold it upwards (you can see how I do it in the video).

Put your pan on a baking tray and bake at 200˚C for about 15 minutes until the top is golden brown.

Ta-da! Serve immediately. 🙂

Let me know in the comments if you tried this recipe! I’d love to hear from you.

Watch the Video Tutorial!

Summarized Recipe:

Halloumi Cheese Pie

Date Published: July 14th, 2020 | Last Updated: July 14th, 2020
Author: Abby |Category: snacks, vegetarian, breads
Serves: 8 pies | Prep time: 25 mins (without dough) | Cook time: 15 mins

Ingredients:

  • 1 basic dough (or store-bought pizza dough)
  • 6 cups Halloumi cheese, shredded (or to taste. I use about 3/4 cup per pie)

Directions:

  1. Get your basic dough (after it’s risen the first time and kneaded to release air bubbles) and divide it into 8 equal portions.
  2. Cover the 8 balls with a tea towel and set in a warm place for 15 mins (you can use the proofing method if you don’t have a warm place)
  3. After 15 mins, knead each dough ball a few times to release any new air bubbles and use a rolling pin to roll it to 3mm thickness.
  4. Cover half of the dough with halloumi cheese and fold the other half over it. Pinch the edges to seal it.
  5. Bake at 200˚C for 15mins until golden brown. Enjoy!

Note: if you don’t want to make 8 cheese pies, you can make only half of the basic dough recipe or just use half and freeze the other half for later or in another recipe. I frequently make 4 cheese pies and 4 za’atar manakish with one dough ball.

My Go-To Basic Dough


Date Published: July 13th, 2020 | Last Updated: Dec 22nd, 2024
Author: Abby |Category: basics
Serves: 1 large pizza/flatbread or 6-8 small personal pizzas
Prep time: 5 mins | Cook time: 90 mins to proof

Jump to recipe | Watch the video

I used to hate making dough. Any kind of dough. No matter how hard I tried, it never turned out perfectly right – either my arms were tired from kneading or the dough would never rise properly. These days I’m singing a different tune. I’ve discovered the easiest way of proofing dough that always gives me fool-‘proof’ (hah!) results (click here to see how I proof my dough) and my awesome mother-in-law has been letting me use her stand-mixer which has made my life infinitely easier.

Apart from the stand-mixer and easy dough-proofing, this basic dough recipe is my easy go-to dough for almost everything from a quick snack to a main meal. I’ve used it for flatbread, pizzas, cheese pies, pizza pockets, wraps…etc – the possibilities are endless!

Do remember that this is just a BASIC dough. There’s no doubt hundreds of other fancier dough recipes out there, but this one was designed to be quick and easy. You can also easily customize it by adding spices, herbs, garlic…etc. to the dough for more flavour depending on what you’re making (be careful not to make it too heavy or wet) but I usually just keep it simple and then decide on my flavours later on when I’m making the dish rather than incorporating it into the dough.

Rolling the dough out thicker will give you a fluffier bread consistency great for pizzas and flatbreads, whereas rolling it out thinner will result in a crispier base (which is usually how I prefer some of my mini flatbreads).

This recipe is pretty straight forward but becomes a little wordy when I type it out so it seems like a lengthy recipe – I promise it’s easy. Watch the video below to guide you through it and you’ll see how quickly it comes together.

Ingredients:

You only need 6 basic ingredients that you likely already have in your pantry:

  • 1 Tbsp active dry yeast
  • 1 Tbsp granulated sugar
  • 1 cup (250ml) warm water
  • 3 cups (432g) all purpose flour + extra for dusting/kneading
  • 1 tsp salt
  • 1/2 cup (125ml) olive oil

This recipe makes enough for one big flatbread or pizza, or you can divide up the dough into 6-8 balls and make small personal pizzas/flatbread.

Directions:

First, activate the yeast by mixing it in warm water with the sugar. Stir until combined and make sure you have no clumps in your mixture. Leave this aside for about 5-10 minutes until it becomes frothy at the top. (If your mixture does not become frothy, your yeast may be too old or your water is too hot.)

In a stand-mixer bowl (or regular bowl if you’re doing this by hand), add the yeast mixture and knead on a low/knead setting and slowly add in the salt and flour. Then slowly drizzle in the olive oil and continue to knead until you get a smooth moist ball of dough and all the ingredients are incorporated. (You can add a bit more flour if your dough is too wet.)

Take your dough ball out of the mixer and knead it on a lightly floured surface for a minute until you get a smooth non-sticky soft dough ball.

Place your dough ball in a bowl and rub a little olive oil over it (this will help it stretch as it rises). Let the dough rise in a warm place covered with a damp tea towel until doubled in size (~1.5 hours) OR alternatively try out my favourite way of proofing dough here in the oven.

Once the dough has doubled in size, punch and knead it for a couple minutes on a floured surface to release the air bubbles. Your dough is now ready to use! 👍🏼

If you aren’t using the dough right away, you can freeze it by wrapping it in cling wrap. Be sure to freeze it asap before the dough expands more. Just let it thaw out to room temperature before using it. I like to divide my dough into 6 portions and defrost a portion at a time for an easy late night snack by making a quick flatbread or Nutella pizza. Mmmmm. There are seriously SO many things you can do with this dough.

I hope you’ve enjoyed this recipe! If you have any comments or suggestions, I’d love to hear from you in the comment section! You can follow me on instagram, youtube and facebook to see all the recipes I post!

Happy cooking!

Recipes that use this dough:

Watch the Video Tutorial!

Summarized Recipe:

My Go-To Basic Dough

Date Published: July 13th, 2020 | Last Updated: July 29th, 2020
Author: Abby |Category: basics
Serves: 1 large pizza/flatbread or 6-8 small personal pizzas
Prep time: 5 mins | Cook time: 90 mins to proof

Ingredients:

  • 1 Tbsp active dry yeast
  • 1 Tbsp granulated sugar
  • 1 cup (250ml) warm water
  • 3 cups (432g) all purpose flour + extra for dusting/kneading
  • 1 tsp salt
  • 1/2 (125ml) cup olive oil

Directions:

  1. First, activate the yeast by mixing it in warm water with the sugar. Stir until combined and make sure you have no clumps in your mixture. Leave this aside for about 5-10 minutes until it becomes frothy at the top. (If your mixture does not become frothy, your yeast may be too old or your water is too hot.)
  2. In a stand-mixer bowl (or regular bowl if you’re doing this by hand), add the yeast mixture and knead on a low/knead setting and slowly add in the salt and flour. Then slowly drizzle in the olive oil and continue to knead until you get a smooth moist ball of dough and all the ingredients are incorporated. (You can add a bit more flour if your dough is too wet.)
  3. Take your dough ball out of the mixer and knead it on a lightly floured surface for a minute until you get a smooth non-sticky soft dough ball.
  4. Place your dough ball in a bowl and rub a little olive oil over it (this will help it stretch as it rises). Let the dough rise in a warm place covered with a damp tea towel until doubled in size (~1.5 hours) OR alternatively try out my favourite way of proofing dough here in the oven.
  5. Once the dough has doubled in size, punch and knead it for a couple minutes on a floured surface to release the air bubbles. Your dough is now ready to use! 👍🏼

If you aren’t using the dough right away, you can freeze it by wrapping it in cling wrap. Be sure to freeze it asap before the dough expands more. Just let it thaw out to room temperature before using it. I like to divide my dough into 6 portions and defrost a portion at a time for an easy late night snack.

Proofing Dough in the Oven


Date Published: July 12th, 2020 | Last Updated: July 12th, 2020
Author: Abby |Category: how-to

I used to hate working with dough. No matter how hard I tried, when it came to the proofing stage where you leave your dough to rise or “double in size”, mine never did as it was supposed to no matter how closely I followed the recipe. Perhaps it was because I grew up in Canada where it was difficult to find a warm place for my dough to rise (central heating made sure we’re always at perfect room temperature) or maybe the humidity conditions were never right. Whatever the reason was, it was always disappointing to see the dough I spent half an hour hand kneading prior to still be a flat ball after even 2 or 3 hours of resting time.I avoided breads and pastries at all costs, until I stumbled upon this method of proofing dough. It’s so easy and fool-proof and best of all, it doesn’t matter what season or temperature your home is! All you need is some hot water and an oven.

Directions:

Get your dough ball and place it into a glass bowl. Put your bowl in the middle rack of the oven (make sure there’s enough room above your rack for the dough to rise).

Fill a flat baking dish halfway with boiling water and put it on the bottom rack of your oven. (The size of the tray doesn’t matter too much as long as it’s not too small since it’ll decrease the surface area).

Close the oven door and let the steam and heat from the hot water proof your dough for you. You do NOT need to turn your oven on at all during this process. That’s it! Easy, huh?

Leave your dough in the oven for the specified proofing time in your recipe. For proofing times more than an hour, I’d recommend refreshing the hot water in the pan after 1 hour.

Try not to open the oven while the dough is proofing because the warmth and steam will escape and will slow down your proofing process. If you must open your oven, do it quickly or just refresh the hot water after doing so.

Note: you do NOT need to cover your dough with a moist tea towel with this method. The tea towel usually prevents your dough from drying out when proofing your dough the traditional way. However, since we’re keeping the dough in a concealed oven with plenty of humidity, there’s no chance for it to dry out.

Ta-da! Beautifully risen aerated dough.

I haven’t made a recipe video for this but if you’d like me to make one, let me know in the comments! If you have any other comments or suggestions, I’d love to hear from you in the comment section! You can follow me on instagram, youtube and facebook to see all the recipes I post!

Happy cooking!

Spicy Asian Tuna Salad


Date Published: July 4th, 2020 | Last Updated: July 4th, 2020
Author: Abby |Category: sides/salads, <15mins
Serves: 4 | Prep time: 10mins | Cook time: 5mins

Jump to recipe | Watch the video

Last weekend Toby’s dad took us deep sea tuna fishing with a fishing charter in Portland, Vic. My fishing experience is fairly limited but thankfully the charter set up all the rods for us, so all we had to do was wait until a tuna caught on and we take turns reeling them in. Luckily mine didn’t put up too much of a fight but Toby’s gave him a good workout. There was a limit of two tuna per person. We drove around for hours and caught some here and there, but alas we were two fish short of our max. We were on the boat for roughly 6 hours total. We took 4 fish home in total, ranging from 10-15kg (good thing Toby’s parents have a big freezer back on the farm). We youtube’d how to fillet a tuna and we filleted one tuna that night and have been eating it ever since. I’ve been scrambling to find some good tuna recipes and came upon some asian-inspired ones and played around with them. This recipe is the result of it! (I also used up some tuna in the salmon chowder recipe and subbed out the fish type – turned out delicious!)

This recipe has asian-inspired flavours. Some ingredients aren’t very traditionally asian (like the cranberries and raw carrots), but they have their role to play and I promise the overall flavour packs a punch! You end up with a mildly spicy, kinda sweet, crunchy, sesame tuna salad in the end. This recipe is easy and comes together quickly! You can watch the video below to guide you through the recipe.

Anyways, without further ado, here’s the recipe! If you have any comments or suggestions, I’d love to hear from you in the comment section! You can follow me on instagram, youtube and facebook to see all the recipes I post!

Happy cooking!

Ingredients you’ll need:

  • Dressing:
    • 4 Tbsp mayonnaise
    • 1 Tbsp sesame oil
    • 2 tsp light soy sauce
    • 2 Tbsp asian chilli paste or sambal (I like to use the Lao Gan Ma crispy chilli oil (drained), but any chilli paste should do – you may want to adjust the proportions if your chilli sauce is very spicy). You can even use sriracha.
    • 1 1/2 tsp honey
    • 1/2 Tbsp ginger, grated
  • 200g cooked or canned tuna, flaked and drained well
    • You can use canned tuna, but for my purposes I was trying to use up the tuna fillets from our fishing trip so I quickly cooked the tuna in the oven at 180˚C for 10mins and flaked it for this recipe.
  • 1/3 cup dried cranberries
  • 3 Tbsp green onions, chopped (~2 stalks)
  • 1/3 cup carrots, chopped finely
  • 2 tsp sesame seeds
  • 1/2 tsp chilli powder
  • 2 Tbsp lemon juice

I was quite conservative with the spice level in this recipe – just spicy enough to leave your mouth with a slight tingle. You can choose to omit the chili powder altogether if you’re not into spicy or even double it if you’re a spice fiend. The spiciness of your chili paste will also determine how spicy your tuna salad is.

Directions:

In a bowl, mix together the dressing ingredients: mayonnaise, sesame oil, light soy sauce, asian chilli oil, honey, ginger. Set aside.

In a bigger bowl, mix together the rest of the ingredients: tuna, cranberries, green onion, carrots, sesame seeds, chili powder and lemon juice. Once combined, add in the dressing and mix until incorporated. Serve!

You can serve this as a snack or appetizer or side dish. My favourite way to serve this is in some lettuce leaves as wraps. The crisp and freshness of the lettuce cuts through the heaviness of the salad. You can also have it with crackers or spread in a tortilla to make a burrito or even between some bread to make an easy tuna salad with a punch. I also like to serve it with lemon wedges for extra zing!

Watch the Video Tutorial!

Summarized Recipe:

Spicy Asian Tuna Salad

Date Published: July 4th, 2020 | Last Updated: July 4th, 2020
Author: Abby |Category: sides/salads, <15mins
Serves: 4 | Prep time: 10mins | Cook time: 5mins

Ingredients:

  • Dressing:
    • 4 Tbsp mayonnaise
    • 1 Tbsp sesame oil
    • 2 tsp light soy sauce
    • 2 Tbsp asian chilli oil (I like to use the Lao Gan Ma crispy chilli oil (drained), but any chilli oil/sauce should do – you may want to adjust the proportions if your chilli sauce is very spicy)
    • 1 1/2 tsp honey
    • 1/2 Tbsp ginger, grated
  • 1 1/2 cups (200g) cooked/canned tuna, flaked and drained
  • 1/3 cup dried cranberries
  • 3 Tbsp green onions, chopped (~2 stalks)
  • 1/3 cup carrots, chopped finely
  • 2 tsp sesame seeds
  • 1/2 tsp chilli powder
  • 2 Tbsp lemon juice

Directions:

  1. In a bowl, mix together the dressing ingredients: mayonnaise, sesame oil, light soy sauce, asian chilli oil, honey, ginger. Set aside.
  2. In a bigger bowl, mix together the rest of the ingredients: tuna, cranberries, green onion, carrots, sesame seeds, chili powder and lemon juice. Once combined, add in the dressing and mix until incorporated. Serve!

Notes:

  • You can serve this as a snack or appetizer or side dish.
  • My favourite way to serve this is in some lettuce leaves as wraps. You can also have it with crackers or spread in a tortilla to make a burrito or even between some bread to make an easy tuna salad with a punch.

Easy Balsamic Vinaigrette


Date Published: July 4th, 2020 | Last Updated: July 4th, 2020
Author: Abby |Category: sauces/dips
Serves: enough for 4 big salads | Prep time: 5mins | Cook time: 30 seconds

Jump to recipe | Watch the video

Since moving onto Toby’s parents’ family farm a couple months ago, we’ve been cooking nearly everyday. They have an amazing small greenhouse here that has been booming with lettuce. As a result, we’ve been making salads nearly everyday! I usually don’t make much salad as part of our normal meals because I find it hard to keep fresh for long enough in the fridge and I also find it hard to pack for lunch and dinners when you have to keep the dressing separate (but maybe that’s just an excuse). Now that we have so much time off, I actually quite enjoy experimenting with different salads and toppings.

This balsamic vinaigrette is my go-to salad dressing. It’s super easy and comes together very quickly. The only real effort you need to put in is to mince a garlic clove (unless you’ve got a garlic crusher). The rest of the work is just to mix it all together which takes less than 30 seconds. The beauty of this recipe is that you probably have nearly all the ingredients at home already and you can tweak it to your liking depending on what kind of salad you’re making (ie. if you have sweeter ingredients in your salad like fruit, you can increase the amount of vinegar to offset the sweetness and vice versa if you have saltier or sour ingredients, you can increase the amount of honey). You can also make this dressing as fancy as you like by whisking in other ingredients (ie. crushed raspberries). My favourite variation is to mix in a tablespoon of softened goat cheese. 🙂

Anyways, without further ado, here’s the recipe! You can watch the video below to guide you through the recipe. If you have any comments or suggestions, I’d love to hear from you in the comment section! You can follow me on instagram, youtube and facebook to see all the recipes I post!

Happy cooking!

Ingredients you’ll need:

  • 1/2 cup extra virgin olive oil
  • 1/4 cup balsamic vinaigrette
  • 1 tsp dijon mustard
  • 1 tsp honey
  • 1 clove garlic, minced
  • salt & pepper to taste

Remember, this is enough dressing for 4 big salads. If you’re making small side salads, I’d recommend halving the recipe.

Directions:

In a bowl, whisk together all the ingredients together until combined. Done!

Drizzle over your favourite salad. You may not need the full amount depending on how big your salad is. Taste as you mix until it’s enough. As mentioned above, you can tweak any of the ingredients to suit the flavours of your salad to make it more sweet, sour or salty.

Watch the Video Tutorial!

Summarized Recipe:

Easy Balsamic Vinaigrette

Date Published: July 4th, 2020 | Last Updated: July 4th, 2020
Author: Abby |Category: sauces/dips
Serves: 4 big salads | Prep time: 5mins | Cook time: 30 seconds

Ingredients:

  • 1/2 cup extra virgin olive oil
  • 1/4 cup balsamic vinaigrette
  • 1 tsp dijon mustard
  • 1 tsp honey
  • 1 clove garlic, minced
  • salt & pepper to taste

Directions:

  1. In a bowl, whisk together all the ingredients together until combined. Done!

Creamy Salmon Chowder


Date Published: July 2nd, 2020 | Last Updated: July 2nd, 2020
Author: Abby |Category: soups
Serves: 6-8 | Prep time: 30mins | Cook time: 30mins

Jump to recipe | Watch the video

I LOVE chowders. The first chowder I ever had was a Boston Clam Chowder when I was kid and it blew me away. From then on I will always choose a chowder over any other kind of soup. It’s creamy, rich, hearty and warms you up on a cold day – what’s not to love? It’s comfort food at its best. If chowders weren’t so dense in calories, I’d definitely be having this every day.

I always thought chowders were difficult to make so I never attempted it. However, when Toby and I went salmon fishing (on a small fishing farm where you fish out of a small pool…) last year, I caught my first ever salmon! It just also happened to be the largest one in the pool, coming in at a whopping 3.5kg! We ended up with 1kg of fish fillet and I was scrambling to find new recipes to use up raw salmon (other than my go-to maple salmon recipe) before it went off since our freezer was too small. This recipe was the best thing that came out of the fishing experience (other than the excitement of catching a big fish)!

The great thing about this recipe is that you can actually use any meaty fish you like. In fact, we went tuna fishing with Toby’s dad earlier this week and we collectively caught 4 tuna, each averaging about 10-15kg! I made this soup for Toby’s parents yesterday to use up some of the tuna fillets and they’ve already requested it again for their dinner party tomorrow! The strong flavours of the soup does a great job masking the overly fishy taste of tuna.

I hope you enjoy this recipe as much as we do! This recipe is easy and cooks up relatively quickly compared to some soups. You can watch the video below to guide you through the recipe.

Anyways, without further ado, here’s the recipe! If you have any comments or suggestions, I’d love to hear from you in the comment section! You can follow me on instagram, youtube and facebook to see all the recipes I post!

Happy cooking!

Ingredients:

  • 3 Tbsps butter (or olive oil to reduce the calories)
  • 2 cloves garlic, minced
  • 2 cups onion, chopped (roughly 1 large onion)
  • 2 cups celery, chopped (~4 stalks)
  • 2 cups carrots, diced (roughly 2 large carrots)
  • 2 cups potatoes, diced (~2 large potatoes)
  • 3 cups chicken broth
  • 1 tsp salt
  • 1 tsp ground black pepper
  • 1 tsp dried dill
  • 450g of fresh salmon (or any fish), cut to 2.5cm chunks (you can used canned fish as well, drained)
  • 1 can (375ml) evaporated milk
  • 1 can (420g) creamed corn
  • 1 can (420g) corn kernels, drained
  • 200g cheddar cheese, shredded (~1 large handful)

It takes a little time to chop up all the veggies, but once that’s done, the cook goes by pretty quickly.

Directions:

Melt the butter in a large pot over medium heat. Sauté the garlic, onion, celery and carrots for a few minutes then put a lid on the pot and steam the veggies until the carrots are soft enough to break with your spatula (~5-8mins). You can alternatively keep cooking the veggies without the lid if you like but it takes much longer for the vegetables to soften.

Once the carrots and celery are soft enough, add in potatoes, chicken broth, salt, pepper, and dill. Turn up to high heat and bring the soup to a boil. Once boiling, reduce the heat to medium and let the soup simmer with a lid on until the potatoes are soft enough to break with your spatula (~15-20mins).

Note: I used tuna in the video to try and use up our fillets

Once the potatoes are soft, add in the salmon, evaporated milk, and corn. Put the lid back on and bring the soup to a boil then turn the heat down and simmer until the salmon is cooked.

Once cooked, turn the heat off and mix through the shredded cheese until melted. (If you’re using canned fish, then just mix until heated through and add the cheese. Serve when the cheese has melted.)

Adjust salt and pepper to taste. Serve!

You can serve this as a side dish or a main soup with some toasted bread or crackers. I love curling up on the couch on a cold day and hugging a bowl of this creamy soup while binge watching something… then unknowingly end up eating 3 bowls because it’s JUST. THAT. GOOD!

Watch the Video Tutorial!

Summarized Recipe:

Creamy Salmon Chowder

Date Published: July 2nd, 2020 | Last Updated: July 2nd, 2020
Author: Abby |Category: soups
Serves: 6-8 | Prep time: 30mins | Cook time: 30mins

Ingredients:

  • 3 Tbsps butter (or olive oil to reduce the calories)
  • 2 cloves garlic, minced
  • 2 cups onion, chopped (roughly 1 large onion)
  • 2 cups celery, chopped (~4 stalks)
  • 2 cups carrots, diced (roughly 2 large carrots)
  • 2 cups potatoes, diced (~2 large potatoes)
  • 3 cups chicken broth
  • 1 tsp salt
  • 1 tsp ground black pepper
  • 1 tsp dried dill
  • 450g of fresh salmon (or any fish), cut to 2.5cm chunks (you can used canned fish as well, drained)
  • 1 can (375ml) evaporated milk
  • 1 can (420g) creamed corn
  • 1 can (420g) corn kernels, drained
  • 200g cheddar cheese, shredded (~1 large handful)

Directions:

  1. Melt butter in a large pot over medium heat. Sauté the garlic, onion, celery and carrots. Put a lid on the pot and steam the veggies until the carrots are soft enough to break with your spatula (~5-8mins).
  2. Stir in potatoes, chicken broth, salt, pepper, and dill. Bring to a boil, and reduce heat. Cover and simmer until the potatoes are soft enough to break with your spatula (~15-20mins).
  3. Stir in the salmon, evaporated milk, and corn. Put on the lid and bring the soup to a boil then turn the heat down and simmer until the salmon is cooked. Once cooked, turn the heat off and mix through the cheese until melted. (If you’re using canned salmon, then just mix until heated through then serve.)
  4. Adjust salt and pepper to taste. Serve!

Char Kway Teow (Stir-fried flat noodles)


Date Published: July 1st, 2020 | Last Updated: July 1st, 2020
Author: Abby |Category: mains, Asian
Serves: 4-5 | Prep time: 15mins | Cook time: 10mins

Jump to recipe | Watch the video

WOOHOO!! The inaugural post of Polyphagic Abby! Welcome welcome. I’m so excited to share my favourite recipes with you!

I won’t muddle this recipe post by going into the hows and whys of starting up this food blog project in this post but if you’re interested, you can read about it here.

I’m new to the video blogging and food photography game, so don’t mind the occasional questionable camera work. We’re still working out the kinks. We’ve ordered a tripod that’s coming in the mail but I was too excited to start this blog to wait! I also got too excited taking videos of recipes that I forgot to take photos of the process as well, so don’t mind the video screenshots as part of the post for the first few recipes. heh heh.

My partner Toby rigging up the camera for my first recipe video hahaha. This is why the start of the video is a little shaky. Only 1 more week until our tripod arrives!

Toby and I have been religiously watching Masterchef 2020 lately. We’ve never watched a show so intently together before. Our favourite contestant Sarah Tiong was recently eliminated. I’ve always loved watching her put together amazing flavourful Asian dishes on the show and to my luck, she has just released a cookbook! I’ve been wanting to cook closer to my Asian roots lately and her cookbook was the perfect gateway. It’s full of amazing recipes. I absolutely recommend getting her cookbook “Sweet, Savoury, Spicy“. This char kway teow recipe was actually adapted from one of hers.

Char kway teow is a popular Malaysian/Singaporean dish. It’s a dish made from flat rice noodles (banh pho) and sautéed in Chinese sausage (lap cheong) and prawns. You can substitute the protein with anything you like and add in any extra veggies you like. This recipe is easy and cooks up quickly! You can watch the video below to guide you through the recipe.

Anyways, without further ado, here’s the recipe! If you have any comments or suggestions, I’d love to hear from you in the comment section! You can follow me on instagram, youtube and facebook to see all the recipes I post!

Happy cooking!

Ingredients you’ll need:

  • 1 packet (1kg) of cooked flat rice noodles (banh pho) – (375g uncooked packet = ~1kg cooked)
  • 1/3 cup (90ml) of any neutral tasting oil (you can substitute with pork lard for extra flavour)
  • 4 cloves garlic, minced
  • 2 large red shallots, finely chopped (can substitute with 1 red onion instead)
  • 2 medium red chilis, thinly sliced (optional)
  • 130g (~4 medium) lap cheong sausages, thinly sliced
  • 15 large fresh shrimp/prawns, shelled and deveined
  • 4 Tbsps (60ml) light soy sauce
  • 2 Tbsps (30ml) dark soy sauce
  • 1 Tbsp (16ml) oyster sauce
  • 1 Tbsp (16ml) fish sauce
  • 2 tsp sugar
  • 1 tsp ground black pepper
  • 2 large eggs
  • 2 cups (200g) fresh bean sprouts
  • 2 large spring onions, cut into 2.5cm lengths

Directions:

I’d recommend having all of your ingredients prepped and ready within arm’s reach before starting this recipe. This recipe is quick and you’ll need everything one after another to ensure things don’t become overcooked since you’ll be cooking on high heat for the majority of the cook!

Cook the rice noodles according to package instructions. Different brands may differ. I bought the XL banh pho/rice stick with the three-headed elephant brand which instructed to cook the noodles in boiling water for 6-8 minutes then drain. Whatever the instructions may be, it should be fairly similar. Always taste the noodles before straining incase you need to keep them in a little longer. There’s nothing worse than tough noodles! Drain the noodles and set aside. You can add a little oil to the noodles to keep them from clumping together and easier to work with later or run them under cold water to stop them from cooking. Be gentle with the noodles so they don’t break apart.

In a large wok or skillet over high heat, add the oil (or lard) until the oil starts to smoke. Then add the garlic, shallots, chili and sausage. Stir-fry for about 30 seconds.

Add the prawns/shrimp to the pan and stir-fry for 1 minute. Shrimp cook very quickly. Don’t worry about cooking your shrimp all the way through at this stage. We just want to mix all the ingredients together. The shrimp will finish cooking once you reach the end of the recipe.

Add in the rice noodles to the pan and mix with the other ingredients while gently breaking up the noodles. Take your time making sure the noodles are mixed thoroughly and clump free without breaking them.

Once mixed, add in: light soy sauce, dark soy sauce, oyster sauce, fish sauce, sugar and black pepper (you can combine these ingredients into a bowl first and then toss it all into the wok at once for ease). Stir-fry until combined.

Make a well in the centre of the pan and add the egg. Scramble it quickly until the egg is a little lumpy (~20 seconds), then mix it together with everything in the pan to continue cooking the egg.

Notice the little clumps of cooked egg in the centre? If you like to have more visually obvious eggs in your char kway teow, you can scramble the eggs further by leaving it in the well longer before mixing it in with the rest of the ingredients.

Add bean sprouts and green onion and mix for another 2mins. Turn off the heat and serve immediately. Enjoy!

Yum!!!

Watch the Char Kway Teow Video Tutorial

Summarized Recipe:

Char Kway Teow (Stir fried flat noodles)

Date Published: June 27th, 2020 | Last Updated: June 27th, 2020
Author: Abby |Category: mains, asian
Serves: 4 – 5 | Prep time: 15mins | Cook time: 10mins

Ingredients:

  • 1 packet of cooked flat rice noodles (banh pho) – (375g uncooked packet = ~1kg cooked)
  • 1/3 cup (90ml) of any neutral tasting oil (can substitute with pork lard for extra flavour)
  • 4 cloves garlic, minced
  • 2 large red shallots, finely chopped (can substitute with 1 red onion instead)
  • 2 medium red serrano chilis, thinly sliced (optional)
  • 130g (~4 medium) lap cheong sausages, thinly sliced
  • 15 large fresh shrimp/prawns, shelled and deveined
  • 4 Tbsps (60ml) light soy sauce
  • 2 Tbsps (30ml) dark soy sauce
  • 1 Tbsp (16ml) oyster sauce
  • 1 Tbsp (16ml) fish sauce
  • 2 tsp sugar
  • 1 tsp ground black pepper
  • 2 large eggs
  • 2 cups (200g) fresh bean sprouts
  • 2 large spring onions, cut into 2.5cm lengths

Directions:

  1. Cook the rice noodles according to package instructions. Drain and set aside. You can add a little oil to the noodles to keep them from clumping together.
  2. In a large wok or skillet over high heat, add the oil (or lard) until the oil starts to smoke. Then add the garlic, shallots, chili and sausage. Stir-fry for about 30 seconds.
  3. Add the prawns/shrimp to the pan and stir-fry for 1 minute.
  4. Add in the rice noodles to the pan and mix with the other ingredients while gently breaking up the noodles.
  5. Once mixed, add in: light soy sauce, dark soy sauce, oyster sauce, fish sauce, sugar and black pepper. Stir-fry until combined.
  6. Make a well in the centre of the pan and add the egg. Scramble it quickly until the egg is a little lumpy (~20 seconds), then mix it together with everything in the pan to continue cooking the egg.
  7. Add bean sprouts and green onion and mix for another 2mins. Turn off the heat and serve immediately. Enjoy!