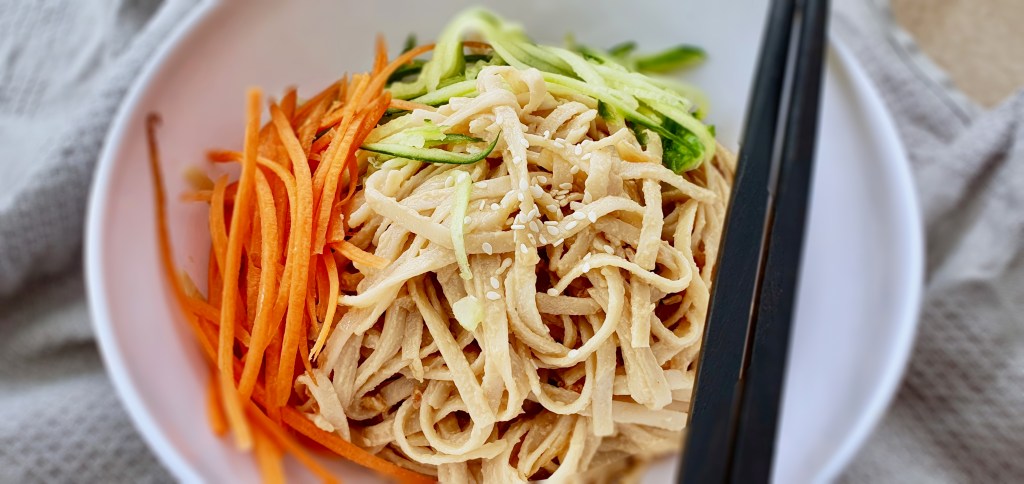
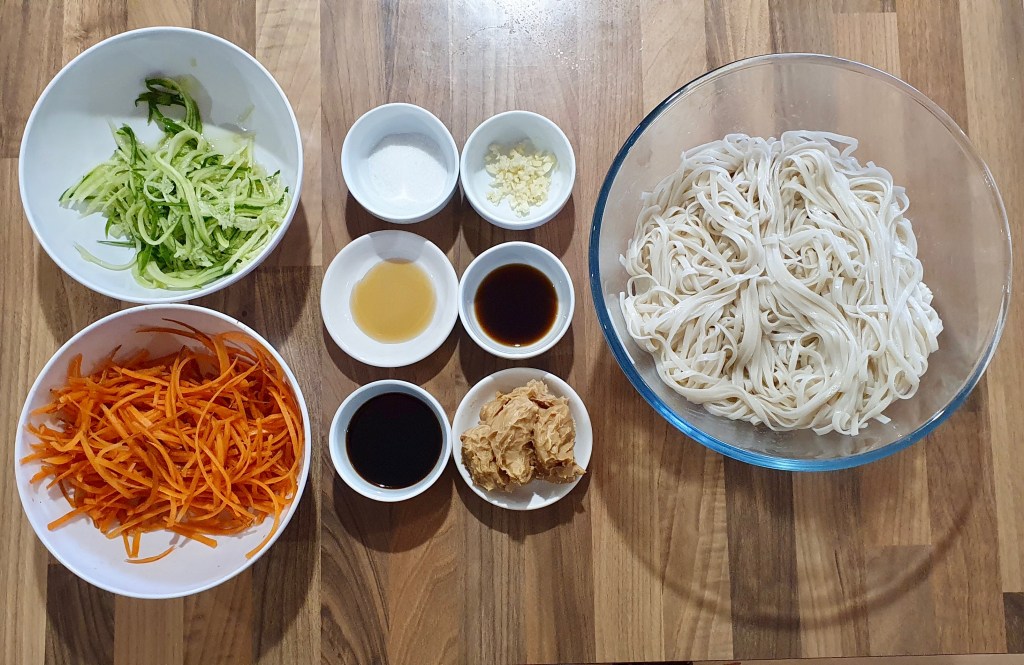
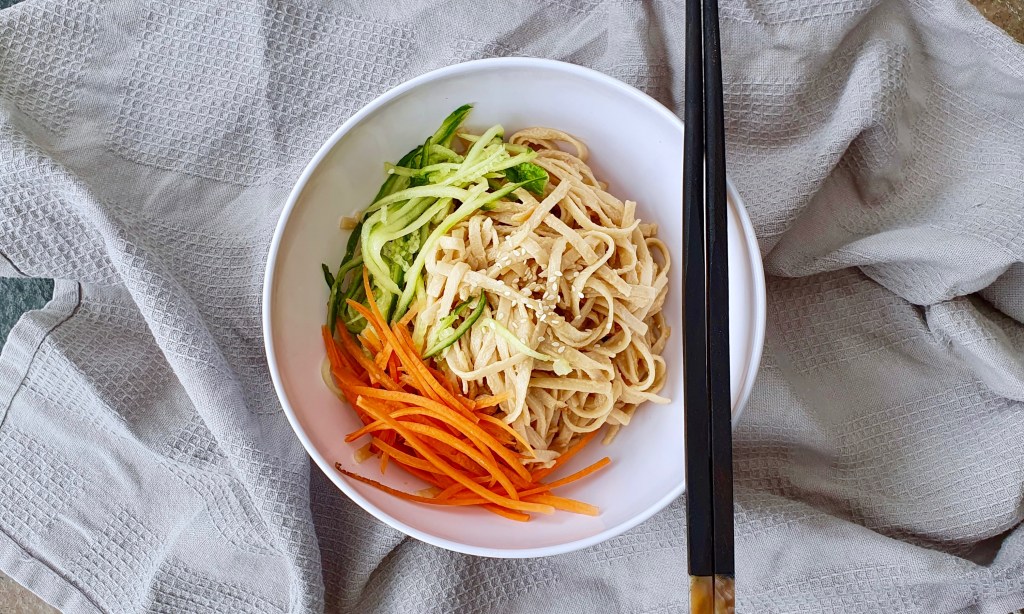
Taiwanese Sweet Mayonnaise 沙拉醬


Date Published: August 12th, 2020 | Last Updated: August 12th, 2020
Author: Abby |Category: sauces/dips, asian
Serves: 2 cups | Prep time: 2 mins | Make time: 10 mins

Jump to recipe |

I was SO excited when I learned how to make Taiwanese sweet mayonnaise. It’s the back bone and not so secret sauce to so many classic Taiwanese dishes (usually snack foods): pineapple shrimp balls, breakfast triangle sandwiches, burgers, salads…etc. I’m actually not 100% sure if this originated in Taiwan but anecdotally I’ve only seen Taiwanese brands of this mayo and I’ve never been able to find it outside of Taiwan nor have I seen it used in any dishes outside of Taiwan so therefore I’m dubbing it Taiwanese – prove me wrong!

This mayo is a common staple in many Taiwanese households and it usually comes in a tube-shaped plastic bag where you snip a corner off and squeeze it out over your dish. Taiwanese people don’t eat many raw veggies such as a traditional leafy greens salad but instead we tend to cook our veg (usually blanched or boiled) and in Taiwan you’ll commonly see them squeeze this mayo over the plain veggies for a quick “salad”. Sometimes there’s more mayo than actual veg (I’m looking at you, grandma 😂). I’ve had it over boiled potatoes, asparagus, bamboo, carrots, boiled eggs…etc, all served cold. The direct translation of the common name for this sauce is literally “salad sauce/dressing” (but lots of people call it mayonnaise as well). In fact, when you talk about mayonnaise in Taiwan, most people will think of sweet mayo rather than the tangy version Western countries are used to.

There are only a few ingredients to this recipe and it’s pretty straightforward, but it will help immensely if you’ve got a stand mixer or an electric whisk. It takes a little patience to ensure the sauce doesn’t split but it’s worth it! This recipe makes about 2 cups (which is a LOT), feel free to halve it but it also stores really well in the fridge.

Anyways, without further ado, here’s the recipe! If you have any comments or suggestions, I’d love to hear from you in the comment section! You can follow me on instagram, youtube and facebook to see all the recipes I post!

I’ll be posting some recipes where you can use this mayo, so keep your eyes peeled!

Happy cooking!

Ingredients you’ll need:
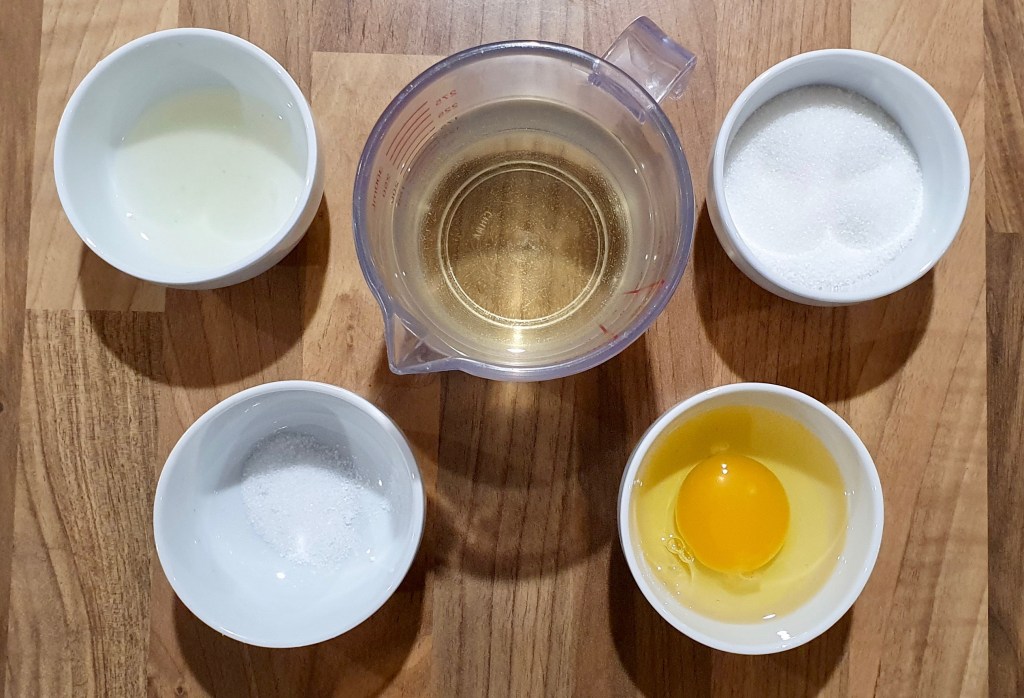
  • 80g sugar
  • 4g salt
  • 1 large egg
  • 400ml neutral oil
  • 3-5 tsps lemon juice (or more to taste)

This makes roughly 2 cups of sweet mayo which is actually quite a lot! It stores well in an air tight container for about a month but feel free to halve the recipe to make a smaller portion. I find it easiest to halve an egg by whisking it first then weighing it out and divide the weight by two.

Directions:
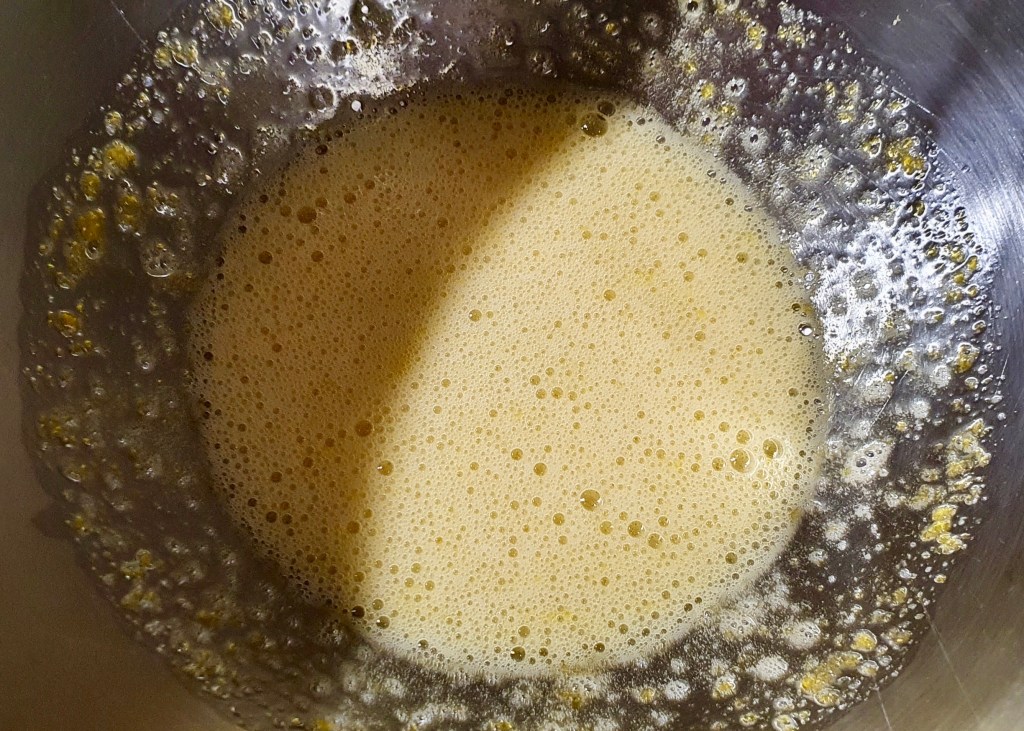
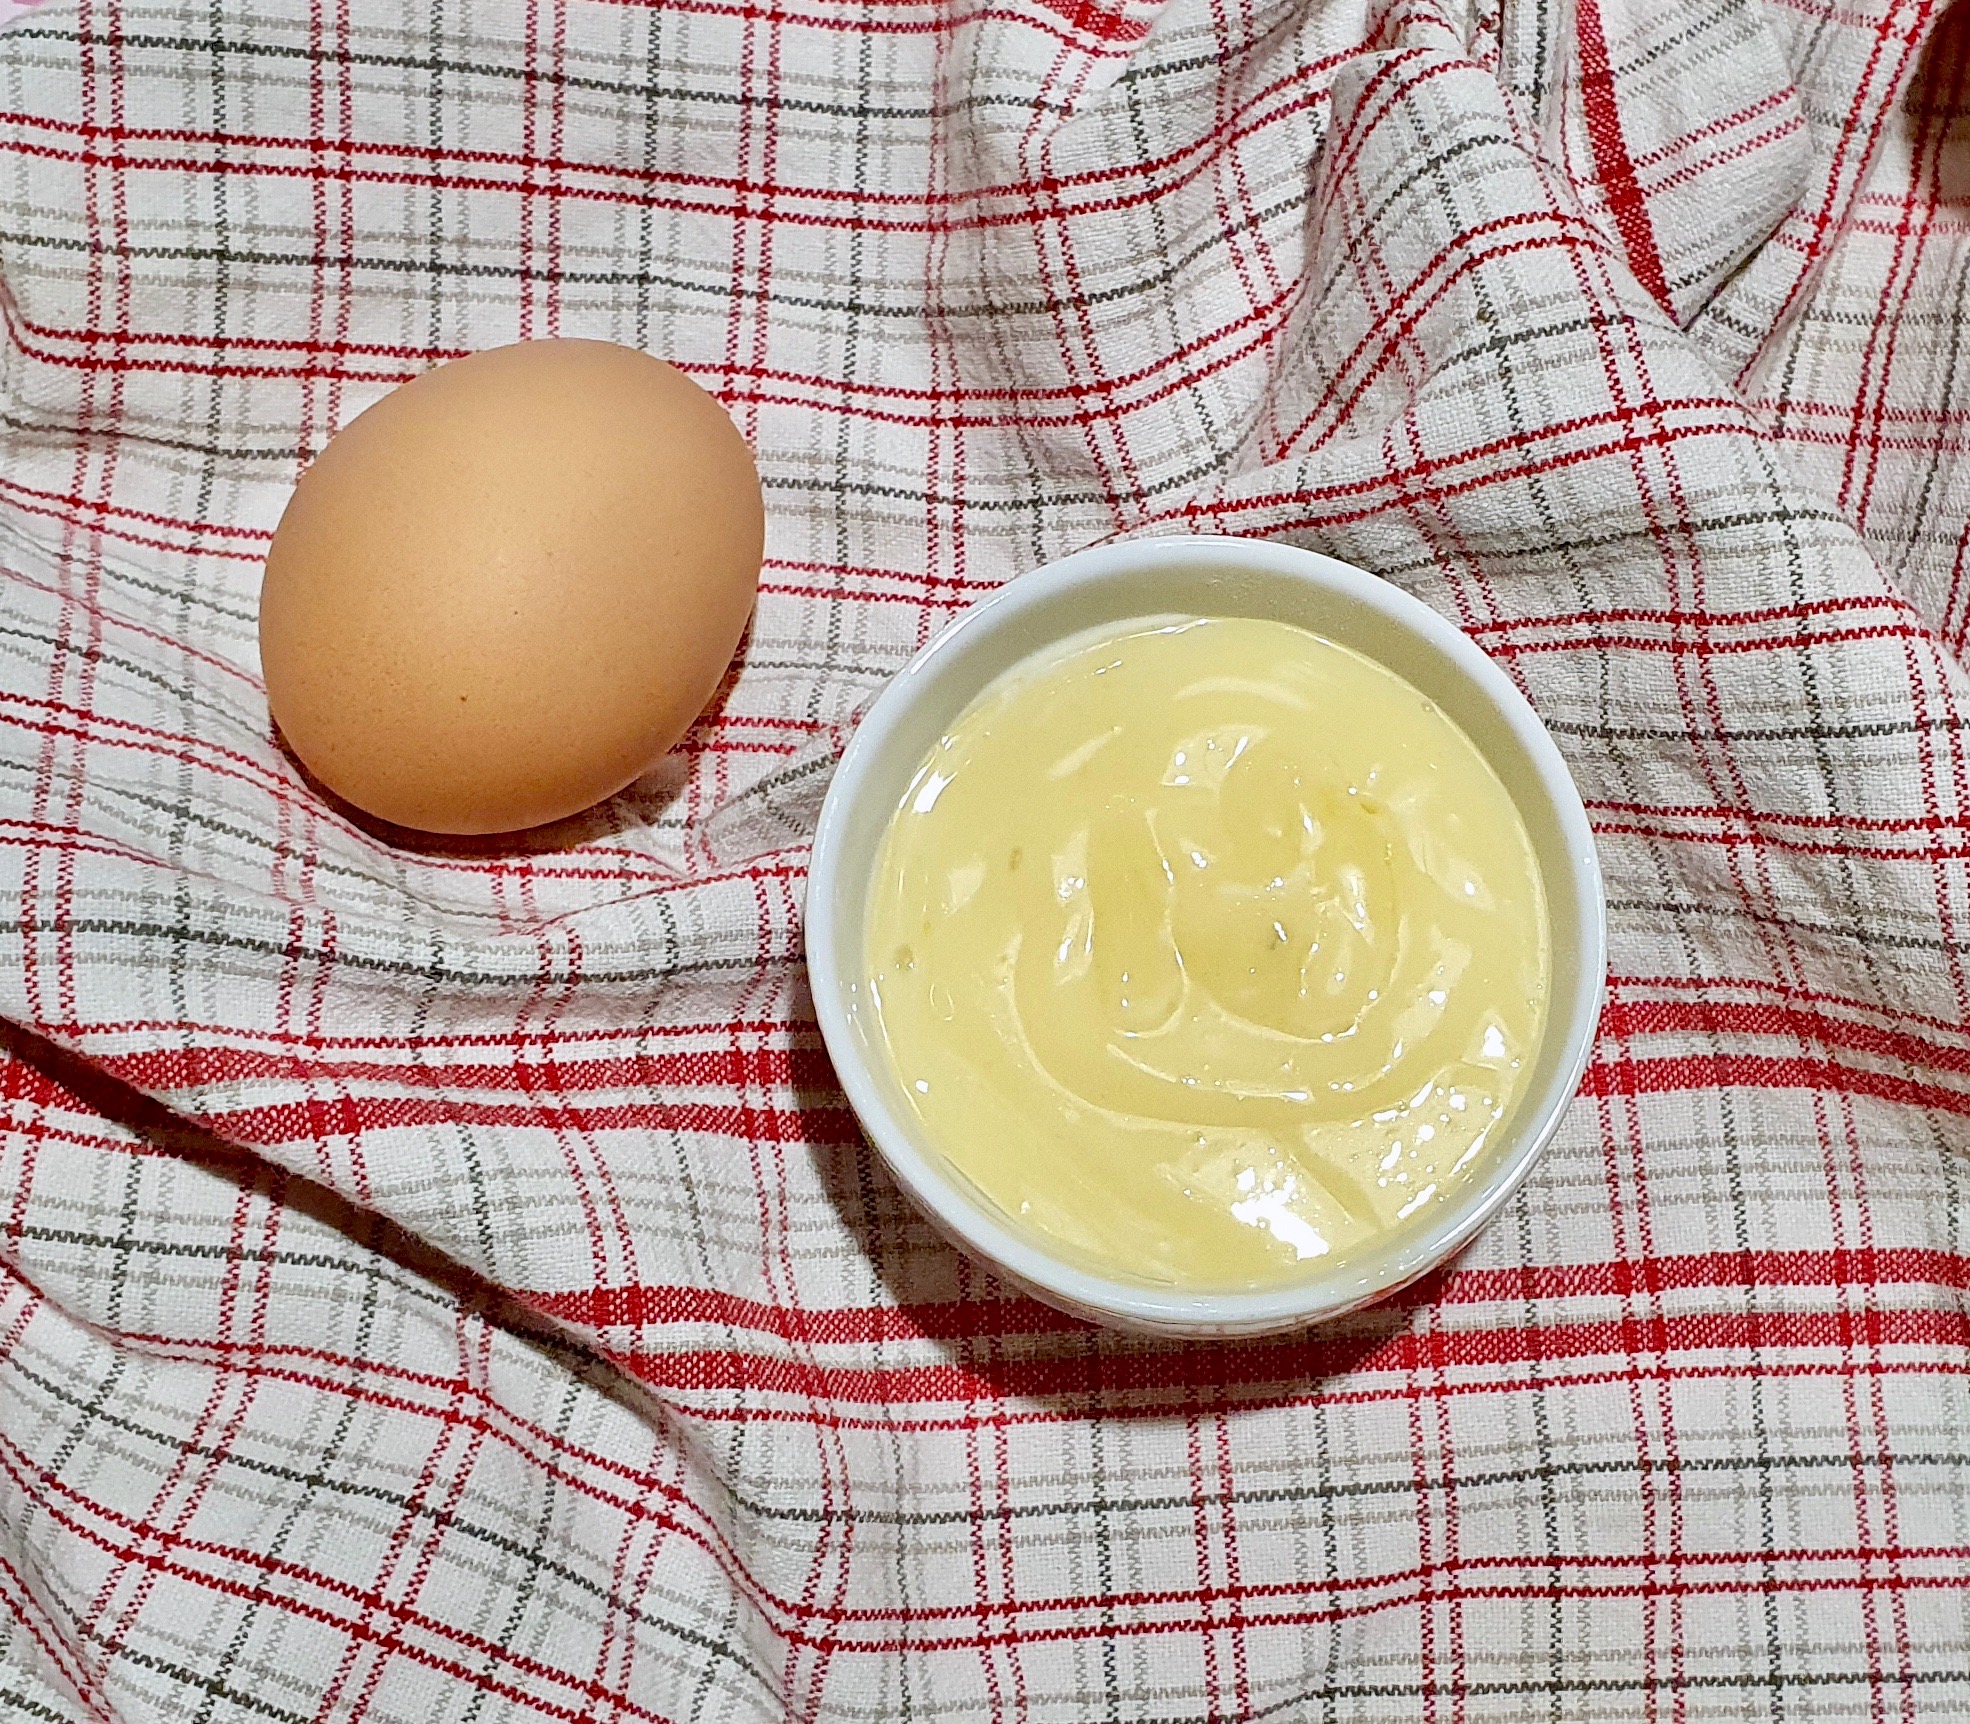
In a stand mixer bowl, add the sugar, salt and egg. Whisk on high speed until it’s combined with small bubbles (see photo above). You can use a hand mixer as well but it’ll take some coordination when you drizzle in the oil.

Continue to mix on high speed and drizzle in 1 tablespoon of oil. Once the oil has been incorporated, then start drizzling the rest of the oil VERY SLOWLY with the mixer on HIGH speed the whole time. When I say slow, I mean painfully slow where you’re pouring in a very thin stream (almost drops). If you’ve ever made hollandaise sauce before, you’ll recognize this pain. If you pour the oil too quickly, it won’t combine properly and your sauce will end up being a separated oily mess. Better to pour the oil too slow than too fast! If you see your mixture thickening and no separation of oil, you’re on the right track!

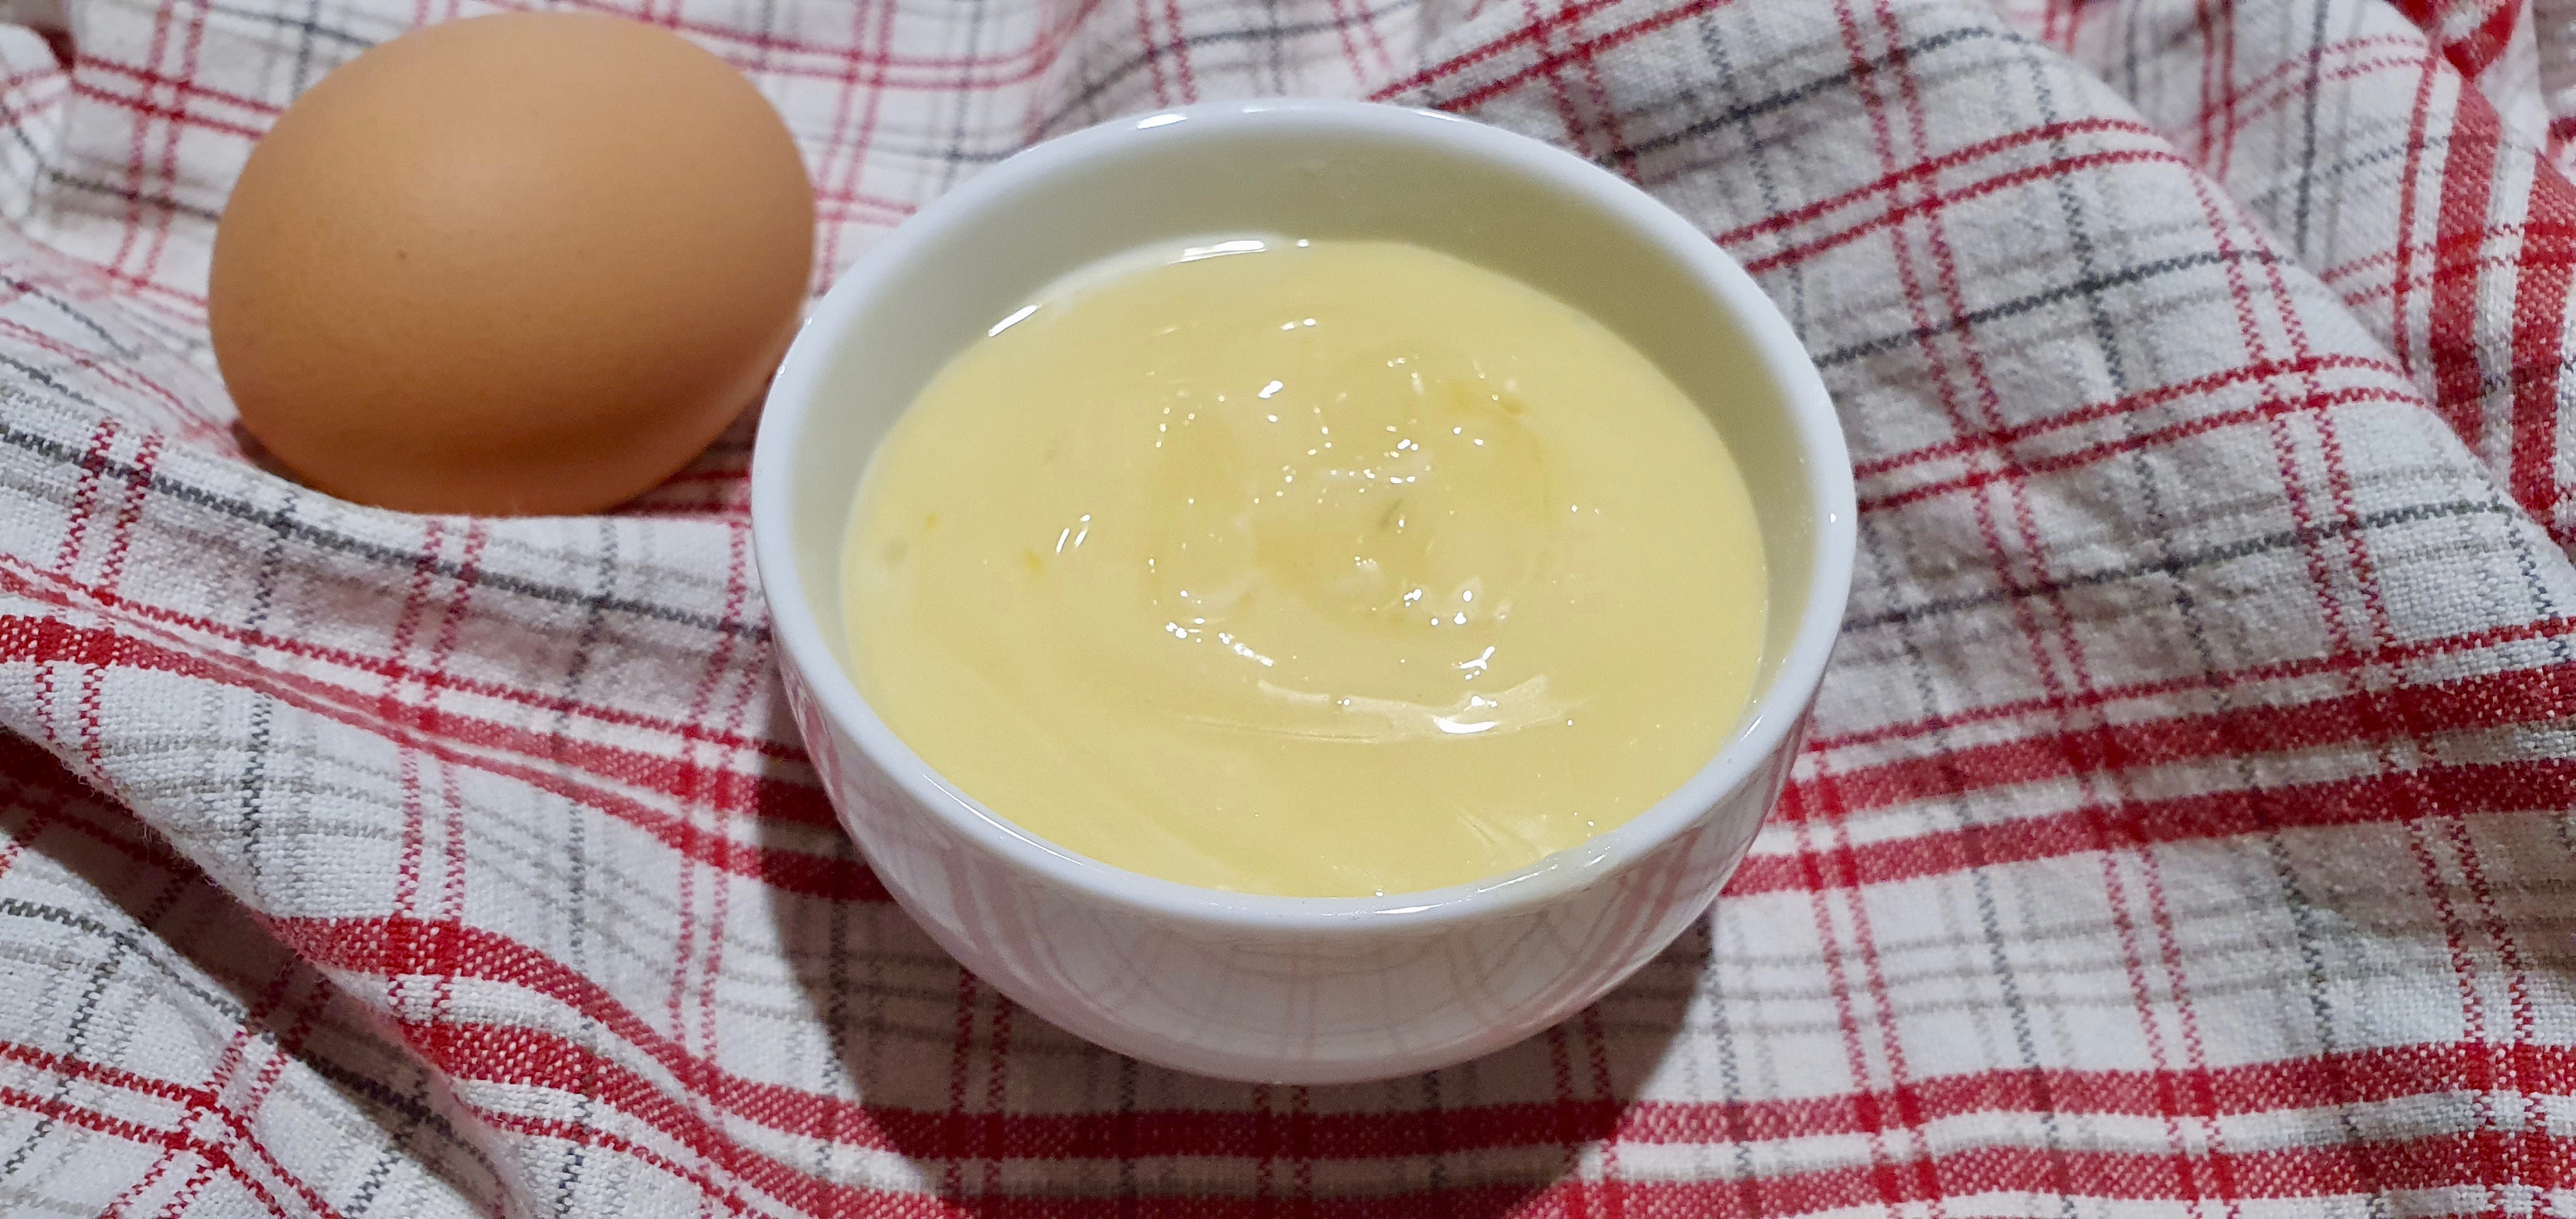
As you continue to add the oil, you’ll get a thicker and thicker smooth sauce. Once you’ve finished adding the oil, drizzle the lemon juice while still whisking on high speed. Once it’s all incorporated, stop the mixer and taste. You should have a smooth sweet mayo with a tang from the lemon. Add more lemon juice if needed since different lemons can vary on their sourness. Done!

Store in an air tight container (ie glass jar) for a few weeks to a month!

Summarized Recipe:

Taiwanese Sweet Mayonnaise 沙拉醬

Date Published: August 12th, 2020 | Last Updated: August 12th, 2020
Author: Abby |Category: sauces/dips, asian
Serves: 2 cups | Prep time: 2 mins | Make time: 10 mins

Ingredients:

  • 80g sugar
  • 4g salt
  • 1 large egg
  • 400ml neutral oil
  • 3-5 tsps lemon juice (or more to taste)

Directions:

  1. In a stand mixer bowl, add the sugar, salt and egg. Whisk on high speed until it’s combined with small bubbles (see photo above). You can use a hand mixer as well but it’ll take some coordination when you drizzle in the oil.
  2. Continue to mix on high speed and drizzle in 1 tablespoon of oil. Once the oil has been incorporated, then start drizzling the rest of the oil VERY SLOWLY with the mixer on HIGH speed the whole time.
    • When I say slow, I mean painfully slow where you’re pouring in a very thin stream (almost drops). If you’ve ever made hollandaise sauce before, you’ll recognize this pain. If you pour the oil too quickly, it won’t combine properly and your sauce will end up being a separated oily mess. Better to pour the oil too slow than too fast! If you see your mixture thickening and no separation of oil, you’re on the right track!
  3. As you continue to add the oil, you’ll get a thicker and thicker smooth sauce. Once you’ve finished adding the oil, drizzle the lemon juice while still whisking on high speed. Once it’s all incorporated, stop the mixer and taste. You should have a smooth sweet mayo with a tang from the lemon. Add more lemon juice if needed since different lemons can vary on their sourness. Done!

Store in an air tight container (ie glass jar) for a few weeks to a month!

Taiwanese Crystal Dumplings 水晶饺 (Shuĭ Jing Jiao)


Date Published: August 9th, 2020 | Last Updated: August 9th, 2020
Author: Abby |Category: asian, mains, easy, soups
Serves: 24 dumplings | Prep time: 30 mins | Cook time: 10 mins

Jump to recipe |

[Warning: Long foreword to this post. If you want to skip ahead to the recipe, click on the link above.]

Taiwanese Crystal Dumplings!!! I don’t think I’ve been more excited or proud to share a recipe! These hold the ultimate nostalgia for me. My maternal grandparents live in Miao Li which is a county ages away from Taipei (where we lived) and it takes roughly 2.5 hours train ride to get there and then we’d have to hail a cab to get to their house because their public transport system isn’t the most efficient. Although the journey to visit them is laborious, it was always so nice to see them, especially when it was only once a year when we’d visit Taiwan. It was even better when ‘wai po’ (grandmother on my mother’s side) would visit us in Taipei and stay for a few weeks at a time. She’d always make such delicious food (steamed egg (chawanmushi), fried fish and sesame chicken soup was her specialty). Back to crystal dumplings: she never made them for us but there was a special shop in Miao Li that would sell them frozen and she’d always buy a big bag of them when she visited. Those crystal dumplings were Miao Li’s best kept secret. I’ve had crystal dumplings in Taipei from various shops, but none compared to the ones she’d bring from Miao Li. Now in her later years she doesn’t travel to Taipei anymore, but every time we’d visit Miao Li with my aunt, we’d be sure to pick up a bag before heading home.

Crystal dumplings were always this special treat that we’d only get if wai po visited or if we made the journey to Miao Li. There was no other way to get them and no one else makes a good substitute (I guess you could say I have very high crystal dumpling standards 😜). However since the pandemic, I’ve had a lot more time on my hands and I’ve been delving deeper and deeper into the cooking world. I was a self-taught cook in the kitchen and only made Western dishes in the early days roughly 8 years ago. Asian food is familiar territory when it came to ordering from a restaurant, but cooking it was completely foreign to me – I had no idea where to start (so many sauces!). Over the years I became more competent in the kitchen and started cooking more Asian food. During this pandemic and with the release of Polyphagic Abby, I found myself gravitating towards more and more traditional Taiwanese and Chinese dishes. Perhaps I’m missing my family from so far away in all this craziness or maybe it’s because there’s no decent good Chinese food out here in the Aussie country. Whatever the reason, it makes me so happy when a recipe turns out perfectly and I’m transported back to the days eating with my family again.

I’ve had a few victories so far recreating my childhood dishes such as cheese dan bing, Vietnamese pho, and Taiwanese cold noodles which I’m all really proud of, but I’m especially proud of this crystal dumplings recipe because this brings me back home. A lot of dishes make me revisit my childhood in Taiwan, but this one in particular makes me think of wai po. This is a photo of wai po and wai gong back in 2016.

Taiwan has a LOT of popular dishes but for whatever reason the reputation of the crystal dumpling didn’t cross into the Western world so it was impossible to find any recipes on these bad boys. I searched high and low and couldn’t find any english recipes for this dish so after watching multiple Taiwanese youtube cooking videos, compiling different methods and ingredients together with a lot of taste-testing and trial and error (I still have a 500g bag of failed pork filling in the freezer that I didn’t want to throw away 😂), I think I’ve successfully created a recipe that is just like the ones in Miao Li (I haven’t been to Miao Li in a few years, but I’ll have to have them side by side to be extra sure) 👏 👏 👏 (is it weird to applaud myself? I’m just that proud)! Crystal dumplings are one of my mom’s favourite foods so I’ll have to let her be the judge when we can be together again. This is the reason why I’m so proud and excited to share this recipe with you. Not only because it’s so sentimental to me, but also because I feel like I’m introducing crystal dumplings to the Western world and it’s a Taiwanese secret that the world needs to know about.

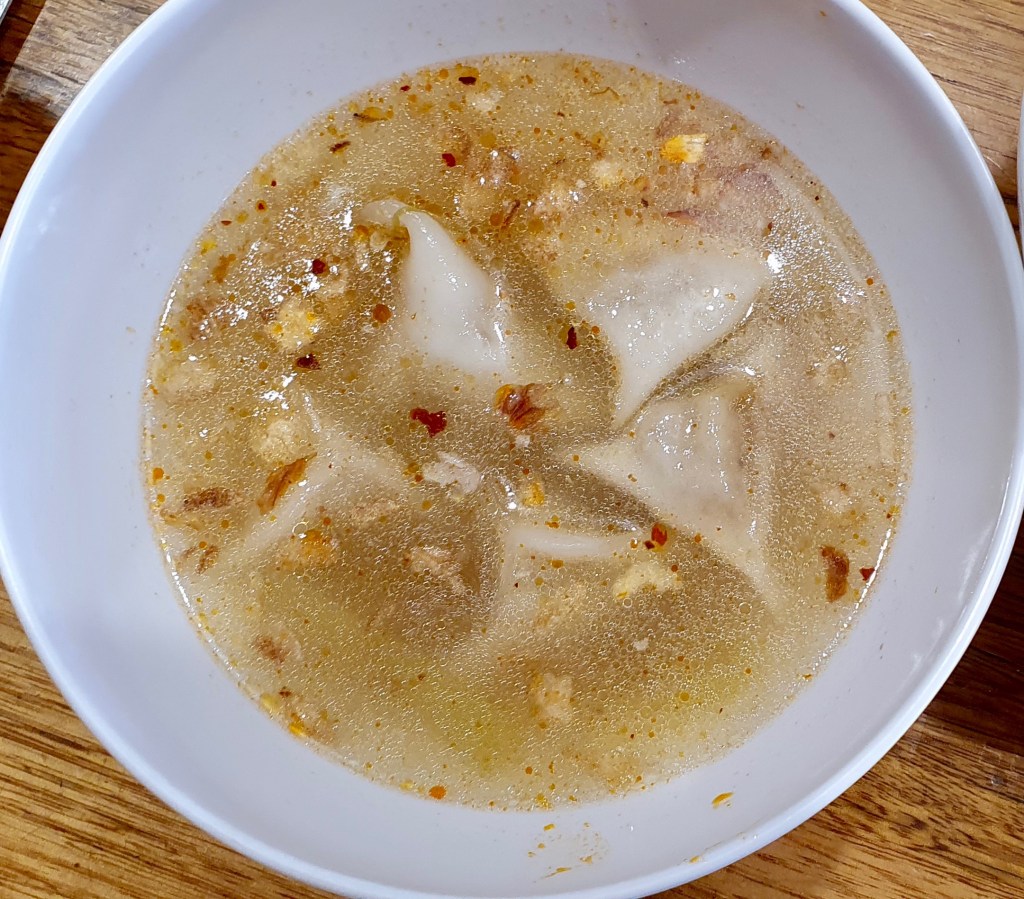
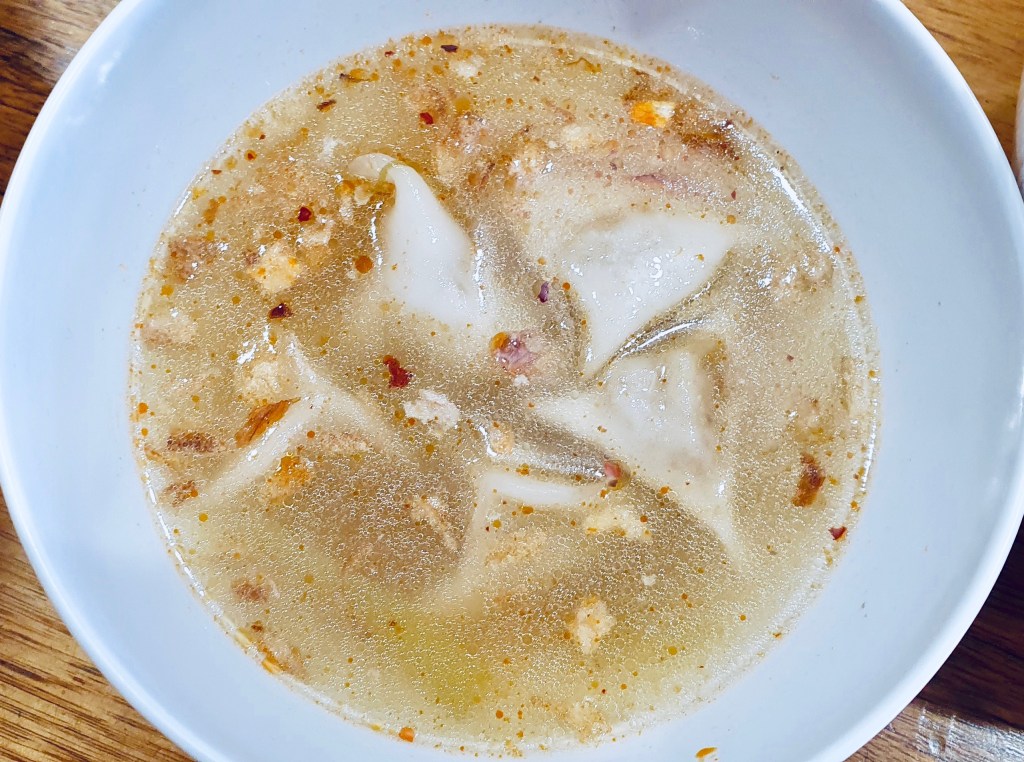
Taiwanese crystal dumplings have an outer casing that’s made with potato starch which becomes translucent when the dumplings cool down after being cooked (hence “crystal”). The starch gives it a distinct chewy texture. The casing itself doesn’t have much flavour but serves more as a textural component. The real flavour is in the pork filling which is sautéed in fried shallots and soy sauce, making a little flavour bomb. The intensity of the flavours in the filling carries the bland casing with it to create a wonderful balanced mouthful of savoury chewy goodness. There are multiple ways to eat a crystal dumping. My favourite way is to have it in a bowl of warm chicken soup with fried shallots but you can also eat it on its own or throw it in a hotpot. Scroll to the end of the recipe and I’ll show you how to eat them in different ways! I’ll be uploading a video on how to make them shortly so keep an eye out!

Anyways, thanks for reading my story and without further ado, here’s the recipe! If you have any comments or suggestions, I’d love to hear from you in the comment section! You can follow me on instagram, youtube and facebook to see all the recipes I post!

Happy cooking!

Ingredients you’ll need:

  • Filling:
    • 200g pork mince
    • 1 1/2 Tbsps soy sauce
    • 1 1/2 Tbsps fried shallots
    • 1/2 tsp ground white pepper
  • Crystal Dumpling Skin:
    • 1 cup (165g) potato starch
    • 1/4 cup boiling water
    • 3 Tbsps (45ml) cold water + more if needed
    • 2 tsp sesame oil
  • Bowl of cold water + 2 tsp sesame oil

Directions:

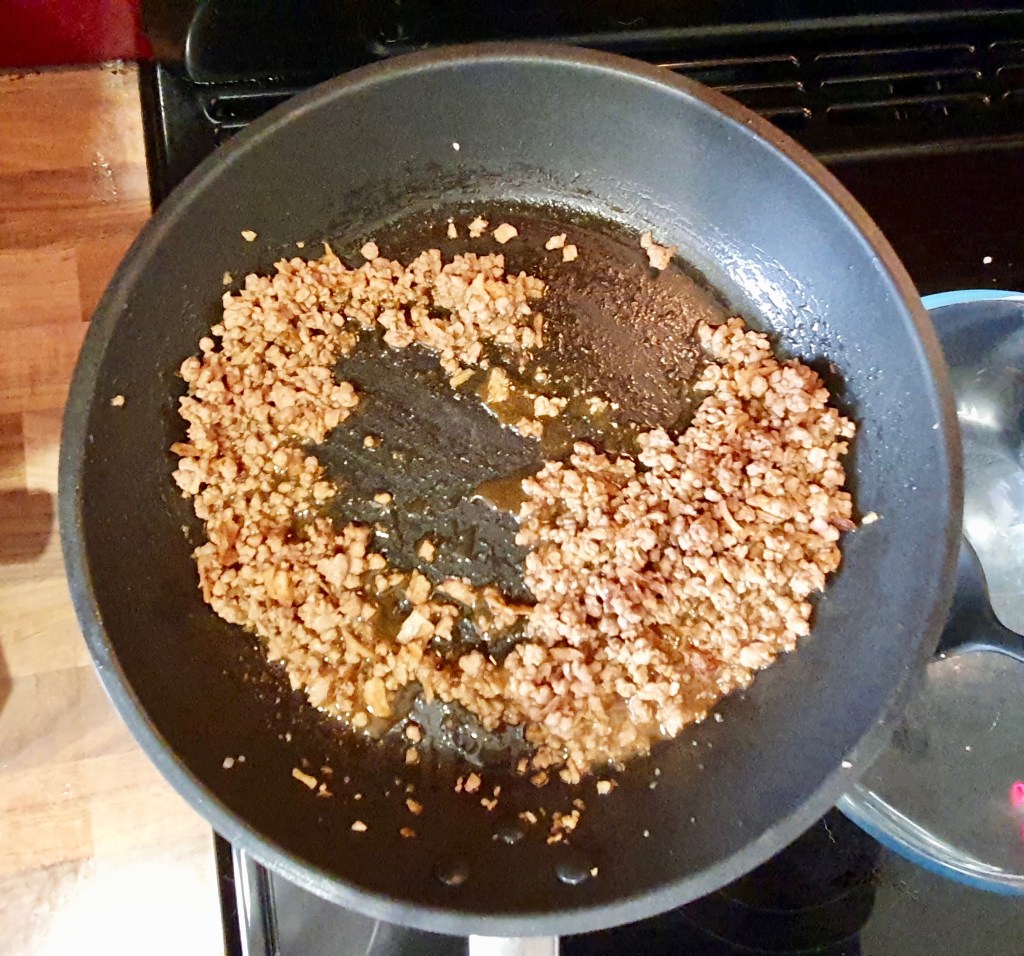
Make the filling: Heat a skillet over MED-HIGH heat and sauté 1/3 of the pork mince in some oil until cooked through. Add in the soy sauce and stir until fragrant. Turn off the heat and mix in the fried shallots.

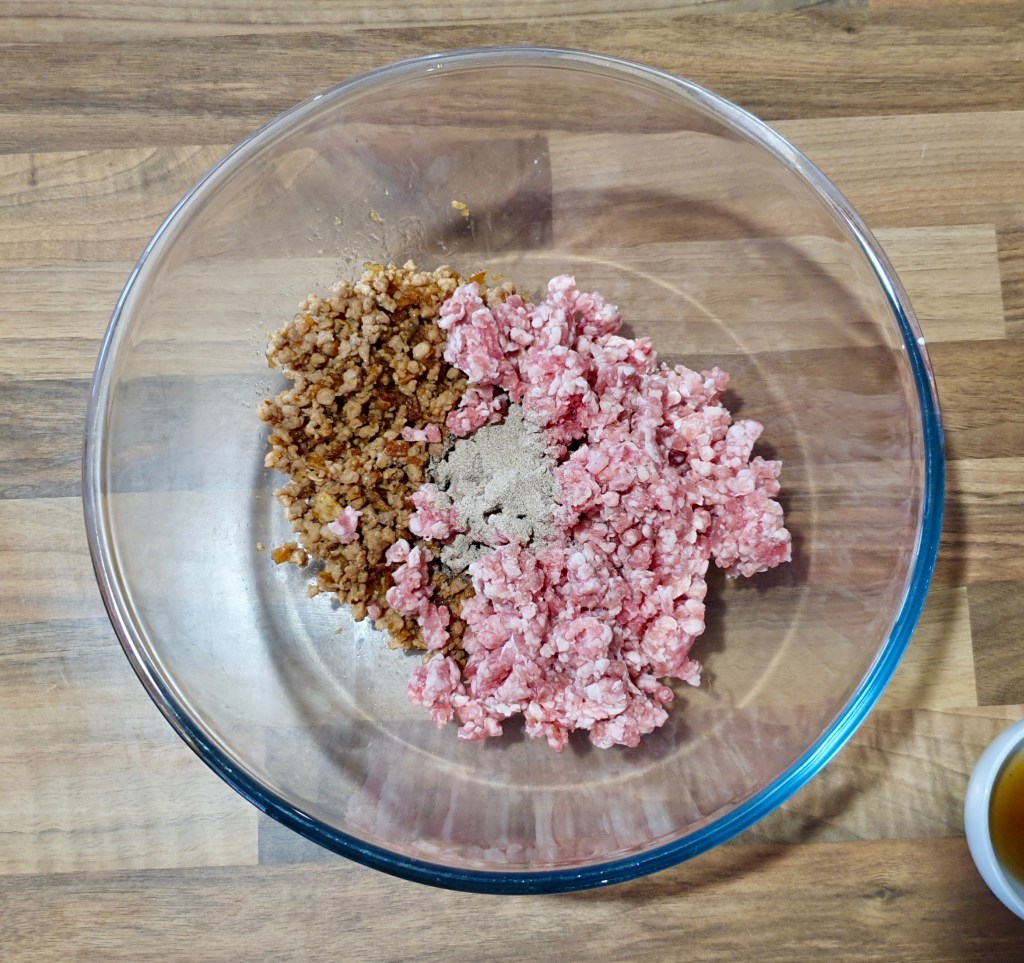
Put all the contents from the skillet in a large bowl and mix in the remaining pork mince and white pepper to the bowl. You should now have a sticky filling mixture. Set aside.

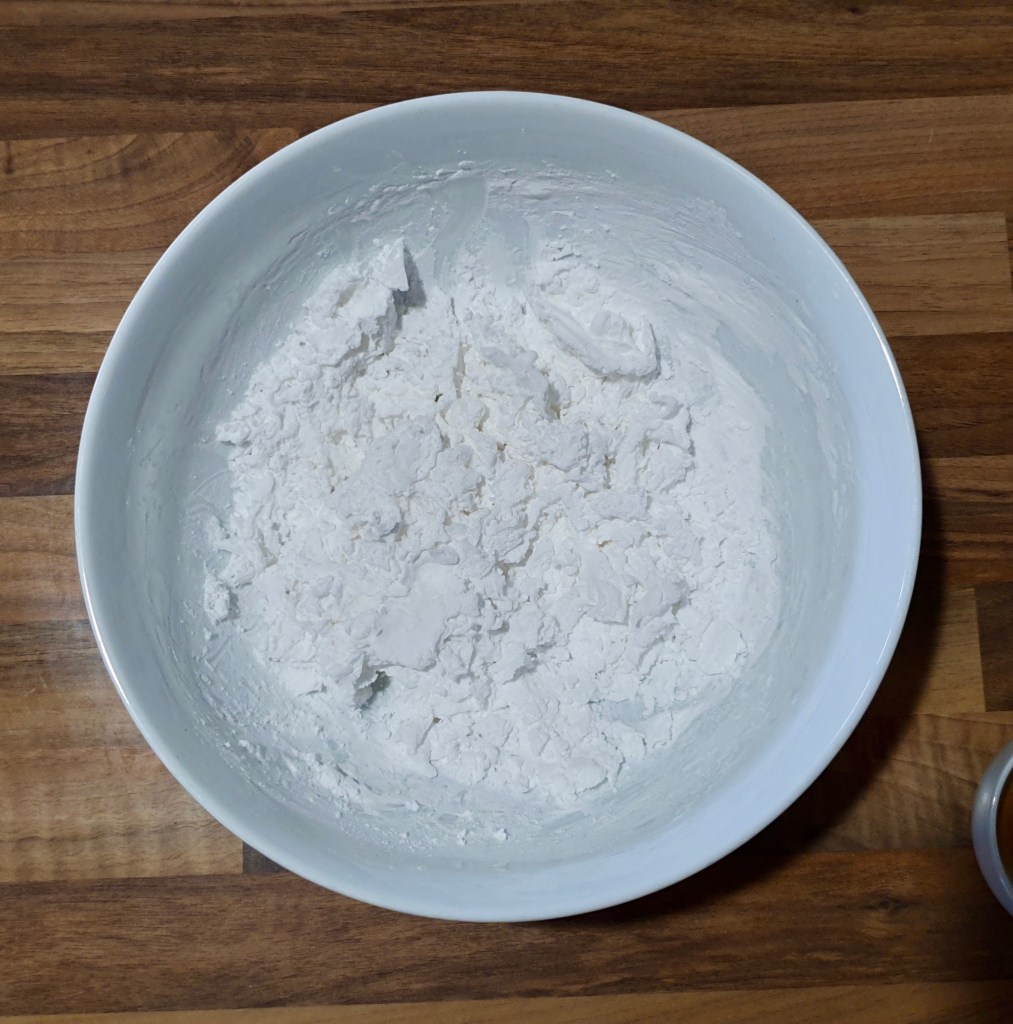
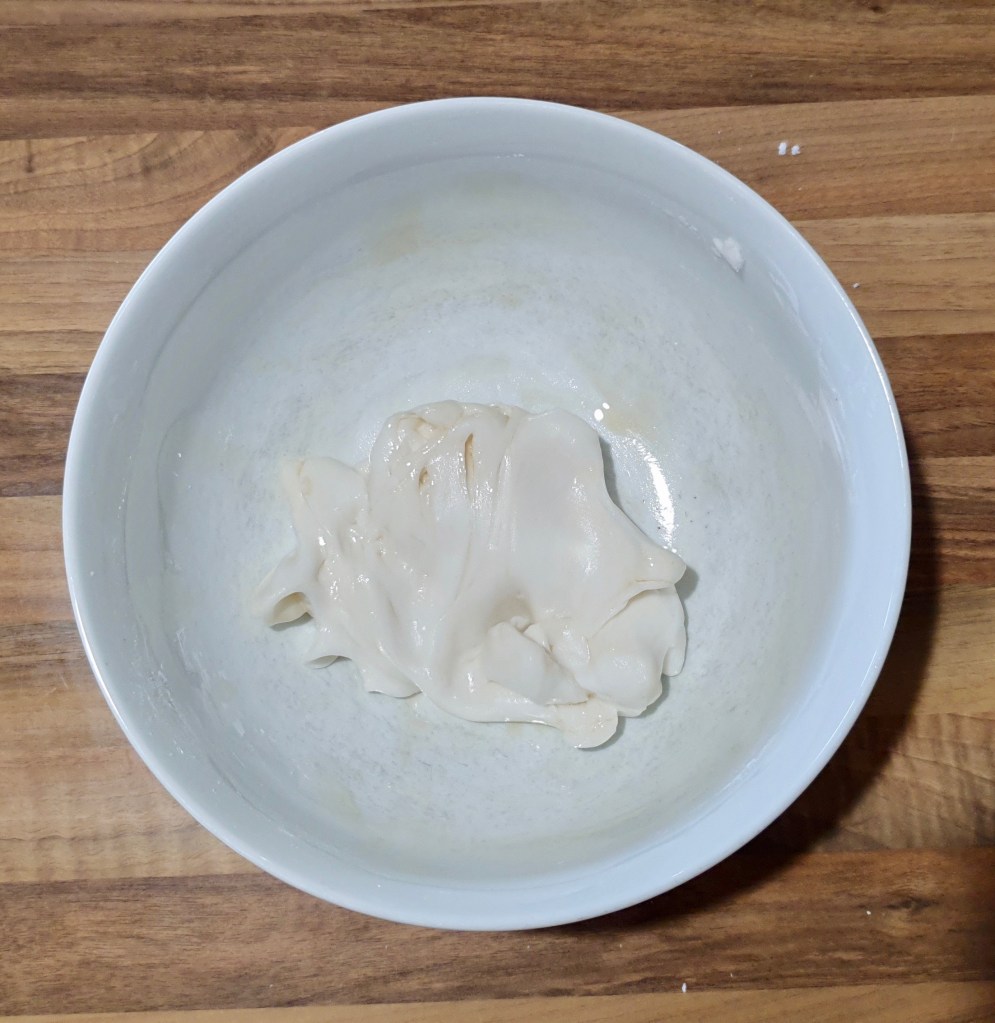
Make the dumpling wrappers: In a wide base bowl (you want a wider base for a bigger surface area), add in potato starch and pour the boiling water over the potato starch and mix with a spatula until combined/clumped together. When the dough is cool enough to handle, continue mixing with your hands. THIS STEP IS CRUCIAL! The boiling water cooks the starch and it’s what gives the dumpling the chewy texture so you want to mix it all together as best as you can before adding the cold water. Once you’ve mixed it as well as you can (you’ll end up with a rough dry dough (second photo)), add in the cold water 1/3 at a time while using your hands to mix the dough until you get a smooth ball (you might not need all of the water, just add enough until it’s smooth). Roll the dough around the bowl to ensure you’ve incorporated all of the potato starch into the dough. Add in 2 tsps of sesame oil and mix it into the dough. You should have a smooth, easily pliable dough ball similar to soft play-doh.

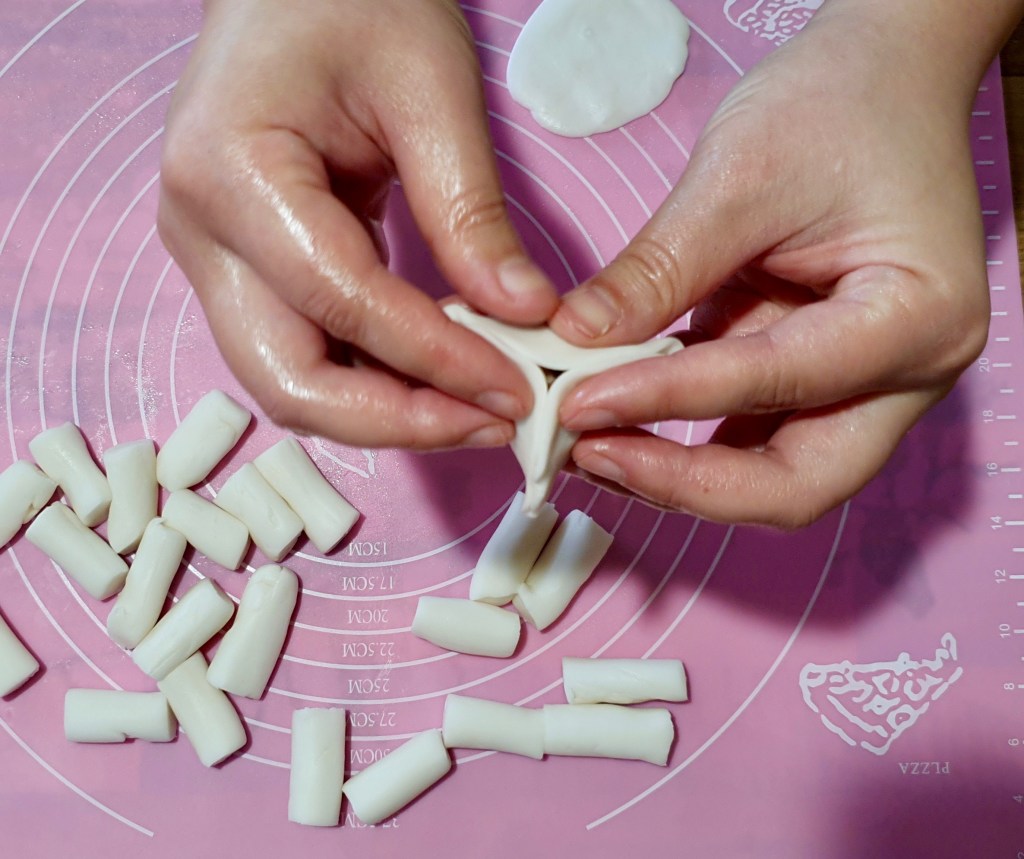
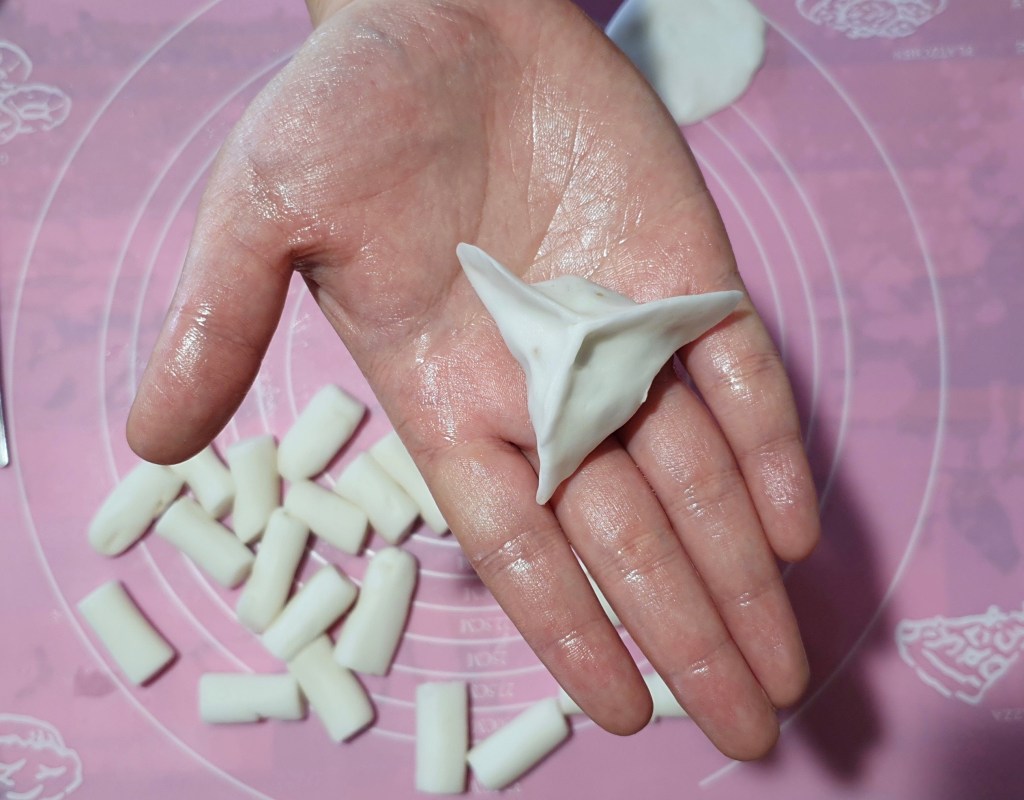
Oil your hands and roll the dough out into a roll and cut it into 24 equal pieces (you can keep dividing the dough into halves until you reach 24 pieces). Then using your hands, flatten each small dough ball into a flat pancake roughly 2-3mm thick and place 1 tsp of filling in the middle. Bring the edges together to form a triangle shape and press together the edges to seal it.

Tips:

  • Be careful not to overfill the dumplings! This dough is not like typical dumpling dough and does not stretch well – it can easily break if you stretch it too much or overfill the dumplings. If you can see the filling through the skin, you’ve stretched it too much and it will have a higher chance of breaking while cooking.
  • If you’re worried you’re wrapping them too thin or thick, you can always wrap a few and cook them first as a test to see if the thickness is right for you.
  • While you’re wrapping the dumplings, keep the rest of the dough covered so it doesn’t dry out. By keeping your hands oiled during the wrapping process it helps keep the dough moist and easier to work with.

Cook the Dumplings: Once you’ve finished wrapping all your dumplings, bring a pot of water to a hard boil and gently drop the dumplings in one at a time. Traditionally when dumplings float to the top they’re considered cooked, however with these dumplings I found that they need a little longer to cook the skin to get the ultimate chewy texture. These dumplings will pretty much float to the top in the first 30 seconds, but they aren’t done cooking until the skin looks a little puffy/squishy and the edges are a little translucent (see photo above – it’s hard to describe it!), ~5-8 mins to cook.

Strain from the hot water and dunk them into a bowl of cold water with sesame oil (the oil stops them from sticking together and the cold water stops the cooking process, firms up the skin, and also makes the dumplings more translucent). When cooled, drain them (don’t let them soak for too long in the water or they can get soggy and fall apart).

Choose Your Eating Adventure:

In a broth (my favourite way!!): Add some fried shallots and chopped spring onion to a bowl and pour hot chicken stock into the bowl, topped with a few dumplings and serve. You can also add in some noodles and shredded chicken if you like to make it a full meal.

Eaten alone: If the dumplings have cooled, put them in a pot of boiling water to warm them up and then drain and serve with any sauce you like. Lao gan ma crispy chilli oil would be my go-to choice! You can alternatively also eat them directly as they come out of the pot after boiling instead of dunking them in cold water but make sure you add some sesame oil on them or else they’ll stick together when you serve it.

Storage: Drain the dumplings well and place them in a plastic bag with a teaspoon of sesame oil and mix them around. You can refrigerate them in the bag for a few days but I’d recommend eating them soon

In a hotpot: Dump them directly in your hotpot soup! They only take a couple minutes to warm up and be ready to eat.

Summarized Recipe:

Taiwanese Crystal Dumplings 水晶饺 (Shuĭ Jing Jiao)

Date Published: August 9th, 2020 | Last Updated: August 9th, 2020
Author: Abby |Category: asian, mains, easy, soups
Serves: 24 dumplings | Prep time: 30 mins | Cook time: 10 mins

Ingredients:

  • Filling:
    • 200g pork mince
    • 1 1/2 Tbsps soy sauce
    • 1 1/2 Tbsps fried shallots
    • 1/2 tsp ground white pepper
  • Crystal Dumpling Skin:
    • 1 cup (165g) potato starch
    • 1/4 cup boiling water
    • 3 Tbsps (45ml) cold water + more if needed
    • 2 tsp sesame oil
  • Bowl of cold water + 2 tsp sesame oil

Directions:

  1. Make the filling: Heat a skillet over MED-HIGH heat and sauté 1/3 of the pork mince in some oil until cooked through. Add in the soy sauce and stir until fragrant. Turn off the heat and mix in the fried shallots. Put all the contents from the skillet in a large bowl and mix in the remaining pork mince and white pepper to the bowl. You should now have a sticky filling mixture. Set aside.
  2. Make the dumpling wrappers: In a wide base bowl, add in potato starch and pour the boiling water over the potato starch and mix with a spatula until combined/clumped together. When the dough is cool enough to handle, continue mixing with your hands to pick up as much starch as possible (you’ll end up with a rough dry crumbly dough (see photo above) – THIS STEP IS CRUCIAL! Next add in the cold water 1/3 at a time while using your hands to mix the dough until you get a smooth ball (you might not need all of the water, just add enough until it’s smooth). Roll the dough around the bowl to ensure you’ve incorporated all of the potato starch into the dough. Add in 2 tsps of sesame oil and mix it into the dough. You should have a smooth, easily pliable dough ball similar to soft play-doh.
  3. Oil your hands and roll the dough out into a roll and cut it into 24 equal pieces. Then using your hands, flatten each small dough ball into a flat pancake roughly 2-3mm thick and place 1 tsp of filling in the middle. Bring the edges together to form a triangle shape and press together the edges to seal it (see tips and photos above). Don’t overfill or stretch them too much and keep your remaining dough under cover so it doesn’t dry out.
  4. Cook the Dumplings: Once you’ve finished wrapping all your dumplings, bring a pot of water to a hard boil and gently drop the dumplings in one at a time. They’re done when the skin looks a little puffy/squishy and the edges are a little translucent (see photo above – it’s hard to describe it!), ~5-8 mins to cook.
  5. Strain from the hot water and dunk them into a bowl of cold water with sesame oil. When cooled, drain them (don’t let them soak for too long in the water or they can get soggy and fall apart).

Choose Your Eating Adventure:

  • In a broth (my favourite way!!): Add some fried shallots and chopped spring onion to a bowl and pour hot chicken stock into the bowl, topped with a few dumplings and serve. You can also add in some noodles and shredded chicken if you like to make it a full meal.
  • Eaten alone: If the dumplings have cooled, put them in a pot of boiling water to warm them up and then drain and serve with any sauce you like. Lao gan ma crispy chilli oil would be my go-to choice! You can alternatively also eat them directly as they come out of the pot after boiling instead of dunking them in cold water but make sure you add some sesame oil on them or else they’ll stick together when you serve it.
  • Storage: Drain the dumplings well and place them in a plastic bag with a teaspoon of sesame oil and mix them around. You can refrigerate them in the bag for a few days.
  • In a hotpot: Dump them directly in your hotpot soup! They only take a couple minutes to warm up and be ready to eat.

Taiwanese Cheese Egg Crepe 起司蛋餅 (Cheese Dan Bing)


Date Published: August 7th, 2020 | Last Updated: August 7th, 2020
Author: Abby |Category: asian, snacks
Serves: 4 crepes | Prep time: 5 mins | Cook time: 30 mins

Jump to recipe |

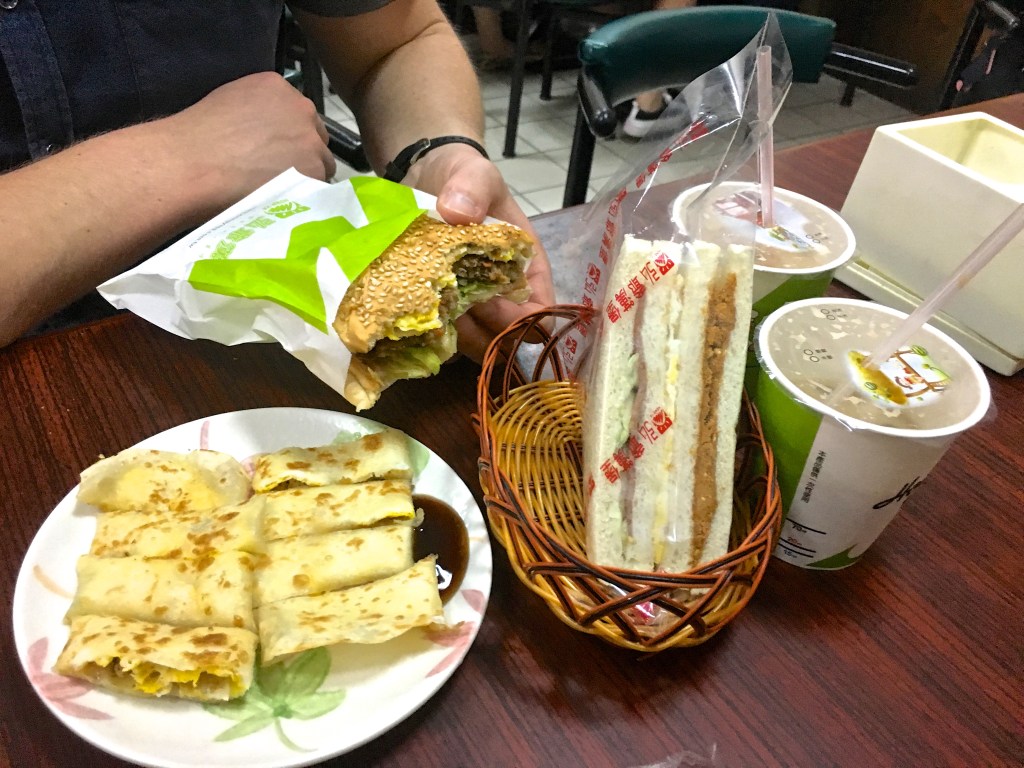
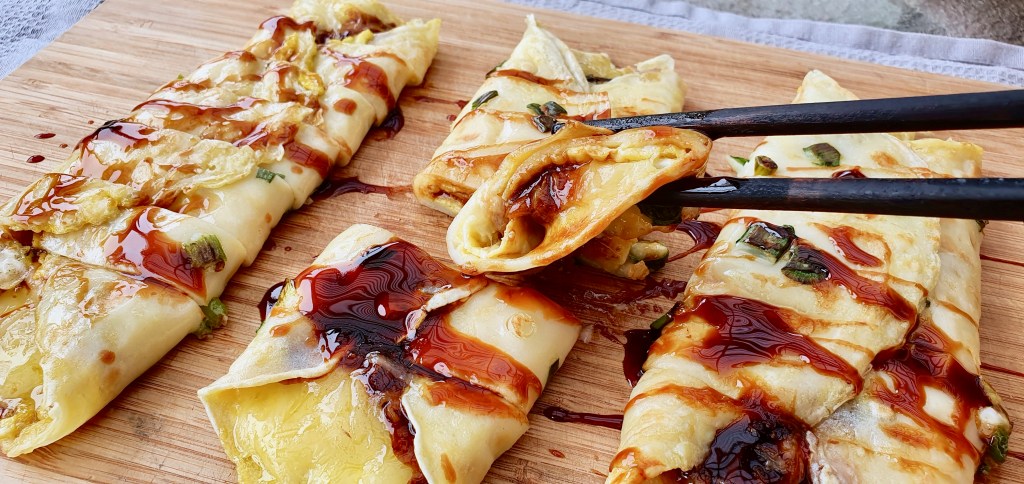
I’m SO excited to share this recipe with you guys! This is my ALL TIME FAVOURITE Taiwanese breakfast item. I would eat this dish nearly every day in Taiwan for breakfast from Hong Ya Hamburger which is a breakfast shop just outside the alleyway of our home. There are many varieties of dan bing, but NOTHING beats the cheese dan bing. I remember when I was a kid, this one time my mom accidentally ordered a dan bing without the cheese and the shitty younger me threw a hissy fit and refused to eat breakfast that morning (sorry mom, love you!). I also remember my mom trying to make dan bing for us in Canada from pre-packaged wrappers that she found at the Asian grocer, but unfortunately it just wasn’t the same. Trying to recreate a cheese dan bing on my own seemed like a daunting task. I had never had a good dan bing outside of Taiwan. Dare I challenge the Taiwanese street food gods and try it myself where far better cooks have failed? And from scratch?? I guess this is why they call it quarantine cooking. What have I got to lose? After a few attempts from different recipes and many failed gloopy bings, I came across ChooChoo-ca-Chew‘s recipe and it came out near perfect! This recipe is going straight into the top 10 list. I owe this recipe to her blog and I’ve rewritten it with tweaks and notes from my experience cooking these so they can come out perfect for you every time – and of course, lots of pictures to guide you through the process. It’s actually pretty quick and easy to make, but the tricky part is getting your crepe spread out evenly to the right thickness. Once you get the hang of it, it’s a breeze.

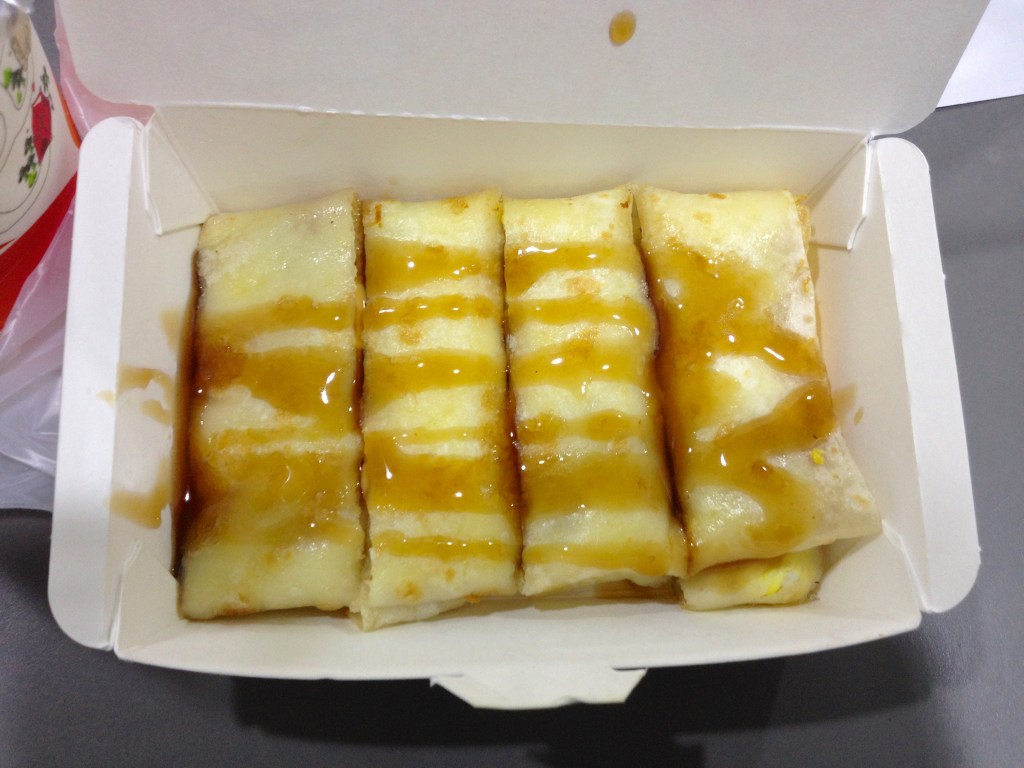
What is a cheese dan bing? The direct translation is cheese egg “crepe”. It’s essentially an egg with melty cheese wrapped up in a crepe-like wrapper topped with soy sauce paste. Kind of like a cheesy omelette wrapped in a ‘bing’. Chinese people use the term “bing” as an overarching word for pretty much anything round and flat. Whether it’s cakes, pastries, sweets, or savoury spring onion pancakes, as long as they’re that shape it’s a bing! I’ve used the word “crepe” in the title translation to replace “bing” because in this recipe, this version of a bing is most similar to a crepe. However when I think of crepes, I think of sweet french crepes with chocolate, fruit and whipped cream which, although delicious, just doesn’t fit in here so I’ll continue to call them “bings” for the rest of this post.

Anyways, without further ado, here’s the recipe! If you have any comments or suggestions, I’d love to hear from you in the comment section! You can follow me on instagram, youtube and facebook to see all the recipes I post!

Happy cooking!

Ingredients you’ll need:

Batter ingredients
  • Bing Batter:
    • 110g (3/4 cup) all purpose flour
    • 30g (1/4 cup) tapioca flour (or potato starch)
    • 1/2 tsp salt
    • 1 egg
    • 280ml (1 cup + 2 Tbsps) water
  • 2 spring onions, chopped
  • Assembly:
    • shredded cheese (~1/3 cup per crepe)
    • 1 egg per crepe
    • ground white pepper
    • soy sauce paste to drizzle
      • Soy sauce paste is CRUCIAL to this dish. Soy sauce paste is essentially a thickened and sweeter version of soy sauce that pairs beautifully with the cheesy egg. I always ask for extra sauce when I order dan bing. You should be able to find it from most Asian grocers. It’s on my to-do list to try and recreate soy sauce paste at home, so keep a look-out for the recipe when it’s uploaded!

Directions:

Make the batter: in a bowl, mix the all purpose flour, tapioca flour, salt and egg in a bowl. Add in 1/4 of the water and mix until there are no clumps then add the rest of the water and continue to mix. Set aside.

Note: you can add the spring onions to the batter as well, but I always have trouble having them distribute evenly when cooking so I choose to keep it separate and sprinkle it on instead.

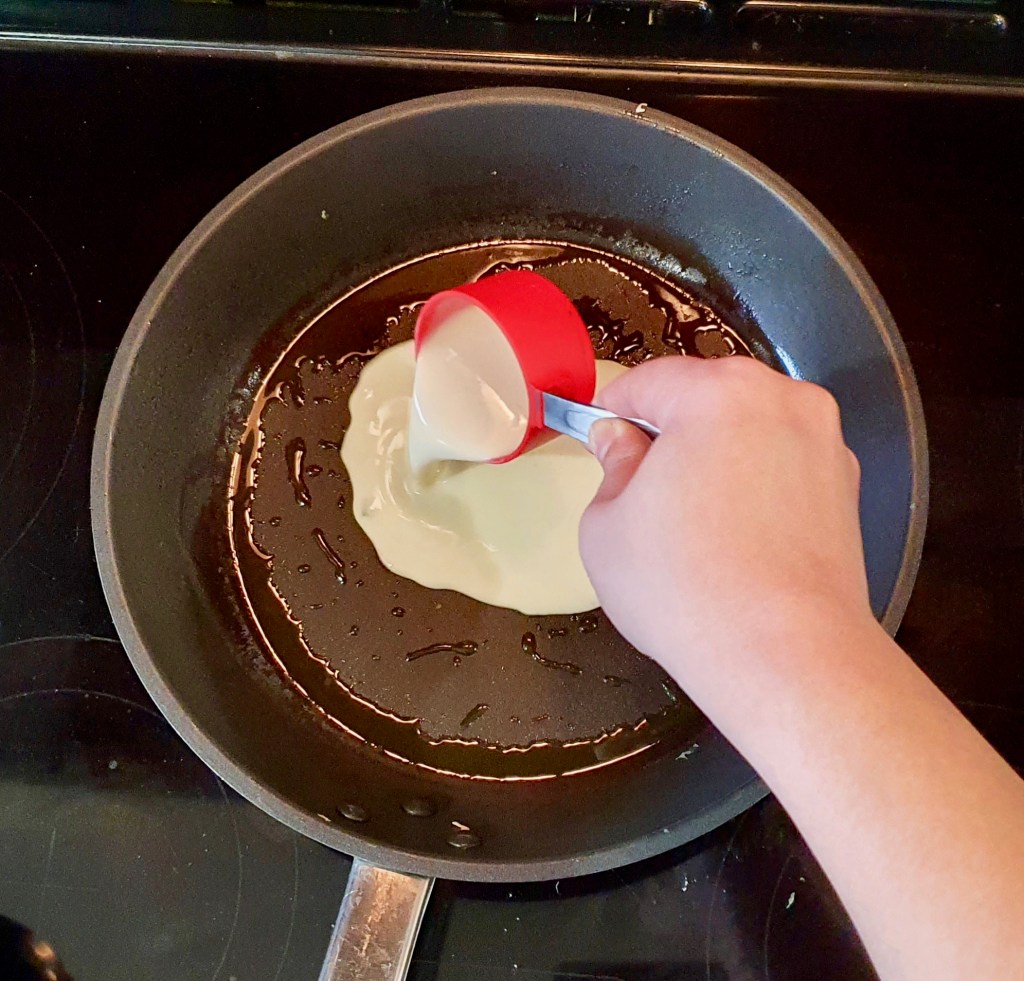
Cook the Bing: Heat a non-stick skillet over medium heat and add 1 tsp of oil and swirl your pan around to coat it in oil. Once your skillet is hot enough, add 1/3 cup of batter into the middle of the pan and quickly swirl your pan around to let the batter distribute around the pan evenly. Sprinkle spring onions over the batter.

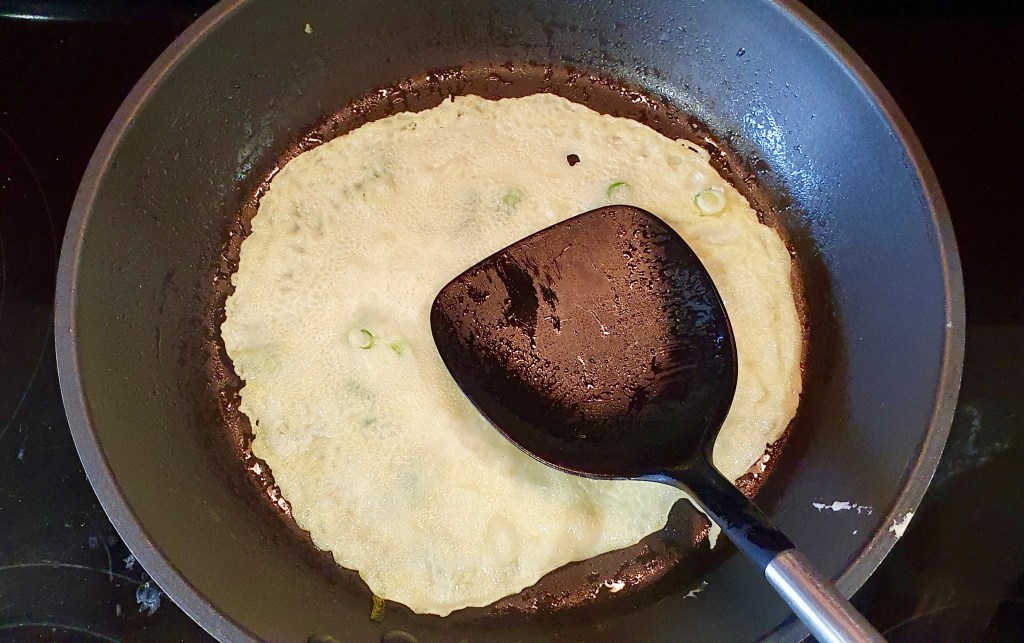
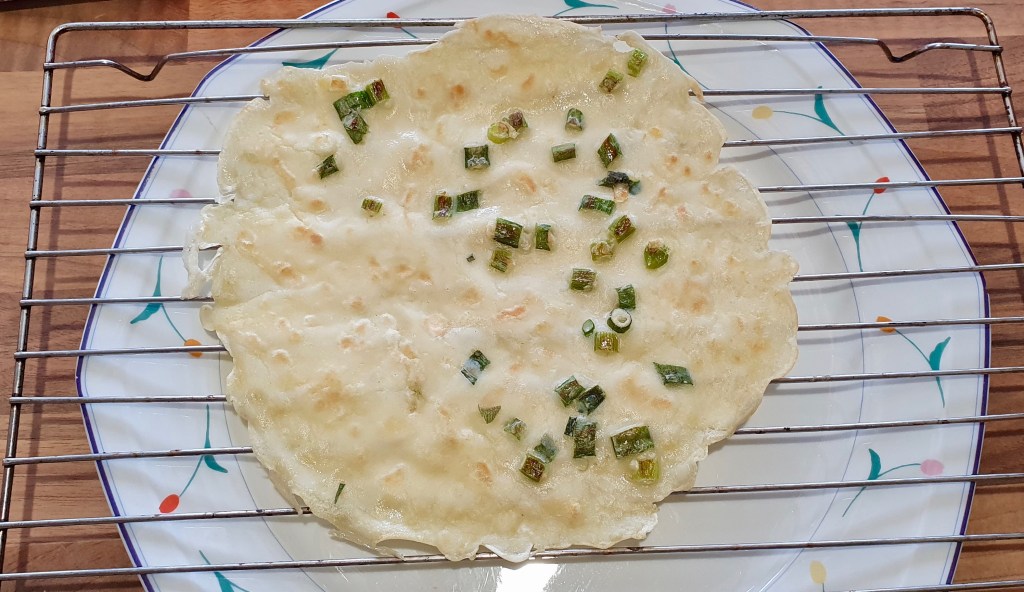
Once the edges of the bing are lifting from the pan edges (see second photo), flip it over and cook the other side. Continue to cook until you get small toasty brown spots on the bing on both sides. You can use your spatula to compress down areas that are taking longer to cook. Transfer to a wire rack to cool. Repeat this step to finish cooking the rest of the bings. Don’t worry if they’re not perfectly round or if your spring onions aren’t perfectly distributed – you’re rolling them up in the end anyway!

Note: Like pancakes, the first one might be a dud to get the temperature of the pan right. Don’t get discouraged!

Tip: If you’re making multiple dishes for a meal, you can make the bings first and set them aside until you’re ready for the next step. The next step goes fairly quickly (roughly 1-2mins each to assemble) and you want to serve these hot so I suggest not starting this next step until all your other dishes are ready.

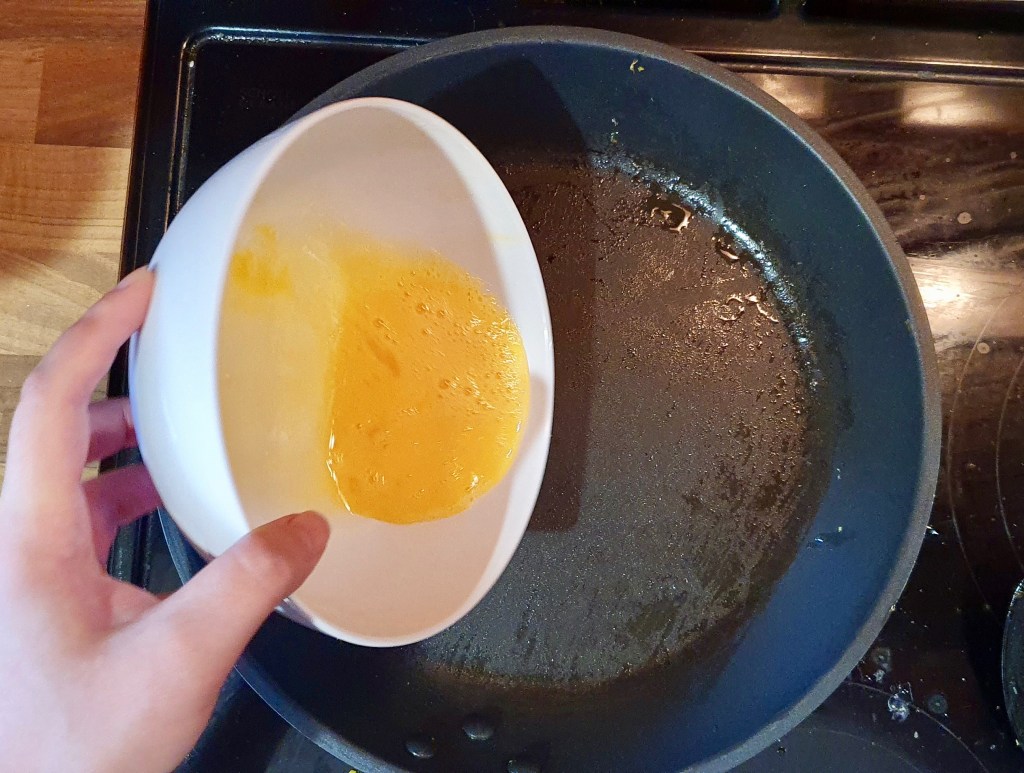
Assemble the Dan Bing: In the same skillet (still on MED heat), pour in one lightly beaten egg into the centre then quickly place one bing ontop of the egg while it’s still undercooked (it’s very important you put the bing on the egg while it’s still undercooked so it sticks together. If you let the egg fully cook, the egg will separate from the bing). Let it cook for about 30 seconds until you’re able to lift and flip the egg with the bing together without it falling apart.

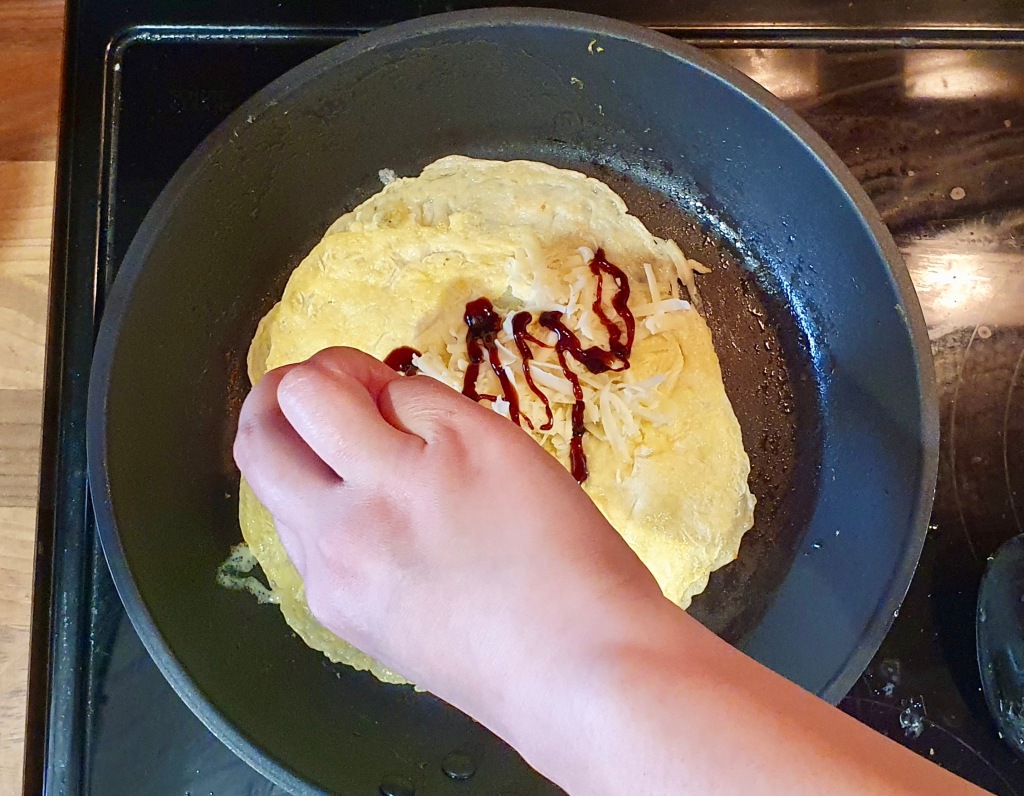
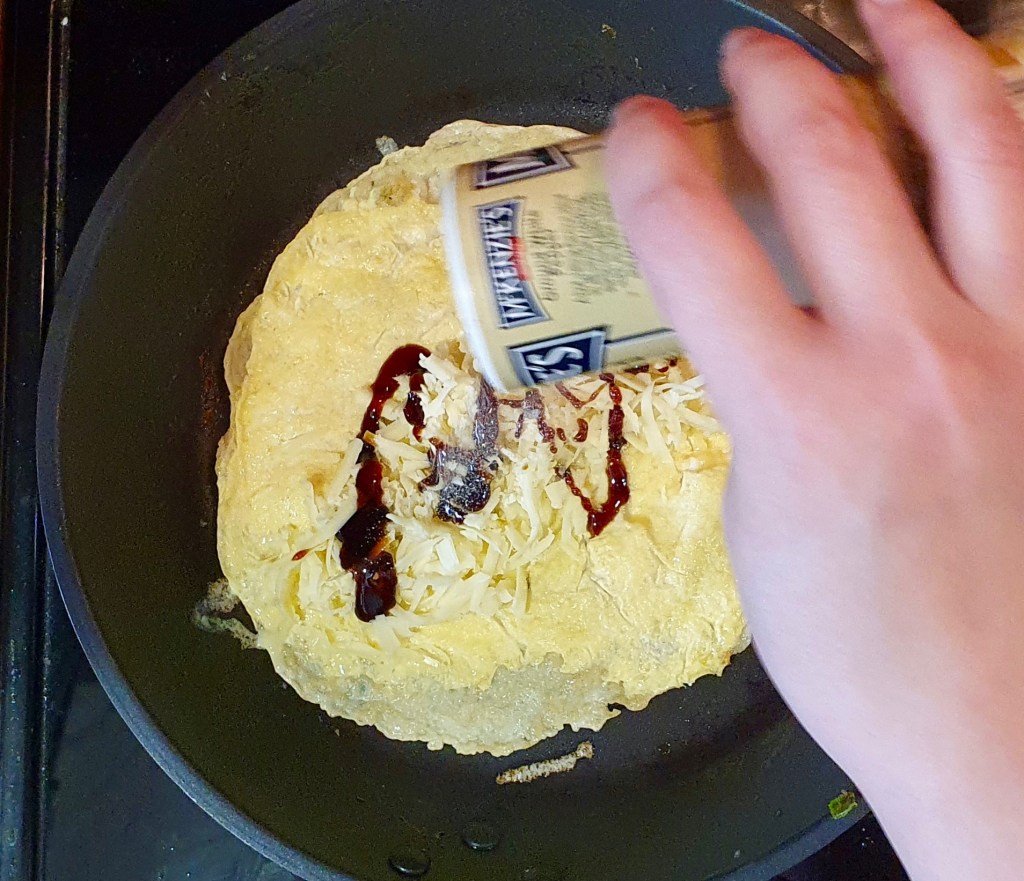
Once flipped over, add shredded cheese in a line in the middle of the egg, then top with a small drizzle of soy sauce paste then a dusting of white pepper. Fold up both sides of the dan bing towards the middle. Press it down lightly for the cheese to stick the layers together then transfer to a plate. Repeat to make the rest of the bings.

Slice into 1 inch pieces and serve with extra soy sauce paste for dipping if needed. Enjoy!

Tip: You can also add additional toppings other than the cheese. Some popular options in Taiwan: corn, ham, pork floss…etc.

Summarized Recipe:

Taiwanese Cheese Egg Crepe 起司蛋餅 (Cheese Dan Bing)

Date Published: August 7th, 2020 | Last Updated: August 7th, 2020
Author: Abby |Category: asian, snacks
Serves: 4 crepes | Prep time: 5 mins | Cook time: 30 mins

Ingredients:

  • Bing Batter:
    • 110g (3/4 cup) all purpose flour
    • 30g (1/4 cup) tapioca flour (or potato starch)
    • 1/2 tsp salt
    • 1 egg
    • 280ml (1 cup + 2 Tbsps) water
  • 2 spring onions, chopped
  • Assembly:
    • shredded cheese (~1/3 cup per crepe)
    • 1 egg per crepe
    • ground white pepper
    • soy sauce paste to drizzle

Directions:

  1. Make the batter: in a bowl, mix the all purpose flour, tapioca flour, salt and egg in a bowl. Add in 1/4 of the water and mix until there are no clumps then add the rest of the water and continue to mix. Set aside.
  2. Cook the Bing: Heat a non-stick skillet over medium heat and add 1 tsp of oil and swirl your pan around to coat it in oil. Once your skillet is hot enough, add 1/3 cup of batter into the middle of the pan and quickly swirl your pan around to let the batter distribute around the pan evenly. Sprinkle spring onions over the batter.
  3. Once the edges of the bing are lifting from the pan edges, flip it over and cook the other side. Continue to cook until you get small toasty brown spots on the bing on both sides. You can use your spatula to compress down areas that are taking longer to cook. Transfer to a wire rack to cool. Repeat this step to finish cooking the rest of the bings.
    • Note: Like pancakes, the first one might be a dud to get the temperature of the pan right. Don’t get discouraged!
  4. Assemble the Dan Bing: In the same skillet (still on MED heat), pour in one lightly beaten egg into the centre then quickly place one bing ontop of the egg while it’s still undercooked. Let it cook for about 30 seconds until you’re able to lift and flip the egg with the bing together without it falling apart.
  5. Once flipped over, add shredded cheese in a line in the middle of the egg, then top with a small drizzle of soy sauce paste then a dusting of white pepper. Fold up both sides of the dan bing towards the middle. Press it down lightly for the cheese to stick the layers together then transfer to a plate. Repeat to make the rest of the dan bings.
  6. Slice into 1 inch pieces and serve with extra soy sauce paste for dipping if needed. Enjoy!

Tip: You can also add additional toppings other than the cheese. Some popular options in Taiwan: corn, ham, pork floss…etc.

Taiwanese Cold Noodles 涼麵 (Liang Mian)


Date Published: August 7th, 2020 | Last Updated: August 7th, 2020
Author: Abby |Category: asian, mains, easy, vegetarian
Serves: 4 | Prep time: 10 mins | Cook time: 2 mins + time to cook noodles

Jump to recipe |

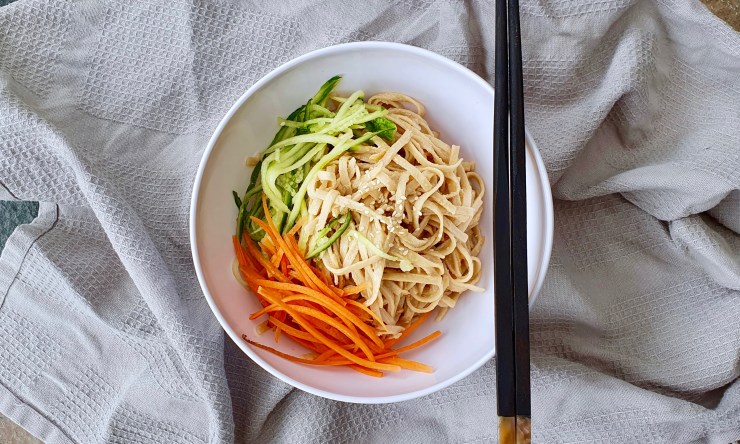
If you’ve ever been to Taiwan in the middle of summer, you’ll know that not only does it get hot, it gets HUMID AF. What’s better on a hot sticky day than a refreshing bowl of cold noodles? This dish is commonly found everywhere in Taiwan – you can even pick them up from most convenience stores, pre-packaged in a lunch box and ready to eat – just add the sauce! The direct translation of “liang mian” is “chilled” or “cold” noodles and it’s served as a bowl of cold white noodles mixed with a savoury peanut sauce and topped with cucumber and carrot slices, occasionally a sliced egg. It’s delicious, filling and crazy easy to make! It’s also a great lunch to pack to eat on the go or to avoid the microwave queues at work or school 😉.

Anyways, without further ado, here’s the recipe! If you have any comments or suggestions, I’d love to hear from you in the comment section! You can follow me on instagram, youtube and facebook to see all the recipes I post!

Happy cooking!

Ingredients you’ll need:

  • Sauce:
    • 6 Tbsps crunchy peanut butter (smooth is okay too but crunchy gives it better texture)
    • 2 Tbsp soy sauce
    • 2 tsp garlic, minced
    • 2 tsp sugar
    • 2 tsp black vinegar
    • 1 tsp sesame oil
    • 3 Tbsps warm water (or more)
  • White Noodles (any brand you like)
  • 1 Tbsp sesame oil
  • 1 cucumber, julienned
  • 1 carrot, julienned

Directions:

Make the sauce by combining all the sauce ingredients together except for the water. Once combined, add 1 Tbsp of warm water at a time to the sauce and mix until you get a thin runny sauce but not overly watery (only add as much water as you need).

Make the noodles according to package instructions. Drain well and rinse under cold running water until the noodles are cooled. Drizzle 1 Tbsp of sesame oil on the noodles and mix it around so they don’t stick together.

Assemble the noodles by adding the sauce to the noodles with the cucumber and carrots. Mix until combined. Taste and adjust flavours as needed. If you’ve made too many noodles (as I always do because I’m terrible at judging how much noodles to cook), make more sauce for the noodles until you’re happy with the intensity of the flavours. Serve cold!

Tip: If you’re making this ahead of time, I’d suggest you pack the sauce separately and pour it on the noodles when you’re ready to eat to avoid the noodles getting too soft from sitting in sauce for too long.

Summarized Recipe:

Taiwanese Cold Noodles 涼麵 (Liang Mian)

Date Published: August 7th, 2020 | Last Updated: August 7th, 2020
Author: Abby |Category: asian, mains, easy, vegetarian
Serves: 4 | Prep time: 10 mins | Cook time: 2 mins + time to cook noodles

Ingredients:

  • Sauce:
    • 6 Tbsps crunchy peanut butter (smooth is okay too but crunchy gives it better texture)
    • 2 Tbsp soy sauce
    • 2 tsp garlic, minced
    • 2 tsp sugar
    • 2 tsp black vinegar
    • 1 tsp sesame oil
    • 3 Tbsps warm water (or more)
  • White Noodles (any brand you like)
  • 1 Tbsp sesame oil
  • 1 cucumber, julienned
  • 1 carrot, julienned

Directions:

  1. Make the sauce by combining all the sauce ingredients together except for the water. Once combined, add 1 Tbsp of warm water at a time to the sauce and mix until you get a thin runny sauce but not overly watery (only add as much water as you need).
  2. Make the noodles according to package instructions. Drain well and rinse under cold running water until the noodles are cooled. Drizzle 1 Tbsp of sesame oil on the noodles and mix it around so they don’t stick together.
  3. Assemble the noodles by adding the sauce to the noodles with the cucumber and carrots. Mix until combined. Taste and adjust flavours as needed. Serve cold!
    • If you’ve made too many noodles (as I always do because I’m terrible at judging how much noodles to cook), make more sauce for the noodles until you’re happy with the intensity of the flavours.

Tip: If you’re making this ahead of time, I’d suggest you pack the sauce separately and pour it on the noodles when you’re ready to eat to avoid the noodles getting too soft from sitting in sauce for too long.