Date Published: Mar 3rd, 2024 | Last Updated: Mar 3rd, 2024
Author: Abby |Category: Asian, mains, soups
Serves: 4-6 | Prep time: 12 hours before to marinate | Cook time: 4.5 hours total
Jump to recipe |
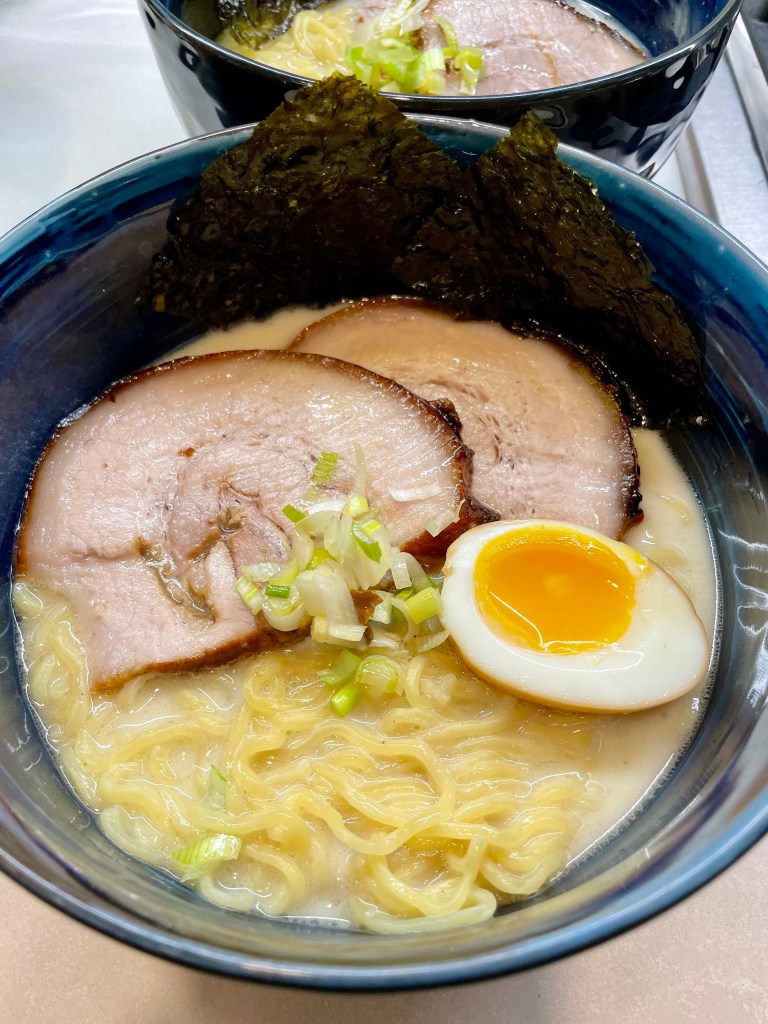
A tonkotsu ramen is my all time favourite thing to eat, so I’m extra excited to be sharing this recipe with everyone! It’s a beautiful bowl of a rich pork bone broth with noodles, chashu, and a ramen egg. No matter what is happening in my life, a tonkotsu ramen will always make it better. When Toby and I travel, I’m always seeking out the local ramen spots – I must’ve had over a hundred bowls of ramen in my life time…so far.
I’ve always wanted to try making a tonkotsu ramen, however due to its long 12 hour cooking time, it’s complexities (ramen shops will use a refractometer to check their broth!), and having to source pork bones on the move, it has constantly been on the back burner. I’ve searched time and time again for a simplified recipe and even went as far as buying instant tonkotsu ramen to satisfy the cravings, but I’ve never succeeded in finding anything that was close to restaurant quality – until now! Recently I stumbled across a ramen subreddit where u/ramen_lord posted his version of a tonkotsu ramen but made in an Instant Pot in 3 hours (find original recipe here)! This made it much less intimidating for me and I decided to try it out. Amazingly, the recipe turned out near perfect the first time and after the second time, Toby said it was the best tonkotsu ramen he’s ever had. It was THAT good! If you’re ever reading this, thank you u/ramen_lord! (If you check out the original link, he also gives a recipe at making your own ramen noodles.)
Although it is a long recipe, each step and component is pretty easy and straightforward, so I’d encourage you to give it a try if you’re a ramen lover like me!
What Makes up a Tonkotsu Ramen?
A traditional tonkotsu ramen is made up of 6 major components, and yes, all of them are included in this very thorough monster recipe!
1. Chashu – pork belly slices
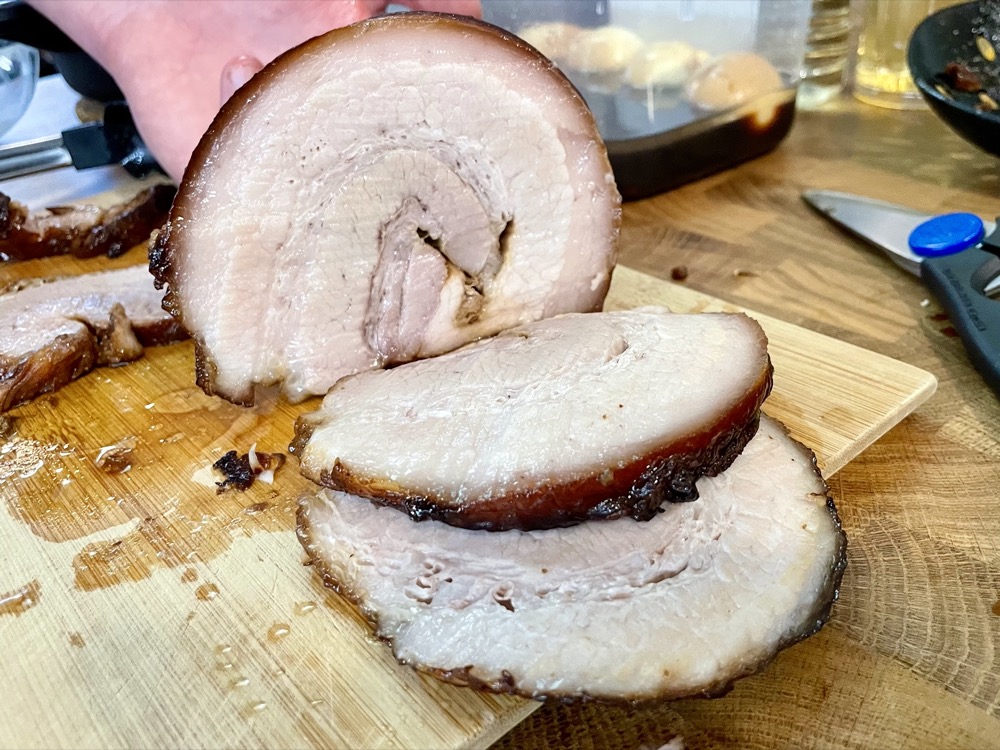
Chashu is a Japanese-style savoury pork belly that is braised the day before and marinated overnight. This is the main protein of the dish. Due to its fatty richness, it is usually served in thin slices and in small portions. This recipe will make about 2-3 slices per bowl. If you’re big on pork belly, then double the chashu portion of the recipe!
Note: Japanese chashu differs from the Chinese-style Charsiu which is barbecue pork rather than braised pork.
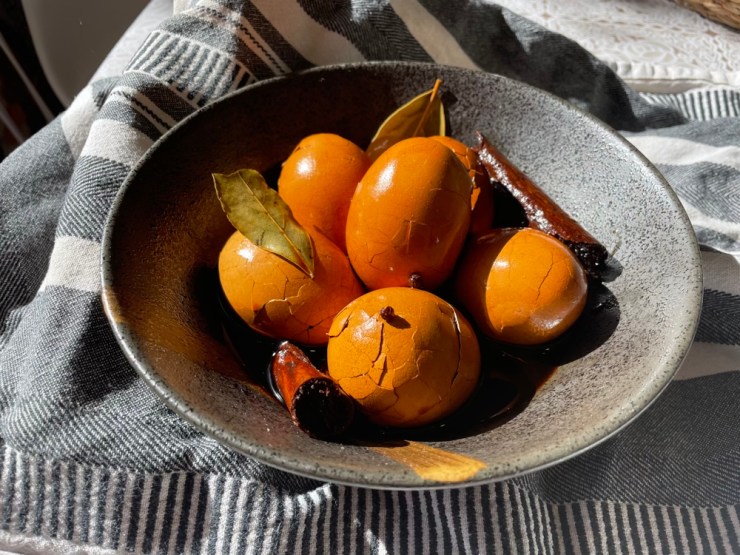
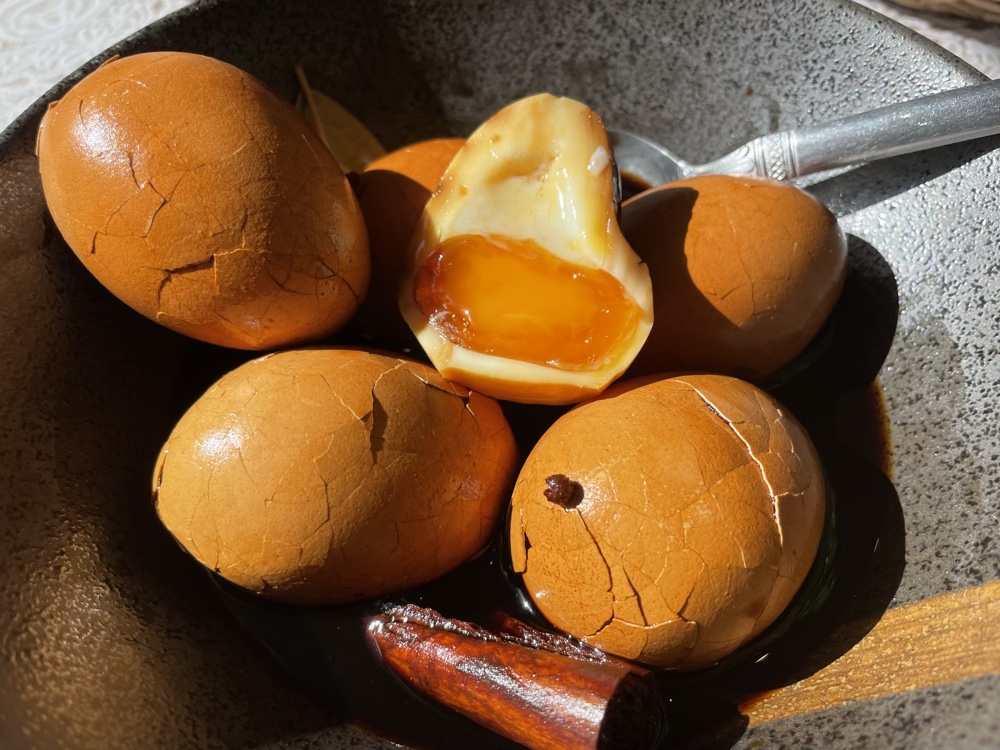
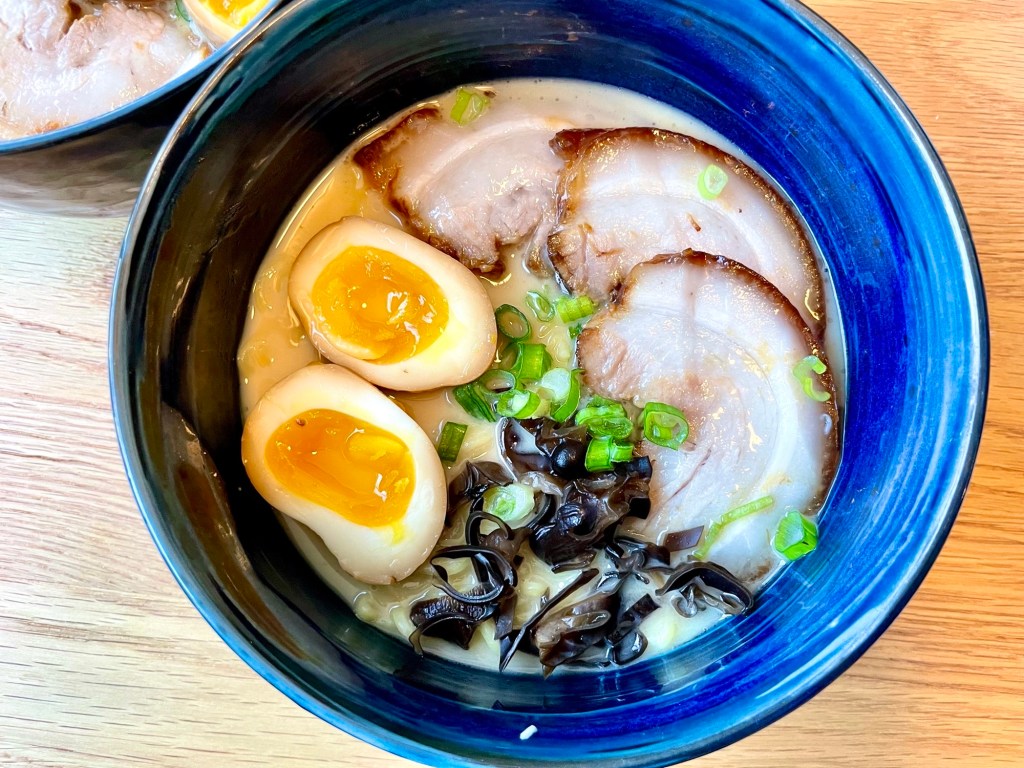
2. Ramen egg – a marinated boiled egg with a perfectly soft jammy centre
A ramen egg is a specific style of egg served in a bowl of ramen. It is always soft to medium-boiled to ensure a jammy velvety centre then marinated in a savoury sauce – I marinate mine in the chashu marinade overnight. Make sure you have a timer ready when you cook the eggs to ensure the perfect soft centre.
The ramen egg is always my favourite part of a bowl of ramen (my family would agree with me). For some reason, Toby is not a huge fan of eggs in general, so every time we go out for ramen he always gives me his egg! Lucky me 😊🙃❤️.
3. Tonkotsu broth – a rich and creamy pork bone broth
This is the star of the show. “Tonkotsu” literally translates to “pork bone”, which adequately names this ramen dish. The traditional method of making a tonkotsu broth is to boil the pork bones on high heat for 12 hours then add in aromatics. It is a long and arduous process which is why I’ve avoided making this recipe for so long. This recipe uses the Instant Pot pressure cooker to bring down the cook time to just 3 hours and produces restaurant-quality results!
A classic tonkotsu broth is creamy and rich due to the breakdown of the gelatin in the pork bones. Some recipes will blend pork fat and add it to the broth to make it even more creamy. For the sake of my cholesterol, there is no extra blended fat in this recipe. The broth here is just as good without it.
The colour of a tonkotsu broth should be opaque and milky white. Traditionally the pork bones are cleaned thoroughly by boiling them and removing the scum that is released and then scrubbing them clean before the broth is even started. Many purists out there will insist that you must clean the bones this way or else your broth will never be white. My first time making this recipe I cleaned the bones this way. Although it took extra time, it did produce a white broth. However after further research, I realized that you can also just roast the bones in the oven rather than scrubbing them clean and you still get the same results but with much less work. I tried it both ways and the results were quite similar. The oven roasting method produced a very slightly darker broth, however I’m sure that if I blended more of it in the blender, the results would be the same. Myth busted!

*Note: Tonkotsu is not to be confused with “tonkatsu” which is a breaded and fried pork cutlet
4. Tare – the flavour enhancer/salt of the dish
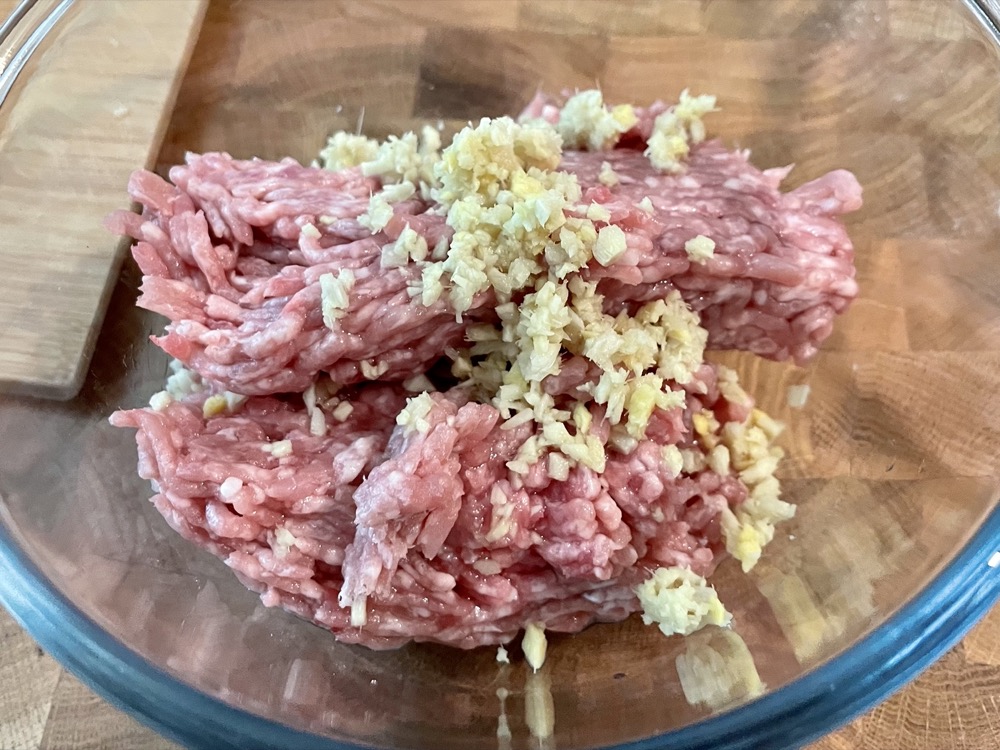
The tonkotsu broth alone lacks salt and umami flavour but when combined with the tare, it makes the perfect broth. Tare differs greatly between ramen shops and even between chefs. It can range from a simple mix of sauces to an incredibly complex recipe. It’s a chef’s signature to make a dish uniquely theirs. This recipe is a simplified version that’s essentially soy sauce marinated with mushrooms, seaweed, and dried fish.
5. Ramen noodles

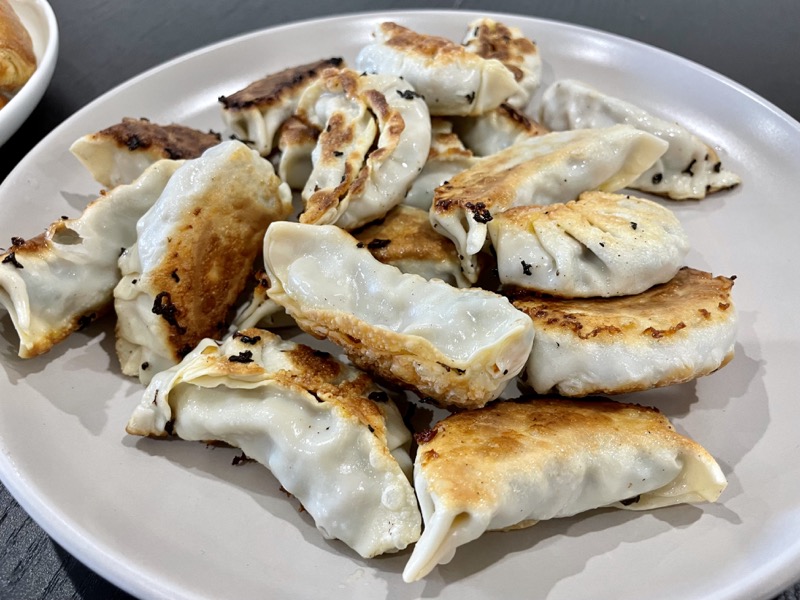
Ramen noodles are different than regular noodles. They are alkaline and has a distinct taste with a slight chewy/bounce texture. To stay true to the authenticity of a tonkotsu ramen, I’d recommend taking the extra effort to find ramen noodles – you’re putting in all this effort to make it all from scratch anyway!
When looking for ramen noodles, try to buy them either freshly made or in the frozen section. Avoid the dehydrated dried noodles that are labeled as ‘ramen noodles’ – I’ve tried a few different kinds in the past and they’re just not the same.
My favourite ramen noodles are made from Sun Noodle and they come in medium or thick noodles (see picture). This one package has 2 servings – it doesn’t seem like much, but it definitely expands when cooking!
Myojo is another brand of ramen noodles I’ve heard good things about, but never tried myself.
6. Toppings
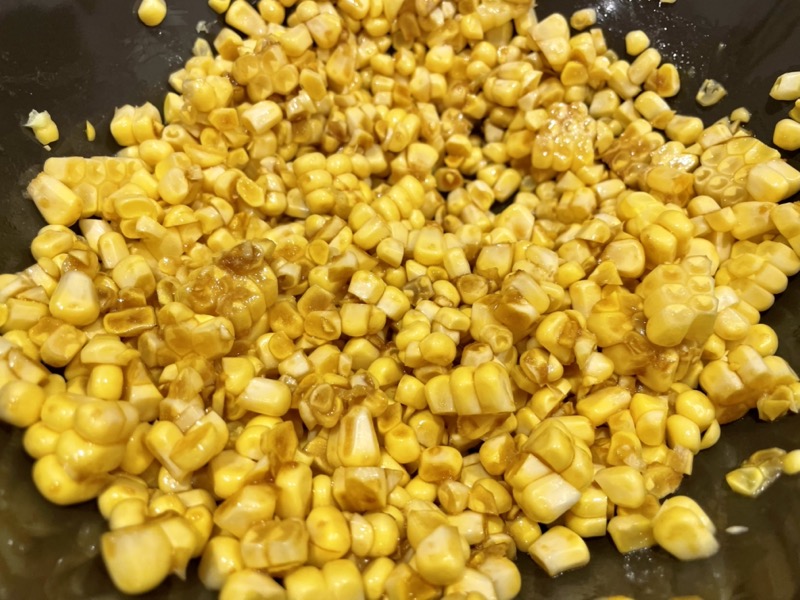
There is a wide variety of toppings you can add to your ramen. I’ve put some examples in the recipe below, but feel free to add in whatever you like. Different restaurants will have different offerings of what you can add – it all depends on personal preference. A few examples of toppings include: bean sprouts, corn, seaweed, sliced wood ear fungus, fresh garlic, chili paste, chopped green onion…etc.
Anyways, without further ado, here’s the recipe! If you have any comments or suggestions, I’d love to hear from you in the comment section! You can follow me on instagram, youtube and facebook to see all the recipes I post!
Happy cooking!
Equipment you’ll need:
- Pressure cooker (at least 8 quarts in size)
- Cooking twine
- Small pot with lid/saucepan
Ingredients you’ll need:
- Chashu (Pork Belly): MAKE THE DAY BEFORE
- 500g (1.5lbs) pork belly with the skin on or off – this will be enough for 2-3 slices per portion. Feel free to double the chashu recipe if you want to serve more.
- 1 cup water
- 1/2 cup Japanese soy sauce (ie. Kikkoman)
- 1/4 cup mirin
- 2 Tbsps brown sugar
- 2 garlic cloves, smashed
- Ramen Egg: MAKE THE DAY BEFORE
- 4-6 eggs (depending on how many people you’re serving)
- Broth:
- 1kg (2 lbs) pork neck bones (you want some meat to be attached to the bones for extra flavour)
- 1kg (2 lbs) pork femur bones (make sure the larger leg bones are split so the bone marrow is exposed) – if you can’t find femur bones, you can use all neck bones
- 12 cloves of garlic, peeled and smashed
- 1 small brown onion, peeled and quartered
- 4cm piece of ginger, sliced (don’t worry about peeling it)
- 2 green onions, cut into thirds
- Tare:
- 1/2 cup (120ml) water
- 1.5 Tbsps (25ml) mirin
- 1 Tbsp (15ml) sake
- 4g kombu (dried kelp)
- 3g dried porcini mushrooms
- 3g sababushi/dried mackerel, or katsuobushi/bonito flakes, or niboshi/dried anchovies – I had a difficulty sourcing these in my neighbourhood, so any of these will work to give it an umami fishy flavour
- 1/2 cup (120ml) Japanese soy sauce (ie. Kikkoman)
- 2.5 tsps (15g) kosher salt
- 1.5 tsps (5g) brown sugar
- 4-6 portions of ramen noodles, premade
- Additional Toppings (optional):
- Sliced green onion
- Wood ear mushrooms
- Seaweed
- Bean sprouts
Directions:
THE DAY BEFORE:
A) Make the chashu:
Make sure the pork belly is at room temperature (take it out of the fridge at least 30mins prior).


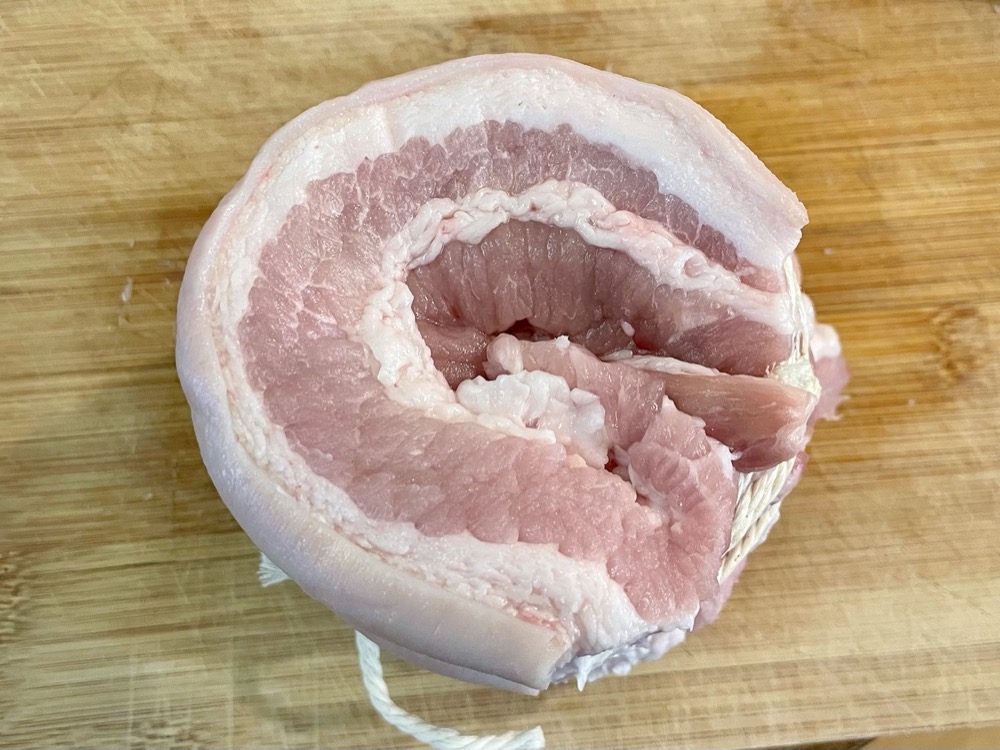
Roll the pork belly into a cylinder with the layers visible on the side (see photo) and tie tightly with cooking twine so it stays in shape.
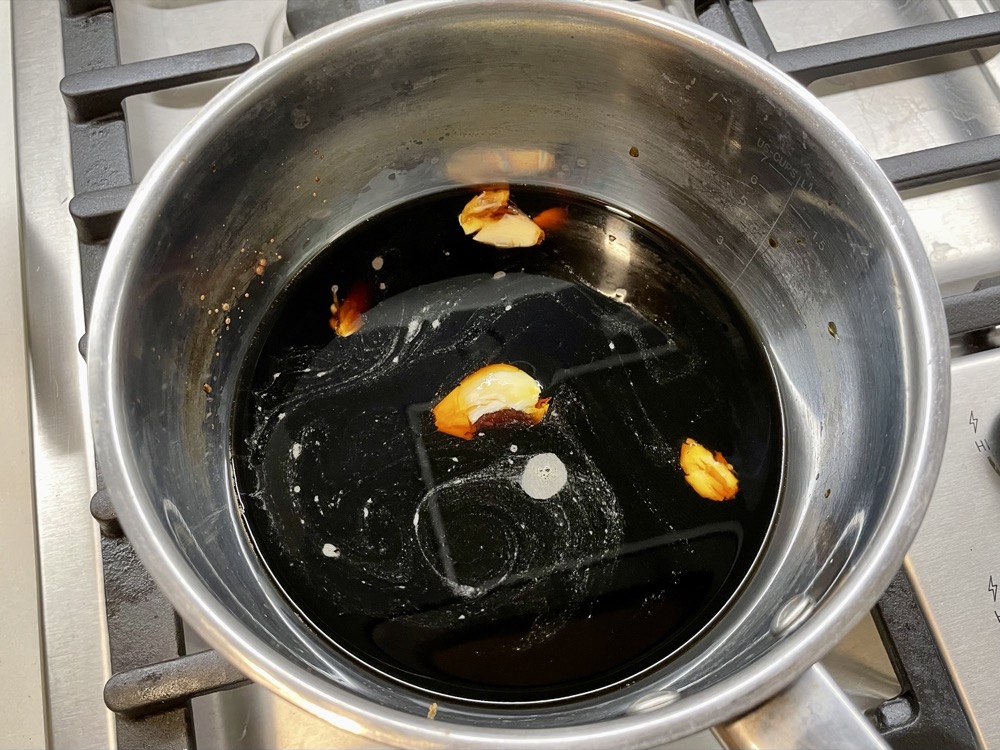
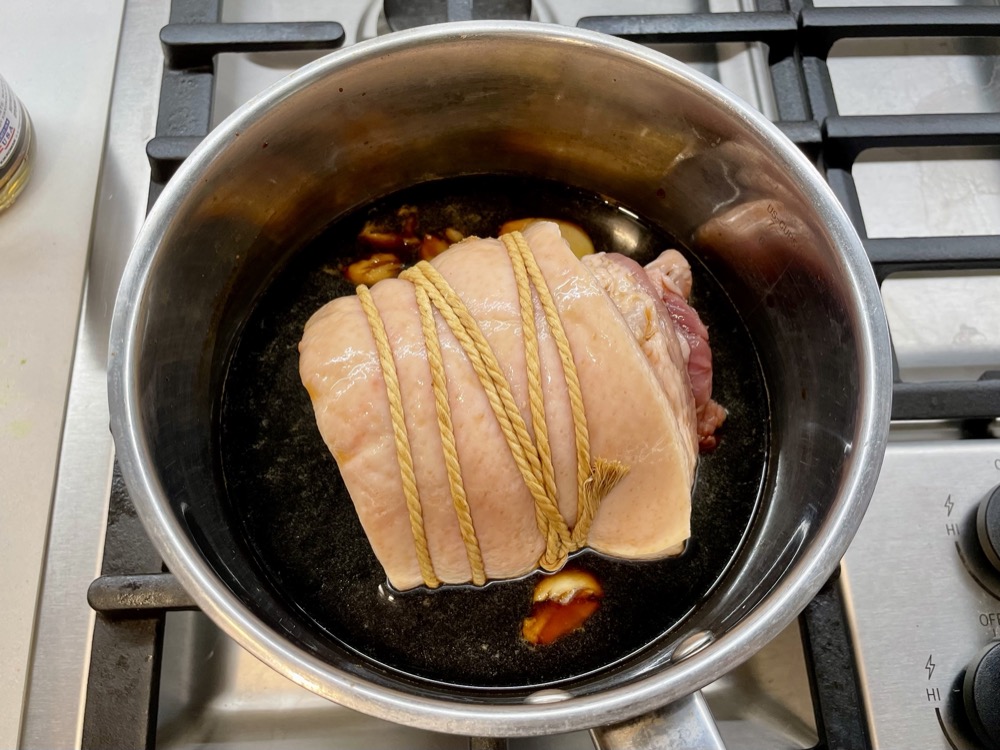
Take out a saucepan with a lid and add in the rest of the the chashu ingredients: water, soy sauce, mirin, brown sugar, garlic. Place the tied up pork belly in the middle of the saucepan.


Turn the heat on to HIGH and let the sauce come to a boil, then turn the heat down to LOW and let it simmer with the lid on for 90 minutes. Turn the pork belly every 20 minutes so it gets evenly braised in the sauce.
When there’s 20 minutes left to your cook time, preheat your oven to 220˚C (425˚F) and prepare a baking tray with a wire rack.


Once the 90 minutes is up, turn off the heat and take out the pork belly (keeping the remaining sauce aside) and place it on the rack over a baking tray and roast in the preheated oven for 8-10 minutes, or until the outside is a dark caramel colour.

When the pork belly is done, take it out of the oven and place it in a heat-proof container (make sure there’s enough room for the eggs as well). Pour the leftover sauce over and let the pork belly marinate in the sauce overnight. If the marinade doesn’t surround the pork belly, either use a smaller container or turn the pork belly halfway through for even marination. A vacuum-sealed plastic bag works well as well.

B) Make the ramen eggs: (you can do this step while you’re waiting for the pork belly to cook)
Bring a small pot of water to boil. Gently lower all 4 eggs into the boiling water and start a timer for 7 minutes. Adjust the heat if the water is boiling too rapidly to avoid the eggs from knocking around in the pot.

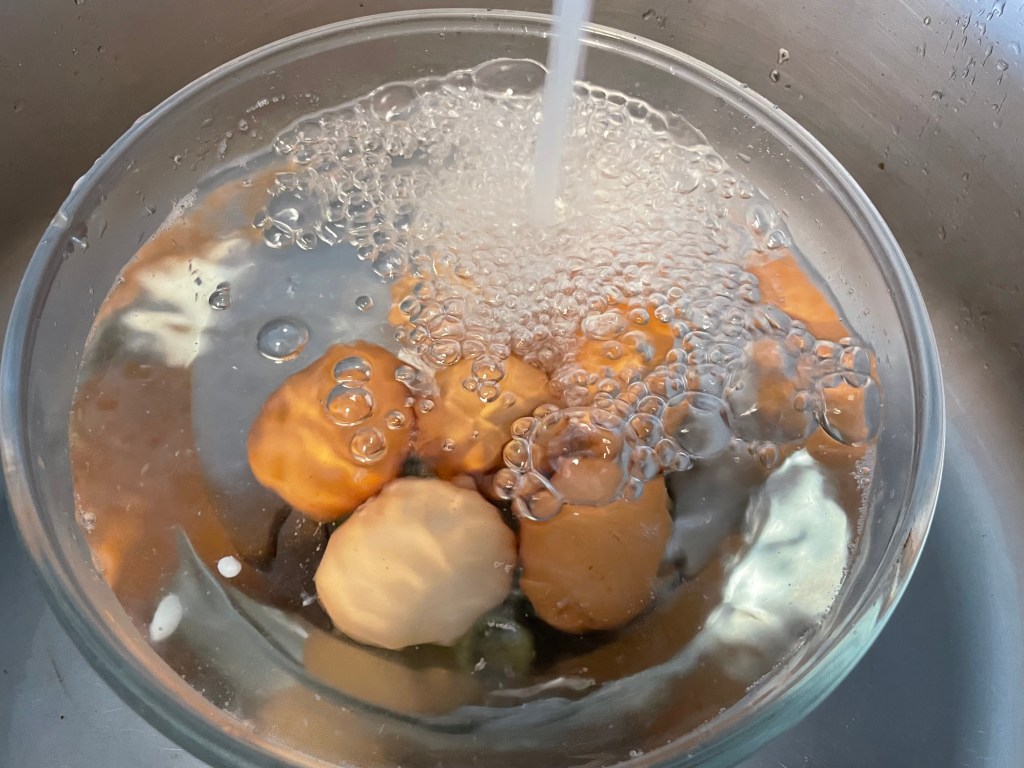
While you’re waiting, prepare an ice bath for the eggs. Once the timer is up, turn off the heat and immediately submerge all the eggs into the ice bath. Once the eggs are cool enough to handle, remove all of the shells.
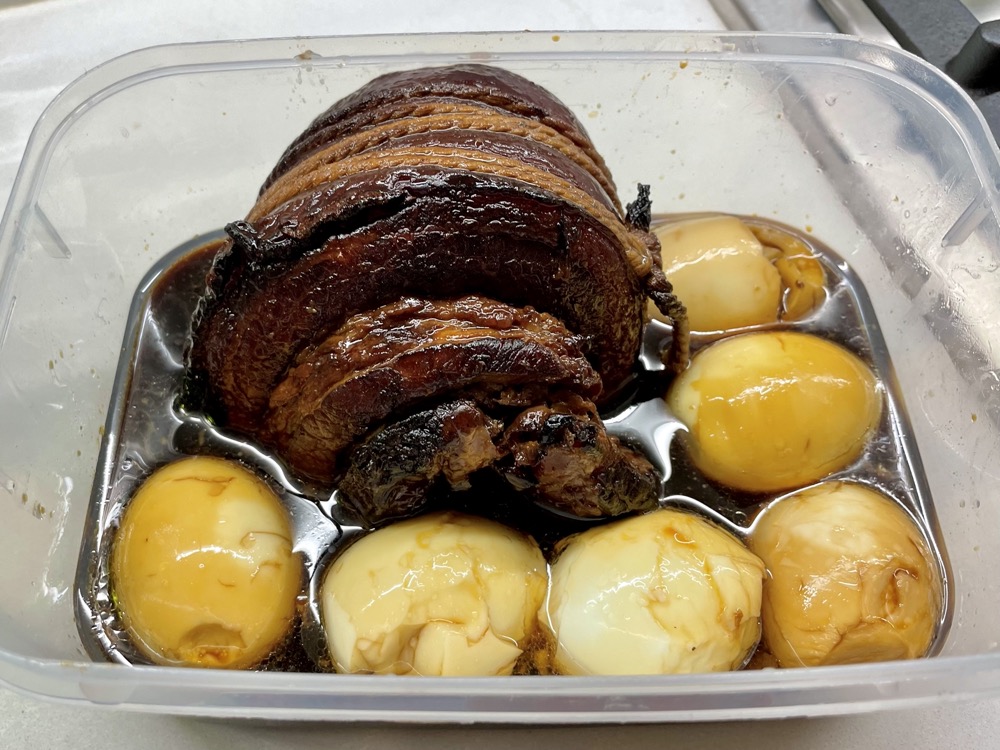
Place the peeled boiled eggs into the same container as the pork belly and marinate together overnight. If the sauce does not surround the egg, turn the eggs halfway through for even marination. A vacuum-sealed plastic bag works well as well. Do not marinate for longer than 2-3 days or else the egg will become too salty.
THE DAY OF:
C) Make the tonkotsu broth:
Preheat oven to 220˚C (425˚F)
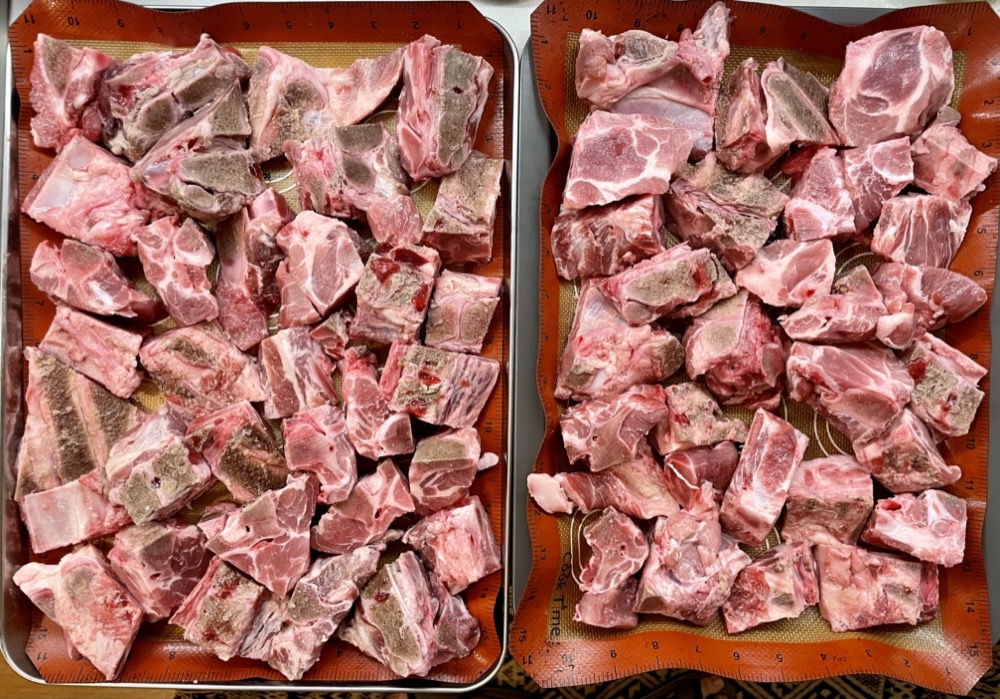


Roast the bones: Prepare a large lined baking tray. Rinse the pork bones and place them all in one layer of the tray (do not overlap the bones). Use a second tray if they don’t all fit into one. Roast in the preheated oven for 40 minutes, turning the bones once halfway through the cook time. After 40 minutes, turn off the oven. You should have a dark brown char on the bones.


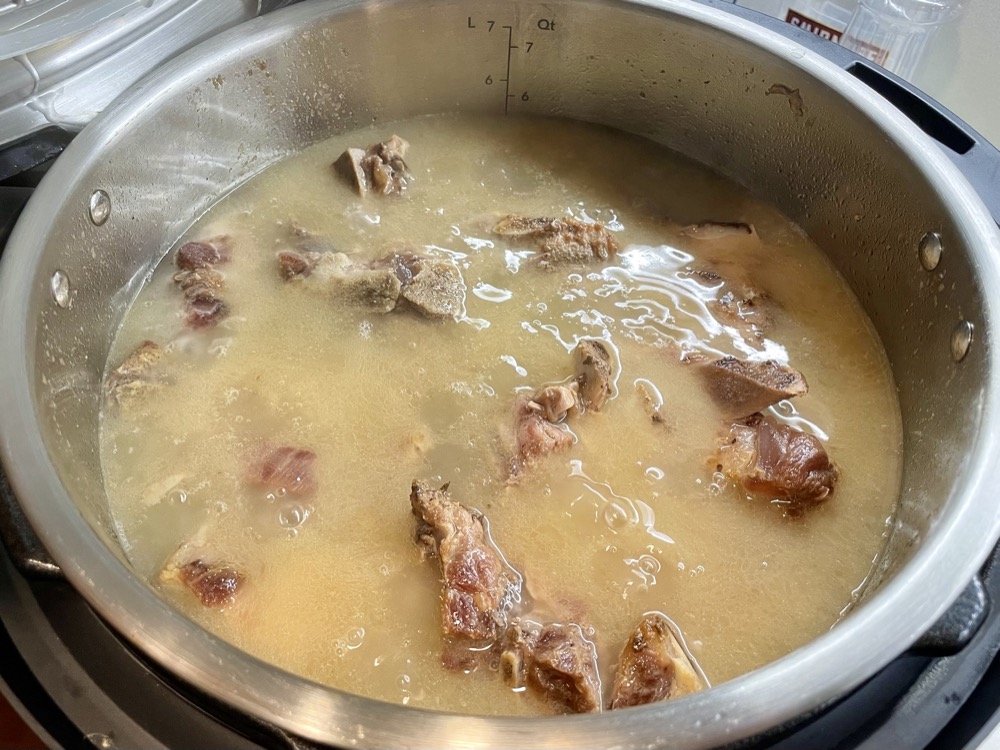
Cook the broth: Place the roasted bones along with any browned bits or liquids from the tray (these will add extra flavour) into your Instant Pot. Add enough water to cover the bones by 2-3cm (roughly 3 litres). Turn the Instant Pot on to a sauté setting and set the heat to HIGH. Once the water comes to a boil, cancel the setting and put the lid on. Turn on the pressure cook setting to HIGH and cook for 2 hours. (You can start making the tare or prepare any additional toppings during this time as you wait.) When the timer finishes, quick release the pressure – be careful of any spurting of liquids from the vent! When it is safe to do so, remove the lid carefully.


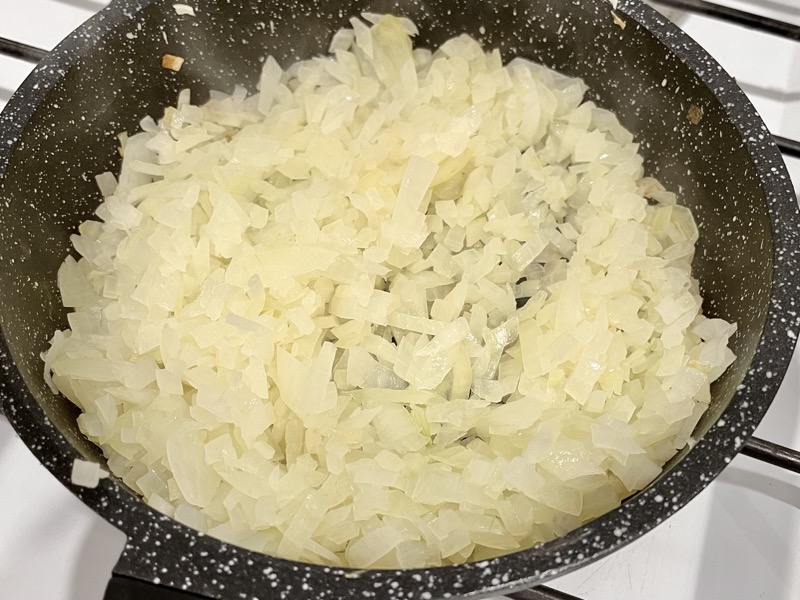
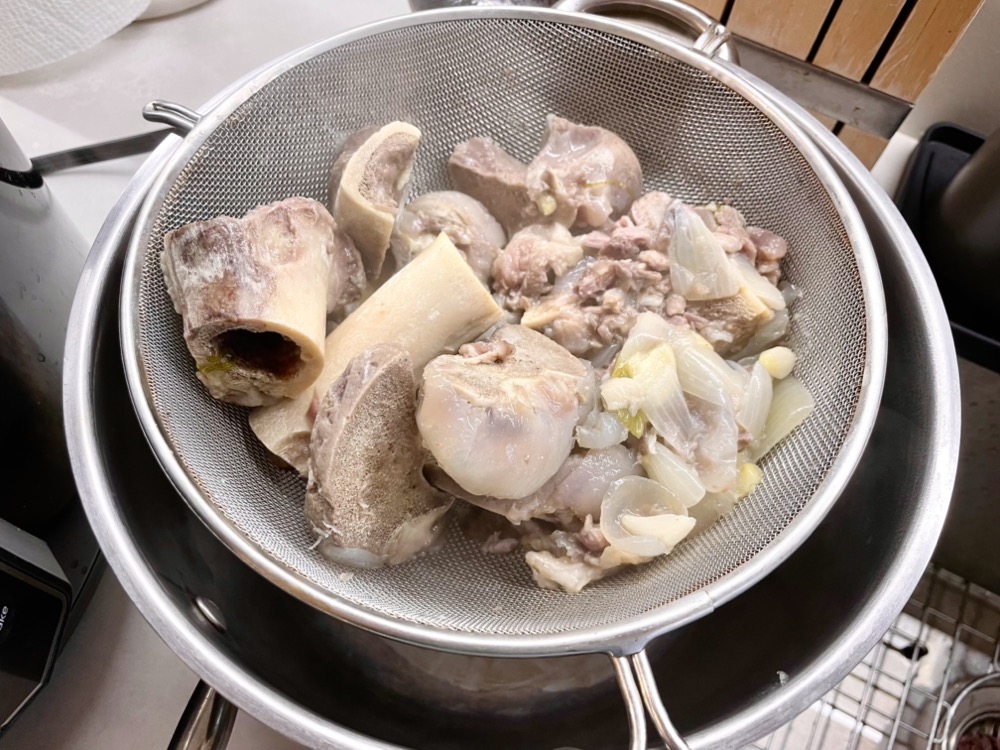
Add in aromatics & free the bone marrow: Add in garlic, ginger, green onion and onion into the broth. Use a chopstick and scrape out any bone marrow from the bones and let the marrow boil freely in the soup alongside the bones.
Taste for richness and Reduce (if needed): At this point the broth will taste quite bland since there as been no added salt and the aromatics were just introduced. Ignore the need to want to add in salt right now – it will come later. You want to taste for the texture of the broth, not the flavour. How creamy your broth is at this stage will dictate how you cook down your broth (the texture will vary greatly depending on the mix of bones you started with – it varies every time I make it):
If your broth is watery: turn on the sauté setting on the Instant Pot and set to MED heat so the soup boils moderately. Let it boil uncovered for 1 hour to reduce the broth and increase in concentration/richness. Taste at the end of 1 hour – you can let it boil for longer if needed.
If your broth is rich & creamy: add a lid on to the Instant Pot (or transfer to a regular soup pot with a lid) and let the soup boil on MED heat for 1 hour to release the flavour of the aromatics but to still contain all the liquid.
You will need to boil the broth for 1 hour regardless of how rich your broth is. The difference is whether you keep the lid on or off to control how much liquid is evaporated. If you’re unsure, then start boiling without a lid, then taste after 30 minutes, or have the lid half-on so it only reduces slightly. Once your broth is rich enough then put the lid on and finish boiling until the 1 hour timer is up.
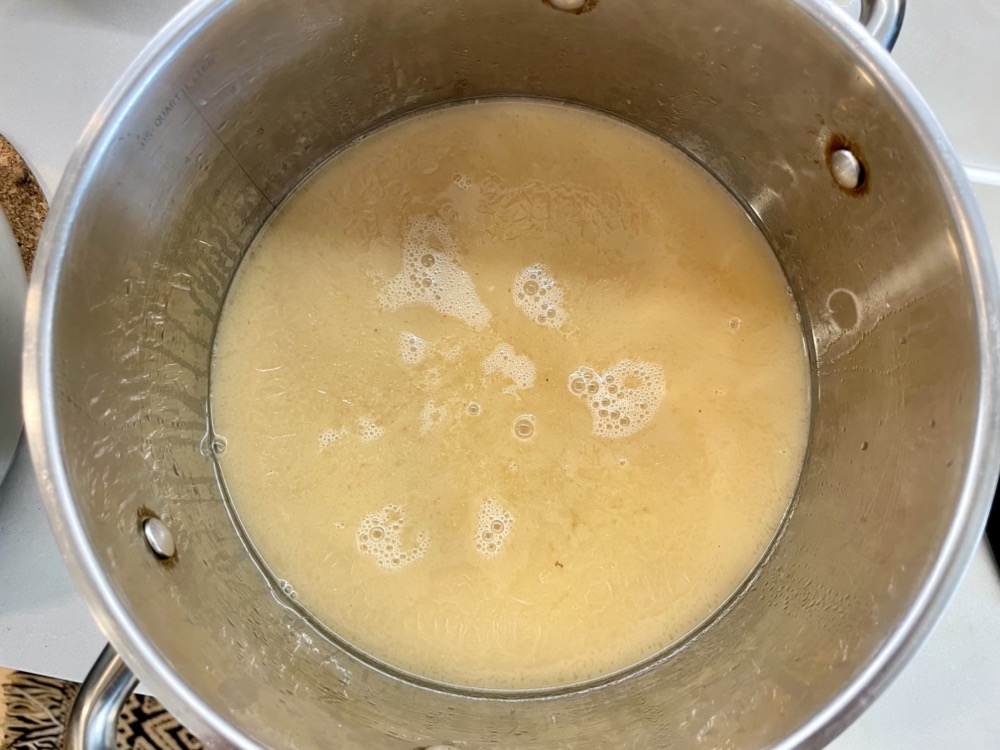
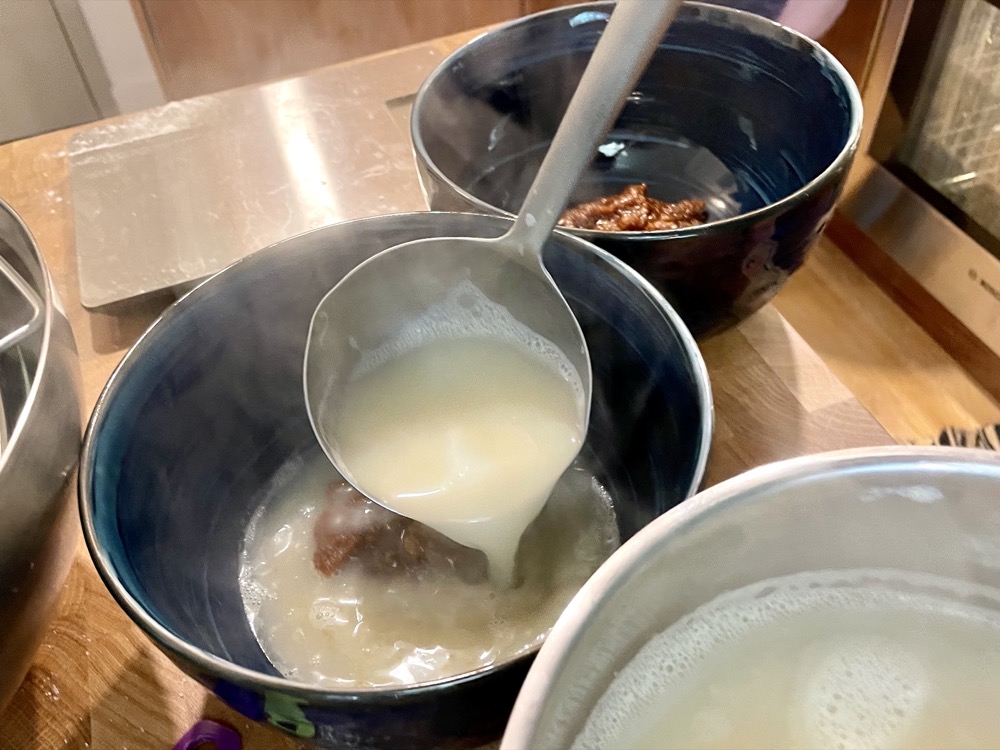
Strain: After an hour, turn off the heat and strain the broth into a clean pot. Discard the bones, aromatics, and any floaters that you have strained out. You should now have a pale brown opaque broth. Do not worry if your broth is not a lighter colour – it will lighten up in the next step.

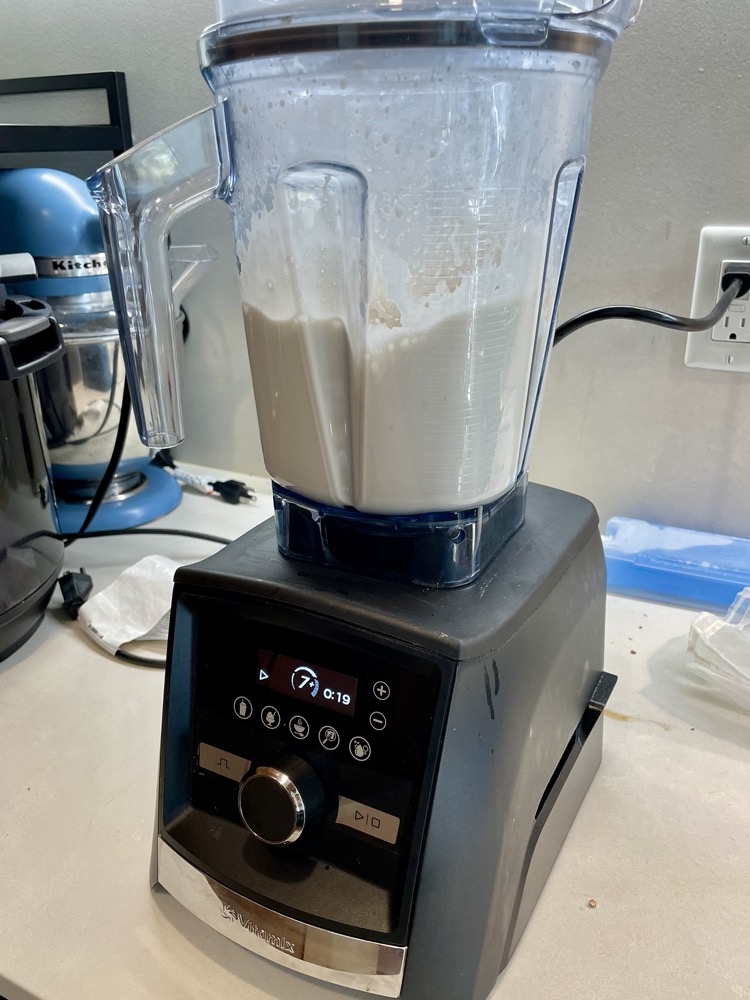


Blend – the magic step that makes the broth extra creamy and white: Remove roughly a quarter of the amount of broth into a blender and blend it on HIGH until you get a very smooth, white, and creamy texture. Add this back into the rest of the broth and mix well. Taste again for the texture.
If you find that it is too creamy, add hot water a cup at a time until desired consistency.
If you want it creamer and whiter, add more broth into the blender and blend again on HIGH and add it back into the broth until desired consistency.
Resist the urge to add salt – the final taste test will be at the end with the combination of the tare (salty goodness) with with broth together. The tonkotsu broth is now complete! If you still need more time to prepare the rest of the toppings or tare, then keep the soup on low heat to keep it hot until ready to serve.
D) Make the tare: (do this while you’re waiting for the broth to cook)
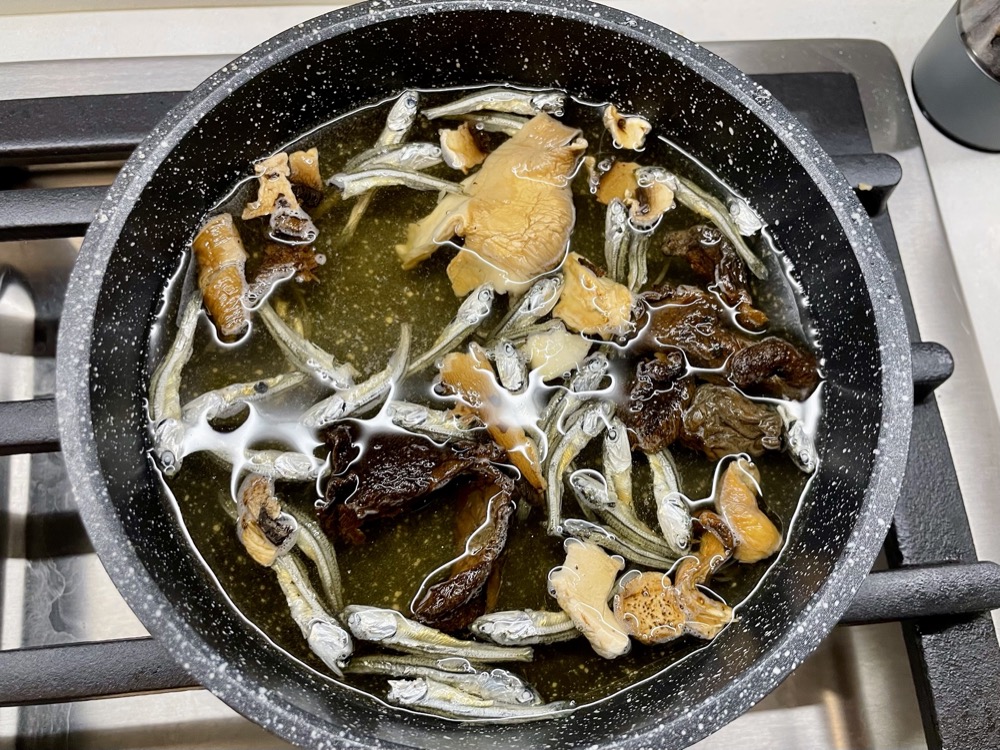

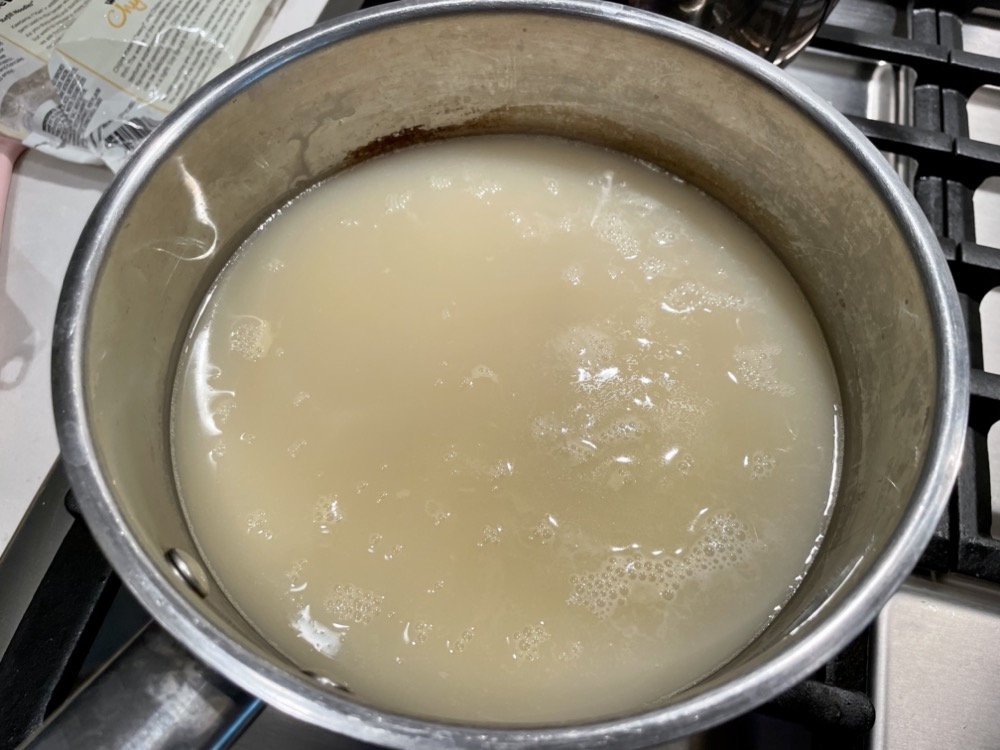
In a small pan, add the water, mirin, sake, kombu, porcini, and sababushi. Turn the heat on to HIGH. When it starts to boil, turn the heat off and let it steep for 30 minutes.


After 30 minutes, remove the kombu, add in the soy sauce, salt, sugar, and MSG. Whisk until dissolved. Turn the heat back on to HIGH until it starts to boil, then turn it off again and let it steep for at least 30 minutes. Strain before using. You can store this in the fridge for up to 6 months.
E) Cook the noodles, prepare the rest of the toppings: (you can do this in the final 10-15 minutes of your broth cooking)

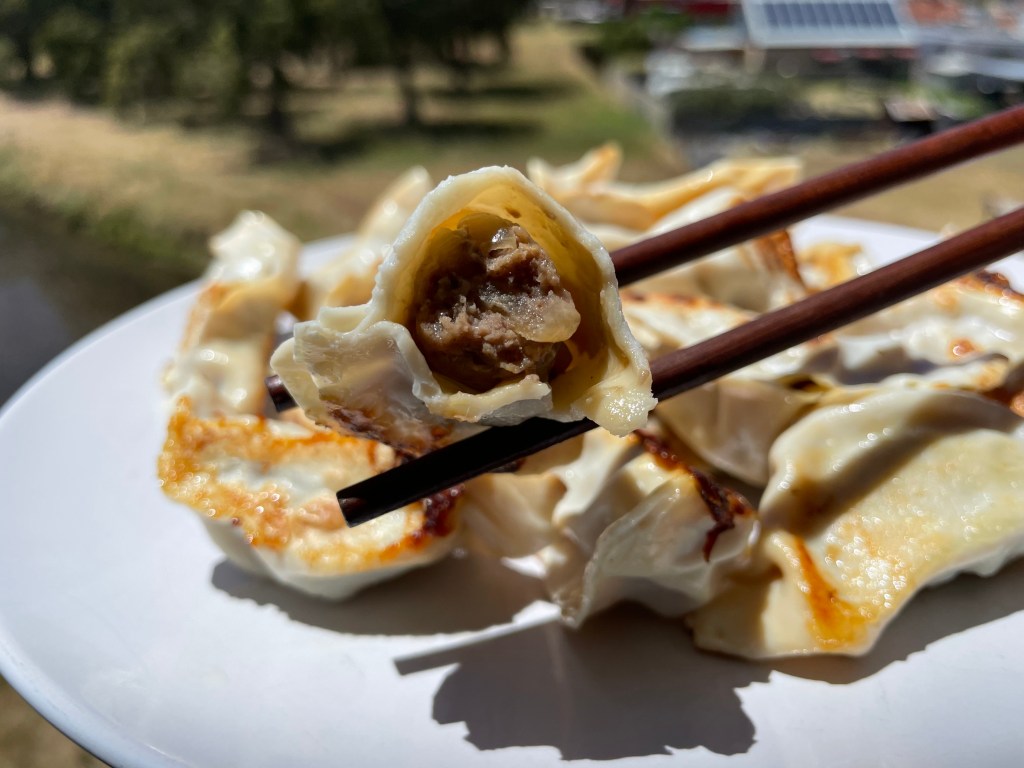
Chashu and ramen egg: Remove the twine from the chashu and thinly slice it while still chilled (it will be easier to get neater cuts). Cut each egg in half to reveal the jammy egg yolk centre. Set aside.


Noodles: Cook the noodles according to package instructions and strain when finished.
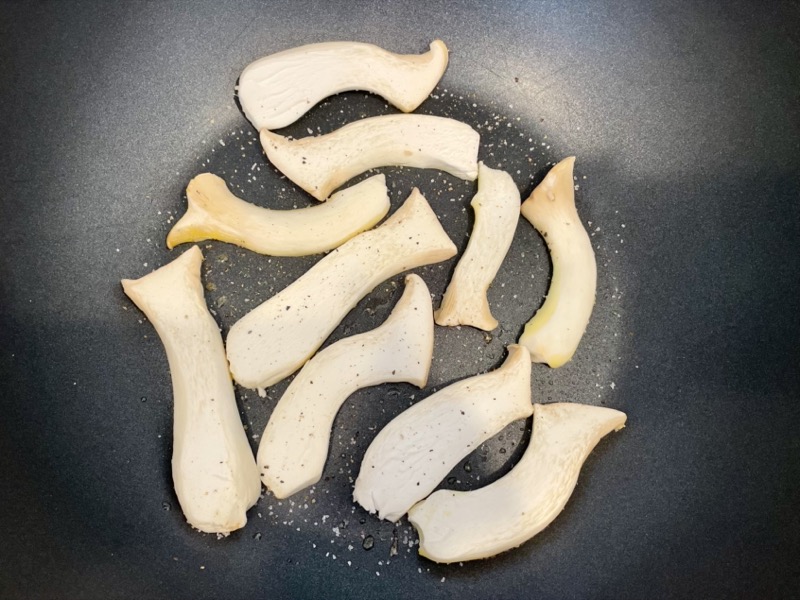
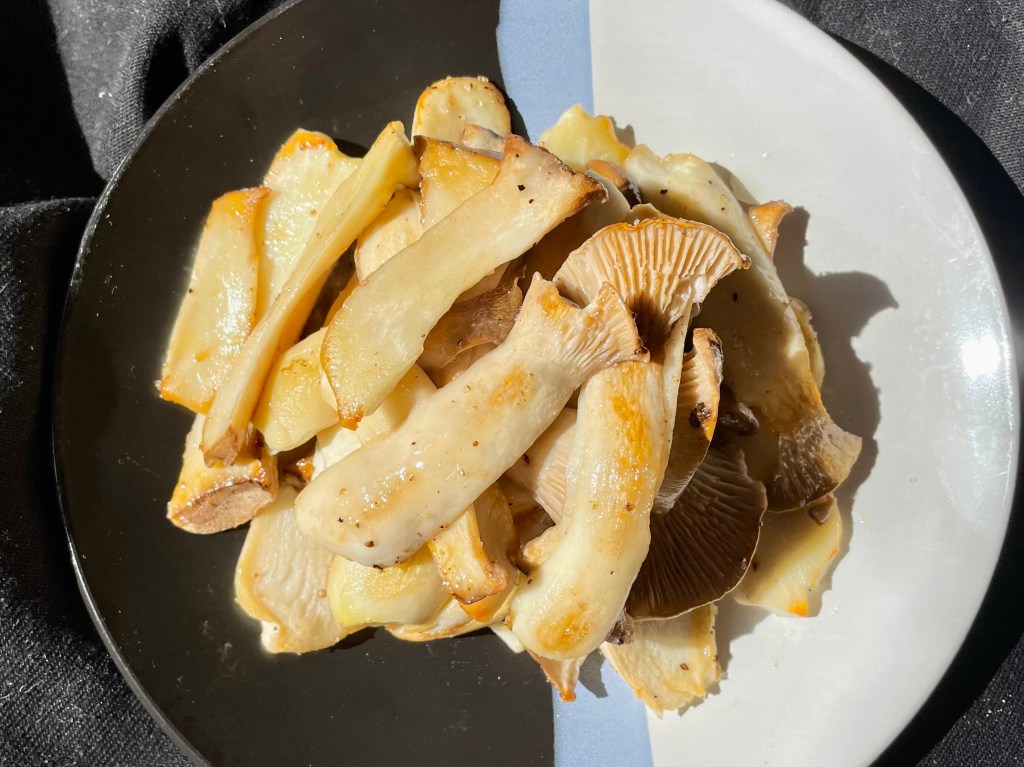
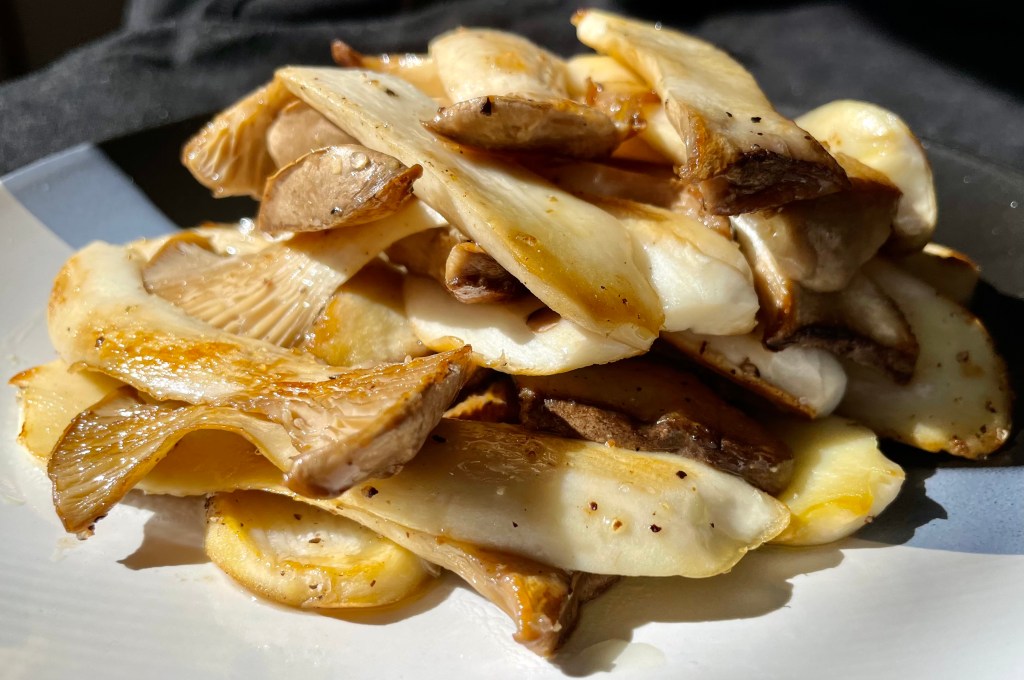
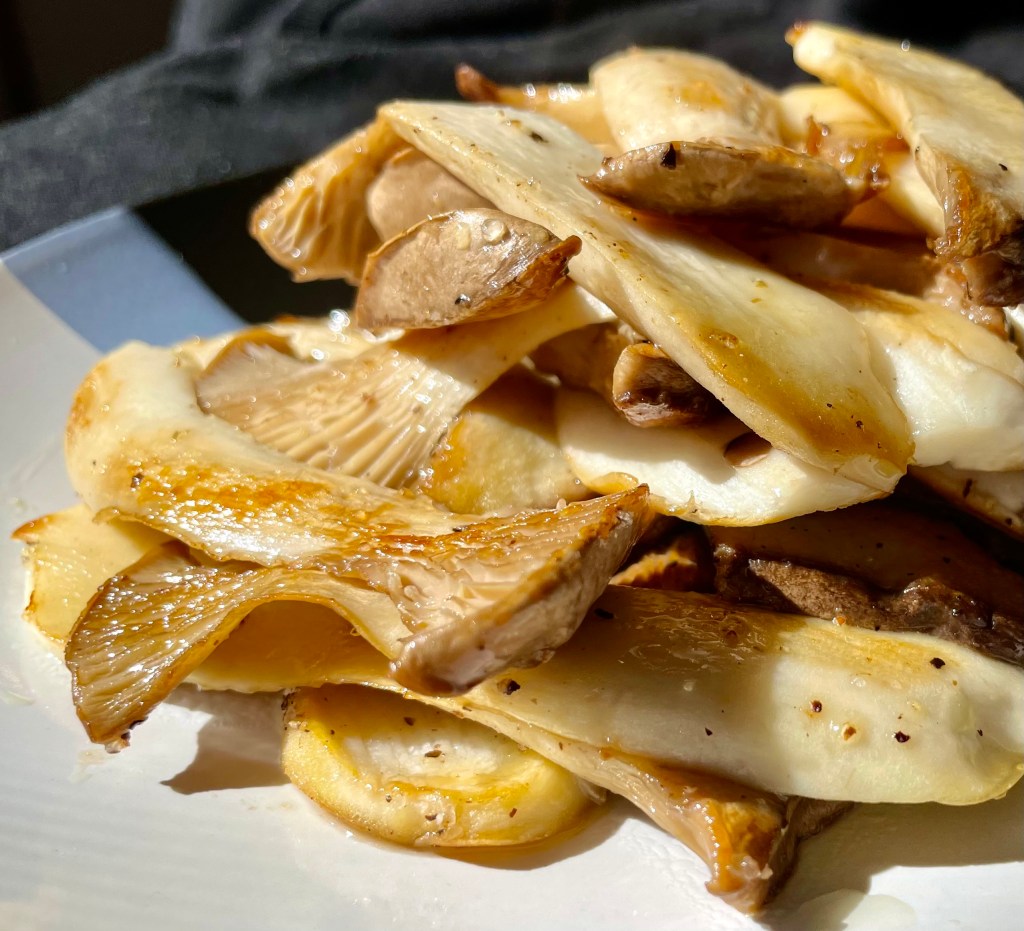
Wood ear mushrooms: Soak the wood ear mushrooms in a bowl of boiling hot water for at least 15 minutes or until softened and expanded. Remove from the water, rinse, and slice. Set aside.
Green onion: Thinly slice one green onion for garnish. Set aside.
Seaweed: Cut your seaweed to desired sizes for serving.
F) Assemble the ramen: (finally!)

Divide the noodles equally into the serving bowls if not done so already.
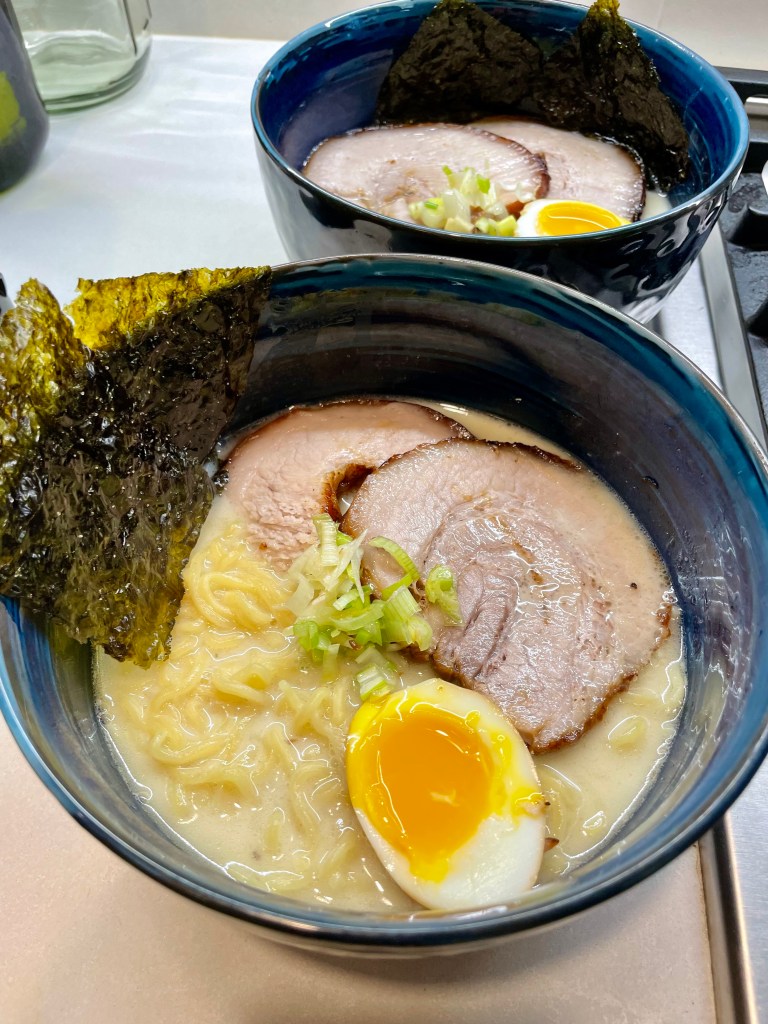
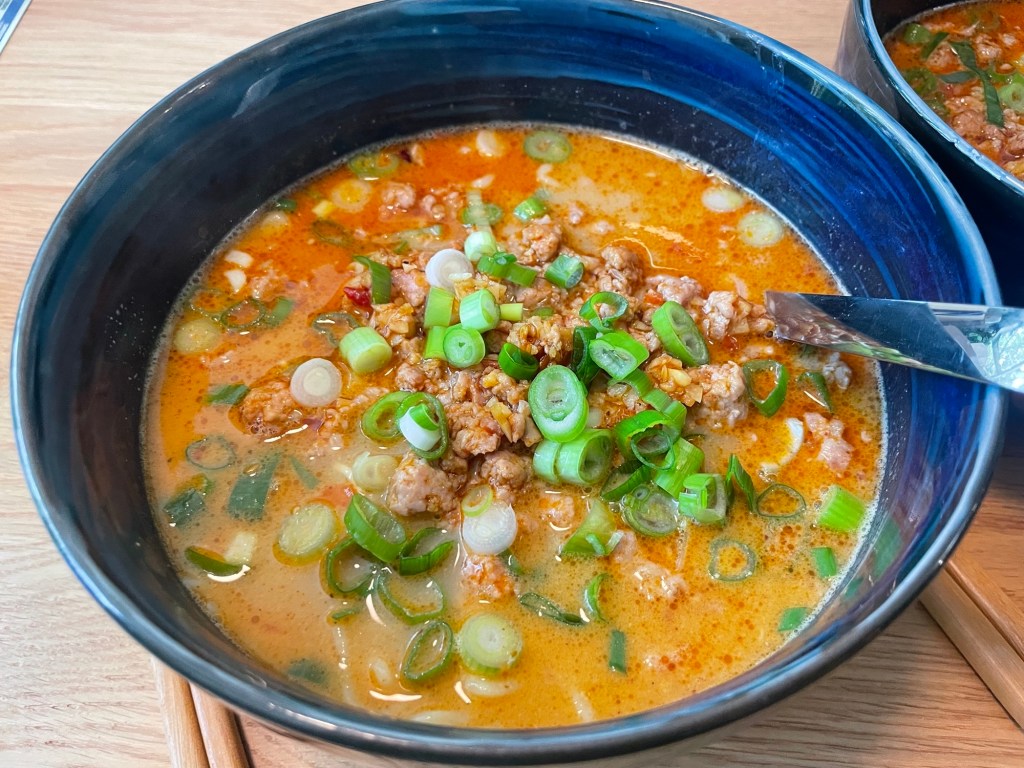
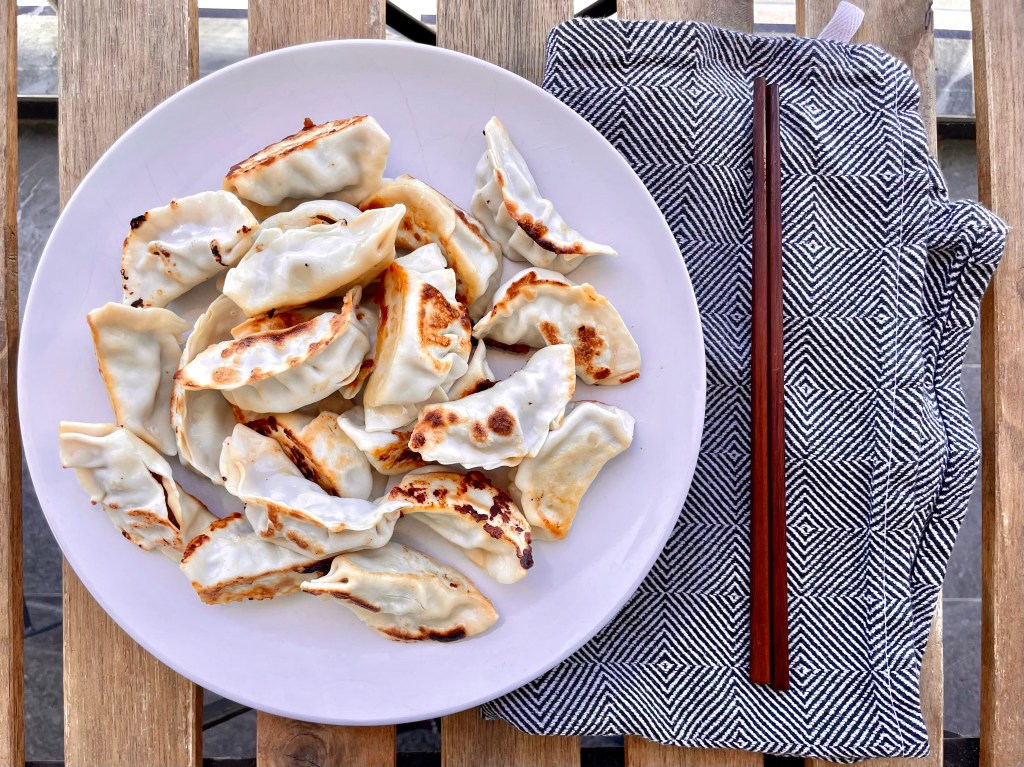
Add 2 ladles of the tonkotsu broth over the noodles. Top with sliced chashu, ramen egg, wood ear mushrooms, seaweed, and green onion to garnish. Add a 3 tablespoons of tare over top (or more if you prefer it saltier). ENJOY!


Summarized Recipe:
Legit Tonkotsu Ramen from scratch (in an Instant Pot)
Date Published: Mar 3rd, 2024 | Last Updated: Mar 3rd, 2024
Author: Abby |Category: Asian, mains, soups
Serves: 4-6 | Prep time: 12 hours before to marinate | Cook time: 4.5 hours total
Equipment you’ll need:
- Pressure cooker (at least 8 quarts in size)
- Cooking twine
- Small pot with lid/saucepan
Ingredients you’ll need:
- Chashu (Pork Belly): MAKE THE DAY BEFORE
- 500g (1.5lbs) pork belly with the skin on or off – this will be enough for 2-3 slices per portion. Feel free to double the chashu recipe if you want to serve more.
- 1 cup water
- 1/2 cup Japanese soy sauce (ie. Kikkoman)
- 1/4 cup mirin
- 2 Tbsps brown sugar
- 2 garlic cloves, smashed
- Ramen Egg: MAKE THE DAY BEFORE
- 4-6 eggs (depending on how many people you’re serving)
- Broth:
- 1kg (2 lbs) pork neck bones (you want some meat to be attached to the bones for extra flavour)
- 1kg (2 lbs) pork femur bones (make sure the larger leg bones are split so the bone marrow is exposed) – if you can’t find femur bones, you can use all neck bones
- 12 cloves of garlic, peeled and smashed
- 1 small brown onion, peeled and quartered
- 4cm piece of ginger, sliced (don’t worry about peeling it)
- 2 green onions, cut into thirds
- Tare:
- 1/2 cup (120ml) water
- 1.5 Tbsps (25ml) mirin
- 1 Tbsp (15ml) sake
- 4g kombu (dried kelp)
- 3g dried porcini mushrooms
- 3g sababushi/dried mackerel, or katsuobushi/bonito flakes, or niboshi/dried anchovies – I had a difficulty sourcing these in my neighbourhood, so any of these will work to give it an umami fishy flavour
- 1/2 cup (120ml) Japanese soy sauce (ie. Kikkoman)
- 2.5 tsps (15g) kosher salt
- 1.5 tsps (5g) brown sugar
- 4-6 portions of ramen noodles, premade
- Additional Toppings (optional):
- Sliced green onion
- Wood ear mushrooms
- Seaweed
- Bean sprouts
Directions:
THE DAY BEFORE:
- A) Make the chashu:
- Make sure the pork belly is at room temperature (take it out of the fridge at least 30mins prior).
- Roll the pork belly into a cylinder with the layers visible on the side (see photo) and tie tightly with cooking twine so it stays in shape.
- Take out a saucepan with a lid and add in the rest of the the chashu ingredients: water, soy sauce, mirin, brown sugar, garlic. Place the tied up pork belly in the middle of the saucepan.
- Turn the heat on to HIGH and let the sauce come to a boil, then turn the heat down to LOW and let it simmer with the lid on for 90 minutes. Turn the pork belly every 20 minutes so it gets evenly braised in the sauce.
- When there’s 20 minutes left to your cook time, preheat your oven to 220˚C (425˚F) and prepare a baking tray with a wire rack.
- Once the 90 minutes is up, turn off the heat and take out the pork belly (keeping the remaining sauce aside) and place it on the rack over a baking tray and roast in the preheated oven for 8-10 minutes, or until the outside is a dark caramel colour. When the pork belly is done, take it out of the oven and place it in a heat-proof container (make sure there’s enough room for the eggs as well). Pour the leftover sauce over and let the pork belly marinate in the sauce overnight. If the marinade doesn’t surround the pork belly, either use a smaller container or turn the pork belly halfway through for even marination. A vacuum-sealed plastic bag works well as well.
- B) Make the ramen eggs: (you can do this step while you’re waiting for the pork belly to cook)
- Bring a small pot of water to boil. Gently lower all 4 eggs into the boiling water and start a timer for 7 minutes. Adjust the heat if the water is boiling too rapidly to avoid the eggs from knocking around in the pot.
- While you’re waiting, prepare an ice bath for the eggs. Once the timer is up, turn off the heat and immediately submerge all the eggs into the ice bath. Once the eggs are cool enough to handle, remove all of the shells.
- Place the peeled boiled eggs into the same container as the pork belly and marinate together overnight. If the sauce does not surround the egg, turn the eggs halfway through for even marination. A vacuum-sealed plastic bag works well as well. Do not marinate for longer than 2-3 days or else the egg will become too salty.
THE DAY OF:
- C) Make the tonkotsu broth:
- Preheat oven to 220˚C (425˚F)
- Roast the bones: Prepare a large lined baking tray. Rinse the pork bones and place them all in one layer of the tray (do not overlap the bones). Use a second tray if they don’t all fit into one. Roast in the preheated oven for 40 minutes, turning the bones once halfway through the cook time. After 40 minutes, turn off the oven. You should have a dark brown char on the bones.
- Cook the broth: Place the roasted bones along with any browned bits or liquids from the tray (these will add extra flavour) into your Instant Pot. Add enough water to cover the bones by 2-3cm (roughly 3 litres). Turn the Instant Pot on to a sauté setting and set the heat to HIGH. Once the water comes to a boil, cancel the setting and put the lid on. Turn on the pressure cook setting to HIGH and cook for 2 hours. (You can start making the tare or prepare any additional toppings during this time as you wait.) When the timer finishes, quick release the pressure – be careful of any spurting of liquids from the vent! When it is safe to do so, remove the lid carefully.
- Add in aromatics & free the bone marrow: Add in garlic, ginger, green onion and onion into the broth. Use a chopstick and scrape out any bone marrow from the bones and let the marrow boil freely in the soup alongside the bones.
- Taste for richness and Reduce (if needed): At this point the broth will taste quite bland since there as been no added salt and the aromatics were just introduced. Ignore the need to want to add in salt right now – it will come later. You want to taste for the texture of the broth, not the flavour. How creamy your broth is at this stage will dictate how you cook down your broth (the texture will vary greatly depending on the mix of bones you started with – it varies every time I make it):
- If your broth is watery: turn on the sauté setting on the Instant Pot and set to MED heat so the soup boils moderately. Let it boil uncovered for 1 hour to reduce the broth and increase in concentration/richness. Taste at the end of 1 hour – you can let it boil for longer if needed.
- If your broth is rich & creamy: add a lid on to the Instant Pot (or transfer to a regular soup pot with a lid) and let the soup boil on MED heat for 1 hour to release the flavour of the aromatics but to still contain all the liquid.
- You will need to boil the broth for 1 hour regardless of how rich your broth is. The difference is whether you keep the lid on or off to control how much liquid is evaporated. If you’re unsure, then start boiling without a lid, then taste after 30 minutes, or have the lid half-on so it only reduces slightly. Once your broth is rich enough then put the lid on and finish boiling until the 1 hour timer is up.
- Strain: After an hour, turn off the heat and strain the broth into a clean pot. Discard the bones, aromatics, and any floaters that you have strained out. You should now have a pale brown opaque broth. Do not worry if your broth is not a lighter colour – it will lighten up in the next step.
- Blend – the magic step that makes the broth extra creamy and white: Remove roughly a quarter of the amount of broth into a blender and blend it on HIGH until you get a very smooth, white, and creamy texture. Add this back into the rest of the broth and mix well. Taste again for the texture.
- If you find that it is too creamy, add hot water a cup at a time until desired consistency.
- If you want it creamer and whiter, add more broth into the blender and blend again on HIGH and add it back into the broth until desired consistency.
- Resist the urge to add salt – the final taste test will be at the end with the combination of the tare (salty goodness) with with broth together. The tonkotsu broth is now complete! If you still need more time to prepare the rest of the toppings or tare, then keep the soup on low heat to keep it hot until ready to serve.
- D) Make the tare: (do this while you’re waiting for the broth to cook)
- In a small pan, add the water, mirin, sake, kombu, porcini, and sababushi. Turn the heat on to HIGH. When it starts to boil, turn the heat off and let it steep for 30 minutes.
- After 30 minutes, remove the kombu, add in the soy sauce, salt, sugar, and MSG. Whisk until dissolved. Turn the heat back on to HIGH until it starts to boil, then turn it off again and let it steep for at least 30 minutes. Strain before using. You can store this in the fridge for up to 6 months.
- E) Cook the noodles, prepare the rest of the toppings: (you can do this in the final 10-15 minutes of your broth cooking)
- Chashu and ramen egg: Remove the twine from the chashu and thinly slice it while still chilled (it will be easier to get neater cuts). Cut each egg in half to reveal the jammy egg yolk centre. Set aside.
- Wood ear mushrooms: Soak the wood ear mushrooms in a bowl of boiling hot water for at least 15 minutes or until softened and expanded. Remove from the water, rinse, and slice. Set aside.
- Noodles: Cook the noodles according to package instructions, strain, and even divide into serving bowls.
- Green onion: Thinly slice one green onion for garnish. Set aside.
- Seaweed: Cut your seaweed to desired sizes for serving.
- F) Assemble the ramen: (finally!)
- Divide the noodles equally into the serving bowls if not done so already.
- Add 2 ladles of the tonkotsu broth over the noodles.
- Top with sliced chashu, ramen egg, wood ear mushrooms, seaweed, and green onion to garnish. Add a 3 tablespoons of tare over top (or more if you prefer it saltier). ENJOY!