Date Published: August 27th, 2020 | Last Updated: August 27th, 2020
Author: Abby |Category: appetizers, snacks, Asian
Serves: 12 spring rolls | Prep time: 20 mins mins | Cook time: 15 mins
Jump to recipe |
I don’t love deep-frying things at home, but I sure do love spring rolls, especially with a good dipping sauce or tossed in a bùn bowl (Vietnamese vermicelli salad) with a good nuoc mam. Mmmmmm… This spring rolls recipe is adapted from Sarah Tiong’s cookbook: Sweet, Savoury, Spicy – you might’ve seen me mention her book before in a couple other posts. Sarah was my favourite Masterchef AU 2020 contestant and I encourage you to check out her book – it’s full of amazing recipes. Girl’s got a talent for packing in big bold flavours!
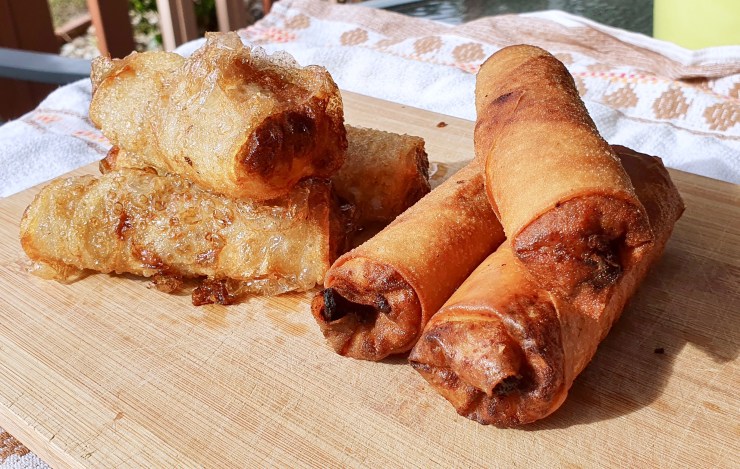
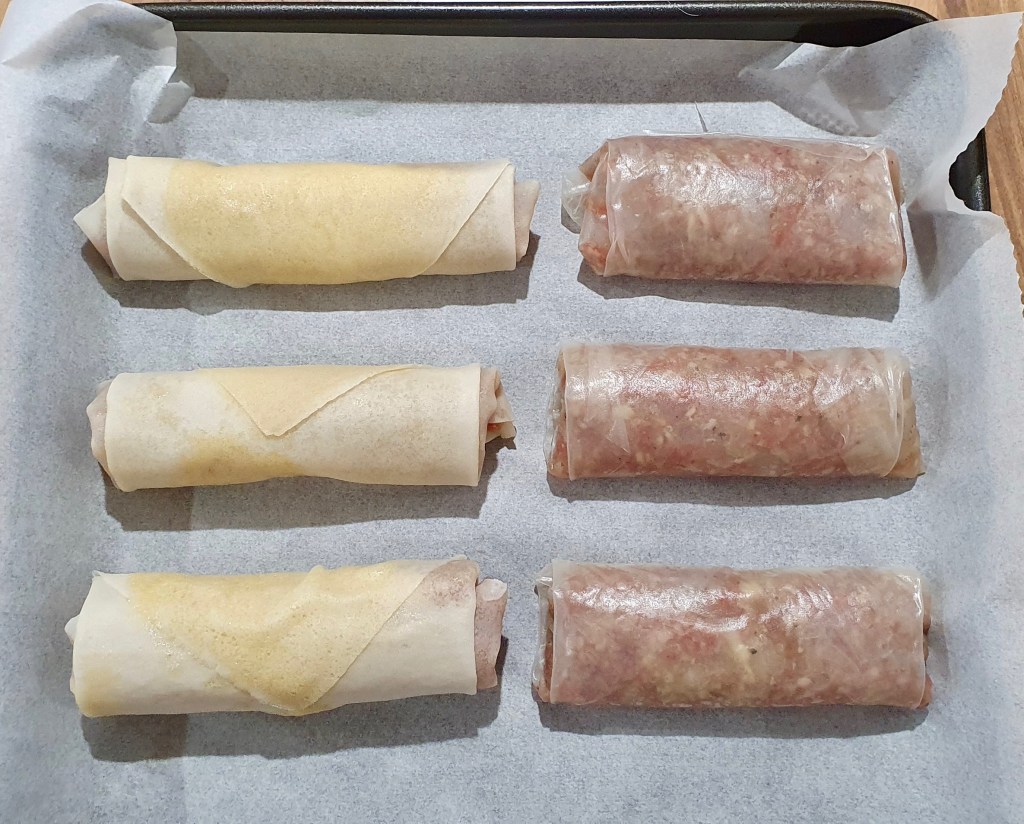
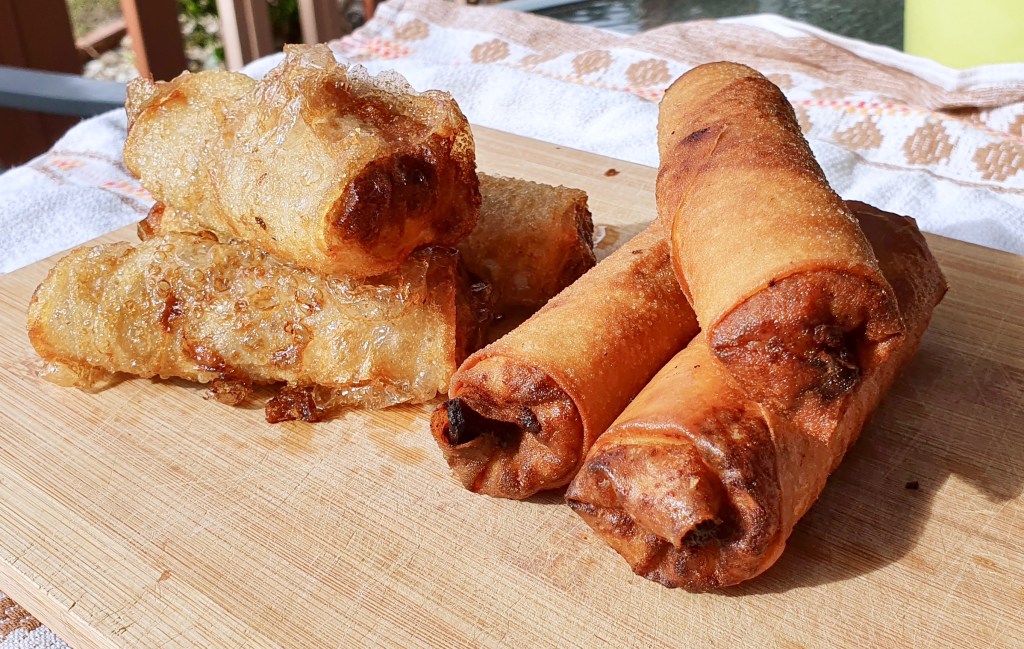
The original recipe called for rice paper wrappers which creates a slightly crispy but also chewier texture compared to the regular spring roll wrappers that are much crispier. I couldn’t decide which I liked better, so I included both methods in this recipe so you can choose for yourself 😜. Toby prefers the original spring roll wrappers but I’m still torn.
These spring rolls call for the classic pork and prawn combo, but feel free to change it up to a different protein of your choice or add in some rice noodles or black fungus to bulk it up. This recipe seems complicated, but it’s actually pretty easy. Just chop and mix everything up in a bowl and you’re ready to wrap! I actually really love wrapping spring rolls. I find them more fun and less room for error than dumplings 😂. Toby actually wrapped these ones in the photos – pretty pro, eh?

Anyways, without further ado, here’s the recipe! If you have any comments or suggestions, I’d love to hear from you in the comment section! You can follow me on instagram, youtube and facebook to see all the recipes I post!
Happy cooking!
Ingredients you’ll need:
- Filling:
- 8 fresh large prawns (140g), shelled, deveined, tails removed and meat coarsely chopped
- 250g fatty ground pork (more fat = juicier spring roll)
- 2 large red Asian shallots or 1 small brown or yellow onion, finely chopped
- 2 cloves garlic, minced
- 2 Tbsps (30 ml) fish sauce
- 1 tsp sugar
- 1 tsp ground black pepper
- 1 tsp salt
- 1 large egg
- 1 Tbsp (9 g) cornstarch
- Wrappers:
- If using rice paper wrappers:
- 12 rice paper wrappers
- 1 cup warm water
- 2 tsps sugar
- If using spring roll wrappers:
- 12 spring roll wrappers
- 1 large egg, beaten
- If using rice paper wrappers:
Directions:


Mix all of the filling ingredients into a bowl until combined: prawns, pork, shallots, garlic, fish sauce, sugar, black pepper, salt, egg, and cornstarch. Set aside.
Assemble the spring roll:
If using rice paper rolls:
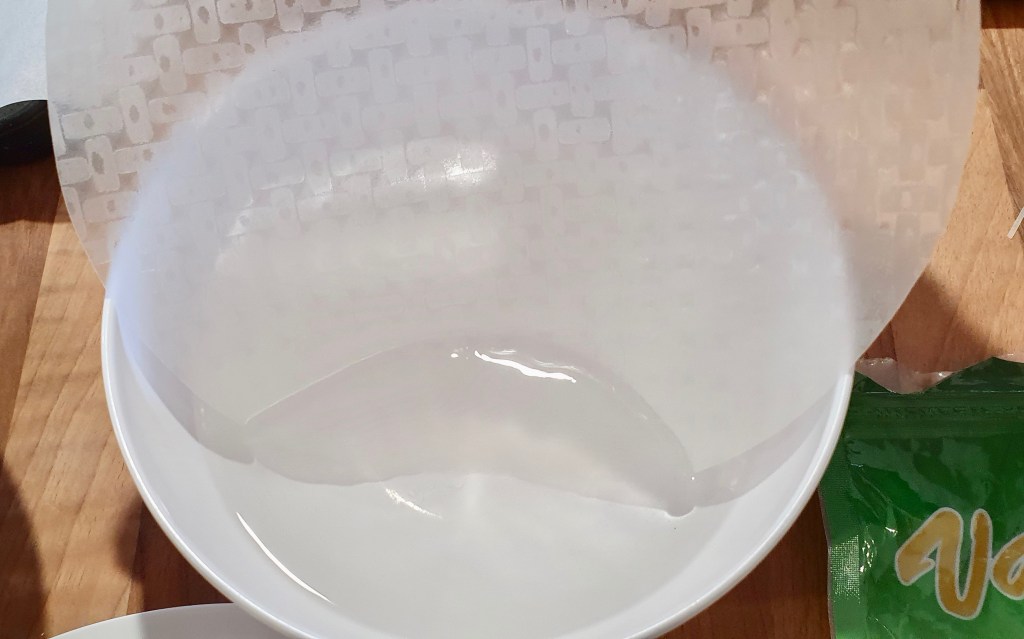
Dissolve the sugar in the warm water and pour it into a large bowl. Dunk a sheet of rice paper in the sugar water and quickly remove it, shaking off any excess water. You only want to wet it. It will get softer and softer as you wrap your spring roll.
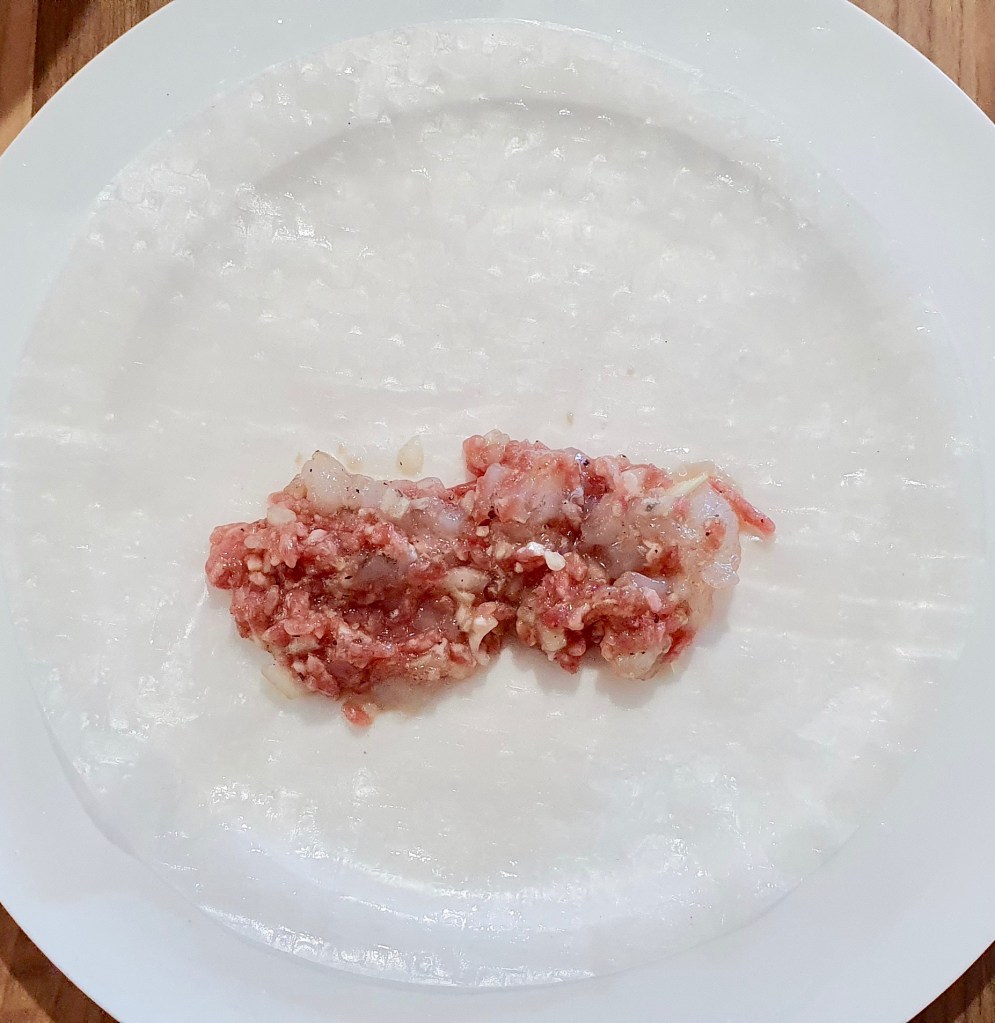
Place the filling centred in the lower third of the wrap 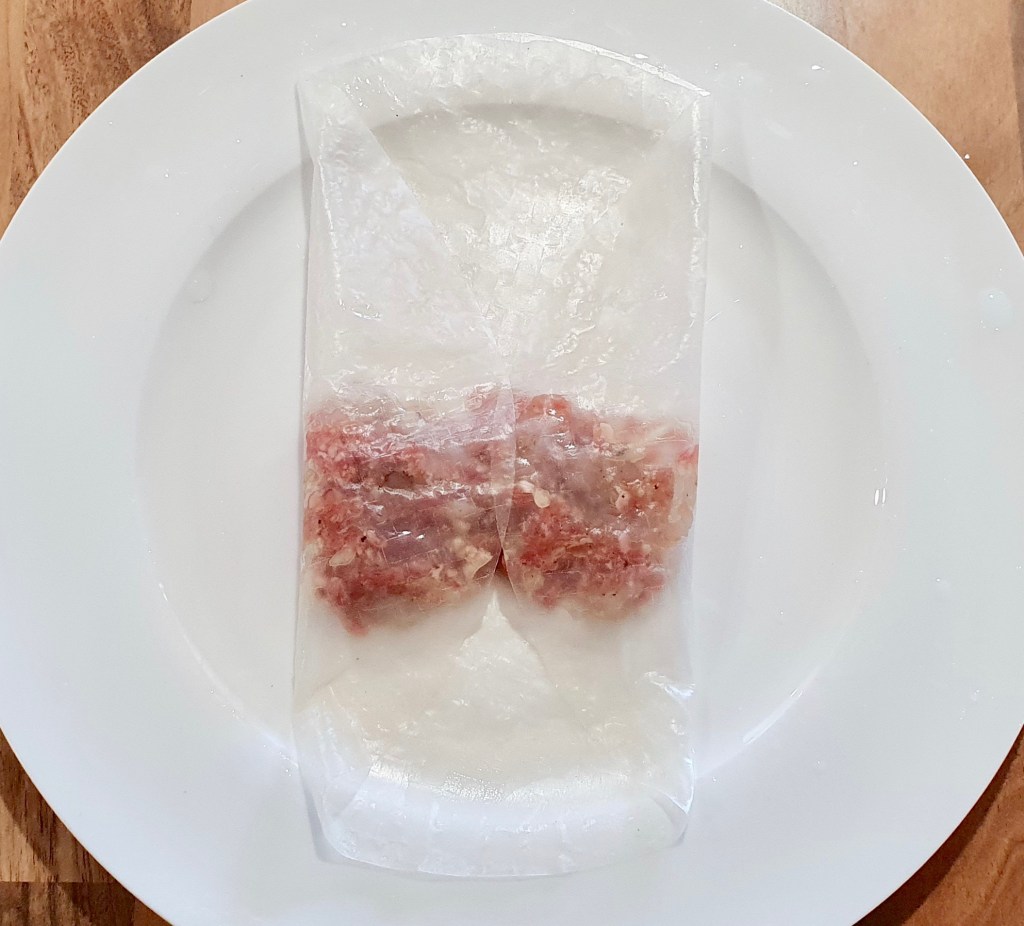
Fold in the left and right sides towards the middle 
Fold the bottom of the wrapper up over the filling 
Roll up the rest of the wrapper 
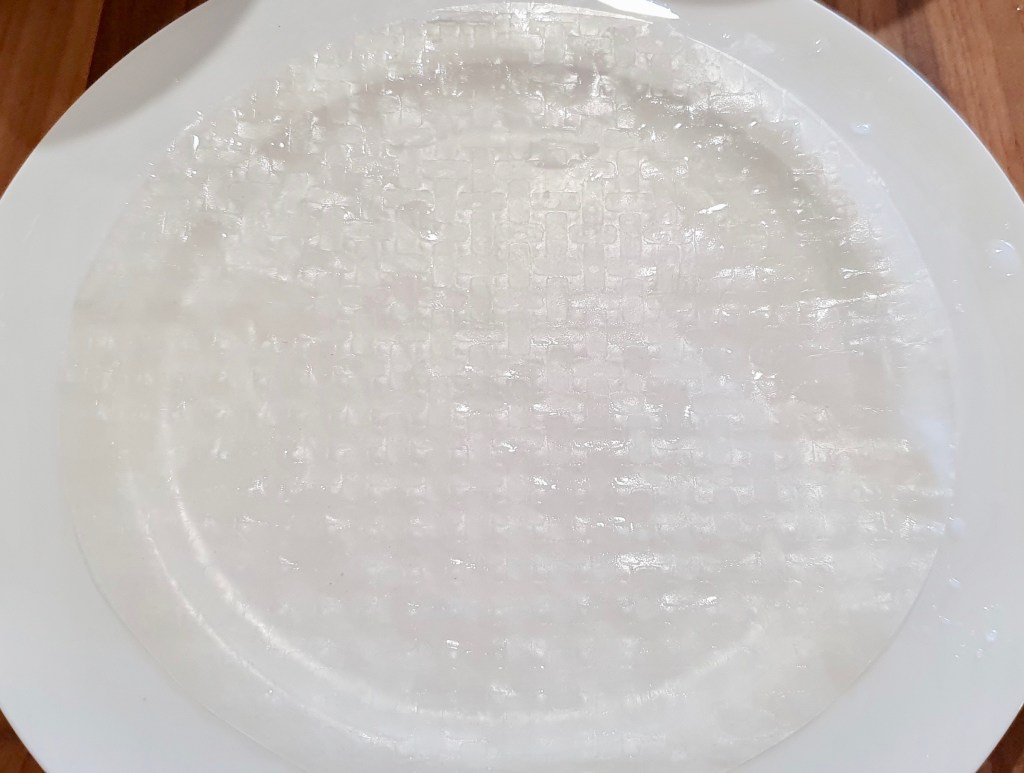
Place the rice paper on a plate then place 2 tablespoons of the filling centred in the bottom third of the wrap. Fold in the left and right sides over the filling then fold up the bottom edge over the filling, tucking the bottom edge under the filling. Roll upwards until you reach the top. Repeat until all the filling has been wrapped.
Let all the spring rolls air-dry for 15 minutes (you can use paper towels to soak up any excess moisture). You can also fold these a few hours in advance and refrigerate for a few hours until they dry out.
If using spring roll wrappers:
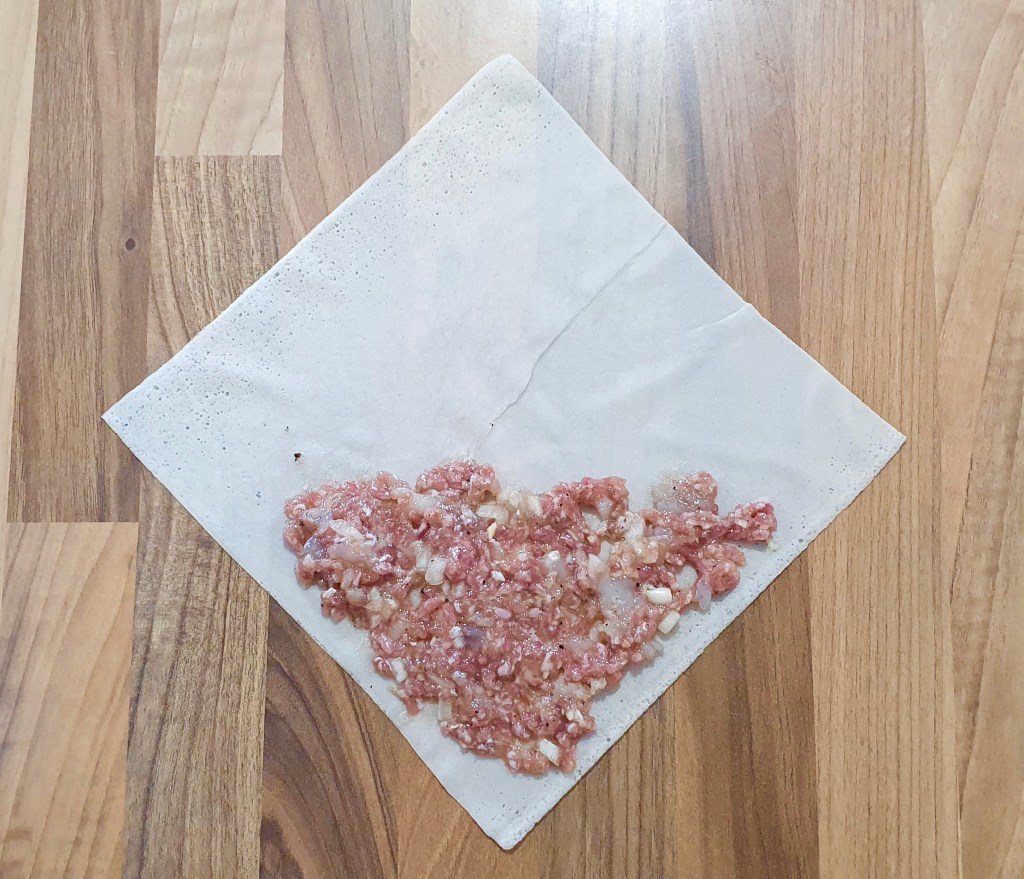
Place 2 tablespoons in the bottom third of the wrap and spread upwards 
Fold in the left and right sides towards the centre 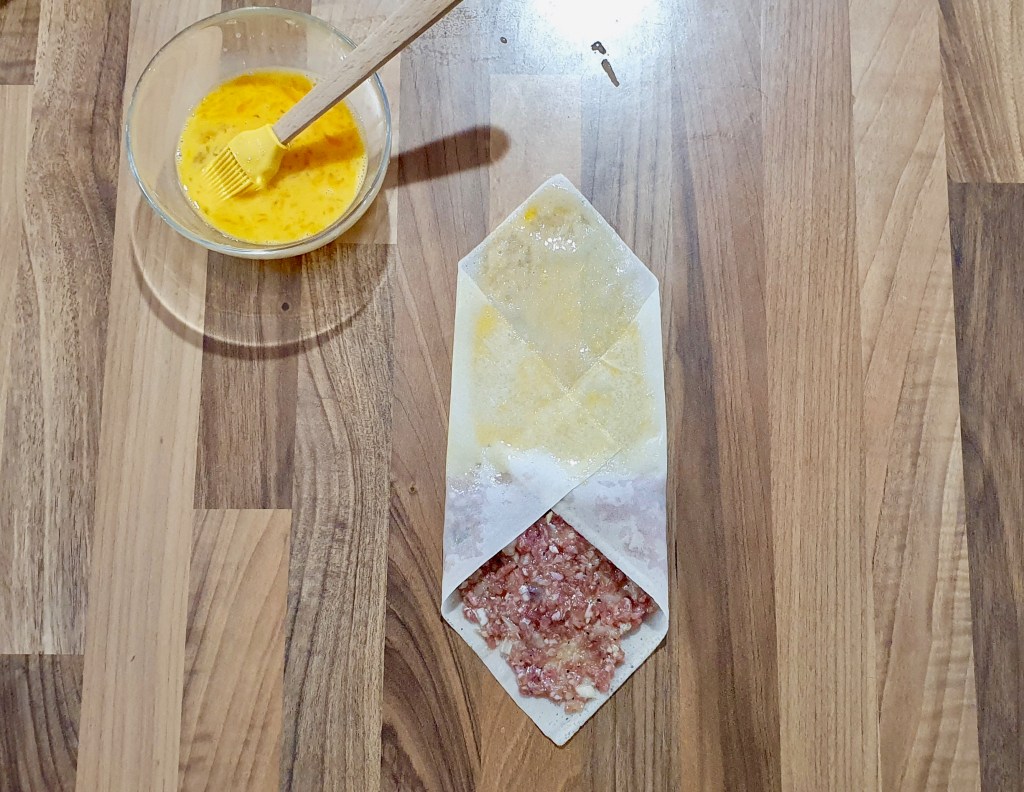
Brush egg wash over the top third of the wrapper. 
Roll up the wrapper from the bottom towards the top 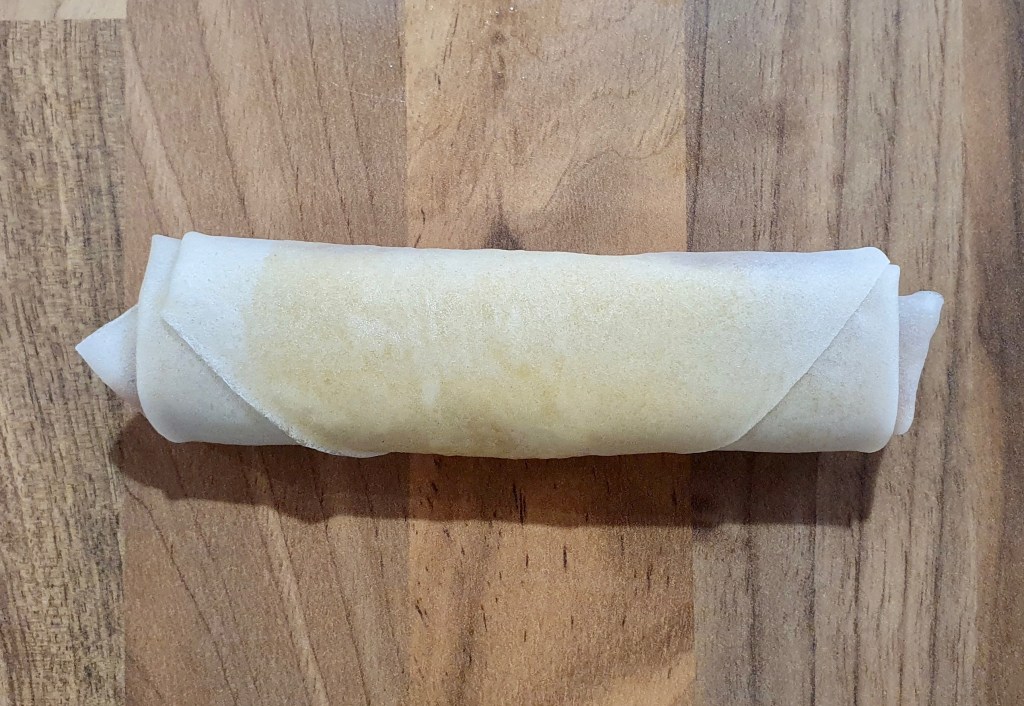
Done! 
Place a spring roll wrapper on a flat surface diagonally with a corner facing you. Add 2 tablespoons of the filling near the corner closest to you. Fold the left and right sides in over the filling. Brush the top third of the wrapper with the beaten egg then start rolling the wrapper with the filling from the bottom upwards. The egg helps seal the spring roll wrapper together.
Fry the spring rolls:


Fill half a saucepan with a neutral oil and heat it to 175˚C. Fry a few spring rolls at a time to not crowd the pan until golden brown and turning occasionally (~2-3 mins for rice paper rolls, 3-4 mins for spring rolls). Transfer to a paper towel to drain. Serve.


Summarized Recipe:
Vietnamese Spring Rolls
Date Published: August 27th, 2020 | Last Updated: August 27th, 2020
Author: Abby |Category: appetizers, snacks, Asian
Serves: 12 spring rolls | Prep time: 20 mins mins | Cook time: 15 mins
Ingredients:
- Filling:
- 8 fresh large prawns (140g), shelled, deveined, tails removed and meat coarsely chopped
- 250g fatty ground pork (more fat = juicier)
- 2 large red Asian shallots or 1 small brown or yellow onion, finely chopped
- 2 cloves garlic, minced
- 2 Tbsps (30 ml) fish sauce
- 1 tsp sugar
- 1 tsp ground black pepper
- 1 tsp salt
- 1 large egg
- 1 Tbsp (9 g) cornstarch
- Wrappers:
- If using rice paper wrappers:
- 12 rice paper wrappers
- 1 cup warm water
- 2 tsps sugar
- If using spring roll wrappers:
- 12 spring roll wrappers
- 1 large egg, beaten
- If using rice paper wrappers:
Directions:
- Mix all of the filling ingredients into a bowl until combined: prawns, pork, shallots, garlic, fish sauce, sugar, black pepper, salt, egg, and cornstarch. Set aside.
- Assemble the spring roll:
- If using rice paper rolls:
- Dissolve the sugar in the warm water and pour it into a large bowl.
- Dunk a sheet of rice paper in the sugar water and quickly remove it, shaking off any excess water. Place the rice paper on a plate then place 2 tablespoons of the filling centred in the bottom third of the wrap. Fold in the left and right sides over the filling then fold up the bottom edge over the filling, tucking the bottom edge under the filling. Roll upwards until you reach the top. Repeat until all the filling has been wrapped.
- Let all the spring rolls air-dry for 15 minutes (you can use paper towels to soak up any excess moisture). You can also fold these a few hours in advance and refrigerate for a few hours until they dry out.
- If using spring roll wrappers:
- Place a spring roll wrapper on a plate diagonally with a corner facing you. Add 2 tablespoons of the filling near the corner closest to you. Fold the left and right sides in over the filling. Brush the top third of the wrapper with the beaten egg then start rolling the wrapper with the filling from the bottom upwards. The egg helps seal the spring roll wrapper together.
- If using rice paper rolls:
- Fry the spring rolls:
- Fill half a saucepan with a neutral oil and heat it to 175˚C. Fry a few spring rolls at a time to not crowd the pan until golden brown and turning occasionally (~2-3 mins for rice paper rolls, 3-4 mins for spring rolls). Transfer to a paper towel to drain. Serve.