F*cking Good Butter Chicken (Chicken/Murgh Makhani)


Date Published: April 16th, 2024 | Last Updated: April 16th, 2024
Author: Abby |Category: Asian, main
Serves: 6 | Prep time: 30 mins | Cook time: 30 mins

Jump to recipe |

Butter chicken is no doubt the most popular dish at most Indian restaurants. It’s creamy, full of flavour, and has the perfect amount of sweetness. It’s an indulgent dish and I can never get enough of it. I’ve tried a LOT of different butter chickens in my life and I’ve come to realize that my favourite butter chickens have been on the sweeter side. I’ve tried to make this dish multiple times in the past with different recipes and methods, but it was never quite right to my liking. There is a lot of variation out there between recipes in terms of level of heat, salt, sweetness, tomato flavour, and even blend of spices. I was beginning to give up on my quest, until someone mentioned trying the Youtube recipe by Chef Varun Inamdar. I’m not a big youtube person when it comes to recipes (which is probably why I never came across it on my own), but this video had 47 MILLION views and has been deemed THE most popular butter chicken recipe on the internet. With a reputation like that, of course I had to try it. As you can probably guess, it was fucking amazing! It’s rich, buttery, and on the sweeter side. You can even taste the flavours of the aromatics that elevate this dish. The only complaint I had was that it was TOO sweet for my liking so I’ve cut down the sugar level by 1/3. I also decreased the amount of butter used (don’t worry, there’s still plenty in this dish to make it deliciously unhealthy) and swapped out cream with cashew cream. OH, and lastly I also doubled his original recipe because it was so damn good that I’d finish it all in one sitting on my own, so i figured I should make enough to share 😜.

A Quick Note on Chilli Powder

This recipe uses Kashmiri chilli powder, which is an Indian chilli powder variety that’s not too spicy and it what gives the dish its orangey/red colour. It can be a bit hard to find unless you’ve got an Indian grocer near you, but if you can’t find it, a good substitute is gochugaru, which is a Korean chilli powder. Do NOT substitute with cayenne pepper which is a MUCH spicier chilli powder. If you absolutely can’t find Kashmiri chilli powder nor gochugaru, then you can substitute with 1 part cayenne powder: 3 parts paprika.

Check out my easy naan recipe to serve with this butter chicken!

Anyways, without further ado, here’s the recipe! If you have any comments or suggestions, I’d love to hear from you in the comment section! You can follow me on instagram, youtube and facebook to see all the recipes I post!

Happy cooking!

Ingredients you’ll need:

  • Chicken marinade:
    • 600g (3 medium-sized) chicken breasts, skinless, boneless, diced to 2.5cm pieces
    • 1 Tbsp ginger, grated
    • 1 Tbsp garlic, finely minced
    • 2 Tbsps kashmiri chilli powder (or gochugaru/Korean chilli powder)
    • Pinch of salt
  • Sauce:
    • 1 large brown onion, diced
    • 2 Tbsps (30g) + 1 stick (115g / 8 Tbsps) butter
    • 1kg (~5 large) tomatoes, roughly chopped
    • 100g raw unsalted cashews
    • 1 cup water
    • 2 Tbsps garlic, finely minced
    • 3 Tbsps white vinegar
    • 1/4 cup (53g) sugar
    • 1 tsp garam masala
    • 1/4 cup kashmiri chilli powder (or gochugaru/Korean chilli powder)
    • 1 cup cashew cream (or blend 40 raw cashews (90g) with 2/3 cup water)
    • 2 tsps dried fenugreek leaves (kasuri methi)
    • Salt to taste

Directions:

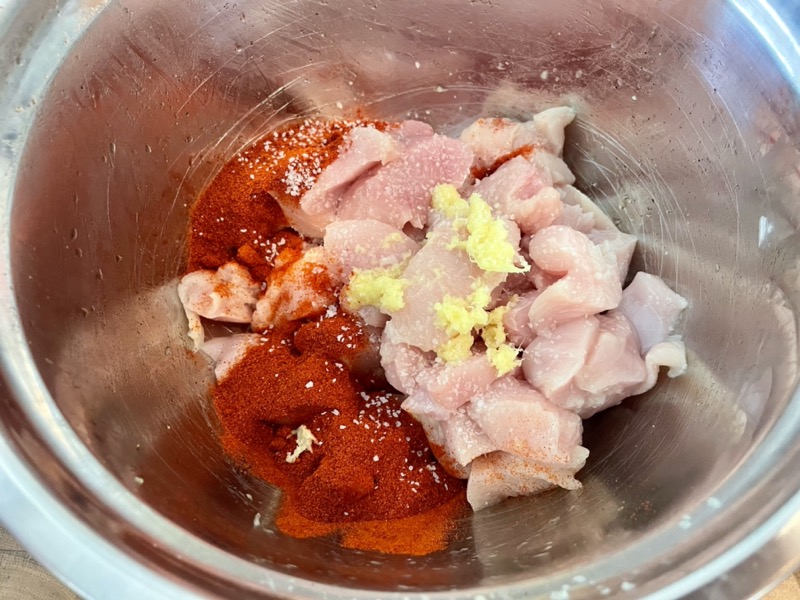
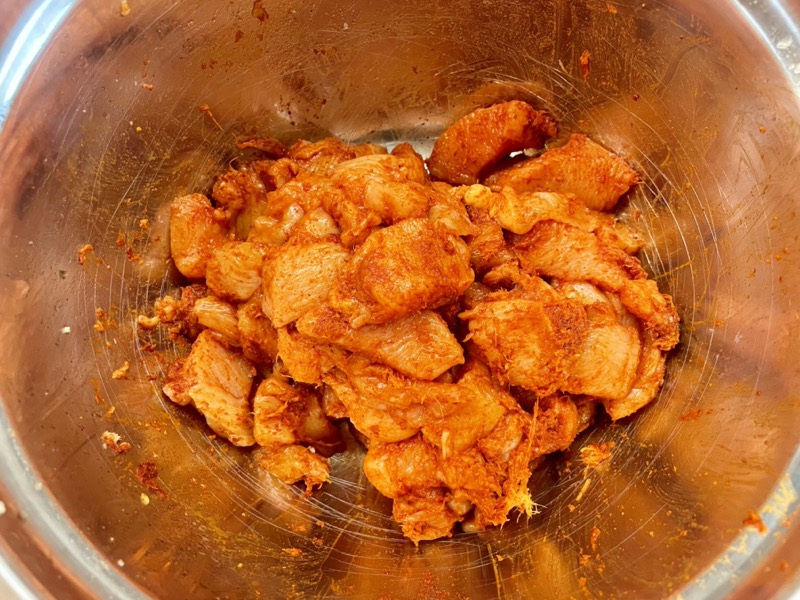
Marinate the chicken: in a mixing bowl, add the ginger paste, garlic, chilli powder, and a pinch of salt. Mix well and set aside at room temperature for 15 minutes.

In a large pan or pot on MED heat, add a drizzle of oil and sear the marinated chicken pieces on both sides for 1-2 minutes. Do not crowd the pan, have the chicken in a single layer. You will have to do this in 2-3 batches depending on the size of your pan/pot. Once finished, remove the chicken and set aside in a bowl.

In the same pan, add another drizzle of oil then add in the diced onion and 2 Tbsps butter. Sauté for 4-5 minutes until the onion is translucent.

Next add in the tomatoes and cashews and mix well. Add in 1 cup of water, garlic, vinegar, sugar, garam masala, chilli powder, and a big pinch of salt. Turn down the heat to LOW-MED and let the sauce simmer for 20 minutes. Mix it around every 5 minutes to ensure nothing sticks to the bottom of the pan.

(While you wait, you can make any sides you wish to serve this with: ie. basmati rice, naan.)
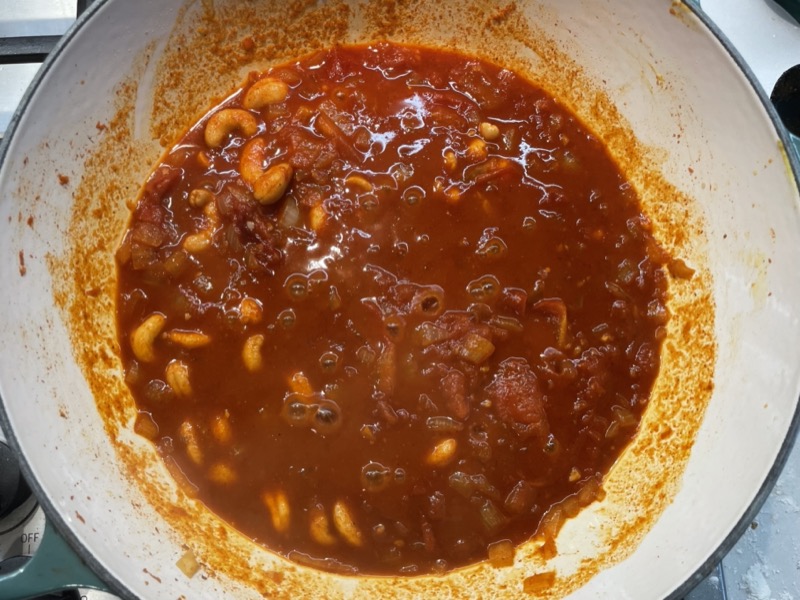
After 20 minutes, turn the heat OFF and use a stick blender or a high speed blender to purée everything in the pot until smooth (a high speed blender will get you smoother results than a stick blender).

Return the blended sauce back into the pan. Turn the heat back on to MED and add in the chicken (from step 2), 1 stick of butter, cashew cream*, and crush the dried fenugreek leaves into the pot. Mix it all around and let it simmer for 5-7 minutes. Taste and adjust salt and sugar as needed. Done! Serve with basmati rice or naan.

*Note: if you don’t have cashew cream, you can simply blend 40 raw cashews (90g) with 2/3 cup water in a high speed blender until smooth.

Summarized Recipe:

F*cking Good Butter Chicken (Chicken/Murgh Makhani)

Date Published: April 16th, 2024 | Last Updated: April 16th, 2024
Author: Abby |Category: Asian, main
Serves: 6 | Prep time: 30 mins | Cook time: 30 mins

Ingredients:

  • Chicken marinade:
    • 600g (3 medium-sized) chicken breasts, skinless, boneless, diced to 2.5cm pieces
    • 1 Tbsp ginger, grated
    • 1 Tbsp garlic, finely minced
    • 2 Tbsps kashmiri chilli powder (or gochugaru/Korean chilli powder)
    • Pinch of salt
  • Sauce:
    • 1 large brown onion, diced
    • 2 Tbsps (30g) + 1 stick (115g / 8 Tbsps) butter
    • 1kg (~5 large) tomatoes, roughly chopped
    • 100g raw unsalted cashews
    • 1 cup water
    • 2 Tbsps garlic, finely minced
    • 3 Tbsps white vinegar
    • 1/4 cup (53g) sugar
    • 1 tsp garam masala
    • 1/4 cup kashmiri chilli powder (or gochugaru/Korean chilli powder)
    • 1 cup cashew cream (or blend 40 raw cashews (90g) with 2/3 cup water)
    • 2 tsps dried fenugreek leaves (kasuri methi)
    • Salt to taste

Directions:

  1. Marinate the chicken: in a mixing bowl, add the ginger paste, garlic, chilli powder, and a pinch of salt. Mix well and set aside at room temperature for 15 minutes.
  2. In a large pan or pot on MED heat, add a drizzle of oil and sear the marinated chicken pieces on both sides for 1-2 minutes. Do not crowd the pan, have the chicken in a single layer. You will have to do this in 2-3 batches depending on the size of your pan/pot. Once finished, remove the chicken and set aside in a bowl.
  3. In the same pan, add another drizzle of oil then add in the diced onion and 2 Tbsps butter. Sauté for 4-5 minutes until the onion is translucent.
  4. Next add in the tomatoes and cashews and mix well. Add in 1 cup of water, garlic, vinegar, sugar, garam masala, chilli powder, and a big pinch of salt. Turn down the heat to LOW-MED and let the sauce simmer for 20 minutes. Mix it around every 5 minutes to ensure nothing sticks to the bottom of the pan.
  5. (While you wait, you can make any sides you wish to serve this with: ie. basmati rice, naan.)
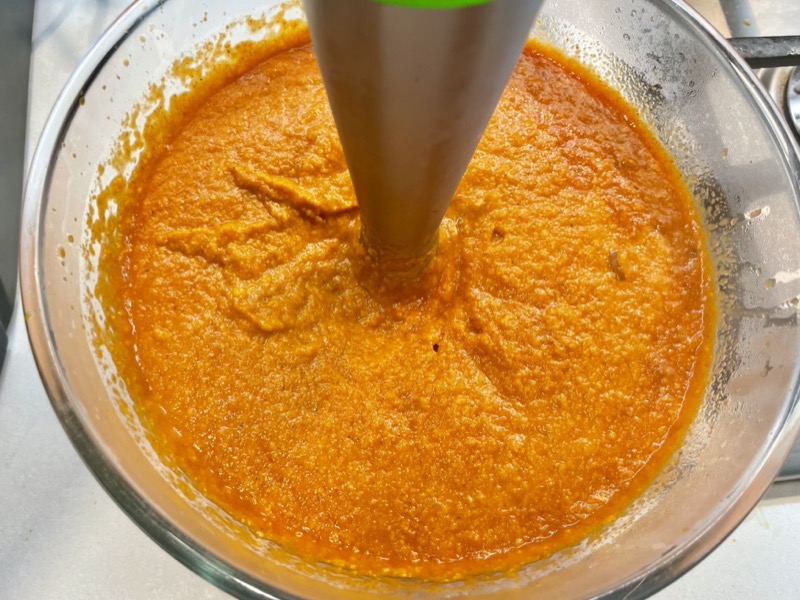
  6. After 20 minutes, turn the heat OFF and use a stick blender to purée everything in the pot until smooth. To get a smoother sauce, you can put everything in a high speed blender instead. Return the blended sauce back into the pan.
  7. Turn the heat back on to MED and add in the chicken (from step 2), 1 stick of butter, cashew cream, and crush the dried fenugreek leaves into the pot. Mix it all around and let it simmer for 5-7 minutes. Taste and adjust salt and sugar as needed. Done! Serve with basmati rice or naan.
Korean Sweet Pickled Radish (“Chicken-mu”)


Date Published: April 16th, 2024 | Last Updated: April 16th, 2024
Author: Abby |Category: Asian, easy, sides, vegetarian, quick, healthy, low cal, vegetarian
Serves: 6 | Prep time: 10 mins | Cook time: marinate for 2 days

Jump to recipe |

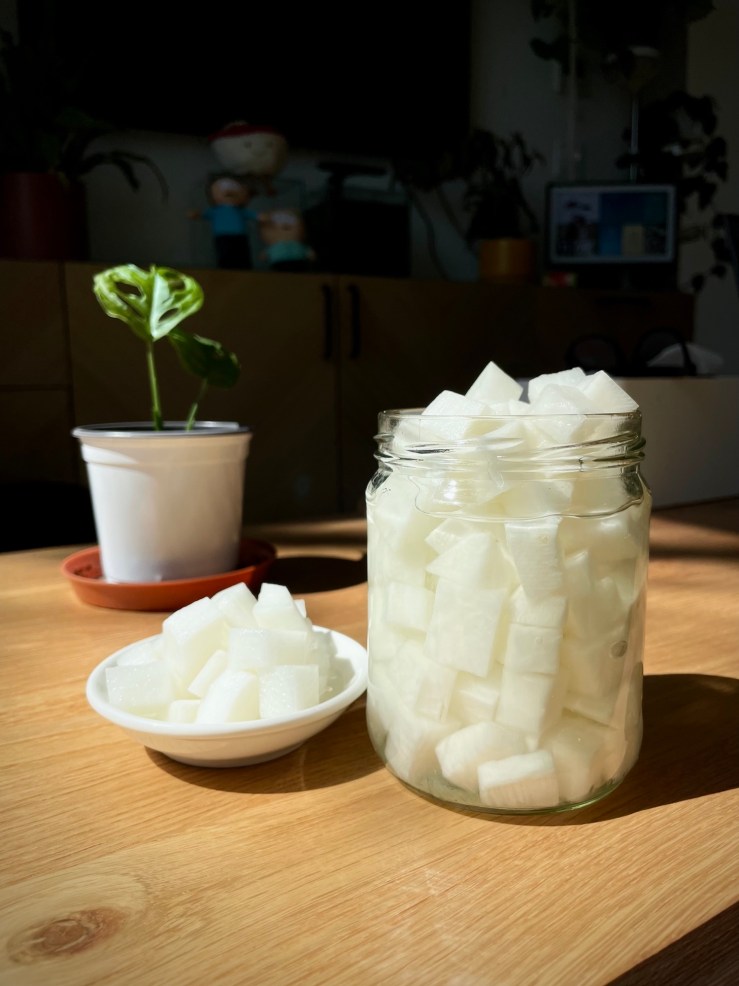
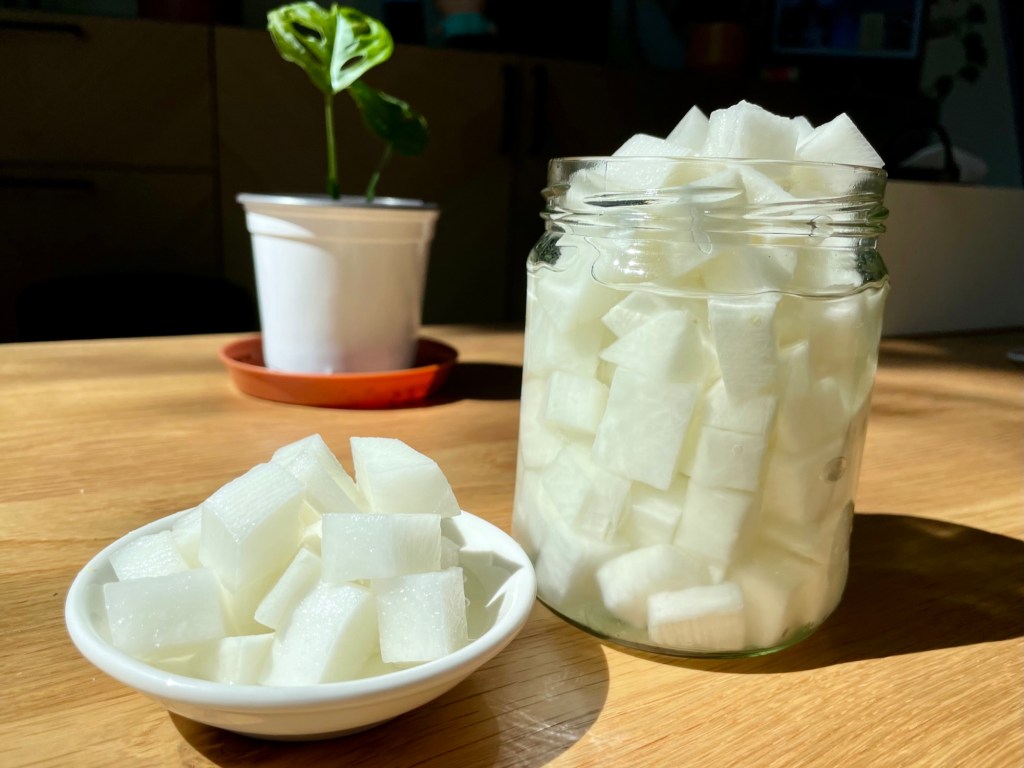
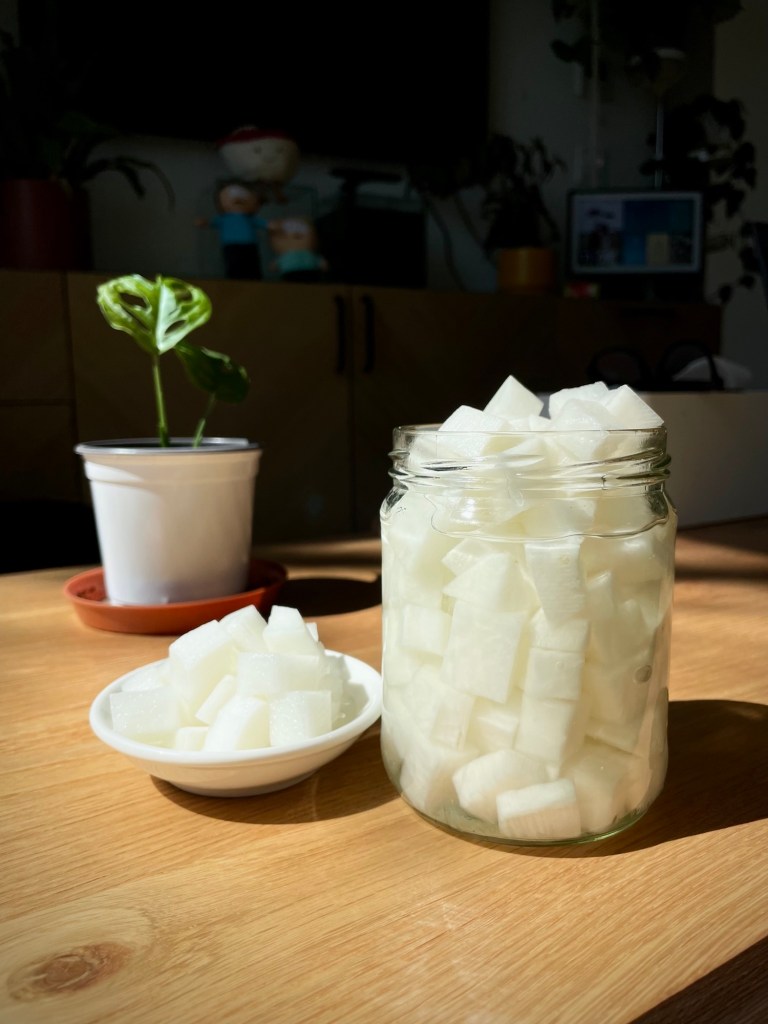
Toby and I are obsessed with Korean Fried Chicken. Whenever we move to a new town, we are always on the lookout for a good Korean fried chicken spot (and also a good ramen spot). Throughout our travels around Australia, our favourite Korean chicken spot still remains to this day, 7 Grams Chicken in Perth, Western Australia. It’s just so damn good and the chicken is always cooked perfectly – there’s no comparison. With every serving of Korean fried chicken, a little bowl of sweet cold pickled radishes always accompanies it. This little bowl of radishes is the perfect accompaniment to cut the grease – it’s not too sour and not too sweet, and the refreshing crunch of the perfect little white cubes makes you forget that you’re gorging on oily fried chicken and that somehow you’re still being healthy by eating your vegetables. We love our pickled radishes so much that we always get extra orders, but now that I’ve learned how to make this, I can stop paying extra for the pickled radishes and make it myself ahead of time!

We’ve never been to Korea, but when I was researching this recipe I found that it is also often called “Chicken-mu”. ‘Mu’ means radish in Korean and this specific pickled radish dish is pretty much only served with fried chicken, which is why they call it ‘Chicken-mu’!

What type of radish?

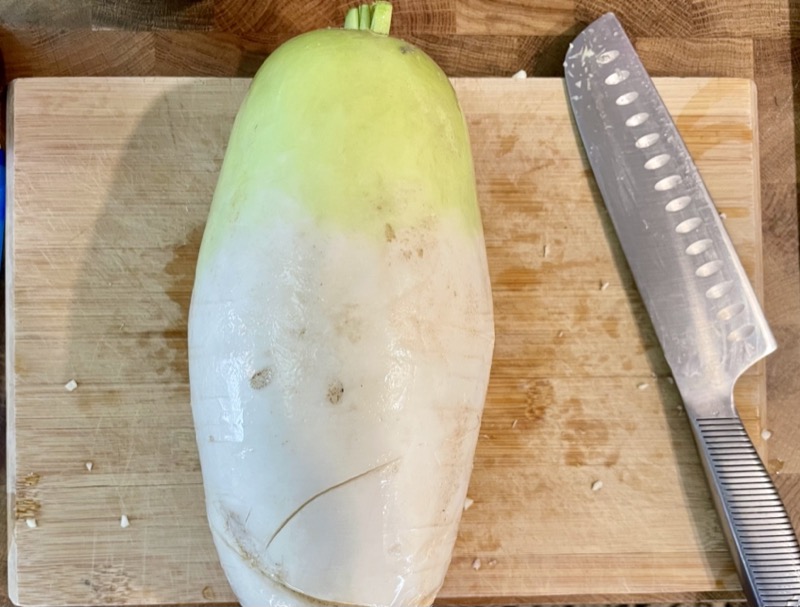
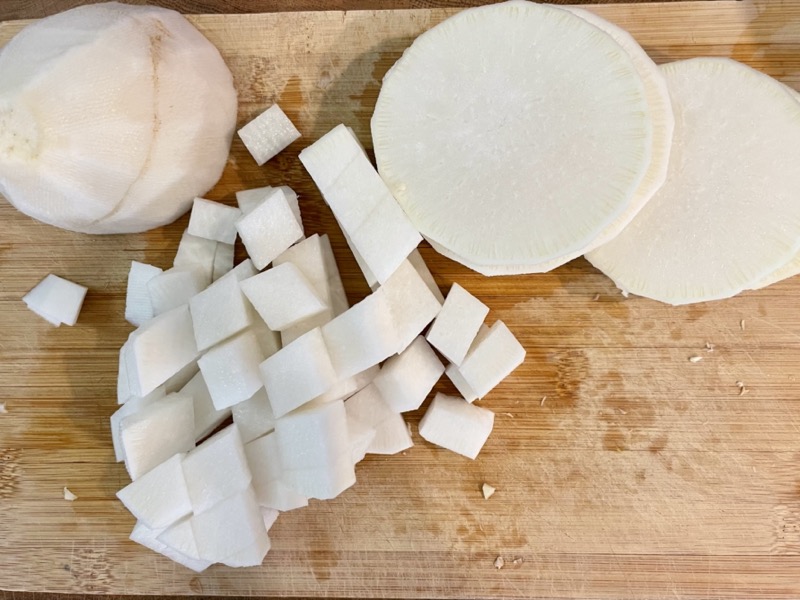
It is no surprise that a Korean radish is used to make this recipe. It is generally smaller and rounder than the common Chinese style daikon radish and has a green colour on the top half. A Korean radish has a little less water content which results in a crunchier texture and holds up well in the pickling liquid. If you can’t find a Korean radish, substitute with daikon instead, but results may differ a little.

Anyways, without further ado, here’s the recipe! If you have any comments or suggestions, I’d love to hear from you in the comment section! You can follow me on instagram, youtube and facebook to see all the recipes I post!

Happy cooking!

Ingredients you’ll need:

  • Pickling liquid:
    • 1/3 cup granulated sugar
    • 1/3 cup white vinegar
    • 1/3 cup water
    • 1 tsp kosher salt
  • 450g (1lb = 1 small) Korean radish, peeled and cut into 1.5 cm cubes

Directions:

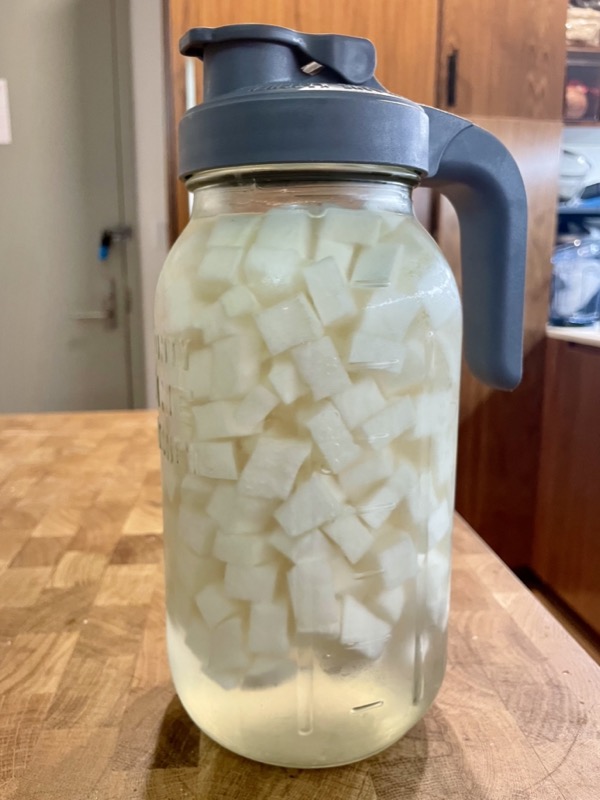
In a large glass container (with a lid), add in the sugar, vinegar, water and salt. Shake the container until the sugar and salt have dissolved.

Rinse the radish and peel it, then chop it into 1.5cm cubes.

Add in the cubed radishes. Ensure all of the radish is submerged into the pickling liquid – if not, double the amount of pickling liquid. Close the lid and let it marinate for at least 24 hours (flavours will be better after 48 hours). Store up to 10 days, flavours will be best if eaten within 4 days.

Summarized Recipe:

Korean Sweet Pickled Radish (“Chicken-mu”)

Date Published: April 16th, 2024 | Last Updated: April 16th, 2024
Author: Abby |Category: Asian, easy, sides, vegetarian, quick, healthy, low cal, vegetarian
Serves: 6 | Prep time: 10 mins | Cook time: marinate for 2 days

Ingredients:

  • Pickling liquid:
    • 1/3 cup granulated sugar
    • 1/3 cup white vinegar
    • 1/3 cup water
    • 1 tsp kosher salt
  • 450g (1lb = 1 small) Korean radish, peeled and cut into 1.5 cm cubes

Directions:

  1. In a large glass container (with a lid), add in the sugar, vinegar, water, and salt. Shake the container until the sugar and salt have dissolved.
  2. Add in the cubed radishes. Ensure all of the radish is submerged into the pickling liquid – if not, double the amount of pickling liquid. Close the lid and let it marinate for at least 24 hours (flavours will be better after 48 hours). Store up to 10 days, flavours will be best if eaten within 4 days.

Taiwanese Pickled Garlic Smashed Cucumber


Date Published: April 16th, 2024 | Last Updated: April 16th, 2024
Author: Abby |Category: asian, quick, easy, Taiwanese, vegetarian, sides, healthy, low cal
Serves: 1 large jar, about 6 portions as sides | Prep time: 1 hour | Cook time: marinate for 4 hours

Jump to recipe

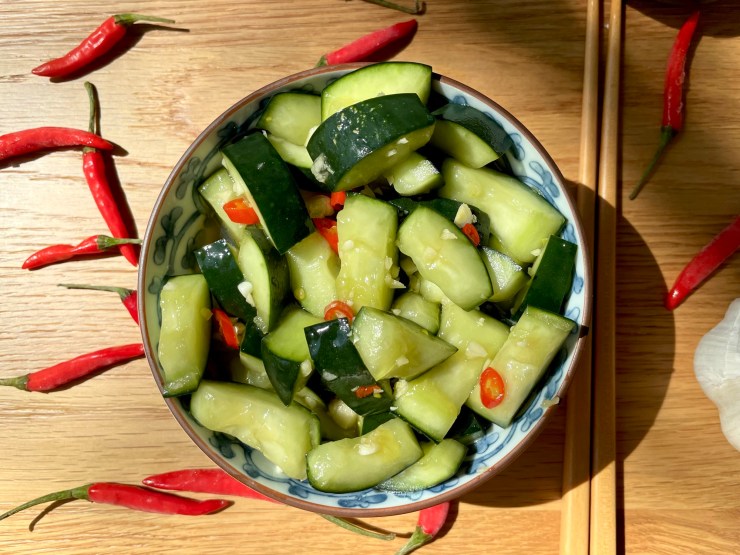
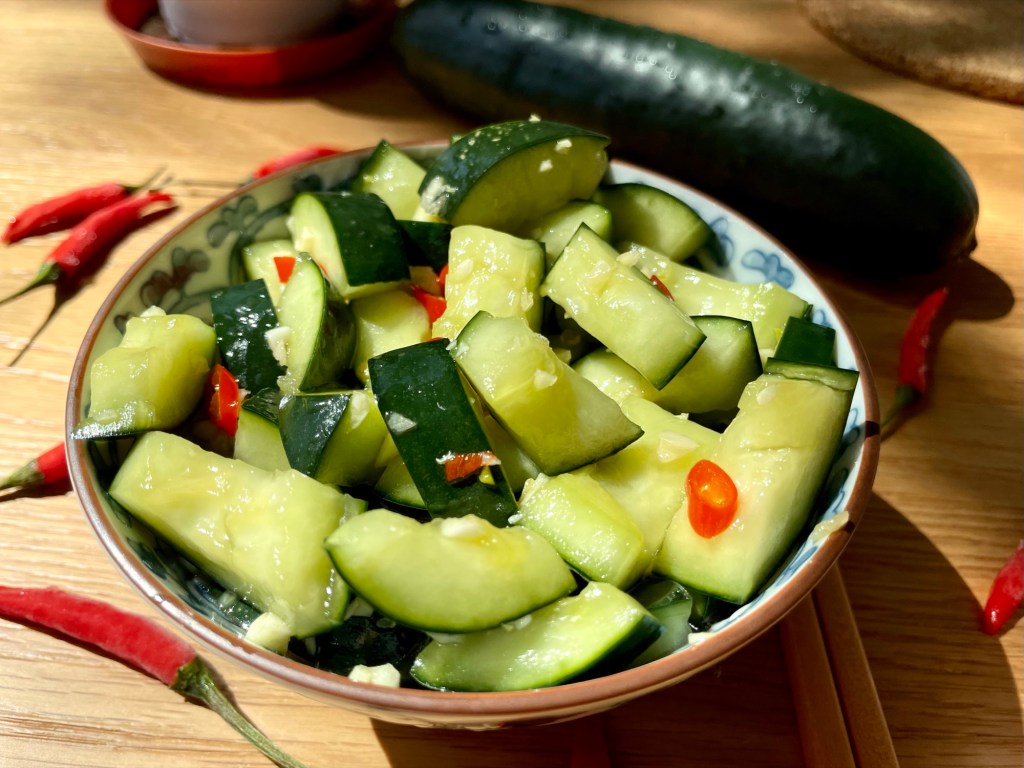
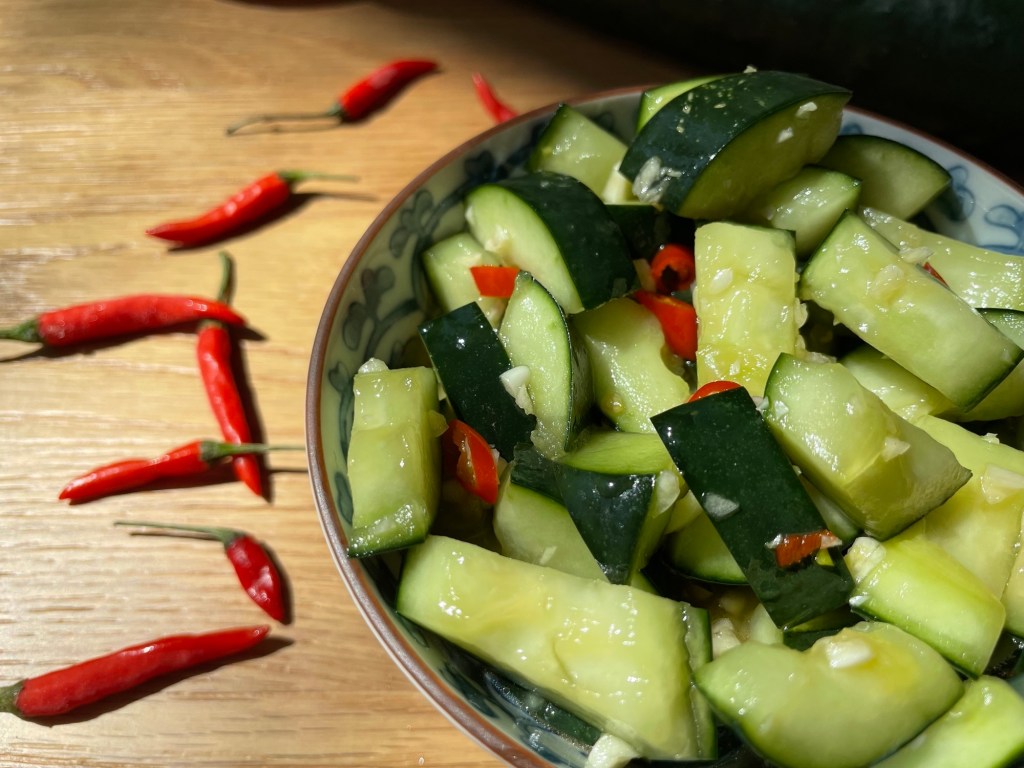
Pickled smashed cucumber is a common side dish in Taiwan that pairs well with almost anything. You can find it in pre-packed lunch boxes or in self-serve portions in small restaurants in the market. It cuts the grease and cleanses your palate. This mildly spicy and very garlicky version is super easy and you can make it in 5 minutes (after soaking the cucumbers in salt for 1 hour 🤫). You can serve it immediately, but it’s best served after marinating for at least 4 hours or overnight.

Anyways, without further ado, here’s the recipe! If you have any comments or suggestions, I’d love to hear from you in the comment section! You can follow me on instagram, youtube and facebook to see all the recipes I post!

Happy cooking!

Ingredients you’ll need:

  • 2 large (450g/1lb) cucumbers
  • 1 tsp kosher salt
  • Pickling liquid:
    • 2 garlic cloves, minced
    • 2 bird’s eye chilli, thinly sliced
    • 1 Tbsp soy sauce
    • 1 tsp sesame oil
    • 1/4 cup white sugar
    • 1/4 cup rice vinegar

Directions:

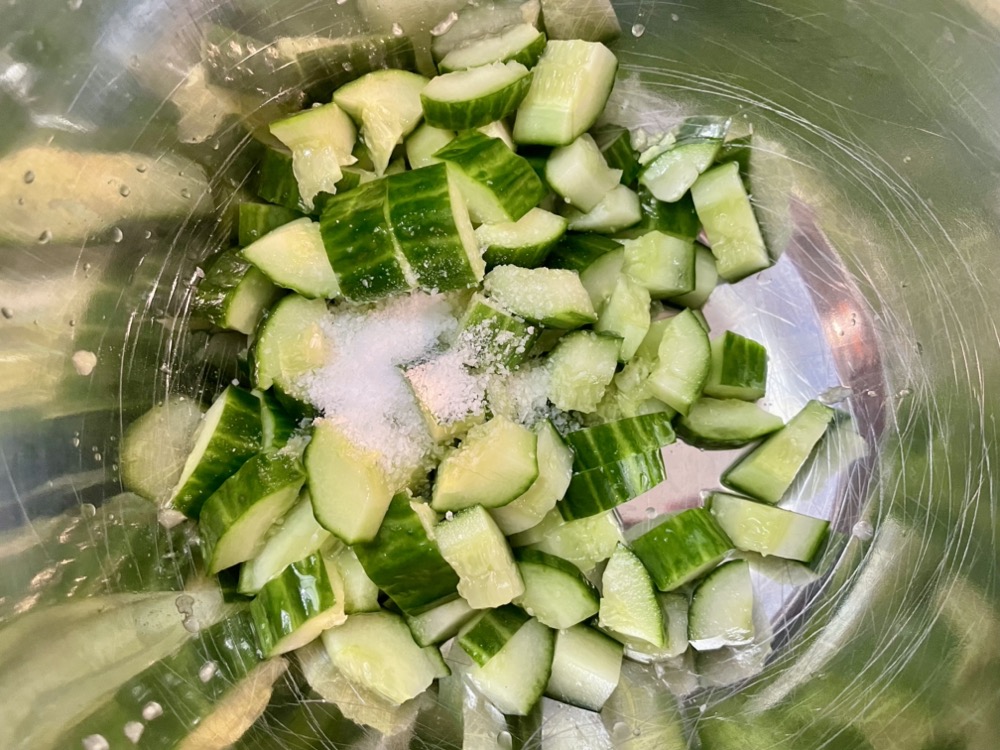
Cut the cucumbers in half lengthwise and again crosswise. Use a large knife on its flat side to smash the cucumber until cracked then slice into bite sized pieces (see photo).

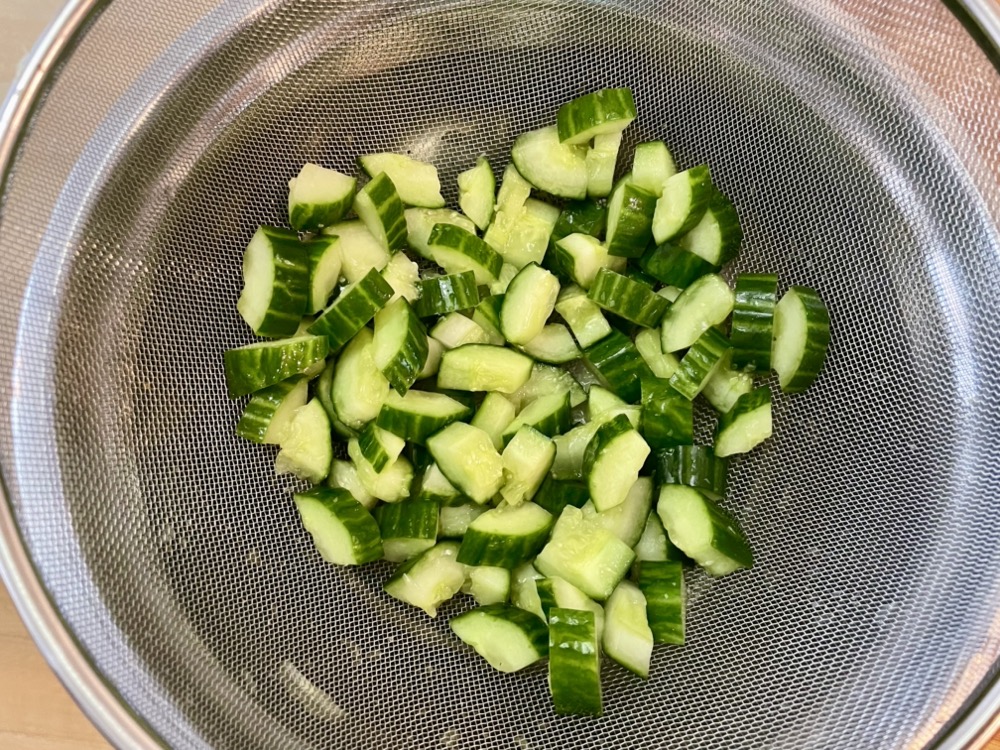
Place the smashed cucumber in a strainer over a bowl and mix in 1 tsp of salt. Let the cucumber sit for 1 hour at room temperature to allow excess water to be released. After 1 hour, discard the released cucumber water and rinse the salt off the cucumber. Set aside in a colander.

In a large glass jar (with a lid), add in the pickling liquid ingredients: garlic, chilli, soy sauce, sesame oil, sugar, and rice vinegar. Put on the lid and shake until the sugar has dissolved. Add in the smashed cucumbers (from step 1), ensuring all the cucumber is submerged in the pickling liquid. Close the lid and let it marinate for at least 4 hours in the fridge or overnight. Done! Keeps in the fridge for up to 1 week, best eaten within 3 days.

Summarized Recipe:

Taiwanese Pickled Garlic Smashed Cucumber

Date Published: April 16th, 2024 | Last Updated: April 16th, 2024
Author: Abby |Category: asian, quick, easy, Taiwanese, vegetarian, sides, healthy, low cal
Serves: 1 large jar, about 6 portions as sides | Prep time: 1 hour | Cook time: marinate for 4 hours

Ingredients:

  • 2 large (450g/1lb) cucumbers
  • 1 tsp kosher salt
  • Pickling liquid:
    • 2 garlic cloves, minced
    • 2 bird’s eye chilli, thinly sliced
    • 1 Tbsp soy sauce
    • 1 tsp sesame oil
    • 1/4 cup white sugar
    • 1/4 cup rice vinegar

Directions:

  1. Cut the cucumbers in half lengthwise and again crosswise. Use a large knife on its flat side to smash the cucumber until cracked then slice into bite sized pieces (see photo). Place the smashed cucumber in a strainer over a bowl and mix in 1 tsp of salt. Let the cucumber sit for 1 hour at room temperature to allow excess water to be released. After 1 hour, discard the released cucumber water and rinse the salt off the cucumber. Set aside in a colander.
  2. In a large glass jar (with a lid), add in the pickling liquid ingredients: garlic, chilli, soy sauce, sesame oil, sugar, and rice vinegar. Put on the lid and shake until the sugar has dissolved. Add in the smashed cucumbers (from step 1), ensuring all the cucumber is submerged in the pickling liquid. Close the lid and let it marinate for at least 4 hours in the fridge or overnight. Done! Keeps in the fridge for at least 2-3 days.

Haluski – a yummy buttery cabbage & noodle dish


Date Published: April 16th, 2024 | Last Updated: April 16th, 2024
Author: Abby |Category: mains, easy, Czech, <30 mins
Serves: 4-6 | Prep time: 20 mins | Cook time: 30 mins

Jump to recipe |

I’ll be honest, I had never heard of Haluski before until one day I was googling recipes for inspiration on how to use up my week old leftover cabbage in the fridge, so there’s no heart felt nostalgia or travel memory associated with this dish to fill up this post. I simply saw it, tested a few recipes, and decided on this version that I’m sharing today because it’s tasty.

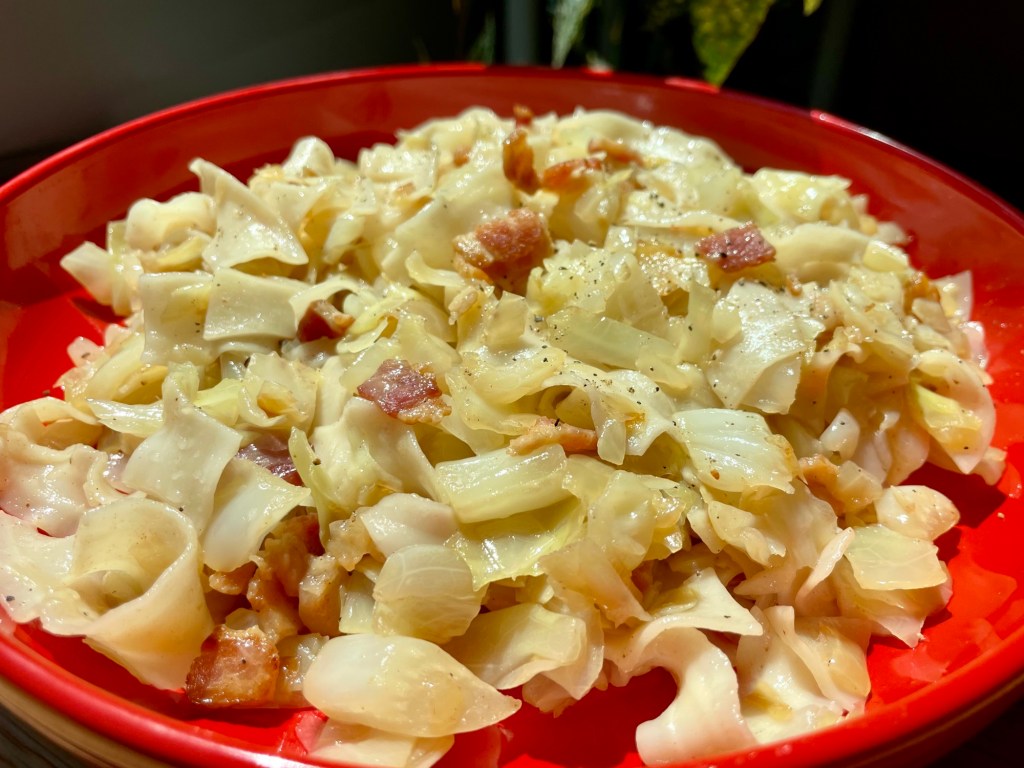
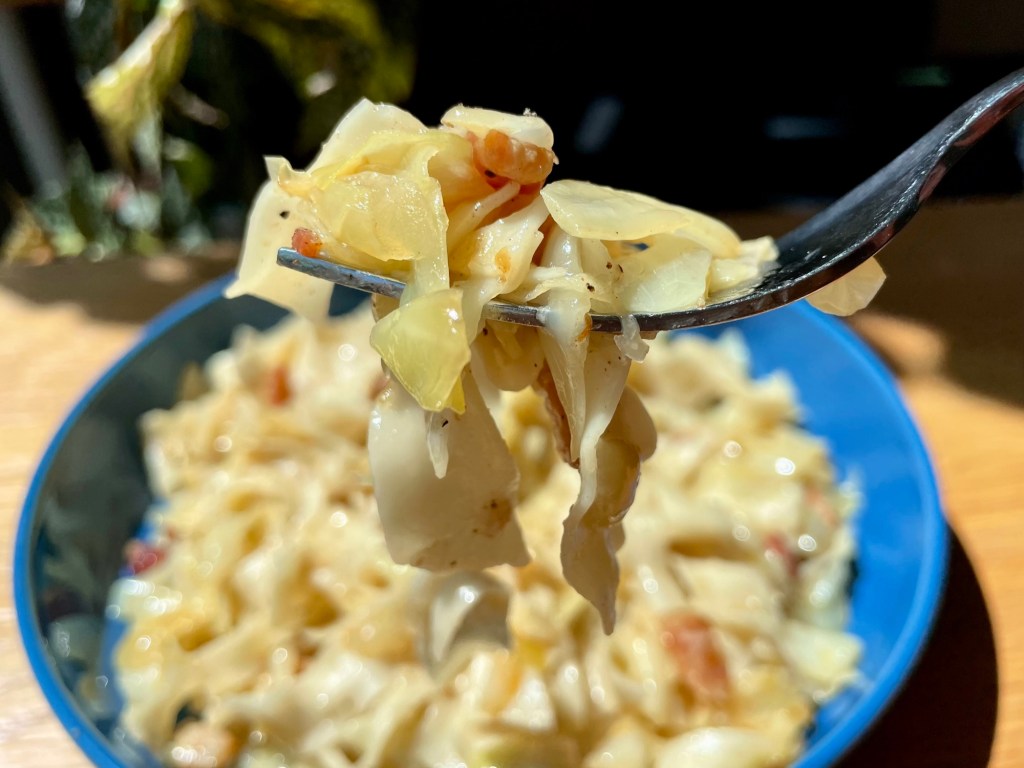
From my Google research, Haluski is a central/eastern European dish with arguable origins of either Poland, Solvakia, Hungary, or Ukraine – Toby thinks there’s even a Czech version too. It’s essentially bacon, onions, and cabbage cooked in butter and bacon fat, then mixed with fresh cooked egg noodles. It’s quick and easy, a little oily (from the butter and bacon fat), and definitely delicious. Give it a try!

Anyways, without further ado, here’s the recipe! If you have any comments or suggestions, I’d love to hear from you in the comment section! You can follow me on instagram, youtube and facebook to see all the recipes I post!

Happy cooking!

Ingredients you’ll need:

  • 3 Tbsps butter
  • 400g (~6 strips) of thick cut bacon, chopped
  • 1 large yellow onion, diced
  • 2 cloves garlic, minced
  • 1 med cabbage (~1kg), cored and diced
  • 4 portions (~10oz) of egg noodles – or alternatively nokedli
  • Fresh ground black pepper to taste
  • Kosher salt to taste

Directions:

In a large skillet on MED-HIGH heat, melt the butter until it starts to lightly brown – you’ll smell the aroma of brown butter.

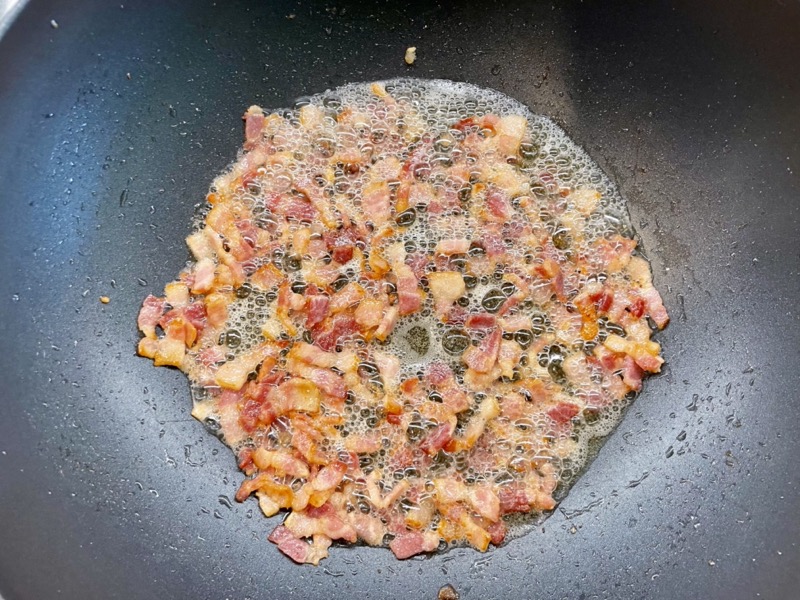
Then add in the bacon and sauté until browned and lightly crispy.

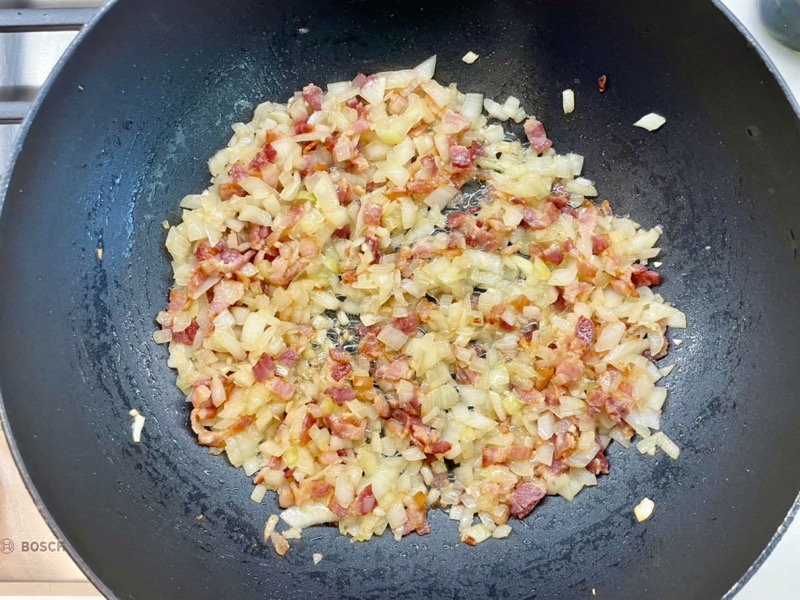
Next, add the garlic and onions. Continue to cook for another 3-4 minutes until the onion is translucent and lightly browned.

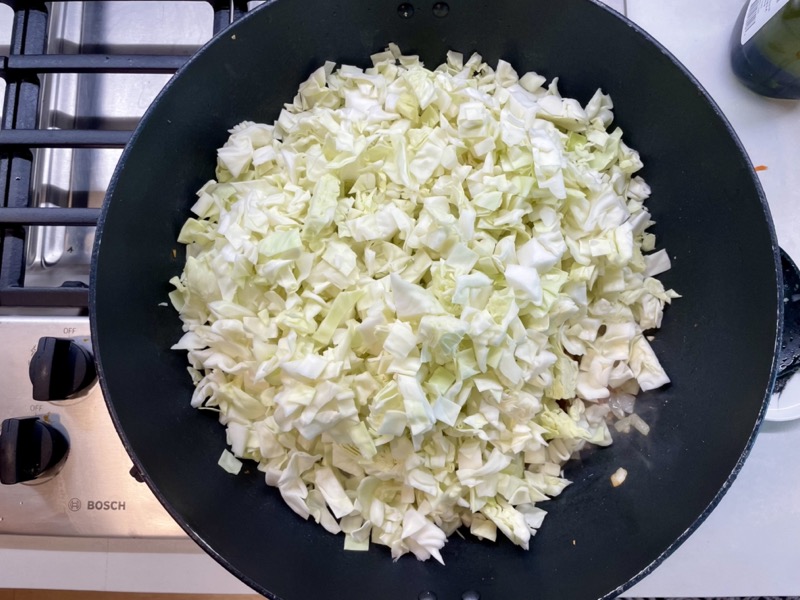
Next, add in the diced cabbage and sauté for 8-10 minutes until the cabbage has softened and lightly browned.

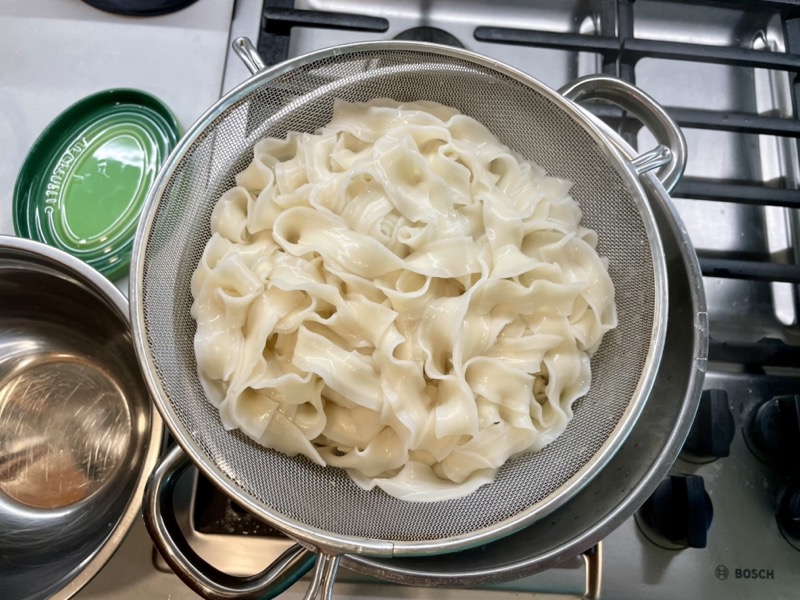
While the cabbage is cooking, cook the egg noodles in salted water according to package instructions. When cooked, drain and set aside.

Once the cabbage has cooked, add in the cooked egg noodles, freshly ground black pepper, and a big pinch of salt. Mix it around and taste to adjust salt as needed. Done!

Summarized Recipe:

Haluski – a yummy buttery cabbage & noodle dish

Date Published: April 16th, 2024 | Last Updated: April 16th, 2024
Author: Abby |Category: mains, easy, Czech, <30 mins
Serves: 4-6 | Prep time: 20 mins | Cook time: 30 mins

Ingredients:

  • 3 Tbsps butter
  • 400g (~6 strips) of thick cut bacon, chopped
  • 1 large yellow onion, diced
  • 2 cloves garlic, minced
  • 1 med cabbage (~1kg), cored and diced
  • 4 portions (~10oz) of egg noodles – or alternatively nokedli
  • Fresh ground black pepper to taste
  • Kosher salt to taste

Directions:

  1. In a large skillet on MED-HIGH heat, melt the butter until it starts to lightly brown – you’ll smell the aroma of brown butter, then add in the bacon. Sauté the bacon until browned and lightly crispy.
  2. Next, add the garlic and onions. Continue to cook for another 3-4 minutes until the onion is translucent and lightly browned.
  3. Next, add in the diced cabbage and sauté for 8-10 minutes until the cabbage has softened and lightly browned.
  4. While the cabbage is cooking, cook the egg noodles in salted water according to package instructions. When cooked, drain and set aside.
  5. Once the cabbage has cooked, add in the cooked egg noodles, freshly ground black pepper, and a big pinch of salt. Mix it around and taste to adjust salt as needed. Done!

Garlic Soy Sauce Paste/Dressing


Date Published: April 16th, 2024 | Last Updated: April 16th, 2024
Author: Abby |Category: easy, Asian, quick, Taiwanese, <15 mins, sauces
Serves: 1.5 cups of sauce | Prep time: 5 mins | Cook time: 5 mins

Jump to recipe

Soy sauce paste is one of the most popular sauces you’ll find in Taiwanese street food, often drizzled over a wide variety of dishes including fried fish cake tempura, century egg with silken tofu, dan bing, sautéed vegetables…the list goes on! It’s so versatile, yet so difficult to find outside of Taiwan.

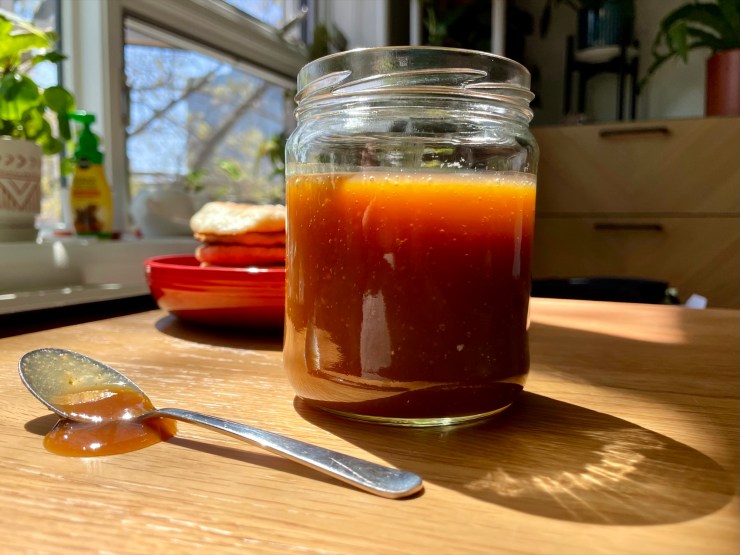
Soy sauce paste is more than just thickened soy sauce – it’s lightly sweetened but still maintains the umami profile. It’s a little similar to oyster sauce – in fact, some people use it interchangeably with vegetarian/mushroom oyster sauce if soy sauce paste is not readily available.

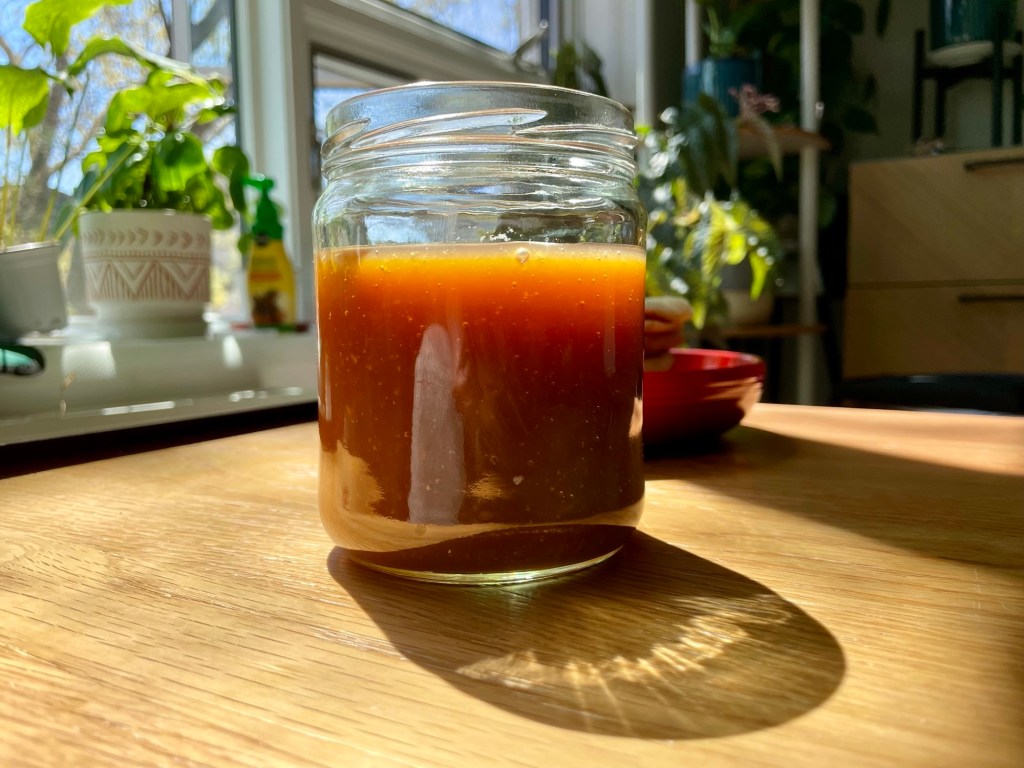
This recipe is a garlic version of the classic soy sauce paste which in my opinion makes it even better! It’s quick and easy, and the sauce will keep in the fridge for up to a week – just give it a shake each time you’re about to use it!

Anyways, without further ado, here’s the recipe! If you have any comments or suggestions, I’d love to hear from you in the comment section! You can follow me on instagram, youtube and facebook to see all the recipes I post!

Happy cooking!

Ingredients you’ll need:

  • Garlic puree:
    • 4 cloves (25g) garlic, peeled with fibrous ends cut off
    • 1/2 cup (120ml) water
  • Soy sauce paste:
    • 1/4 cup (60ml) soy sauce (ie. kikkoman)
    • 1/4 cup (60ml water)
    • 2 Tbsps (25g) granulated sugar
    • 1.5 Tbsps cornstarch
    • 2 Tbsps water
  • 2 Tbsps (25g) granulated sugar

Directions:

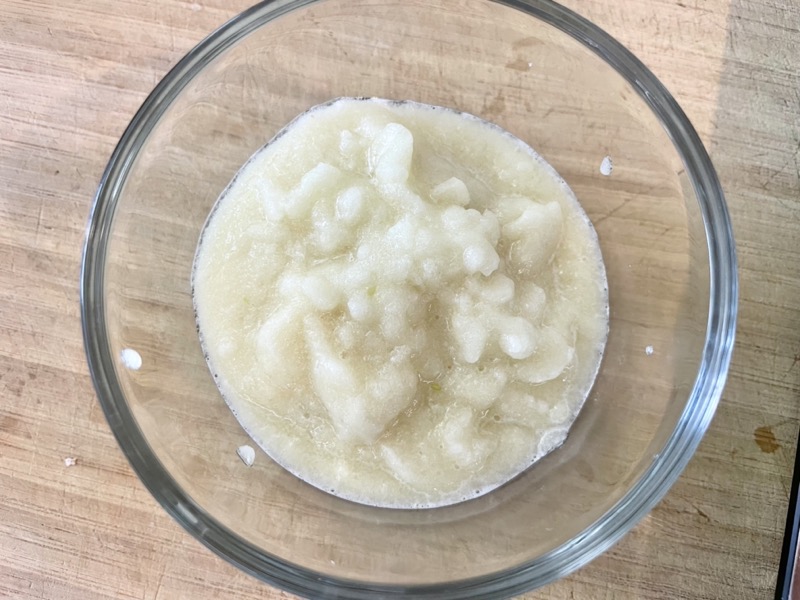
Make the garlic purée: Add the garlic with 1/2 cup of water into a high speed blender. Blend until you get a smooth paste. Set aside.

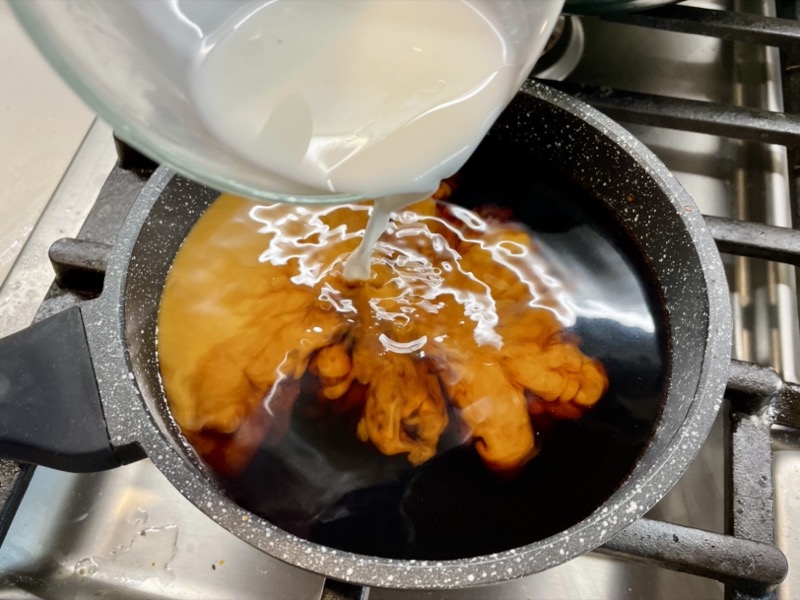
Make the soy sauce paste: In a small saucepan on MED heat, add in the soy sauce, 1/4 cup water, and sugar. Stir until the sugar has dissolved. Let the sauce come to a light simmer. While you’re waiting, in a separate bowl, mix together the cornstarch and 2 Tbsps of water. When the sauce has come to a simmer, add in the cornstarch/water mixture and continuously whisk for about 1 minute or until the mixture comes to a gloopy paste. Turn off the heat and set aside to let cool.

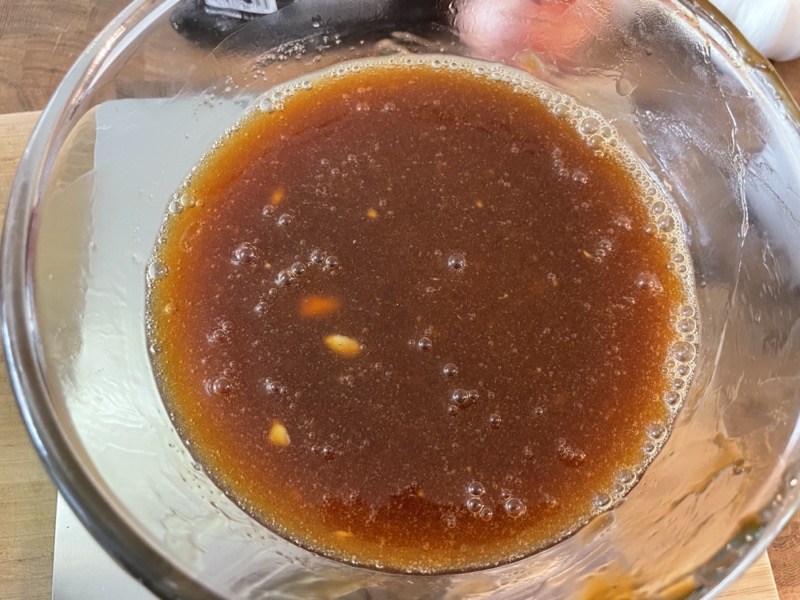
Once the soy sauce paste has slightly cooled, add in the garlic purée (from step 1) and 2 Tbsps of sugar. Mix it all together and taste to adjust salt or sugar. Done! Keeps well in the fridge for up to 1 week.

Summarized Recipe:

Garlic Soy Sauce Paste/Dressing

Date Published: April 16th, 2024 | Last Updated: April 16th, 2024
Author: Abby |Category: easy, Asian, quick, Taiwanese, <15 mins, sauces
Serves: 1.5 cups of sauce | Prep time: 5 mins | Cook time: 5 mins

Ingredients:

  • Garlic puree:
    • 4 cloves (25g) garlic, peeled with fibrous ends cut off
    • 1/2 cup (120ml) water
  • Soy sauce paste:
    • 1/4 cup (60ml) soy sauce (ie. kikkoman)
    • 1/4 cup (60ml water)
    • 2 Tbsps (25g) granulated sugar
    • 1.5 Tbsps cornstarch
    • 2 Tbsps water
  • 2 Tbsps (25g) granulated sugar

Directions:

  1. Make the garlic purée: Add the garlic with 1/2 cup of water into a high speed blender. Blend until you get a smooth paste. Set aside.
  2. Make the soy sauce paste: In a small saucepan on MED heat, add in the soy sauce, 1/4 cup water, and sugar. Stir until the sugar has dissolved. Let the sauce come to a light simmer. While you’re waiting, in a separate bowl, mix together the cornstarch and 2 Tbsps of water. When the sauce has come to a simmer, add in the cornstarch/water mixture and continuously whisk for about 1 minute or until the mixture comes to a gloopy paste. Turn off the heat and set aside to let cool.
  3. Once the soy sauce paste has slightly cooled, add in the garlic purée (from step 1) and 2 Tbsps of sugar. Mix it all together and taste to adjust salt or sugar. Done! Keeps well in the fridge for up to 1 week.