Date Published: Mar 27th, 2024 | Last Updated: Mar 27th, 2024
Author: Abby |Category: mains, vegetarian
Serves: 4 | Prep time: 24 hours before | Cook time: 1 hour
Jump to recipe |

In August of last year Toby and I went to LA for the first time to attend my friend Mehdi’s wedding. We stayed at a nice hotel called Short Stories and they happened to be hosting a pop-up restaurant called Netflix Bites! It was a restaurant that served dishes from celebrity chefs that appeared on a Netflix series. There were quite a few exciting dishes to choose from so naturally we over-ordered and had 3 main dishes between the two of us. My favourite of the night was a roasted cabbage dish by Dominique Crenn. I had never had cabbage like this before and the flavours were so unique! I was instantly obsessed and knew I had to recreate it somehow. Lucky for me, it’s one of the dishes on her Masterclass – yes, I subscribed to Masterclass just to cook this dish. It was worth it. 🙂
Strap in, this is a lengthy recipe. There are 5 components and it takes some time to put them all together but each step on its own is actually quite simple and you can make most of these components ahead of time and keep it in the fridge if you don’t want to jumble 5 different things at once in the kitchen.
Although there are a lot of components, each one has a purpose:

- Homemade Sauerkraut – this adds extra tartness and a bit of crunch. You have to make this 2 weeks ahead. Dominique Crenn teaches us to appreciate the humble cabbage by making our own sauerkraut. It’s surprisingly easy and you only need 2 ingredients!
- Here’s a great website if you want to learn about the fermentation process and lacto-fermentation: https://urbanfarmandkitchen.com/how-to-make-sauerkraut-lacto-fermented-cabbage/
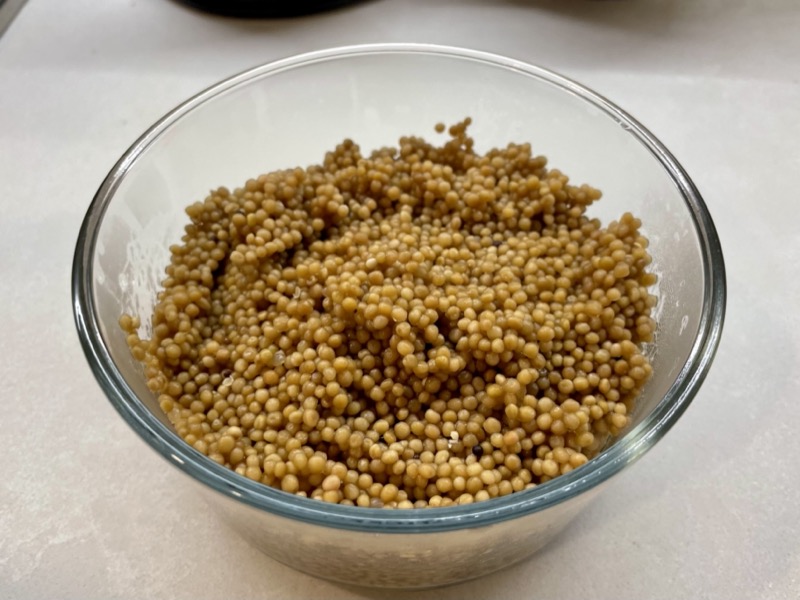
- Pickled Mustard Seeds – these add a little pop (kind of like caviar or roe on sushi) and sweetness to balance out the texture and flavours of the dish. It takes a minimum of 2 hours to marinate but it tastes better if left overnight so definitely make this ahead of time.
- Parsley Oil – this is pretty easy to make and results in a beautiful deep green oil, super concentrated in parsley flavour. You will need a powerful blender like a Vitamix to break down the parsley fine enough. You can either make this the day-of or up to a week early.
- Crème Fraîche Sauce – this is the creamy tart sauce that makes the base of the dish. The parsley oil will be mixed through this to complete the flavours. You can either make this the day-of or up to a week early.
- Roasted Cabbage – the cabbage is first seared with thyme and garlic to bring out extra flavour, then finished off in the oven to cook through.
Anyways, without further ado, here’s the recipe! If you have any comments or suggestions, I’d love to hear from you in the comment section! You can follow me on instagram, youtube and facebook to see all the recipes I post!
Happy cooking!
Ingredients & Tools you’ll need:
- Sauerkraut:
- A small or medium savoy cabbage (depending on how much you want to make)
- Kosher salt
- Tools: a kitchen scale and maybe gloves, fermenting container with weights or glass jar with a lid and something heavy in a ziploc bag.
- A knob of butter (~30g) – used later on for heating up the finished sauerkraut before serving
- Pickled Mustard Seeds:
- 1/2 cup (100g) yellow mustard seeds
- 2 Tbsps (30g) rice vinegar
- 2 Tbsps (30g) sherry vinegar
- 1.25 Tbsps (20g) granulated sugar
- 1/2 tsp (3g) kosher salt
- Parsley Oil:
- 50g flat leaf parsley leaves
- 100g grapeseed oil
- Tools: a powerful blender
- Crème Fraîche Sauce:
- 2 Tbsps sauerkraut liquid
- 500g crème fraîche
- 2 Tbsps (30g) Sherry vinegar
- 1/2 Tbsp fresh lemon juice
- Salt & pepper to taste
- Roasted Cabbage:
- 1 large cabbage, cleaned
- Grapeseed oil for searing (or any other neutral flavoured oil tolerant to high heat)
- 2 + 2 cloves of garlic, peeled
- 4 + 4 sprigs of fresh thyme
Directions:
A. Optional: Homemade Sauerkraut (Make at least 2 weeks ahead, it will keep in the fridge for up to 3 months):
This step is optional. You can use store-bought sauerkraut as well for the recipe, the flavours will be similar.
- Ingredients & Tools you’ll need:
- A small or medium savoy cabbage (depending on how much you want to make)
- Kosher salt
- Tools: a kitchen scale and maybe gloves, fermenting container with weights or glass jar with a lid and something heavy in a ziploc bag.

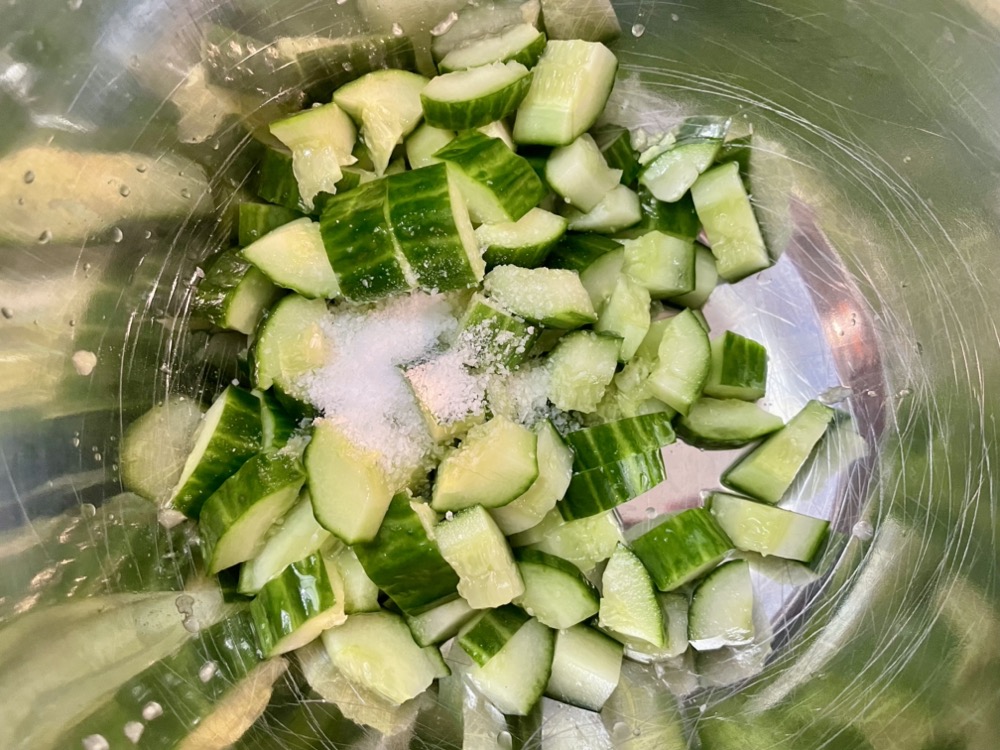
Cut: Peel away any wilted, dirty outer leaves of the cabbage. Cut the cabbage in half and cut out the core. Chop the rest of the cabbage thinly.
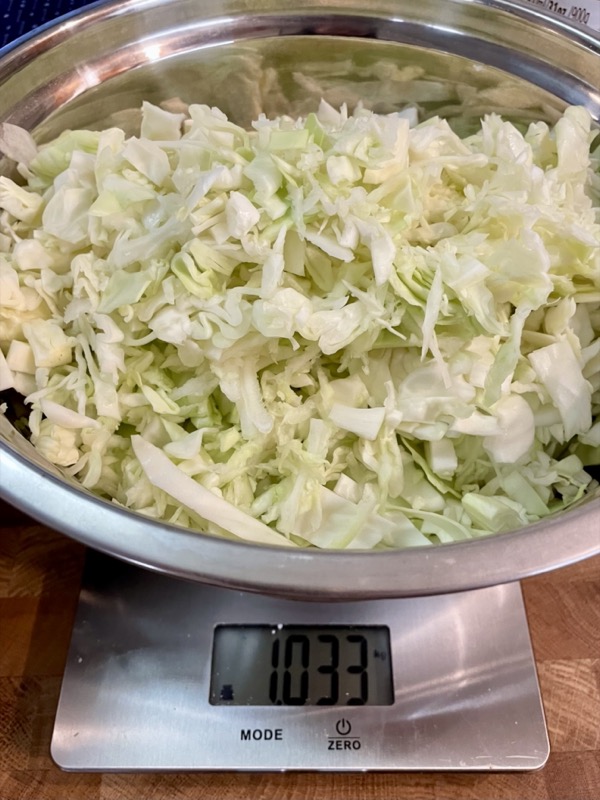
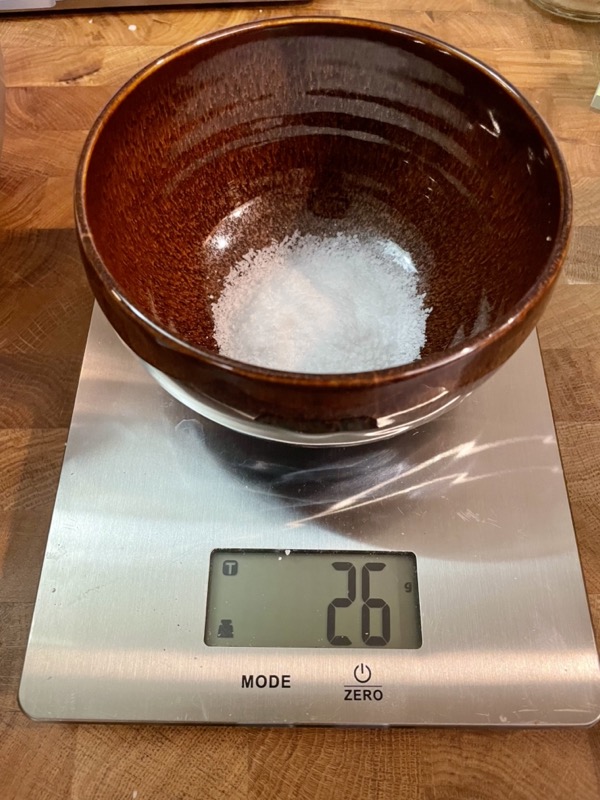
Weigh & Salt: Weigh the amount of sliced cabbage you have on a kitchen scale. Calculate 2.5% of the weight of your cabbage and that will be the amount of salt you will add to the cabbage.
Example: my sliced cabbage weighed 1033g (or 1.033kg) x 0.025 = 25.8g. I rounded up and used 26g of salt.

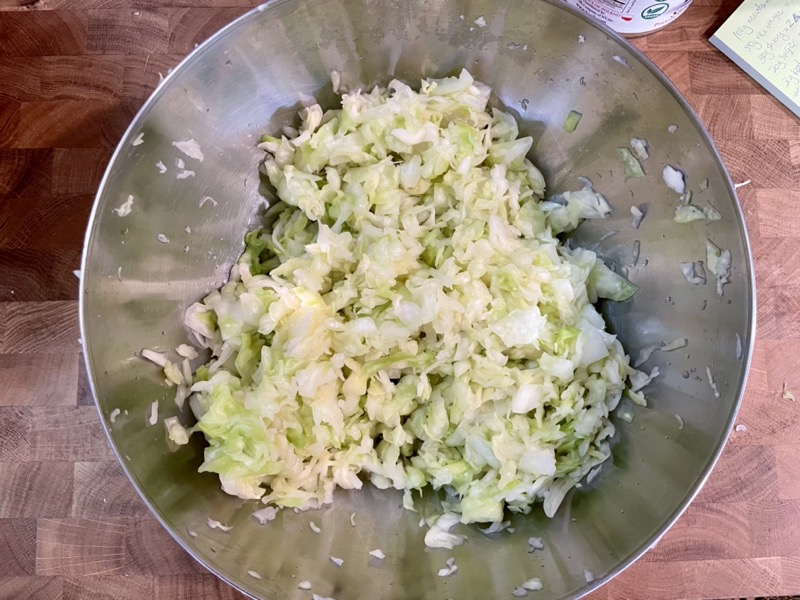
Massage: Make sure your hands are thoroughly washed and cleaned (you can wear disposable kitchen gloves if you’ve got some) – we don’t want to introduce contaminants into our cabbage. Once you’ve added in your salt, massage the cabbage with your hands to mix the salt through, lightly crushing the cabbage as you massage. Do this for about 5-10 minutes until you get a slightly softened and wet cabbage mix.


Pack and Compress: Transfer your sauerkraut to a clean fermenting vessel or glass jar. Use the back of a ladle and compress down the sauerkraut to allow the juices to come up and surround the cabbage. Add a weight* to the top and close the lid. If your container is not light-proof, put your jar in a dark cool place.
*You can get special glass weights for fermenting purposes, but if you don’t have any on hand you can just fill a clean ziploc bag with water, salt, sugar – or anything that will add weight, seal it tight and use it as a weight.
Check on it regularly: If you’re not using a fermenting vessel and if your lid is air-tight, you will need to check on it at least once a day to quickly release any built up gasses. Do not leave the lid off too long to introduce excess air. If you have a special fermenting vessel then you don’t need to do this because the lid will allow the gasses to escape on its own. However, you do need to check on it at least once every 3-4 days to see if any mold has developed or there is any odd discolouration patches. If so, you will need to start over and ensure all your instruments are clean.


2 week final check: After 2 weeks, the sauerkraut should be ready! Do a final inspection for any mold or weird dark patches. The sauerkraut should be a uniform colour and a pale yellow/brown colour (like regular sauerkraut). Give it a taste! This will keep in the fridge for up to 3 months.
B. Pickled Mustard Seeds (Make the day before – this step takes some time and patience and needs to marinate at least 2 hours, so make it early – it will keep in the fridge for 1 month):
- Ingredients you’ll need:
- 1/2 cup (100g) yellow mustard seeds
- 2 Tbsps (30g) rice vinegar
- 2 Tbsps (30g) sherry vinegar
- 1.25 Tbsps (20g) granulated sugar
- 1/2 tsp (3g) kosher salt


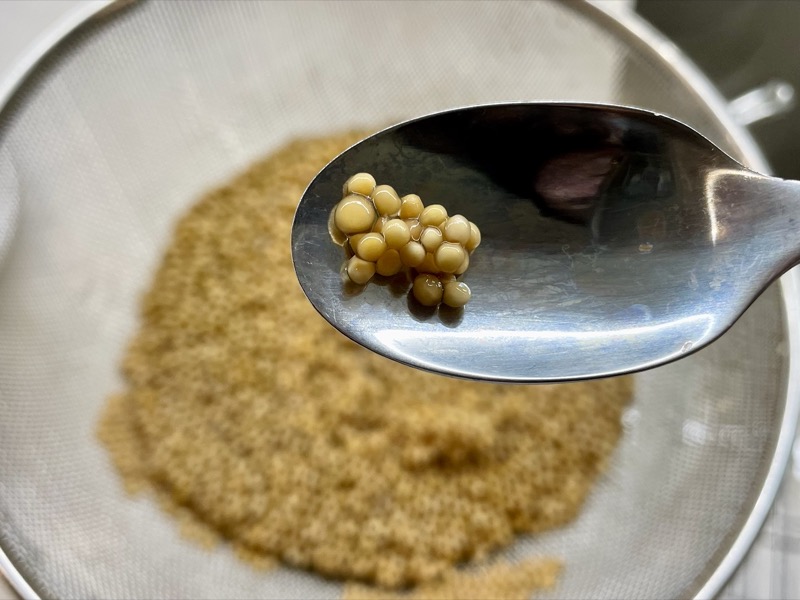
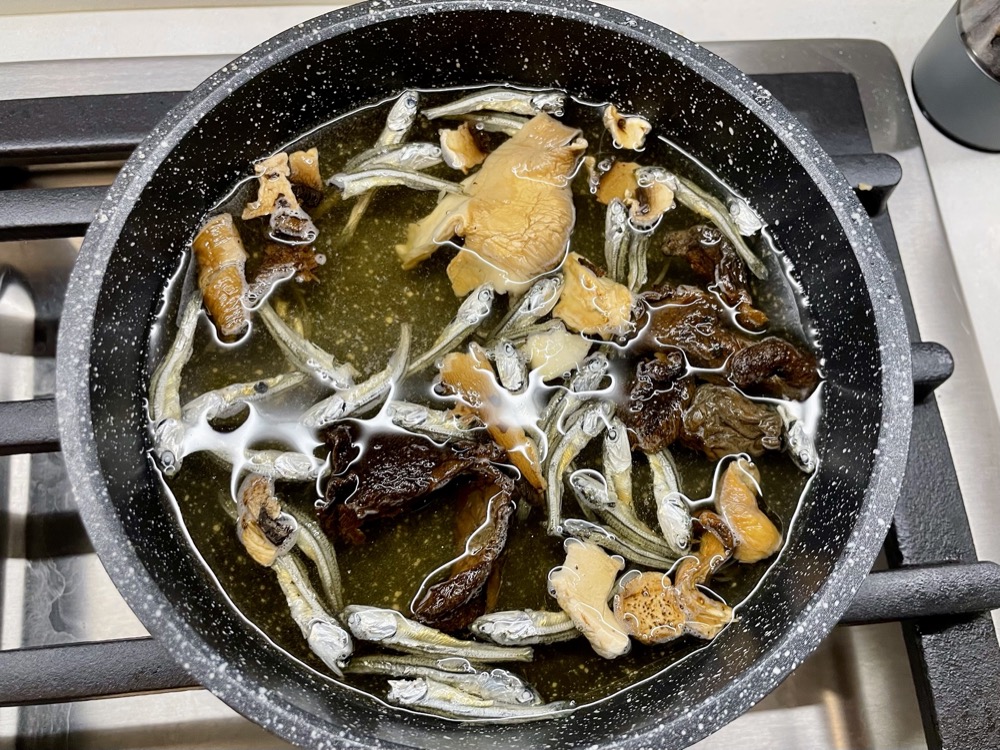
Blanche the mustard seeds: Place your mustard seeds in a saucepan and add enough cold water to submerge the seeds and cover it by about 2-3cm. Turn on the heat to HIGH to bring it to a simmer, then turn the heat down to LOW and continue to simmer for 5 minutes. After 5 minutes, strain and discard the water. Repeat this step 3-8 more times until the seeds are no longer bitter and softened but with a crunchy/pop like caviar. The seeds themselves will not have much of a flavour. Once done, strain the seeds and set aside.
The amount of water doesn’t matter too much but if you use too little, the seeds will absorb it all and you won’t be able to simmer, but if you use too much then it will take much longer for the water to come to a boil and you will be waiting for ages.
Yes, this will take a while depending on how many times you have to do it. I did it 6 times. Dominique Crenn said to do it 10-20 times!! 🤯
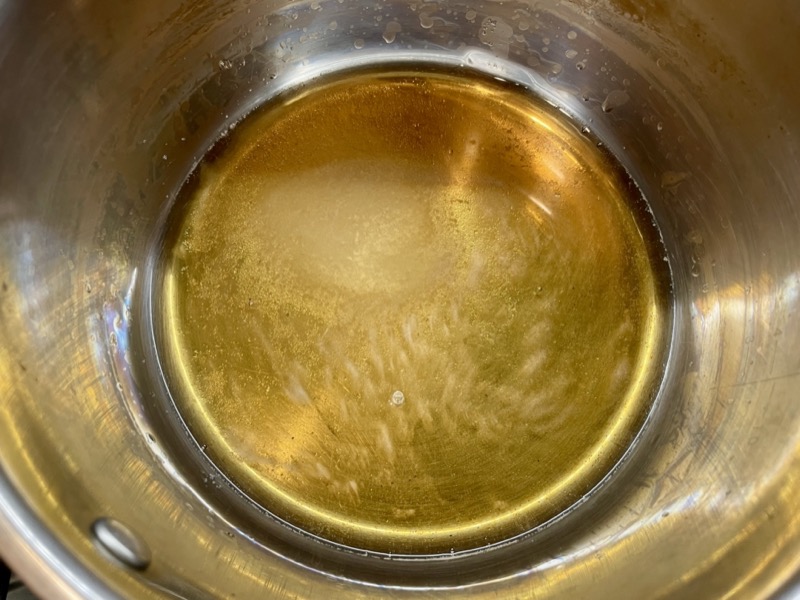
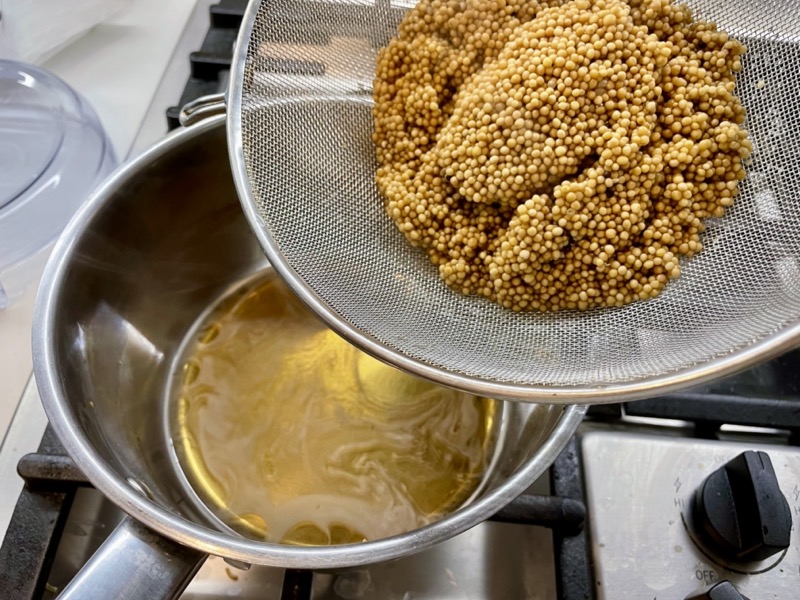
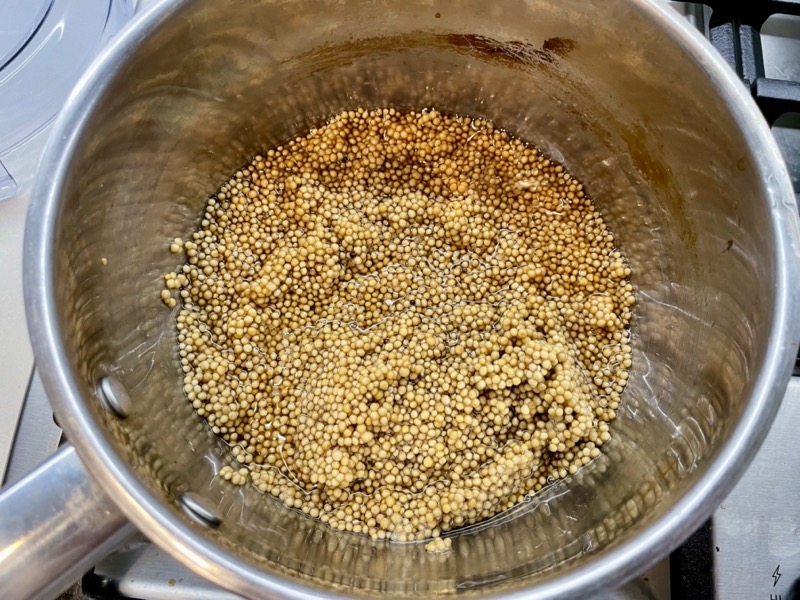
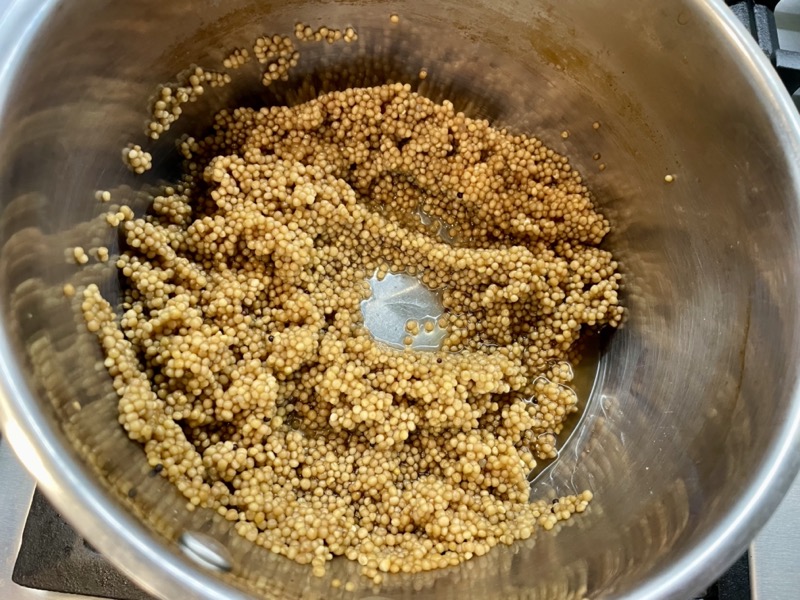
Prepare the vinegar brine: In the same saucepan on LOW heat, add in the rice vinegar, sherry vinegar, sugar, and salt. Stir together until the sugar and salt have dissolved. Add in the blanched mustard seeds and simmer on LOW heat for 15 minutes, until the majority of the vinegar brine has been absorbed by the seeds. Turn off the heat.
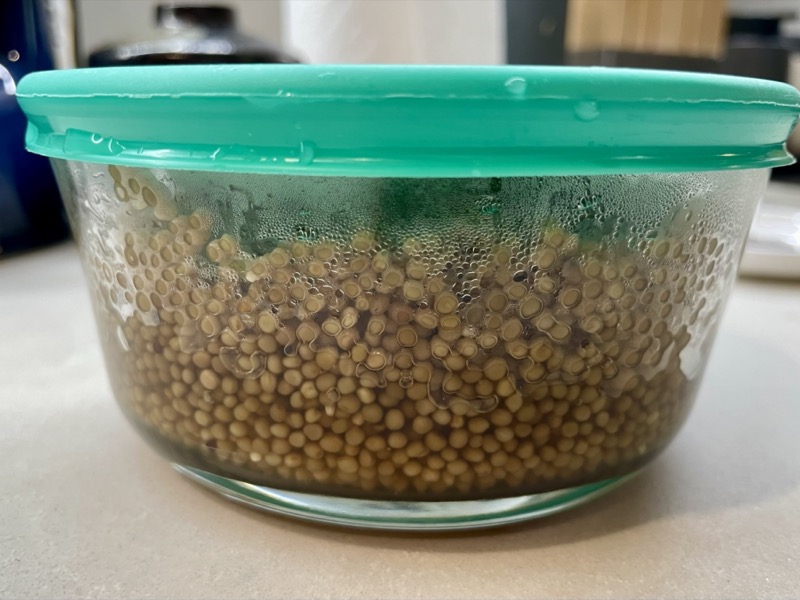
Marinate & Chill: Transfer the mustard seeds and all of the liquid into a heat-proof container and allow it to cool. Put on an airtight lid and let it marinate and chill in the refrigerator for at least 2 hours before using. This will keep in the fridge for up to 1 month.
C. Parsley Oil (Make ahead or the day-of. It will last in the fridge up to a week):
- Ingredients and Tools you’ll need:
- 50g flat leaf parsley leaves
- 100g grapeseed oil
- Tools: a powerful blender

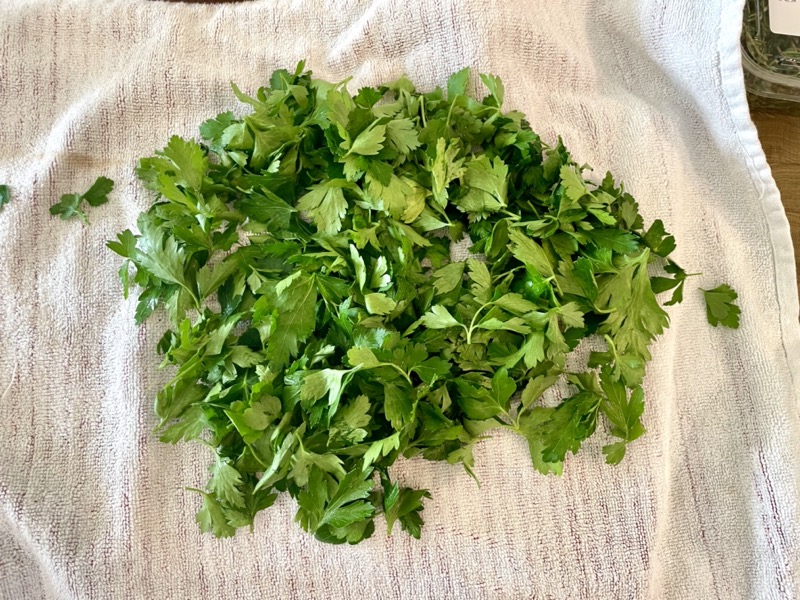
Remove the stems off the parsley so you’re left with just the leaves. Wash and thoroughly dry all the parsley.


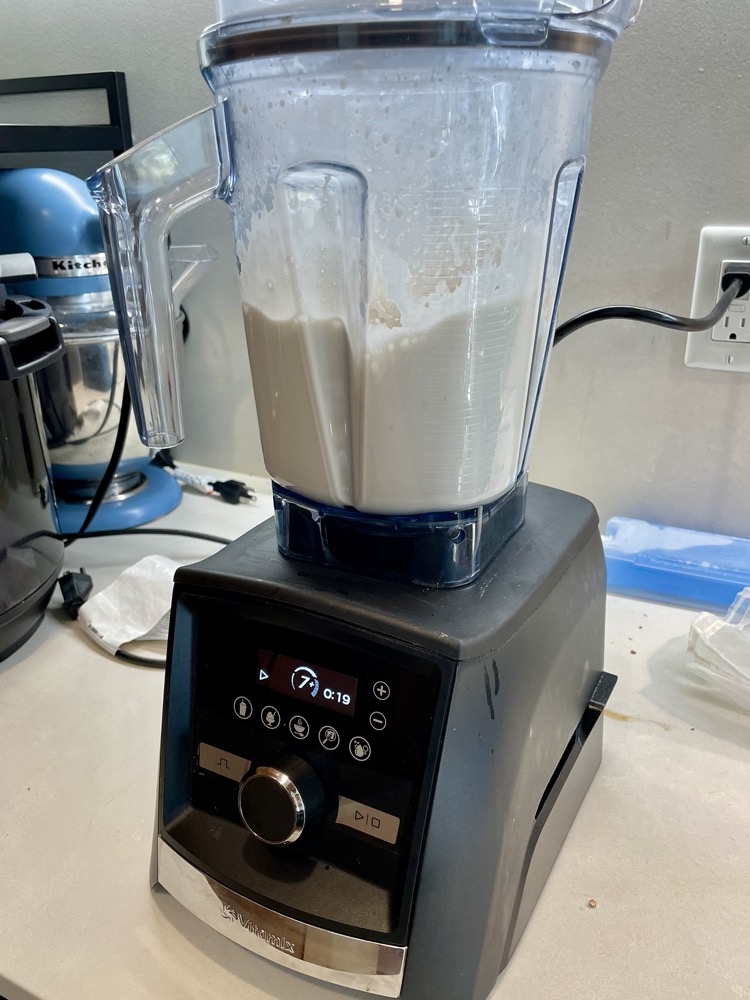
Get out your blender and add a third of the amount of grapeseed oil into the the blender, then the parsley, then drizzle the remaining grapeseed oil over top. Start the blender off slow until everything is broken up, then turn it up to HIGH for 2-3 minutes until you get a smooth paste.
You want a 1:2 ratio between the leaves and the oil. The recipe calls for 50g leaves and 100g oil. If you don’t quite have 50g or have more than 50g, just weigh it and multiply it by two and that will be the amount of grapeseed oil you’ll need.
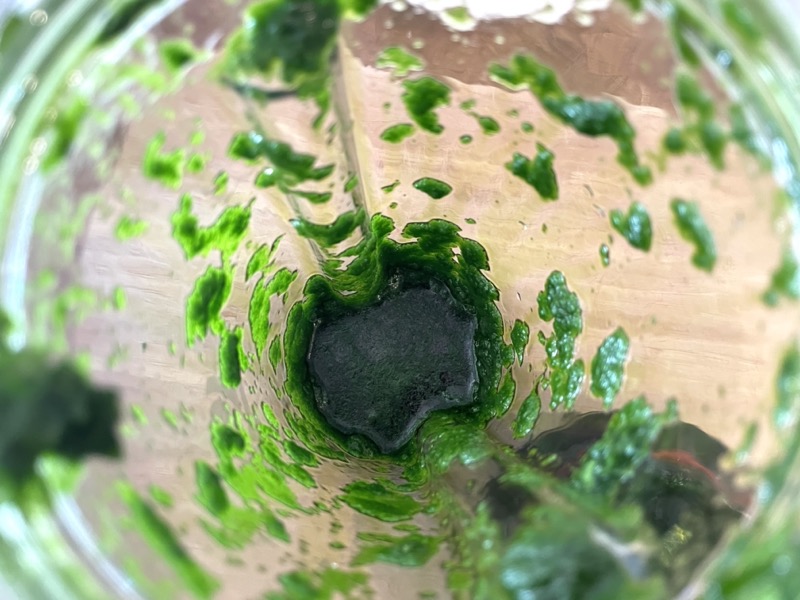

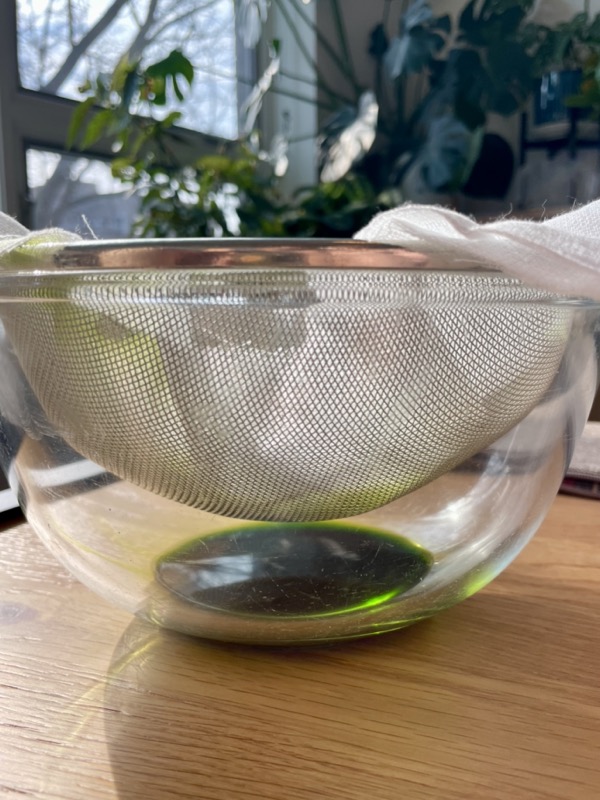
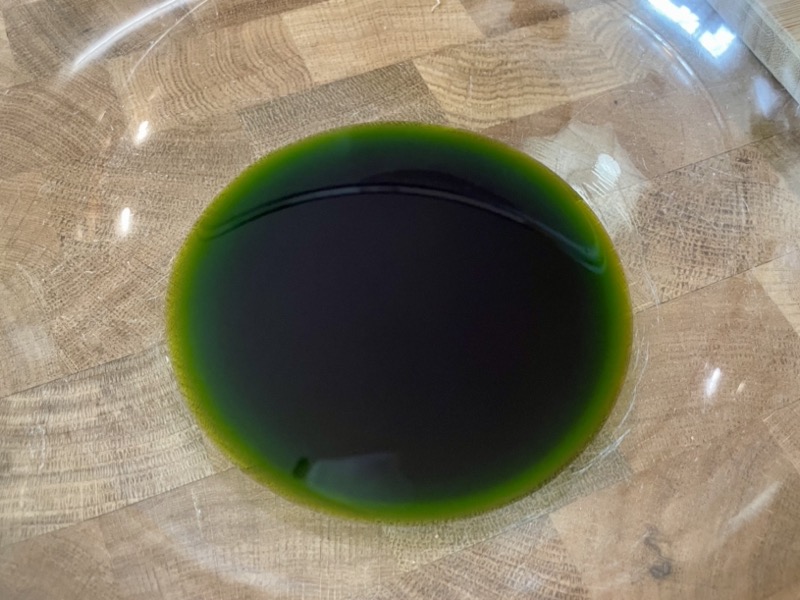
Once blended, line a fine mesh strainer with a cheesecloth/muslin/coffee filter. Strain the blended parsley in oil through this. You can squeeze the bag to release all the oil, but be careful not to squeeze any chunks. You should have a beautiful smooth deep green-coloured oil.
D. Crème Fraîche Sauce (Make ahead or the day-of. It will last in the fridge up to a week):
- Ingredients you’ll need:
- 2 Tbsps sauerkraut liquid
- 500g crème fraîche
- 2 Tbsps (30g) Sherry vinegar
- 1/2 Tbsp fresh lemon juice
- Salt & pepper to taste


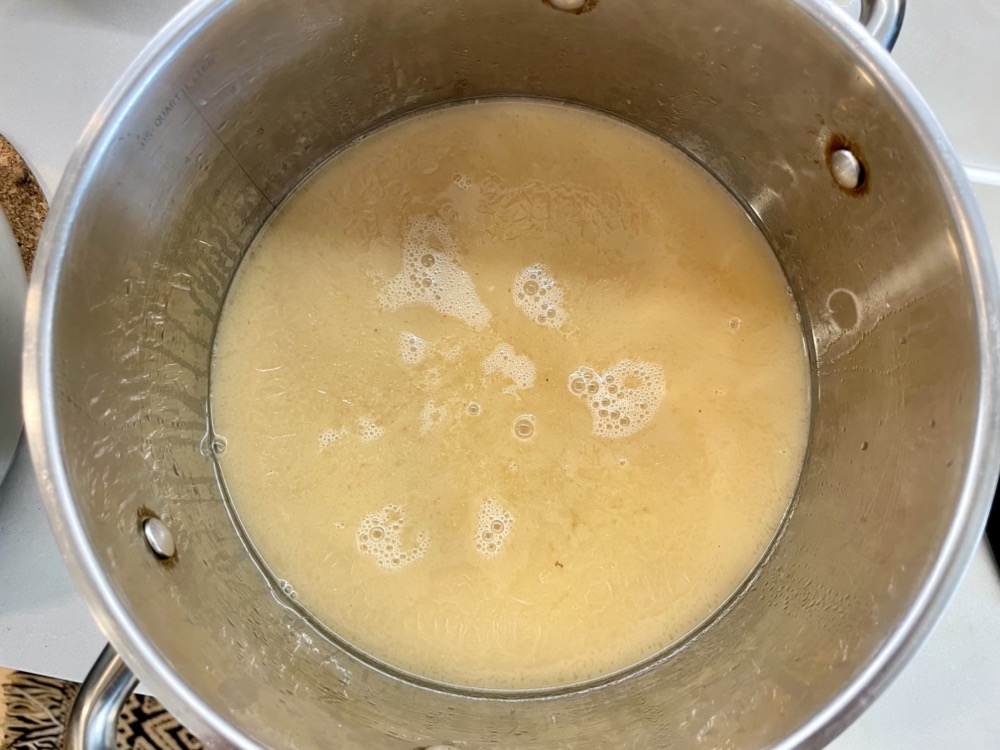
In a saucepan on LOW-MED heat, add the sauerkraut liquid and let it come to a simmer. Add in the crème fraîche and whisk until smooth.
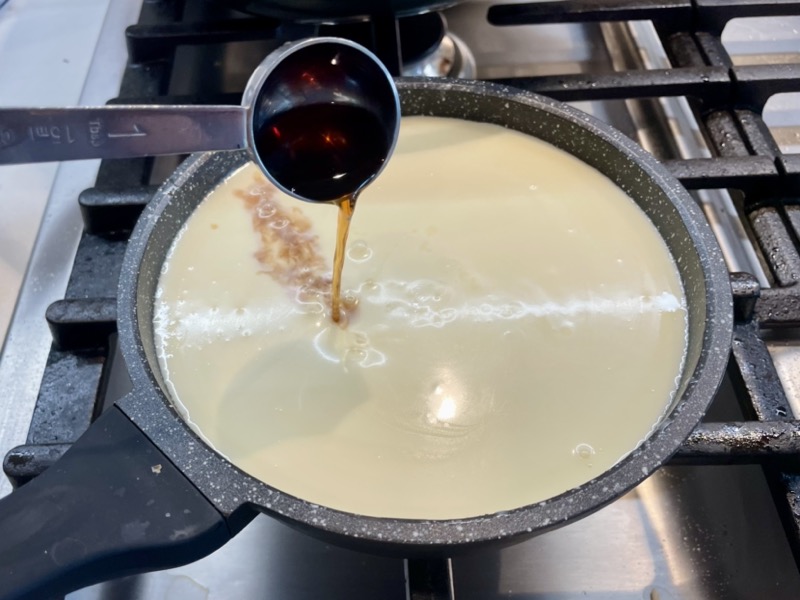
Add in the sherry vinegar, lemon juice, pinch of salt and pepper and mix thoroughly. Taste and add more salt if needed – it should be a creamy tart and slightly salted sauce. Once the sauce is hot, turn off the heat – you do NOT want the sauce to come to a boil, just heated through.
E. Roasted Cabbage (Make the day-of):
- Ingredients you’ll need:
- 1 large cabbage, cleaned
- Grapeseed oil for searing (or any other neutral flavoured oil tolerant to high heat)
- 2 + 2 cloves of garlic, peeled
- 4 + 4 sprigs of fresh thyme

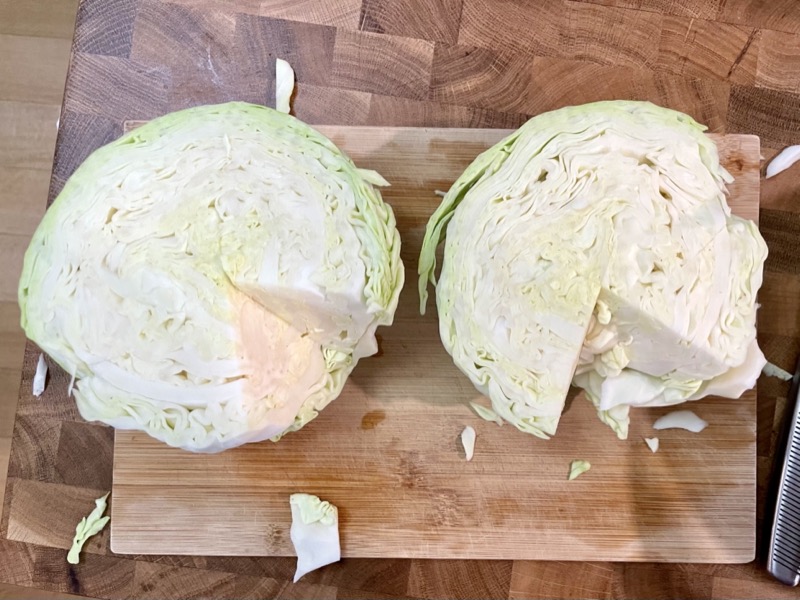
Slice the cabbage into wedges, each wedge will be an eighth of the cabbage – cut it in half, then half of each piece, then half again (see photo). Do NOT remove the core of the cabbage. You want to keep it intact so the leaves all stay together when you’re cooking.
Preheat the oven to 160˚C/325˚F and prepare a lined baking tray.


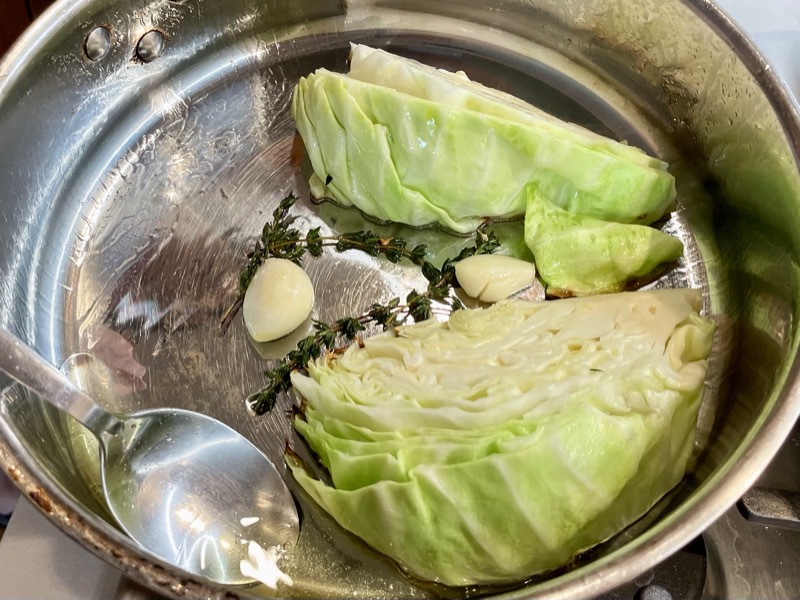

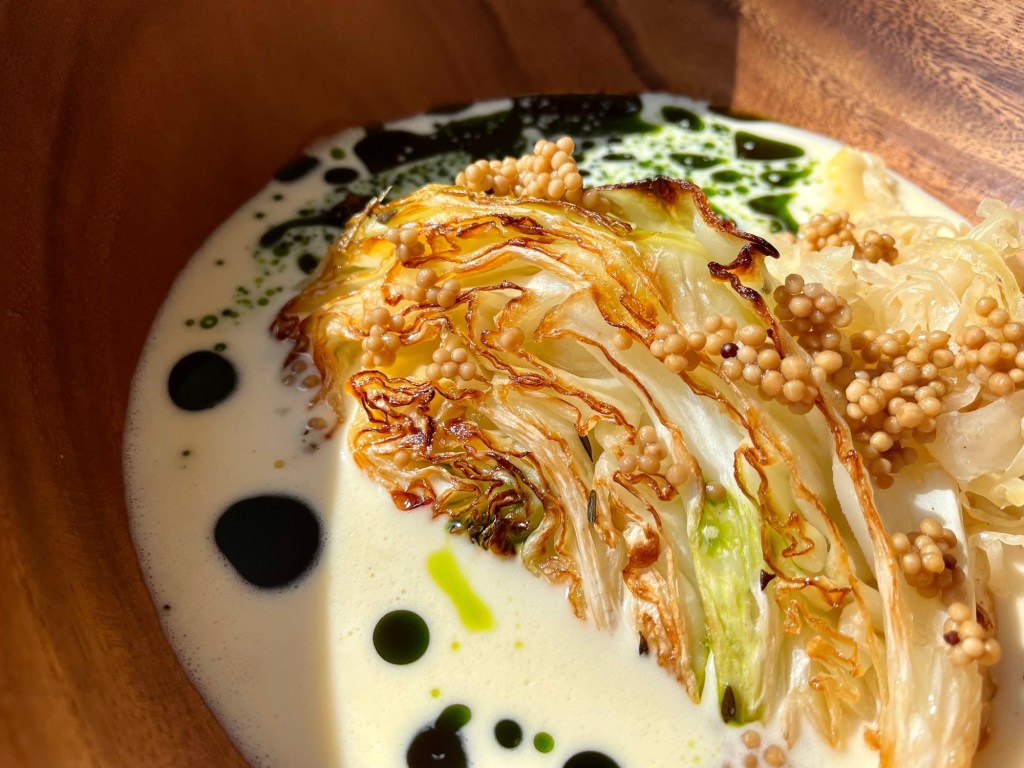
Sear the cabbage: In a wide-based pan on HIGH HEAT, add a drizzle of grapeseed oil to cover the bottom of the pan. Heat the oil until it starts to shimmer then add in 2-3 cabbage wedges depending on the size of your pan (you do not want to crowd the pan or else the moisture released from the cabbage will end up steaming it). Add in 2 peeled garlic cloves and 4 sprigs of fresh thyme to the oil. When fragrant, tilt the pan and baste the hot oil over the cabbages as it sears. As you sear the cabbage on HIGH heat, you will have to move the pan on and off the heat intermittently when the pan gets too hot to control the heat. Watch out for oil splatters and check the underside of the wedges after 2-3 minutes. Once the underside is a nice brown colour, flip it over and sear the other side, continuing to baste with the oil as it cooks. When both sides are seared, transfer the cabbage to a lined baking tray. Repeat with the rest of the cabbage wedges, adding in more grapeseed oil as needed and replacing the garlic cloves and fresh thyme if they get too browned.
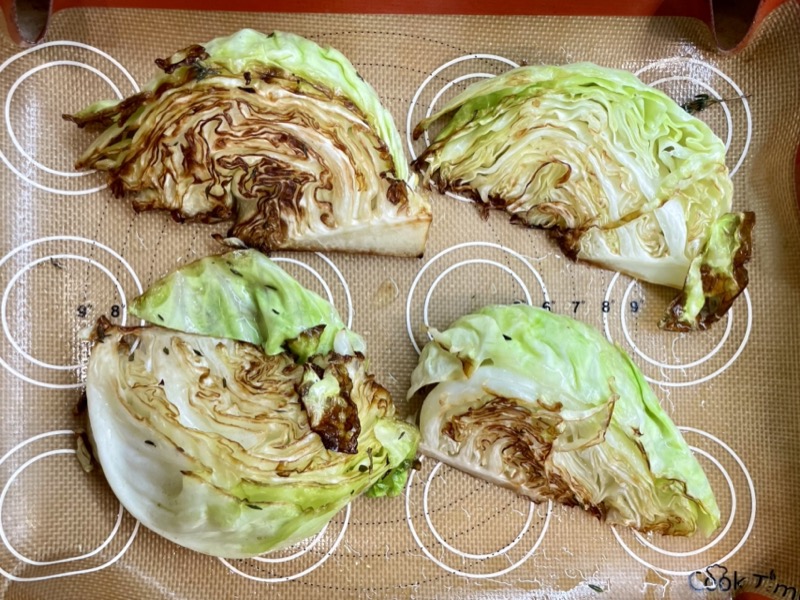
Roast the cabbage: Once all the cabbage wedges have been seared, bake them in the preheated oven for 20-25 minutes or until the cabbage is cooked through – use a fork to check the centre for doneness. The fork should go through with a bit of resistance – not too hard that you can’t poke through, but not too soft that it’s mushy. Turn off the oven when done.
While the cabbage is cooking, start heating up the sauerkraut and the crème fraîche sauce to prepare it for plating (see next steps below).
F. ASSEMBLY (finally!):
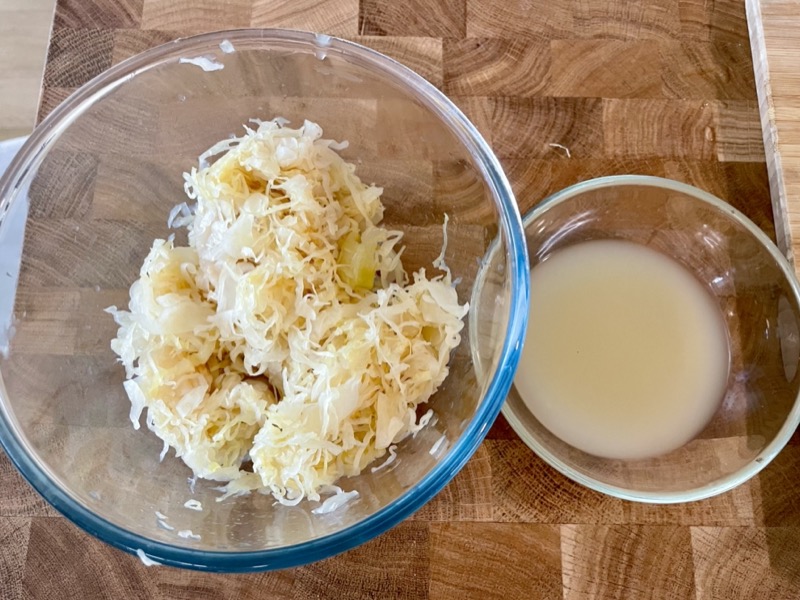

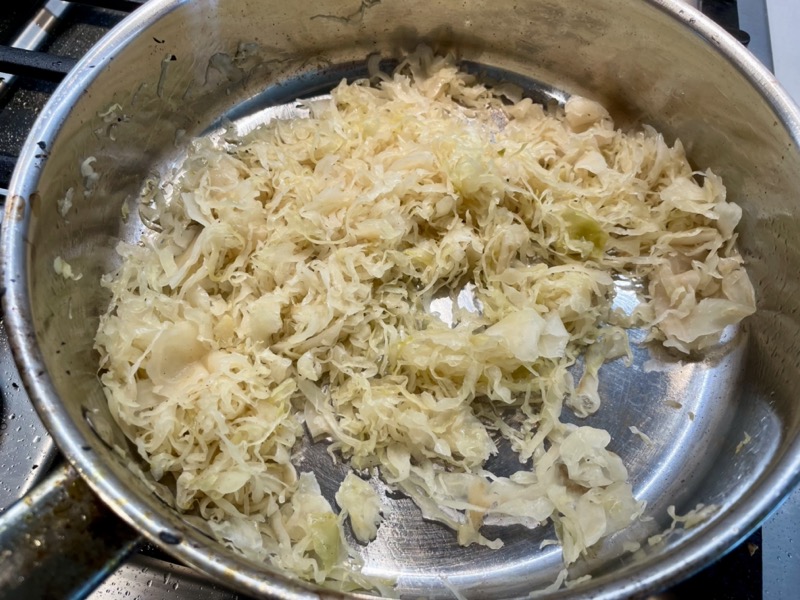
Heat up the sauerkraut: Take out about 2 cups of sauerkraut and squeeze out the liquid a little. Add the sauerkraut to a saucepan on MED heat with 30g of butter and mix until the butter has melted and the sauerkraut has heated through. Turn off the heat.

Warm up the crème fraîche sauce (if it isn’t already): Pour the crème fraîche sauce into a saucepan and heat on LOW-MED heat until hot. Do not let it come to a boil.
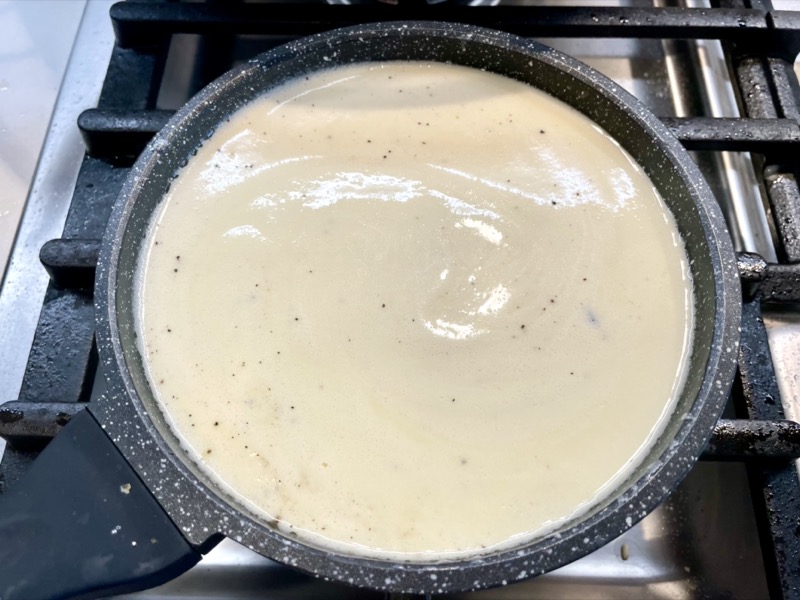
Add 2 Tbsps of parsley oil to the crème fraîche sauce and lightly mix together – don’t mix too thoroughly, you want to see specks and streaks of the green oil contrasting with the white sauce.
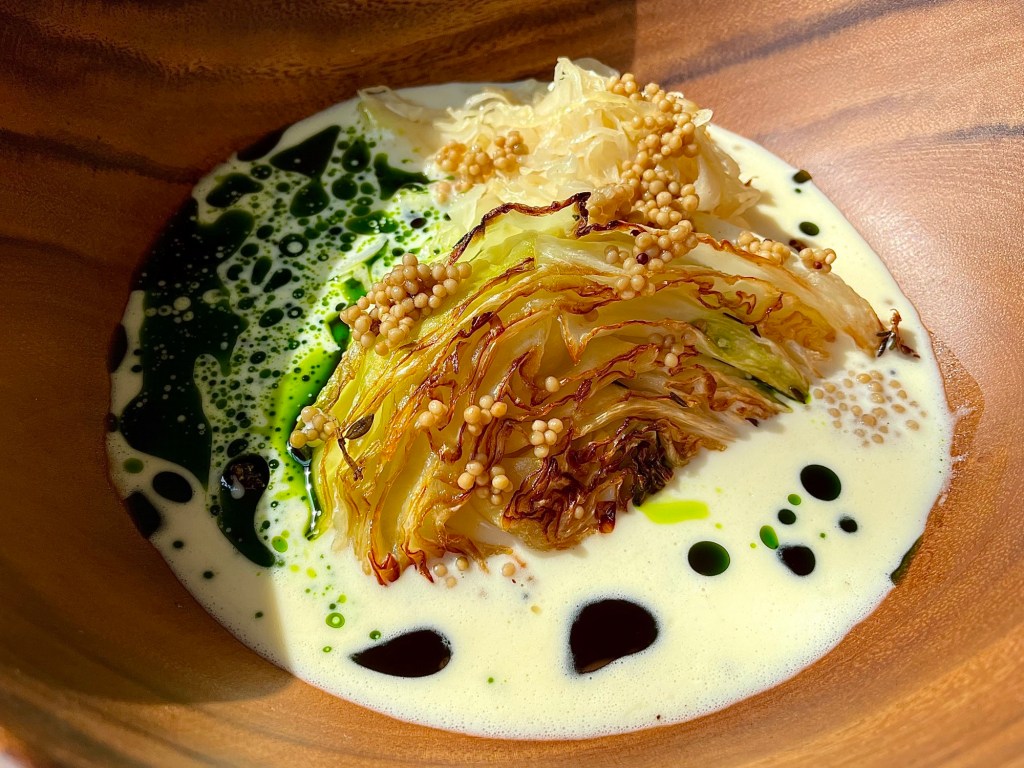
Plating: In a wide base bowl or plate, place 2 roasted cabbage wedges in the centre, followed by a big spoonful of warmed sauerkraut beside it. Add a few spoonfuls of the parsley oil/crème fraîche sauce around the cabbage and finish it off with small spoonfuls of pickled mustard seeds around the plate. Serve immediately. Enjoy!


Summarized Recipe:
Roasted Cabbage with Pickled Mustard Seeds and a Parsley Cream Sauce (a Dominique Crenn recipe)
Date Published: Mar 27th, 2024 | Last Updated: Mar 27th, 2024
Author: Abby |Category: mains, vegetarian
Serves: 4 | Prep time: 24 hours before | Cook time: 1 hour
A. Optional: Homemade Sauerkraut (Make at least 2 weeks ahead, it will keep in the fridge for up to 3 months):
This step is optional. You can use store-bought sauerkraut as well for the recipe, the flavours will be similar.
- Ingredients & Tools you’ll need:
- A small or medium savoy cabbage (depending on how much you want to make)
- Kosher salt
- Tools: a kitchen scale and maybe gloves, fermenting container with weights or glass jar with a lid and something heavy in a ziploc bag.
- Cut: Peel away any wilted, dirty outer leaves of the cabbage. Cut the cabbage in half and cut out the core. Chop the rest of the cabbage thinly.
- Weigh & Salt: Weigh the amount of sliced cabbage you have on a kitchen scale. Calculate 2.5% of the weight of your cabbage and that will be the amount of salt you will add to the cabbage.
- Example: my sliced cabbage weighed 1033g (or 1.033kg) x 0.025 = 25.8g. I rounded up and used 26g of salt.
- Massage: Make sure your hands are thoroughly washed and cleaned (you can wear disposable kitchen gloves if you’ve got some) – we don’t want to introduce contaminants into our cabbage. Once you’ve added in your salt, massage the cabbage with your hands to mix the salt through, lightly crushing the cabbage as you massage. Do this for about 5-10 minutes until you get a slightly softened and wet cabbage mix.
- Pack and Compress: Transfer your sauerkraut to a clean fermenting vessel or glass jar. Use the back of a ladle and compress down the sauerkraut to allow the juices to come up and surround the cabbage. Add a weight* to the top and close the lid. If your container is not light-proof, put your jar in a dark cool place.
- *You can get special glass weights for fermenting purposes, but if you don’t have any on hand you can just fill a clean ziploc bag with water, salt, sugar – or anything that will add weight, seal it tight and use it as a weight.
- Check on it regularly: If you’re not using a fermenting vessel and if your lid is air-tight, you will need to check on it at least once a day to quickly release any built up gasses. Do not leave the lid off too long to introduce excess air. If you have a special fermenting vessel then you don’t need to do this because the lid will allow the gasses to escape on its own. However, you do need to check on it at least once every 3-4 days to see if any mold has developed or there is any odd discolouration patches. If so, you will need to start over and ensure all your instruments are clean.
- 2 week final check: After 2 weeks, the sauerkraut should be ready! Do a final inspection for any mold or weird dark patches. The sauerkraut should be a uniform colour and a pale yellow/brown colour (like regular sauerkraut). Give it a taste! This will keep in the fridge for up to 3 months.
B. Pickled Mustard Seeds (Make the day before – this step takes some time and patience and needs to marinate at least 2 hours, so make it early – it will keep in the fridge for 1 month):
- Ingredients you’ll need:
- 1/2 cup (100g) yellow mustard seeds
- 2 Tbsps (30g) rice vinegar
- 2 Tbsps (30g) sherry vinegar
- 1.25 Tbsps (20g) granulated sugar
- 1/2 tsp (3g) kosher salt
- Blanche the mustard seeds: Place your mustard seeds in a saucepan and add enough cold water to submerge the seeds and cover it by about 2-3cm. Turn on the heat to HIGH to bring it to a simmer, then turn the heat down to LOW and continue to simmer for 5 minutes. After 5 minutes, strain and discard the water. Repeat this step 3-8 more times until the seeds are no longer bitter and softened but with a crunchy/pop like caviar. The seeds themselves will not have much of a flavour. Once done, strain the seeds and set aside.
- The amount of water doesn’t matter too much but if you use too little, the seeds will absorb it all and you won’t be able to simmer, but if you use too much then it will take much longer for the water to come to a boil and you will be waiting for ages.
- Yes, this will take a while depending on how many times you have to do it. I did it 6 times. Dominique Crenn said to do it 10-20 times!! 🤯
- Prepare the vinegar brine: In the same saucepan on LOW heat, add in the rice vinegar, sherry vinegar, sugar, and salt. Stir together until the sugar and salt have dissolved. Add in the blanched mustard seeds and simmer on LOW heat for 15 minutes, until the majority of the vinegar brine has been absorbed by the seeds. Turn off the heat.
- Marinate & Chill: Transfer the mustard seeds and all of the liquid into a heat-proof container and allow it to cool. Put on an airtight lid and let it marinate and chill in the refrigerator for at least 2 hours before using. This will keep in the fridge for up to 1 month.
C. Parsley Oil (Make ahead or the day-of. It will last in the fridge up to a week):
- Ingredients and Tools you’ll need:
- 50g flat leaf parsley leaves
- 100g grapeseed oil
- Tools: a powerful blender
- Remove the stems off the parsley so you’re left with just the leaves. Wash and thoroughly dry all the parsley.
- Get out your blender and add a third of the amount of grapeseed oil into the the blender, then the parsley, then drizzle the remaining grapeseed oil over top. Start the blender off slow until everything is broken up, then turn it up to HIGH for 2-3 minutes until you get a smooth paste.
- You want a 1:2 ratio between the leaves and the oil. The recipe calls for 50g leaves and 100g oil. If you don’t quite have 50g or have more than 50g, just weigh it and multiply it by two and that will be the amount of grapeseed oil you’ll need.
- Once blended, line a fine mesh strainer with a cheesecloth/muslin/coffee filter. Strain the blended parsley in oil through this. You can squeeze the bag to release all the oil, but be careful not to squeeze any chunks. You should have a beautiful smooth deep green-coloured oil.
D. Crème Fraîche Sauce (Make ahead or the day-of. It will last in the fridge up to a week):
- Ingredients you’ll need:
- 2 Tbsps sauerkraut liquid
- 500g crème fraîche
- 2 Tbsps (30g) Sherry vinegar
- 1/2 Tbsp fresh lemon juice
- Salt & pepper to taste
- In a saucepan on LOW-MED heat, add the sauerkraut liquid and let it come to a simmer.
- Add in the crème fraîche and whisk until smooth.
- Add in the sherry vinegar, lemon juice, pinch of salt and pepper and mix thoroughly. Taste and add more salt if needed – it should be a creamy tart and slightly salted sauce. Once the sauce is hot, turn off the heat – you do NOT want the sauce to come to a boil, just heated through.
E. Roasted Cabbage (Make the day-of):
- Ingredients you’ll need:
- 1 large cabbage, cleaned
- Grapeseed oil for searing (or any other neutral flavoured oil tolerant to high heat)
- 2 + 2 cloves of garlic, peeled
- 4 + 4 sprigs of fresh thyme
- Slice the cabbage into wedges, each wedge will be an eighth of the cabbage – cut it in half, then half of each piece, then half again (see photo). Do NOT remove the core of the cabbage. You want to keep it intact so the leaves all stay together when you’re cooking.
- Preheat the oven to 160˚C/325˚F and prepare a lined baking tray.
- Sear the cabbage: In a wide-based pan on HIGH HEAT, add a drizzle of grapeseed oil to cover the bottom of the pan. Heat the oil until it starts to shimmer then add in 2-3 cabbage wedges depending on the size of your pan (you do not want to crowd the pan or else the moisture released from the cabbage will end up steaming it). Add in 2 peeled garlic cloves and 4 sprigs of fresh thyme to the oil. When fragrant, tilt the pan and baste the hot oil over the cabbages as it sears. As you sear the cabbage on HIGH heat, you will have to move the pan on and off the heat intermittently when the pan gets too hot to control the heat. Watch out for oil splatters and check the underside of the wedges after 2-3 minutes. Once the underside is a nice brown colour, flip it over and sear the other side, continuing to baste with the oil as it cooks. When both sides are seared, transfer the cabbage to a lined baking tray. Repeat with the rest of the cabbage wedges, adding in more grapeseed oil as needed and replacing the garlic cloves and fresh thyme if they get too browned.
- Roast the cabbage: Once all the cabbage wedges have been seared, bake them in the preheated oven for 20-25 minutes or until the cabbage is cooked through – use a fork to check the centre for doneness. The fork should go through with a bit of resistance – not too hard that you can’t poke through, but not too soft that it’s mushy. Turn off the oven when done.
- While the cabbage is cooking, start heating up the sauerkraut and the crème fraîche sauce to prepare it for plating (see next steps below).
F. ASSEMBLY (finally!):
- Heat up the sauerkraut: Take out about 2 cups of sauerkraut and squeeze out the liquid a little. Add the sauerkraut to a saucepan on MED heat with 30g of butter and mix until the butter has melted and the sauerkraut has heated through. Turn off the heat.
- Warm up the crème fraîche sauce (if it isn’t already): Pour the crème fraîche sauce into a saucepan and heat on LOW-MED heat until hot. Do not let it come to a boil.
- Add 2 Tbsps of parsley oil to the crème fraîche sauce and lightly mix together – don’t mix too thoroughly, you want to see specks and streaks of the green oil contrasting with the white sauce.
- Plating: In a wide base bowl or plate, place 2 roasted cabbage wedges in the centre, followed by a big spoonful of warmed sauerkraut beside it. Add a few spoonfuls of the parsley oil/crème fraîche sauce around the cabbage and finish it off with small spoonfuls of pickled mustard seeds around the plate. Serve immediately. Enjoy!