Date Published: Feb 16th, 2022 | Last Updated: Feb 16th, 2022
Author: Abby |Category: Taiwanese, Asian, easy, mains, sides
Serves: 2-4 | Prep time: 15 mins | Cook time: 10 mins
Jump to recipe |
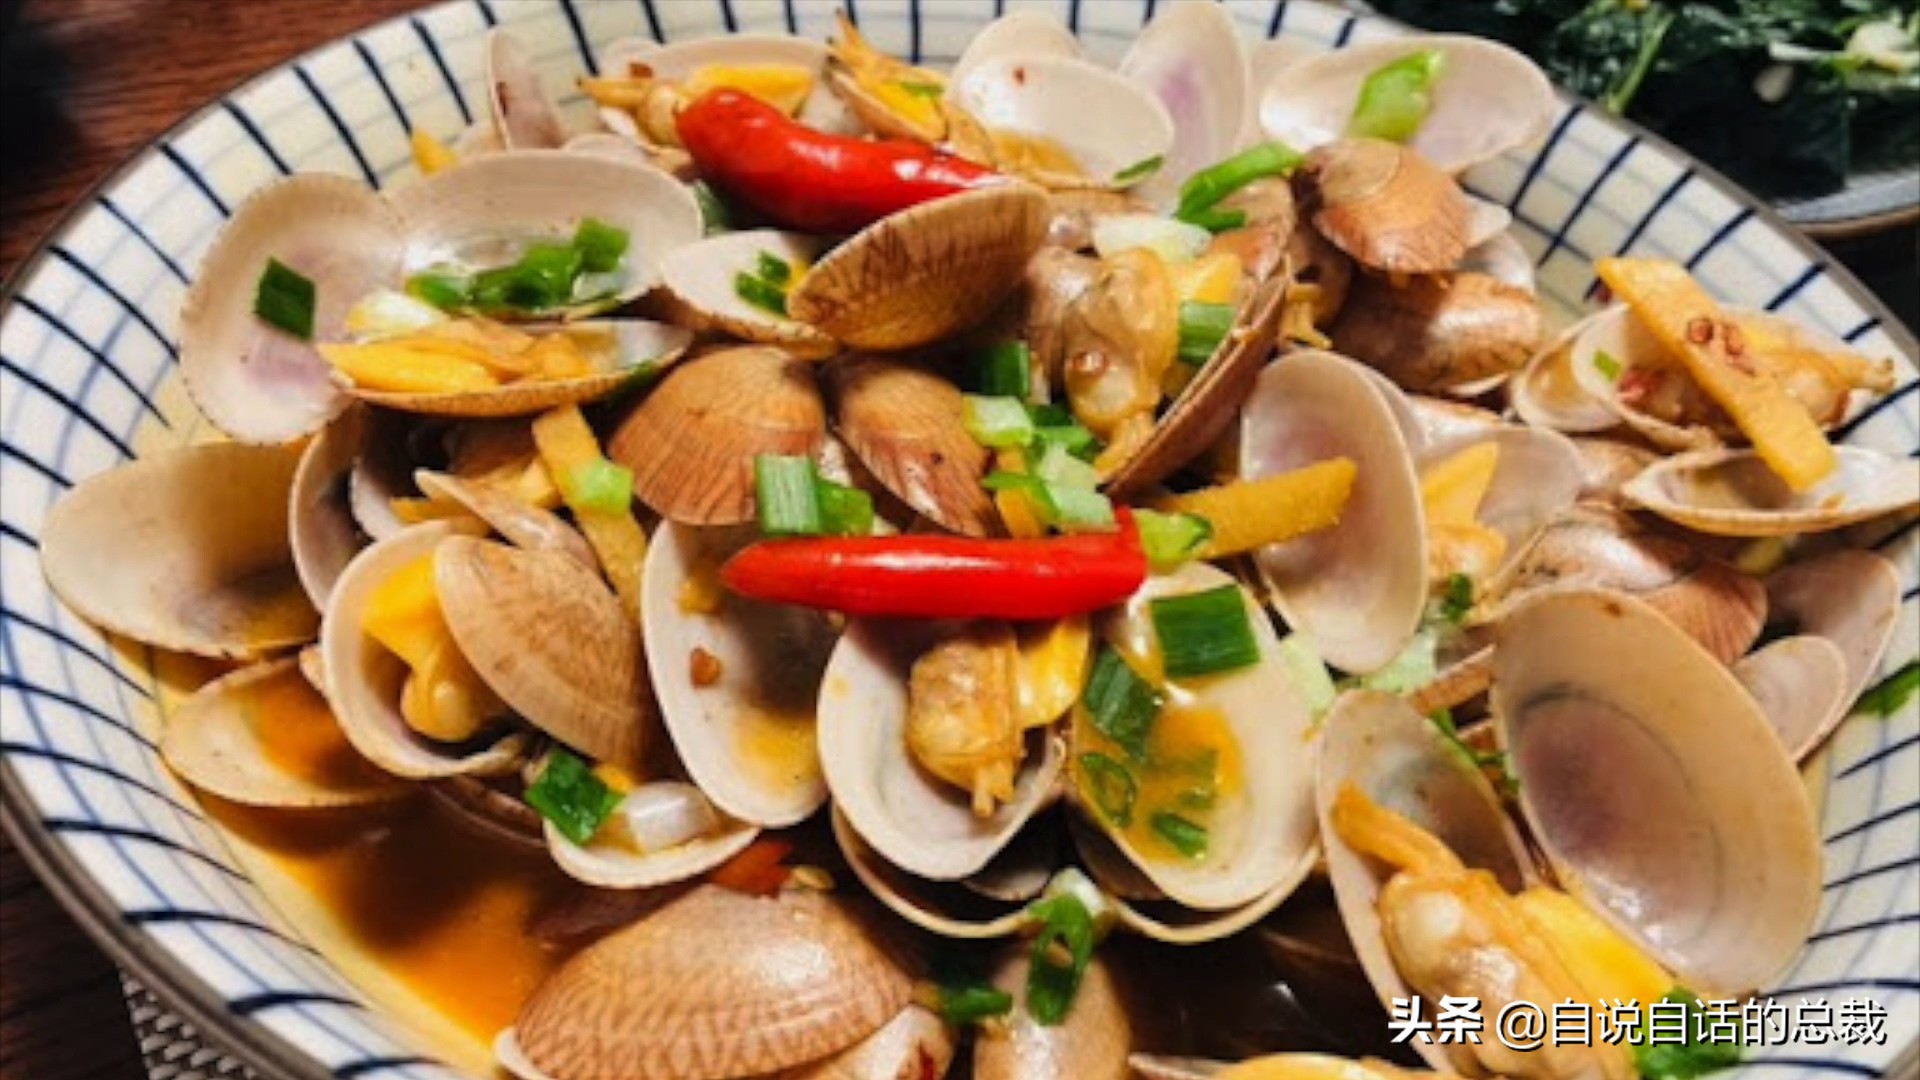
This was one of my all-time favourite dishes growing up in Taiwan. My brother once got mad at me when we were kids when I ate them too fast, lol. The sauce is SO good, you MUST serve it over white rice to soak up all the delicious flavours. This recipe is commonly found in the beerhouses of Taiwan or seafood shops.
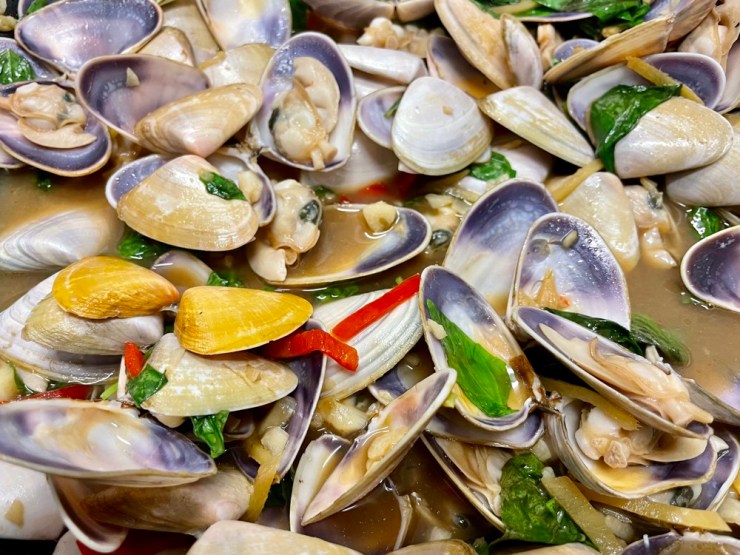
The clams that are traditionally used are called hai gua zi (海瓜子) which roughly translates to ‘ocean melon seeds’ – I think it has to do with the oval shape of them that resembles melon seeds? 🤷🏻♀️ They’re small oval clams with a patterned shell that are commonly found in the region. Any small species of clams can be used in this recipe as long as they’re fresh! I actually had a bit of a hard time finding fresh small clams for this recipe in Australia – even the local seafood shops didn’t have them. Surprisingly they were available at the Costco in Adelaide, SA however were a bit pricy at $20/kg for pipis (it was totally worth it though 😜).
Note the patterned shell and the oval shape of the hai gua zi –>
Image source: https://inf.news/en/nature/b6dd63ea2ba851d1cda05f356fb35732.html
What is a Taiwanese Beerhouse (啤酒屋)?
A Taiwanese beerhouse is a place where locals like to go afterwork to unwind, drink beer and eat hot stir-fry dishes. They’re not breweries, they’re just a place to drink and eat. If you’re a foreign visitor to Taiwan, chances are your host wouldn’t bring you to one of these beerhouses. They’re usually noisy, loud with drunk people, and no doubt lots of cigarette smoke. It’s frequented by people of lower socioeconomic classes and call girls as well as the average working man with their coworkers. It’s kind of like taking a guest to a rowdy grungy bar – it’s not for everyone, but the food is usually damn good. These beerhouses are becoming a dying culture and it’s getting harder to find them in Taiwan – possibly due to an attempt to elevate the social status of the area or maybe from the years of economic downturn and less availability of disposable income, or maybe it’s from Westernization 🤷🏻♀️. I remember my dad taking us out afterwork when I was a kid and getting out of the cab to see a long street of back to back beerhouses lit up with flashing neon lights (although in hindsight, beerhouses definitely aren’t the best place to bring children 😅). The last time I visited a couple years ago there were only two left on the street – the food was still just as good though!
What is beerhouse-style food?
Taiwanese beerhouses usually serve food that is made quickly over a high heat that packs a ton of flavour. These dishes are commonly very salty and/or spicy which goes great with a bowl of rice and a bottle of cold beer. Common dishes you’ll find are “three-cup” based recipes, which involve the triple threat for a lip-smacking combination: soy sauce, sesame oil, and rice wine. It is often sautéed with ginger, garlic, and Thai basil – the basis of classic Taiwanese beerhouse flavours. This clam recipe doesn’t diverge far from the beerhouse basics.
Thai Basil vs Italian Basil?
There are no substitutions for basil in this recipe. You MUST use Thai basil which is a lot stronger in flavour. Basil is a key component of this dish and without a good strong basil, the flavours just won’t be right. You’d have to probably at least double the amount of Italian basil to get similar results.
Anyways, without further ado, here’s the recipe! If you have any comments or suggestions, I’d love to hear from you in the comment section! You can follow me on instagram, youtube and facebook to see all the recipes I post!
Happy cooking!
Ingredients you’ll need:
- 1kg fresh small clams (ie. Pipis)
- 4 cloves garlic, thinly sliced
- 4cm ginger, peeled and thinly sliced into matchsticks
- 2-3 long Thai red chilis, sliced (remove the seeds if you want it less spicy)
- Sauce:
- 2 Tbsps Chinese cooking wine (ie. Shaoxing)
- 1 Tbsp of black vinegar
- 2 Tbsps oyster sauce
- 3 tsps white granulated sugar
- 1/4 tsp white pepper
- 1 LARGE handful (~3 cups) of Thai basil leaves
- 1 Tbsp sesame oil for drizzling
Directions:
*This recipe cooks QUICKLY on HIGH HEAT! Make sure all your ingredients are chopped, prepped and ready to go before you start cooking.

Rinse the clams thoroughly under running water. Optional: soak in salty water 15mins before.


Prepare the sauce by mixing all the sauce ingredients in a bowl: cooking wine, black vinegar, oyster sauce, sugar, and white pepper. Set aside.

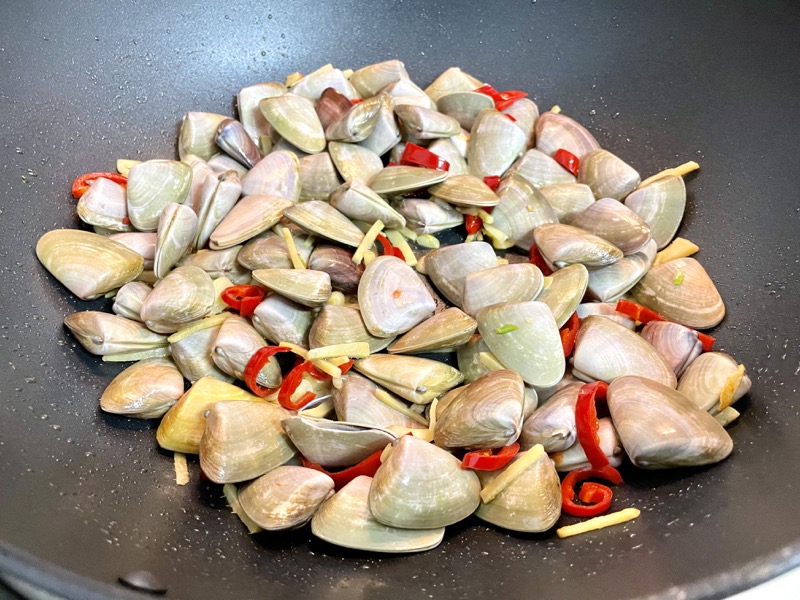
In a wok on HIGH heat, add a drizzle of oil and sauté the garlic, ginger, and chilli for 2-3 mins until fragrant.

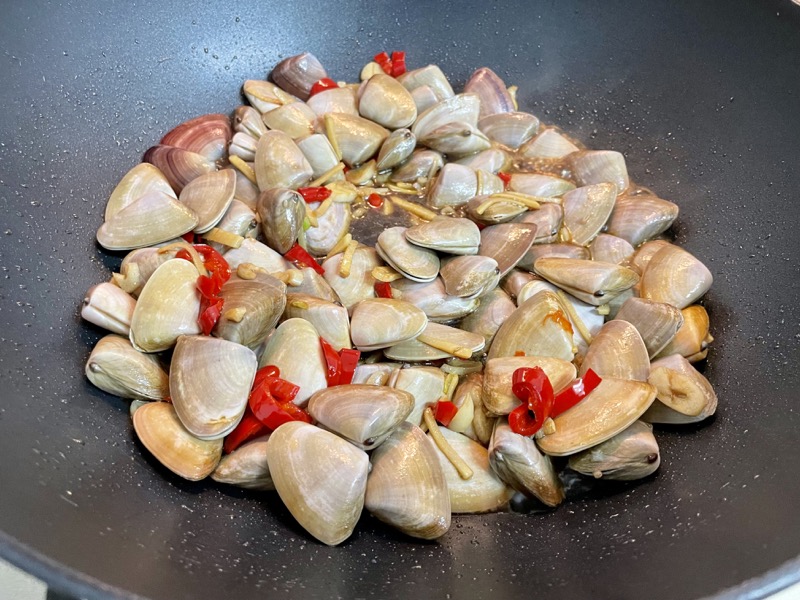
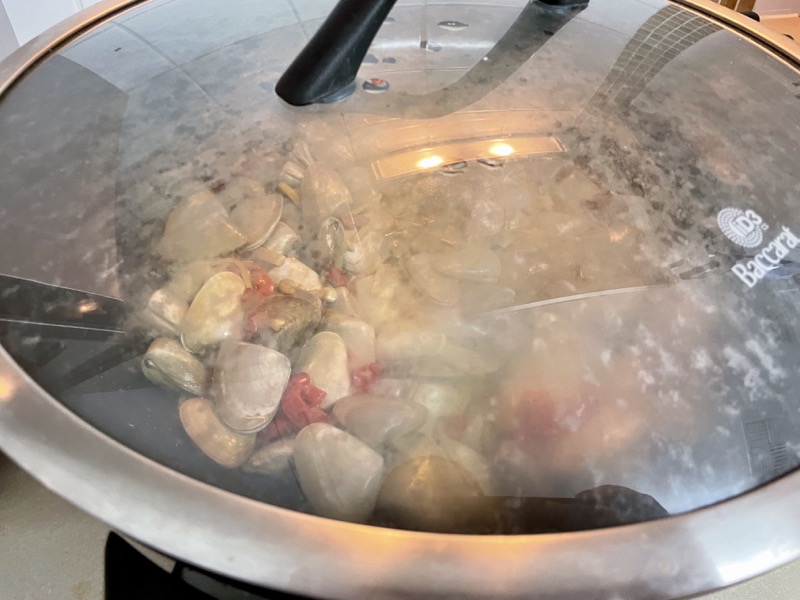

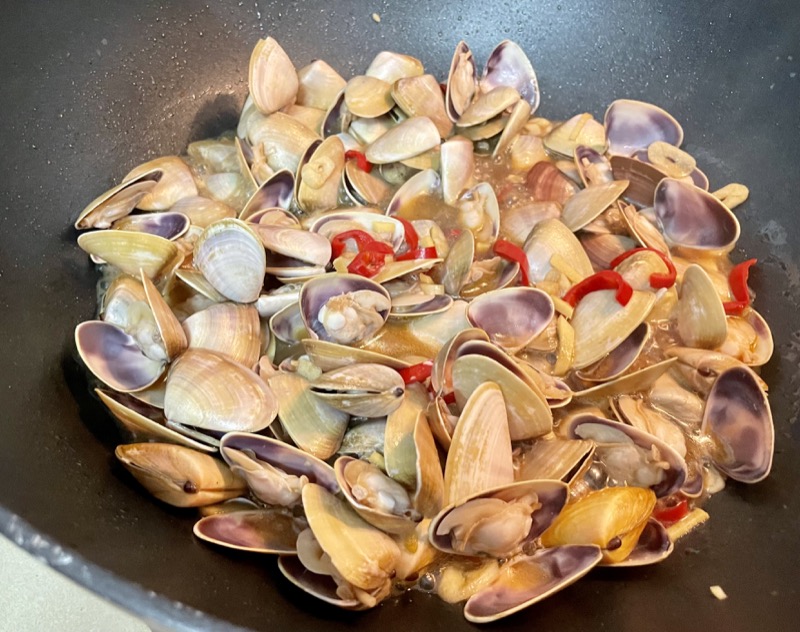
Add the clams to the pot and sauté for 30 seconds then drizzle in the sauce ingredients: cooking wine, black vinegar, oyster sauce, and white pepper. Mix around and let the sauce simmer for 2-3 minutes then put the lid on. Let the clams steam for 3-4 minutes or until they all open up. Careful not to steam them for too long or else the clams will get tough and chewy.
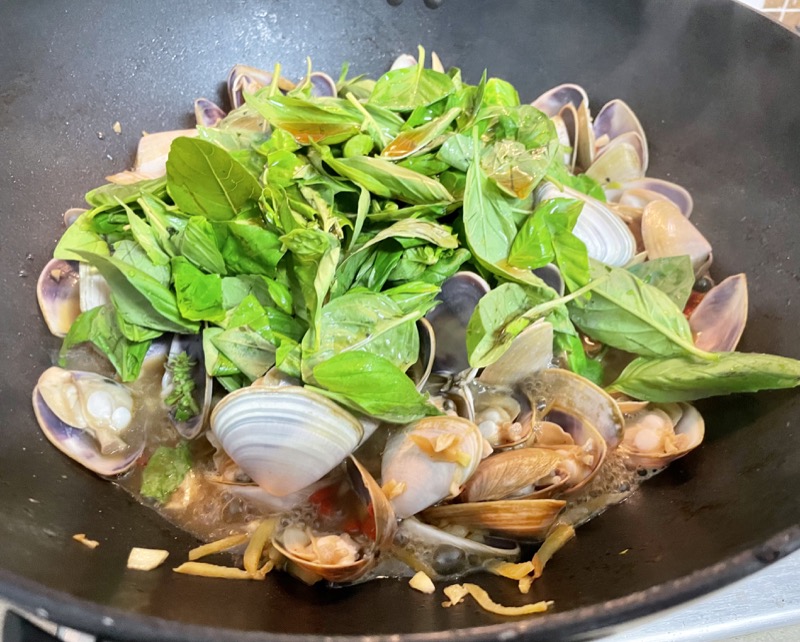
Once the clams have opened up, add in the basil leaves and drizzle the sesame oil over the clams. Sauté for another minute and turn off the heat. Serve! Best served over white rice.


Summarized Recipe:
Taiwanese Style Beerhouse Clams (台式九層塔炒海瓜子)
Date Published: Feb 16th, 2022 | Last Updated: Feb 16th, 2022
Author: Abby |Category: Taiwanese, Asian, easy, mains, sides
Serves: 2-4 | Prep time: 15 mins | Cook time: 10 mins
Ingredients:
- 1kg fresh small clams (ie. Pipis)
- 4 cloves garlic, thinly sliced
- 4cm ginger, peeled and thinly sliced into matchsticks
- 2-3 long Thai red chilis, sliced (remove the seeds if you want it less spicy)
- Sauce:
- 2 Tbsps Chinese cooking wine (ie. Shaoxing)
- 1 Tbsp of black vinegar
- 2 Tbsps oyster sauce
- 3 tsps white granulated sugar
- 1/4 tsp white pepper
- 1 LARGE handful (~3 cups) of Thai basil leaves
- 1 Tbsp sesame oil for drizzling
Directions:
*This recipe cooks QUICKLY on HIGH HEAT! Make sure all your ingredients are chopped, prepped and ready to go before you start cooking.
- Rinse the clams thoroughly under running water. Optional: soak in salty water 15mins before.
- Prepare the sauce by mixing all the sauce ingredients in a bowl: cooking wine, black vinegar, oyster sauce, sugar, and white pepper. Set aside.
- In a wok on HIGH heat, add a drizzle of oil and sauté the garlic, ginger, and chilli for 2-3 mins until fragrant.
- Add the clams to the pot and sauté for 30 seconds then drizzle in the sauce ingredients: cooking wine, black vinegar, oyster sauce, and white pepper. Mix around and let the sauce simmer for 2-3 minutes then put the lid on. Let the clams steam for 3-4 minutes or until they all open up. Careful not to steam them for too long or else the clams will get tough and chewy.
- Once the clams have opened up, add in the basil leaves and drizzle the sesame oil over the clams. Sauté for another minute and turn off the heat. Serve! Best served over white rice.