Graceland: A Complete Guide to Visiting Elvis Presley’s Home


Date Published: April 28th, 2025 | Last Updated: April 28th, 2025
Author: Abby | Category: Travel, USA
Date of travel: April 14th, 2025

Address: 3717 Elvis Presley Blvd.,Memphis, TN 38116
Website: https://www.graceland.com/
Hours: 9am – 4pm, daily
Cost: $84/adult for standard admission (multiple packages available for an additional cost)

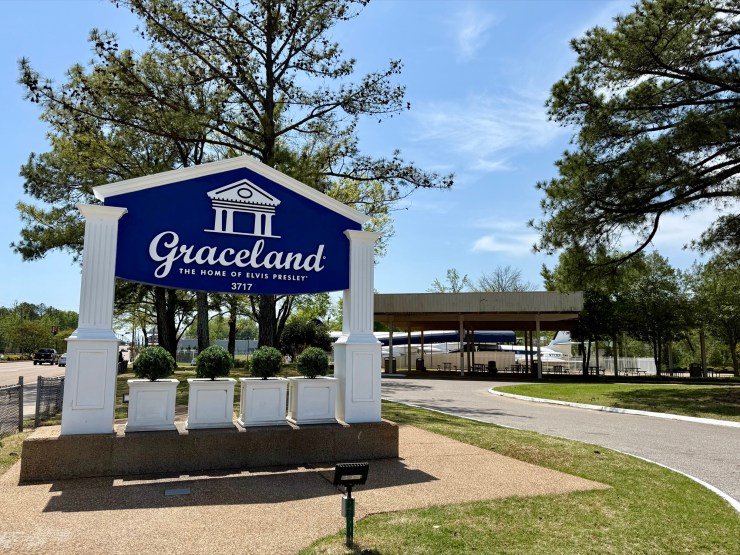
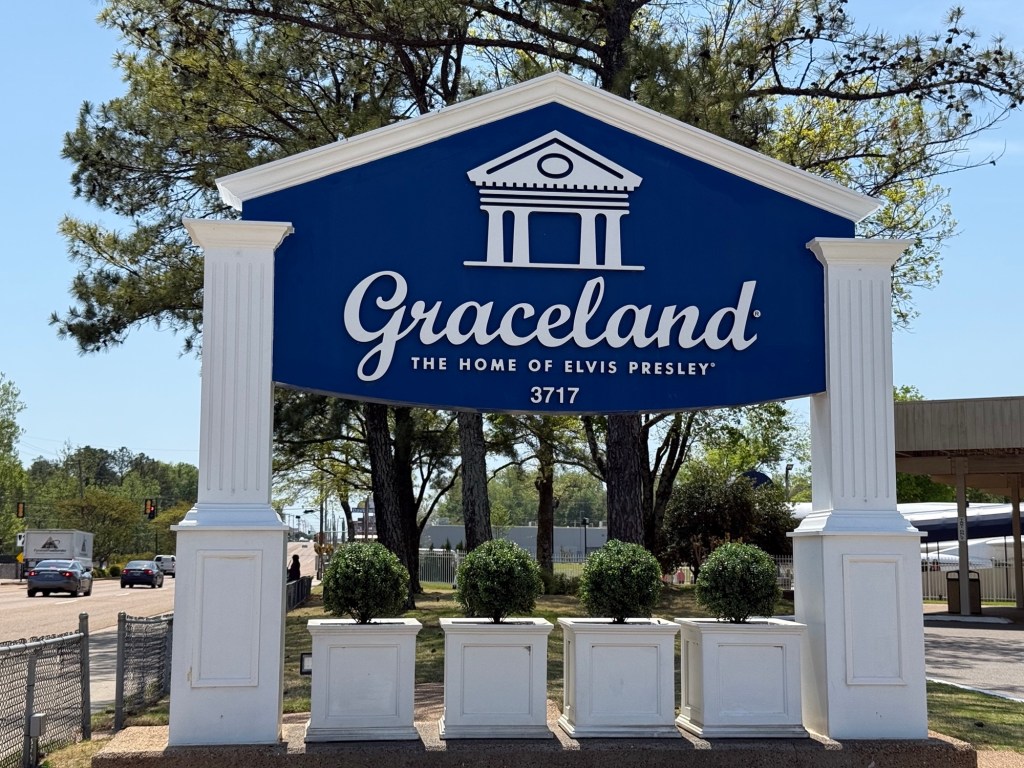
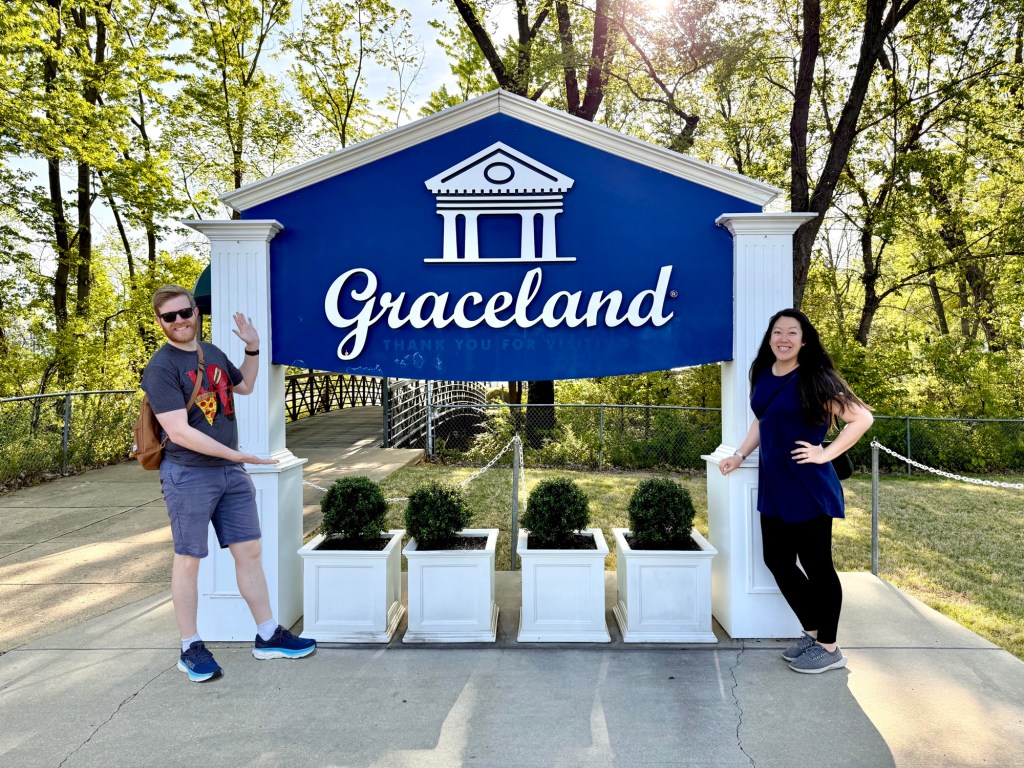
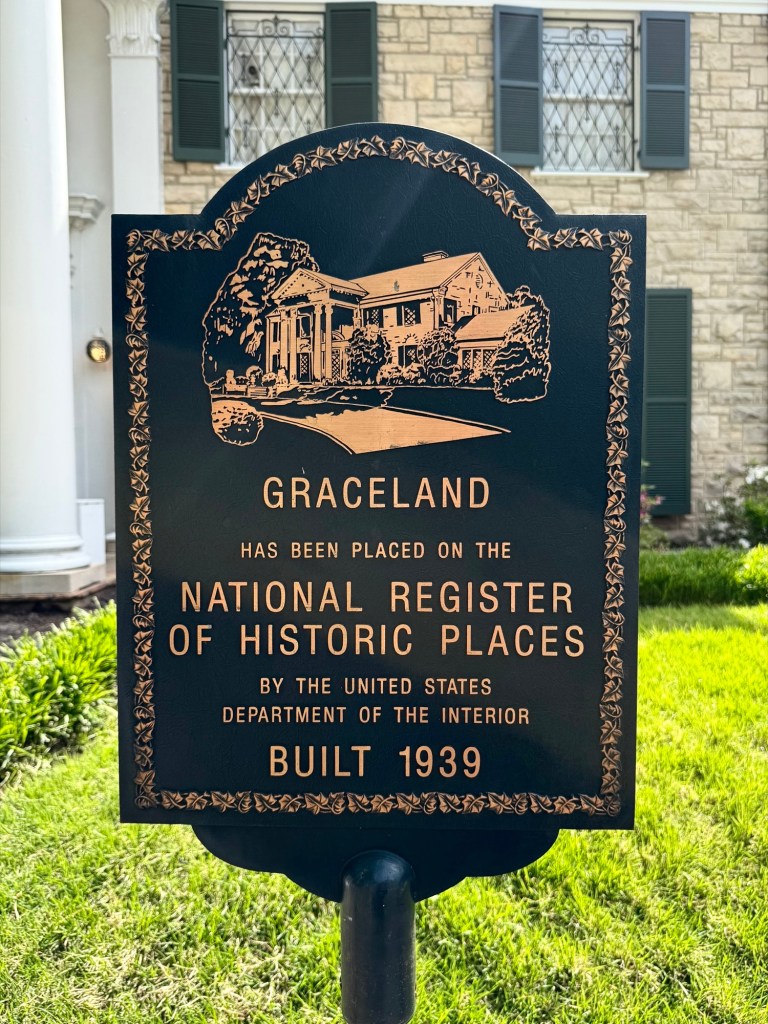
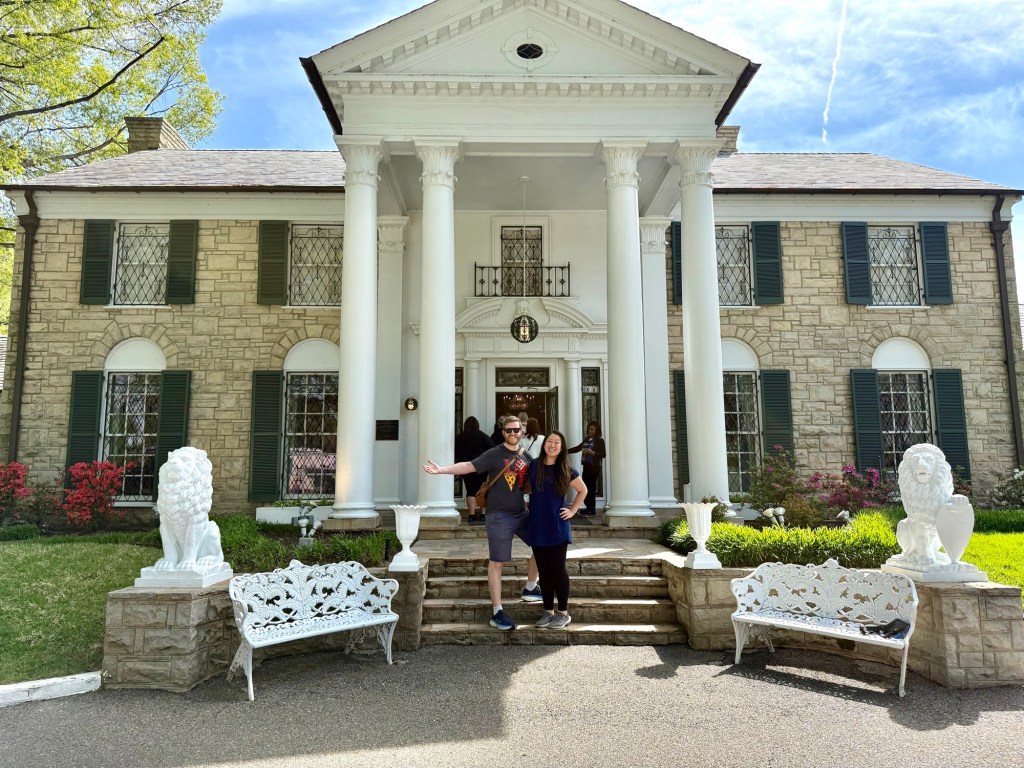
Graceland is a 13.8 hectare property in Memphis, Tennessee, and was once the home of the one and only Elvis Presley. He lived here with his parents Gladys and Vernon from 1957 until his death in 1977. Graceland was declared a National Historic Landmark and is open as a museum that houses everything Elvis, from grade school report cards to his massive collection of beaded shiny jumpsuits. This is Memphis’ top tourist attraction and has everything you need to know about the King! For die-hard fans, you can even stay the night in the “guest house” behind the property which is done up like a resort.

Toby and I came in the middle of April and although it was busy, it wasn’t insane. I’d recommend coming early in the morning to get ahead of the crowds and to go through the exhibit without too many people squeezing around you. Even if you’re not a big fan, Graceland is still a neat place to visit to immerse yourself in Rock n’ Roll history and learn about the icon himself.

How much time do I need?

You’ll need at least 3-4 hours here to get through most of it, but if you want to read through the description of every piece of memorabilia or artifact, then expect to be here for much longer. We got here at 9am when they opened and didn’t leave until 1pm, and we still didn’t have enough time to see his planes! We were going at a moderate pace, reading most things, but not everything. You could seriously spend a whole day here if you add on dining at one of his restaurants on site.

To break it down:

  • The star attraction is the mansion itself, which wasn’t as big as I was expecting (however, we did just recently come from visiting the Biltmore Estate in Knoxville, TN 😂). The self-guided tour of the home took about 1.5 hours. You go through the house in groups, so there can be a bit of a wait to get into the actual house depending on how busy it is.
  • The majority of the Elvis memorabilia and artifacts are inside the Entertainment Complex, which is the building that’s connected to the visitor’s centre. You get access to this area after coming back from the mansion. This took us 2 hours to get through. The exhibits just kept coming and coming!
  • There are a couple of themed restaurants and multiple gift shops around, so add on another 30 minutes to 1.5 hours if you plan on staying for a meal and doing some shopping.
  • To see the planes, you’ll need at least another 30 minutes or so.
  • *Allow for even more time if you decide to get an upgraded ticket package!
https://assets.speakcdn.com/assets/2597/elvispresley-2dmap-20-print.jpg

Getting Here

Getting here by car is the best way to reach Graceland. There’s plenty of parking here and it’s only a short 15-minute drive from downtown Memphis. You can also Uber/Lyft here to save on driving.

There are also options of public transport, tourist busses, and shuttles, however from my research none of them seemed straightforward and I struggled to find costs and timings for these services. Best to just drive or ride share to get a better sense of timing (you should arrive 15 minutes before the start of your timed ticket).

Cost of Tickets

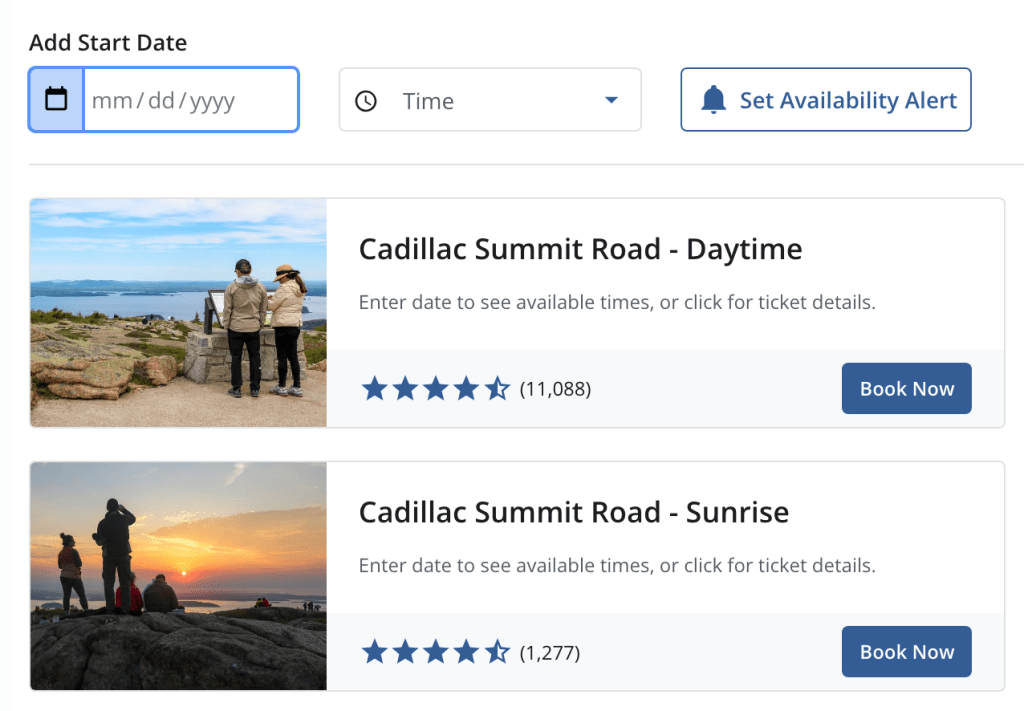
There are a few options for ticket packages that I’ve screenshotted from their website below.

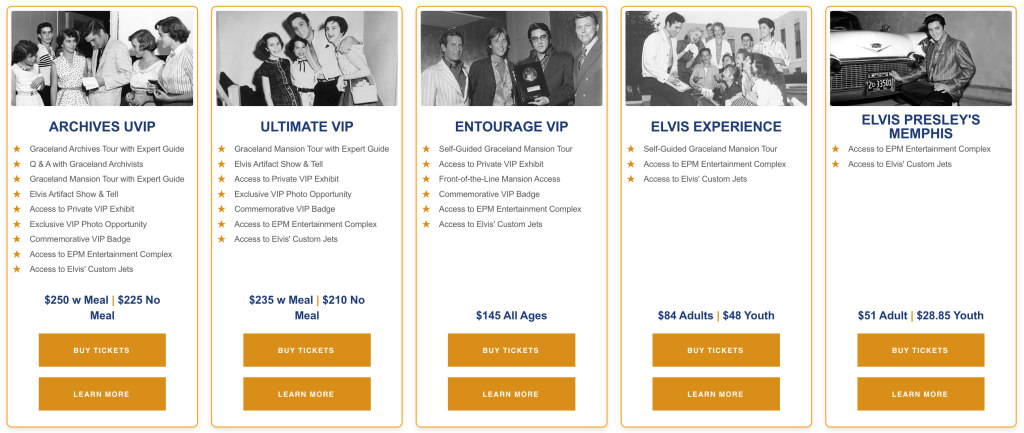
We went for the standard admission (“Elvis Experience“), it’s $84 per adult. Pretty steep, but it includes the self-guided tour of the mansion, the “entertainment complex” (where all the Elvis items are on display including his car collection), and his custom jet plane. These 3 alone will take you at least 4 hours and will give you more than enough everything Elvis.

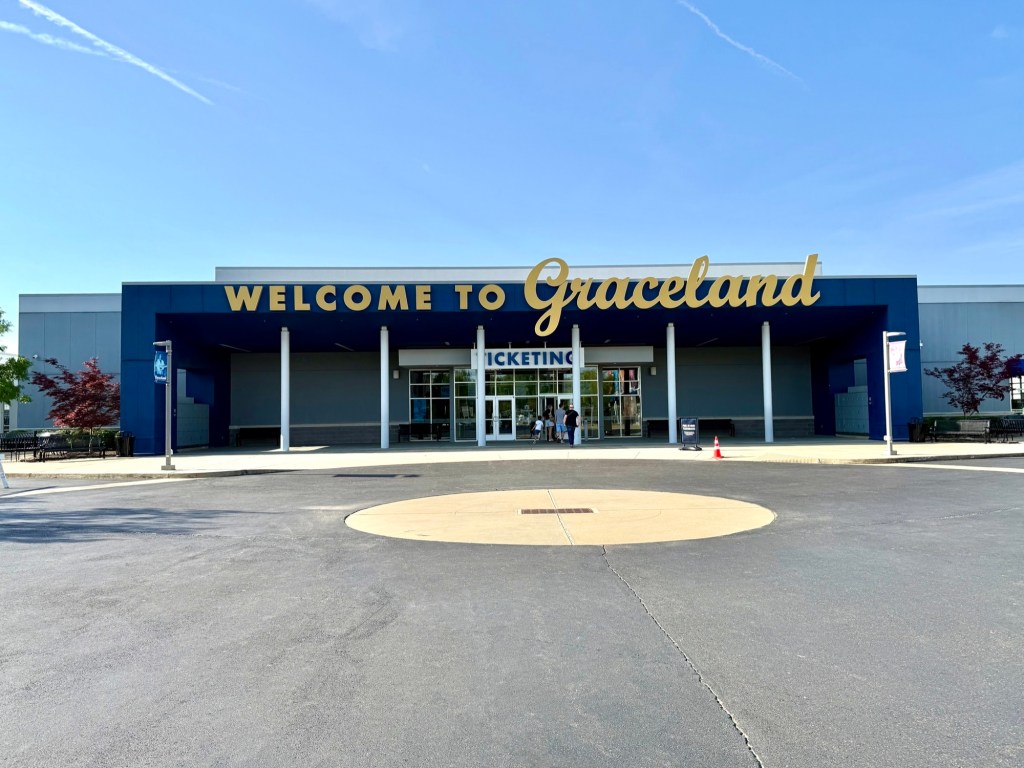
Entertainment Complex/Visitor’s Center – the start of the journey

Get here 15 minutes prior to the start of your timed ticket to have enough time to find parking, walk up to the massive building that is the Entertainment Complex, and join the line to watch a short intro video that wasn’t all that exciting. Our tour time was 9am, so there was plenty of parking when we arrived at 8:45am.

They didn’t seem to check ticket times, so don’t stress too much if you’re running late. The times are only to ensure there’s not a massive rush of people all at the same time. When you show up, you just join the line to go into the intro video theatre and when it’s full, they’ll close it and open the next one. They’ll scan your ticket right before going into the theatre.

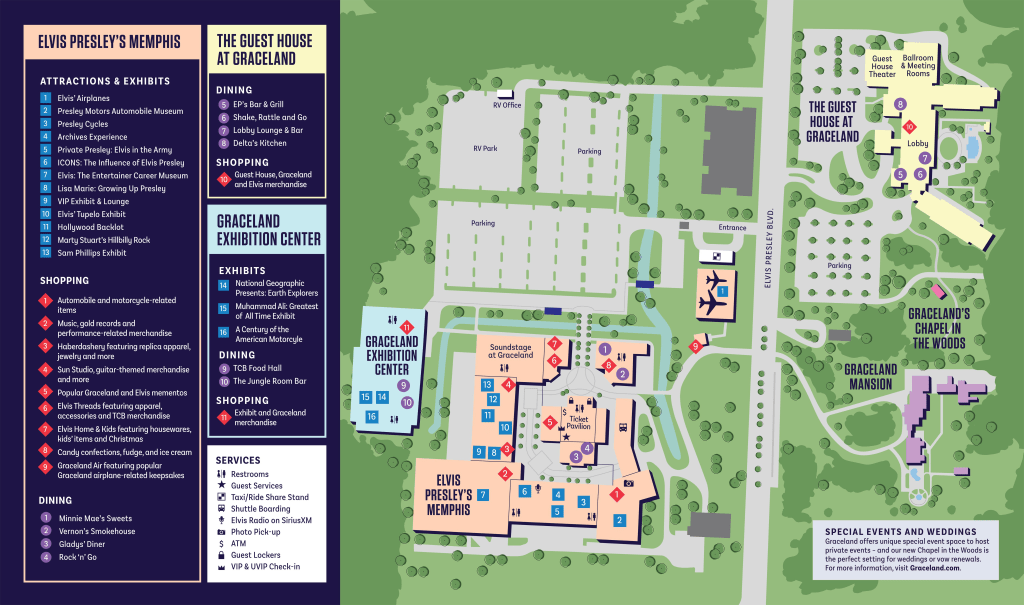
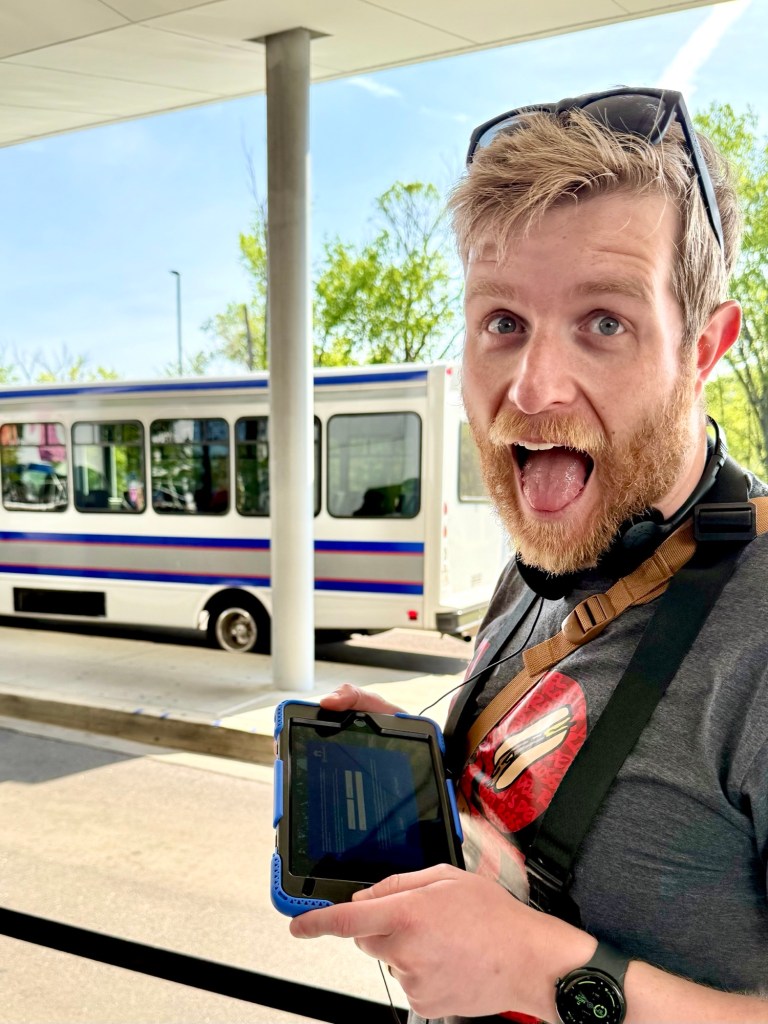
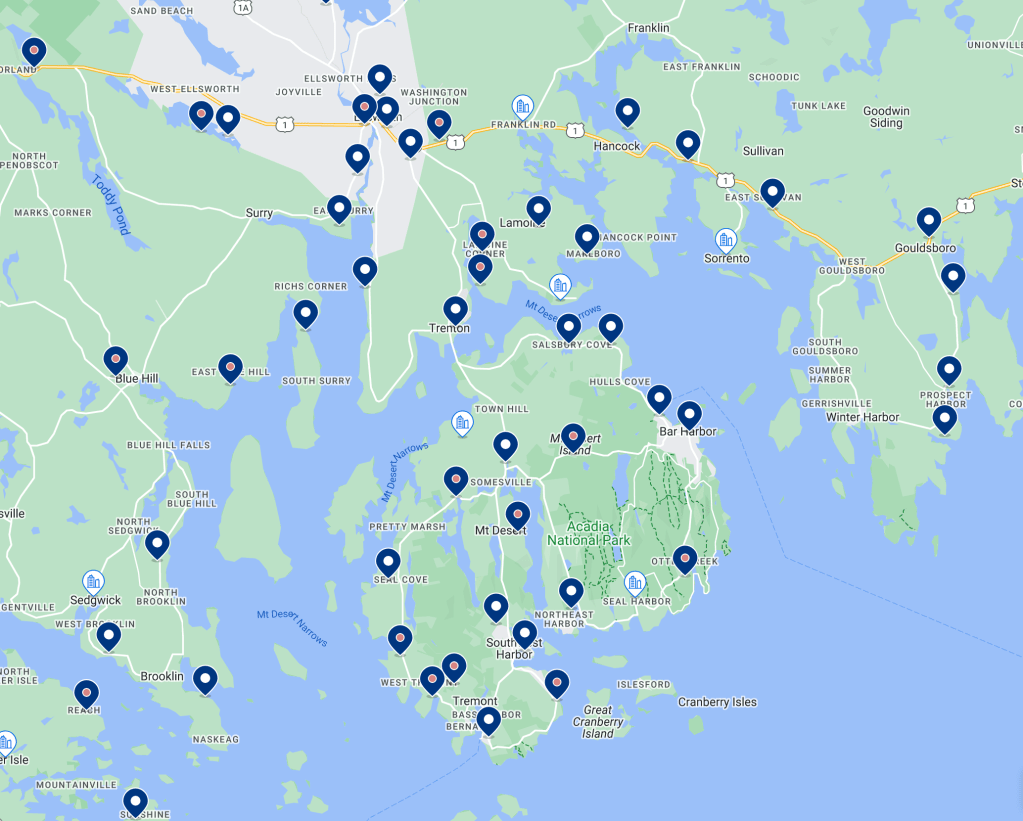
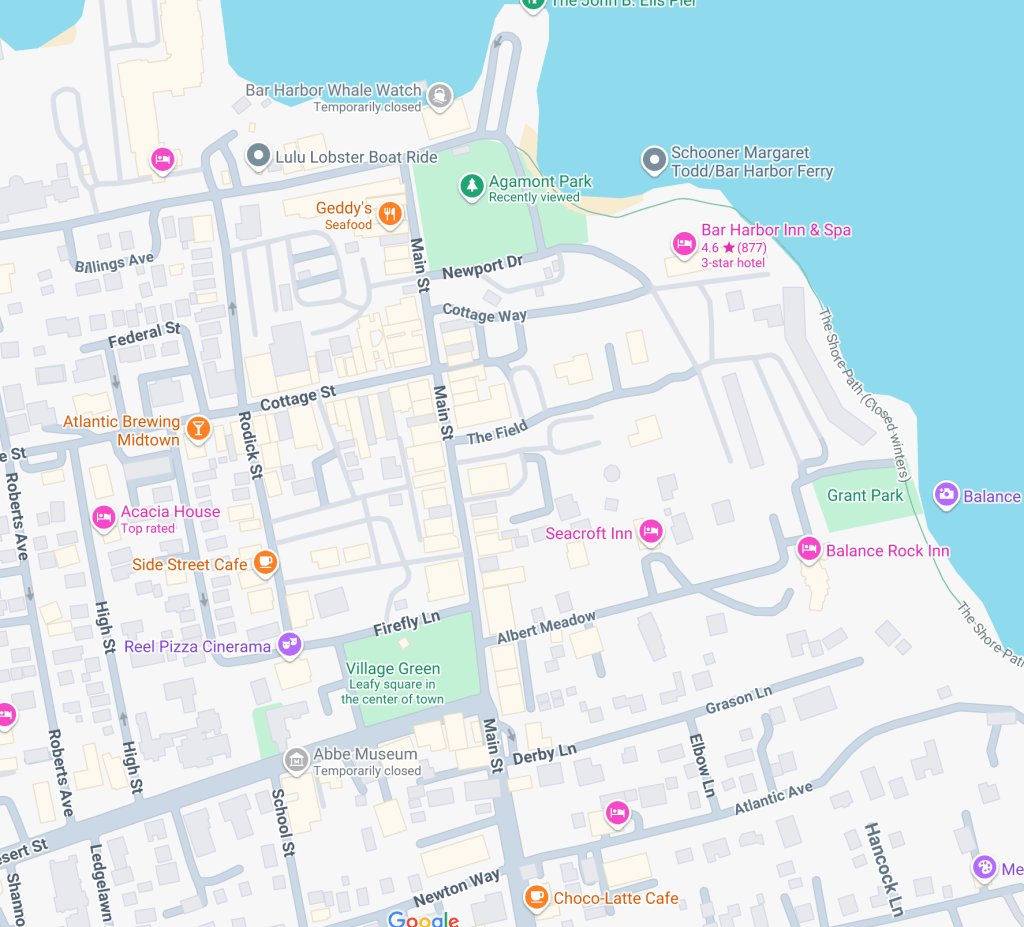
After the short intro video, you’ll get herded out the back door and into another line to collect your iPad for the self-guided tour (audio guide by John Stamos!) and the line to get on the shuttle bus to take you to the mansion that’s located across the road (see map above to get your bearings). You can only access the mansion through their shuttlebus.

The Mansion

The short shuttle bus ride will drop you off directly in front of the mansion. Here, they’ll usher you to the front door and go over some brief rules before entering the house and instructions on how to start your audio guide.

First Floor of the Mansion
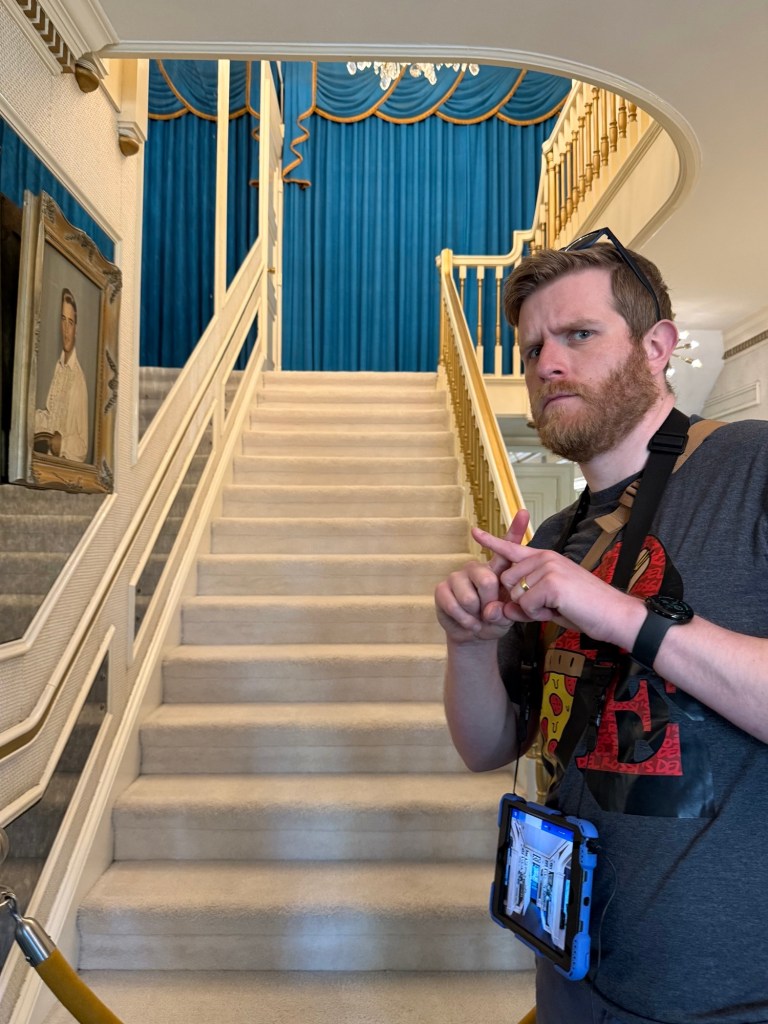
Entryway

You’re immediately greeted by a set of white stairs when you enter the front door. The entire second level was Elvis’ private space and only his closest confidantes were allowed in this space. They’ve kept the upstairs closed off to the public out of respect for him. Too bad, it sure would’ve been cool to see how he would’ve decorated his own bedroom given his eclectic taste for the rest of the house!

If you look closely, there’s a mirror at the top of the stairs to the left. One of the guides said that it was Elvis’ way to look down the stairs without actually coming down to see who was here and if he wanted to hang out with them. 😂

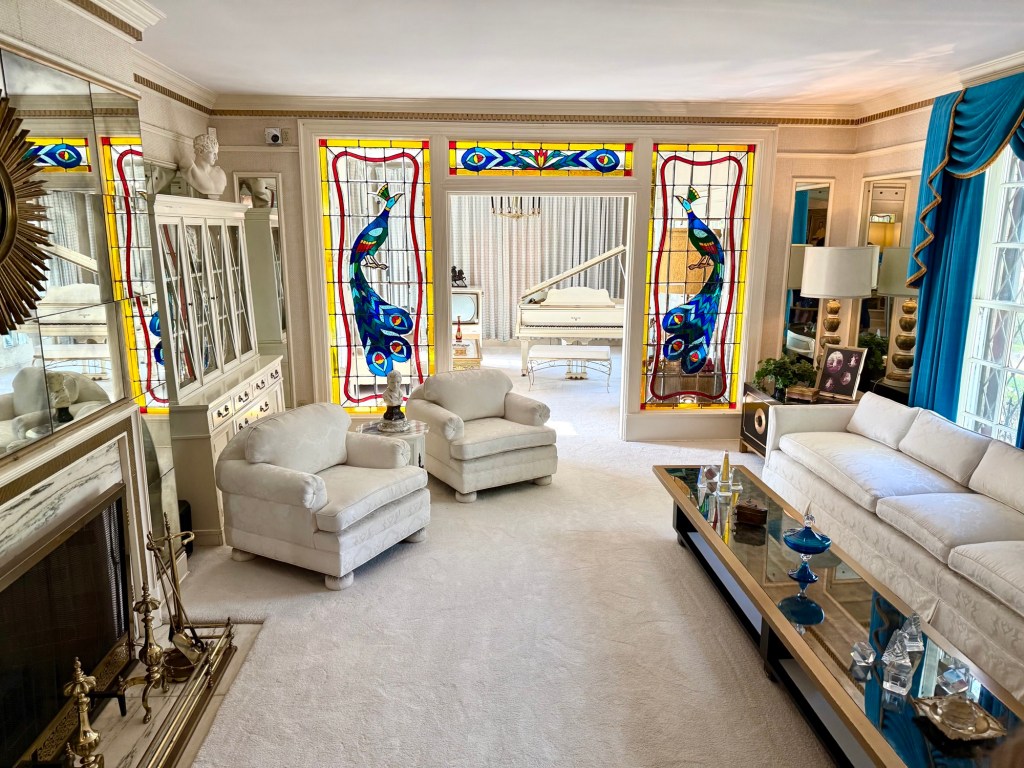
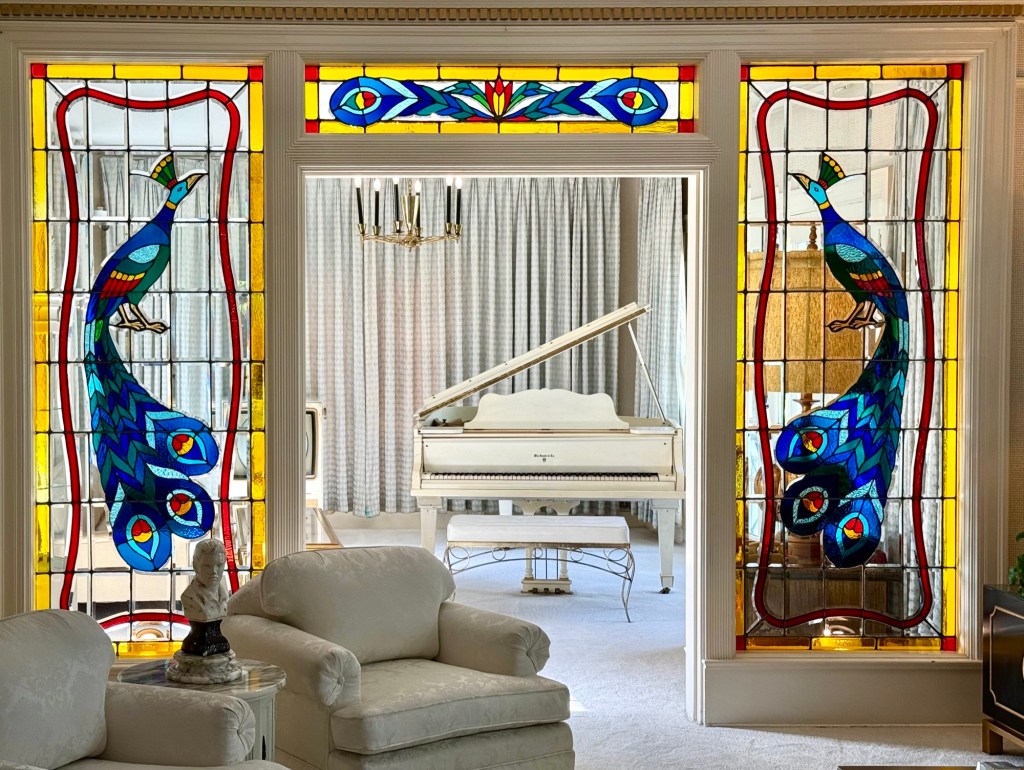
Living Room/Music Room

This is the living room/music room where they would gather, entertain, and sing gospel songs on the white grand piano. The beautiful stain glass peacocks are the Christian symbol for eternity and resurrection.

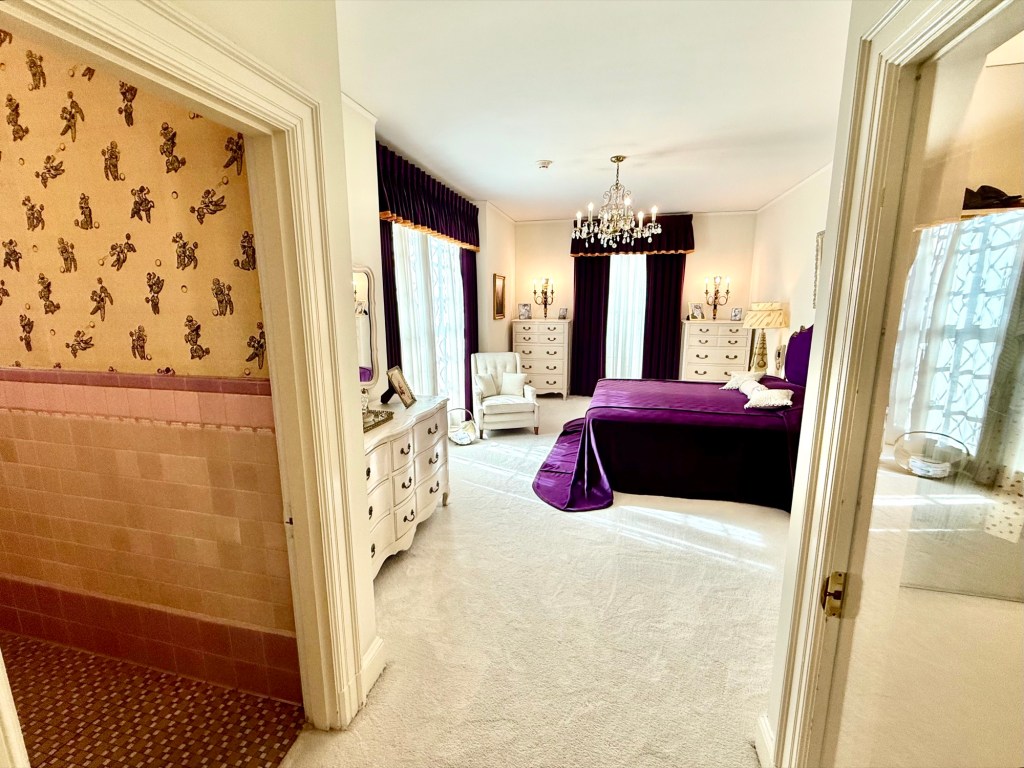
Gladys & Vernon’s Bedroom

Elvis’ parents Gladys and Vernon had their bedroom on the main floor. Gladys was largely involved in decorating this room, including choosing the poodle wallpaper in the bathroom!
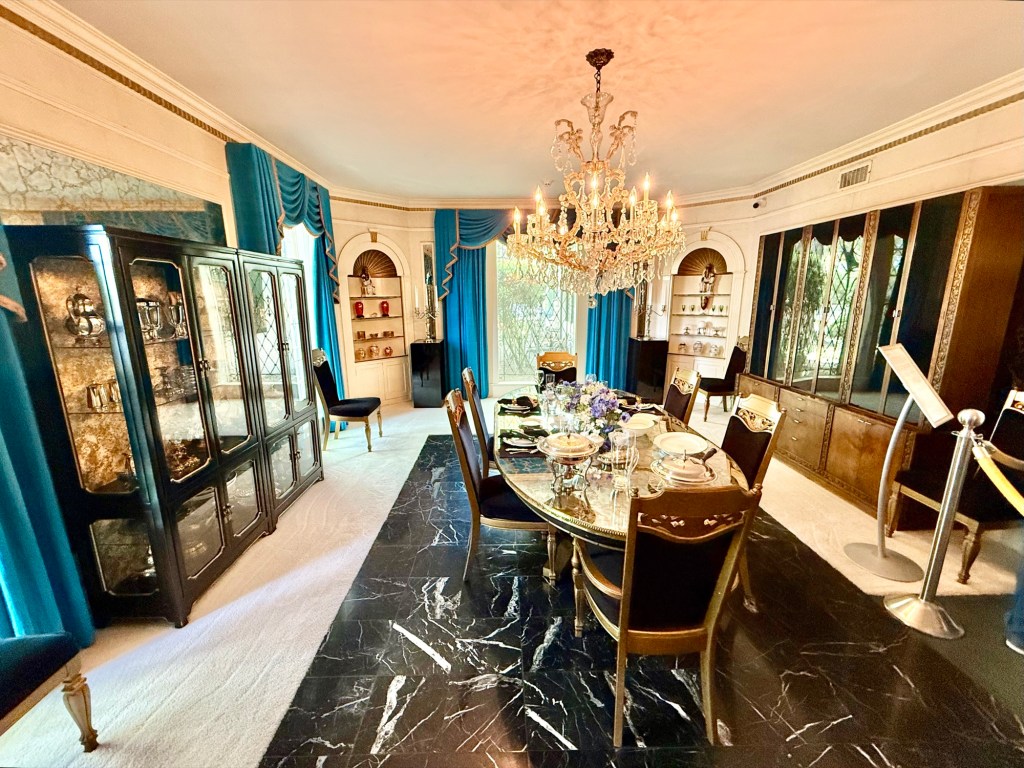
Dining Room

This is the formal dining room where Elvis would sit at the head of the table by the window and entertain guests. Behind him would also be where they would set up their Christmas tree. It was common to have dinner served at 9-10pm at night!
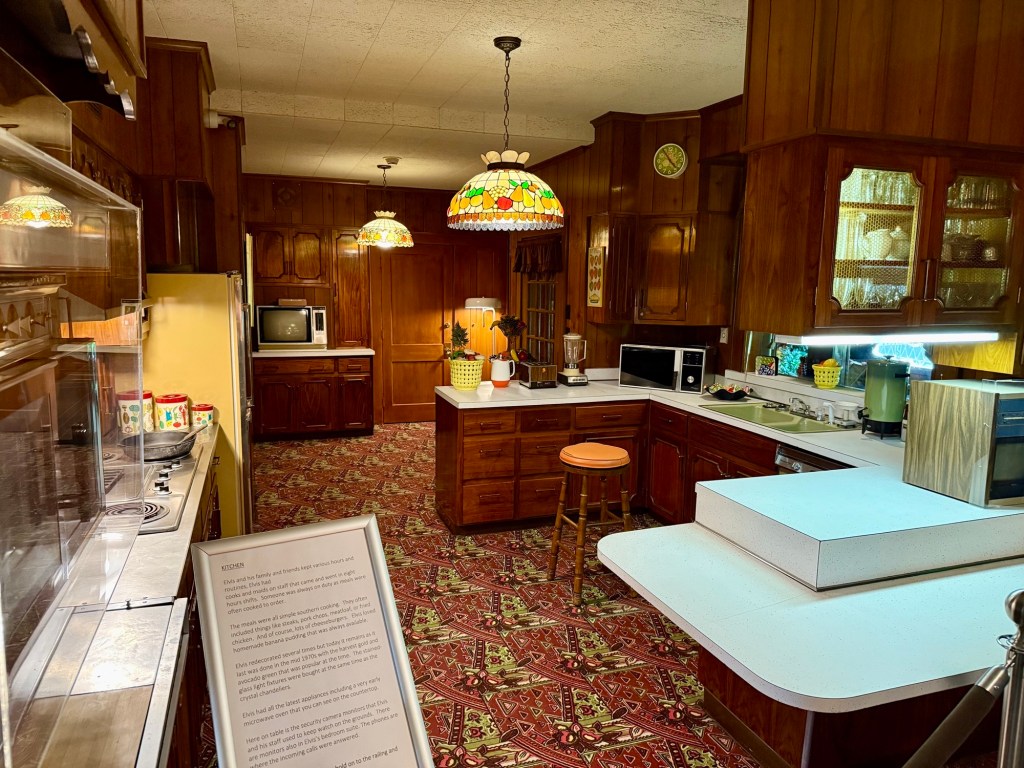
Kitchen

As a foodie and an avid cook, I was quite disappointed by the kitchen. I expected it to be grand with elegance! This kitchen was last redone in the mid-70s. Elvis had cooks and maids on staff at all hours of the day in 8-hour shifts so meals are usually cooked to order! Common dishes would be simple Southern cooking including: fried chicken, steaks, pork chops, meat loaf, and many cheeseburgers. Elvis also loved homemade banana pudding so it was always made available.
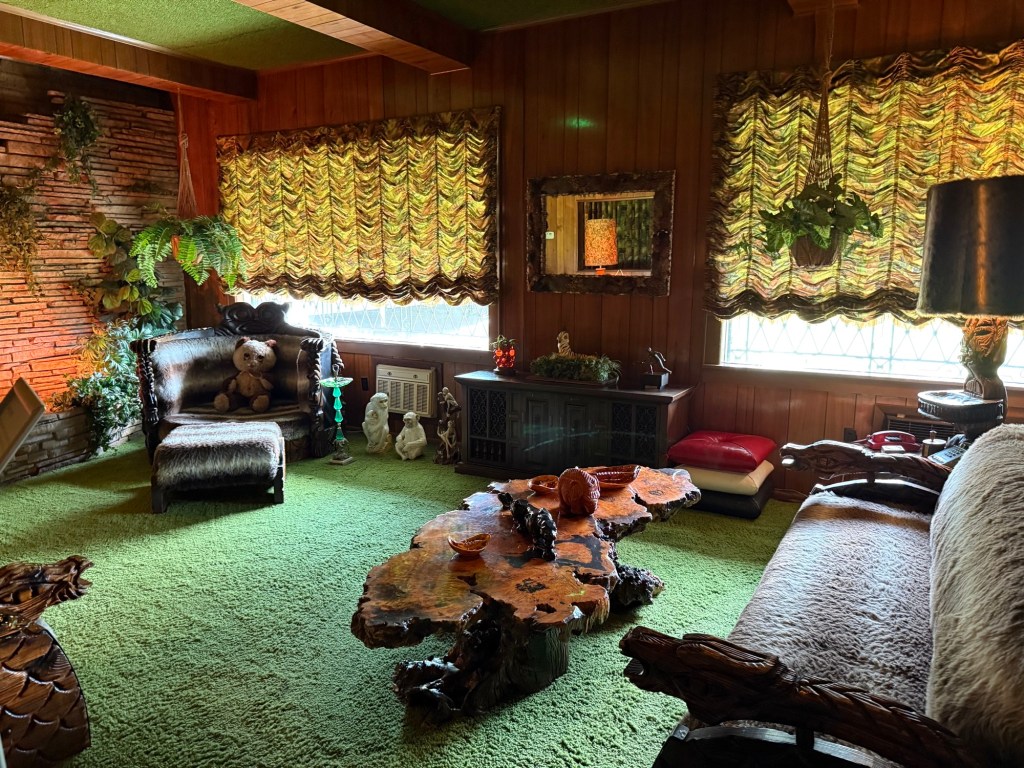
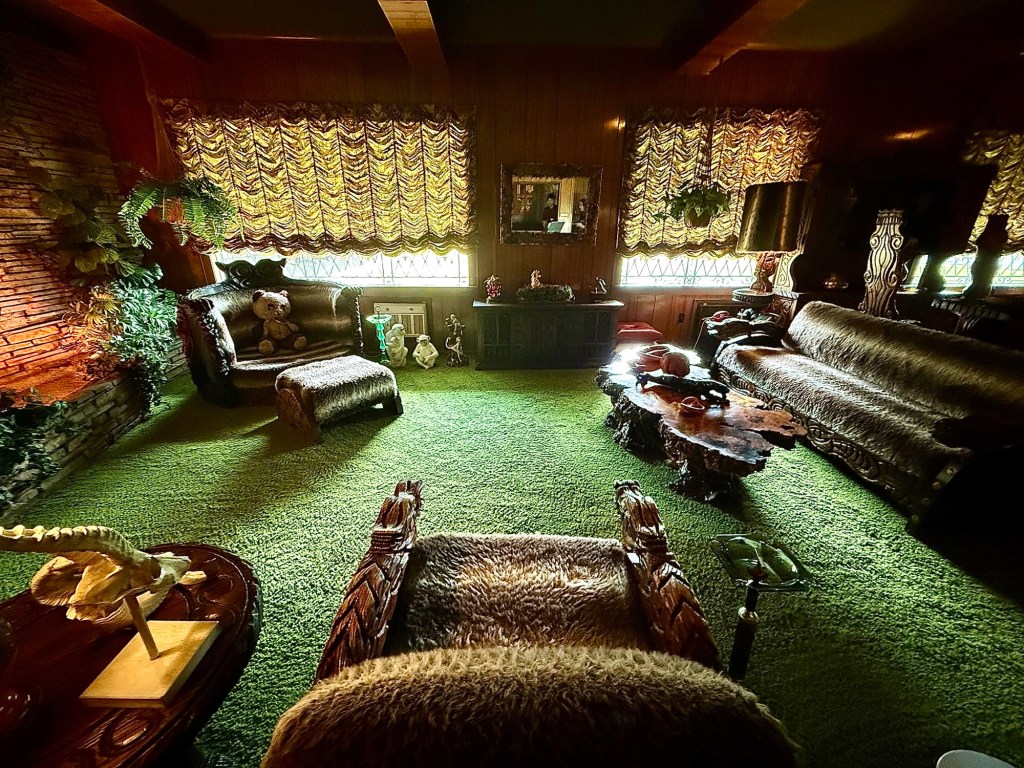
The Jungle Room/Den

In 1974, Polynesia/Tiki furniture was popular and Elvis decorated this room with these furniture pieces to remind him of his favourite Hawaiian vacation. Check out the floor to ceiling green shag carpeting in this room. The immersive carpeting resulted in fantastic acoustics in this room and Elvis recorded 2 of his records with RCA in this very room!

Basement Level of the Mansion

The stairs leading to the basement was lined with mirrors!

TV Room

Elvis loved football and would watch 3 different games at the same time on 3 TVs. There’s also a pull down projector screen where he could play movies and a jukebox that could hold 100 singles with speakers wired throughout the house.
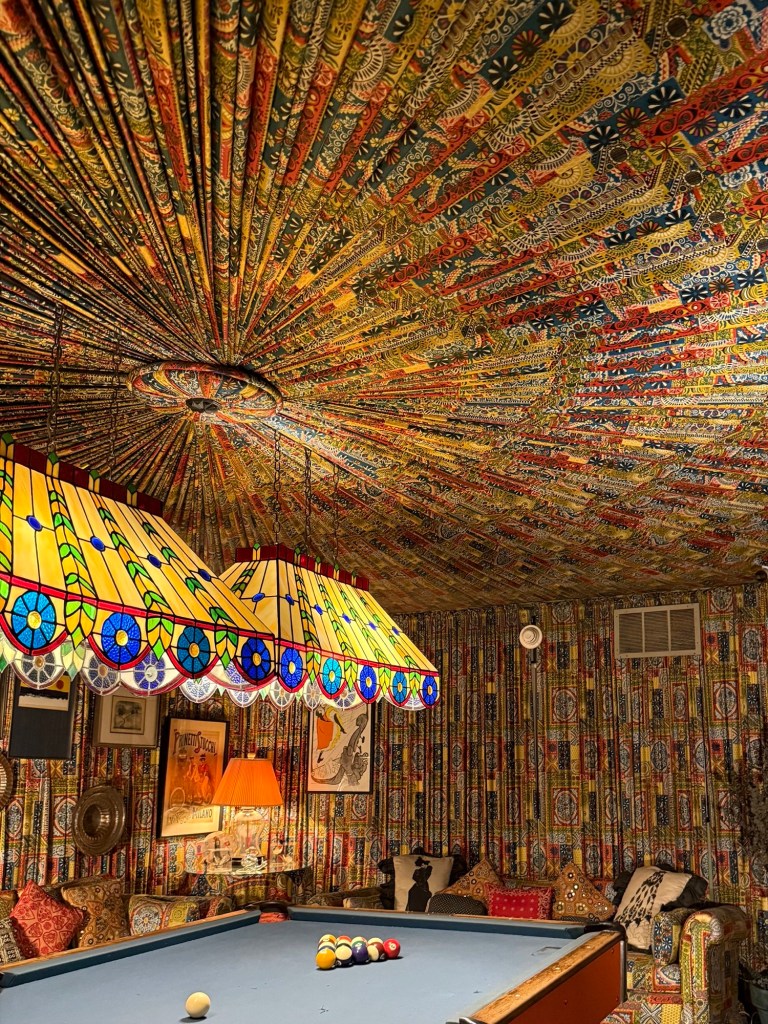
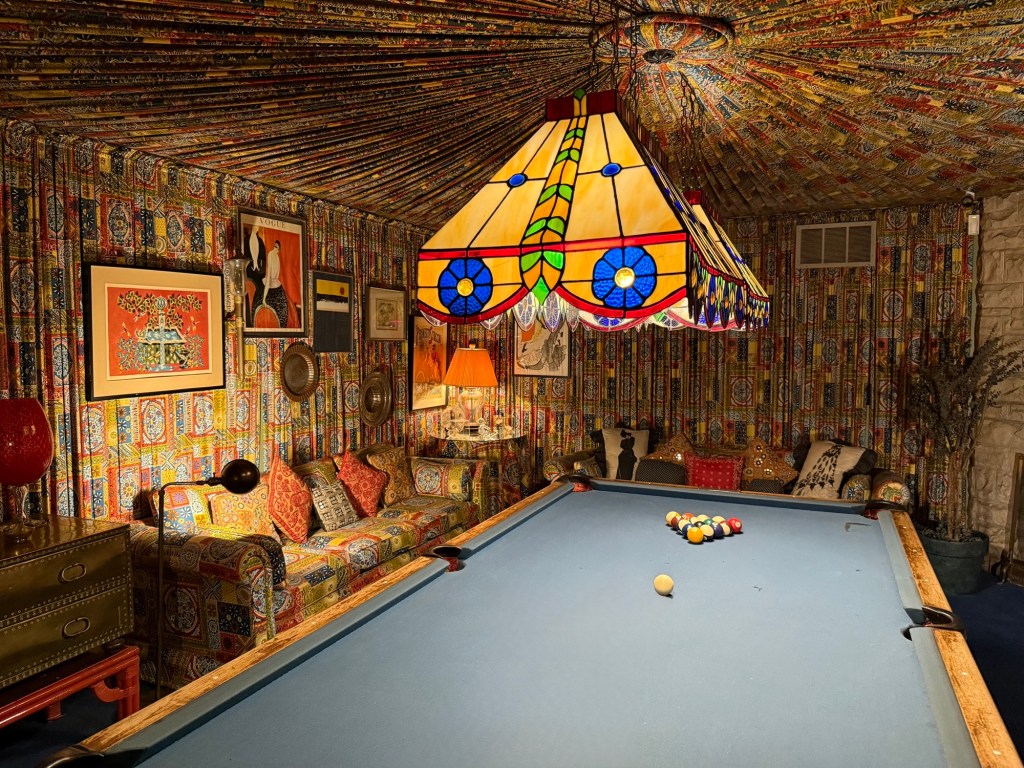
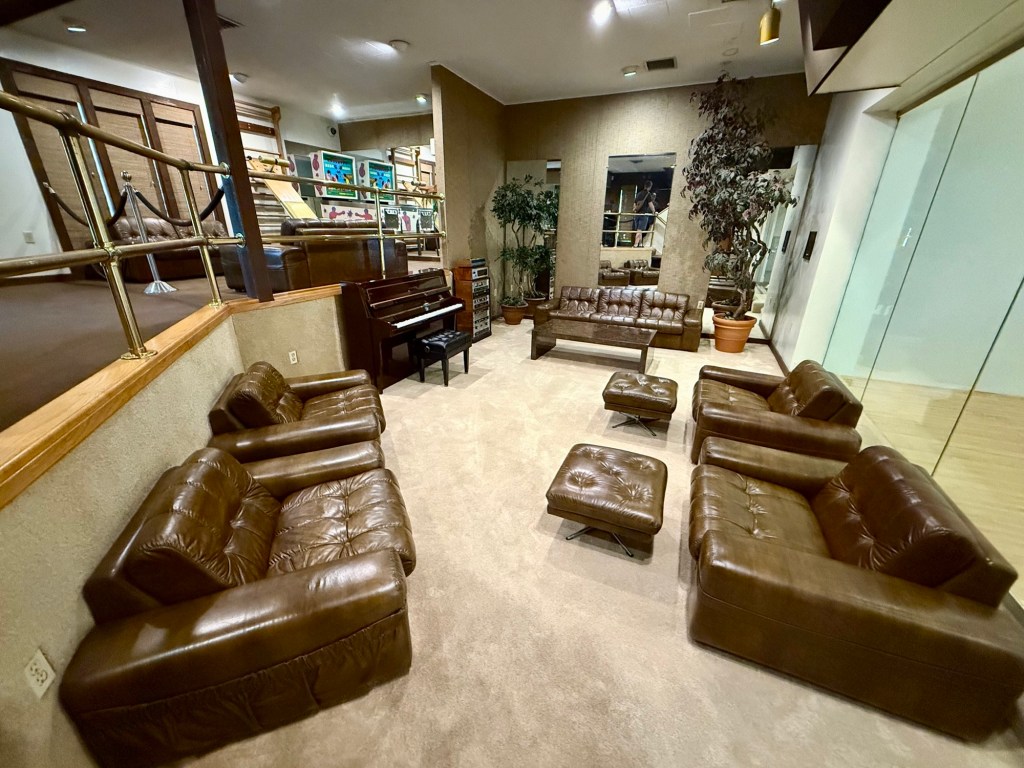
Pool Room

This is my favourite room of the house due to its beautifully colourful interior and unique wall and ceiling panelling!
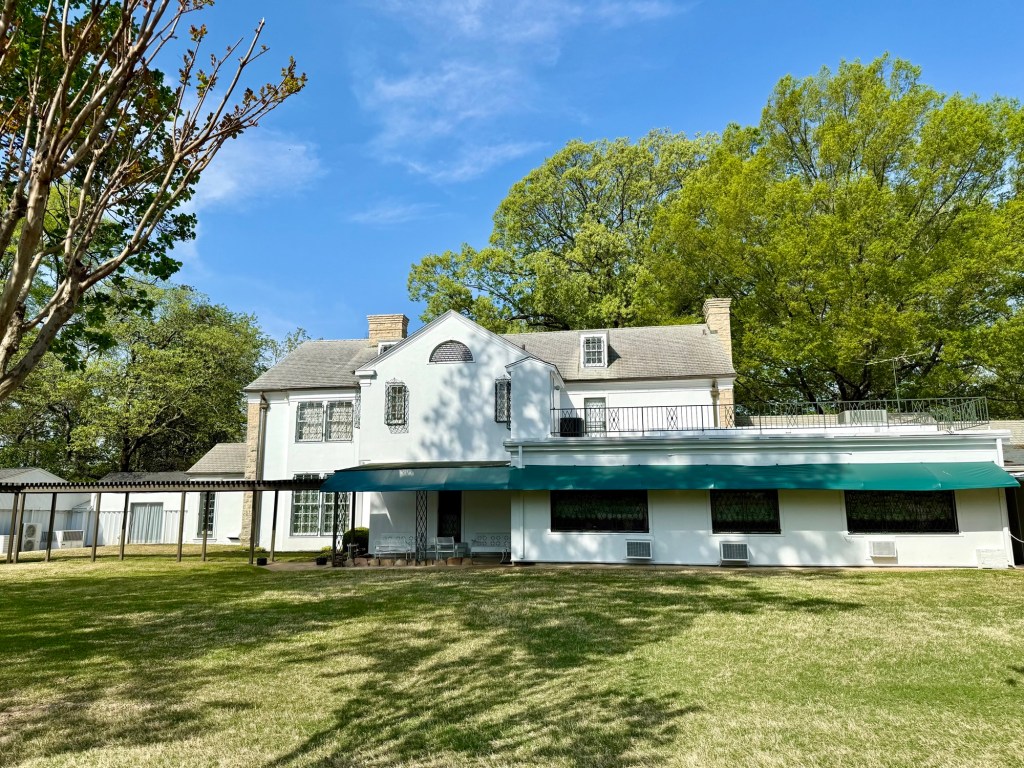
Back of the Mansion

As you finish touring the main house, the trail leads out the back of the house over to the unattached smaller buildings on the property grassy areas where they could ride their horses. There’s also a kidney-shaped pool.

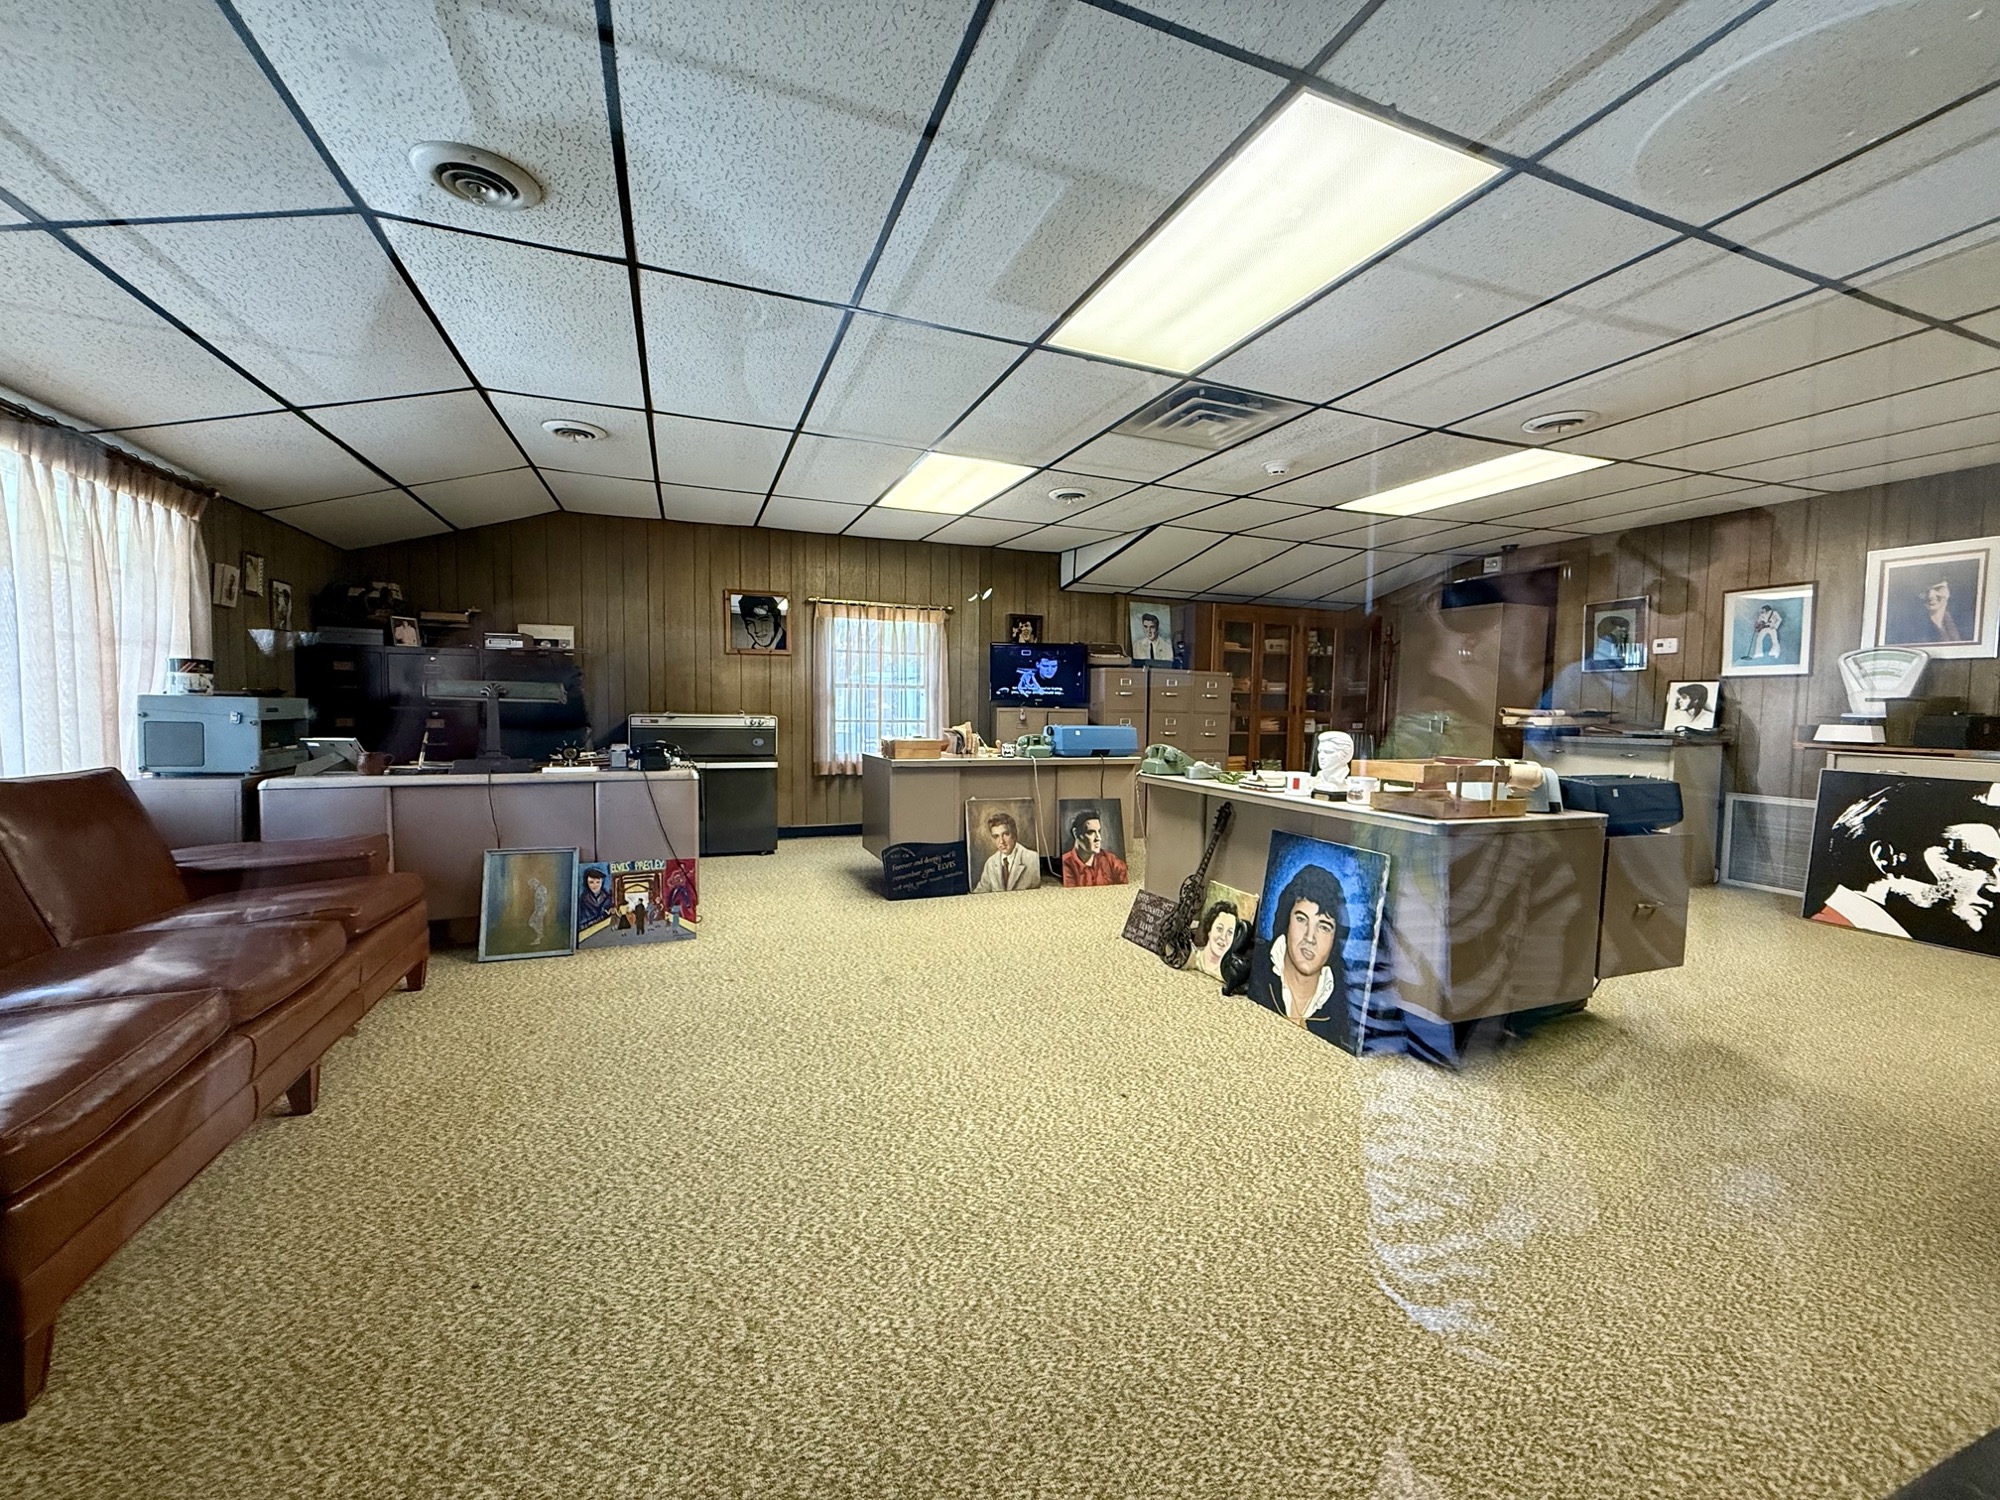
Vernon’s Office & the Smokehouse

Vernon Presley, Elvis’ father managed Elvis’ personal affairs including all of his fan mail and the running of Graceland. He had his own office on the property in the back. There’s also an old smokehouse that was once used as a firing range.

Trophy Building

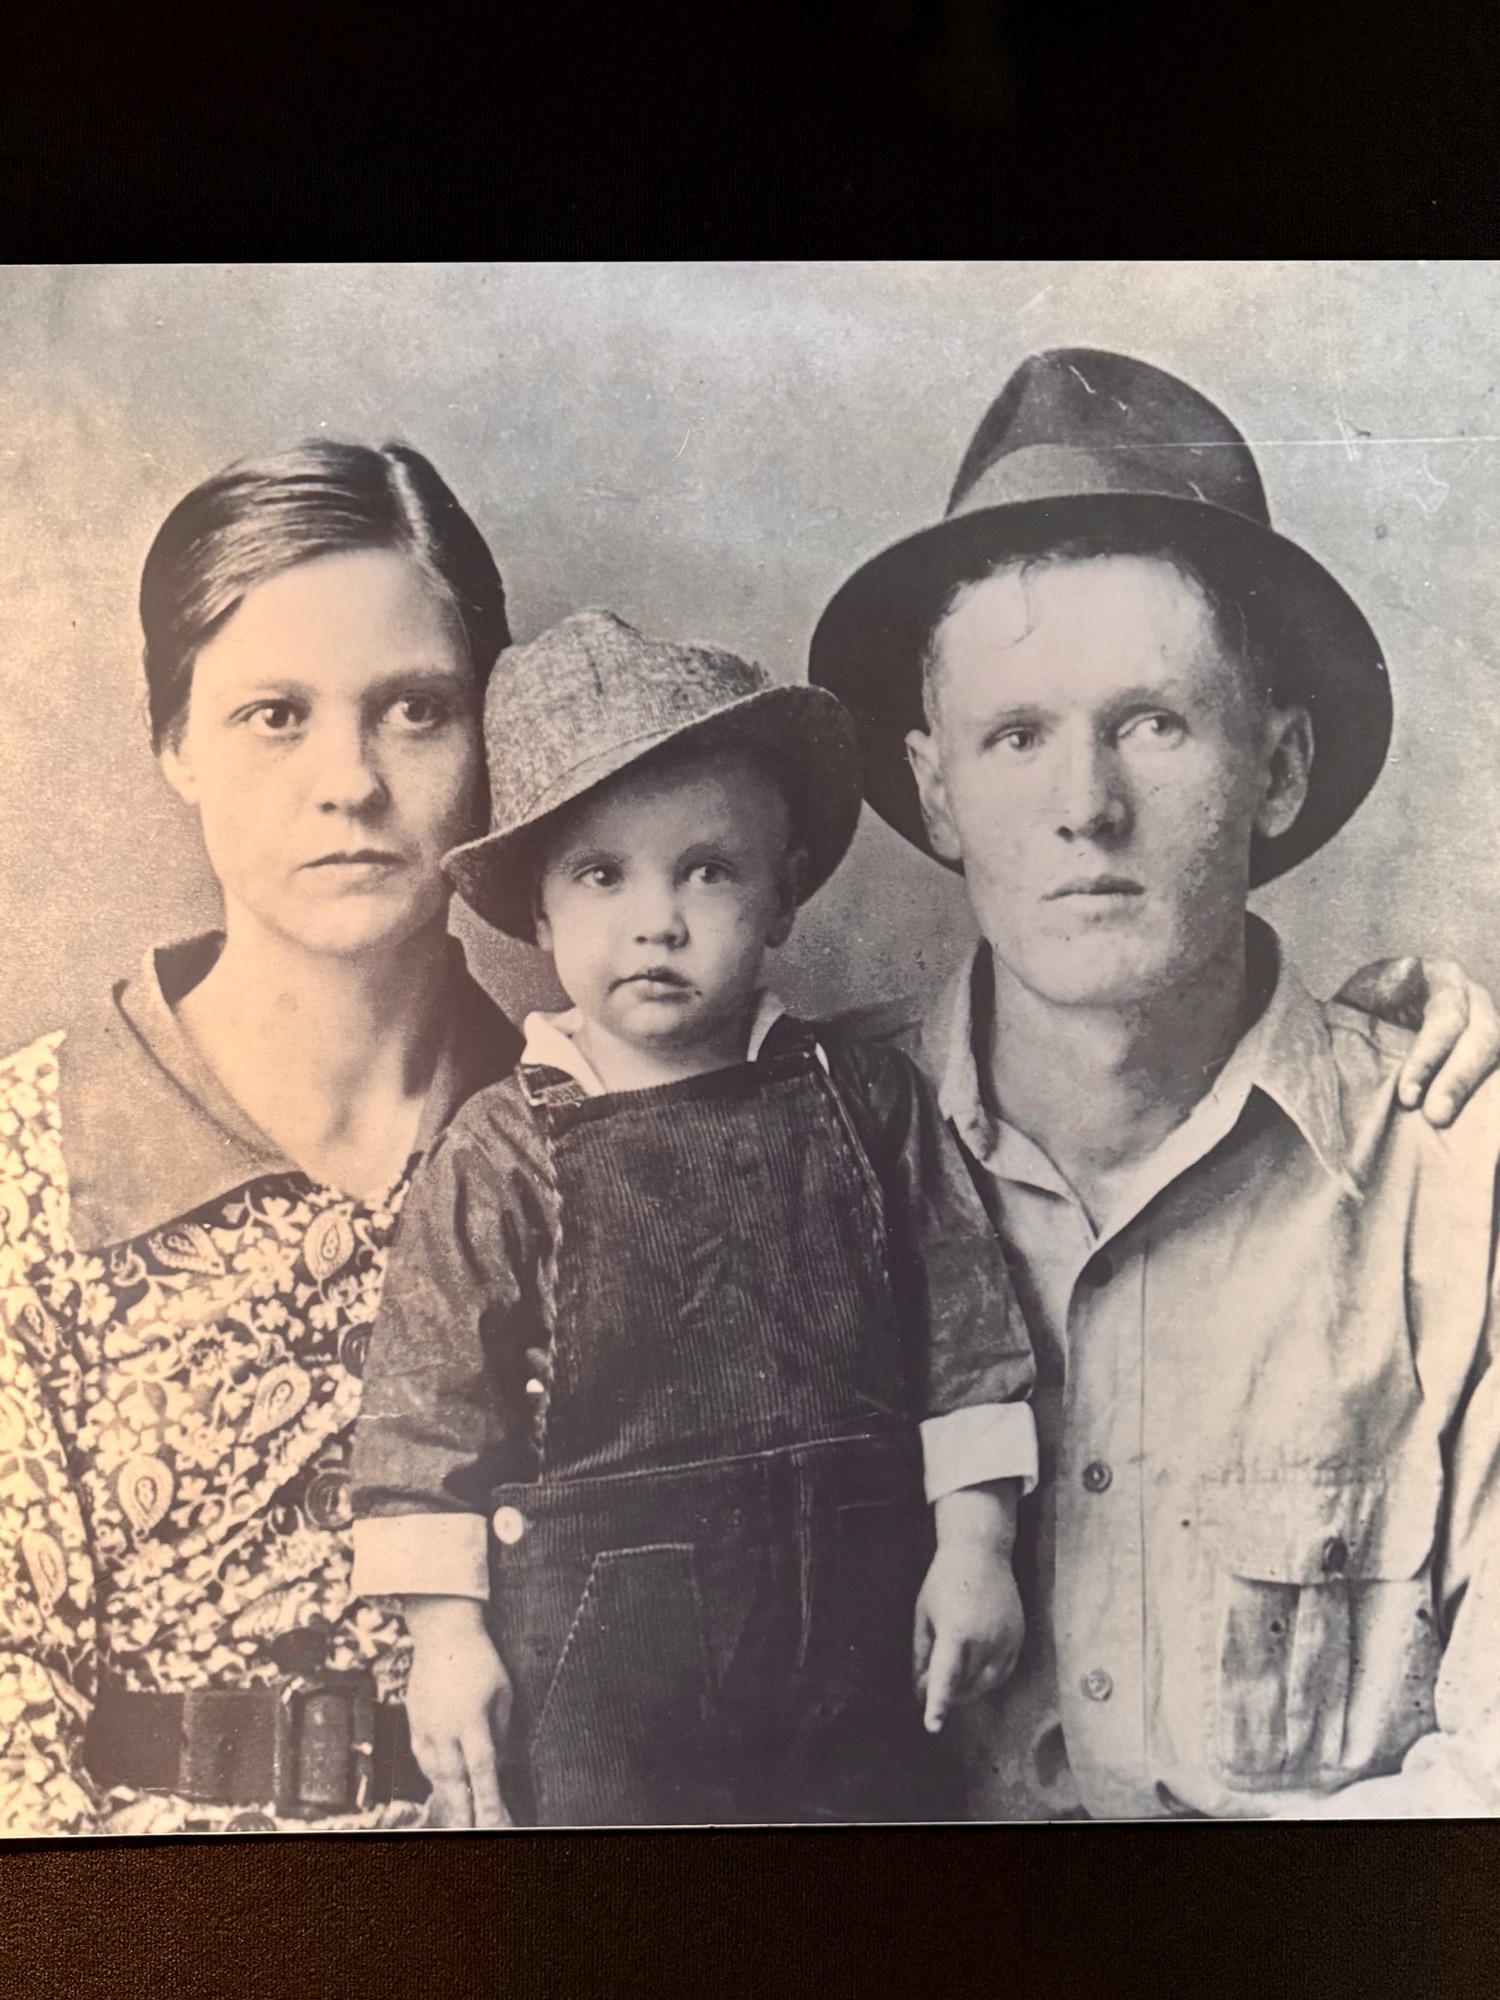
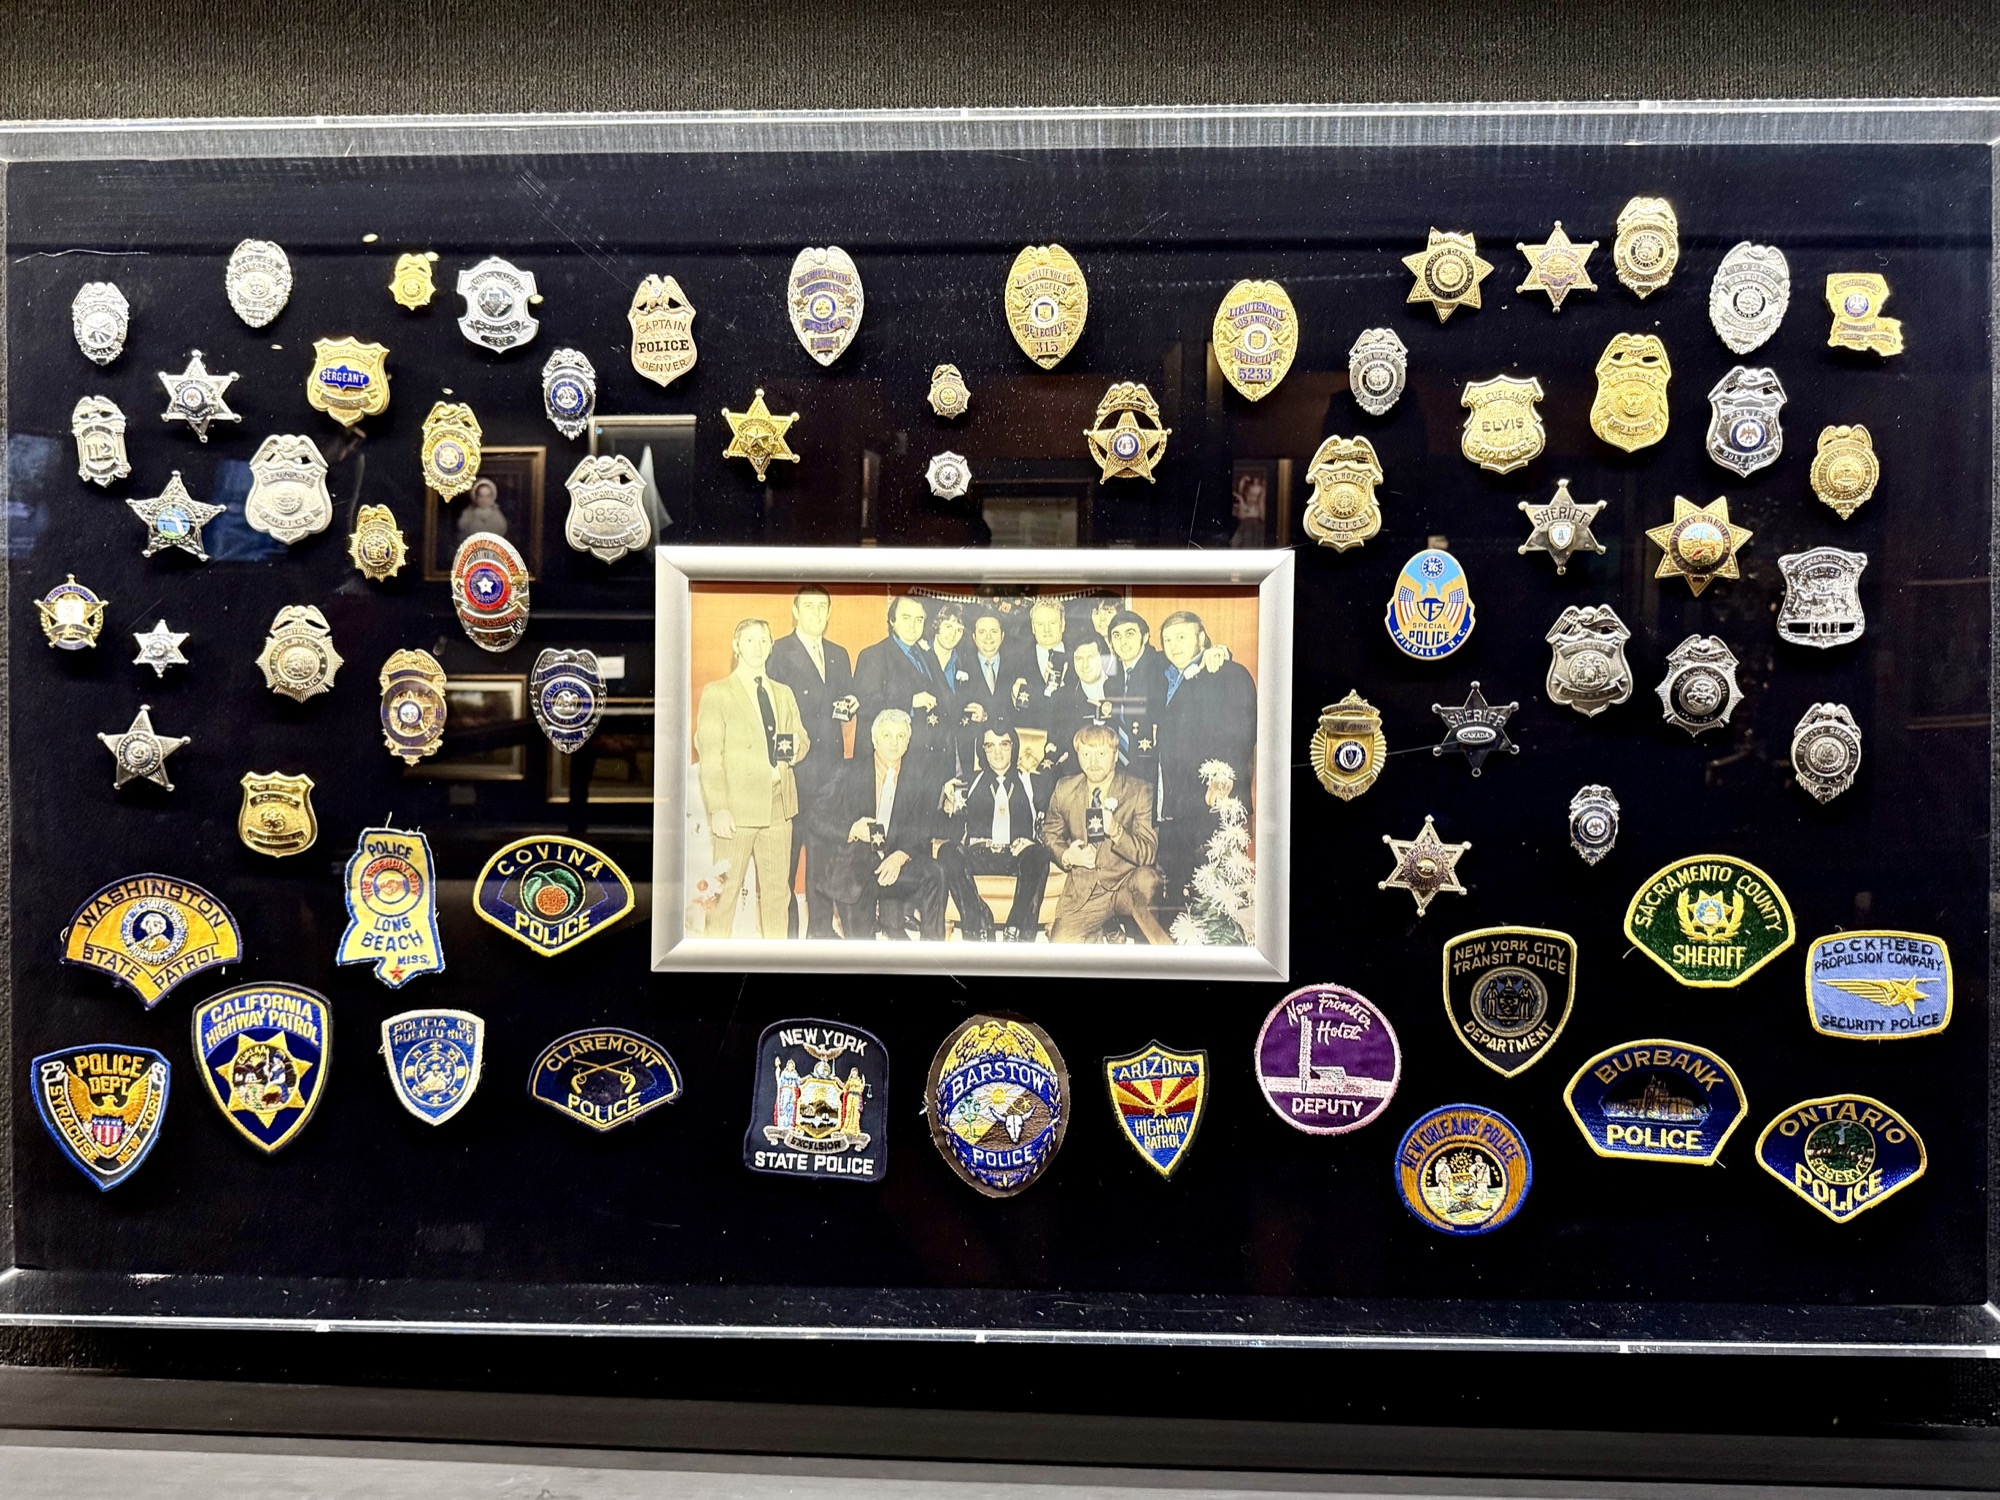
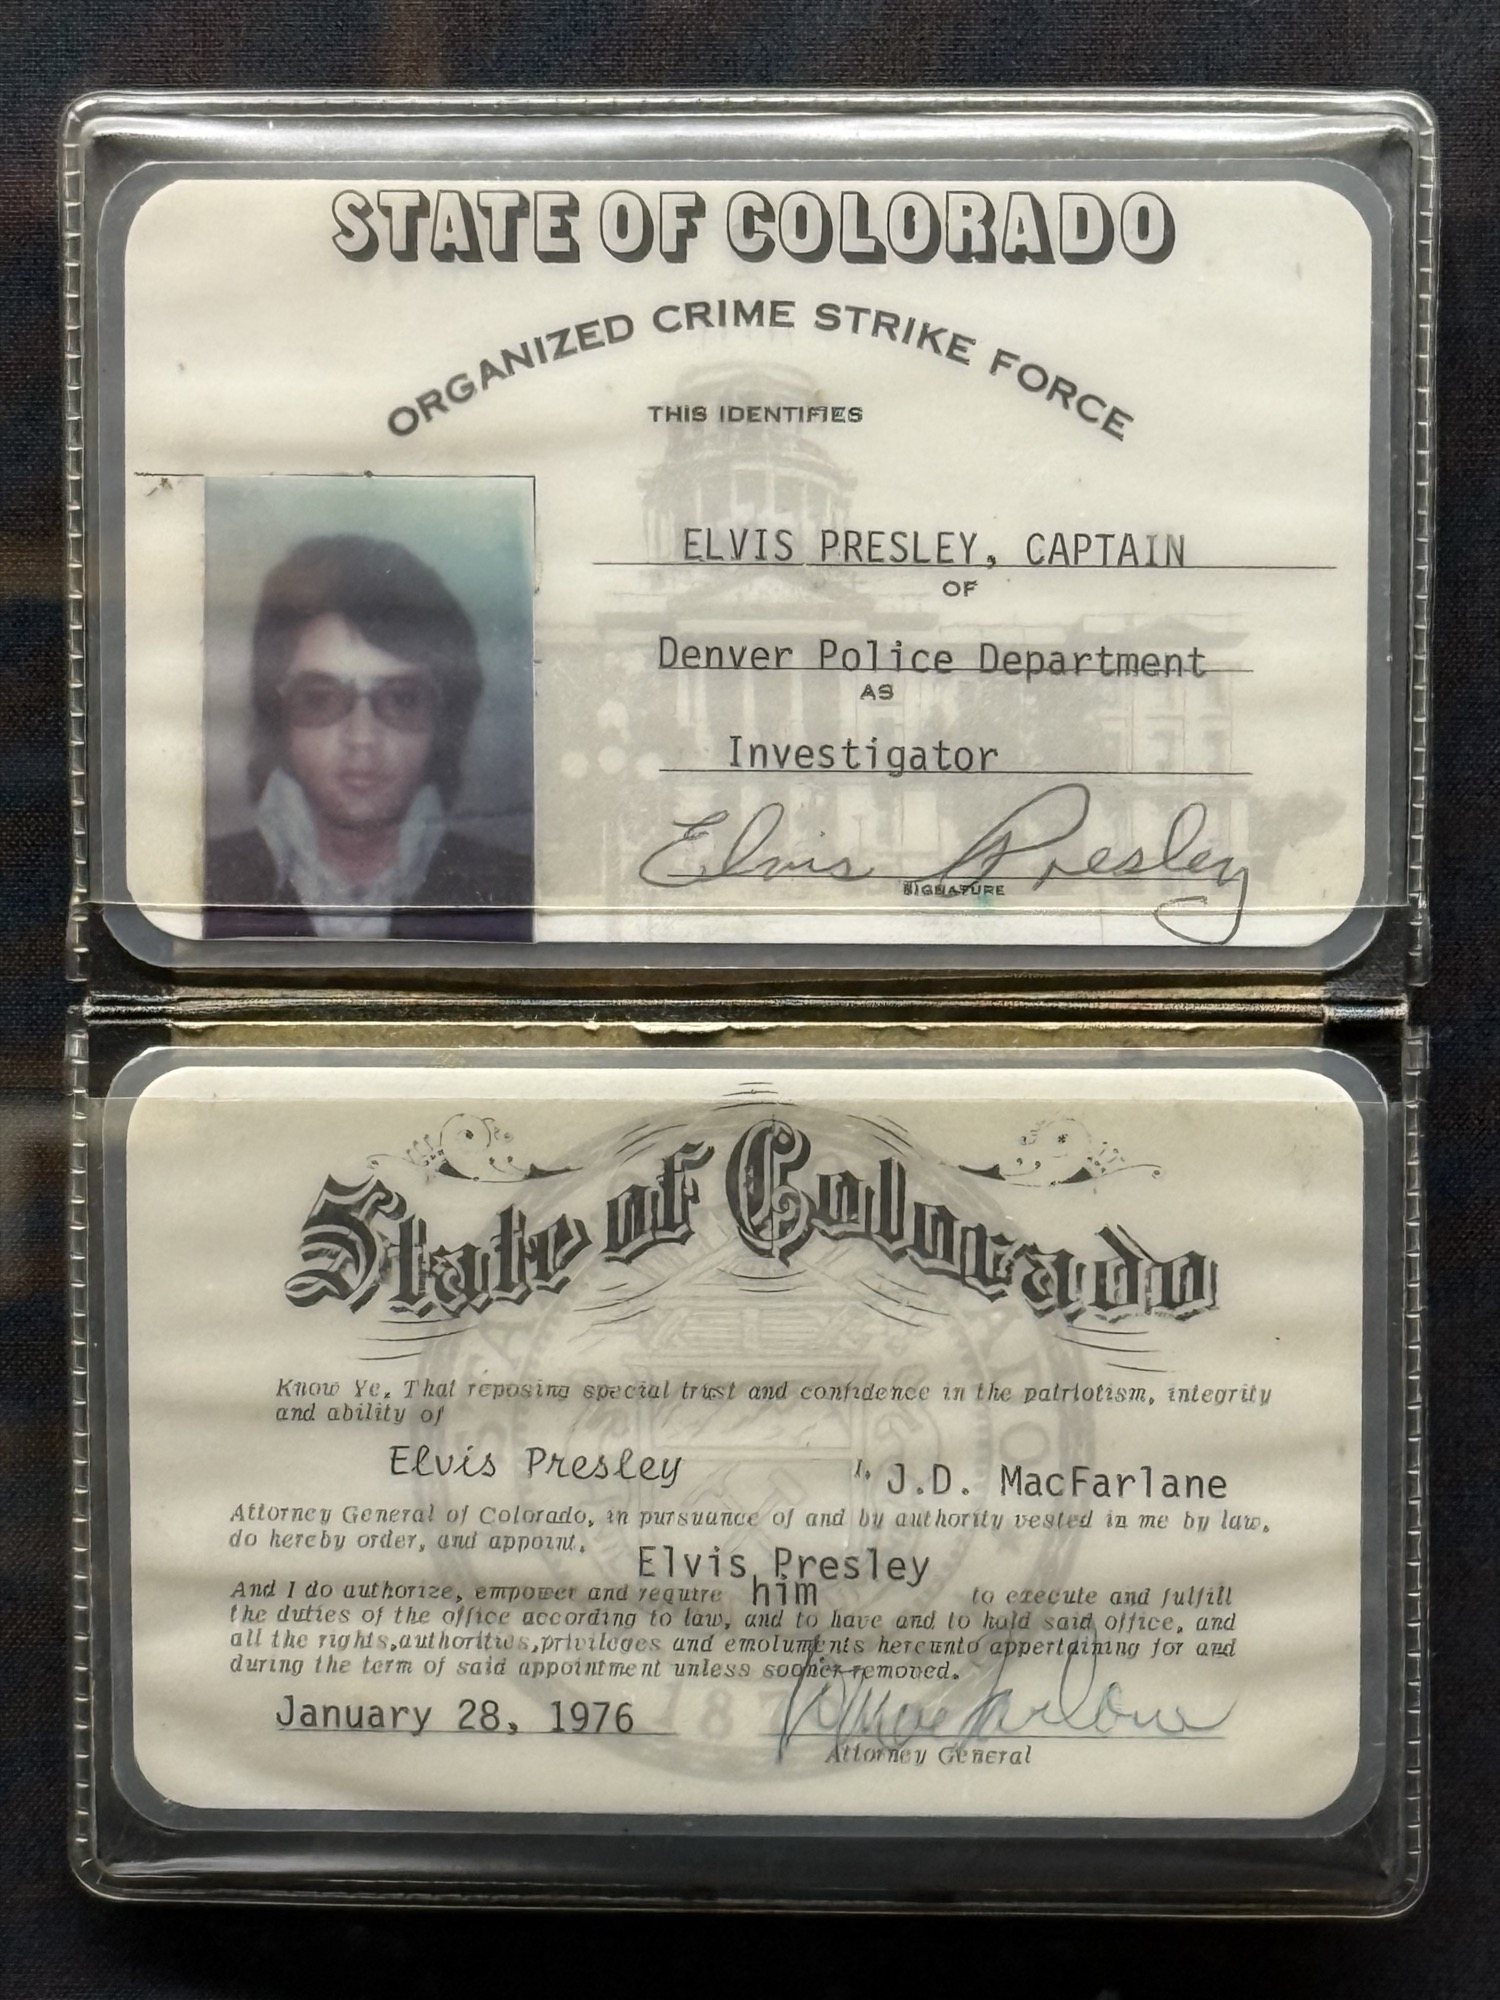
This building was built as an expansion to the home and was also where Elvis and Priscilla had their wedding reception. It has since been renovated to tell Elvis’ personal story and contain artifacts from his family and youth. Here you’ll find old family photos, his first bicycle, a police badge collection (Elvis would have been a policeman if his music career didn’t take off!), and even his grade school report card! The items on display here is in contrast to the memorabilia on display at the Entertainment Complex that focuses on Elvis’ music career rather than personal life.

Interesting fact: Did you know that Elvis was born as the second twin? Unfortunately the first twin Jesse Garon Presley was a stillborn. Gladys and Vernon didn’t even know they were expecting twins until Elvis showed up just 30 minutes later. John Stamos’ character ‘Jesse’ in the show Full House was named as a tribute to Elvis’ brother.

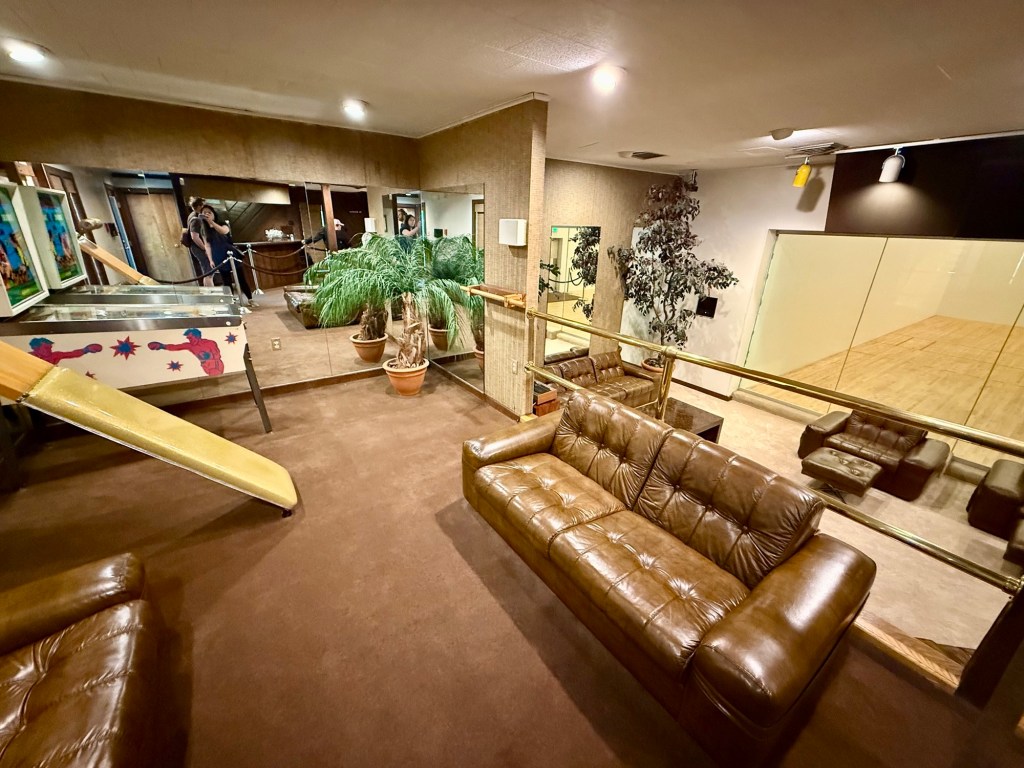
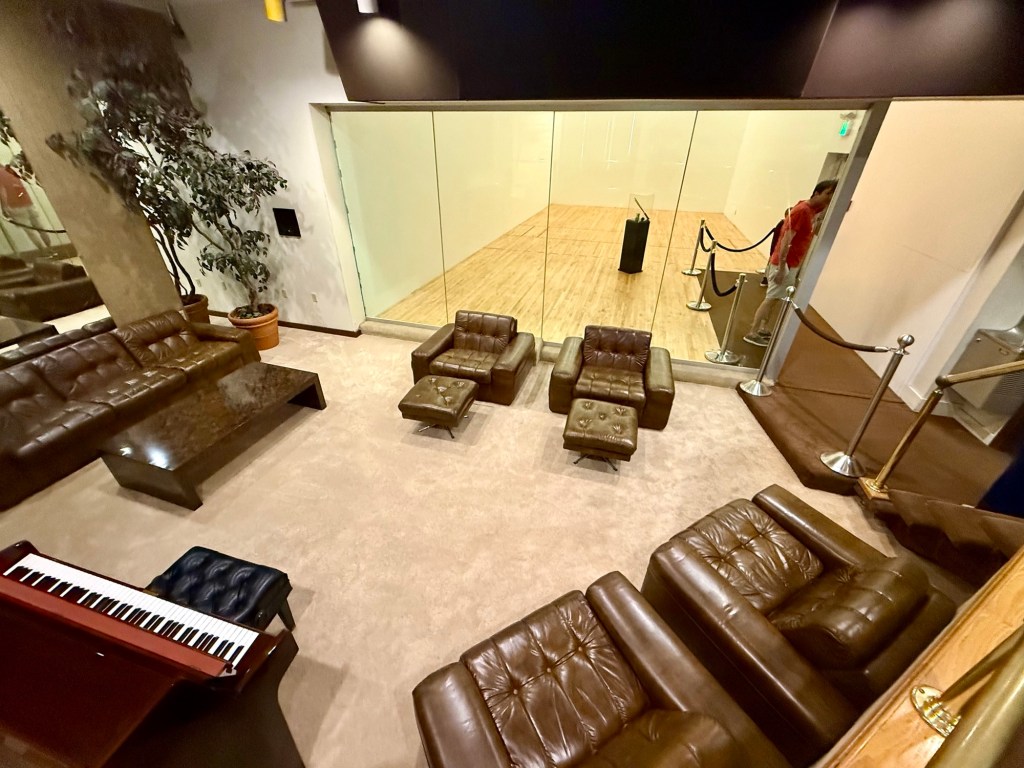
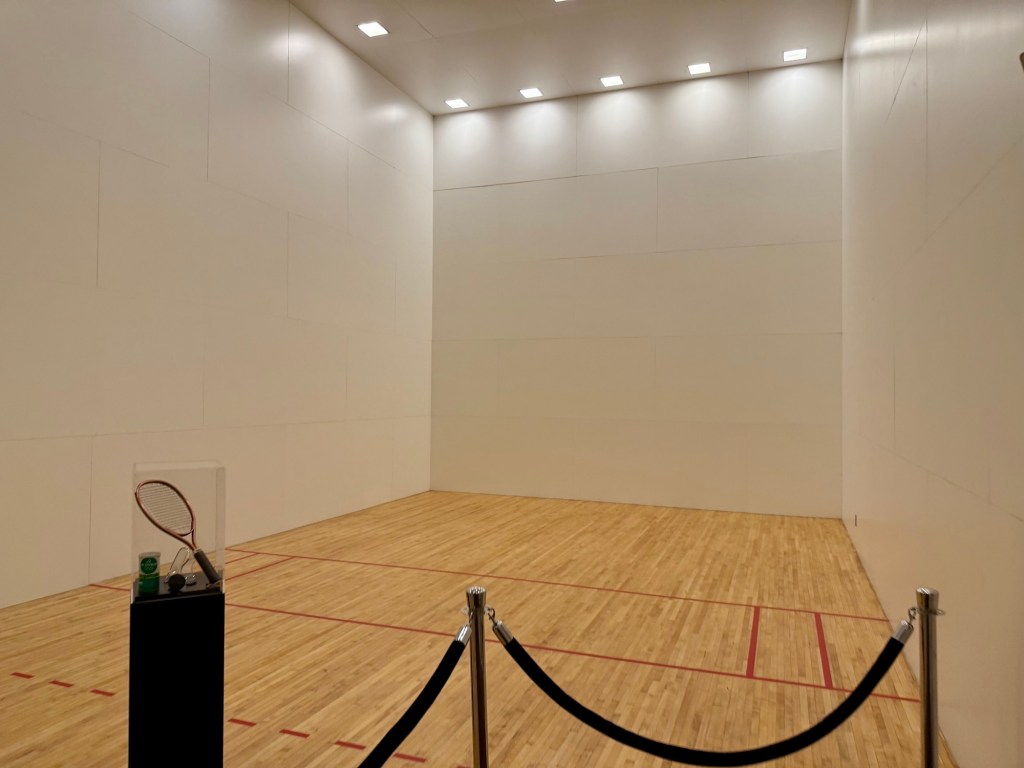
Racquetball Building

Elvis enjoyed racquetball so much that he had a racquetball court built on his property. This was the last room that he was seen alive after playing a game with some friends and singing his last songs on the piano in this room. He retired upstairs to his comfort room and was later found dead.
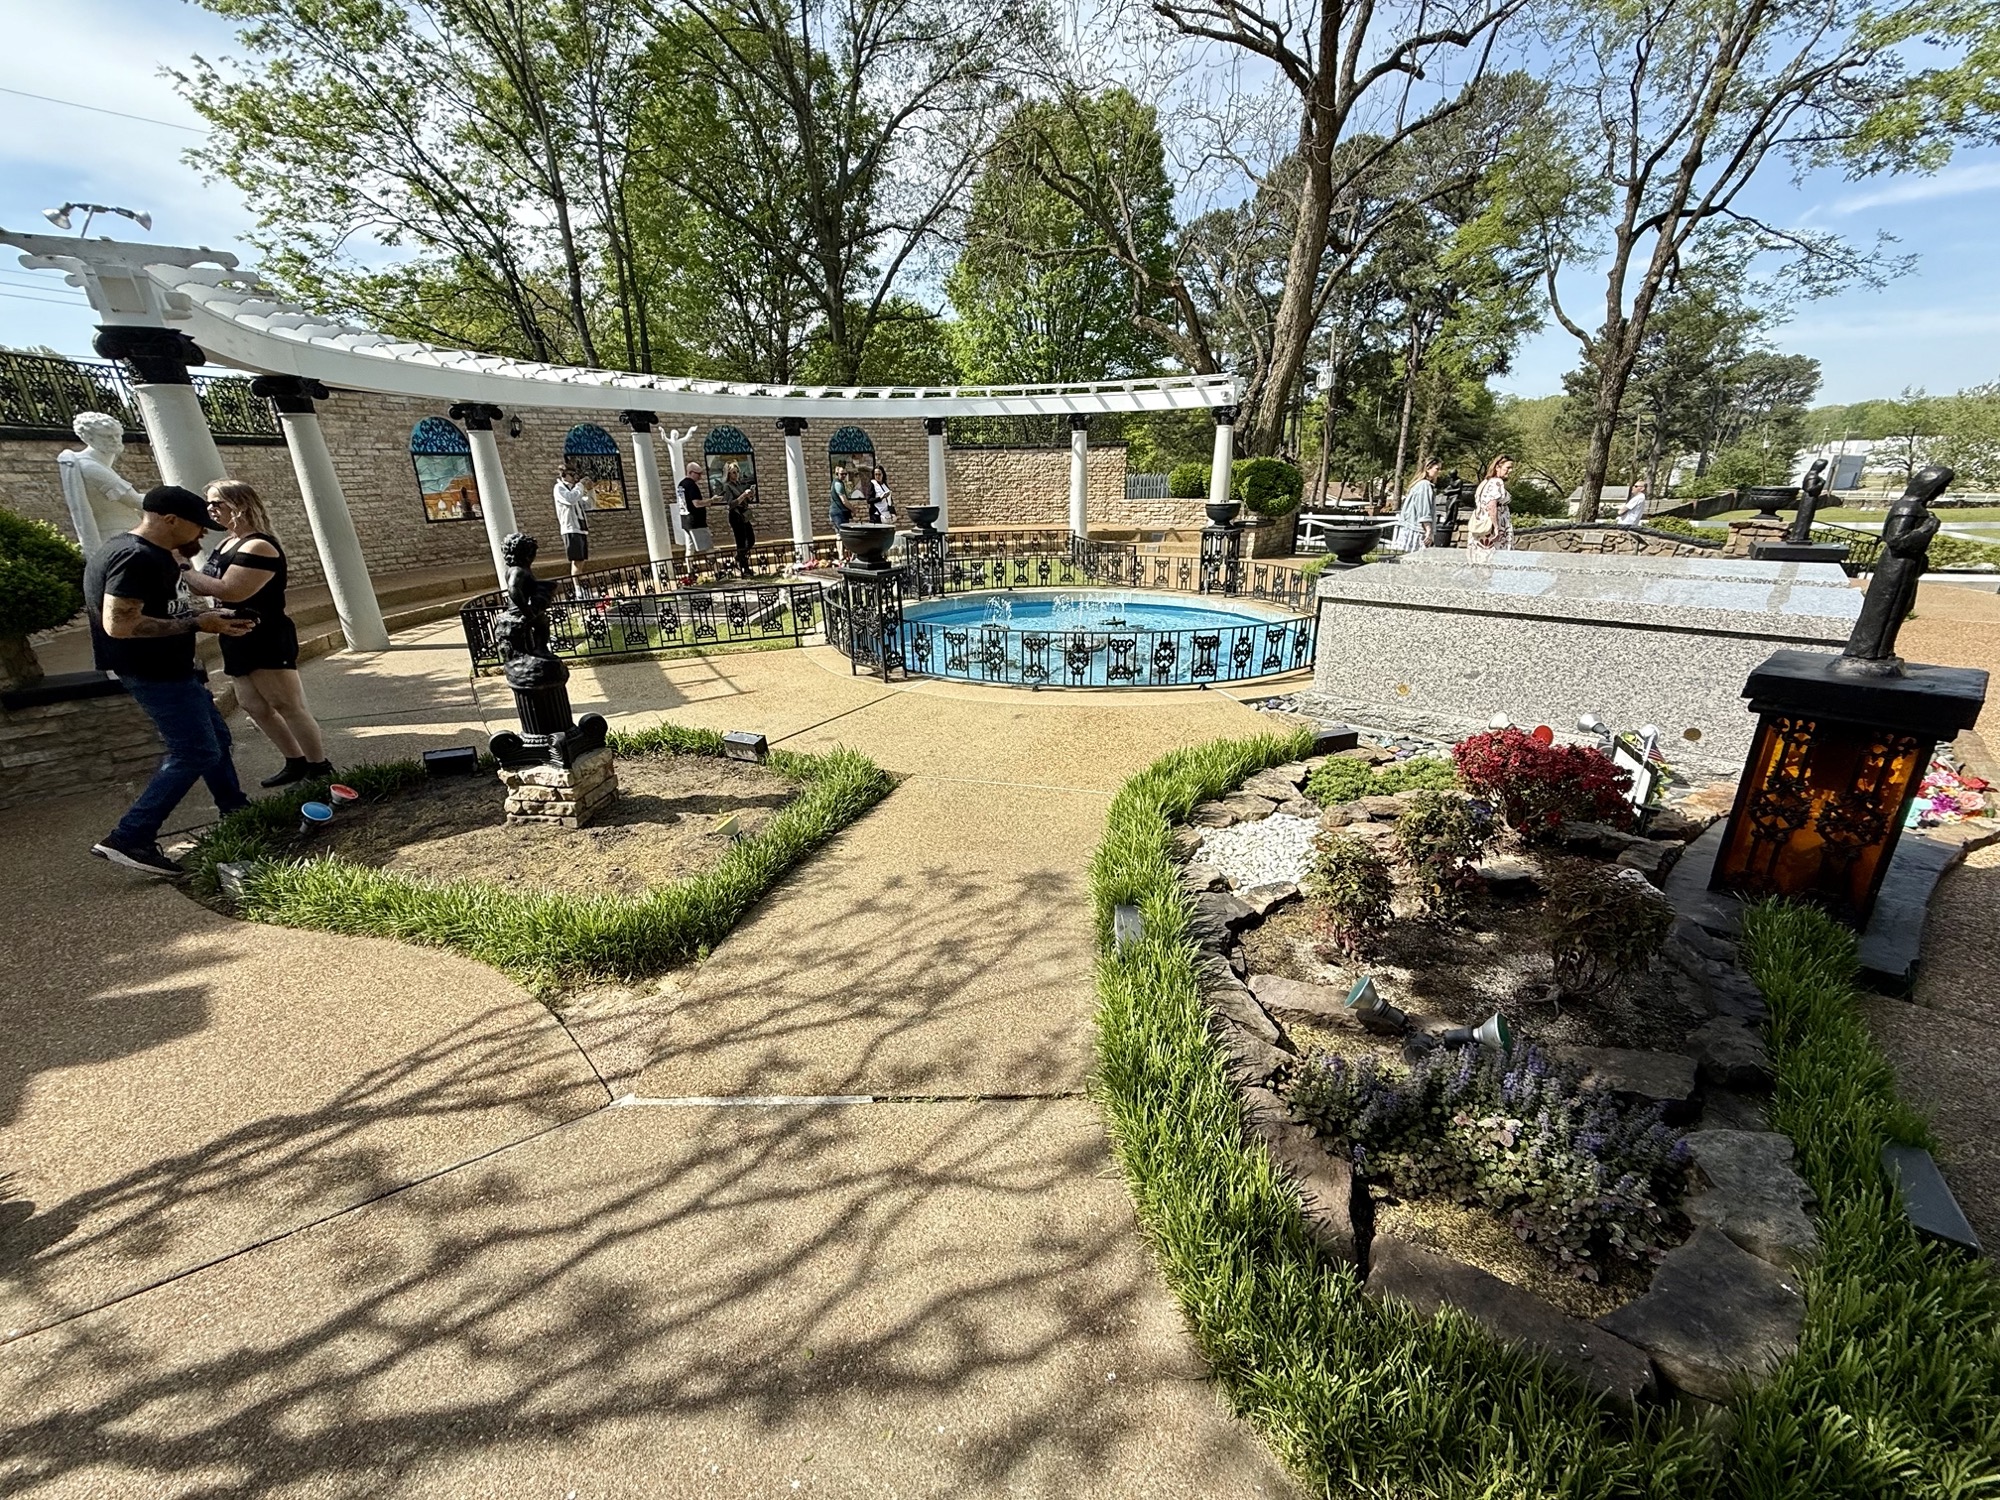
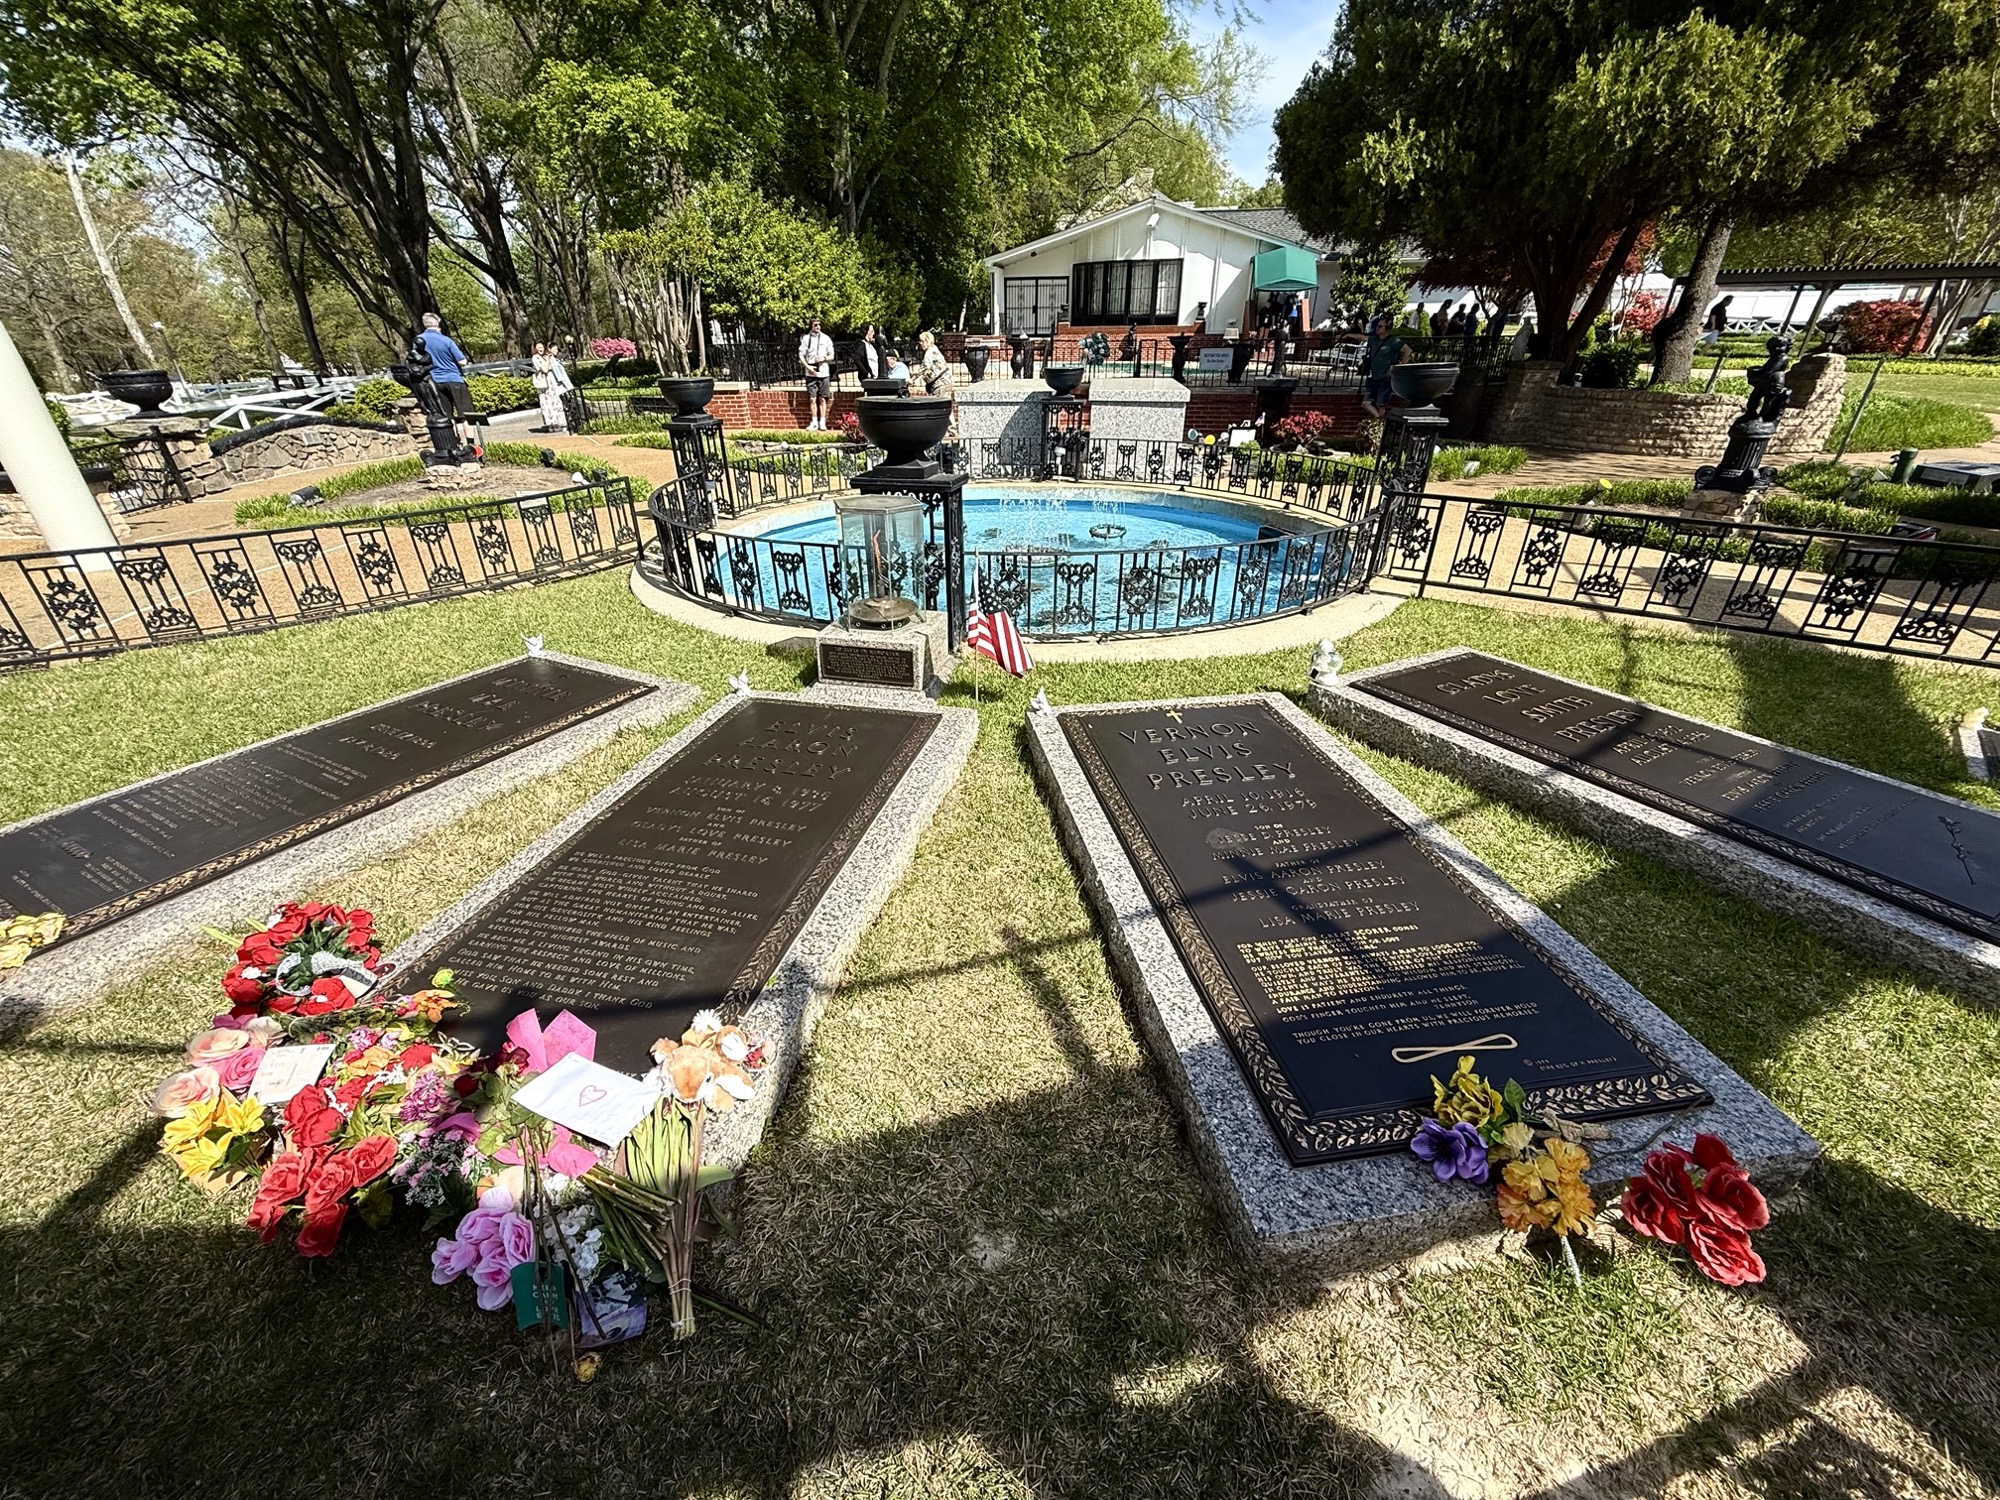
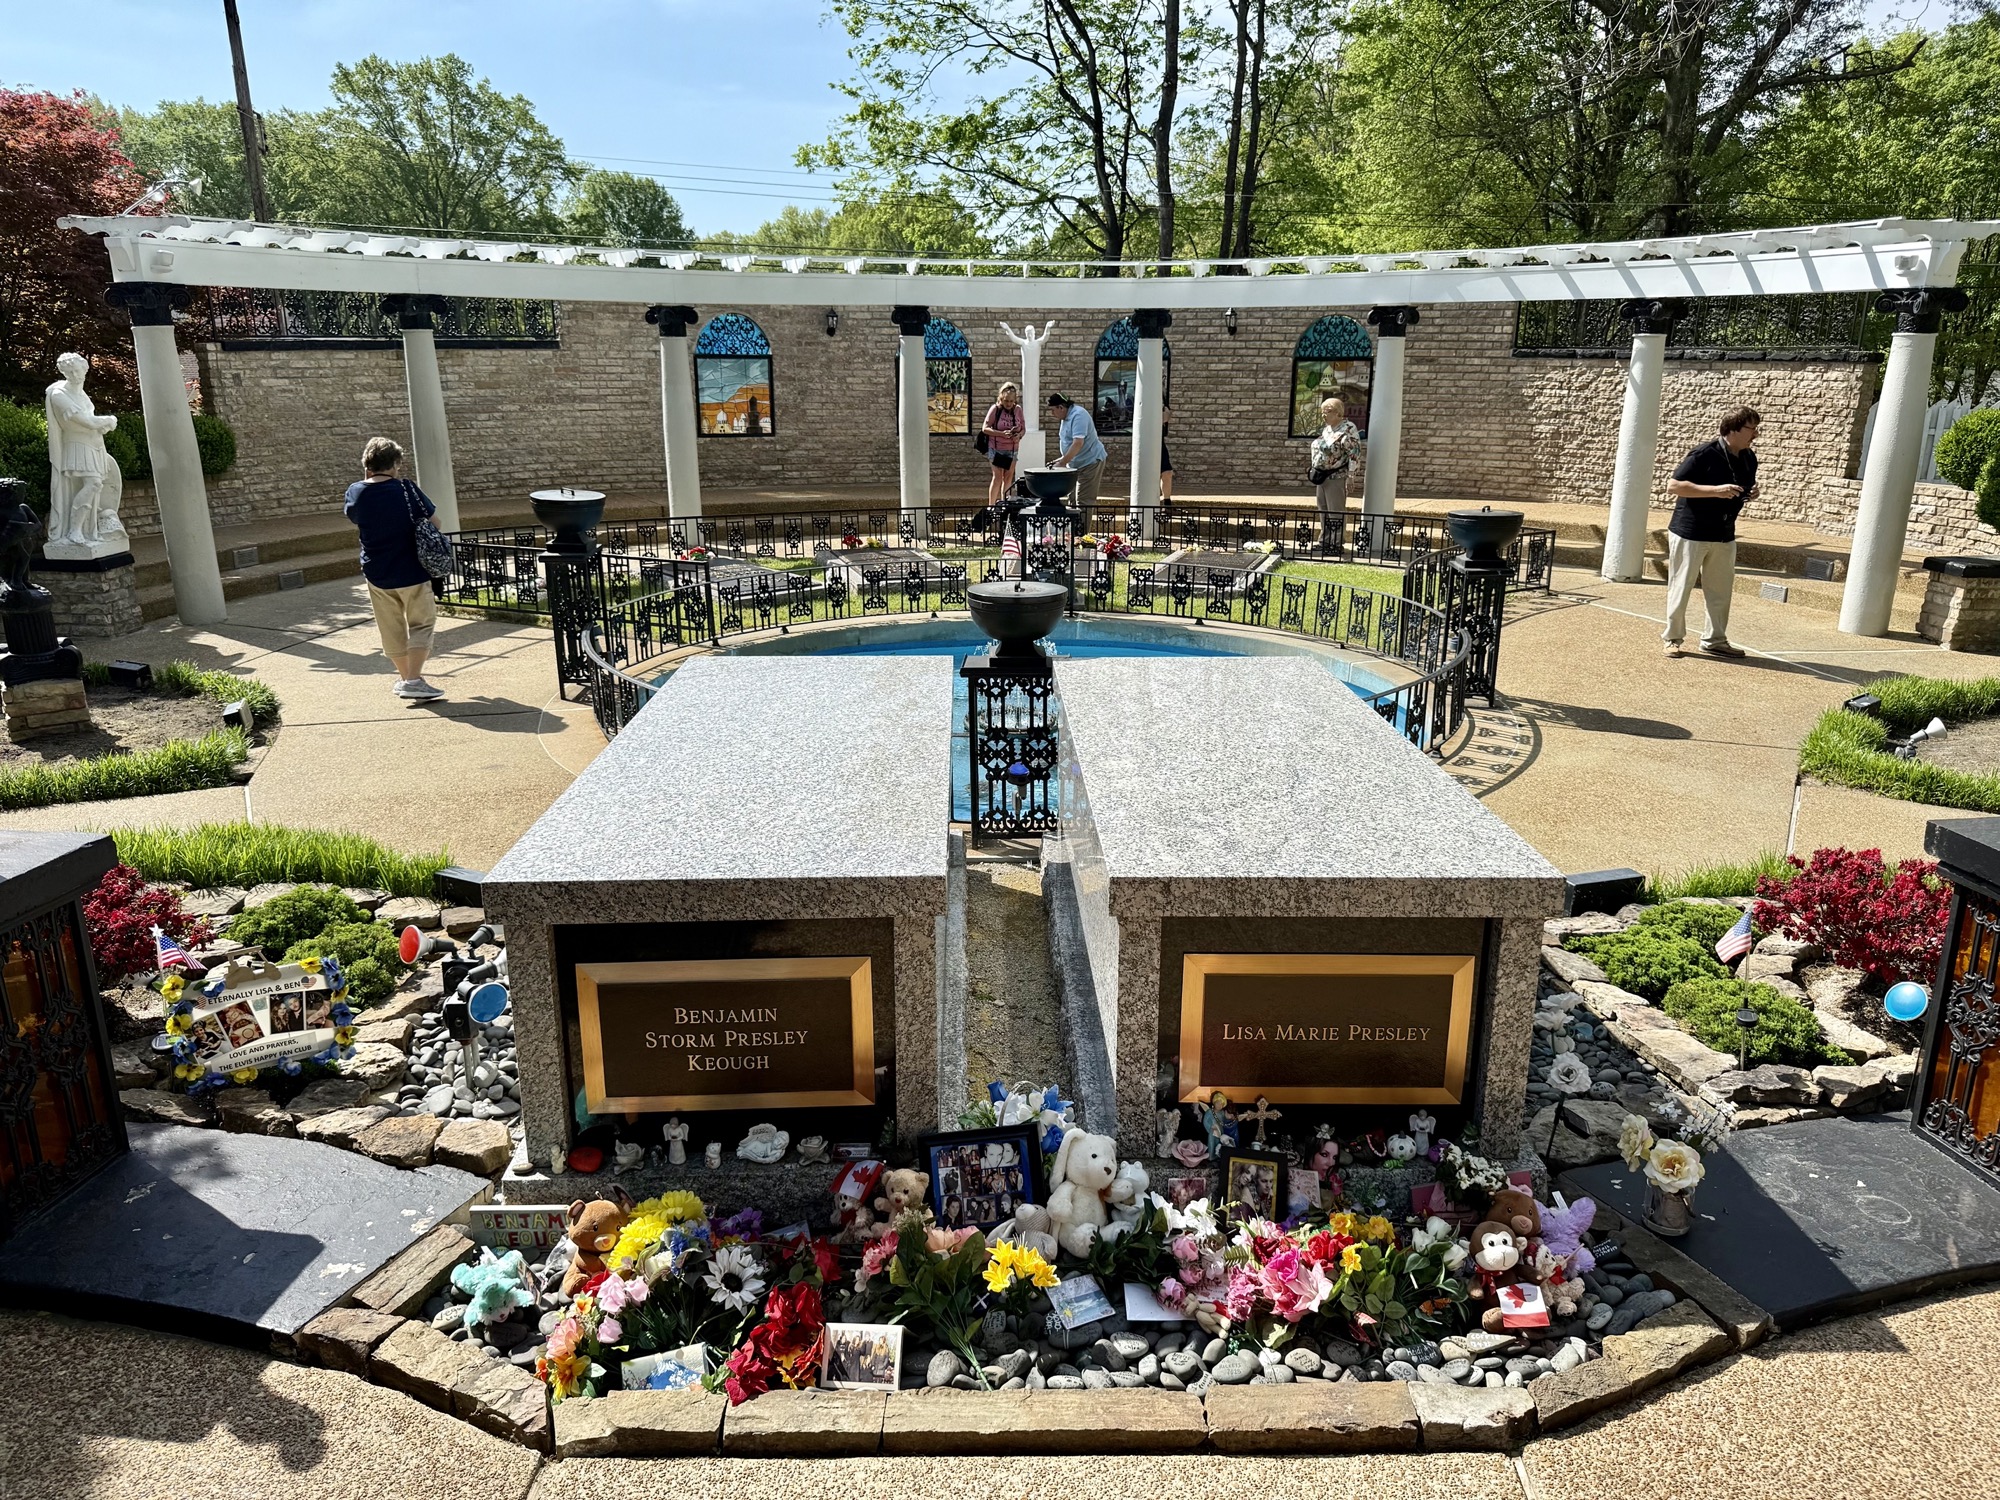
Meditation Garden

The Meditation Garden was said to be one of Elvis’ favourite places on the property. It was a place for meditation, reflection, and quiet contemplation. Gladys and Elvis was originally buried at Forest Hill Cemetery, but for security purposes, Vernon had them moved here on Graceland. The Meditation Garden is the final resting place for Vernon, Gladys, Elvis, and Minnie Mae (Elvis’ maternal grandmother). There’s also a small plaque here for his brother, Jesse. Lisa Marie (Elvis’ daughter) and Benjamin (Elvis’ grandson) are also buried here.

The self-guided tour of the mansion ends after the Meditation Garden but there’s still TONS to see. You’ll line up to get back on the shuttle bus to go back across the street to the Entertainment Complex, where the visitor centre was.

Back to the Entertainment Complex

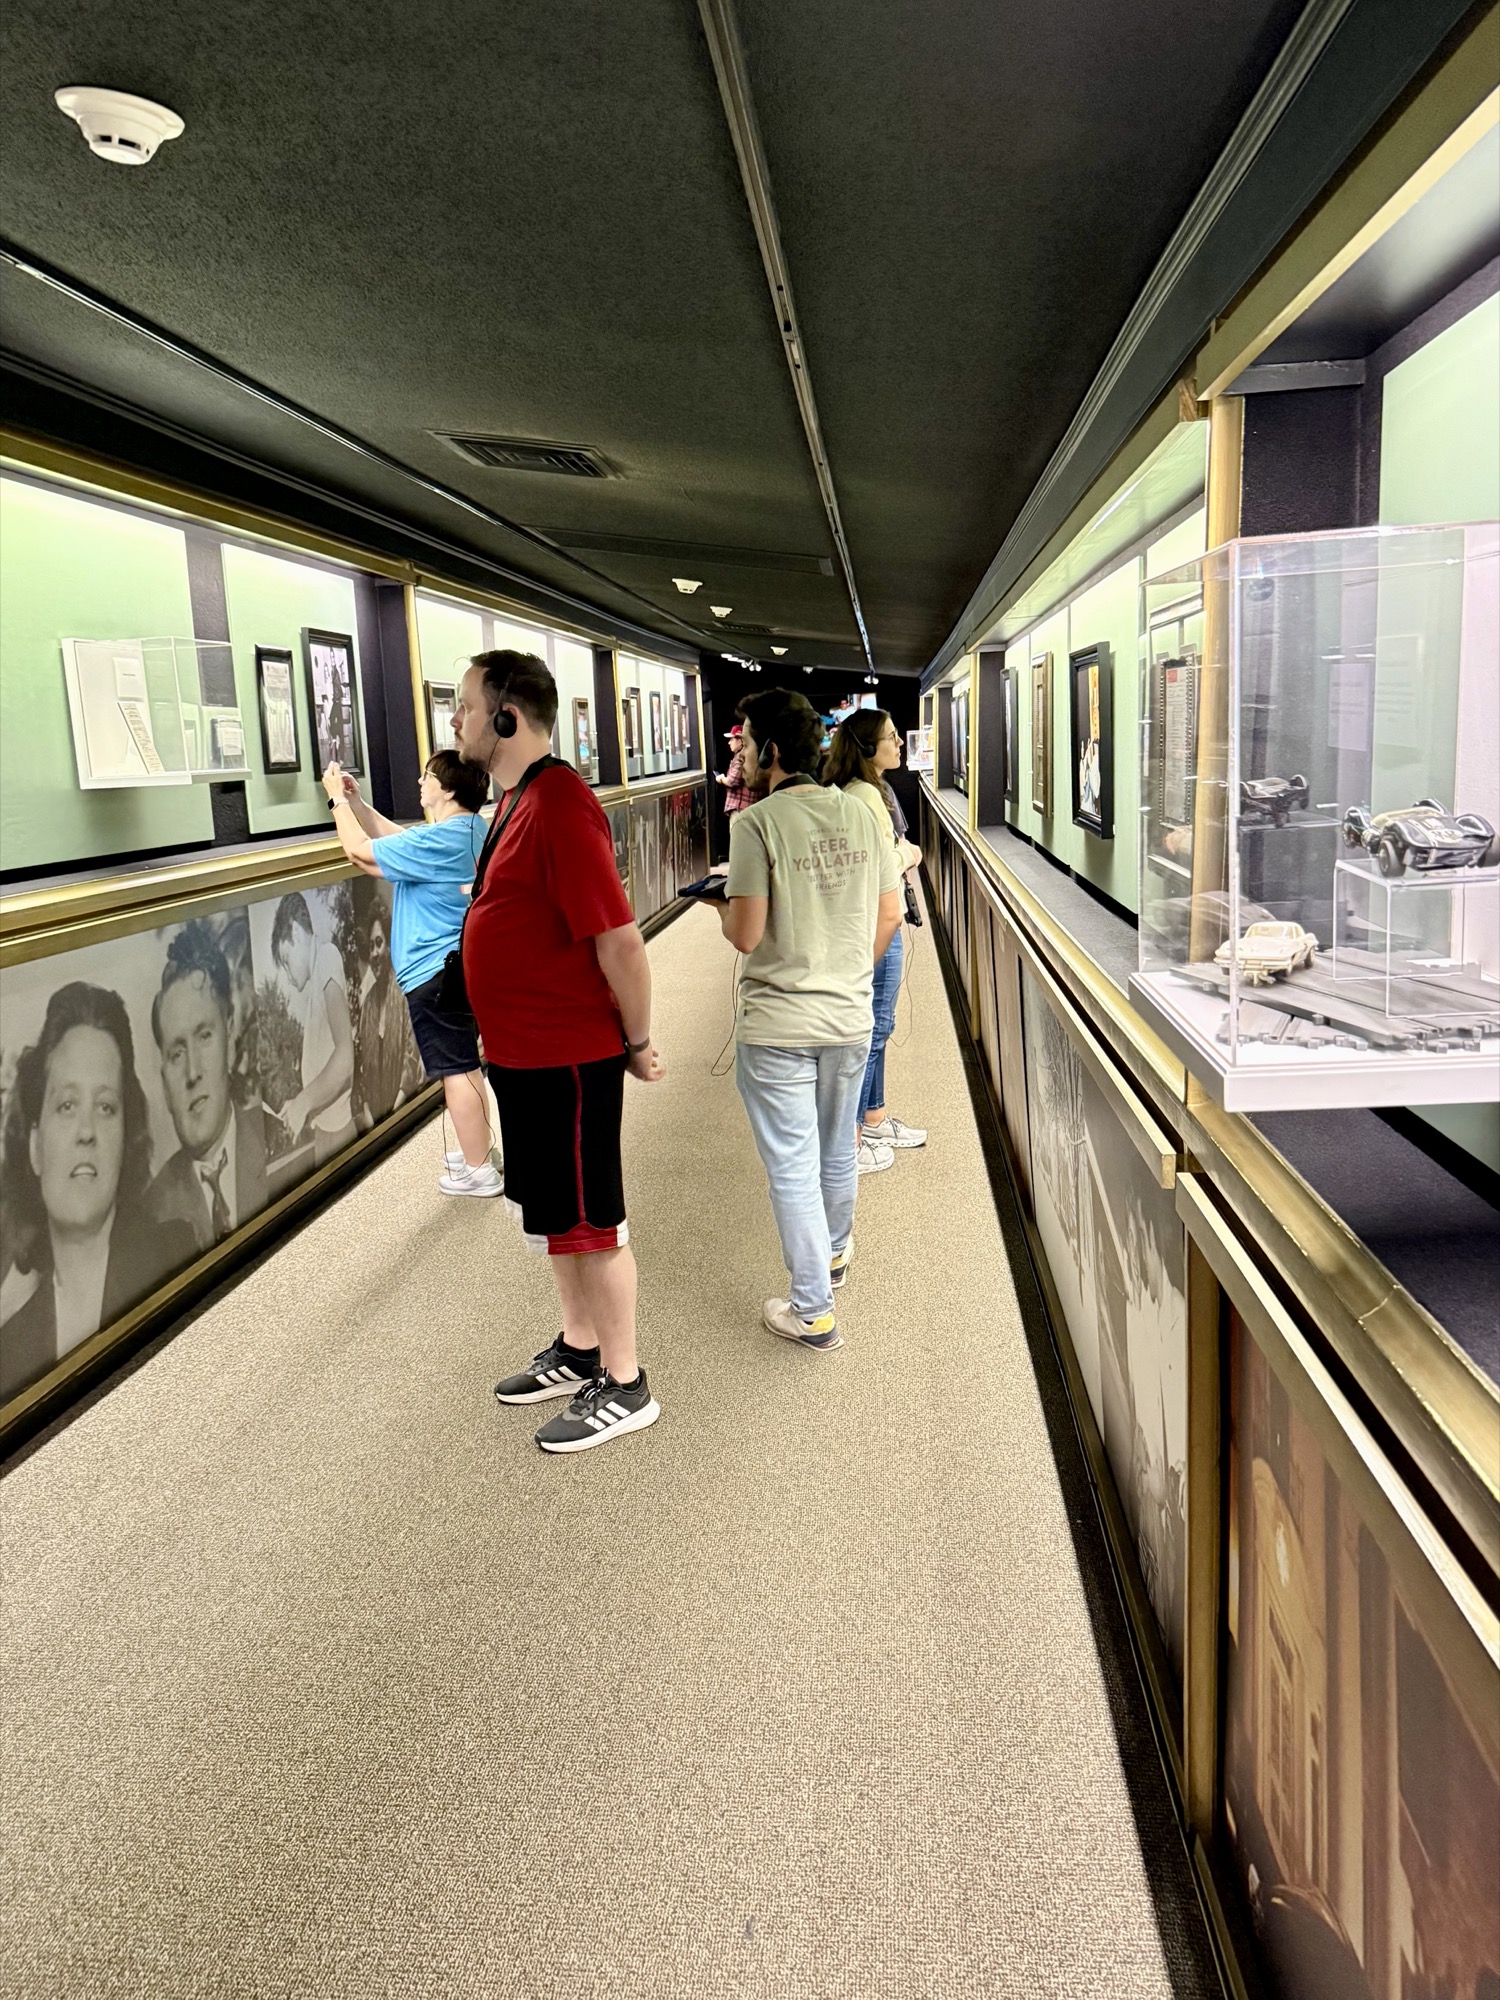
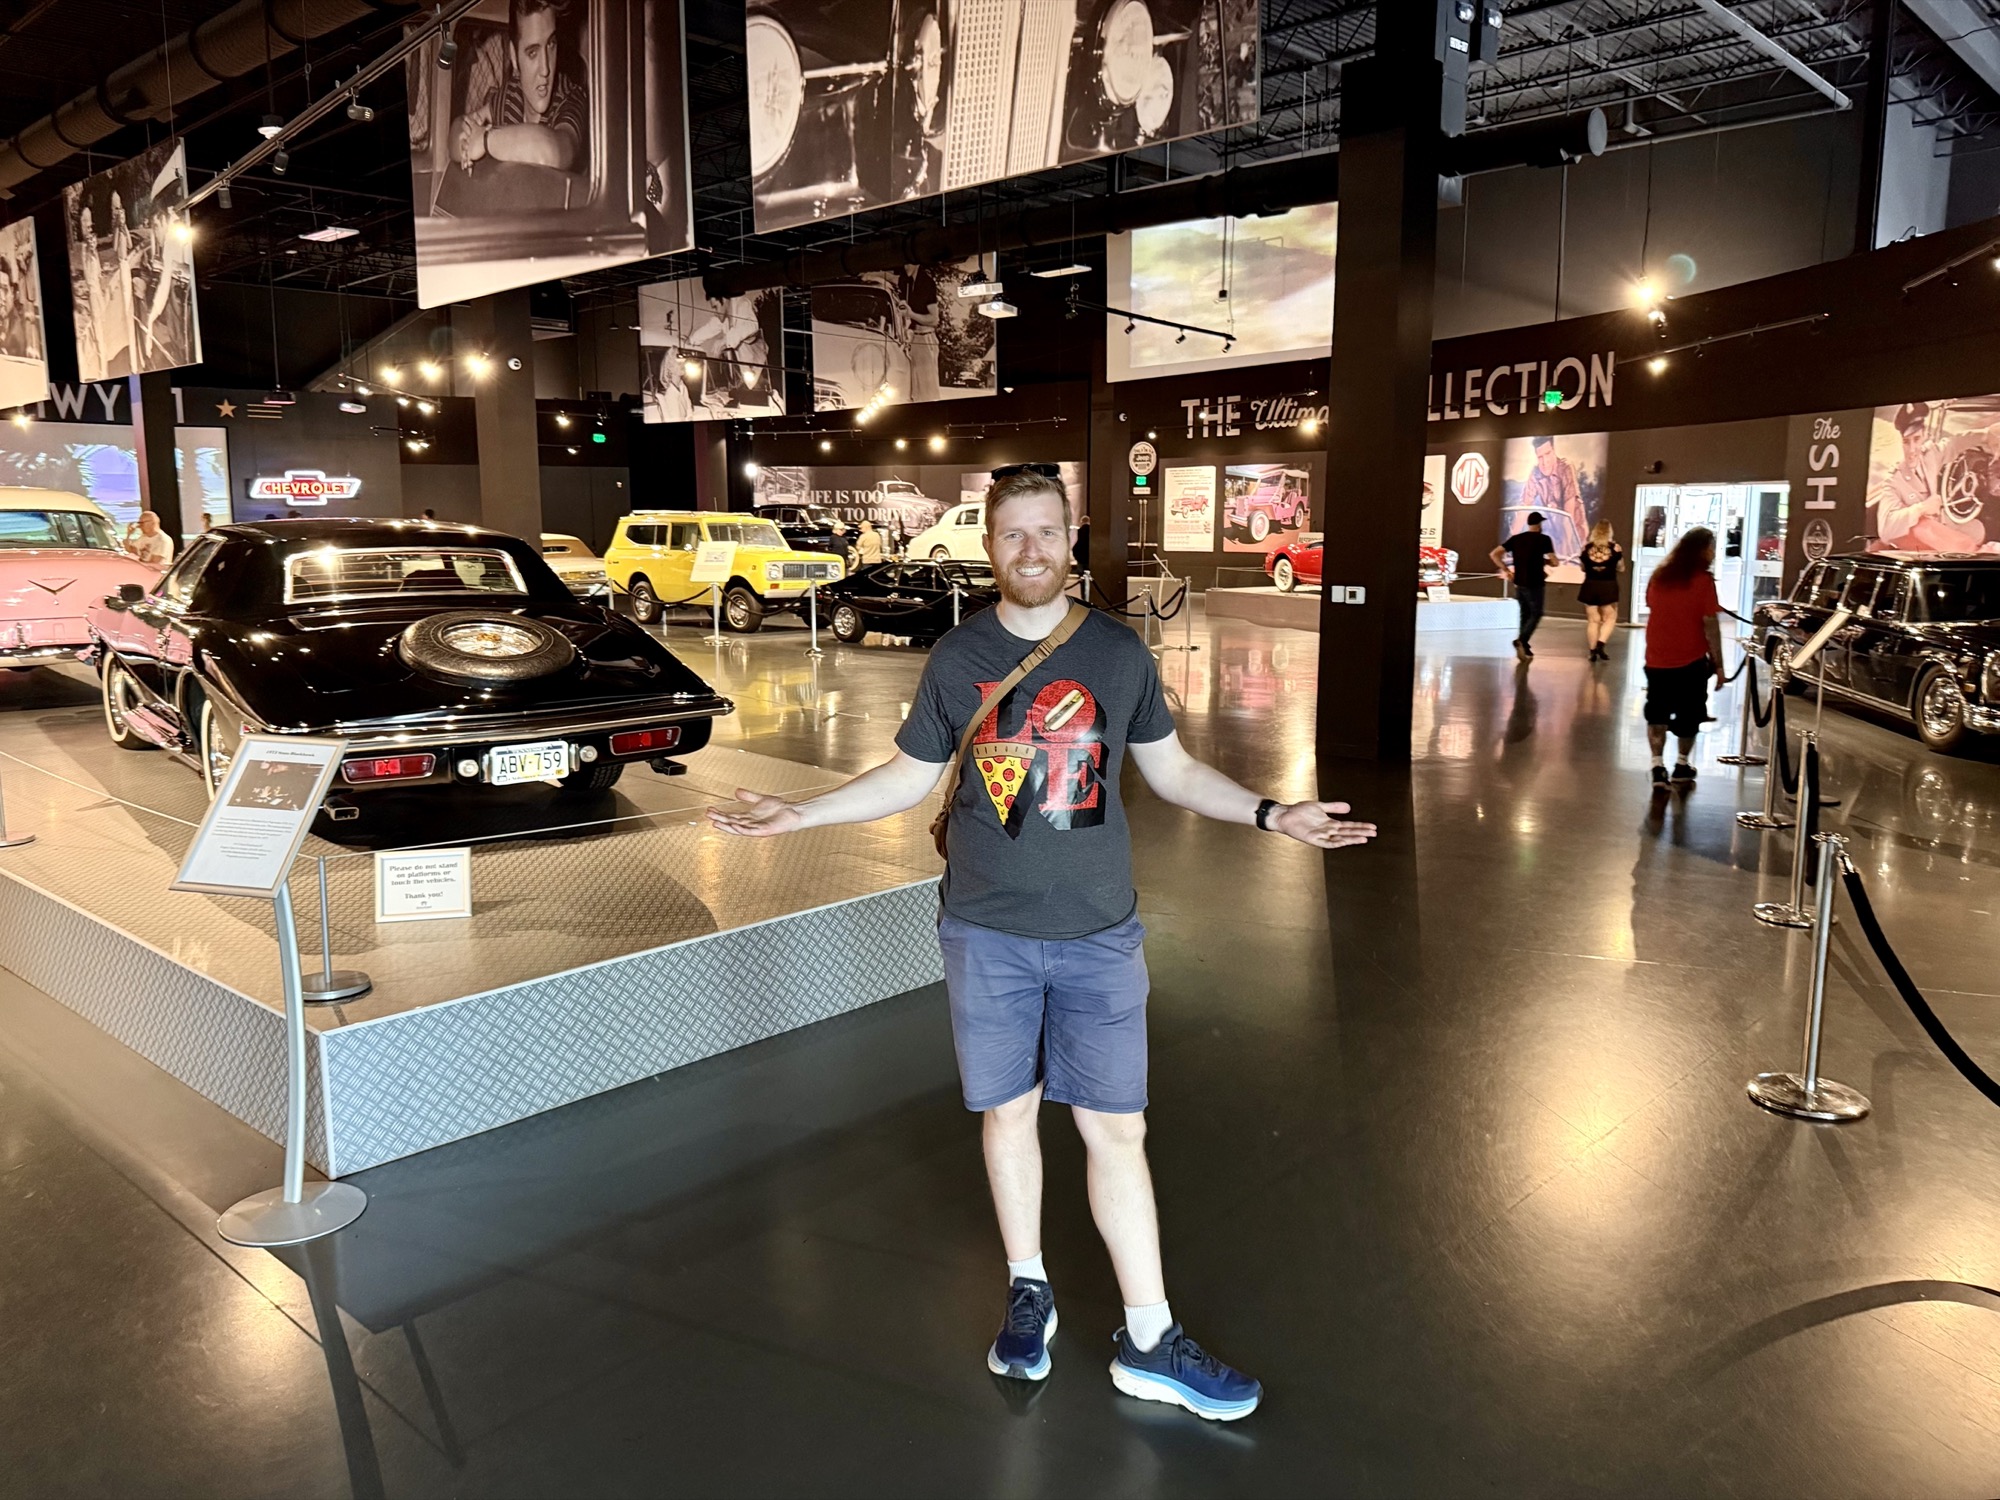
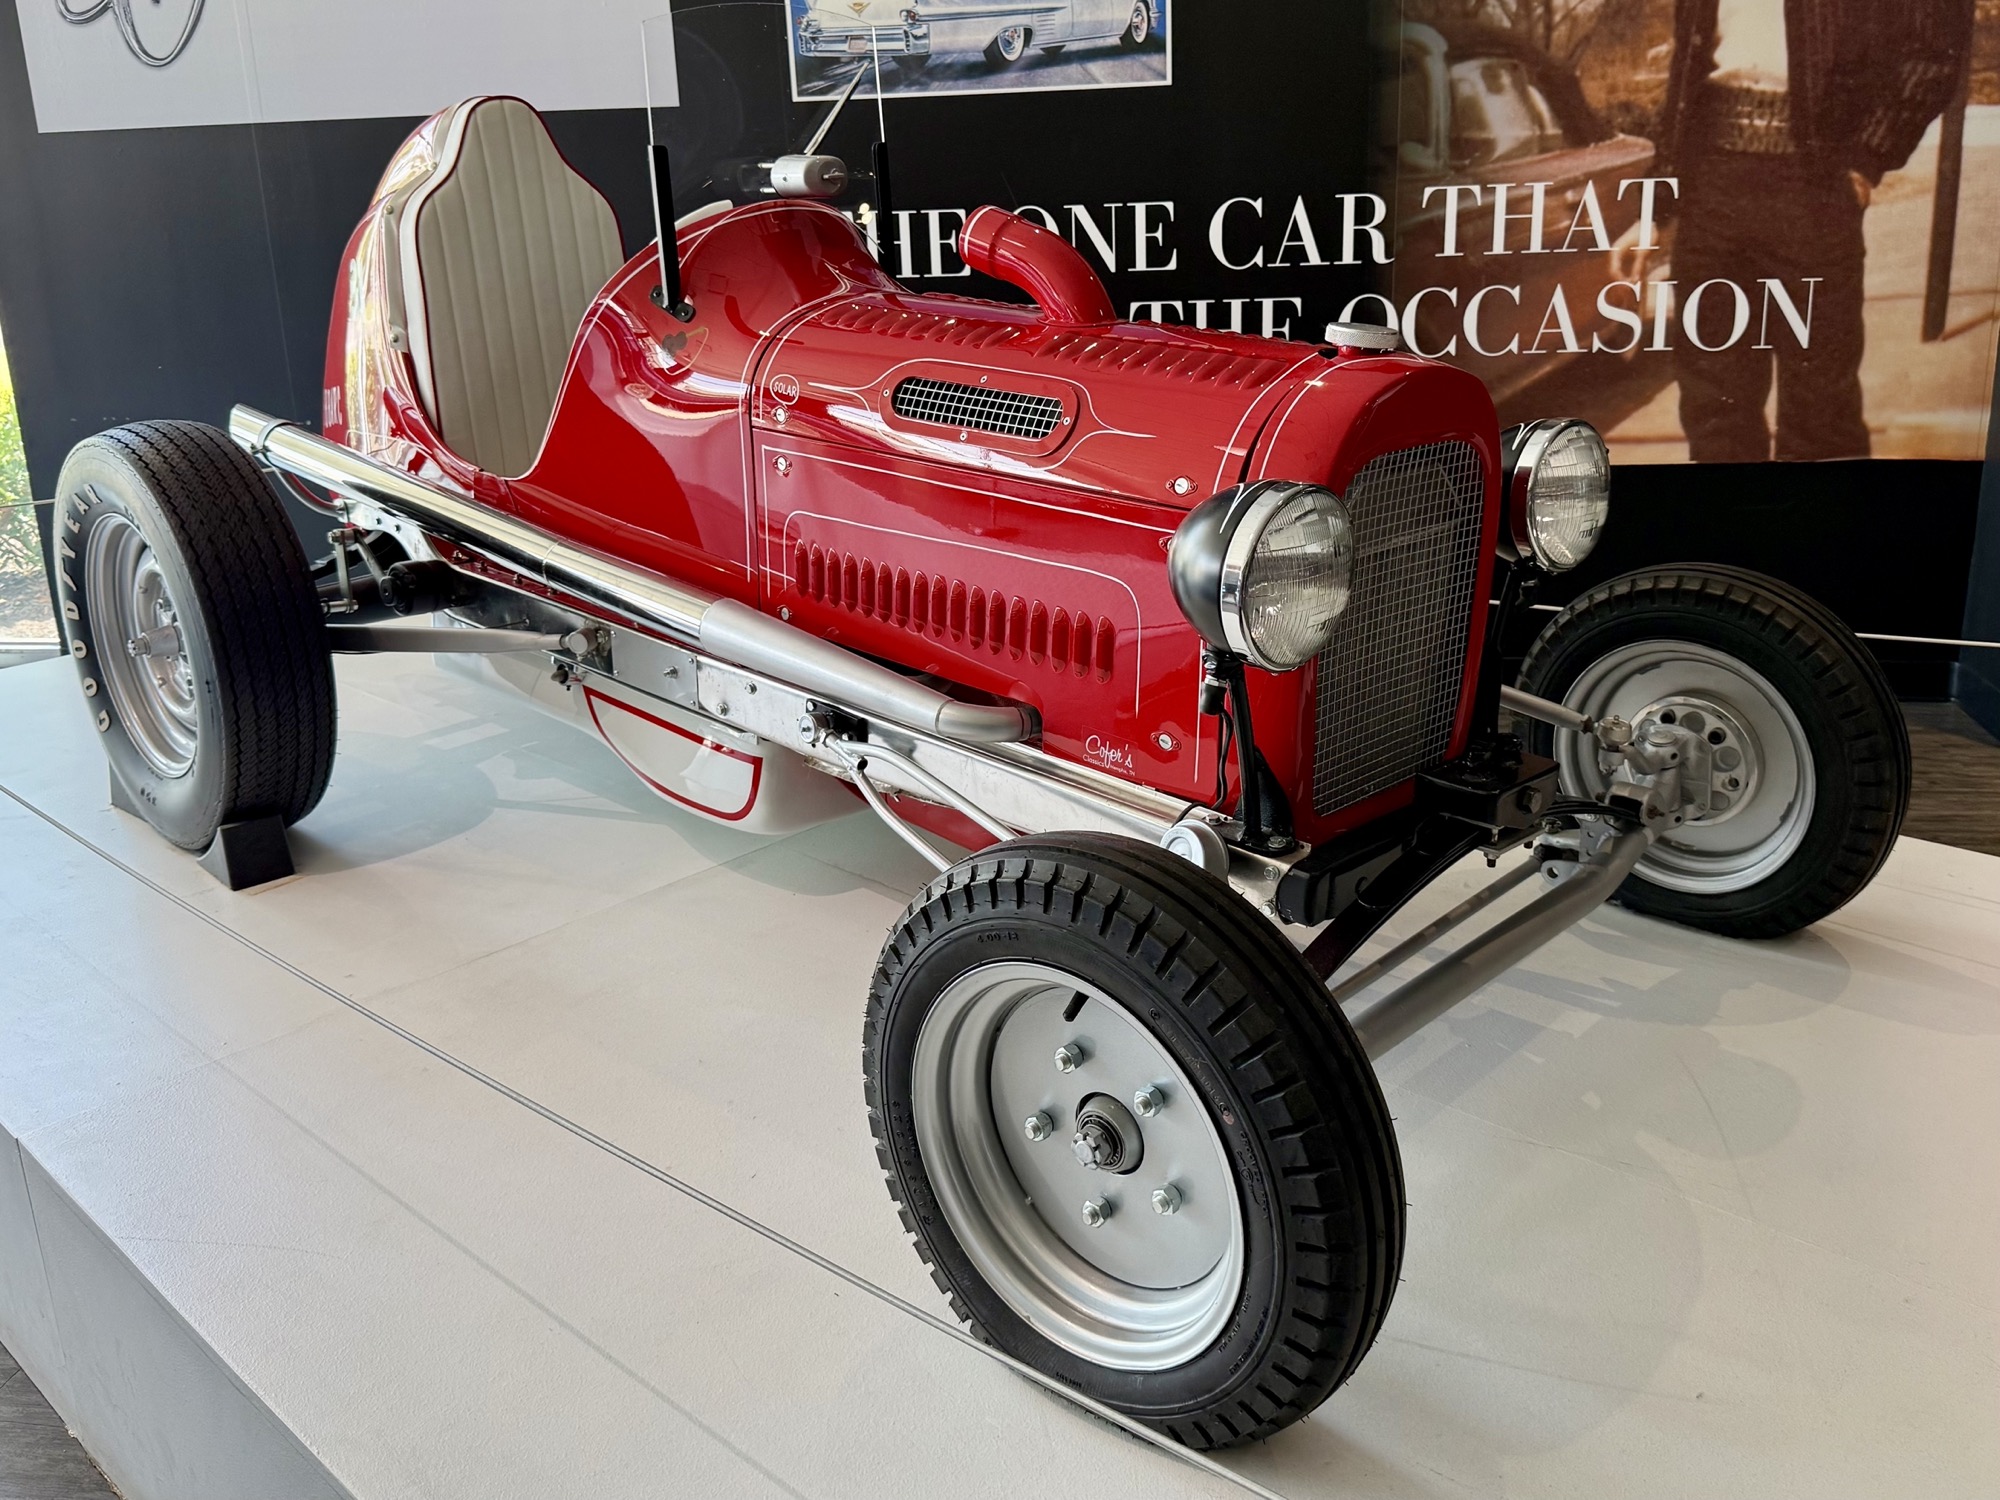
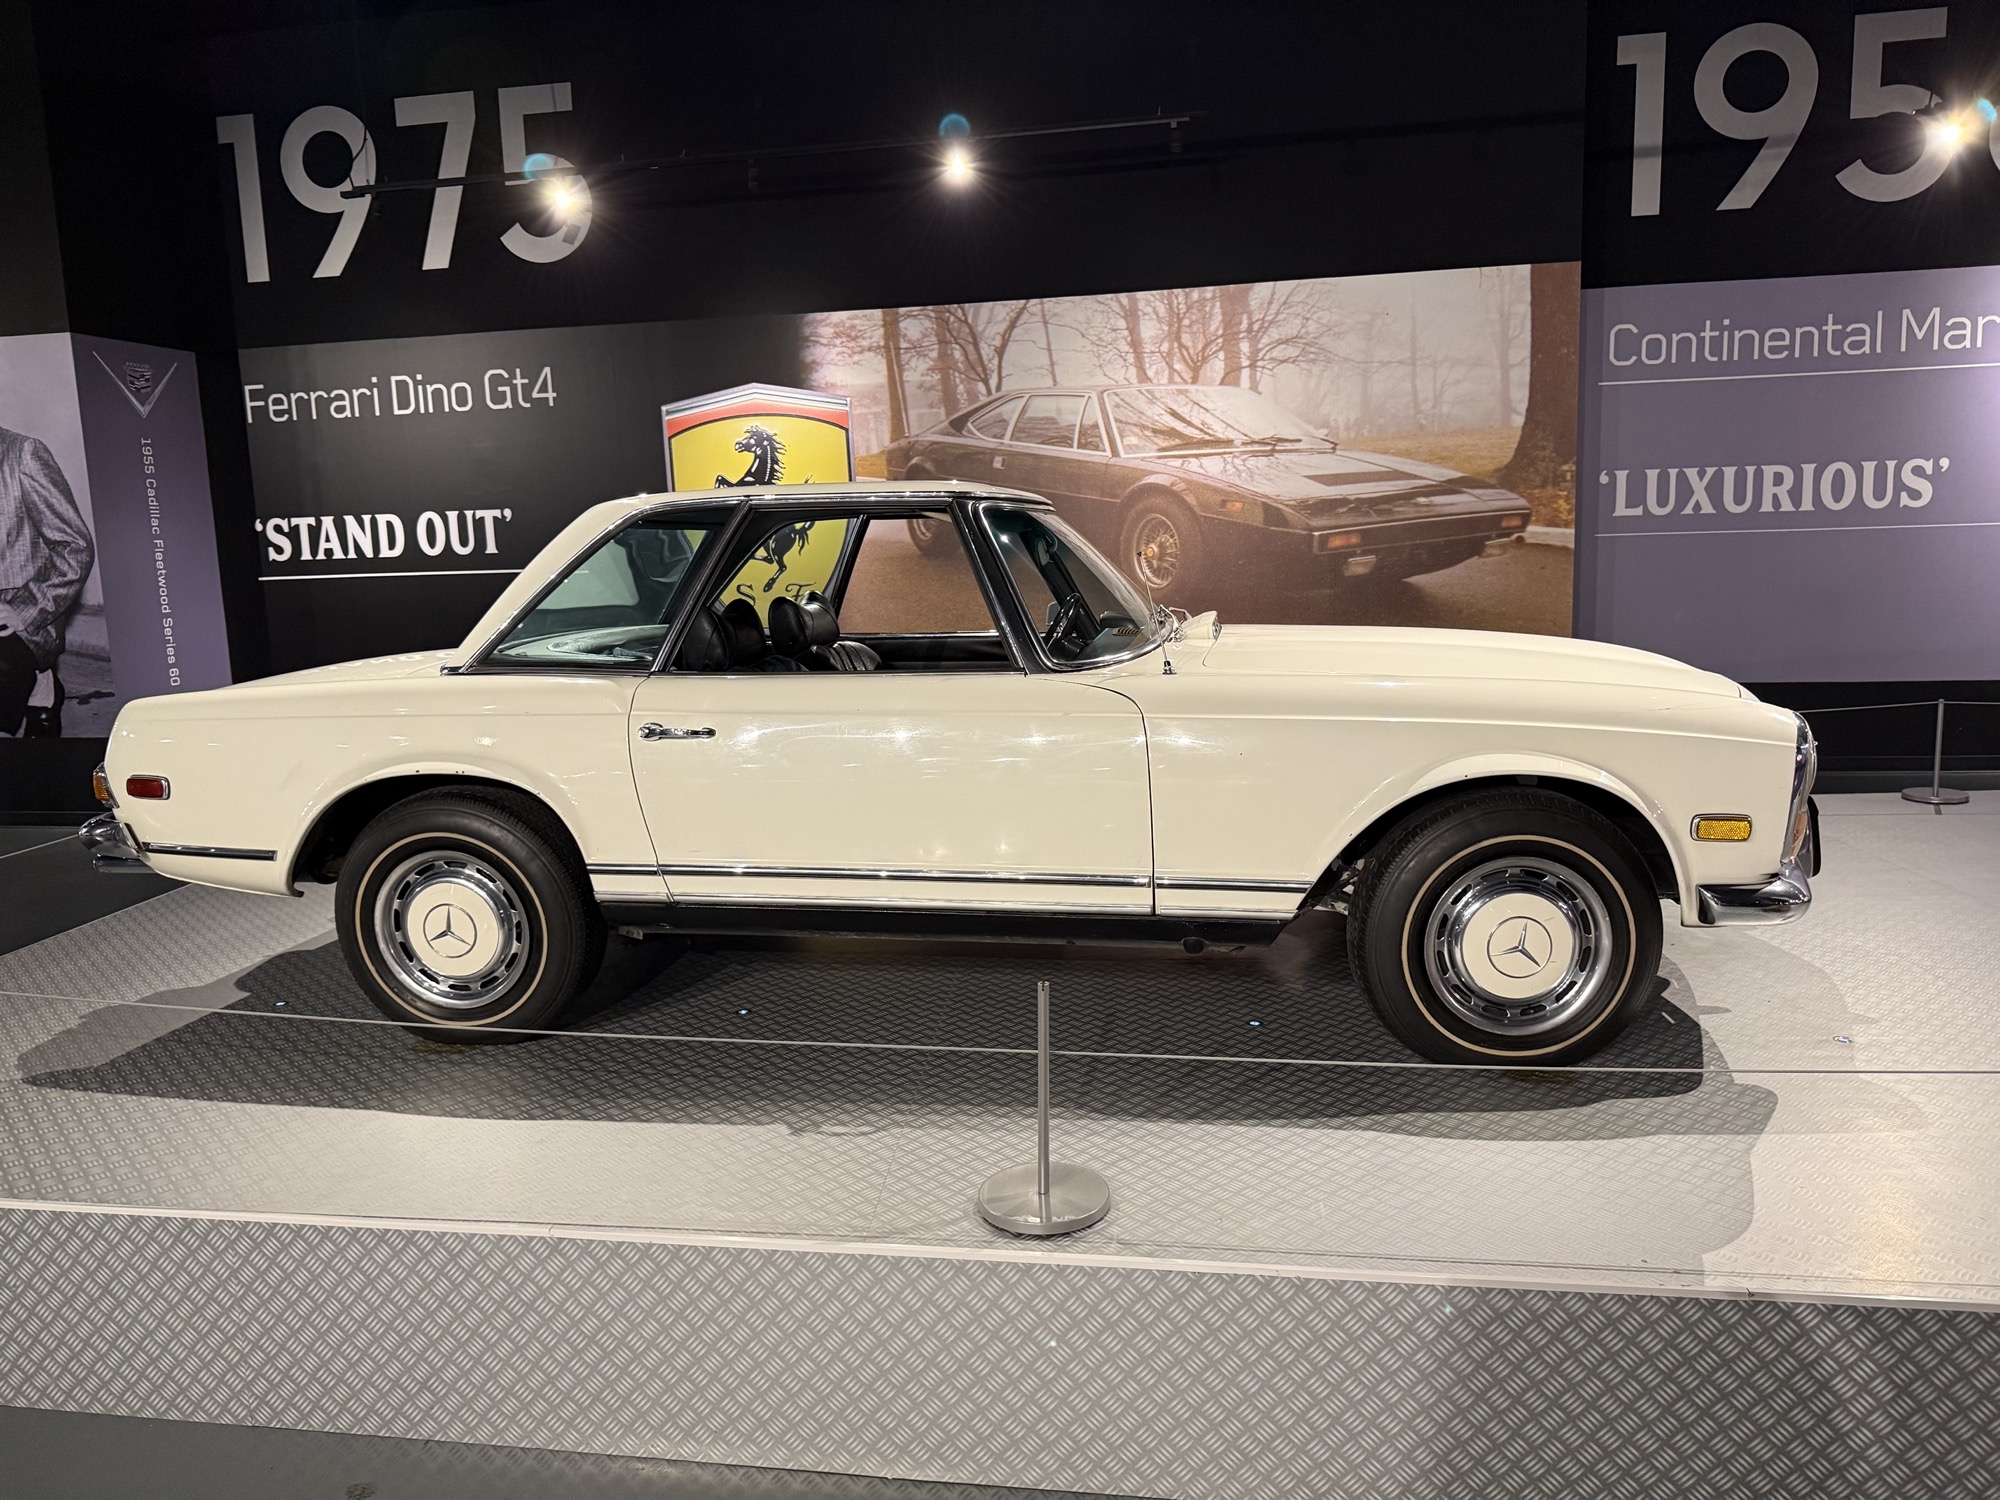
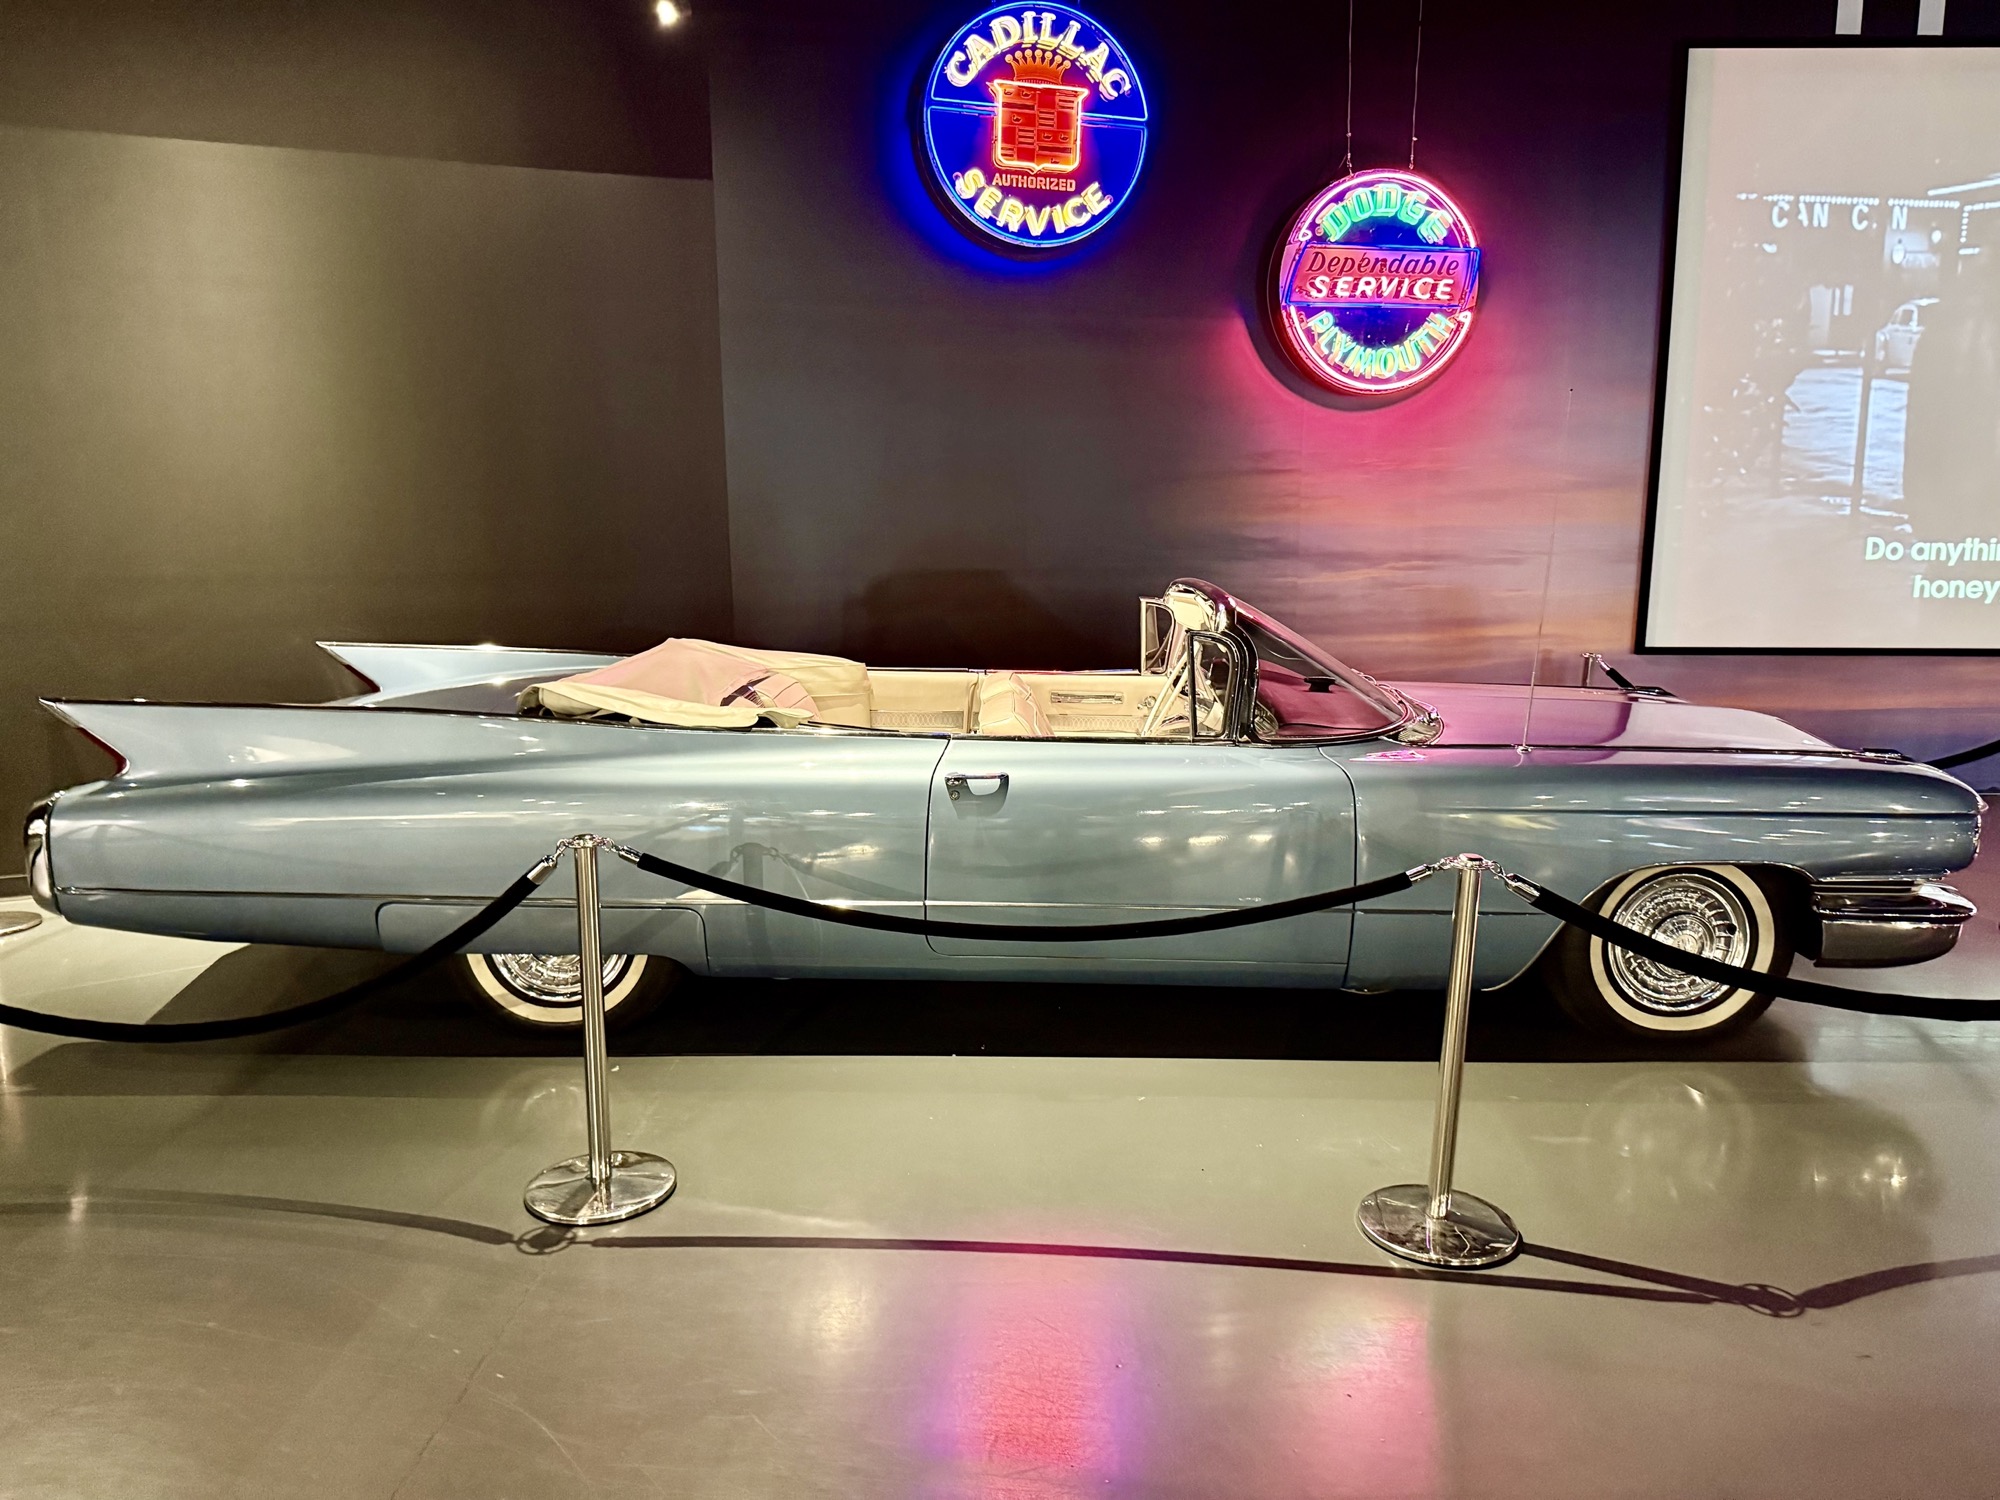
The Entertainment Complex is a HUGE building with seemingly endless exhibits on Elvis. It starts off with his car collection and continues on to more artifacts from his personal life including his passion for karate, his army years, his influence on other celebrities, his television and film work, awards, and of course his many MANY bejewelled jumpsuits.

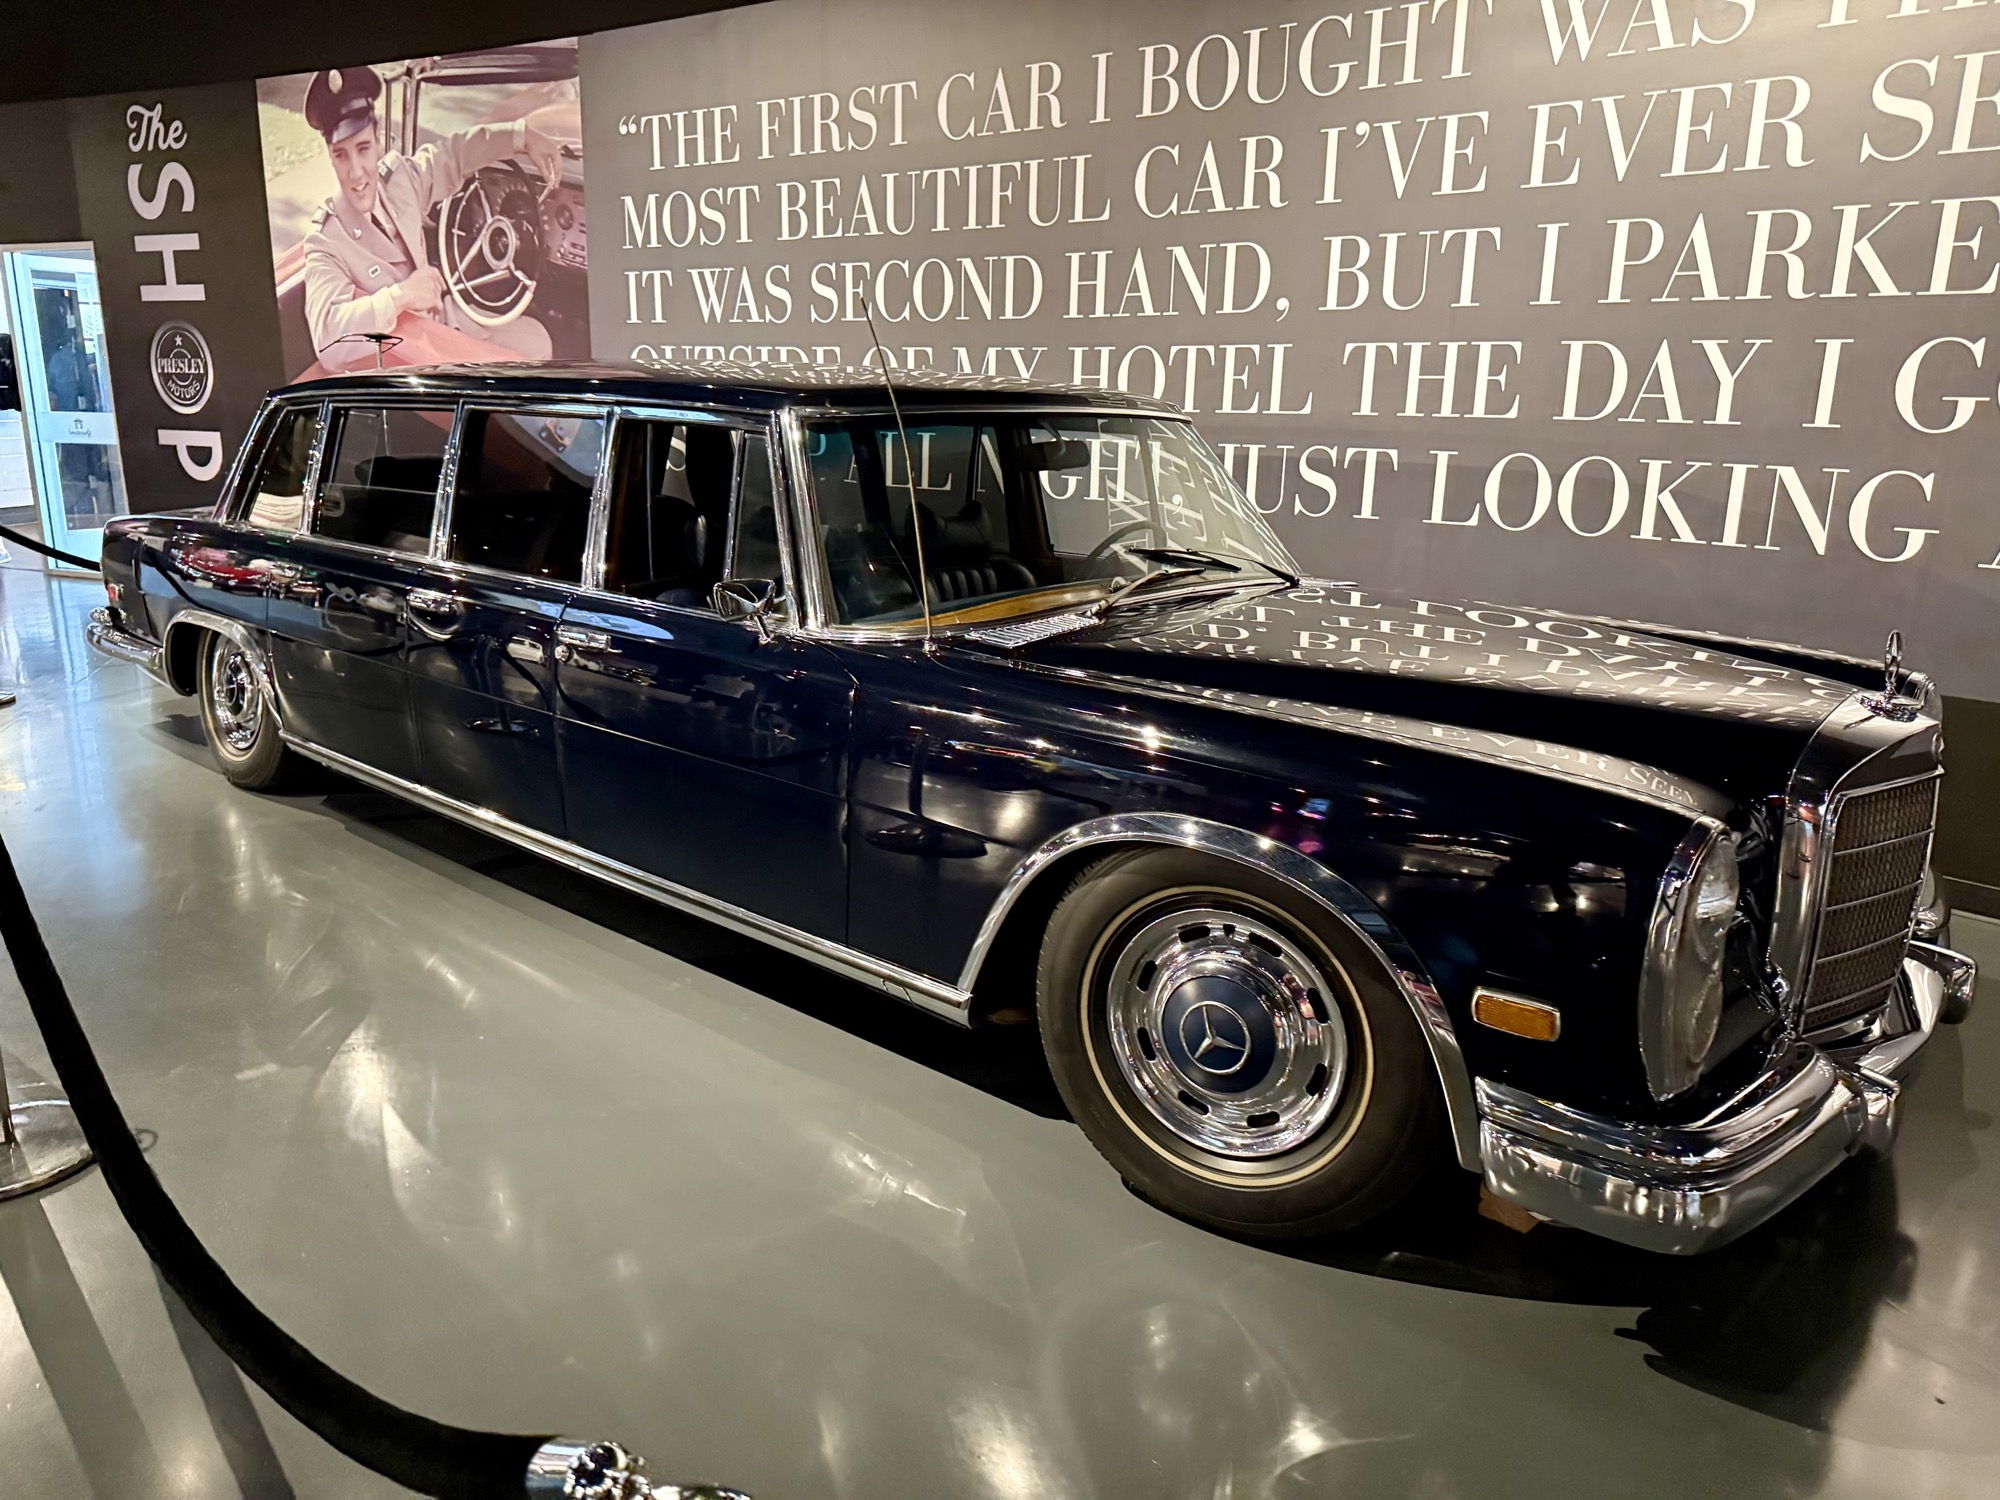
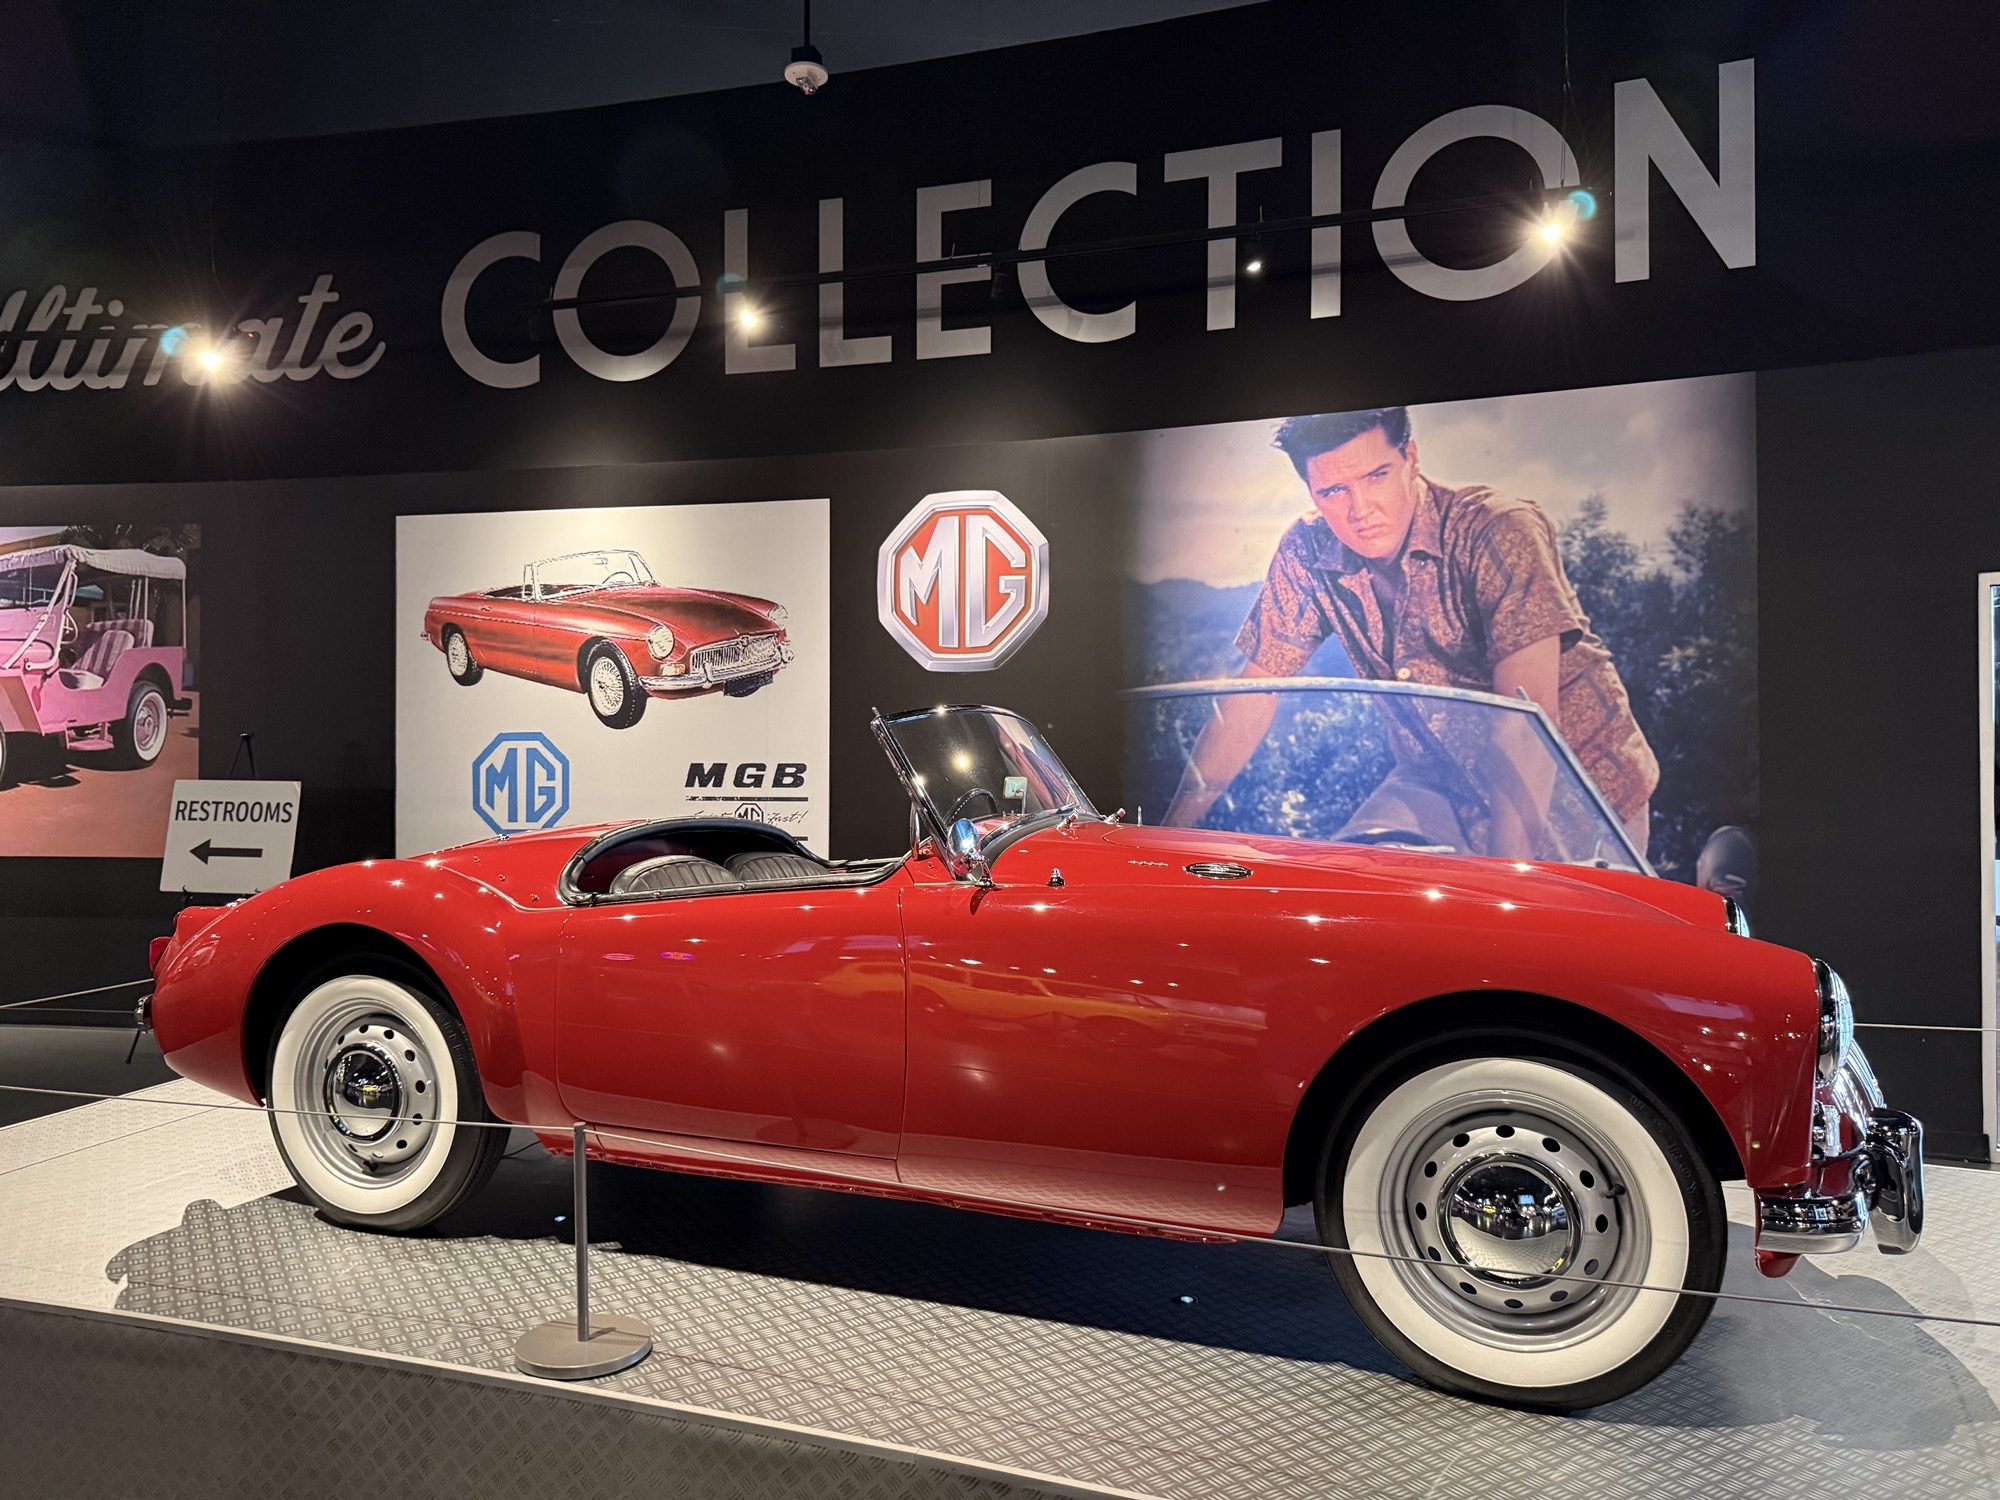
Cars, Motorcycles, and Boats

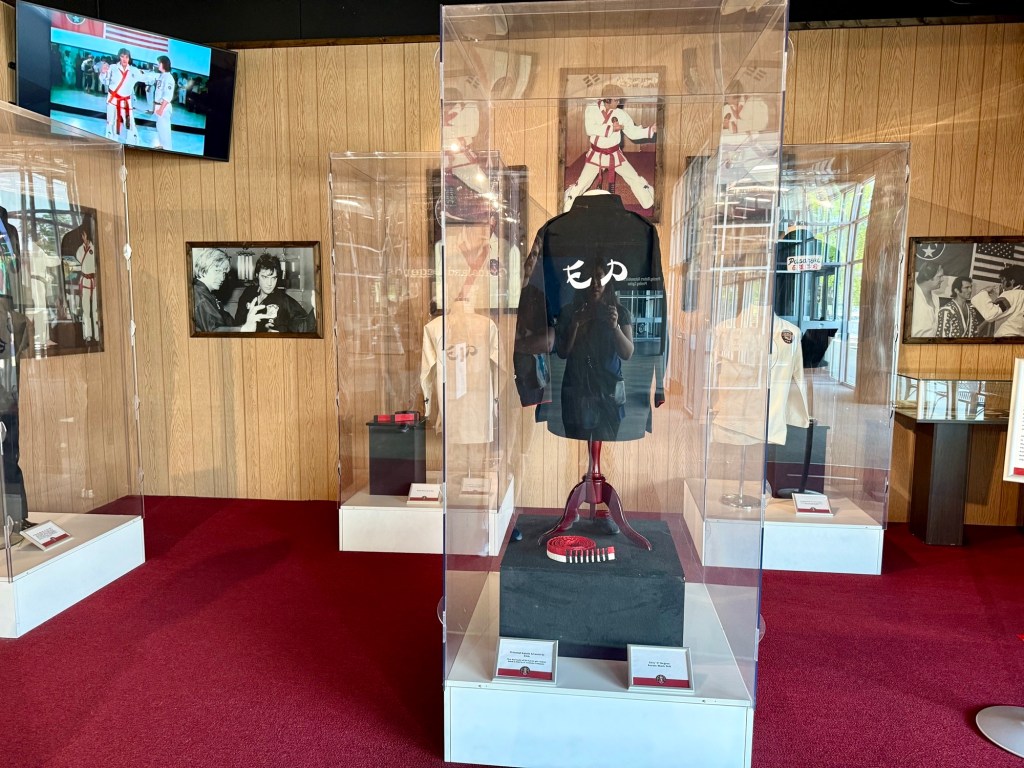
Elvis’ Army Days, Karate, and the Graceland Archives

Despite being a rockstar, Elvis received no special treatment while in the army (according to the posters, anyway 🤫). This exhibited highlighted his time in the army and his duties.

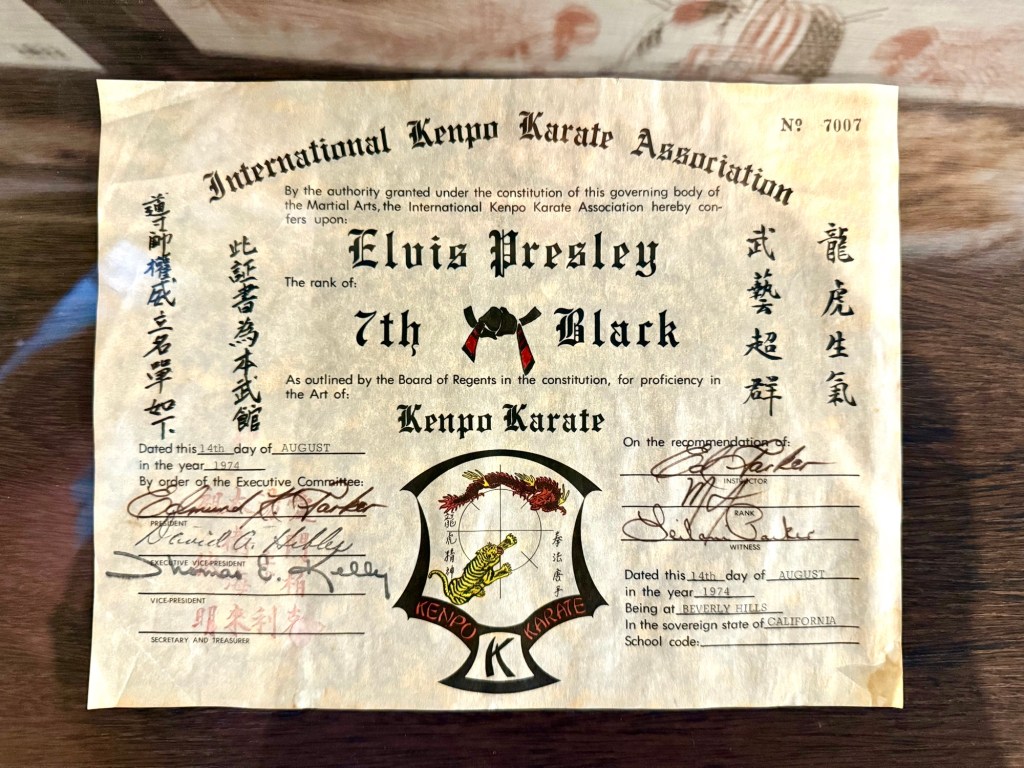
Elvis was also really into karate. He trained and competed, and earned an 8th degree black belt. I know nothing about the karate world, but it sounds impressive.

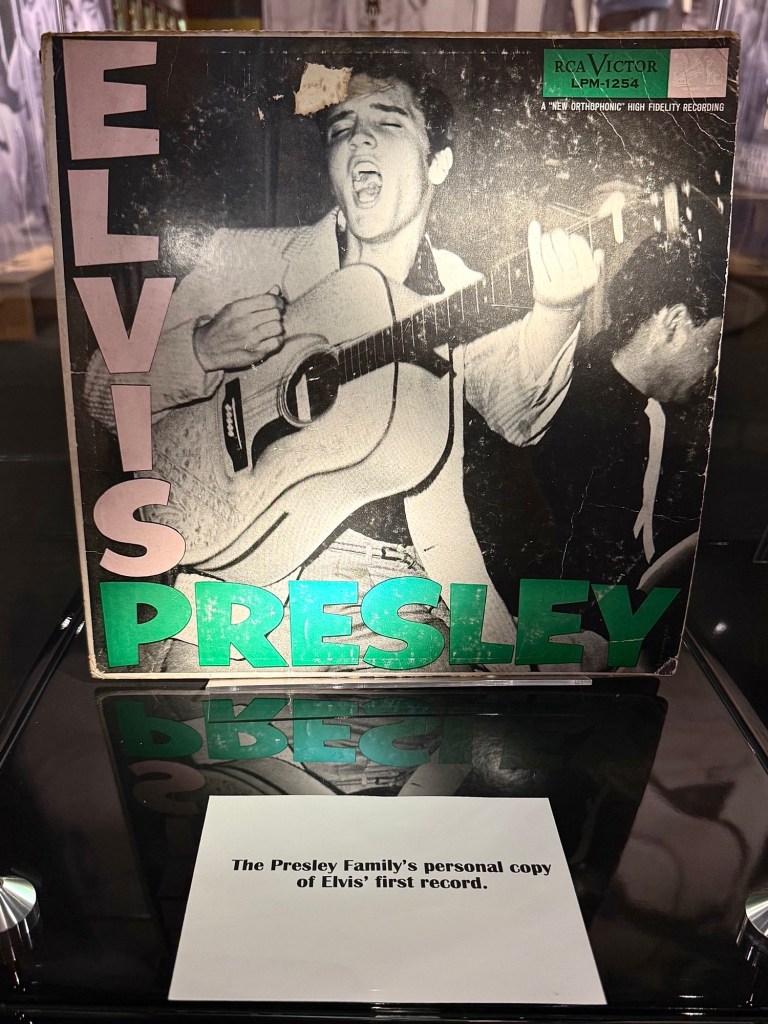
There are over 1.5 million items in the Graceland Archives and on display or just a few of these items of Elvis memorabilia. For an upgraded ticket package tour, you can speak to an archivist!

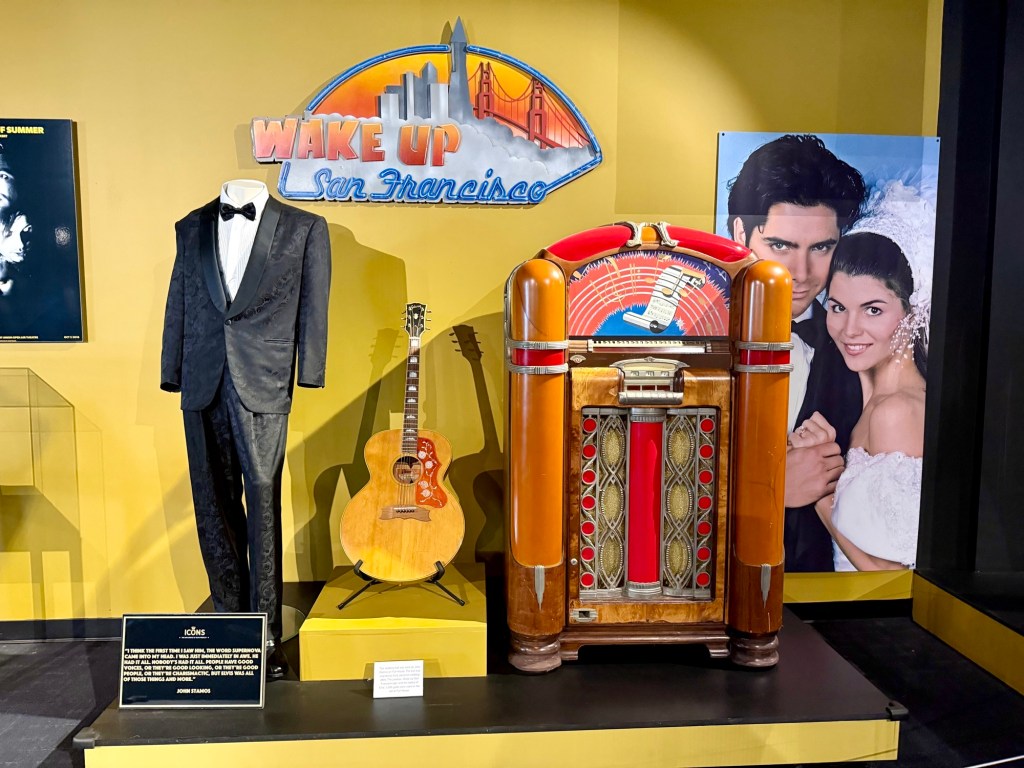
Elvis’ Influence on Other Celebrities

It’s insane how much influence Elvis had to the music industry. This exhibit highlights some of the biggest stars that have drawn inspiration from Elvis in one way or another.

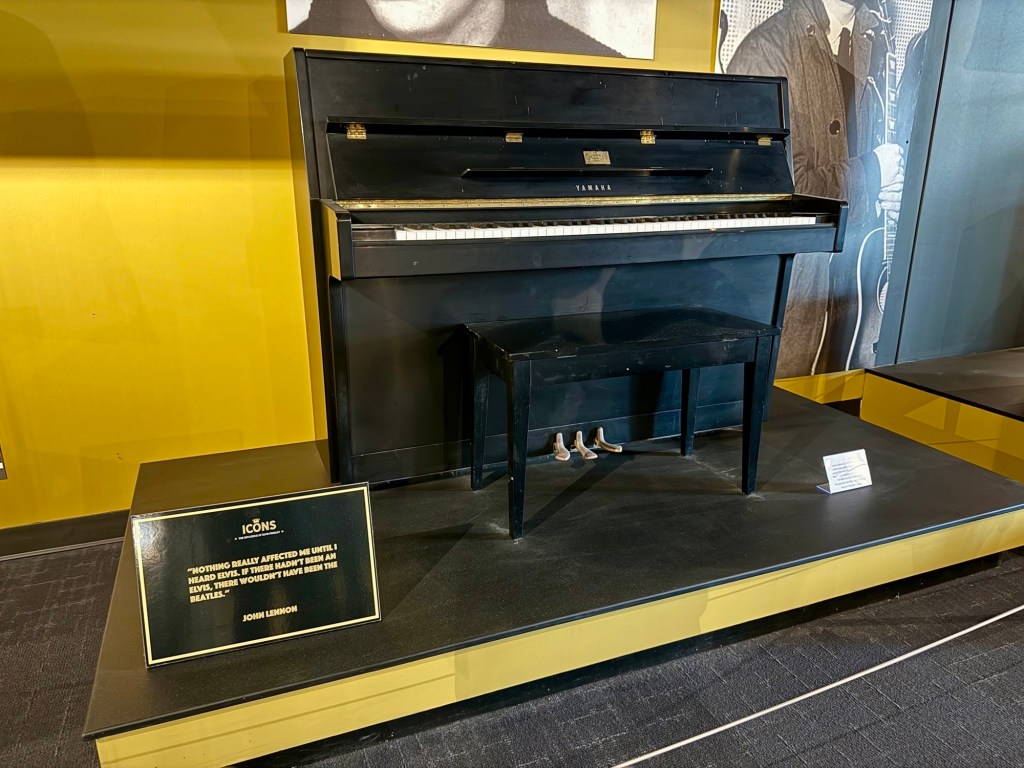
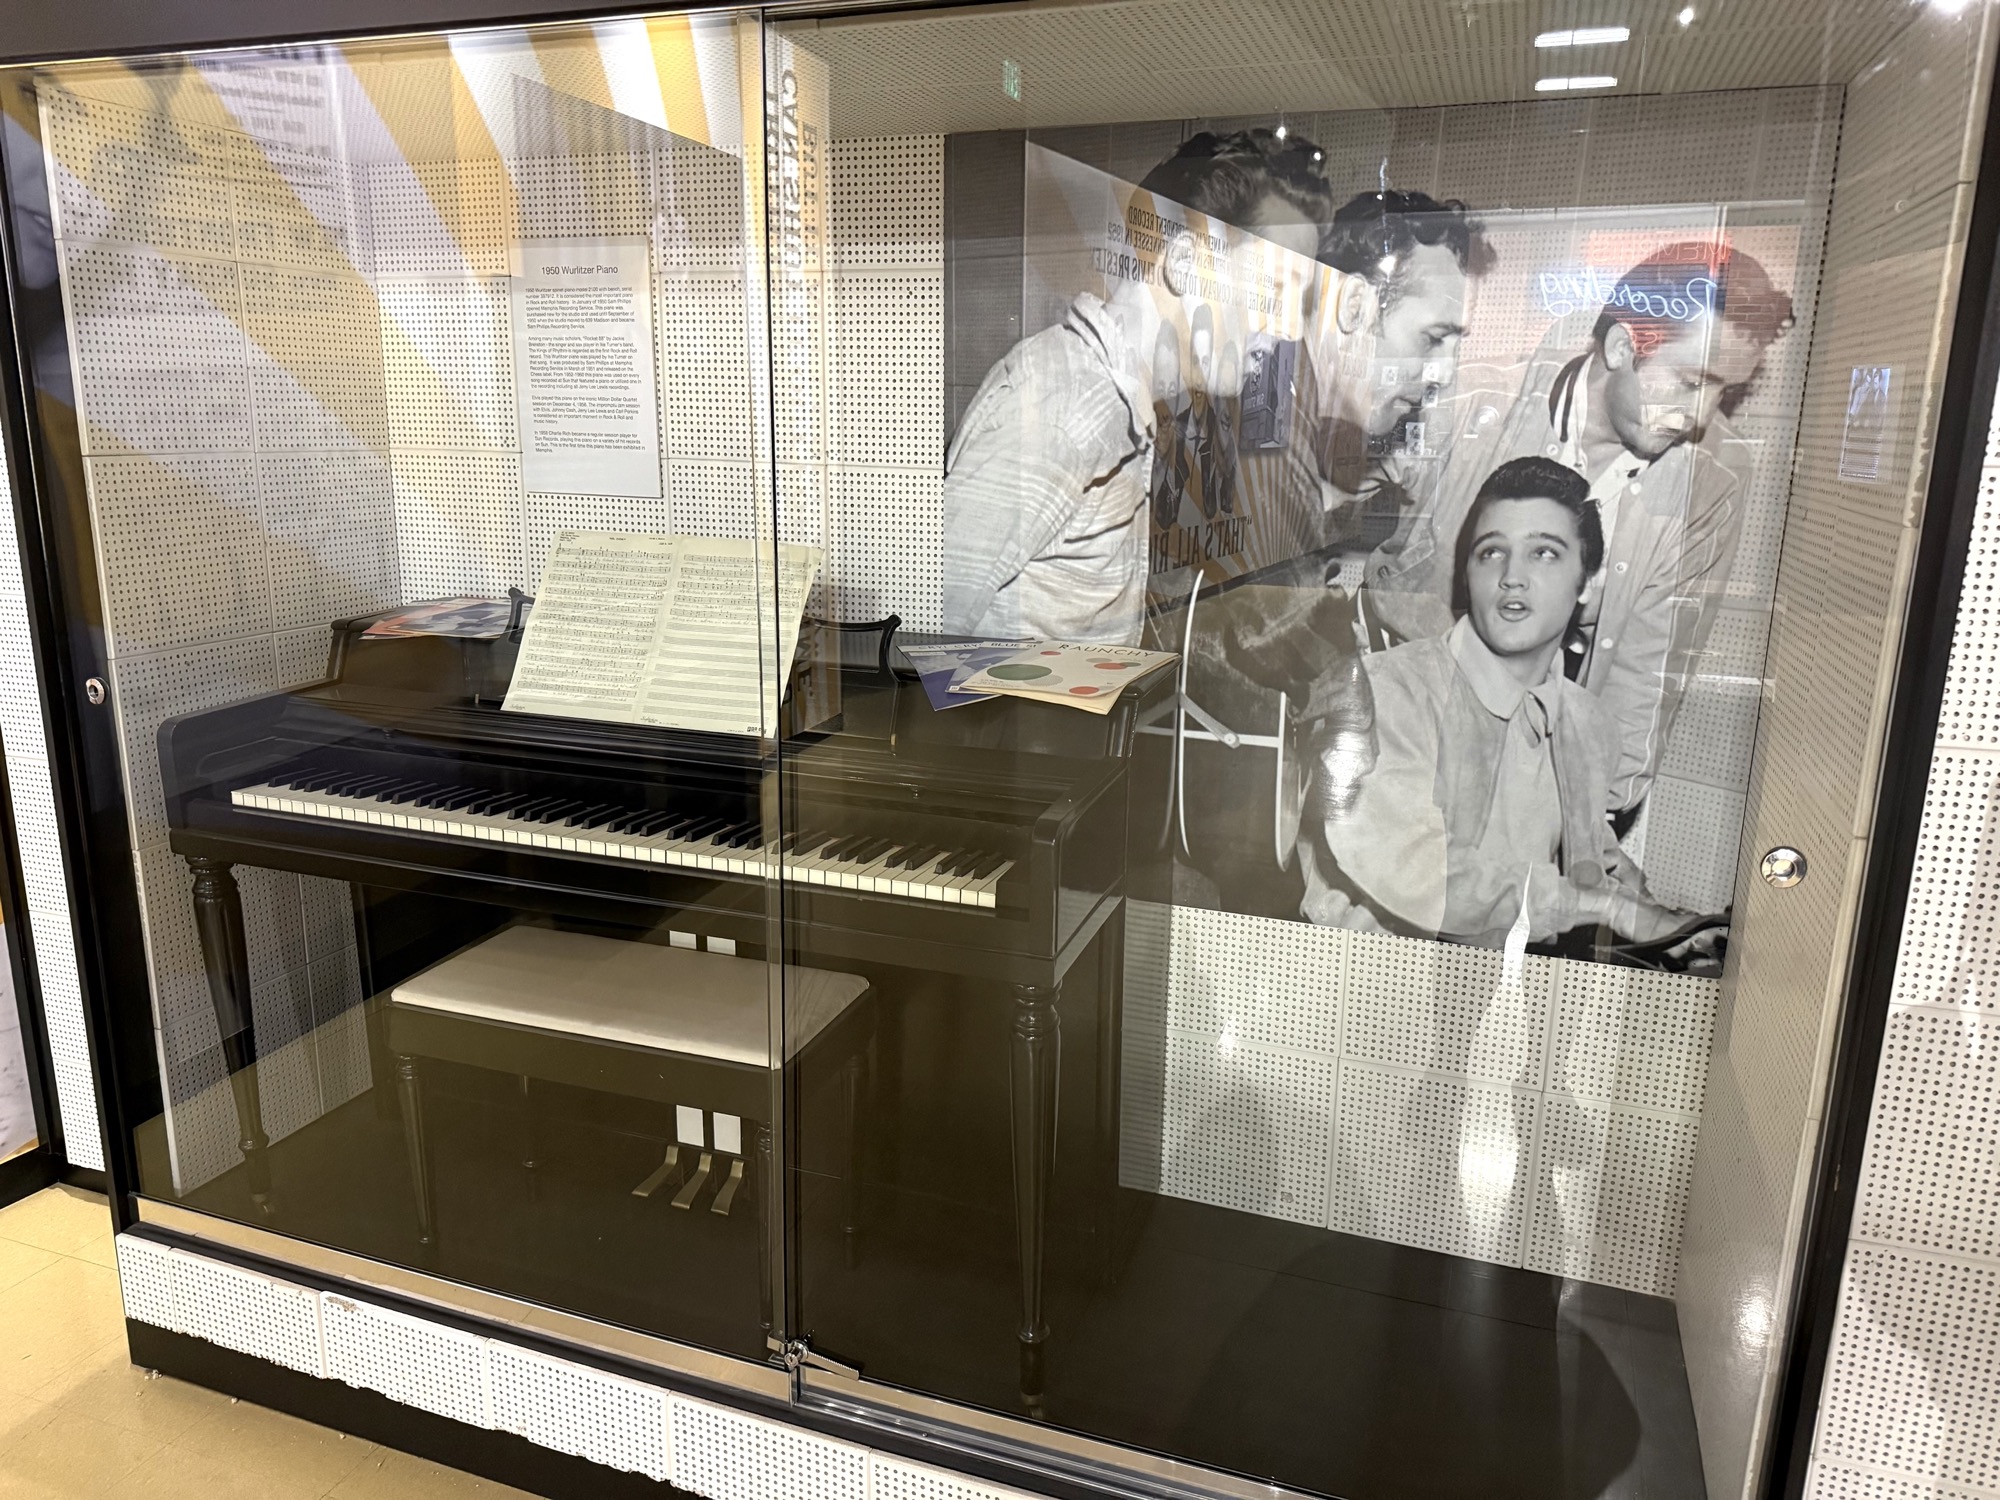
Music and Film Memorabilia

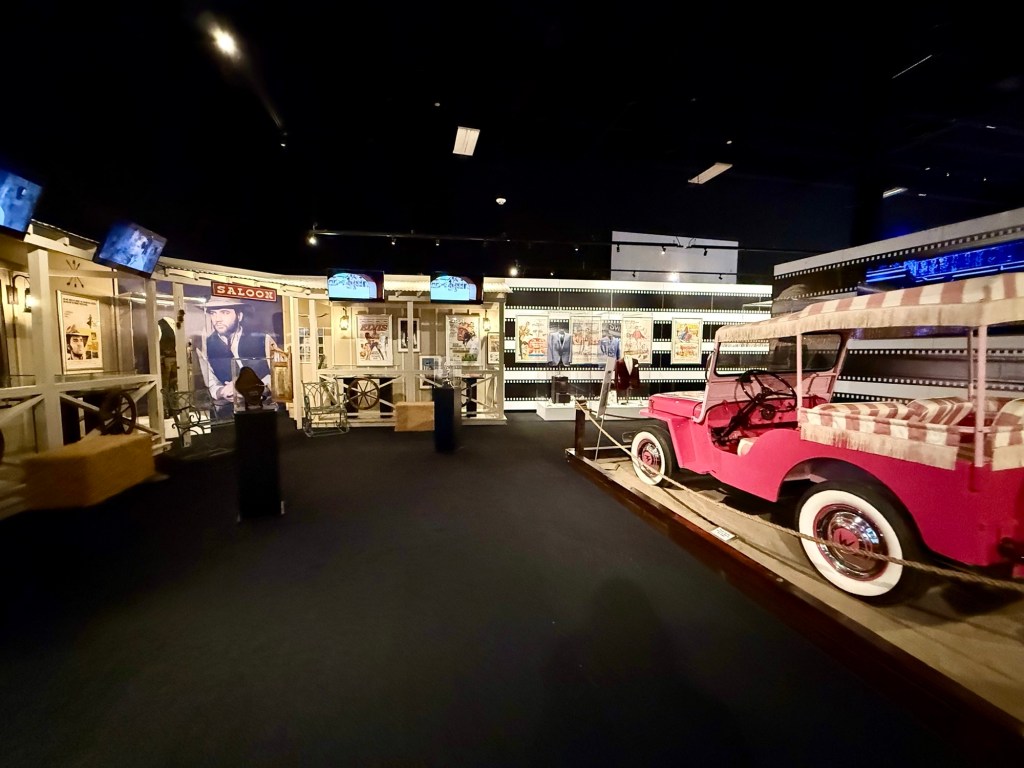
The famous million dollar quartet piano that was at Sun Studio!

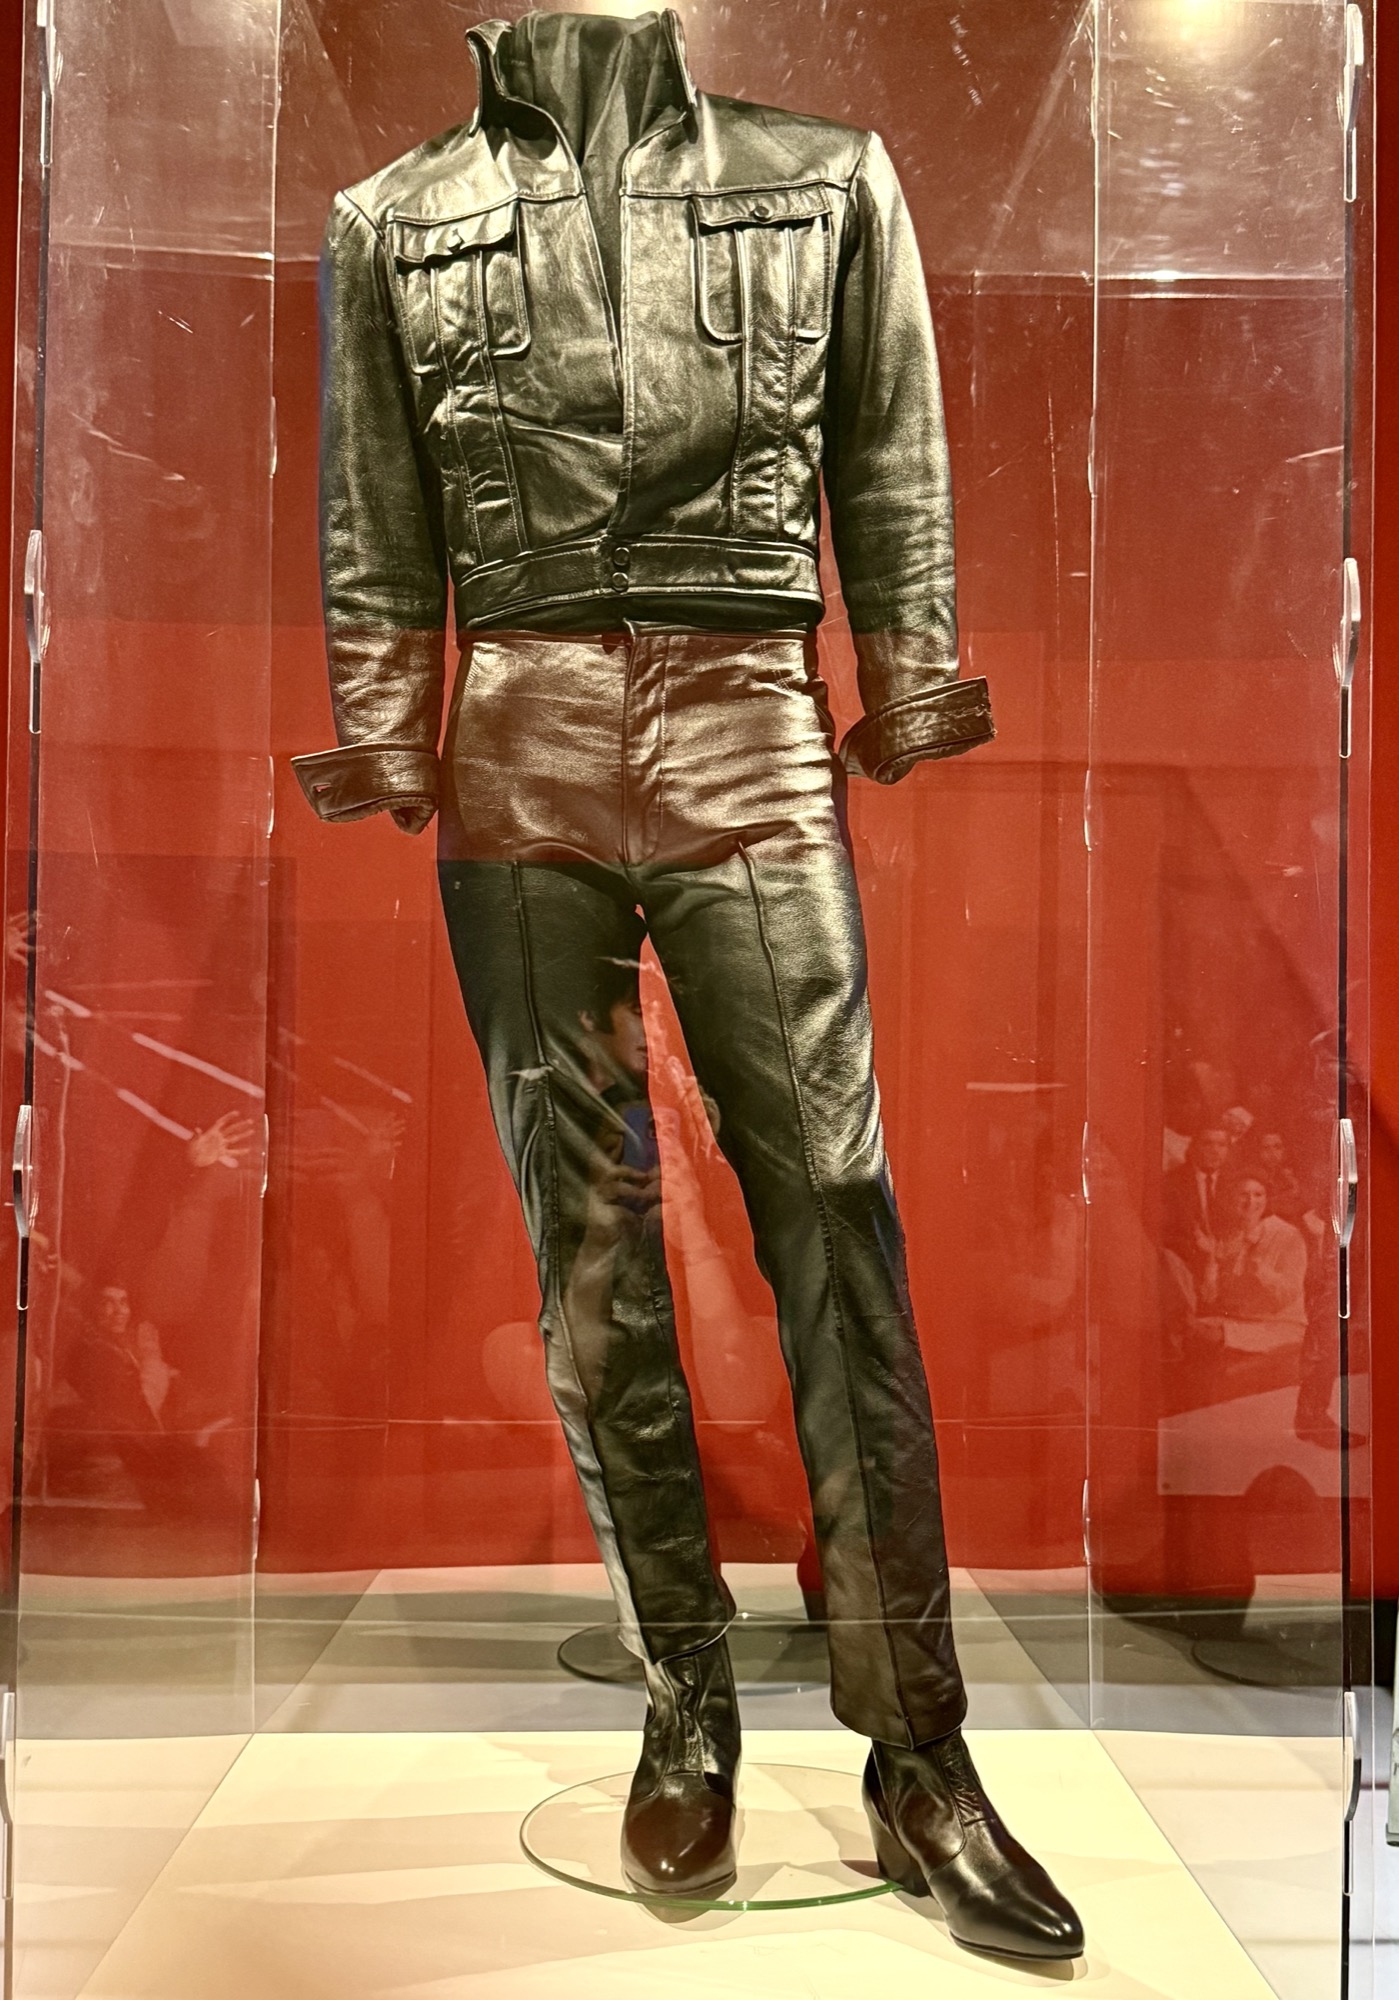
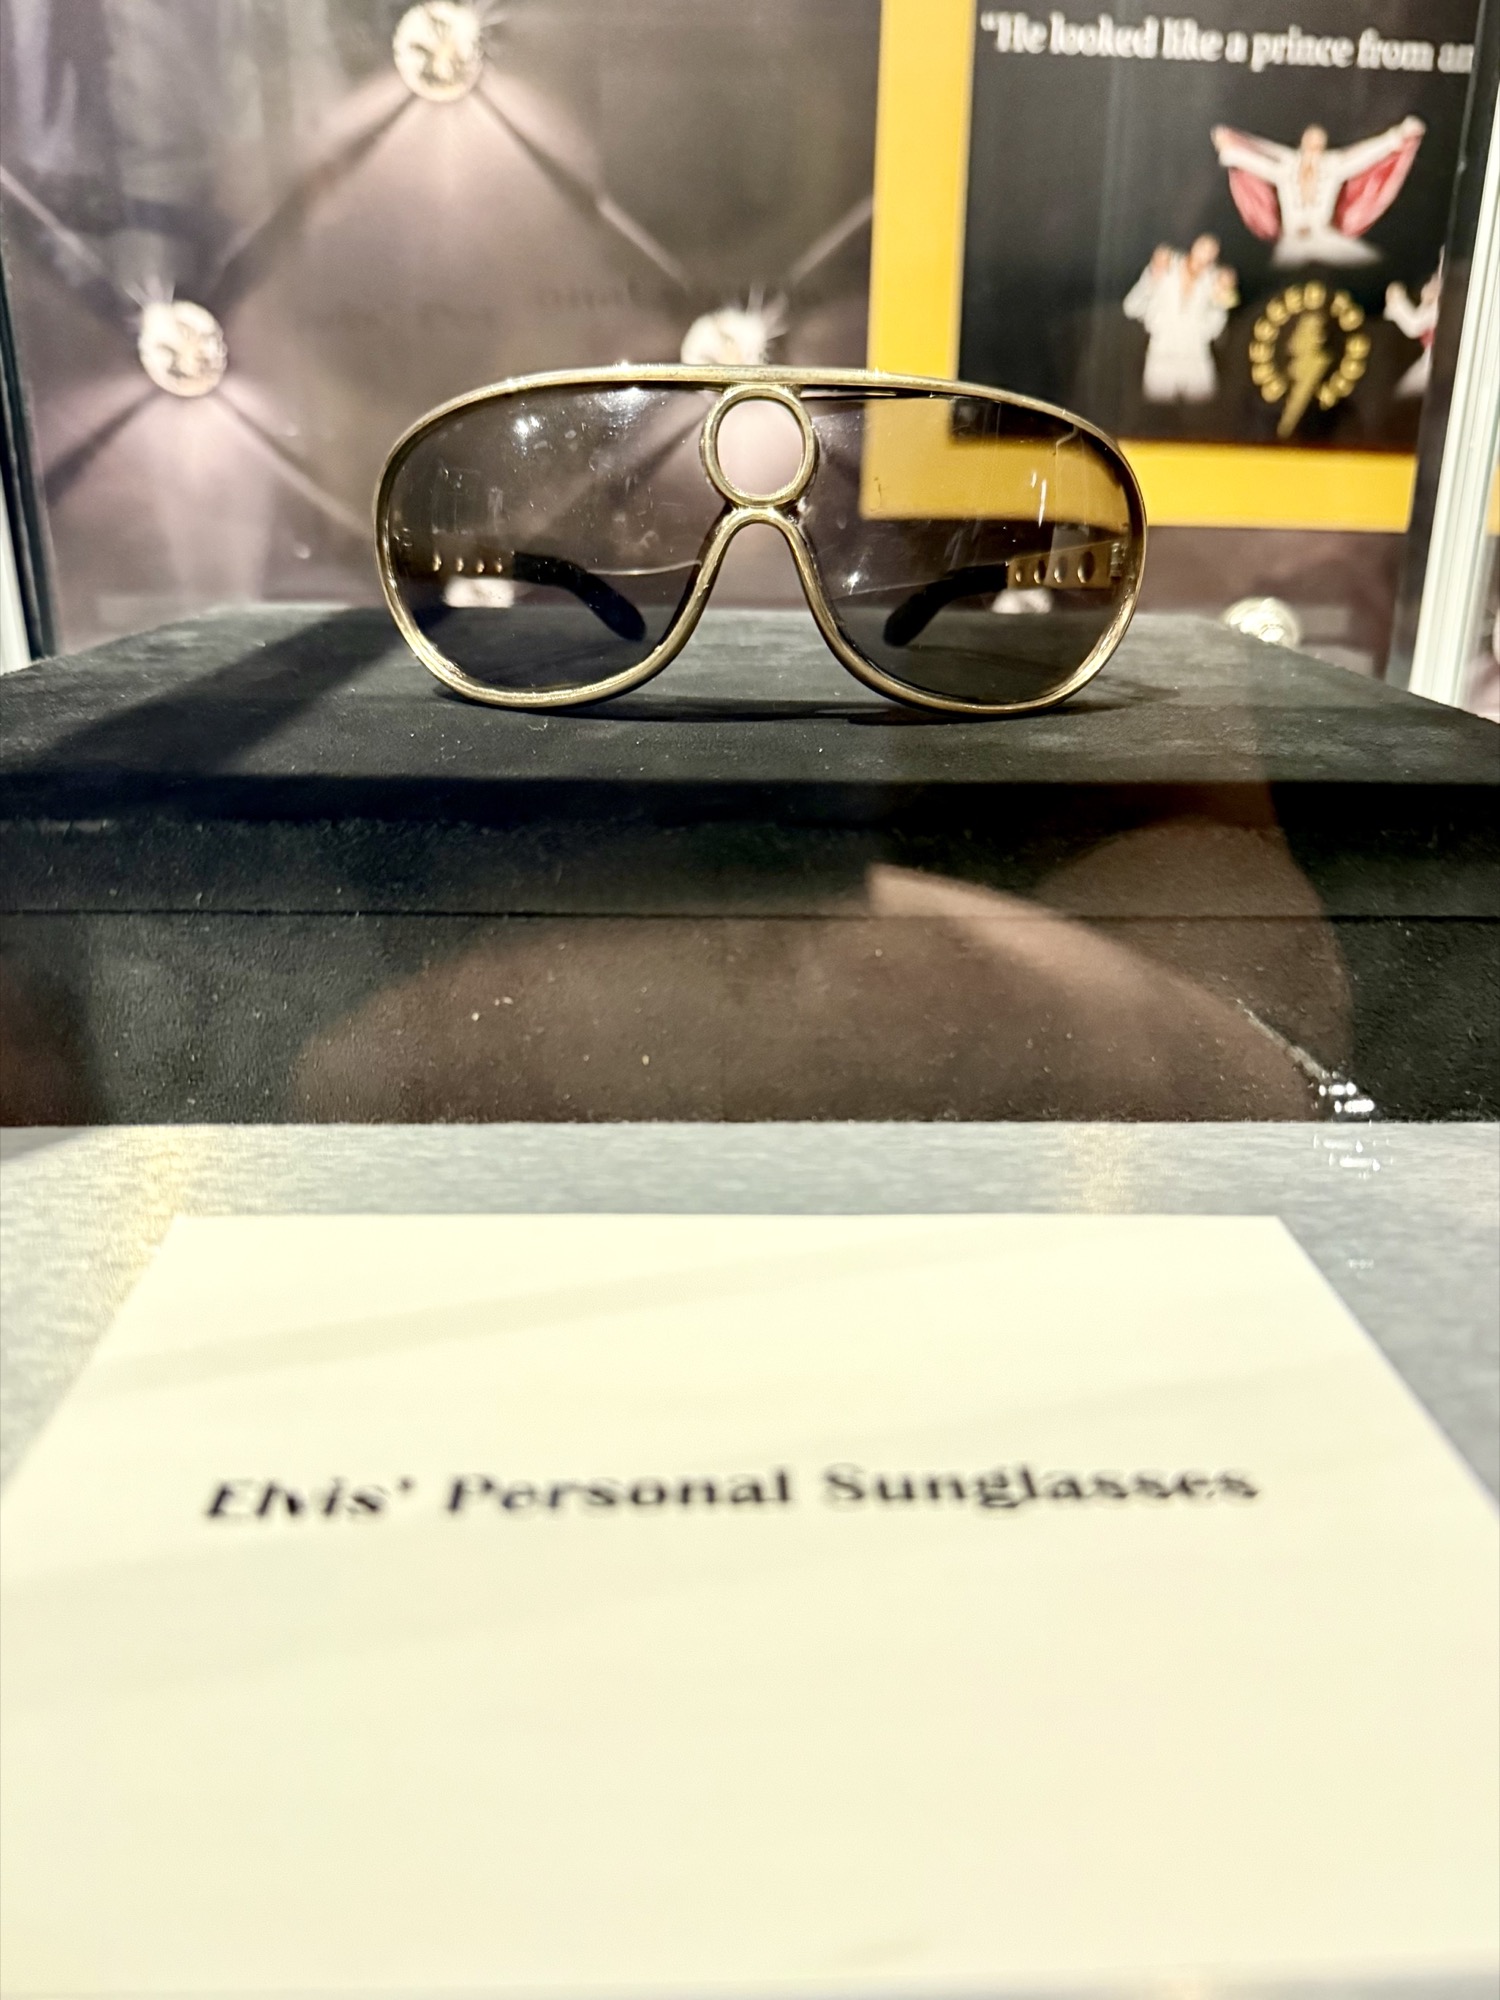
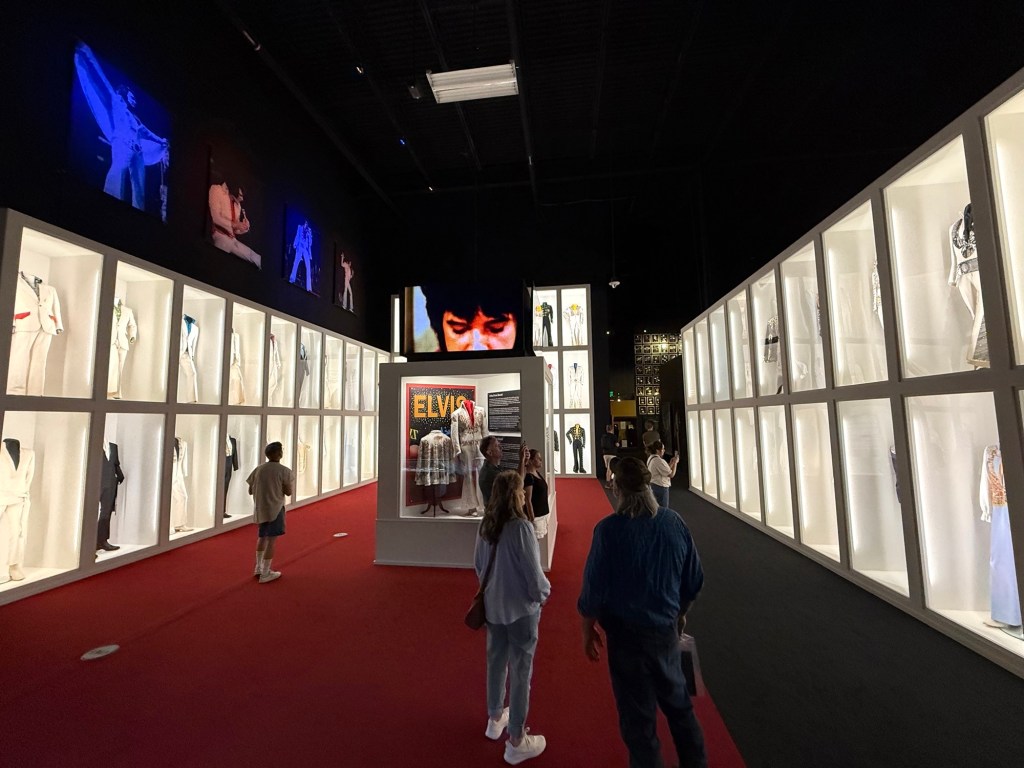
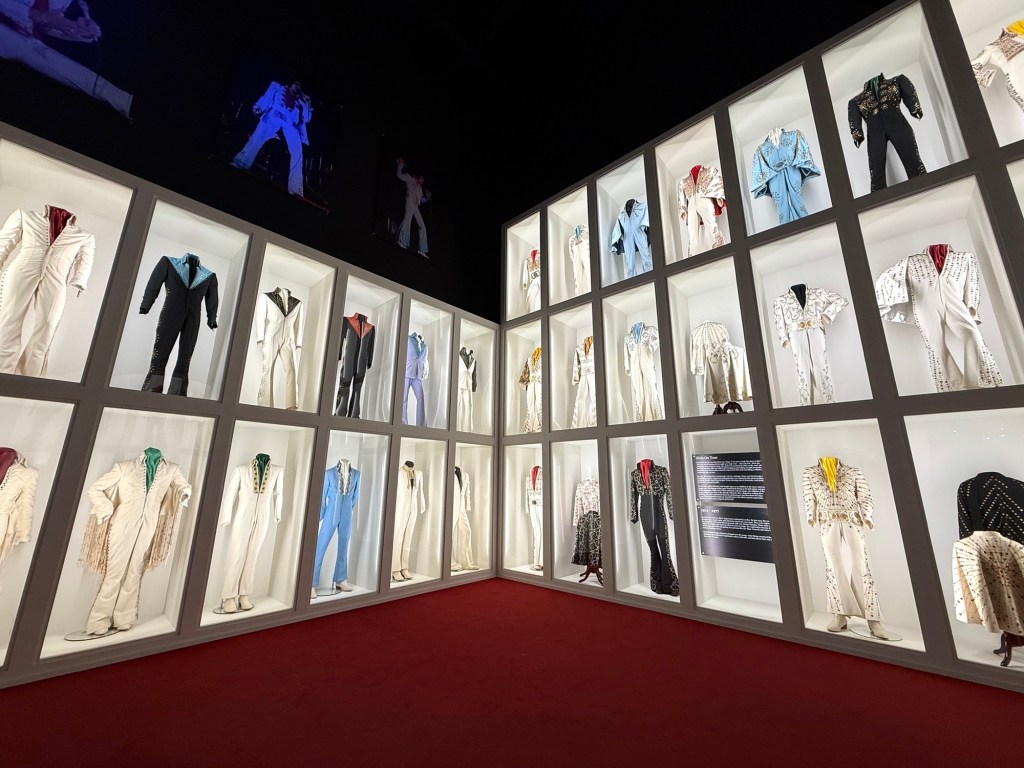
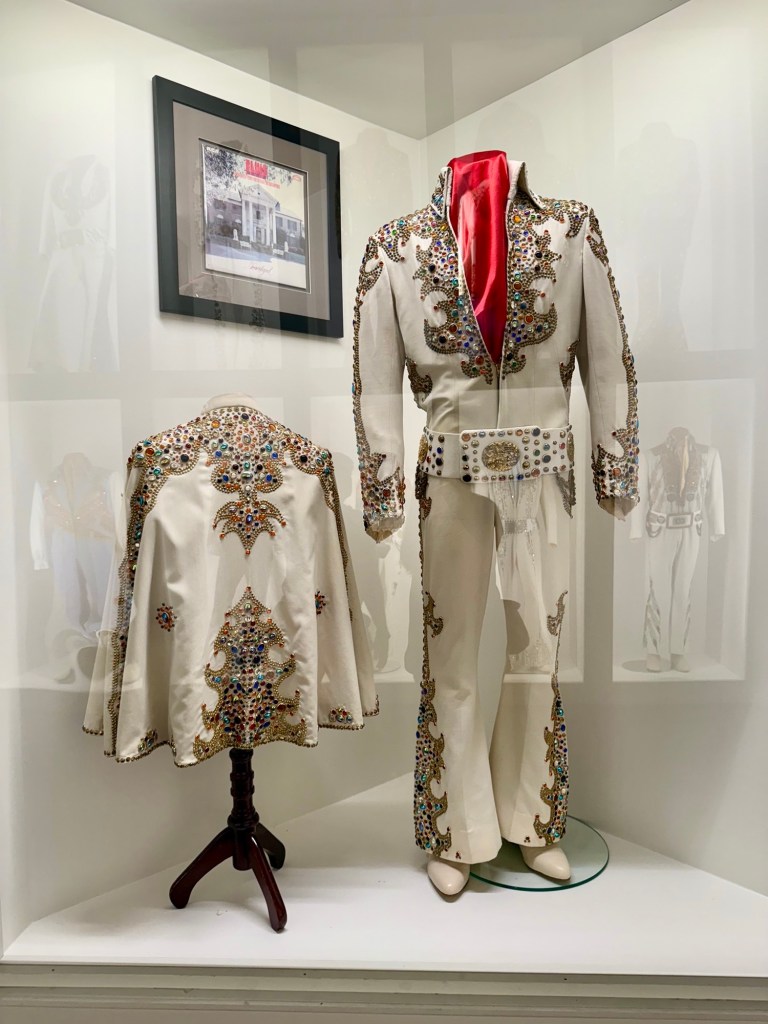
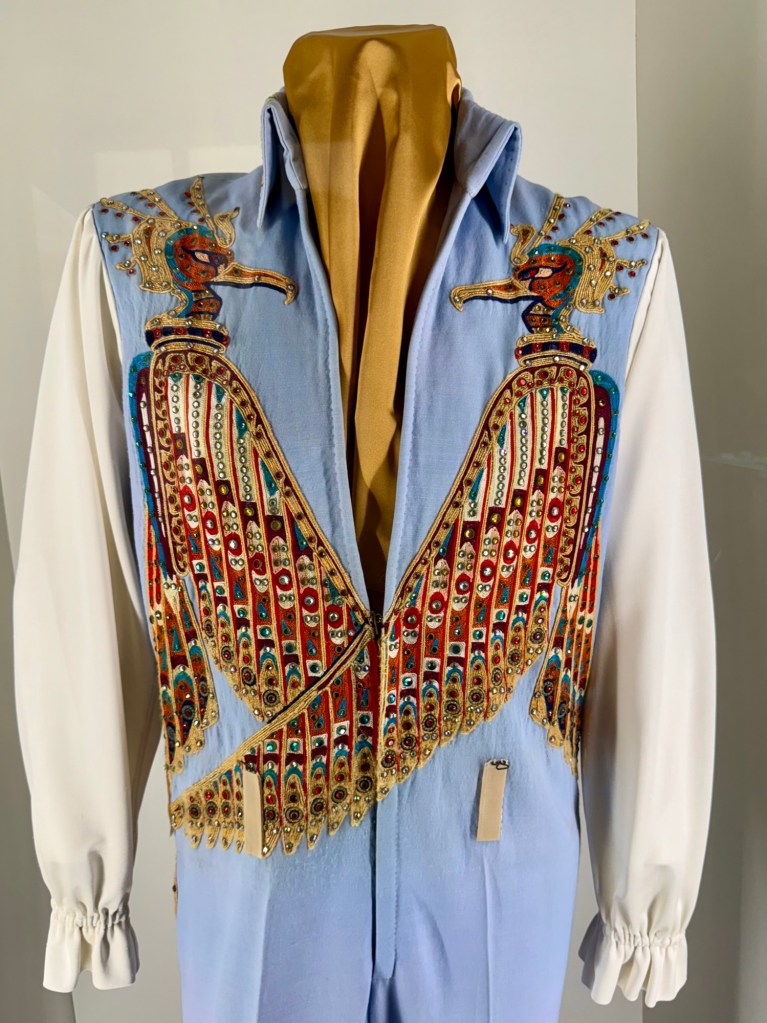
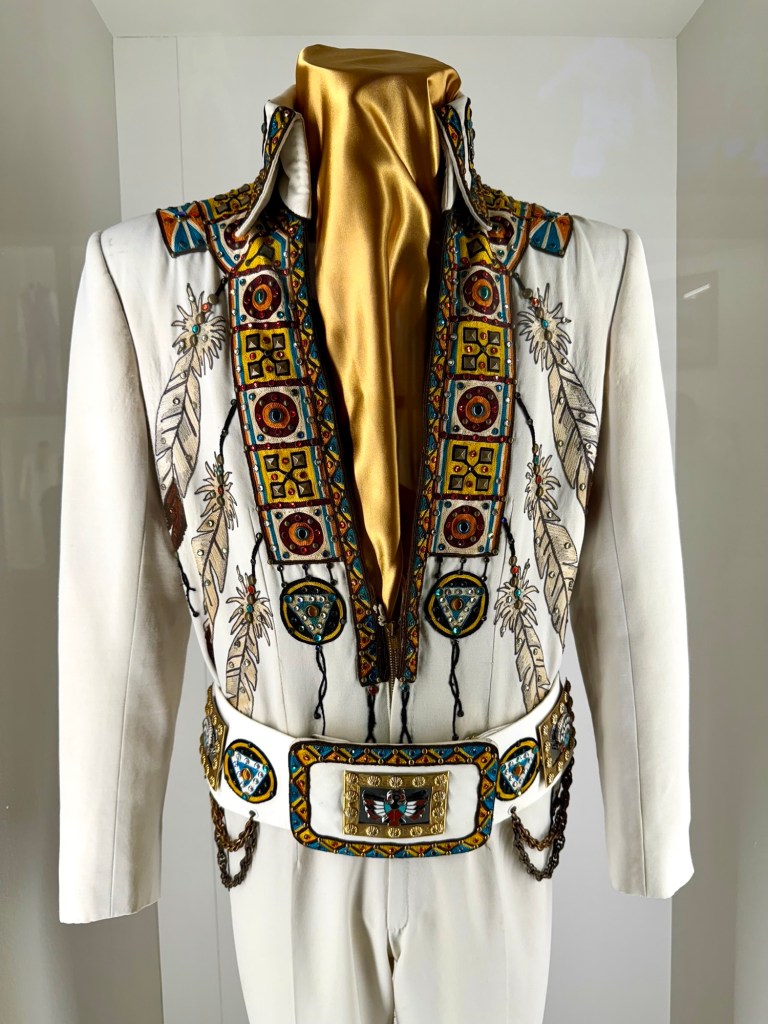
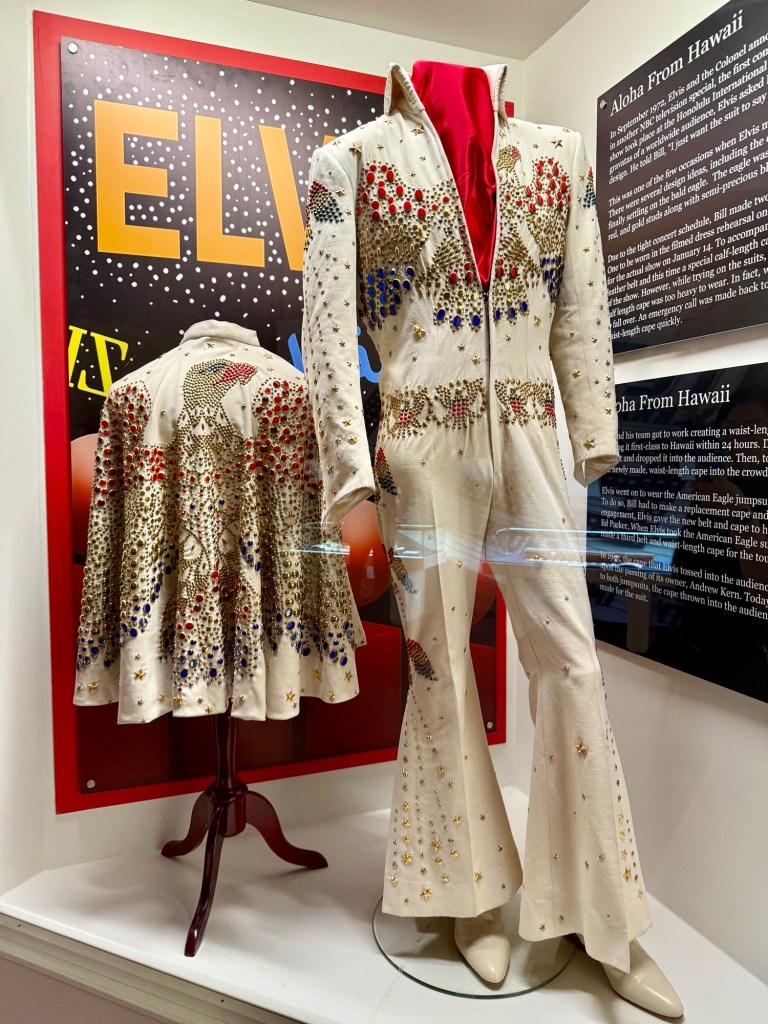
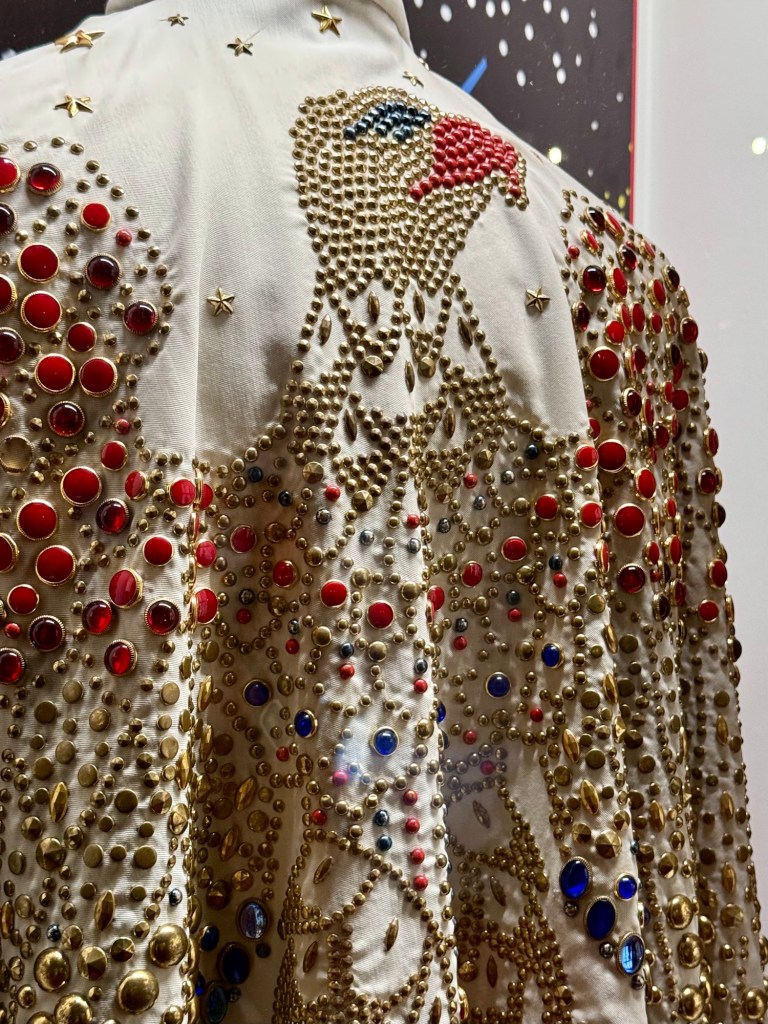
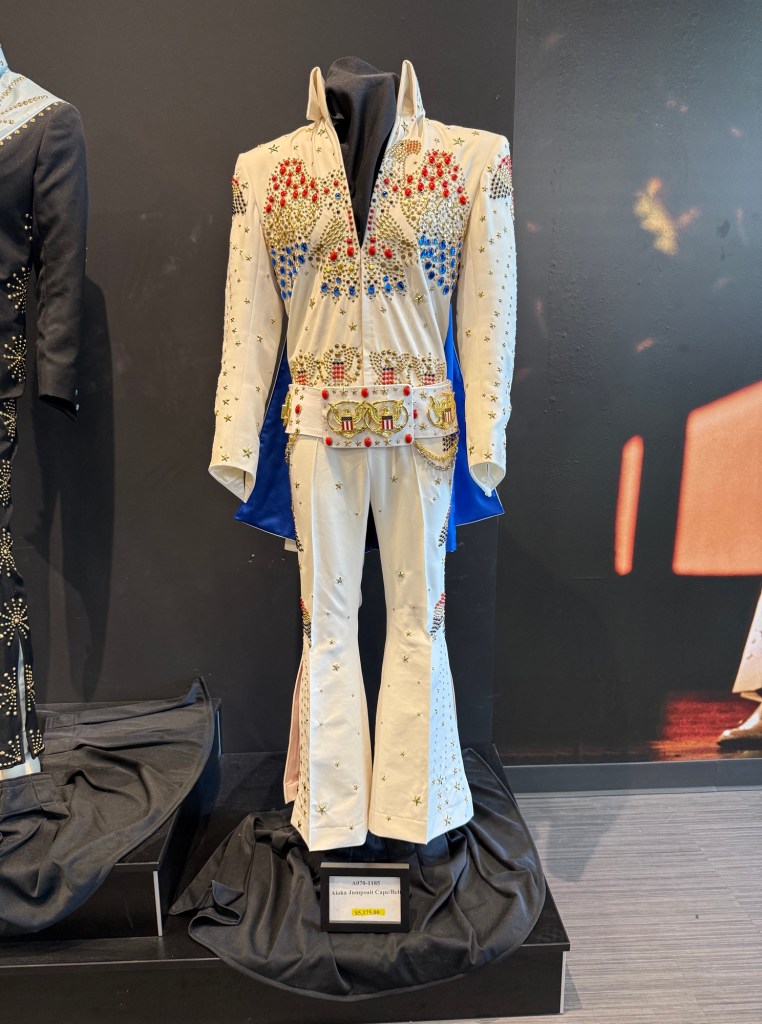
Costumes and Accessories

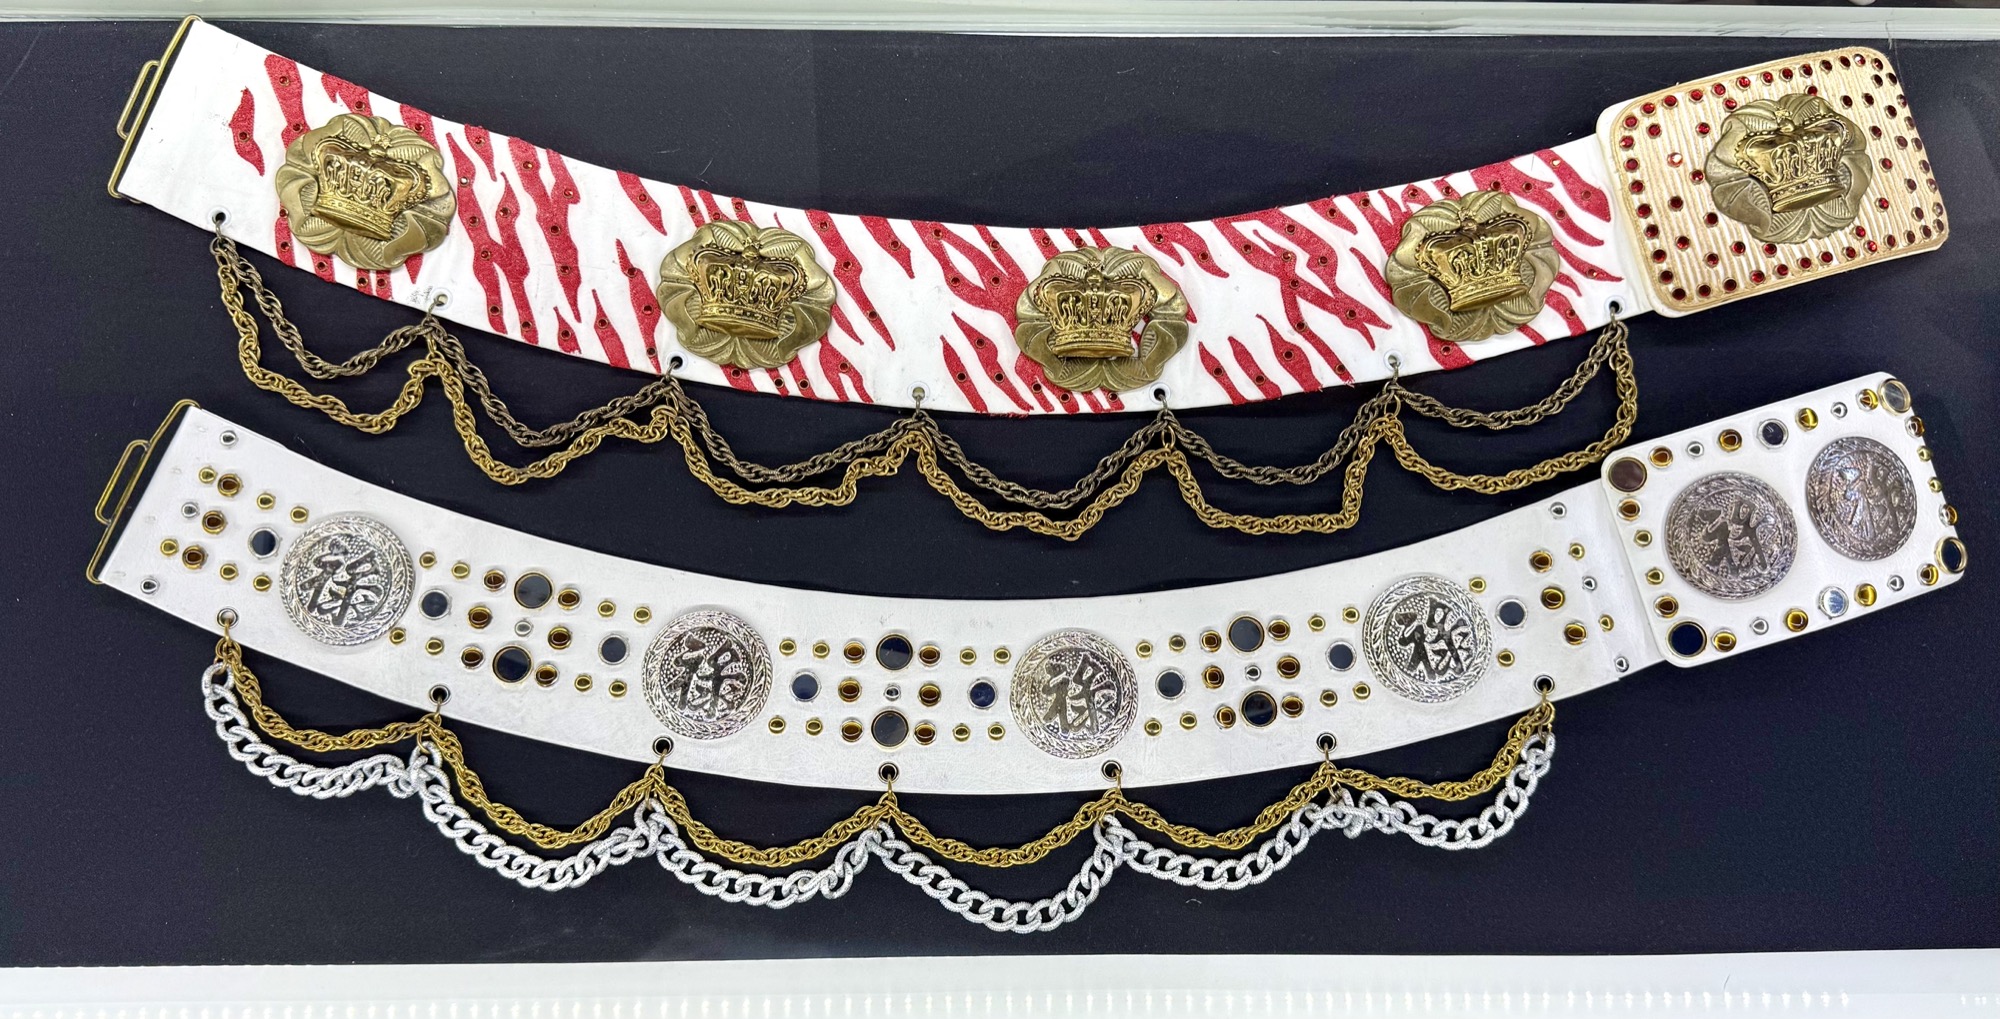
The Glorious Jumpsuits!
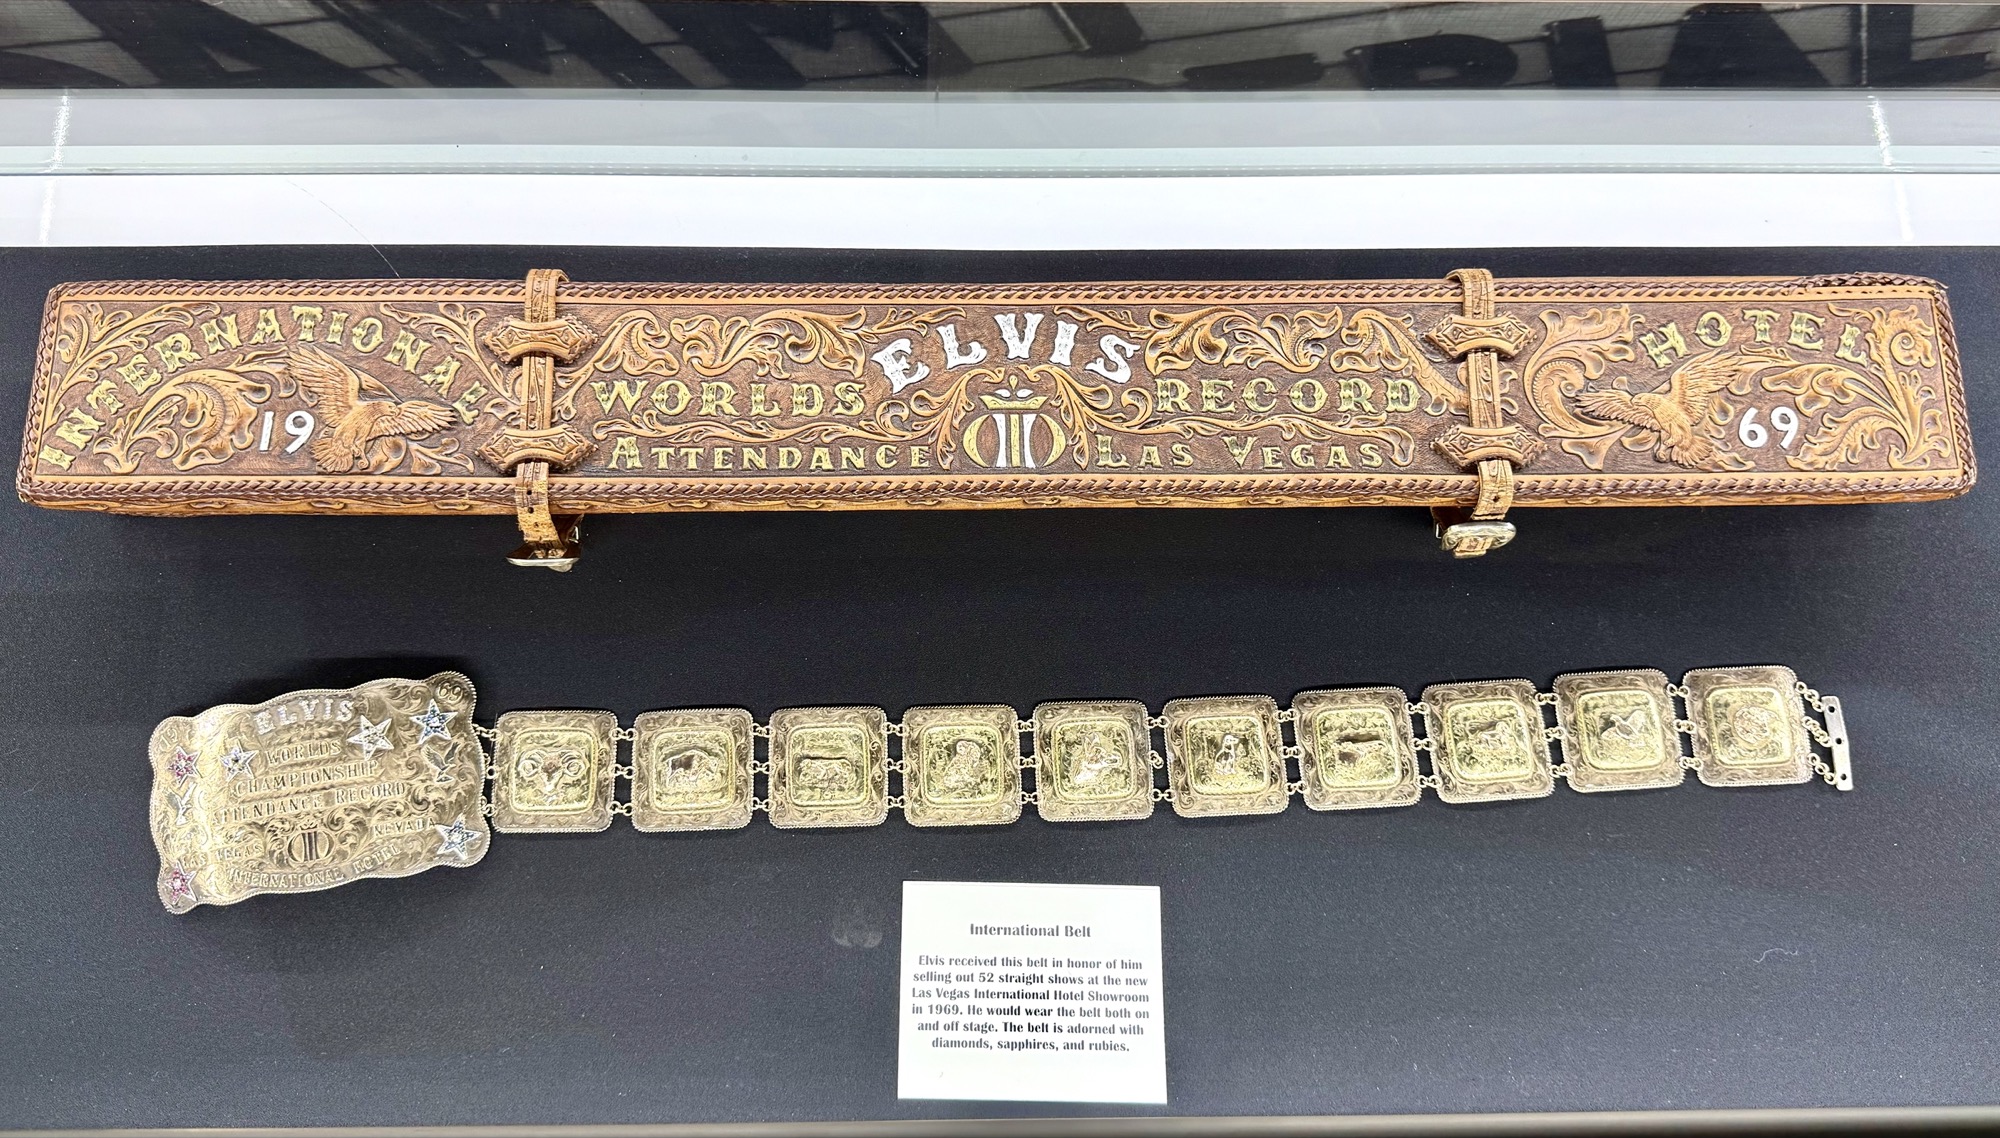
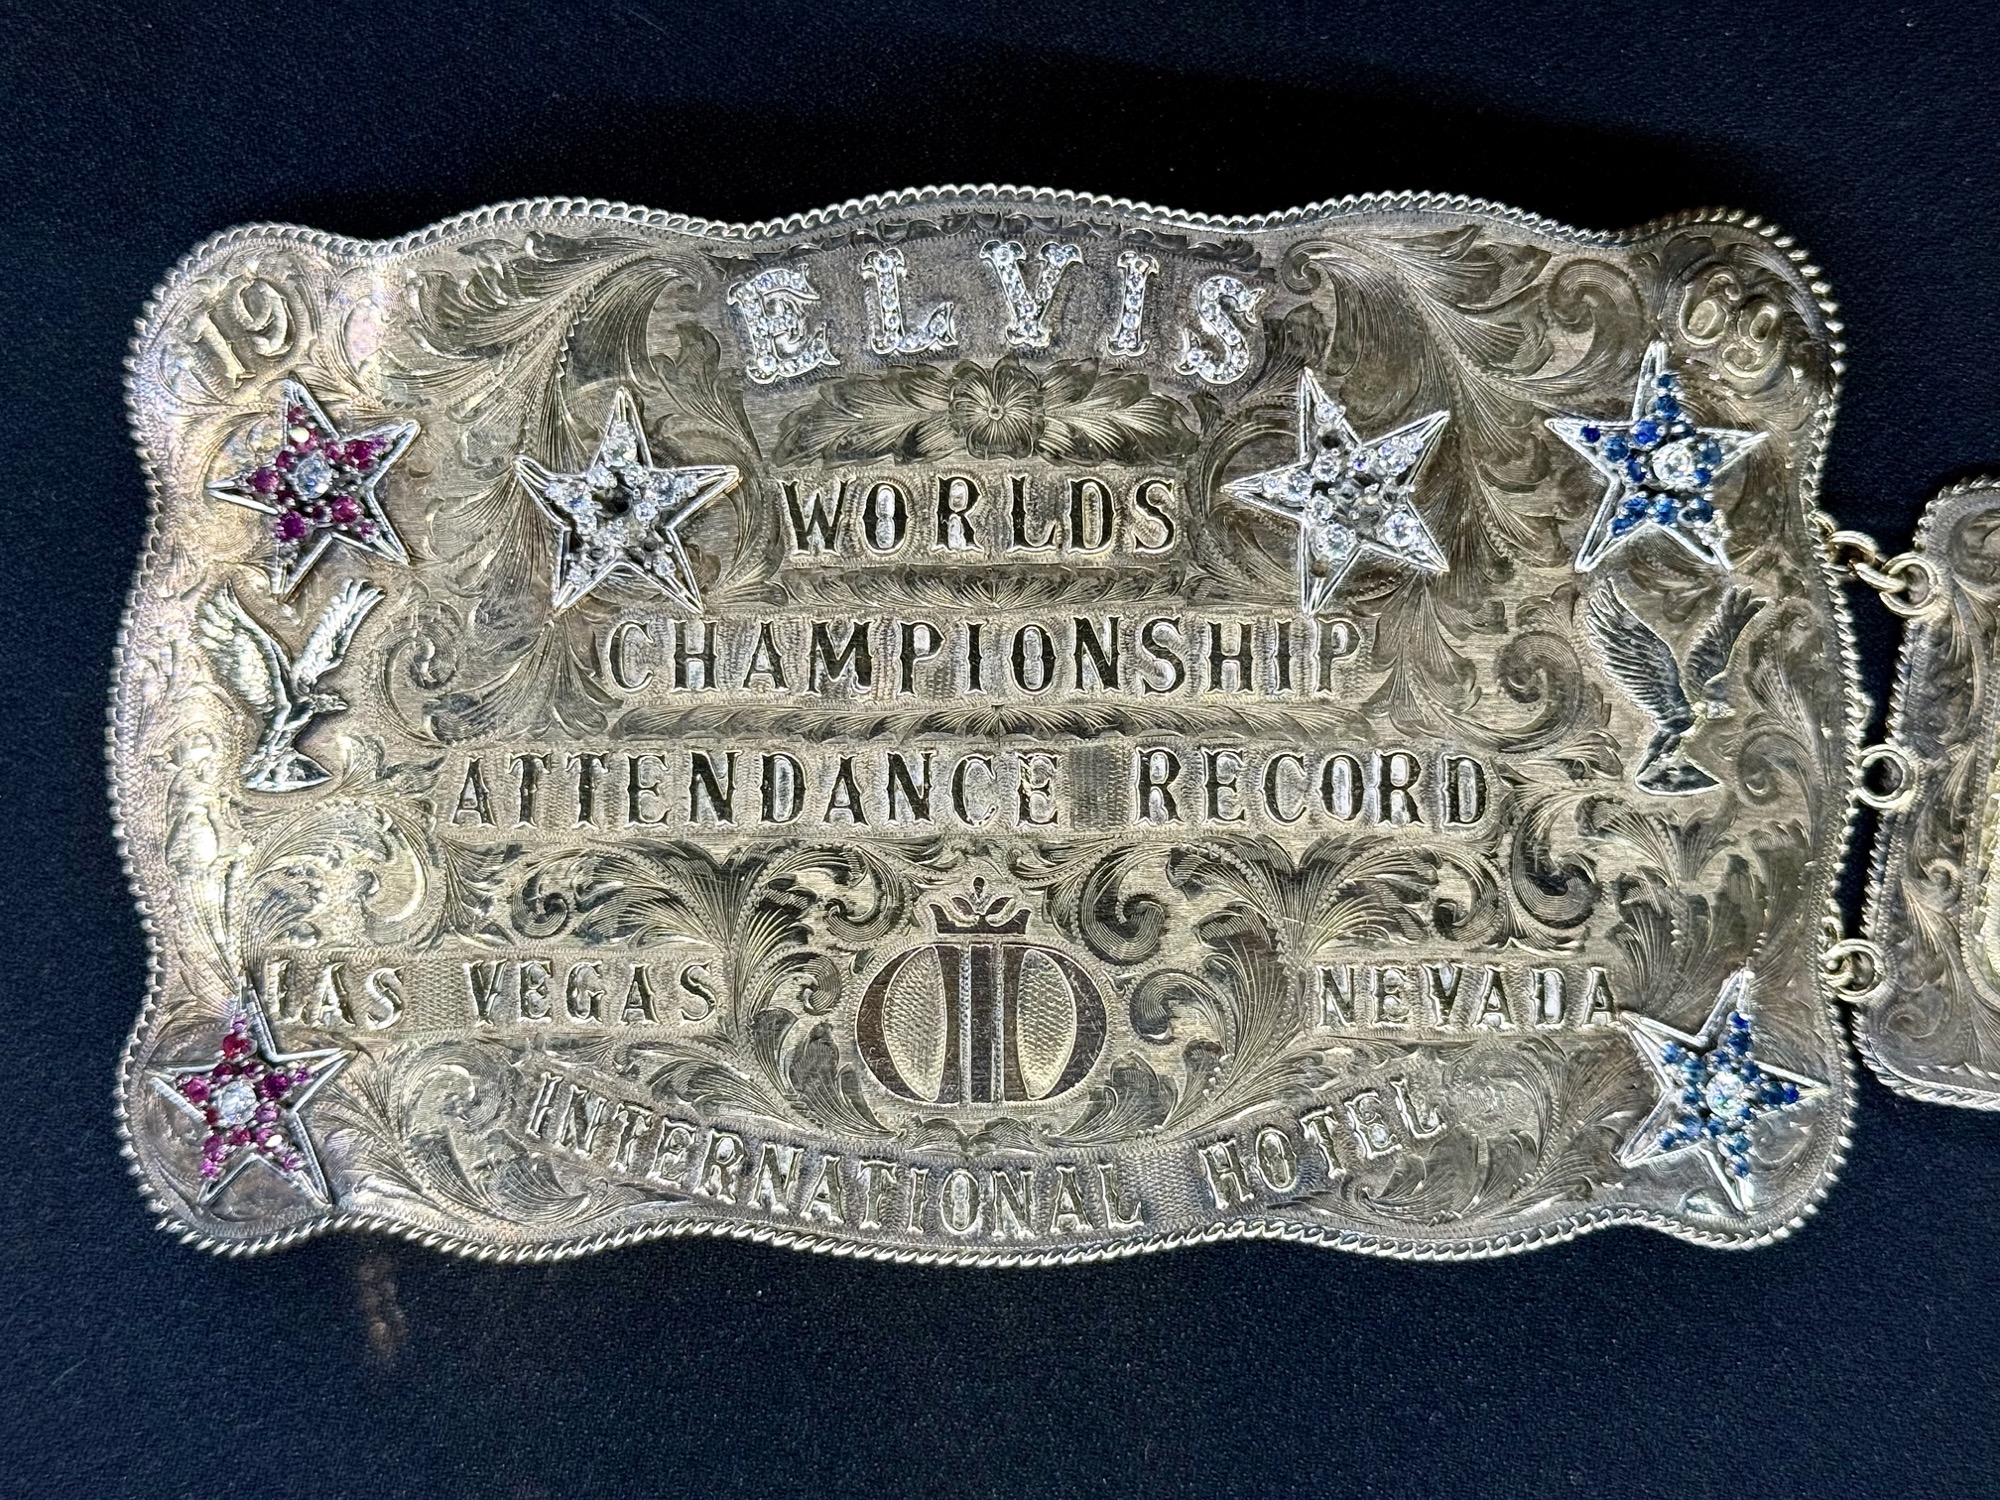
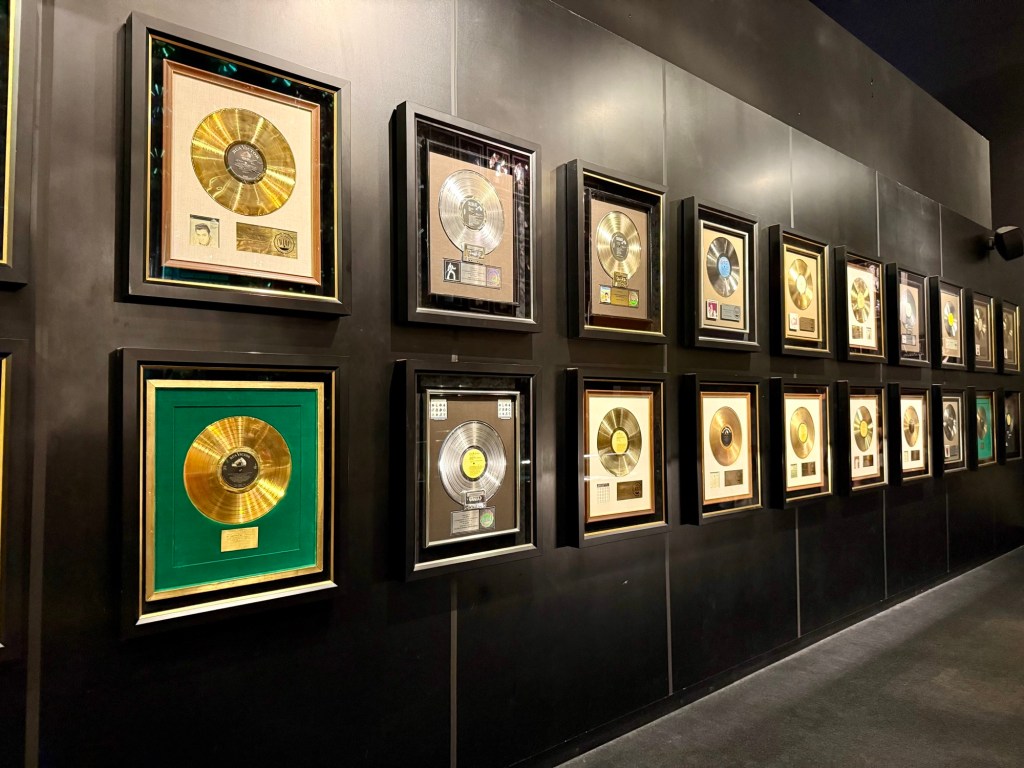
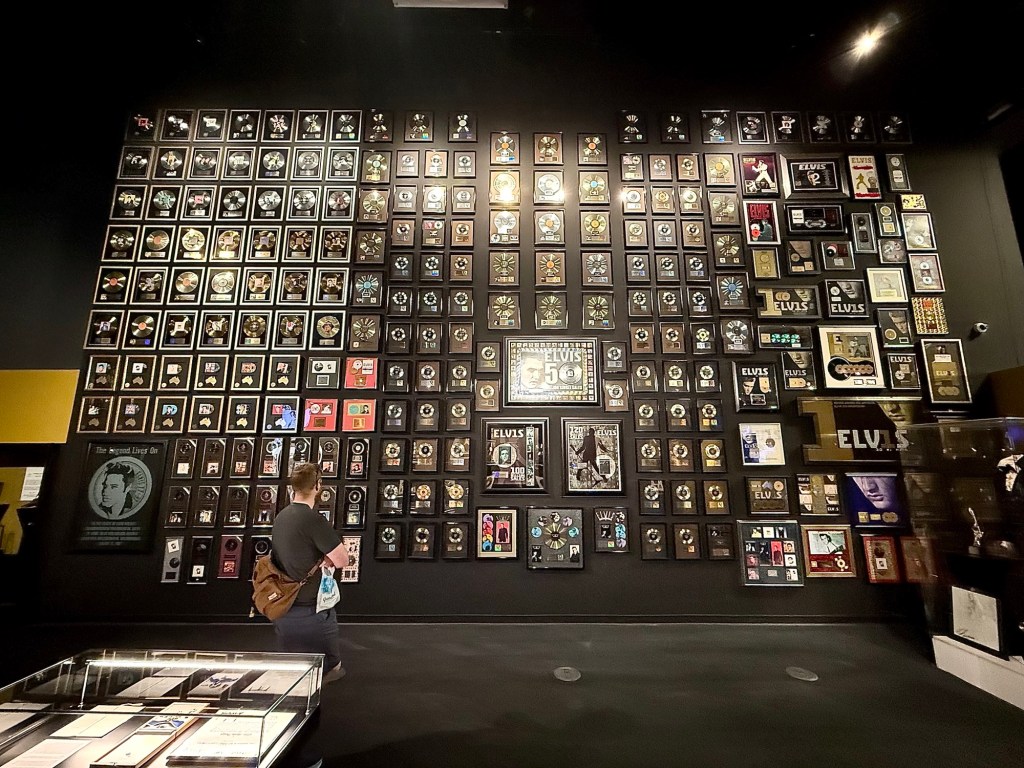
Awards

Giftshops

There are many gift shops sprinkled throughout the Entertainment Complex, some are between exhibits. Each one is a little different and annoyingly they don’t all carry the same things. The largest gift shop that will carry most things will be the one at the entrance to the right of the ticketing area, so I wouldn’t bother going through each one unless you really want to.

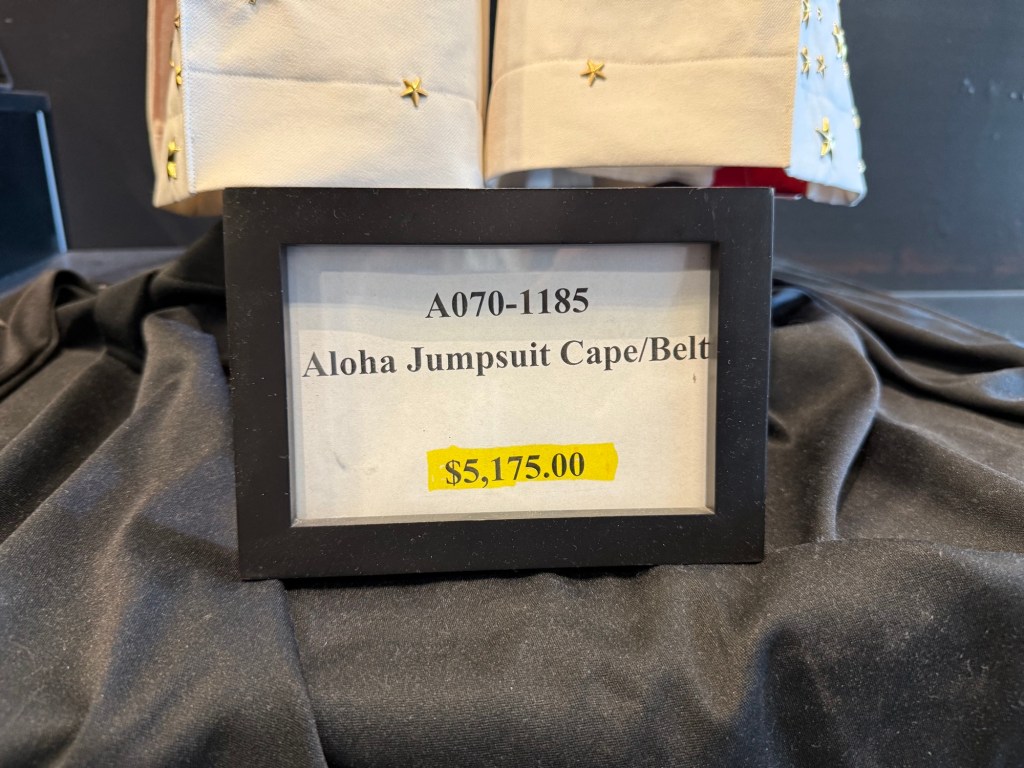
Check out this replica jumpsuit you can buy for $5000!

Dine, Shop, Check out the Planes, or Back to the Parking Lot

Once you’ve finished going through the exhibits in the massive Entertainment Center (congratulations on your legs for lasting this long), you’re done the majority of it. There are a couple of Elvis themed restaurant options and a few more gift shops before you head back to the parking lot.

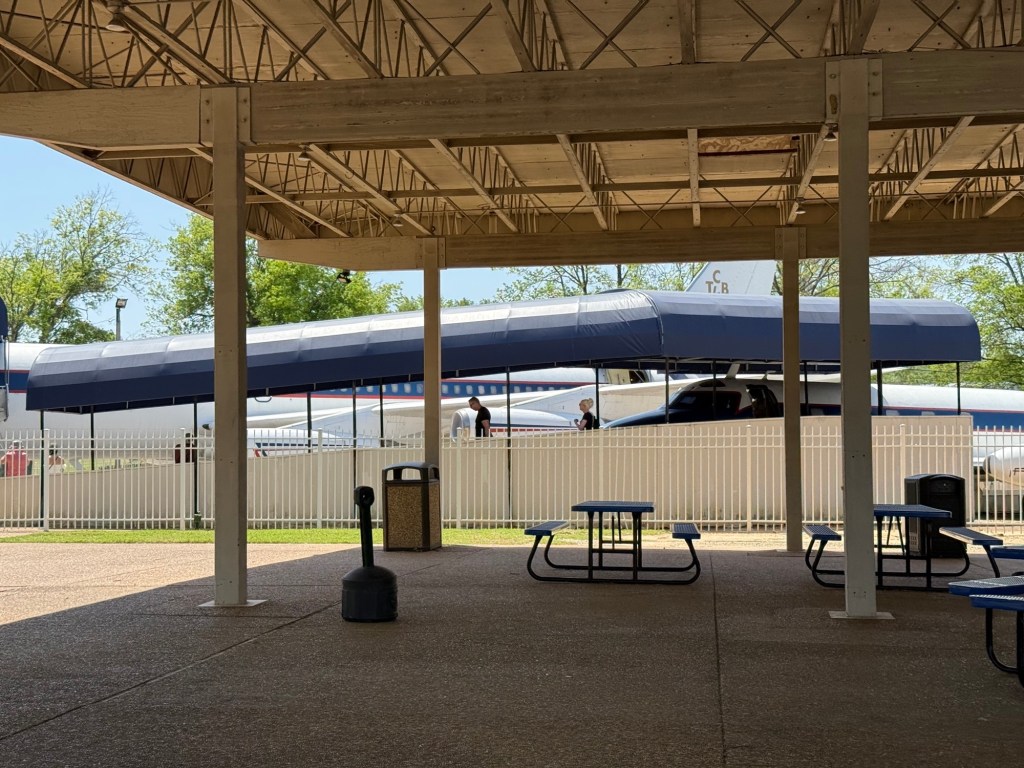
But before you get into your car, you’ll see a walkway that leads to his custom planes. Unfortunately we were on a time constraint (who would’ve guessed that 4 hours wasn’t enough?! 😜) and had to leave to make it on time for our Memphis tour so we couldn’t see the planes. I took a quick snapshot photo of the planes from the outside below:

I hope you enjoyed my picture-filled recount of our visit to Graceland! It’s definitely worth a visit!

Discover Acadia National Park: Your Guide to Mount Desert Island


Date Published: Dec 2nd, 2024 | Last Updated: Dec 2nd, 2024
Author: Abby | Category: Travel, USA
Date of travel: Oct 13-14th, 2024

START HERE: This post has everything you need to know about visiting Acadia’s Mount Desert Island.

Acadia National Park is the “Crown Jewel” of the North Atlantic Coast providing breathtaking coastal views, mountainous hikes, scenic drives, beaches, and a town with no shortage of restaurants. This national park is a must-do in Maine!

Park Info:

Location: Acadia National Park, Maine (Hulls Cove Visitor Center: 25 Visitor Center Road, Bar Harbor, ME 04609)
Park opening hours: Open 24 hours, year-round. There are road closures in the winter months (check the park website for updated info).
Park website: https://www.nps.gov/acad/index.htm
Park fees: $35 per car (+$6 for Cadillac Mountain vehicle reservation) – https://www.nps.gov/acad/planyourvisit/fees.htm

An Overview

Acadia National Park is made up of 3 areas: Isle au haut, Mount Desert Island, and Schoodic Peninsula. Of these three, Mount Desert Island is the most popular with the most amount of things to do and has the the iconic scenery in this national park. During our trip, we didn’t have time to make it to Schoodic nor Isle au Haut, so I will focus on Mount Desert Island only for this post. We do have plans to visit again next year, so keep a look out for updates!

There is a lot to do here, so if you’re feeling overwhelmed, I’ve done a quick 2-day itinerary to see all the main highlights here.

Although an island, Mount Desert Island is accessible by car via Bar Harbor Road. The most popular things to do are on the East side of the island, including exploring Bar Harbor downtown, Sand Beach, hiking the Beehive Trail, Thunder Hole, Ocean Path, Jordan Pond, the ‘Bubbles’, and Cadillac Mountain. I’ve made a quick map of these places below to give you a rough idea of the proximity of the main attractions. I’ll go into each place in more detail further down in this post.

Map of Mount Desert Island in Acadia National Park

When to travel:

The busy season is between Summer and Autumn. When I say busy, I mean BUSY. Plan wayyyy ahead and book your travel plans at least 3 months in advance if you can. I’d recommend visiting in Autumn for the beautiful orange and red colours of the fall foliage that adds to the already breath-taking landscape.

Photo from the South Bubble summit

If you want to time your trip to synchronize with the change in fall colours, here’s a foliage tracker/estimator that can be helpful when planning: https://www.explorefall.com/states/maine. The leaves will usually start changing colours between the end of September to middle of October, depending on the temperature that year. We went in the middle of October this year and while it was perfect for Acadia, it was too early for upstate New York, and just a touch late for New Hampshire 🤷🏻‍♀️.

Check the park website before you go, as some roads are closed during the winter months and some trails are closed during Peregrine Falcon nesting season in the spring to late summer.

How Many Days Do I Need?

To hit the highlights of Acadia in a flash, you’ll need 2-3 days, but if you want to explore more and take it easy, then I’d recommend staying here a week. Toby and I had limited vacation days and wanted to hit up New Hampshire and Vermont during the fall foliage season as well so we did the Acadia highlights in 2 days. We originally planned for 2.5 days, but we hit some bad weather on our last day and and shortened our stay, skipping a couple attractions. 😦

Check the weather ahead of time since many of the popular hiking trails are weather-dependent, so give yourself an extra day or two for wiggle room incase you need to post-pone any activities like us. Check our 2-day itinerary here.

Where to Stay

There are a TON of accommodation options around Acadia National Park. You pass by motel after motel the closer you get to Acadia but with that being said, ALL OF IT WILL GET BOOKED UP EARLY. We’ve never encountered such a busy place in our travels before. A month before planning our trip, every single (affordable) accommodation option was booked up around the national park and we snagged the only affordable one remaining all the way in Surry, a 45 mins drive from the park. Although it meant that we had to wake up earlier than planned to get to where we wanted to go, we were just grateful to get a place at all! We travelled at peak season in middle of October, so if you’re planning to do the same, BOOK EARLY. I’ve included a map of available accommodation options from booking.com for the middle of October next year as reference.

Accommodation options from booking.com

The best place (although more expensive) to stay will be in Bar Harbor town, inside Acadia National Park. Although a small town, it’s got everything you need at your fingertips, including restaurants, shops, grocery stores, bars…etc. It’s also close to the major attractions in the national park as well. I’ve included a screen cap below of available options in Bar Harbor from booking.com for reference. The downtown area is very walkable, so choose to stay closer to Main Street if you want to be in the hustle and bustle. Read more about Bar Harbor below.

Accommodation options in Bar Harbor from booking.com

If you can’t manage to get a place in Bar Harbor (like us), don’t fret. Anything nearby will be fine. You can always drive to Bar Harbour town and spend an afternoon to walk around (it’s not a big town, you can get through it in a couple hours).

Getting Around Acadia – Driving vs the Bus

You can get around Mount Desert Island by either driving or taking the free Island Explorer Bus.

Driving:

We prefer the freedom of driving our own car, however there are downfalls. Since Acadia gets extremely busy, parking can be an absolute nightmare. If you are visiting popular hikes and trailheads, make sure you arrive early (ideally before 8am) to get a parking spot, otherwise prepare to circle the lots and the side roads again and again until one frees up. We had to do this when we visited Jordan Pond and when we did eventually find a parking spot it was a 30 minute walk away from the trailhead 😭. It was the worst parking experience we’ve ever encountered. When parking lots are full, the rangers will barricade the entrance so you can’t just go in and circle around until one frees up. Therefore, if you only want to drive, start early and also consider that it will limit the number of places you go in a day and you’ll have to factor in the extra time to find a parking spot – for example, we woke up super early and got a great parking spot at Sand Beach parking, however in the afternoon when we wanted to to the Jordan Pond hikes, it was near impossible to find a spot and driving around took up a chunk of our schedule.

Also keep in mind that there is limited cellphone reception, so if you rely heavily on Google maps, maybe have a paper map with you just in case.

Island Explorer Bus:

This is a free bus service that operates only from Summer to Fall and runs roughly every 30 minutes. It takes you to the most popular places and will stop at most parking lots. Their website here has more information regarding the bus routes: https://www.exploreacadia.com/routefinder.html. The benefit of taking the bus is that it is easy and you don’t have to worry about parking, however the downfall is that you’ll have to take your whole day of hiking essentials with you and make sure you have places where you can fill up your water bottle throughout the day. The bus is also only every 30 minutes, so you’ll have to factor that in as well when you’re planning your day.

Island Explorer bus – a free bus service around Acadia National Park

What I recommend: a combination of both. Get up early and get parking at your desired lot. If you’re doing the Beehive Trail first thing (which I would recommend), park at the Sand Beach parking lot. If you’re doing the Jordan Pond trails first, then park at the lot there. When you’re ready to move on to the next location, just take the Island Explorer Bus instead of moving your car. It will save you the hassle of having to find parking for your next location. The bus will go to all the parking lots, so even if you can’t get a spot at your desired lot, just park at the next closest one and take the bus. There’s no cost for parking, so you can leave your car at the same place all day.

Park Pass

You will need to purchase a park pass to enter Acadia National Park. There’s no gated entry, but there are plenty of rangers around checking people’s cars for the pass. It’s $35 per car and must be displayed on your windshield. This park pass allows you to go anywhere within the park, however if you wish to drive up Cadillac Mountain (more on that below), you will have to purchase an additional timed vehicle reservation pass ($6 per car). The Cadillac Mountain sunrise tickets sell out quick so plan ahead of time!

The park pass and Cadillac Mountain vehicle pass can both be purchased online ahead of time on the government website: https://www.nps.gov/acad/planyourvisit/fees.htm. You can purchase the park pass in person at the visitor’s centre in town, but not the Cadillac Mountain pass. I’d highly recommend buying both online beforehand and have it printed and ready to go, so you have one less thing to worry about. In peak season, it can be incredibly busy and parking can be a huge hassle – don’t waste your trip waiting in line to look for parking just to buy a park pass!

Travel Tips

Start Early!

If there’s one piece of travel advice I can give you for visiting Acadia National Park, it’d be to start early! Ideally at sunrise. If you were looking for a relaxing getaway of sleeping in, I’m sorry to disappoint you. Because this place has so much to offer, it gets INCREDIBLY busy especially in the summer and fall season – I’m talking about having to park a half an hour away from your car busy – and everyone wants to hit up the same areas and the same iconic hikes. It gets so busy that not only will you struggle to find parking, but you’ll even have to wait in line to climb up mountains! It gets insane, trust me. Getting up early is the only way to ensure the best time away from the majority of the crowds and the frustrations of finding parking. You’ll appreciate the calmer and quieter surrounding in the early morning and take in nature without all the noise.

A benefit of starting early is that you get to see some wicked cool sunrises.
Limited Cellphone Service Everywhere

There is very limited cell reception in Acadia. You might get some pockets of good reception on top of mountains, but it’s spotty at best. There’s free wifi at Jordan Pond House and also decent wifi in Bar Harbor town, but apart from that be prepared for your service to jump in and out. I’d recommend picking up a map of the area or screenshot it on your phone before heading out and going on hikes just incase you lose reception and get lost.

Bring good hiking gear

There are plenty of rock-scrambling and cliff-side hikes to embark on in Acadia. If you plan on trekking through these popular hikes, a reliable pair of hiking shoes with good grip is a must! There’s also rock-climbing involved in some of the trails, so I’d also recommend a good pair of hiking pants that will hold up against abrasive surfaces. Hiking sticks can be useful, but depending on your hike, there are some trails that will require your hands to climb up and down rocks and hold on to iron rungs.

You need to display the Acadia park pass in your windshield when you park. Remember to have it printed and ready to go before you travel or hope that your hotel or accommodation will have a printer you can borrow.

Best Things to Do:

A summary of the best things to do:

Sand Beach

This is the largest sandy beach in Mount Desert Island and unsurprisingly is a very popular spot in the summertime. This open beach is a lovely place to relax and enjoy the views and sounds of crashing waves or to rest your legs after a long hike. We came here during the fall so the weather was a bit chilly for swimming, but there were still plenty of families here with children playing in the sand.

To access Sand Beach, park at the Sand Beach parking lot and it’s only a few steps away.

Ocean Path

Distance: 6.6km (3.3km each way)
Duration: 1.5 hours out and back, not counting time for photos
Trail type: out & back
Start: Sand Beach parking lot

Ocean Path is a lovely walking path along the coast of Maine. The path is narrow and follows along Park Loop Road, but there are multiple small paths to diverge off in the trail to get closer to the views and rocky terrain, best for that perfect Acadia photo. This path is flat and easy to walk on, popular for runners, hikers, photographers, and bird-watchers.

This out and back path starts at Sand Beach parking lot and continues for 3.3km, ending at Otter Point Overlook. Apart from enjoying the views along the way, there are 4 main stopovers on this path: 1) Thunder Hole, 2) Otter Cliff Overlook, 3) Boulder Beach and 4) Otter Point Overlook (marked on the map).

Ocean Path, 6.6km, roughly 1.5 hours to walk to entirety

You can choose to walk as much or as little of this path as you like. If you don’t feel like walking, you can drive down Park Loop Road and you’ll see turn offs for small parking lots at each of the stops (but I’d recommend walking to see the views along the way). Note: Park Loop Road is a one-way road to accommodate for road-side parking, so you can only travel from North to South by car.

Some photos along Ocean Path on our way to and back from Thunder Hole:

Thunder Hole

Thunder Hole is the most popular stop-off on Ocean Path where you can watch waves crash into the rocks, creating a burst splash of water high into the air. You have to come 2 hours before high tide to experience this. We didn’t manage to get our timing right, but it’s still neat to stop over here anyway. It’s roughly a 20 minute walk to Thunder Hole from Sand Beach via Ocean Path with beautiful views along the way.

Beehive Trail

The Beehive Trail is one of Acadia National Park’s most popular hikes, offering breath-taking panoramic views. This hike has a reputation for being thrilling and difficult with iron rungs and vertical climbs but we personally didn’t find it bad at all, especially with good pacing. I recommend starting early, wearing good shoes, and dressing in layers. For safety, avoid this hike if it’s raining. Follow this in-depth guide about hiking the Beehive trail here.

Views on the Beehive Trail

Hiking Acadia’s Beehive Trail: A Complete Overview


The Beehive Trail in Acadia National Park is one of the most popular hiking trails known for its stunning panoramic views and challenging vertical climbs. This guide has all the information you need to tackle this trail.

Jordan Pond Trails

There are numerous trails you can hike around the Jordan Pond, and many of them conveniently start at Jordan Pond House Restaurant. The 3 most popular hikes here are the Jordan Pond Path, Jordan Cliffs Trail, and Bubbles Trail. You can also combine all 3 hikes to get the best of all of them – which is what we did! Follow my complete guide to hiking these trails here.

Jordan Pond House Restaurant

Outside of Bar Harbor, there is a very limited selection of restaurants on Mount Desert Island in Acadia National Park. Jordan Pond House Restaurant is the most popular choice not only because of their good food, but also because of its convenient location where many trailheads are located. The back patio of this restaurant also offers views of Jordan Pond and the North and South “bubbles”.

They’re known for their popovers here, which is kind of like a hollow muffin made with a thin batter, served with butter and their local-made jam. It was okay, but for me the star of the meal was their meatloaf sandwich! Find out more about this restaurant here.

Cadillac Mountain at Sunrise

Cadillac Mountain is the highest point on the eastern seaboard and is famously known to be the best (and first) place to watch the sunrise in Acadia. You can get to the summit by either hiking or driving, but generally driving is the preferred option so you’re not hiking in the dark to get up the mountain by sunrise.

Due to its popularity, Cadillac Mountain is the only place in Acadia National Park where you need a vehicle reservation to drive to the top. You must pre-purchase your reservation ahead of time online on the government website: https://www.recreation.gov/timed-entry/400000. This ticket is in addition to the park pass – you must have both to drive up the mountain. You cannot buy these tickets in person unlike the park pass. 30% of the tickets are released 90 days in advance and the remaining 70% are released 2 days prior at 10am EST.

The government reservation website screenshot of the two ticket type reservations.

Tips to securing a ticket: When you get to the government website, there are 2 types of tickets to choose from: sunrise and day tickets. Not surprisingly, the sunrise tickets are the most highly sought after. Set your timer and get multiple people on multiple devices because as soon as it hits 10am (eastern time – make sure you’re in the right time zone), you must click immediately for your best chances. I tried this on two occasions and swore I clicked exactly on time and the tickets were already sold out within a SECOND. It was insane. Once you’re in, the system reserves the ticket for you for 15 minutes until you check out. Pro-tip: If you didn’t secure a ticket at 10am, keep refreshing and wait until 10:15am to see if tickets become available. All the people that didn’t check out their tickets within the 15 mins have their tickets timed out and gets put up for sale again. This was actually how I managed to snag our tickets 🤫. Once you check out, you’ll get sent a QR code that they will scan at the gate on the day.

The sunrise tickets are timed to enter between 5:30am – 7:30am, there’s no time limit on how long you can stay up there. It is recommended to arrive 1 hour prior to sunrise. It takes about 20 minutes to drive to the top and only a few minutes from the car park to walk to the views.

Map of Cadillac Mountain summit – smaller West lot on the left and East lot on the right

Sadly for us, we did everything right, but the weather was not in our favour. We woke up super early and got to the gate entry at 6:20am, about 20 mins before sunrise (a bit late). We knew visibility was going to be poor, but we had hopes of a small break in the clouds for the views so we drove up anyway – after all, we were already there and the $6 was spent. They scanned our QR code at the gate and it only took us 15 minutes to drive to the top (although I’ve heard it can take up to 30 mins due to slower people unfamiliar with driving up mountain roads and it’s single file all the way up). Once we got to the top, there are 2 parking lots. You’ll pass the smaller West lot first which is farther away (seems like the overflow lot), then you’ll reach the East lot, which is a semi-circle and is directly in front of the trail. You want to park in the East lot. When we visited, the weather was so bad that you could barely see 10 feet in front of you so we just got out to have a quick peak, then got back into our car and headed straight for a warm breakfast in Bar Harbor.

There’s a short and easy 500m trail around the Cadillac Summit that was supposed to be nice to see. I guess we’ll have to try again next time. 🤷🏻‍♀️

Bar Harbor

Bar Harbor is the only major town in Acadia National Park. Here you’ll find lots of cute shops, souvenirs, restaurants, hiking gear, and even a big grocery store for all your food needs. There are also tons of accommodation options in this small town that get booked out way in advance during the busy season.

Map of downtown Bar Harbor – Main Street will be the majority of the shops

You don’t need to spend a ton of time in Bar Harbor, an afternoon is enough to explore this small town. It only takes about 15 minutes to walk from one end to the other. Main Street is the street with the most shops. There are TONS of seafood restaurants around here and of course, lobster rolls – when in Maine!

Take a stroll down The Shore Path that starts at the North end of town from Agamont Park. From here, you can see a ton of lobster boats anchored in the water (we counted at least 26). Continue walking on the path that wraps around Bar Harbour Inn, a big beautiful inn with spa amenities (looked expensive). The path can go for a while but we stopped wen we reached the small beach at Balance Rock and took a right to head back onto the Main Street, weaving through the beautiful old houses in the quiet neighbourhood.

If you need to stock up on supplies, there is a large corporate grocery store that sits at the edge of town called Hannafords.

We had breakfast at a highly rated local diner called Jordans Restaurant (conveniently located next to Hannfords). They open at 5am, which was perfect for us after our big disappointment with the gloomy weather on Cadillac Mountain. When we arrived at 7am, the diner was already half full. By the time we left an hour later, there was a line up out the door! They have a decent sized menu, boasting their wild blueberry muffin and wild blueberry pancakes – we got both (and Toby added chocolate chips to the pancake). We also got the lobster roll, clam chowder, and lobster cheese omelette – if you haven’t noticed, we often order too much food because I want to try it all 😅. Overall it was an okay meal. I liked the home fries and the lobster roll was great (soft fluffy toasted buttered bun). The pancakes with the wild blueberry sauce was good but the lobster omelette and blueberry muffin was just okay. The staff was real friendly and the place had a great buzz about it.

If you’re looking for great coffee, there’s a cool local shop called Vacationland Coffee Roasters where they roast their own beans onsite and will package it fresh for you. What actually drew me here was the super cool logo with the lobster claw pinching a coffee bean. I bought a bag of beans just for the logo 😅.

Overwhelmed? I got you. Here’s an ideal travel itinerary to hit all the highlights in 2 days:

I’ve put together an ideal sample itinerary to hit the highlights of Acadia National Park from our experience (our real itinerary was a bit more messy):

Before you go:

  • Check the tide times for Thunder Hole and estimate to arrive at Thunder Hole 2 hours before high tide. Depending on when you go, you will have to adjust your itinerary to either do Thunder Hole before or after the other activities to get there at the right time. There is a parking lot at Thunder Hole that gets pretty busy so plan accordingly. You can also walk from Sand Beach parking lot via Ocean Path – takes about 20 minutes. You really only need 10 mins at Thunder Hole to watch the waves crash.
  • Make a lunch reservation at Jordan Pond House, timing will depend on where you are able to fit Thunder Hole in.
  • *Book your Cadillac Mountain vehicle pass 2 days in advance.

Day 1: Beehive Trail, Ocean Path, Thunder Hole, Jordan Pond Trails

  • 7am (or earlier): Get to Sand Beach parking lot by 7am to secure a parking spot.
  • 7am – 9am: Hike the Beehive Trail when the sun rises to avoid the crowds. This hike takes roughly 1.5-2 hours, depending on your pace and crowds.
  • 9am-10:30am: Finish the Beehive Trail and head towards Sand Beach to take in the views of the ocean, then walk the Ocean Path (conveniently also starts from the Sand Beach parking lot). Ocean path does link up to Thunder Hole, so if the timing is right you can head there after hiking the Beehive Trail.
  • 11am – Noon: Arrive at Jordan Pond House for your lunch reservation, or if you didn’t secure a reservation, get there before 11am and line up to get seated. If you were able to make a late booking, you’ll have more freedom in your time.
  • 12-4pm: Hike the Jordan Pond Trails (takes about 3-4 hours, be mindful of the time of sunset that day).
  • 4pm onwards: The loop finishes back at the restaurant. Depending on how tired you are, you can have dinner here or head to Bar Harbor for more restaurant options. Have an early rest and wake up early the next day.
  • Note: you can also flip the hikes around and do Jordan Pond Trails first, then lunch at Jordan Pond House and Beehive Trail last, however the Beehive Trail is one of the busiest trails and it will get PACKED in the afternoon, whereas the Jordan Pond Trails are not as busy.

Day 2:

  • 5:30-7:30am: Arrive at the Cadillac Mountain summit before sunrise (make sure you have a vehicle reservation pass).
  • 7:30a – 9am: Enjoy the sunrise views and walk around the Summit Loop.
  • 9am – 10am: Breakfast in town at Bar Harbor – we went to Jordan’s Restaurant. Quick service, decent food, nice people.
  • 10am onwards: Spend the rest of the day exploring Bar Harbour
    • Browse the shops
    • Walk across the foot bridge to Bar Island at low tide to get some views of Bar Harbor from a distance (make sure you come back before the water level rises again!)
    • Book a lobster boat tour with LuLu Lobster Boat Tour (tour times are usually 9am, 11:30am, 2:30pm) – https://lululobsterboat.com/
    • Have lunch or dinner in one of the many restaurants in town
  • Sunset at Bass Harbor Head Lighthouse
    • This is optional and a VERY busy place at sunset. We did not end up doing this due to timing and weather, but other visitors have recommended coming 3 hours before sunset just to get a parking spot due to the very small lot that’s there. It’s roughly a 30 minute drive from Bar Harbor.

Less popular places that came up in my research for this trip but we didn’t get to go due time constraints, so I’ll make a list here for reference on our next trip to Acadia. You’d need at least another day to fit the rest of this into the itinerary:

  • Beech Cliff Ladder Trail – we didn’t get to go due to weather, but this hike (strenuous, roughly 2 hours) provides beautiful views over Echo Lake. It’s not as exhilarating as the Beehive Trail or Precipice Trail but there are still iron rings, ladders, and cliff-side walks. Park at the Echo Lake Beach Entrance for the trailhead.
  • Precipice Trail – I didn’t put this in my original itinerary because of the multiple warnings and thrilling things about this hike, but after doing the Beehive Trail which was also meant to be scary but wasn’t bad at all, I think we’ll give this hike a go next time. It’s the most dangerous hike in Acadia and will take you anywhere between 1-3 hours. Arrive early for a parking spot (what else is new?).
  • Walk across the foot bridge to Bar Island at low tide from Bar Harbor to get views of Bar Harbor.
  • Drive around to the other little towns (ie. Southwest Harbor and Northeast Harbor)
  • Watch the sunset at Bass Harbor Head Lighthouse
  • Visit Echo Lake
  • Visit the other two Acadia regions: Schoodic Point and a day in Isle au Haut
  • LuLu Lobster Boat Tour (9am, 11:30am, 2:30pm) – https://lululobsterboat.com/

Discover Acadia National Park: Your Guide to Mount Desert Island


Acadia National Park is the “Crown Jewel” of the North Atlantic Coast providing breathtaking coastal views, mountainous hikes, scenic drives, beaches, and a town with no shortage of restaurants. This national park is a must-do in Maine!

Exploring Cape Elizabeth: Iconic Lighthouses and Lobster Rolls


Cape Elizabeth, Maine, is a serene coastal town featuring iconic lighthouses, including the famous Portland Head Light and the nearby smaller Bug Light. Visitors can explore both lighthouses and enjoy renowned lobster rolls at local spots like Bite Into Maine and the Lobster Shack at Two Lights, all in half a day.

Top Things to Do in Portland, Maine: Eat, Shop, Explore


Portland, Maine, is a charming coastal city known for its vibrant shops and seafood, particularly lobster rolls. Visitors can enjoy its historic streets, numerous dining options, and attractions, including the iconic Portland Head Light. A few hours is sufficient for a quick visit, but extending to a few days allows for deeper exploration.

Mount Battie and Megunticook: Your Camden Hiking Guide


Camden Hills State Park sits just outside the small coastal town of Camden, Maine. This park has a number of hiking trails with the most popular ones being Mount Battie and Mount Megunticook. Both of these trails offer panoramic views of the ocean coast and sweeping colourful fall foliage trees below. If you’re driving through the…

Hiking Acadia’s Beehive Trail: A Complete Overview


Date Published: Nov 3rd, 2024 | Last Updated: Nov 3rd, 2024
Author: Abby | Category: Travel, USA
Date of travel: Oct 13th, 2024

If you haven’t checked it out yet, here’s a post of an overview of Acadia National Park if you need more info about where to stay, where to eat, getting around, and other travel recommendations.

The Beehive Trail is one of Acadia National Park’s most popular hikes, offering breath-taking panoramic views. This hike has a reputation for being thrilling and difficult with iron rungs and vertical climbs but we personally didn’t find it bad at all, especially with good pacing. I recommend starting early, wearing good shoes, and dressing in layers. For safety, avoid this hike if it’s raining.

I highly recommend coming during peak autumn foliage season for the gorgeous colourful red and orange leaves.

Hike Stats:

Length: 2.4km
Elevation Gain: 155m
Trail type: loop
Difficulty/Terrain: difficult-ish with uphill climbs and rocky terrain
Estimated duration: 1-3 hours, depending on the number of people and waiting times (it took us 2 hours starting at 8:15am – 1 hour to get up and 1 hour down, including waiting in line)
Starting point: park at Sand Beach parking lot, then cross the road to the trailhead
Things to bring: water bottle, sunscreen & hat, good hiking shoes, snacks, dress in layers in case it gets cold as you wait
Driving option?: no
More Trail info: https://www.alltrails.com/trail/us/maine/the-beehive-loop-trail

Is it really that difficult to climb the Beehive Trail?

Not really!

I was a little nervous for the Beehive Trail because I kept reading about how hard it was and there was a lot of climbing. For a person that was not the most fit and with minimal upper body strength, I was anxious to get this hike over and done with. While doing the hike, I kept expecting it to get harder and harder, but it actually wasn’t bad at all. Yes, there are short bursts of vertical climbs and you’re exposed on the side of the cliffs, but there were enough handles to grab on to and good footing to stabilize yourself. It also helps that there was always someone to lend a hand hopping over the trickier bits or climbing up a big rock. At no point did we feel unsafe. We were also moving at a glacial pace near the top where the trickier parts are, so we barely broke a sweat getting to the summit.

If you have a mild fear of heights or if you’re generally a slow hiker, just take it slow and let people pass. The path eventually becomes single-file and the hike may naturally slow down or come to a standstill anyway if it’s busy, due to people taking their time crossing or climbing certain parts. We didn’t mind the slow ascent because the view along the way to the top is AMAZING and gave me ample time to snap (too many) photos. The view gets better the higher you go!

*If you are really terrified of heights, you can try to climb to the first view then decide if you want to turn around. The views at this spot is the same view as you would get at the top, but at a lower viewpoint (see the photos below). I’ve marked this spot on the map here –>

You can also take the Bowl Trail instead where the hike is covered amongst trees until you reach the very top (more on that below). As you can see on the map, it’s not far to backtrack if you decide to take the Bowl Trail instead.

Here’s a comparison of the view from the first view point vs the summit view:

Map of the Trail/Trail Overview

A Brief Overview of the Trail:

A) The Beehive Loop trail starts just off of Park Loop Road (a 5 min walk from the parking lot).

B) The trail starts covered amongst trees and you’ll come to a fork in the road. The right is the Beehive Trail and the left is the Bowl Trail (circled in white and grey in the map above). Although technically a loop, the Beehive Trail is single-file going up the mountain due to the sheer amount of people and it also gets dangerous if you’re coming down the mountain on the side of a cliff. Therefore, if you want to take the easier Bowl Trail, you’ll have to do an out-and-back hike when you reach the summit.

⭐️ Green star on the map marks the point where you’ll see the first ocean views (more pictures below). The path gets more narrow here and will become single-file, so if you want to turn around, do it here.

C) After some vertical climbs and taking way too many photos on the way up, you’ll reach the Beehive Summit. Take a breather and soak in the views, take more photos, then start to make your way down the mountain.

D) You’ll reach another fork in the road. You can either continue on Beehive Trail to reach The Bowl, or take the shortcut and get back to the parking lot via the Bowl Trail.

Ready to hike? Let’s Go! – a more detailed guide to hiking the Beehive Trail with way too many photos

1. Park at Sands Beach – START EARLY!

If there is one crucial piece of advice I can give you to hike the beehive trail, is to start as early as possible to avoid the crowds and get a parking spot. The Beehive Trail is one of THE most popular trails in Acadia National Park due to its amazing views and adrenaline-pumping hike. As a result, it gets INCREDIBLY busy, especially in peak season (which is when we went).

The closest parking lot is at Sands Beach, which is only a short 5 minute walk to the start of the trail. There’s roughly enough spaces for about 100 cars, which sounds like a lot, but by the time we arrived at 7am, the lot was already 70% full. We started the hike at 8:15am (after visiting Thunder Hole) and by the time we finished around 10am, the parking lot was completely full and there was an incredibly long line of cars parked along Park Loop Road and many people were walking 20 mins+ from their car just to get to the start of the trail. There were also park rangers standing at the entrance to stop people from going in, so you can’t even circle the lot to wait for a spot to open up. Therefore, try to get to Sands Beach before 7am if you’re visiting in peak season like us and driving a car.

Sands Beach Parking Lot

If you don’t get here early, be prepared to park far away or consider parking at a different parking lot along Park Loop Road and take the free Island Explorer Bus to Sands Beach parking lot. The bus will drop you off near the public restroom in the parking lot (see map above) and runs every 30 minutes.

Apart from trying to get a parking spot, you want to start the hike as early as possible to avoid the crowds and the line. If you do the trail clockwise via the Beehive Trail (which I recommend for the best views), it becomes single file up the rocks as you scale the mountain. Some people stop to take photos, others who aren’t as confident with climbing or have a fear of heights take it slow, and as a result, you could be looking at a long wait just to get up the mountain when it’s busy. We started the hike at 8:15am and two-thirds up the mountain, we already had to wait in line, taking a few steps at a time until we eventually reached the top (which although was annoying, wasn’t the worst in the world because you’re constantly exposed to the amazing views all the way up and gave me plenty of time to take photos). By the time we finished the hike a couple hours later, the line was much much longer and we were glad we started as early as we did. You can actually see the line from the parking lot. Therefore, I’d recommend starting the hike as soon as the sun comes up or be prepared to wait. Wear layers and pack a snack.

2. Cross the road to the start of the trail

Once you’ve parked at Sands Beach parking lot, make your way across the road to the start of the trail head (there is a public restroom at the parking lot if needed).

The path starts covered amongst trees and gradually increases in elevation with a rocky terrain – make sure you wear good hiking shoes for this hike.

3. Reach a crossroad and turn right to the Beehive Trail to do the trail clockwise

As you make your way to the base of the mountain, you’ll reach an intersection. When it gets busy, there’s a park ranger there that can provide more information. This is the split between the Beehive Trail and the Bowl Trail (see the map above to see the difference). Although more difficult, I would recommend continuing the hike via the Beehive Trail and doing this loop clockwise for the best views. The Beehive Trail is steep and will lead you to vertical climbs (that aren’t bad at all in my opinion) along the side of the mountain, but you’re faced with the beautiful views the entire time, constantly getting better the higher you climb. There are also rock ledges along the way for some great photo spots.

If you choose to do the trail counterclockwise via the Bowl Trail, the trail is not as steep (although there are still large rocks to climb), but the majority of the trail will be covered amongst trees and you will only get the iconic views of Sands Beach and the surrounding views when you reach the top. This may be a better option if you have a fear of heights. Note: You will not be able to go down the Beehive Trail due to the sheer amount of single-file hikers trying to get up the mountain so prepare for an out-and-back hike once you reach the summit.

4. Continue the climb up, cross a metal grate, and climb iron rungs while enjoying the view

As we continued on, it becomes more steep with more boulders to climb over, and we mentally prepared ourselves for vertical climbs and clinging onto the side of the mountain. This was where the line started for us. It was moving along at a decent pace at first, but it got slower closer to the top. Yes this hike is steep and yes there are vertical climbs, however because we had to wait in line and only moving a few steps at a time and taking a few thrusts up big rocks at a time, this hike actually became a breeze. We barely even broke a sweat! There was always something to hold onto and there were flat parts to stand as you wait. You’re constantly exposed to the amazing views beside you and the waiting gives you more than enough time to get some nice photos on rocky ledges. We didn’t mind waiting at all. It was actually a more enjoyable and fun hike compared to constantly walking uphill.

Here are a bunch of photos of our ascent up the mountain (the view gets a bit repetitive, but when you’re there in person, it never gets old):

Our first views of Sand Beach inlet as we emerge from the trees and up the first set of rocks:

*This is the first view of the ocean that you’ll see after emerging from the trees. If you’re scared of heights, there’s still time to turn around at this point before it becomes too difficult to turn back. The views at the top is similar but at a higher vantage point (see the photos below).

As we continue to climb higher, the views open up a little more with fewer trees obstructing the view:

Then the path gets a little more tricky with metal gates and iron rungs. The photos make it seem scarier in photos than it actually was. At no point did I feel like I was going to fall off the side of the mountain or feel like I couldn’t make the climb up. This is where the line started for us as people take they time with the obstacles, but no matter, we’re still loving the views:

Encountered the iron rungs, which were a lot easier than I expected. There’s never more than 3-4 at a time:

This is probably the most common photo I’ve seen that shows how close to the edge you are, however…

…when taken at a different angle you can see that you’ve got the tree beside you with branches so smooth where thousands have people have grabbed onto for support. It didn’t feel scary at all.

Still slowly waiting in line to make our way up, but still enjoying the views every step of the way:

As we got closer to the top it became more steep:

5. Reach the summit and take in the views

The final push to the top was just climbing over rocks but the view at the top was absolutely worth it. I can see how it is one of the most popular hikes in this park!

Take a breather and soak in the view. It’s the same view as what you see on the way up, but higher and more grand with sweeping views of the forest and ocean around you.

But the views don’t stop here. Continue following the blue trail markers to the other side of the mountain. Here you’ll see a sign that marks the actual summit of the mountain and you’ll get more ocean views with the small islands in the distance.

6. Make your way down the mountain

Continue following the blue markers to make your way down the mountain. You’ll get panoramic views of the beautiful trees below before you reach the trail path again.

As you make your way down, you’ll eventually be amongst trees again and climbing down big boulders, but then it gets easier as the ground plateaus and the path is much smoother.

7. Reach another crossroad: Continue on to The Bowl or take the shortcut

You’ll reach another intersection with trail signs that point to The Bowl. Continue on this path to reach views of The Bowl, or take the shortcut and continue the path back to the parking lot. We didn’t have time to make it to The Bowl so we took the shortcut back.

As you make your way back, you’ll eventually meet up with the original trail again and climb down the large rocks back to the parking lot.

By the time we met up with the starting trail, there were SO MANY more people and the line was MUCH longer. The ranger was telling people to do the loop backwards via the Bowl Trail avoid the line going up the Beehive Trail.

8. Get back to the parking lot and be glad you started early

By the time we got back to the parking lot, the lot was completely full with a very long line of cars parked along the road. You can see the top of the Beehive Trail from the parking lot with the many many single-file people slowly making their way up the mountain. Although we had to wait in line ourselves, we were SO happy that our line was no where as long as the one that was forming when we finished!

Some final thoughts

  • Get here early.
  • Get here early.
  • Get here early.
  • The views are amazing and worth the time and effort.
  • Wear good hiking shoes for good traction getting up rocks.
  • Consider skipping this hike if it’s raining.

When you get back to the parking lot, there are a few things you can do:

  • Check out Sand Beach, a short walk to this beautiful inlet beach
  • Walk Ocean Path – a flat easy path along the coast with beautiful views along the way
  • Thunder Hole – a 10-15 min walk along Ocean Path to this narrow inlet where rushing water creates loud thundering sounds and big high splashes of water into the air (come 1-2 hours prior to high tide for the experience)