Date Published: Feb 10th, 2025 | Last Updated: Feb 10th, 2025
Author: Abby | Category: mains
Serves: 6 | Prep time: 3 hours | Cook time: 3 hours
Jump to recipe |
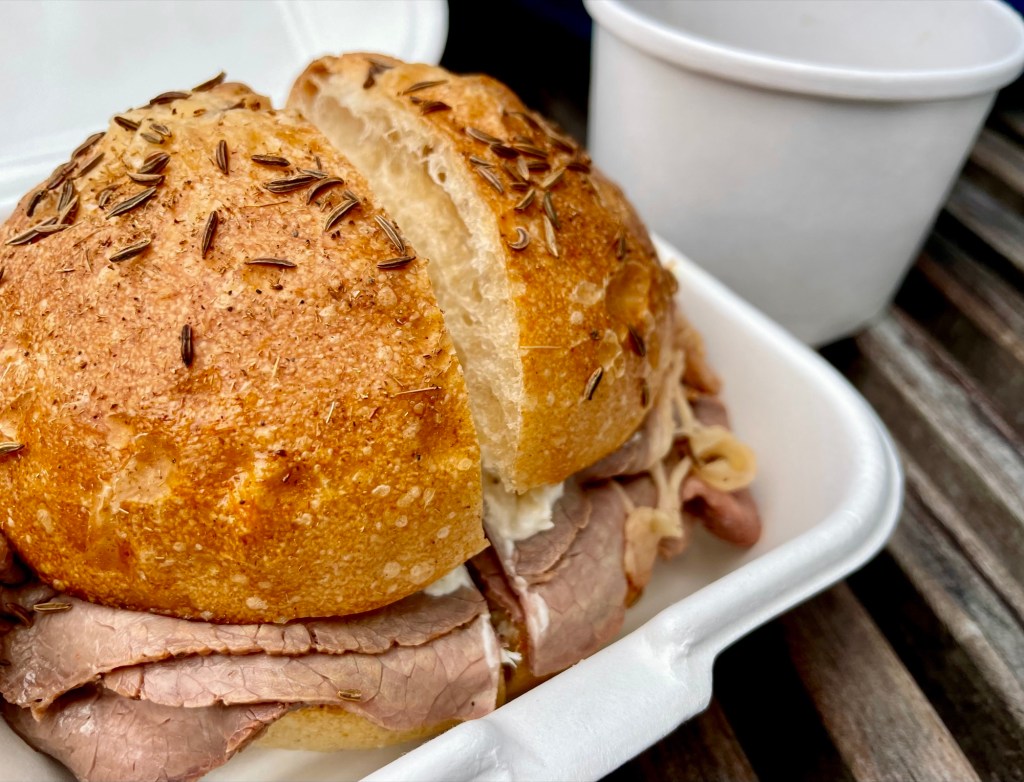
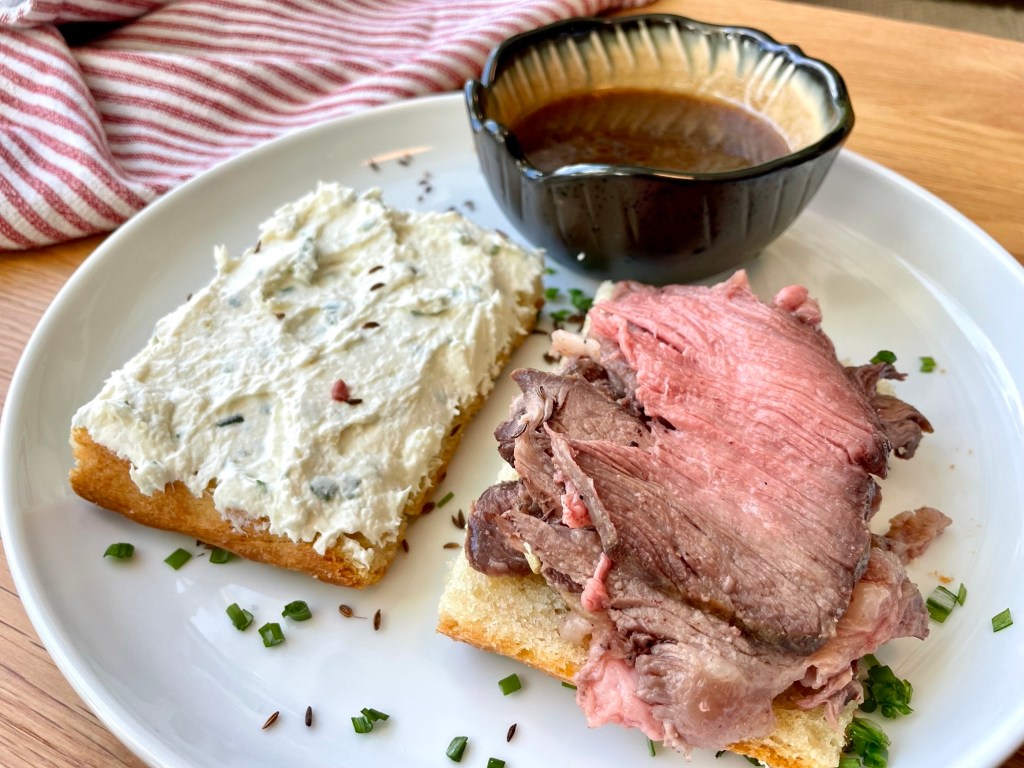
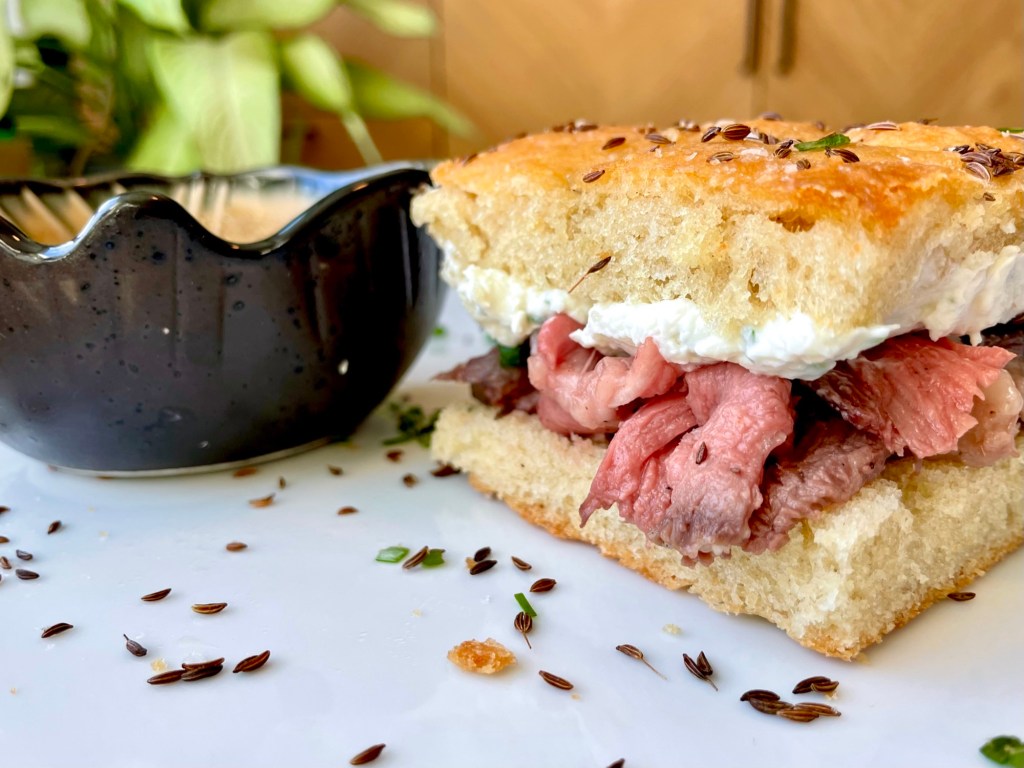
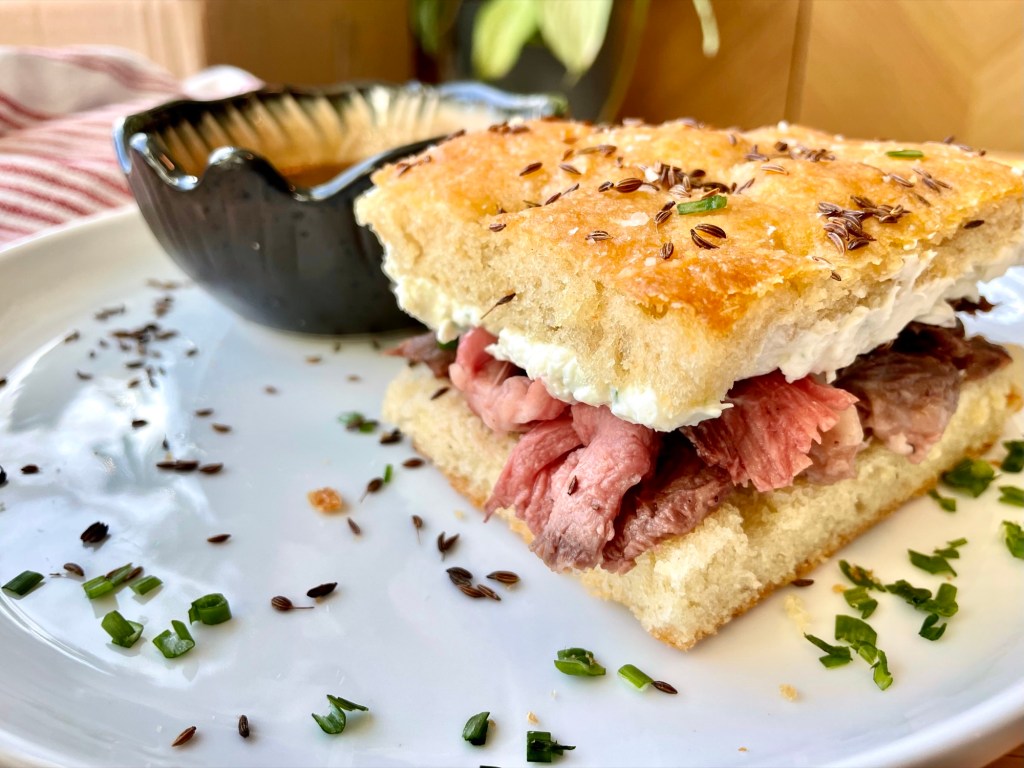
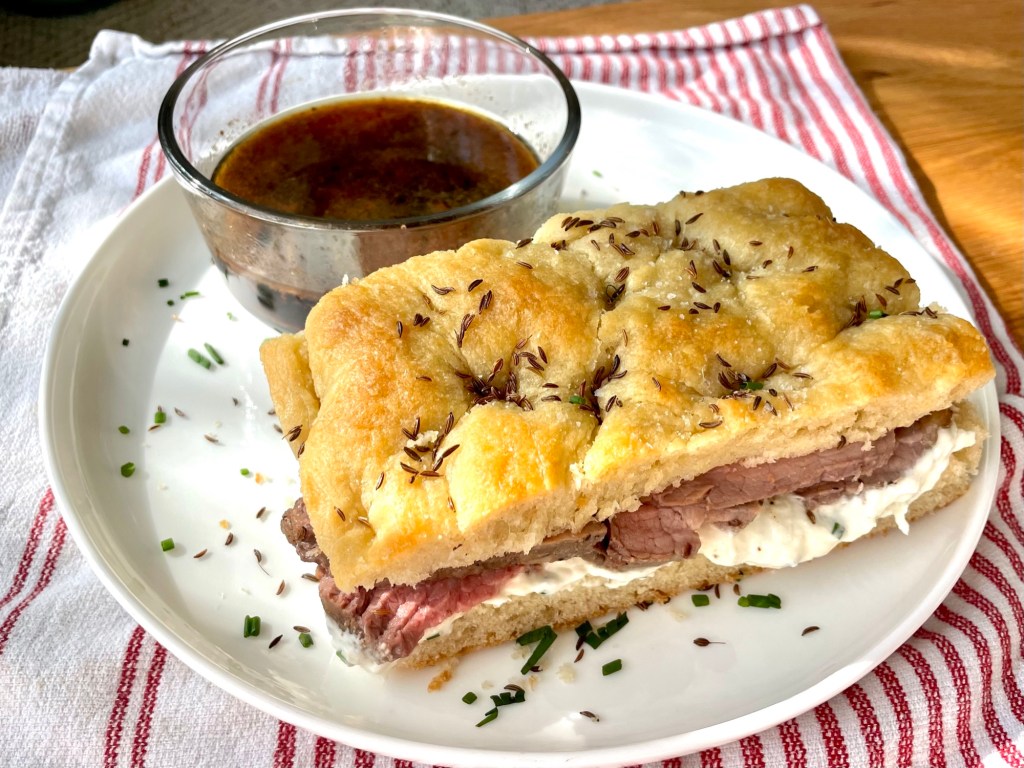
If you haven’t guessed it already, my last three published recipes have been gearing up for this one! This recipe makes the most incredible juicy roast beef sandwich that is balanced with a subtle hint of horseradish masked in the chives cream cheese, and placed between soft fresh focaccia bread topped with caraway seeds. The homemade jus made from the roast beef drippings bring it all together in this amazing sandwich. *chef’s kiss*
I’m going to admit, this combination of flavours is not my original idea. This sandwich is a copycat to a French dip that we had at WINNER Bakery in Brooklyn on 7th Ave a few months ago. If you’ve never been, you should definitely hit them up. There’s usually a queue but their sandwiches and breads are well worth it! I tried this sandwich for the first time a few months ago when I was strolling home from the farmer’s market, and the combination of flavours were so good that I had to bring Toby back to try it. I wanted this sandwich all the time, but at $20 a pop for a small sandwich and the long queue, it wasn’t going to be an everyday sandwich. I thought about this sandwich frequently and knew I just had to give it a go and try to make it myself – and I did! In my humble opinion (and Toby’s), I think my version is even better than the original with a more flavourful jus. I use a focaccia instead of a bun and fresh roast beef. The best part is that I can pack on as much roast beef and cream cheese I want and have it again and again. This recipe make enough for at least 6 sandwiches (if you’re a cream cheese fiend, you may want to double the horseradish chives cream cheese portion).

Everything is made from scratch in this recipe. I mean everything, from the bread to the roast beef to even the prepared horseradish. It is a labour of love so you’ll need to dedicate your morning to this. The good thing is, there’s a lot of waiting (ie. for the beef to come to room temperature, for the dough to proof, for the beef to cook), so you can do multiple steps while you’re waiting to cut down on the overall time to make this sandwich. If you’re in a rush, you can cut corners by using store bought roast beef deli slices, pre-made jus, and any kind of sandwich bread. The only thing you can’t buy is the horseradish chive cream cheese, which is pretty easy to whip up anyway. I’d highly recommend not cutting any corners to get the full experience of this beauty.
Anyways, without further ado, here’s the recipe! If you have any comments or suggestions, I’d love to hear from you in the comment section! You can follow me on instagram, youtube and facebook to see all the recipes I post!
Happy cooking!
Ingredients you’ll need:
- Roast Beef:
- 2 lbs chuck roast/whole eye round/rump roast (I like to use chuck roast with some marbling)
- 2 + 2 Tbsps salt
- 10 cloves of garlic, peeled
- Fresh ground black pepper
- Olive oil
- Caraway Seed Focaccia:
- 1 x basic dough ball
- Olive oil drizzle
- Salt
- 1/4 cup Caraway seeds
- Au Jus:
- 1 cup beef stock
- 1 Tbsp Worccestershire sauce
- 2 Tbsps red wine (ie. pinot noir)
- +/- butter
- +/- beef bouillon cube
- Salt to taste
- Horseradish & Chives Cream Cheese:
- 1 package (8oz/226g) of plain cream cheese, softened
- 3 Tbsps (7g) of fresh chives, chopped
- 1-2 Tbsps horseradish (or more to taste) – check out how to make your own horseradish from scratch here
- Salt to taste
Directions:
Roast Beef:
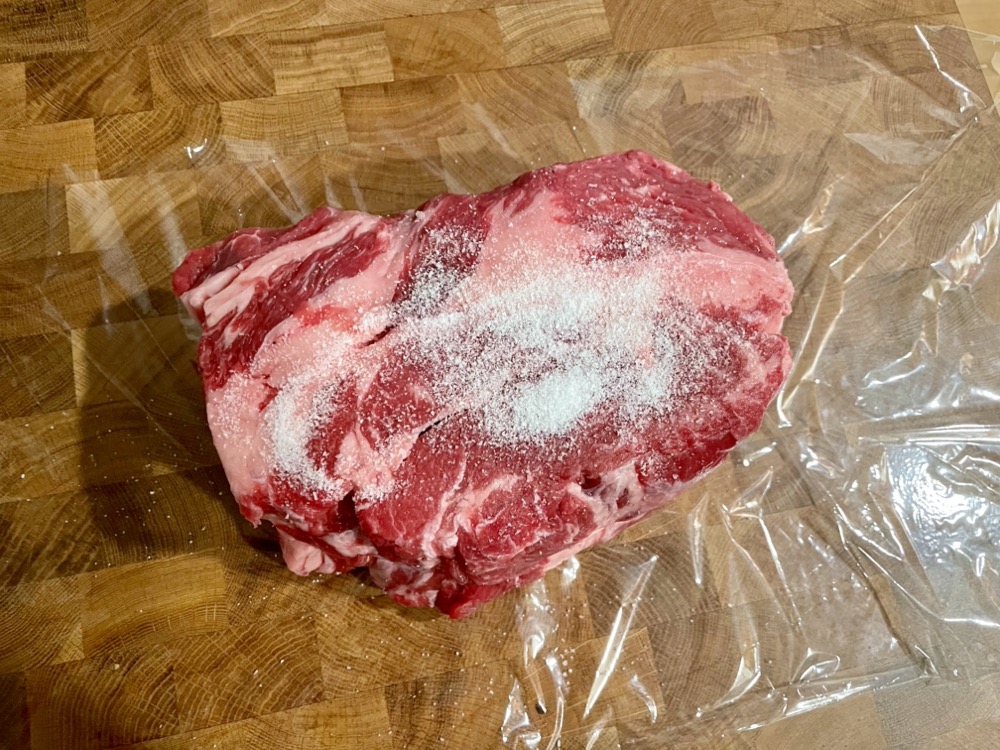
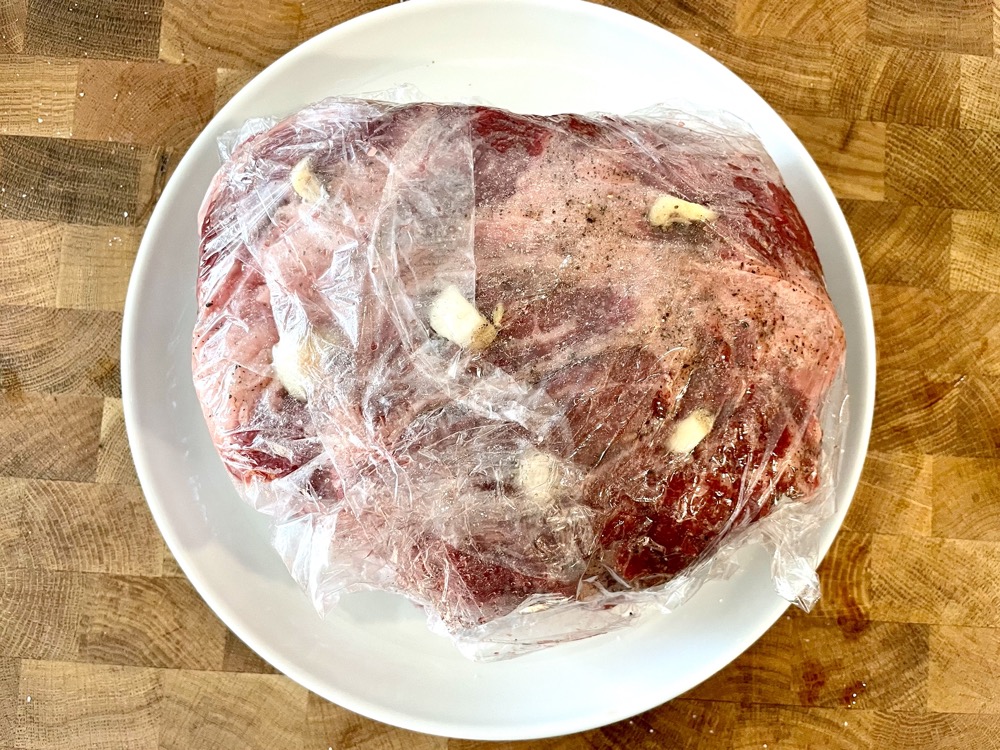
Take the beef out of the fridge 2 hours before. Rinse, pat dry and salt all sides. Wrap it back up in plastic wrap and leave it at room temperature.


You can make the caraway focaccia bread in this time.
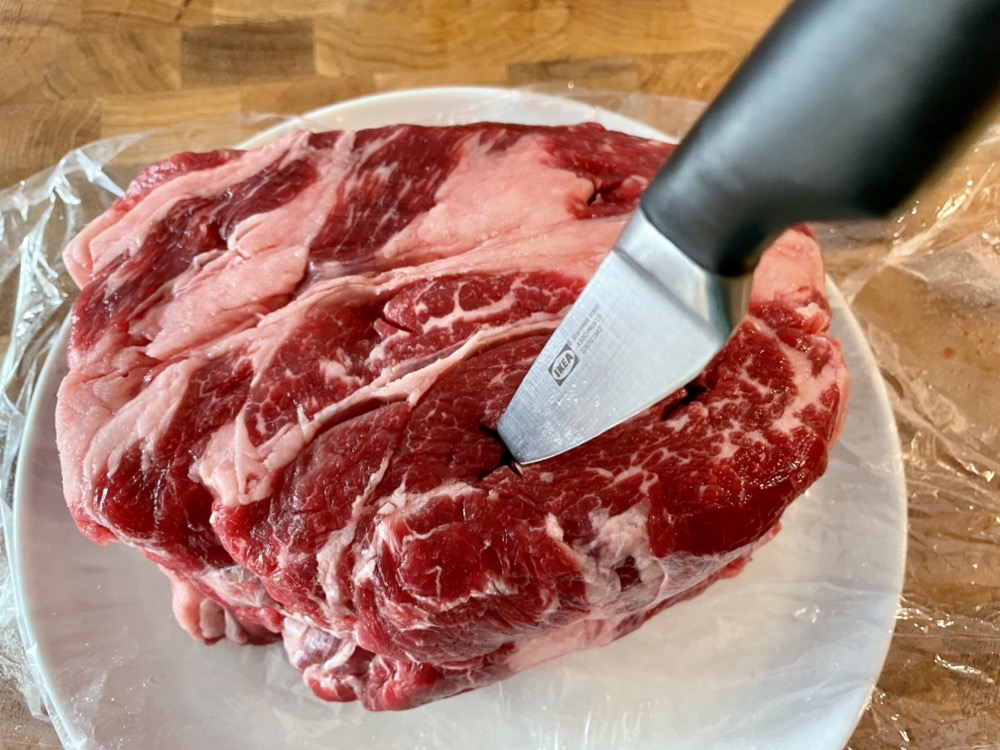
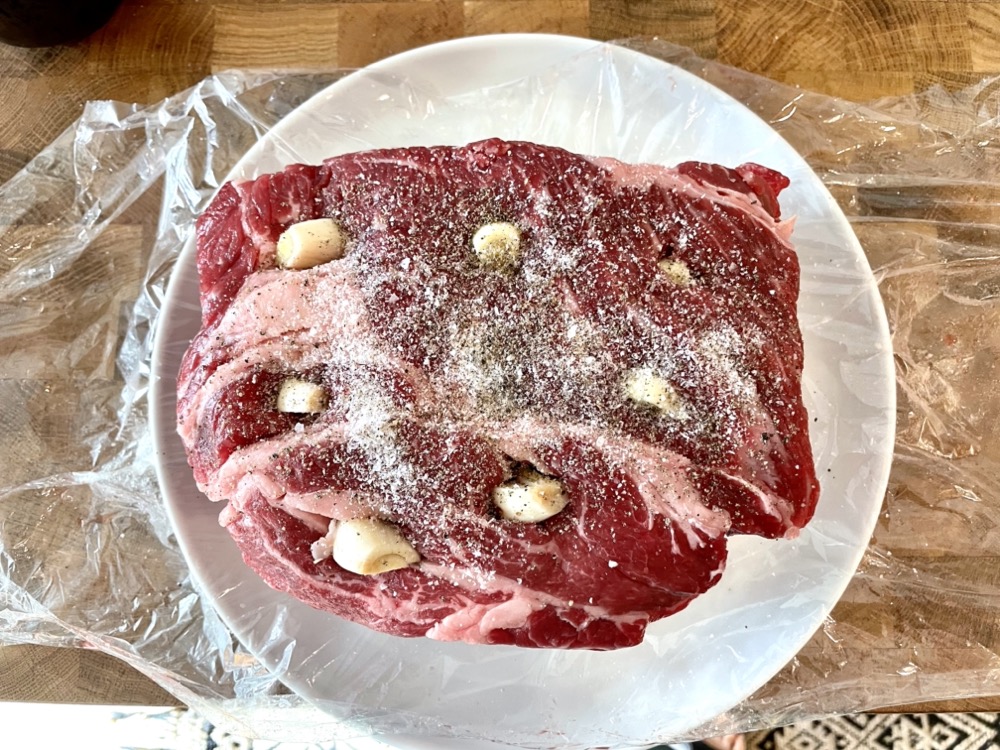
After 2 hours, preheat the oven to 400˚F/200˚C (if it’s not already preheated from baking the focaccia). Unwrap the beef and pat dry with a paper towel. Use a pairing knife and create 5 slits into both sides of the roast and push a clove of garlic into each slit. Rub salt (yes, more salt), fresh ground black pepper, and olive oil on all sides of the beef. Cover again and leave at room temperature for another 20 minutes.


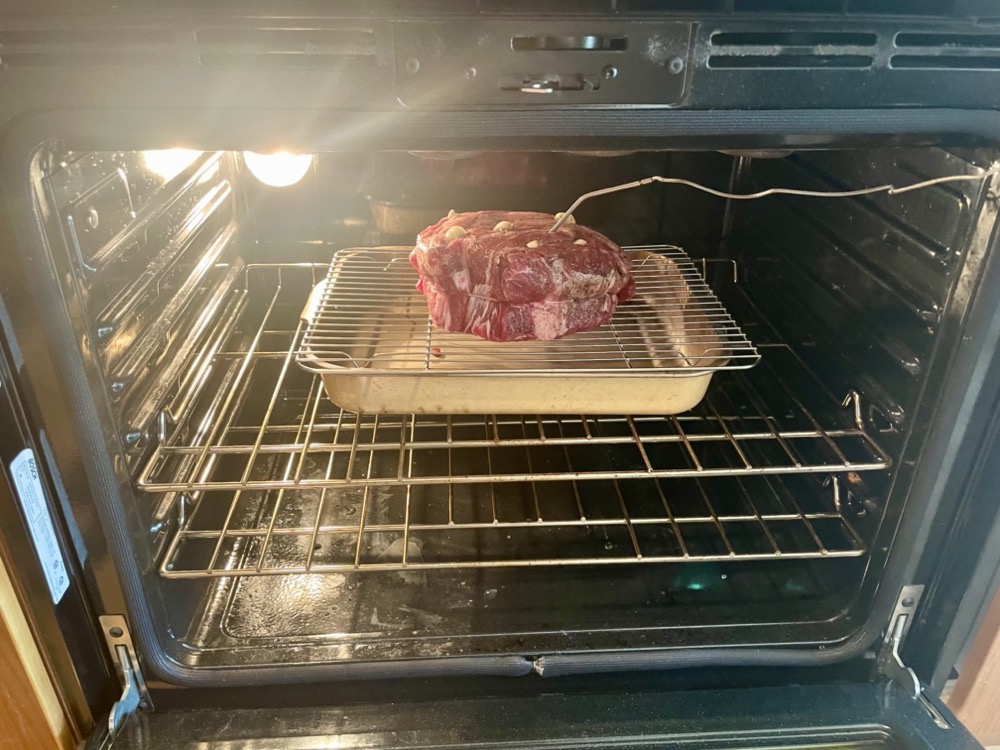
Prepare a baking tray with a metal rack over top and place the beef on the rack. Rub a small amount of olive oil on the outside one more time. If you have a layer on your beef, face the fat layer on top so the fat will drip onto the meat as it cooks. Insert an oven-safe thermometer into the middle of the beef if you’ve got one. Bake in the preheated oven at 400˚F/200˚C for 15 minutes to start the browning process, then turn the heat down to 325˚F/163˚C and continue to cook until the internal temperature reaches 120˚F/49˚C (roughly 1.5-2.5 hours, depending on the size of your beef).


You can make the horseradish chives cream cheese in this time.
Once done cooking, let the roast rest for 20-30 minutes at room temperature before slicing.

You can make the au jus in this time.
When rested, use a sharp knife or deli meat slicer and slice the roast into very thin slices.


Caraway Focaccia Bread:
Follow the recipe for Easy Focaccia Bread. When you get to the toppings part, use 1/4 cup caraway seeds and a sprinkle of salt with the olive oil. Bake according to instructions at 400˚F/200˚C for 20-25mins.


After baking, brush on another 2 Tbsps of olive oil over the top. Let it rest for a few minutes then transfer on a cooling rack and let it cool completely before slicing.


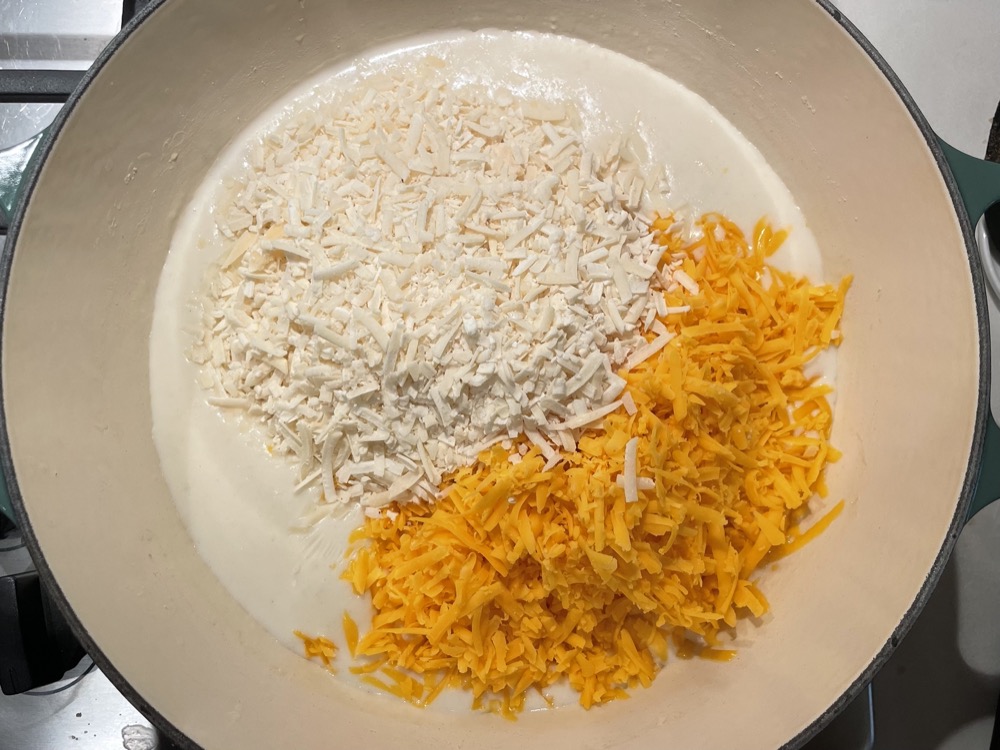
Horseradish & Chives Cream Cheese:
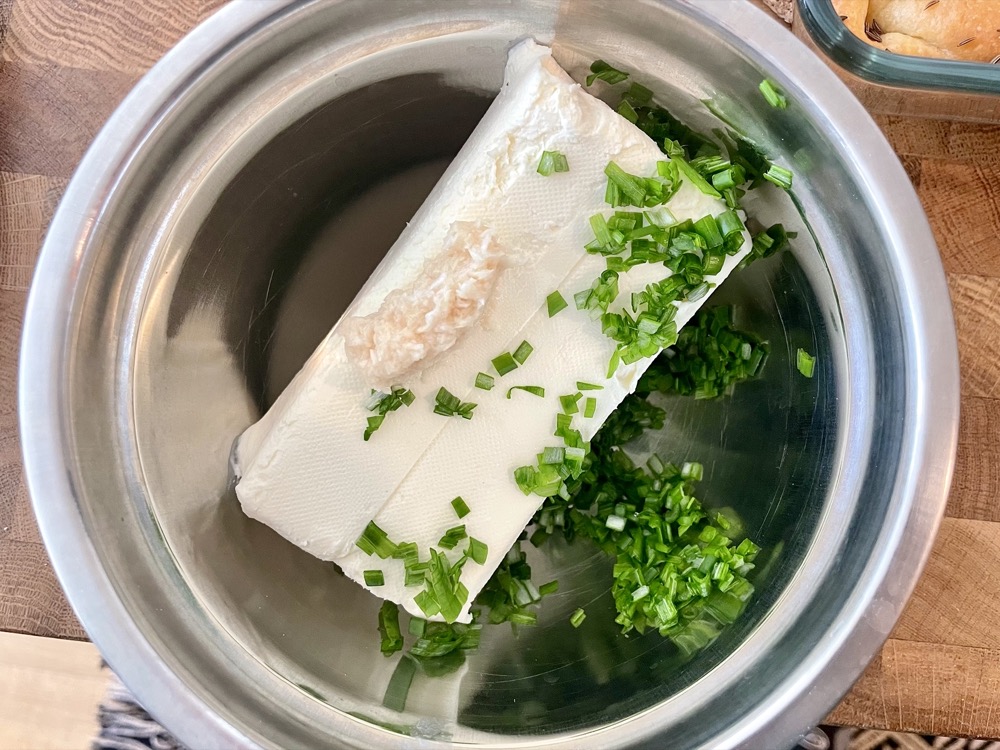
In a mixing bowl, add the softened cream cheese, chopped chives, and the horseradish 1 teaspoon at a time until desired taste (horseradish can be very strong and some brands are hotter than others, so add small amounts until you’re happy).

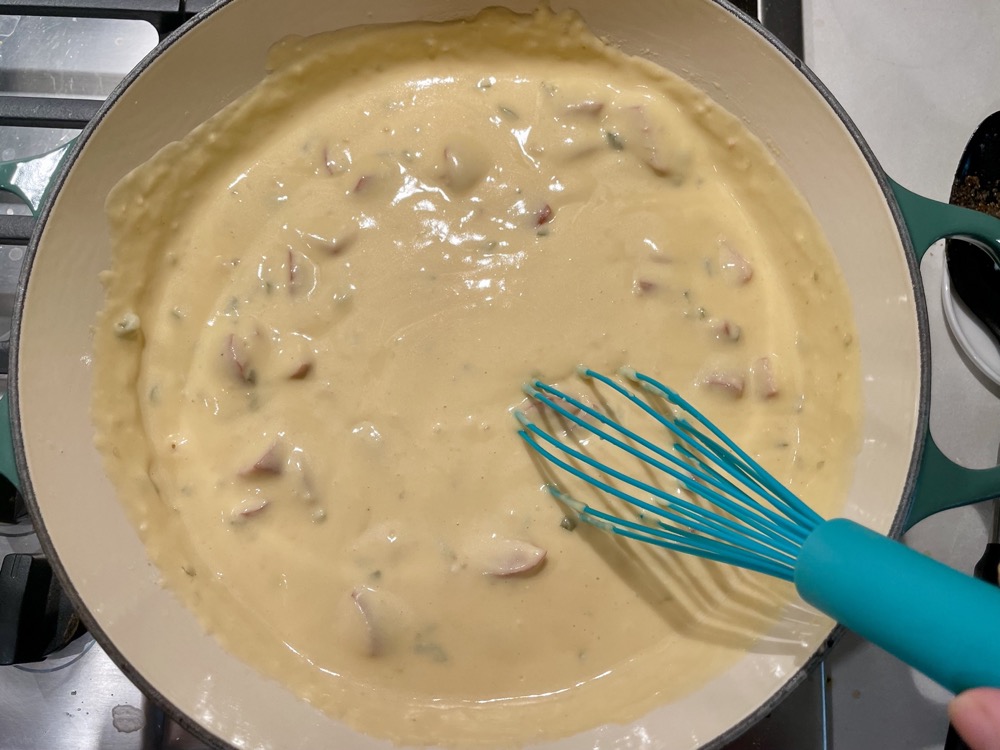
Au Jus:
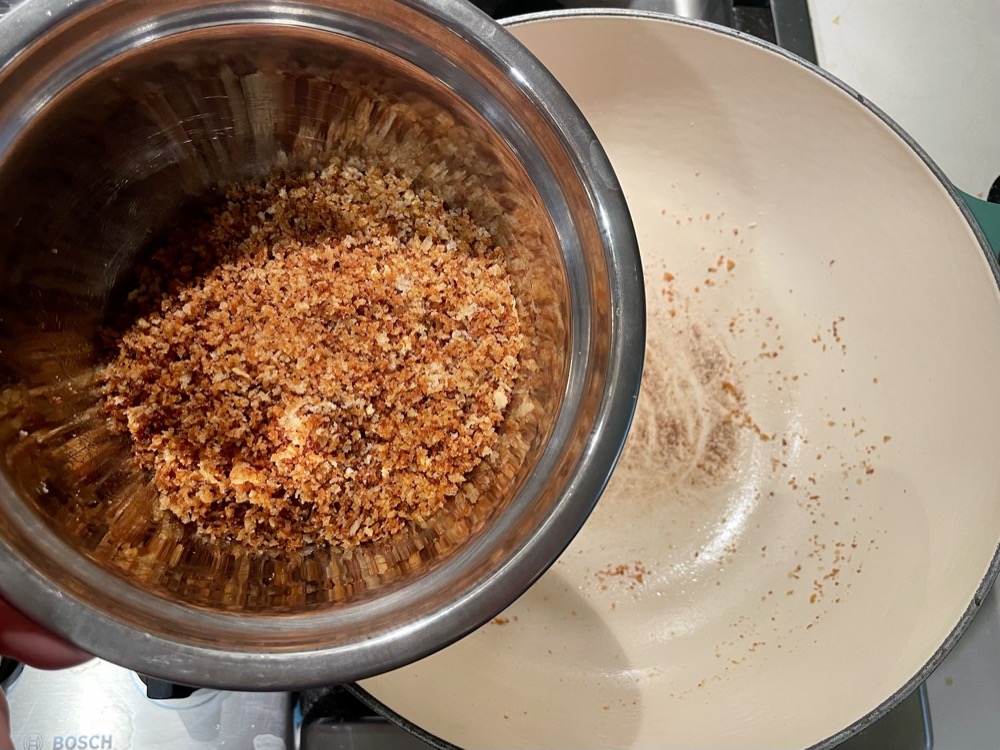
Once the roast beef has finished cooking, collect the drippings from the roast tray into a small saucepan. You should have about 1/4 cup (if not, add enough butter to make it 1/4 cup).


Add 1 cup of beef stock, 1 Tbsp of Worcestershire sauce and 2 Tbsps of red wine to the saucepan and heat on MED heat until simmering. Taste and adjust salt as needed. To make it a more robust beefy flavour, add in 1 beef bouillon cube.


Assembly of the sandwich:
Slice the focaccia into desired sandwich size rectangles, then slice it horizontally.


Apply a layer of the horseradish & chives sour cream onto one slice of the bread, then sandwich a few slices of roast beef in between. Serve with the jus. Done! Serve immediately with a hot jus.


Summarized Recipe:
French Dip with Caraway Focaccia Bread and Horseradish Chives Cream Cheese
Date Published: Feb 10th, 2025 | Last Updated: Feb 10th, 2025
Author: Abby | Category: mains
Serves: 6 | Prep time: 3 hours | Cook time: 3 hours
Ingredients:
- Roast Beef:
- 2 lbs chuck roast/whole eye round/rump roast (I like to use chuck roast with some marbling)
- 2 + 2 Tbsps salt
- 10 cloves of garlic, peeled
- Fresh ground black pepper
- Olive oil
- Caraway Seed Focaccia:
- 1 x basic dough ball
- Olive oil drizzle
- Salt
- 1/4 cup Caraway seeds
- Au Jus:
- 1 cup beef stock
- 1 Tbsp Worccestershire sauce
- 2 Tbsps red wine (ie. pinot noir)
- +/- butter
- +/- beef bouillon cube
- Salt to taste
- Horseradish & Chives Cream Cheese:
- 1 package (8oz/226g) of plain cream cheese, softened
- 3 Tbsps (7g) of fresh chives, chopped
- 1-2 Tbsps horseradish (or more to taste)
- Salt to taste
Directions:
Roast Beef:
- Take the beef out of the fridge 2 hours before and salt all sides. Wrap it back up in plastic wrap and leave it at room temperature.
- You can make the caraway focaccia bread in this time.
- After 2 hours, preheat the oven to 400˚F/200˚C (if it’s not already preheated from baking the focaccia). Unwrap the beef and pat dry with a paper towel. Use a pairing knife and create 5 slits into both sides of the roast and push a clove of garlic into each slit. Rub salt (yes, more salt), fresh ground black pepper, and olive oil on all sides of the beef. Cover again and leave at room temperature for another 20 minutes.
- Prepare a baking tray with a metal rack over top and place the beef on the rack. Rub a small amount of olive oil on the outside one more time. If you have a layer on your beef, face the fat layer on top so the fat will drip onto the meat as it cooks. Insert an oven-safe thermometer into the middle of the beef if you’ve got one. Bake in the preheated oven at 400˚F/200˚C for 15 minutes to start the browning process, then turn the heat down to 325˚F/163˚C and continue to cook until the internal temperature reaches 120˚F/49˚C (roughly 1.5-2.5 hours, depending on the size of your beef).
- You can make the horseradish chives cream cheese in this time.
- Once done cooking, let the roast rest for 20-30 minutes at room temperature before slicing.
- You can make the au jus in this time.
- When rested, use a sharp knife or deli meat slicer and slice the roast into very thin slices.
Caraway Focaccia Bread:
- Follow the recipe for Easy Focaccia Bread. When you get to the toppings part, use 1/4 cup caraway seeds and a sprinkle of salt with the olive oil. Bake according to instructions at 400˚F/200˚C for 20-25mins.
Horseradish & Chives Cream Cheese:
- In a mixing bowl, add the softened cream cheese, chopped chives, and the horseradish 1 teaspoon at a time until desired taste (horseradish can be very strong and some brands are hotter than others, so add small amounts until you’re happy).
- Making your own horseradish:
- 1. Add 240g horseradish root (peeled and chopped) to a small blender or food processor and add enough water to blend the horseradish into a smooth purée (I added about 1/4 cup).
- 2. Once blended, strain out any excess water, then add in 1 Tbsp of white vinegar and a pinch of salt to offset the spiciness. Store in an airtight container in the fridge for up to a month.
- Making your own horseradish:
Au Jus:
- Once the roast beef has finished cooking, collect the drippings from the roast tray into a small saucepan. You should have about 1/4 cup (if not, add enough butter to make it 1/4 cup).
- Add 1 cup of beef stock, 1 Tbsp of Worcestershire sauce and 2 Tbsps of red wine to the saucepan and heat on MED heat until simmering. Taste and adjust salt as needed. To make it a more robust beefy flavour, add in 1 beef bouillon cube.
Assembly of the sandwich:
- Slice the focaccia into desired sandwich size rectangles, then slice it horizontally.
- Apply a layer of the horseradish & chives sour cream onto one slice of the bread, then sandwich a few slices of roast beef in between. Serve with the jus. Done! Serve immediately with a hot jus.