
Date Published: Nov 3rd, 2024 | Last Updated: Nov 3rd, 2024
Author: Abby | Category: Travel, USA
Date of travel: Oct 13th, 2024
If you haven’t checked it out yet, here’s a post of an overview of Acadia National Park if you need more info about where to stay, where to eat, getting around, and other travel recommendations.

Discover Acadia National Park: Your Guide to Mount Desert Island
Acadia National Park is the “Crown Jewel” of the North Atlantic Coast providing breathtaking coastal views, mountainous hikes, scenic drives, beaches, and a town with no shortage of restaurants. This national park is a must-do in Maine!
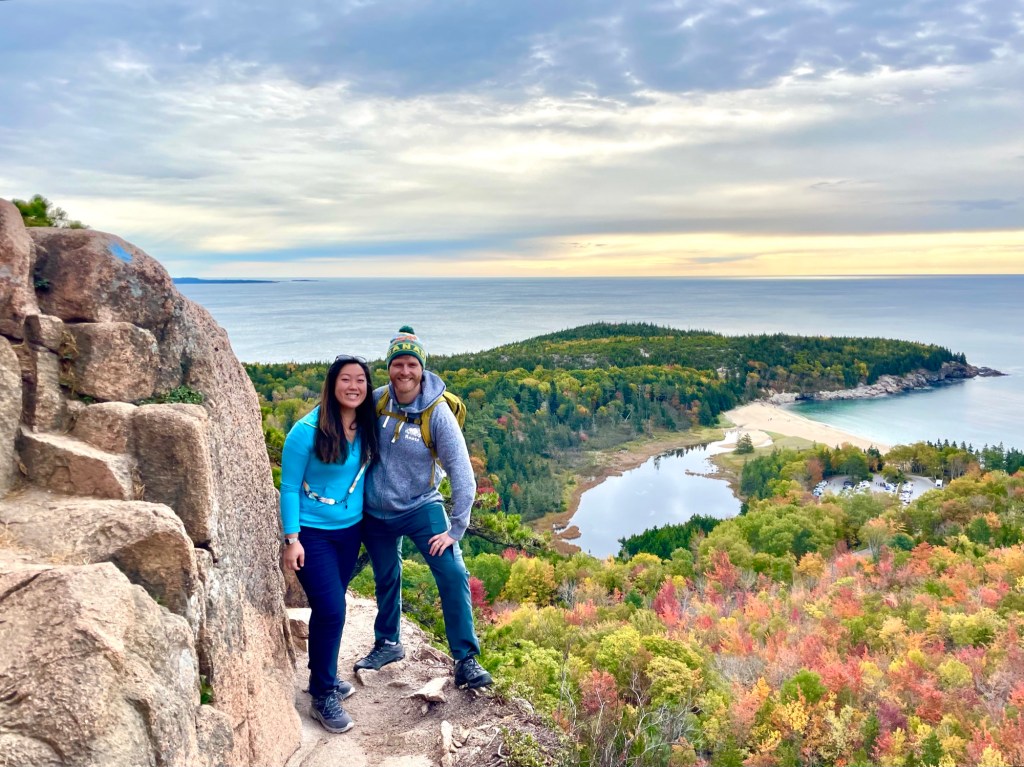
The Beehive Trail is one of Acadia National Park’s most popular hikes, offering breath-taking panoramic views. This hike has a reputation for being thrilling and difficult with iron rungs and vertical climbs but we personally didn’t find it bad at all, especially with good pacing. I recommend starting early, wearing good shoes, and dressing in layers. For safety, avoid this hike if it’s raining.
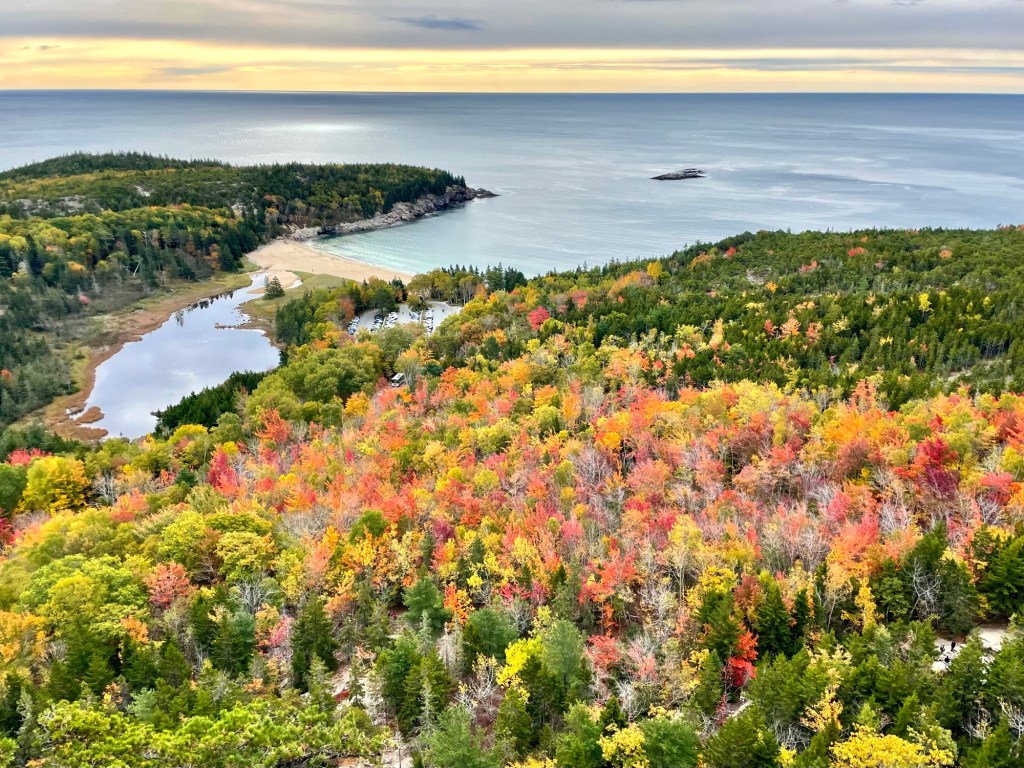
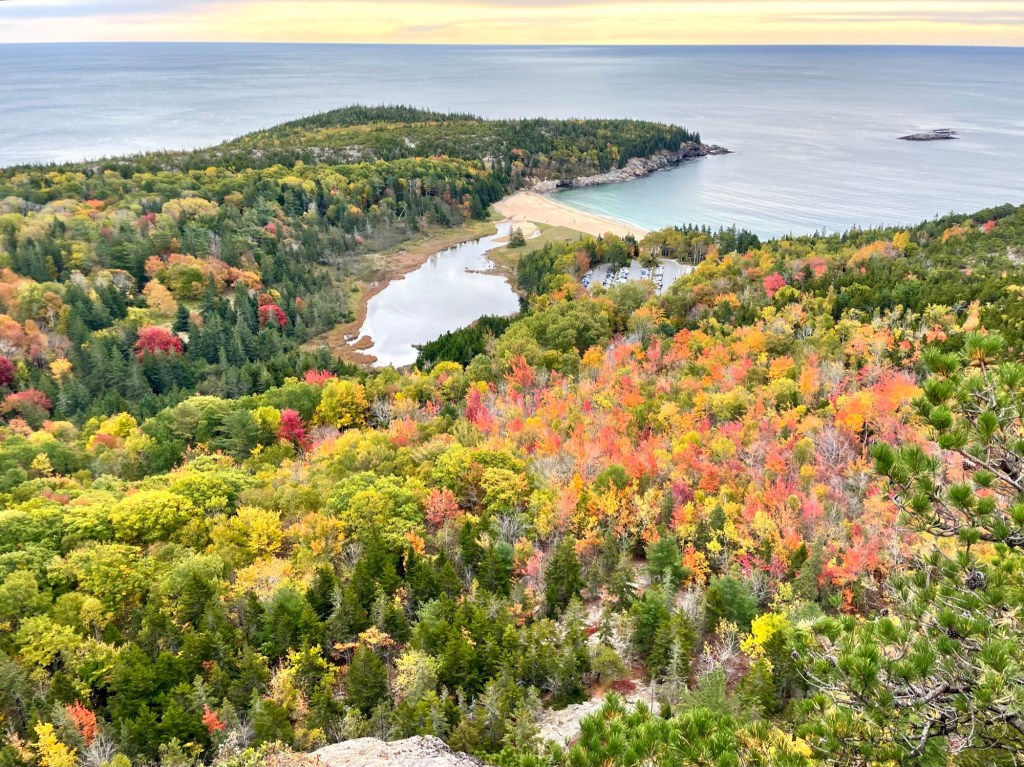
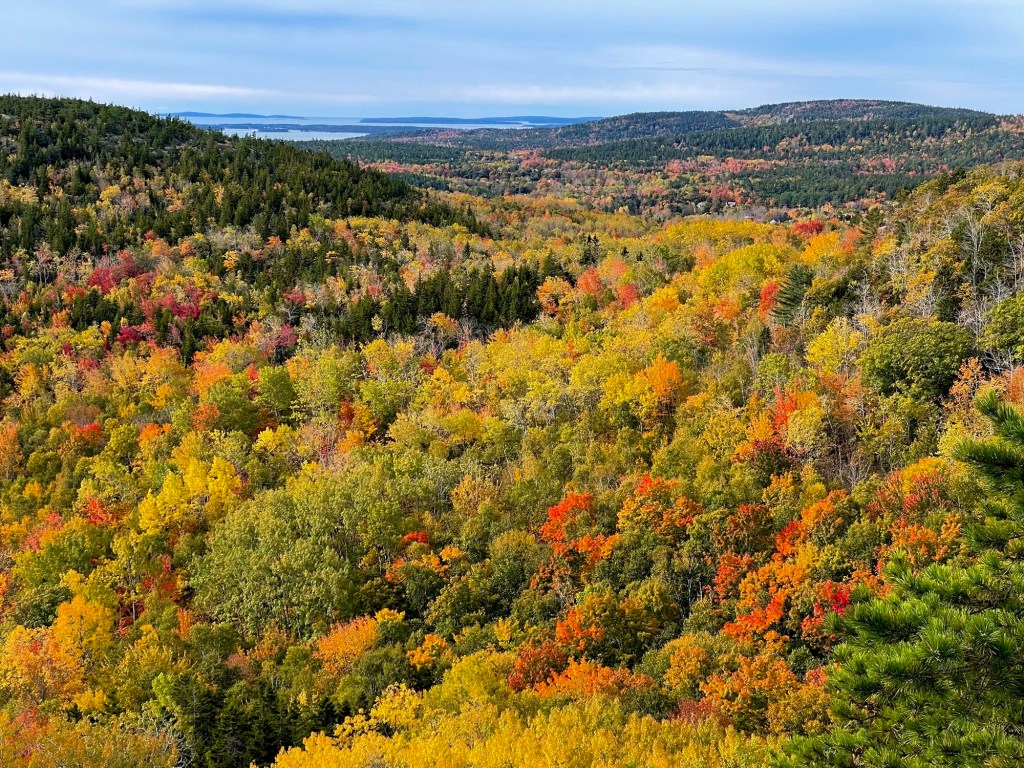
I highly recommend coming during peak autumn foliage season for the gorgeous colourful red and orange leaves.
Contents:
- Hike Stats
- Is it really that difficult to climb the Beehive Trail?
- Map of the Trail/Trail Overview
- Ready to hike? Let’s Go! – a more detailed guide to hiking the Beehive Trail with way too many photos
- Park at Sands Beach – START EARLY!
- Cross the road to the start of the trail
- Reach a crossroad and turn right to the Beehive Trail to do the trail clockwise
- Continue the climb up, cross a metal grate, and climb iron rungs while enjoying the view
- Reach the summit and take in the views
- Make your way down the mountain
- Reach another crossroad: Continue on to The Bowl or take the shortcut
- Get back to the parking lot and be glad you started early
- Some final thoughts
- When you get back to the parking lot, there are a few things you can do:
Hike Stats:
Length: 2.4km
Elevation Gain: 155m
Trail type: loop
Difficulty/Terrain: difficult-ish with uphill climbs and rocky terrain
Estimated duration: 1-3 hours, depending on the number of people and waiting times (it took us 2 hours starting at 8:15am – 1 hour to get up and 1 hour down, including waiting in line)
Starting point: park at Sand Beach parking lot, then cross the road to the trailhead
Things to bring: water bottle, sunscreen & hat, good hiking shoes, snacks, dress in layers in case it gets cold as you wait
Driving option?: no
More Trail info: https://www.alltrails.com/trail/us/maine/the-beehive-loop-trail
Is it really that difficult to climb the Beehive Trail?
Not really!
I was a little nervous for the Beehive Trail because I kept reading about how hard it was and there was a lot of climbing. For a person that was not the most fit and with minimal upper body strength, I was anxious to get this hike over and done with. While doing the hike, I kept expecting it to get harder and harder, but it actually wasn’t bad at all. Yes, there are short bursts of vertical climbs and you’re exposed on the side of the cliffs, but there were enough handles to grab on to and good footing to stabilize yourself. It also helps that there was always someone to lend a hand hopping over the trickier bits or climbing up a big rock. At no point did we feel unsafe. We were also moving at a glacial pace near the top where the trickier parts are, so we barely broke a sweat getting to the summit.
If you have a mild fear of heights or if you’re generally a slow hiker, just take it slow and let people pass. The path eventually becomes single-file and the hike may naturally slow down or come to a standstill anyway if it’s busy, due to people taking their time crossing or climbing certain parts. We didn’t mind the slow ascent because the view along the way to the top is AMAZING and gave me ample time to snap (too many) photos. The view gets better the higher you go!

*If you are really terrified of heights, you can try to climb to the first view then decide if you want to turn around. The views at this spot is the same view as you would get at the top, but at a lower viewpoint (see the photos below). I’ve marked this spot on the map here –>
You can also take the Bowl Trail instead where the hike is covered amongst trees until you reach the very top (more on that below). As you can see on the map, it’s not far to backtrack if you decide to take the Bowl Trail instead.
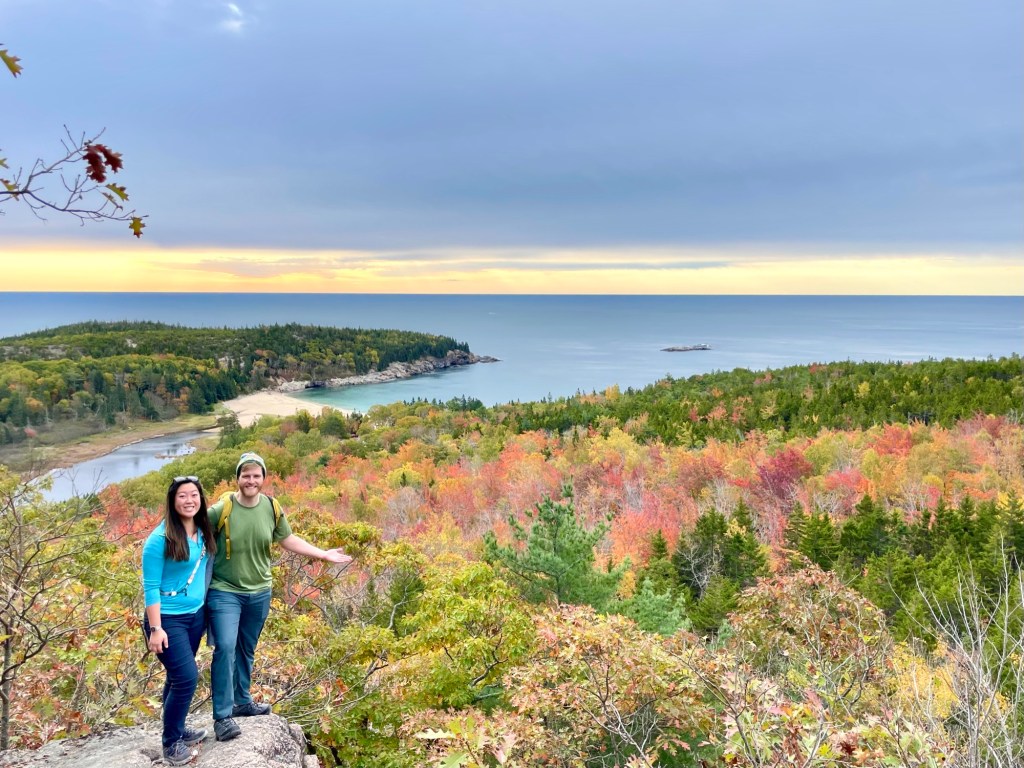
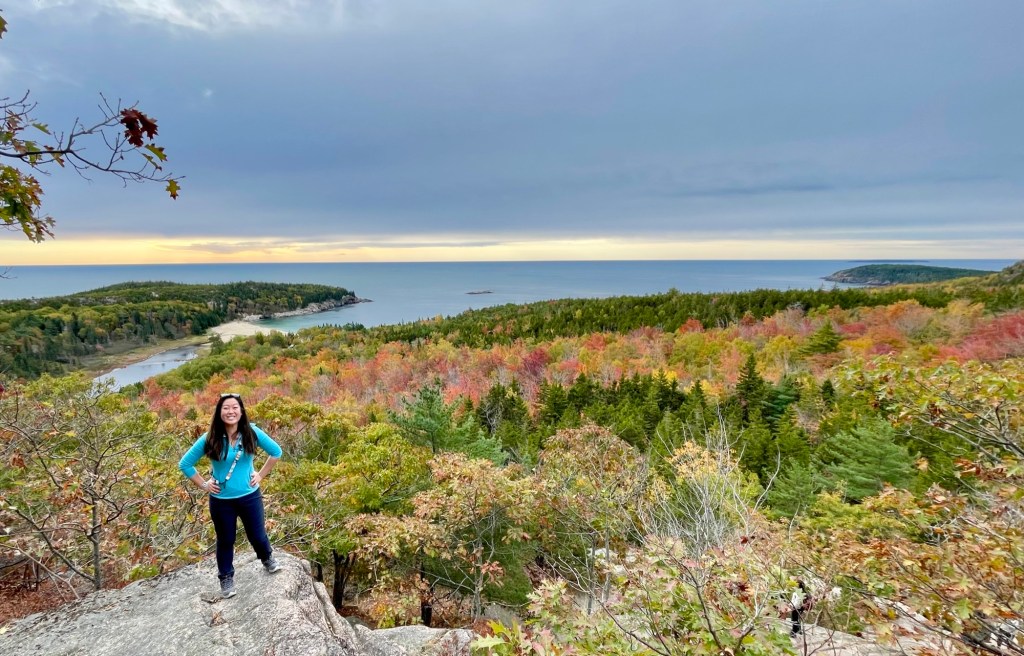
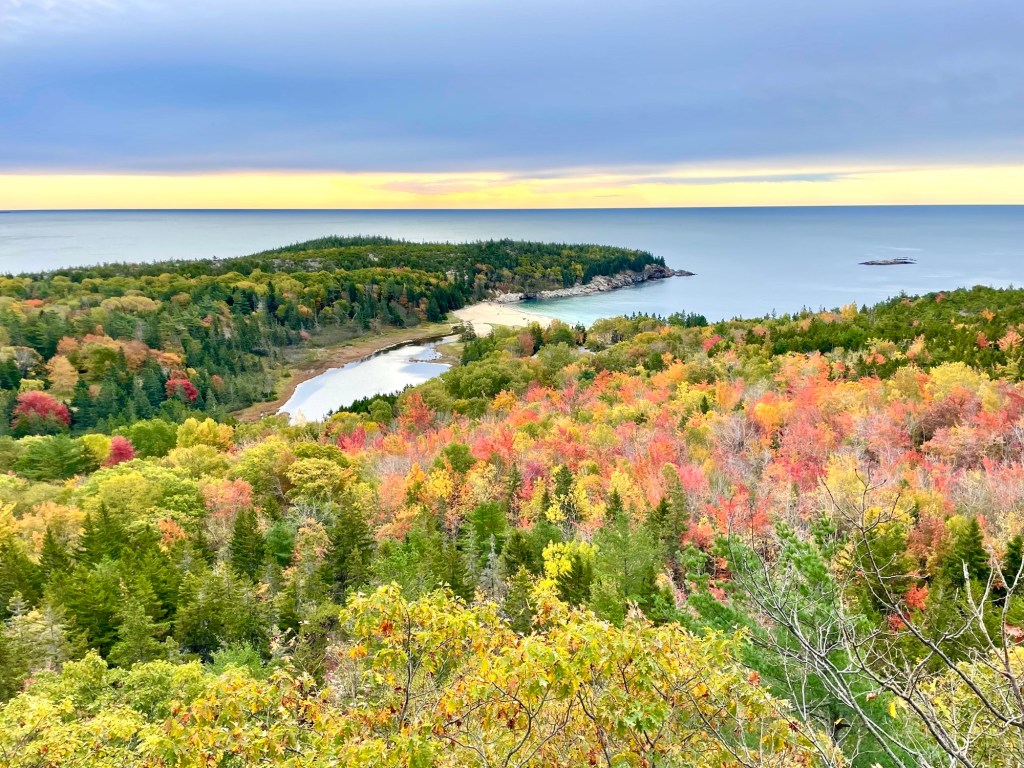
Here’s a comparison of the view from the first view point vs the summit view:


Map of the Trail/Trail Overview

A Brief Overview of the Trail:
A) The Beehive Loop trail starts just off of Park Loop Road (a 5 min walk from the parking lot).
B) The trail starts covered amongst trees and you’ll come to a fork in the road. The right is the Beehive Trail and the left is the Bowl Trail (circled in white and grey in the map above). Although technically a loop, the Beehive Trail is single-file going up the mountain due to the sheer amount of people and it also gets dangerous if you’re coming down the mountain on the side of a cliff. Therefore, if you want to take the easier Bowl Trail, you’ll have to do an out-and-back hike when you reach the summit.
⭐️ Green star on the map marks the point where you’ll see the first ocean views (more pictures below). The path gets more narrow here and will become single-file, so if you want to turn around, do it here.
C) After some vertical climbs and taking way too many photos on the way up, you’ll reach the Beehive Summit. Take a breather and soak in the views, take more photos, then start to make your way down the mountain.
D) You’ll reach another fork in the road. You can either continue on Beehive Trail to reach The Bowl, or take the shortcut and get back to the parking lot via the Bowl Trail.
Ready to hike? Let’s Go! – a more detailed guide to hiking the Beehive Trail with way too many photos
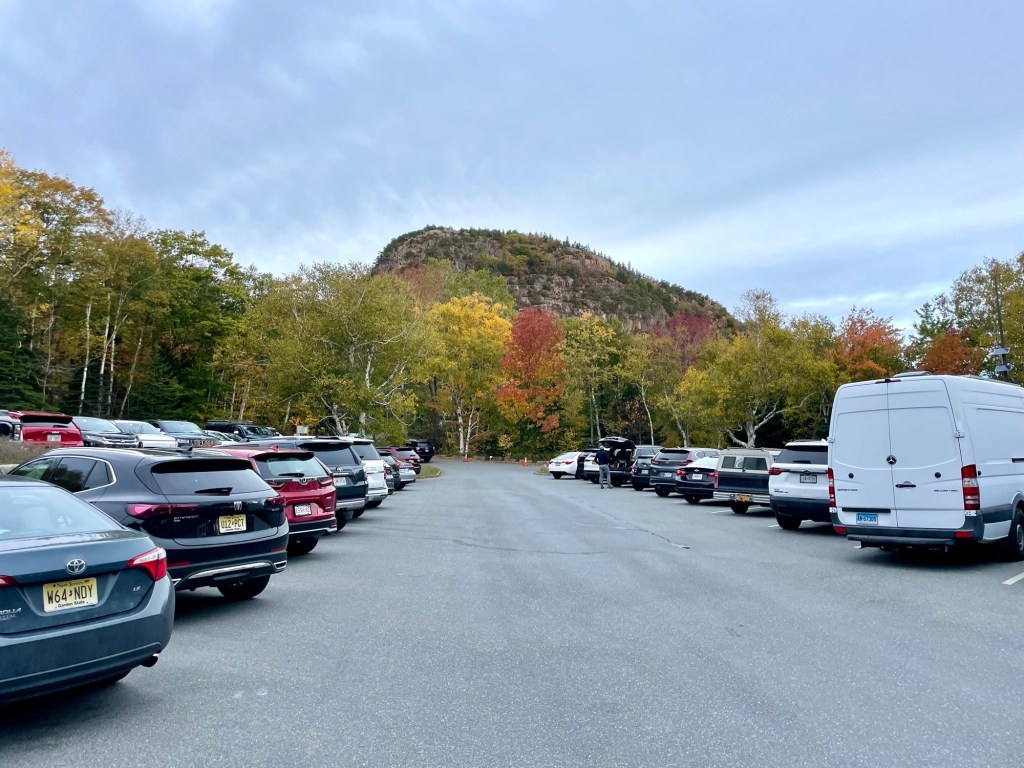
1. Park at Sands Beach – START EARLY!
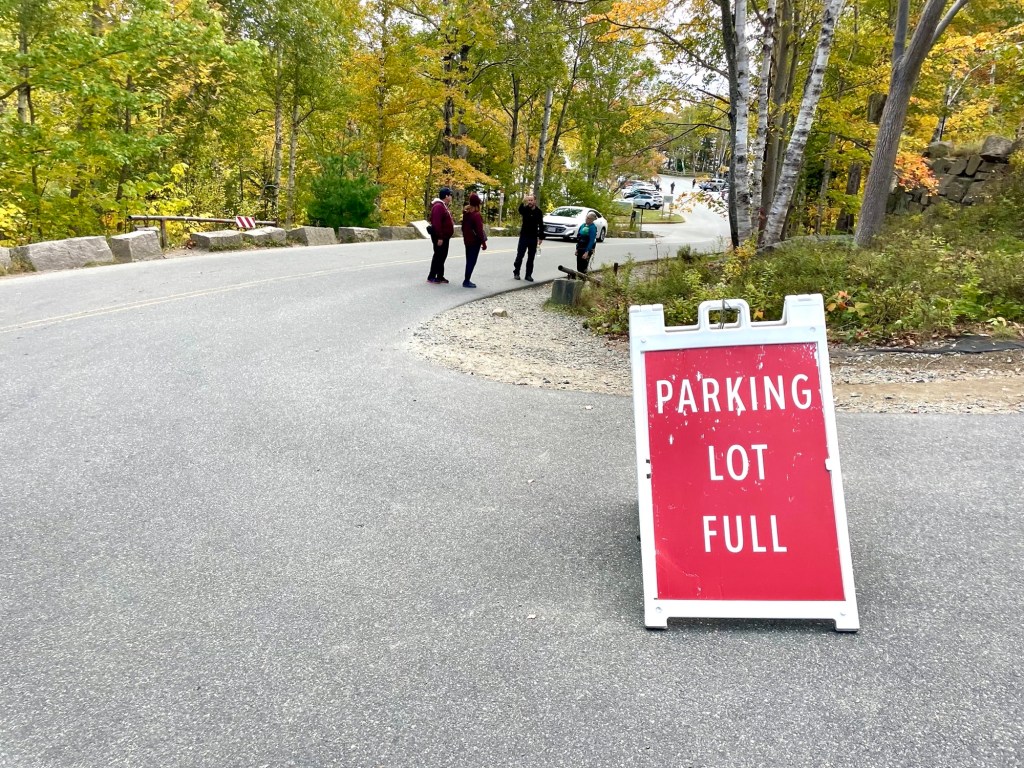
If there is one crucial piece of advice I can give you to hike the beehive trail, is to start as early as possible to avoid the crowds and get a parking spot. The Beehive Trail is one of THE most popular trails in Acadia National Park due to its amazing views and adrenaline-pumping hike. As a result, it gets INCREDIBLY busy, especially in peak season (which is when we went).
The closest parking lot is at Sands Beach, which is only a short 5 minute walk to the start of the trail. There’s roughly enough spaces for about 100 cars, which sounds like a lot, but by the time we arrived at 7am, the lot was already 70% full. We started the hike at 8:15am (after visiting Thunder Hole) and by the time we finished around 10am, the parking lot was completely full and there was an incredibly long line of cars parked along Park Loop Road and many people were walking 20 mins+ from their car just to get to the start of the trail. There were also park rangers standing at the entrance to stop people from going in, so you can’t even circle the lot to wait for a spot to open up. Therefore, try to get to Sands Beach before 7am if you’re visiting in peak season like us and driving a car.


If you don’t get here early, be prepared to park far away or consider parking at a different parking lot along Park Loop Road and take the free Island Explorer Bus to Sands Beach parking lot. The bus will drop you off near the public restroom in the parking lot (see map above) and runs every 30 minutes.
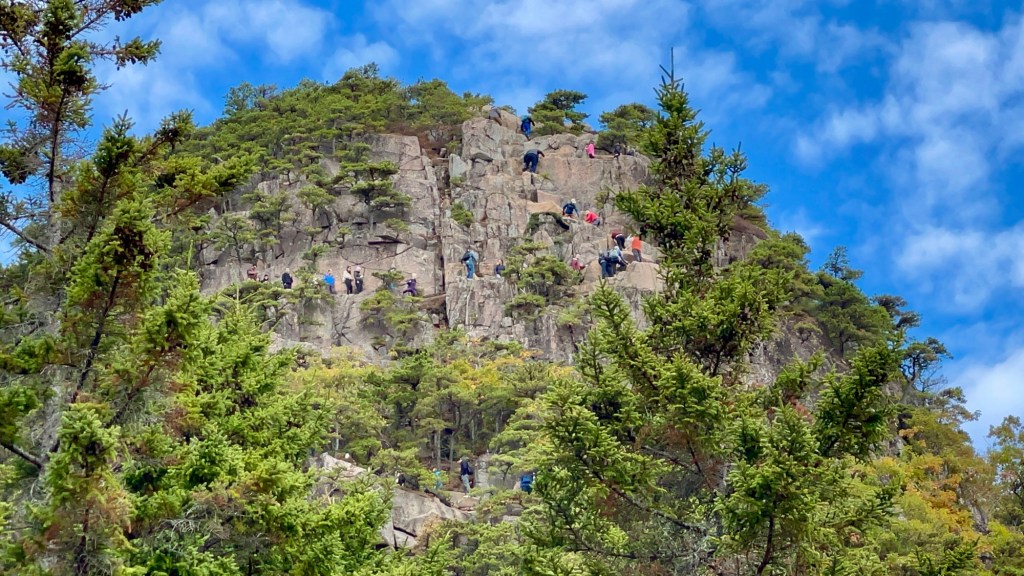
Apart from trying to get a parking spot, you want to start the hike as early as possible to avoid the crowds and the line. If you do the trail clockwise via the Beehive Trail (which I recommend for the best views), it becomes single file up the rocks as you scale the mountain. Some people stop to take photos, others who aren’t as confident with climbing or have a fear of heights take it slow, and as a result, you could be looking at a long wait just to get up the mountain when it’s busy. We started the hike at 8:15am and two-thirds up the mountain, we already had to wait in line, taking a few steps at a time until we eventually reached the top (which although was annoying, wasn’t the worst in the world because you’re constantly exposed to the amazing views all the way up and gave me plenty of time to take photos). By the time we finished the hike a couple hours later, the line was much much longer and we were glad we started as early as we did. You can actually see the line from the parking lot. Therefore, I’d recommend starting the hike as soon as the sun comes up or be prepared to wait. Wear layers and pack a snack.
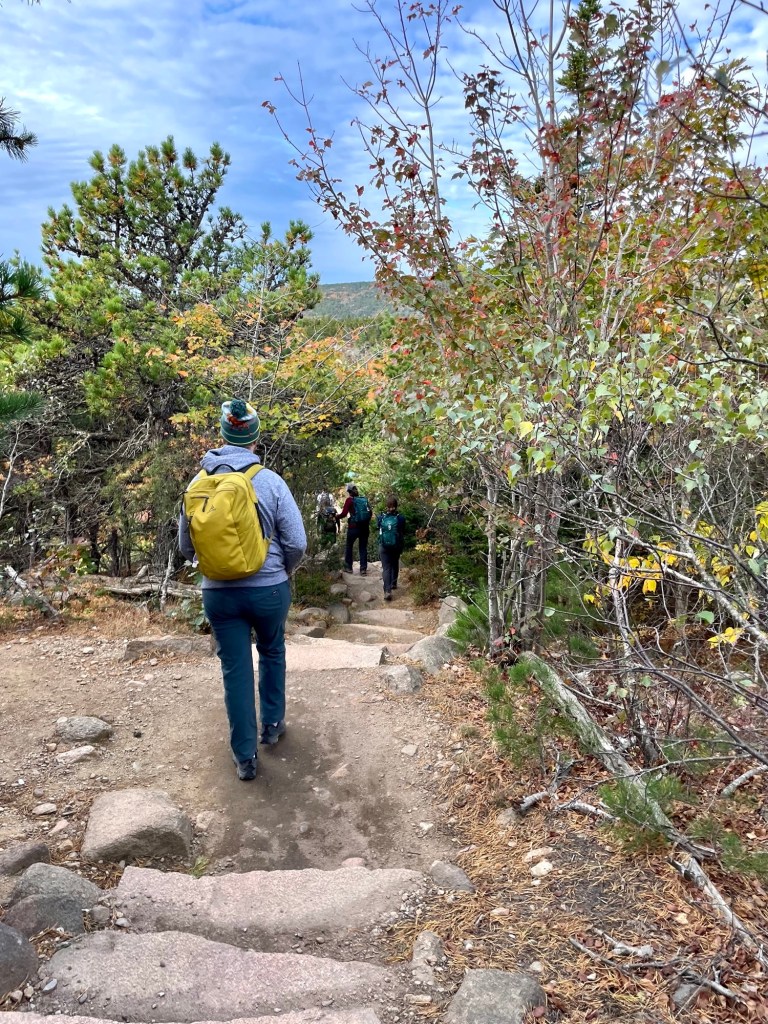
2. Cross the road to the start of the trail
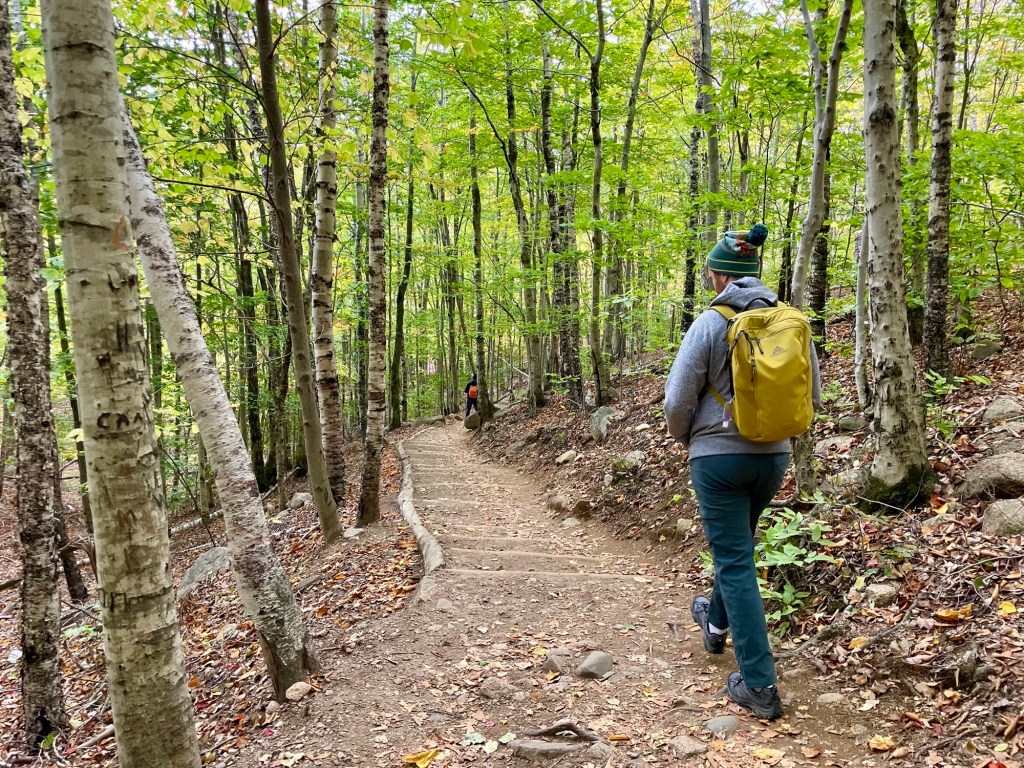
Once you’ve parked at Sands Beach parking lot, make your way across the road to the start of the trail head (there is a public restroom at the parking lot if needed).
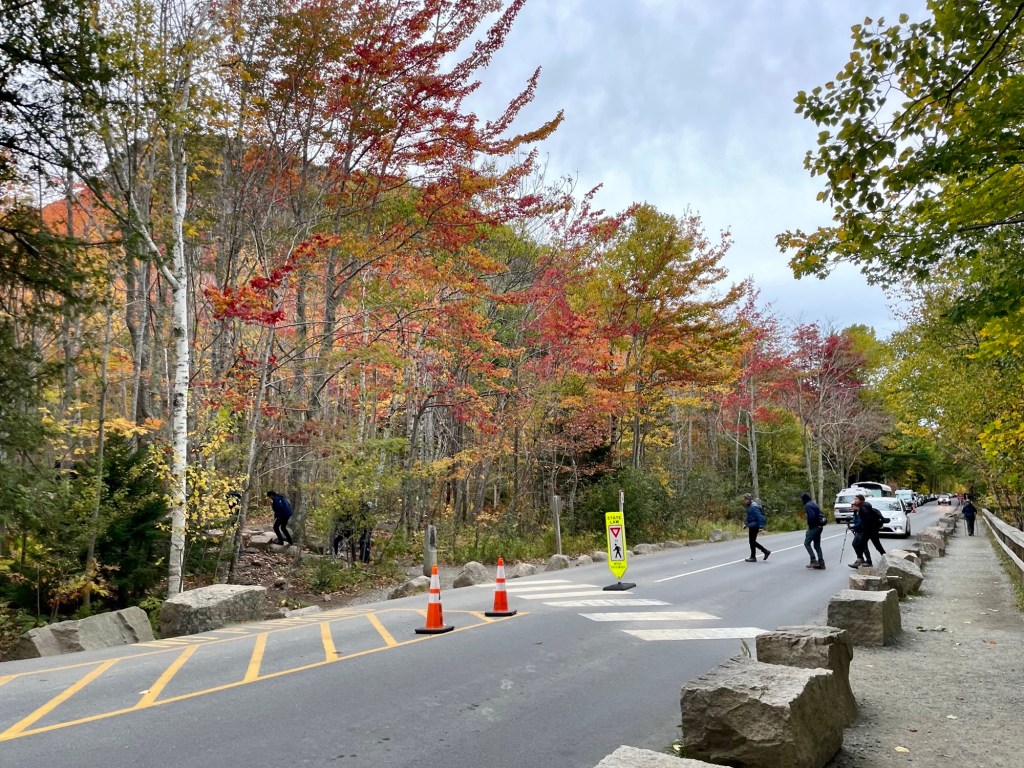
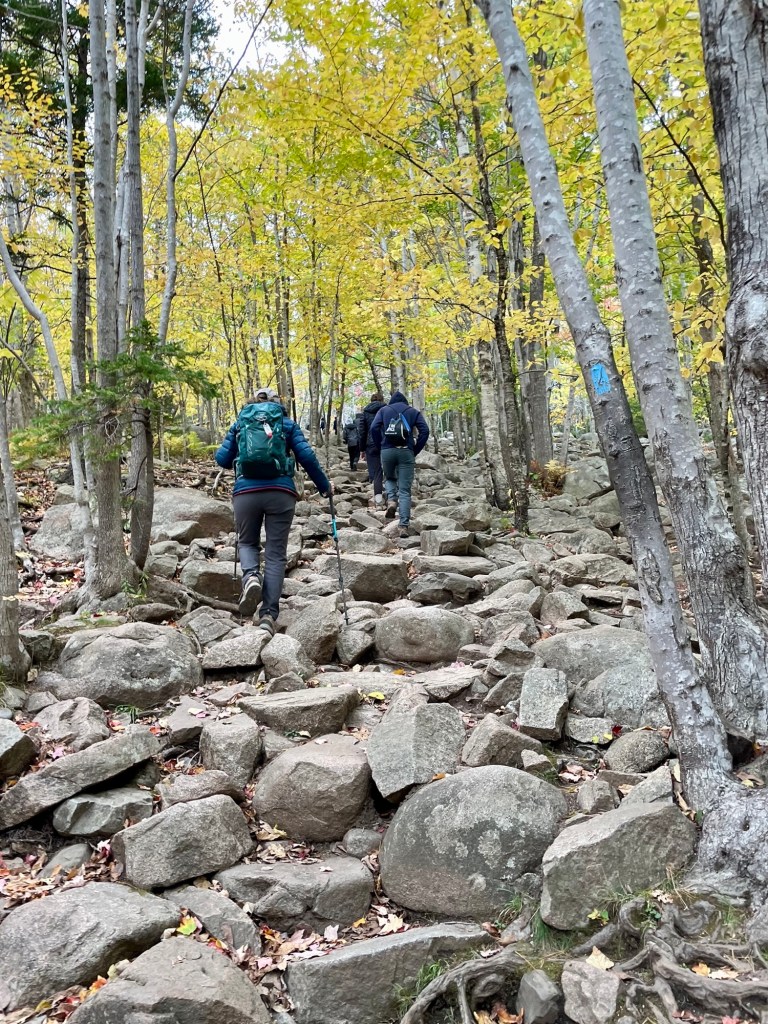

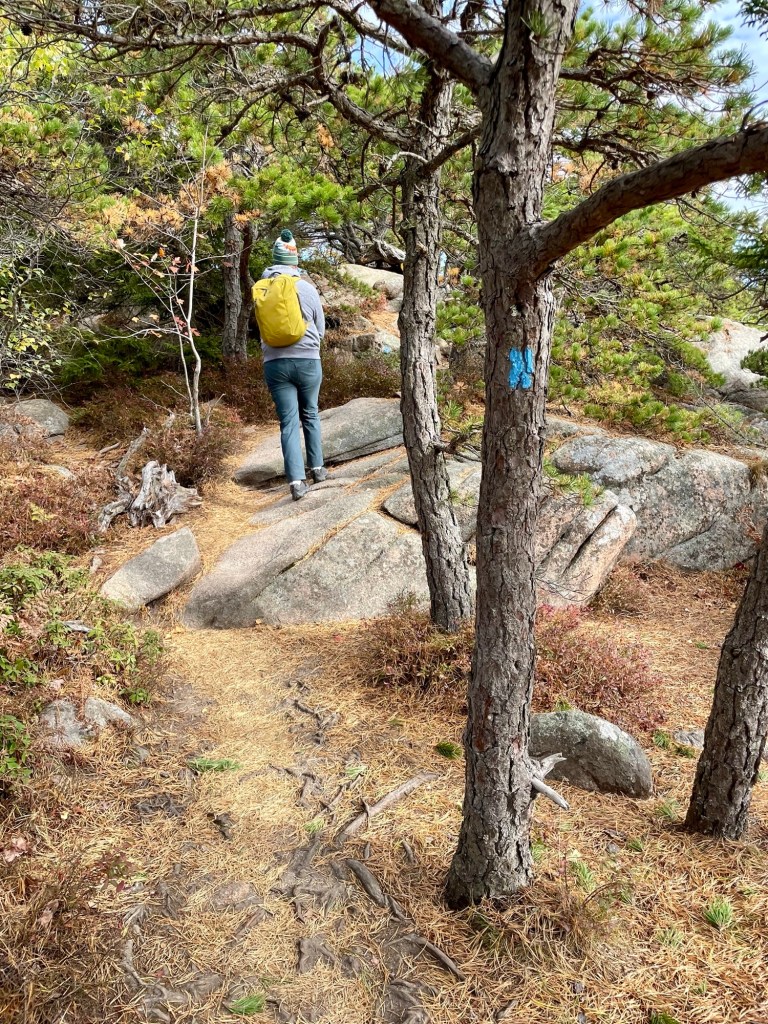
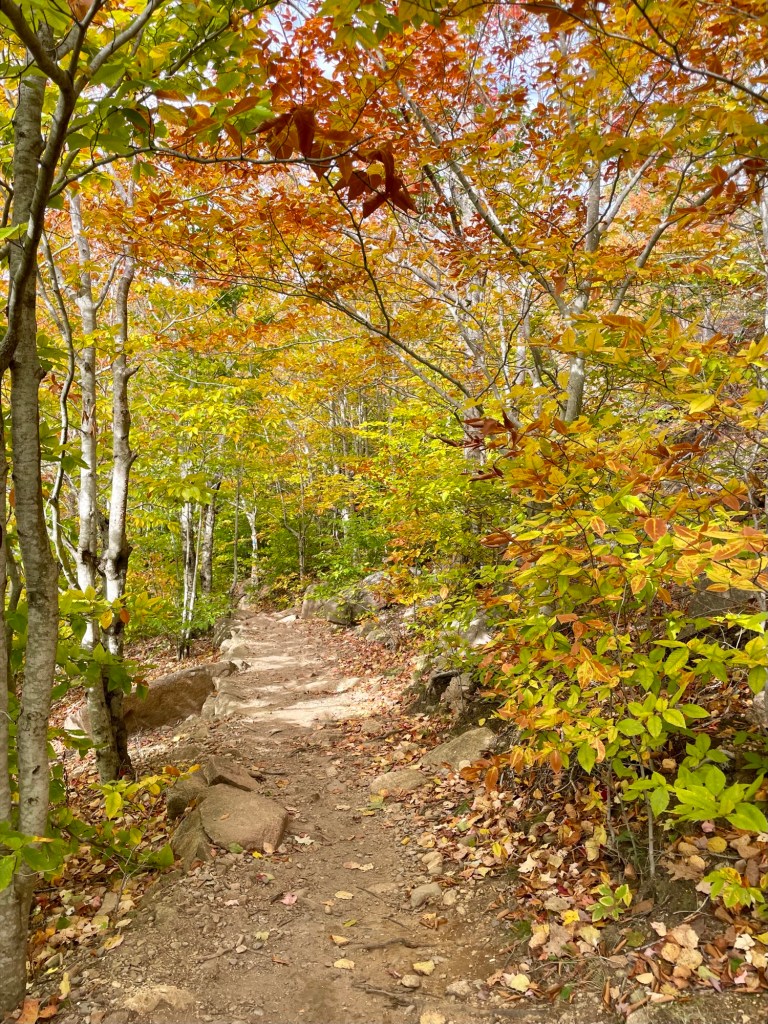
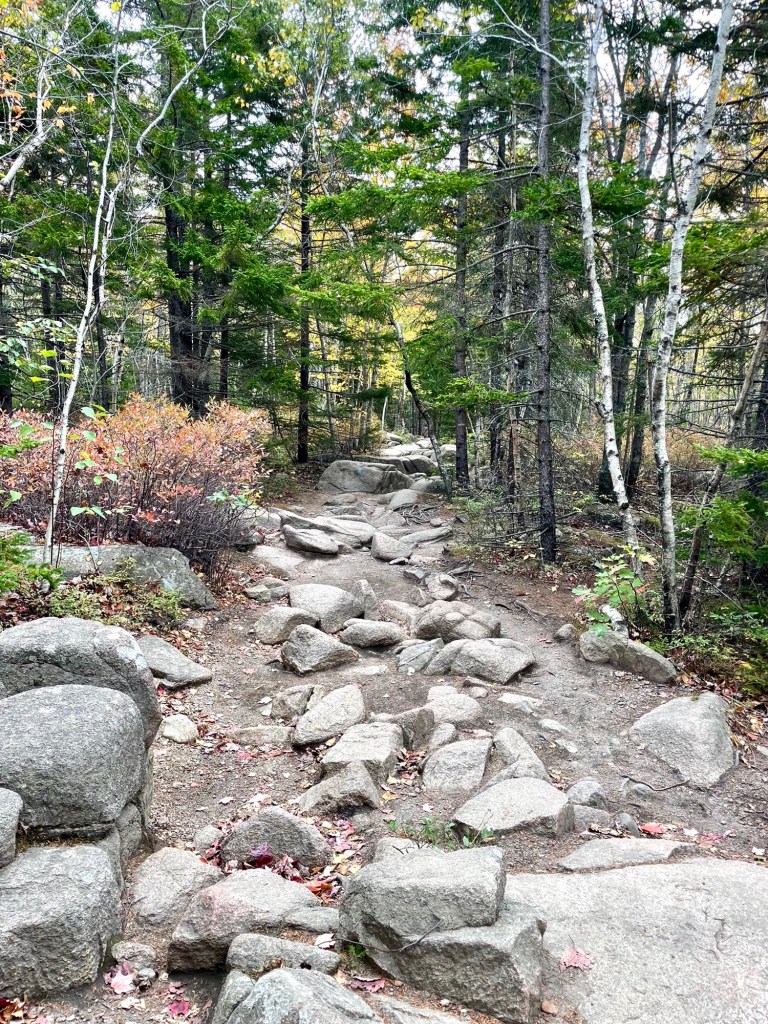
The path starts covered amongst trees and gradually increases in elevation with a rocky terrain – make sure you wear good hiking shoes for this hike.
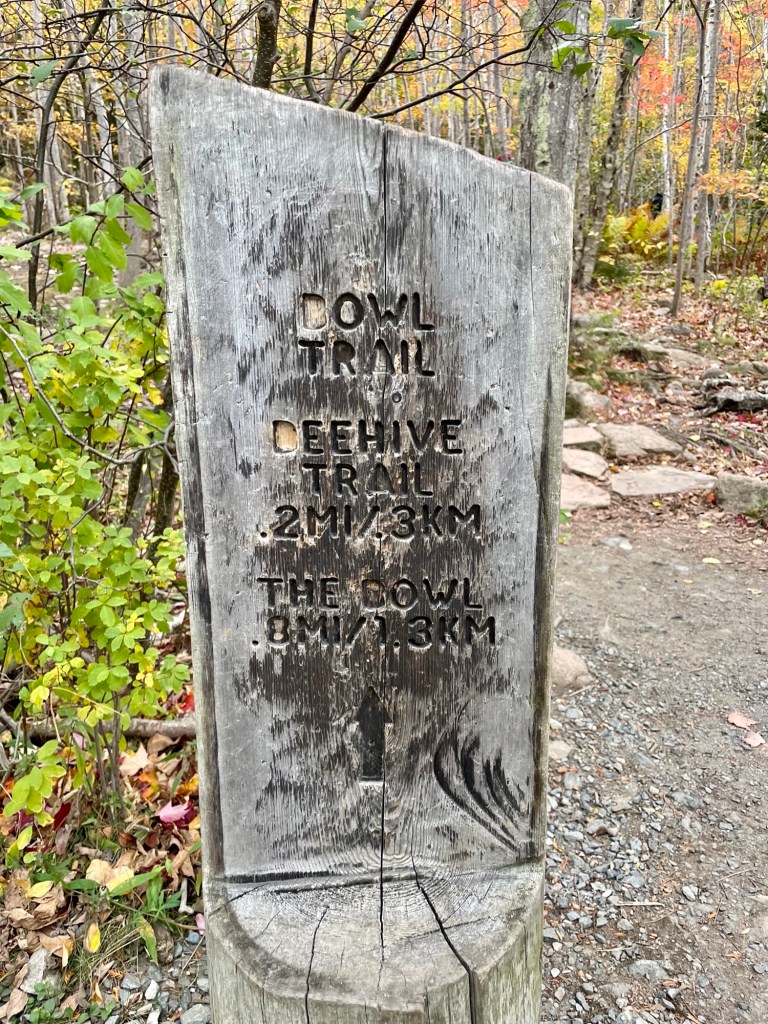
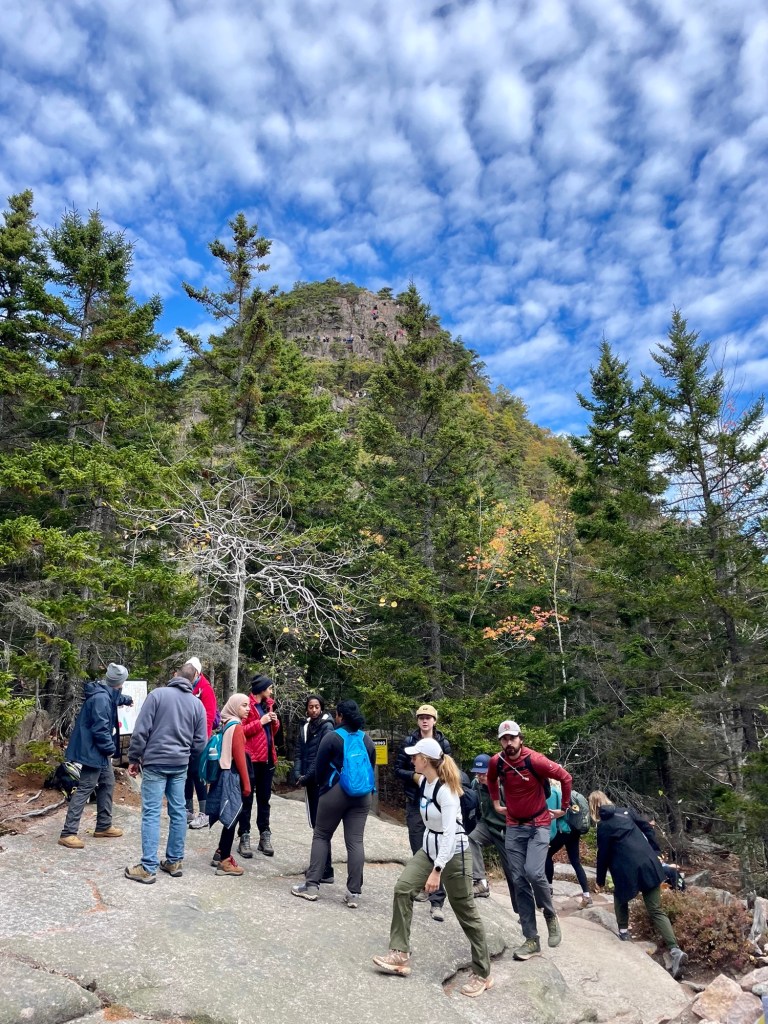
3. Reach a crossroad and turn right to the Beehive Trail to do the trail clockwise
As you make your way to the base of the mountain, you’ll reach an intersection. When it gets busy, there’s a park ranger there that can provide more information. This is the split between the Beehive Trail and the Bowl Trail (see the map above to see the difference). Although more difficult, I would recommend continuing the hike via the Beehive Trail and doing this loop clockwise for the best views. The Beehive Trail is steep and will lead you to vertical climbs (that aren’t bad at all in my opinion) along the side of the mountain, but you’re faced with the beautiful views the entire time, constantly getting better the higher you climb. There are also rock ledges along the way for some great photo spots.

If you choose to do the trail counterclockwise via the Bowl Trail, the trail is not as steep (although there are still large rocks to climb), but the majority of the trail will be covered amongst trees and you will only get the iconic views of Sands Beach and the surrounding views when you reach the top. This may be a better option if you have a fear of heights. Note: You will not be able to go down the Beehive Trail due to the sheer amount of single-file hikers trying to get up the mountain so prepare for an out-and-back hike once you reach the summit.
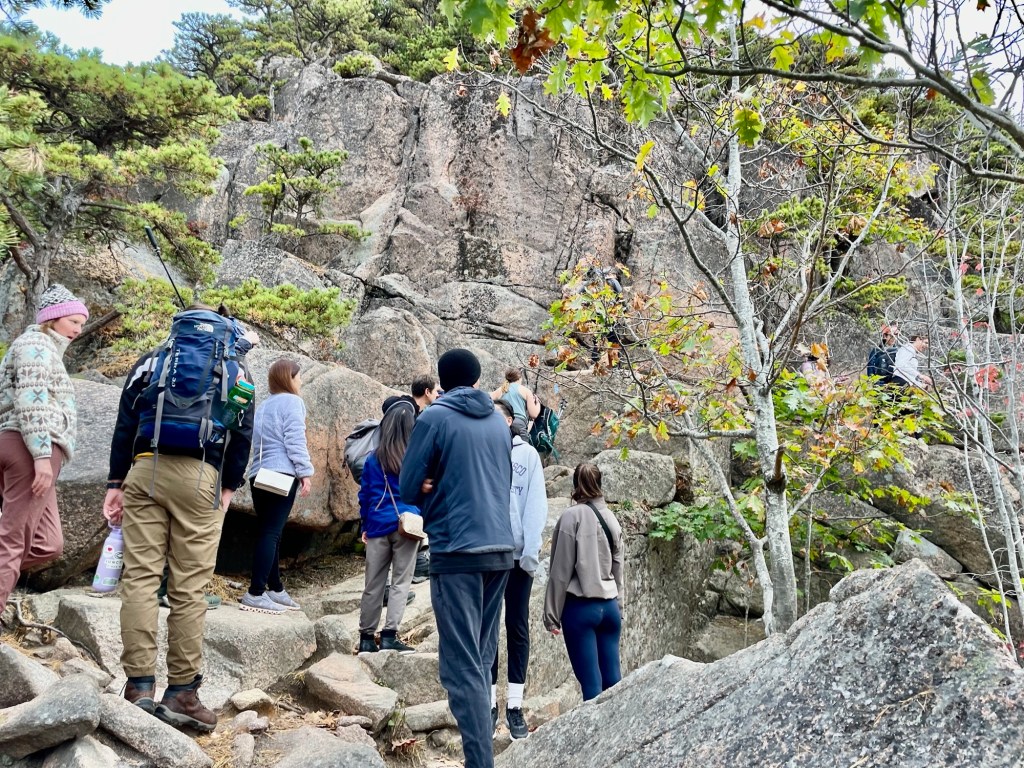
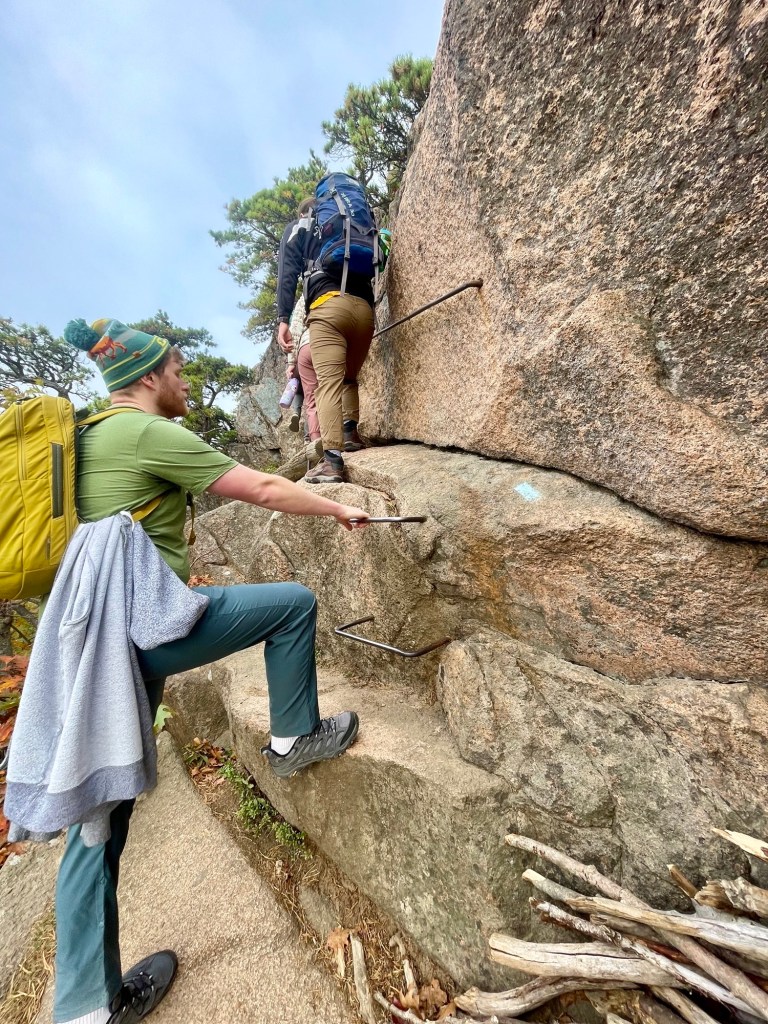
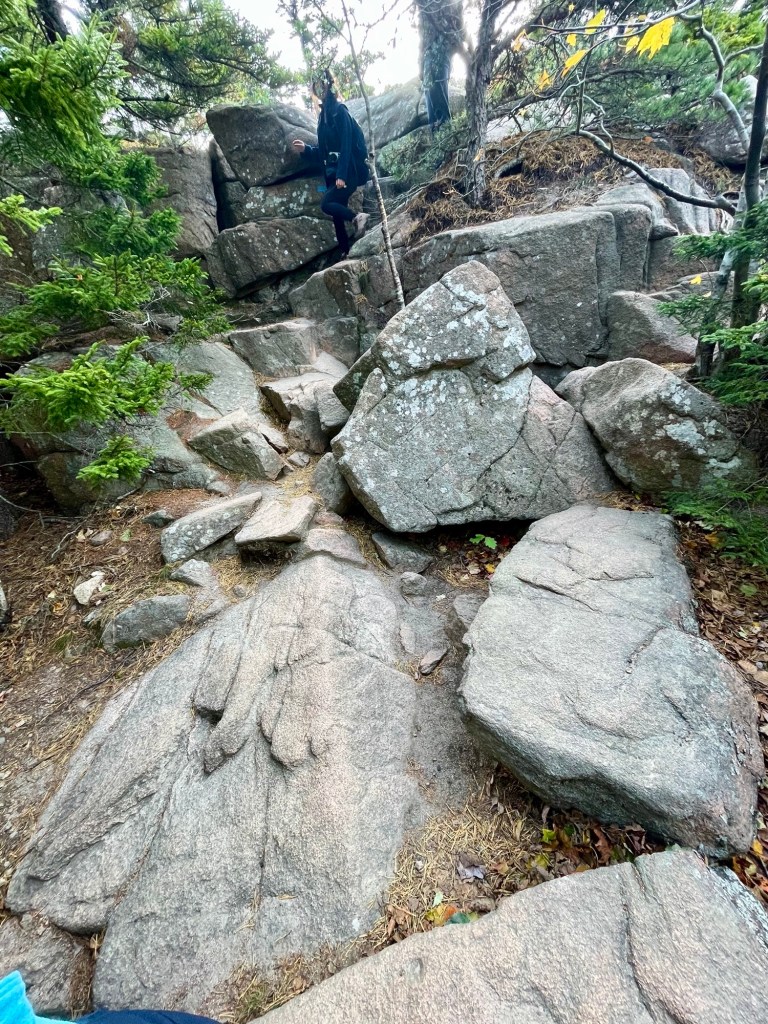
4. Continue the climb up, cross a metal grate, and climb iron rungs while enjoying the view
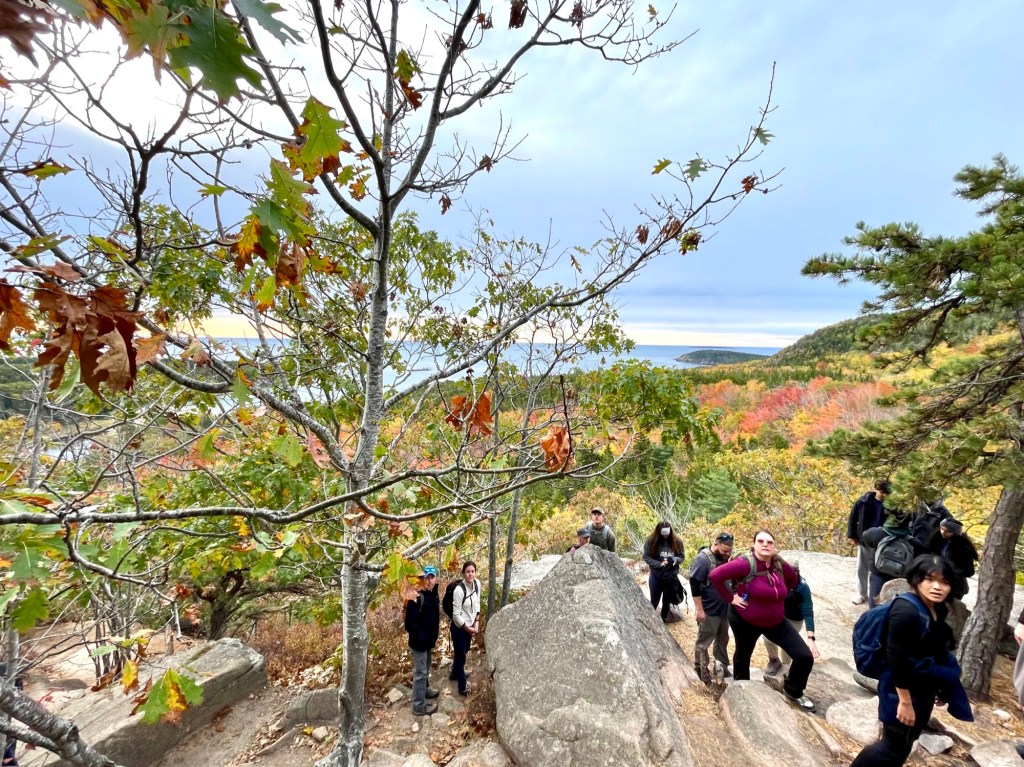
As we continued on, it becomes more steep with more boulders to climb over, and we mentally prepared ourselves for vertical climbs and clinging onto the side of the mountain. This was where the line started for us. It was moving along at a decent pace at first, but it got slower closer to the top. Yes this hike is steep and yes there are vertical climbs, however because we had to wait in line and only moving a few steps at a time and taking a few thrusts up big rocks at a time, this hike actually became a breeze. We barely even broke a sweat! There was always something to hold onto and there were flat parts to stand as you wait. You’re constantly exposed to the amazing views beside you and the waiting gives you more than enough time to get some nice photos on rocky ledges. We didn’t mind waiting at all. It was actually a more enjoyable and fun hike compared to constantly walking uphill.
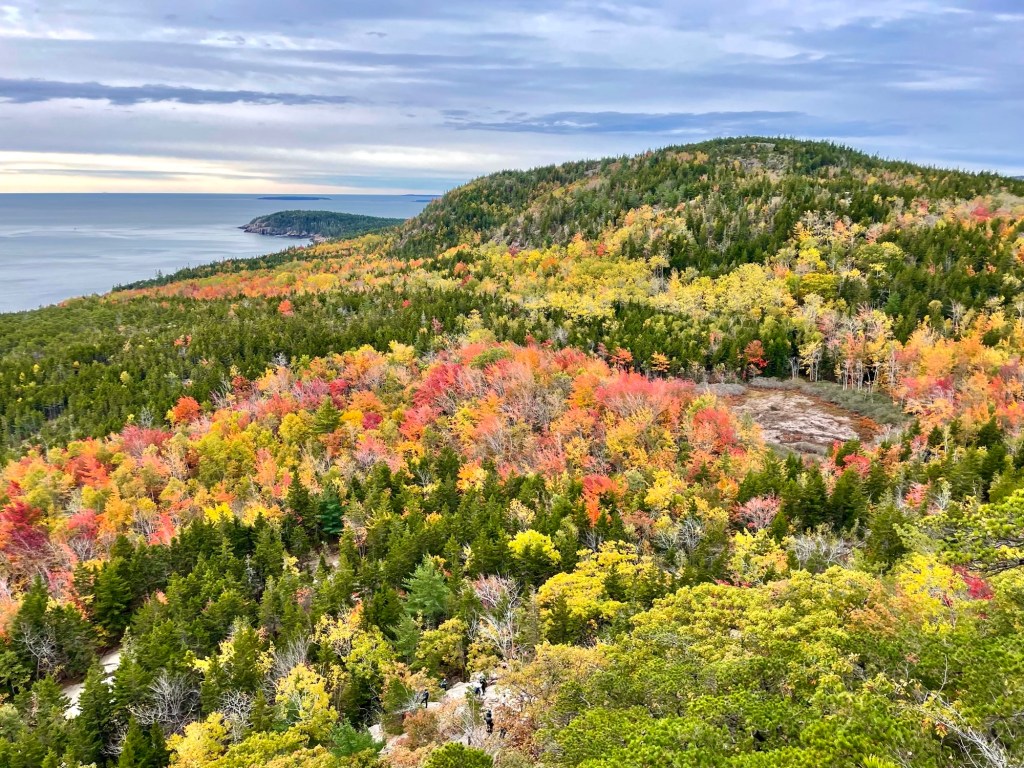
Here are a bunch of photos of our ascent up the mountain (the view gets a bit repetitive, but when you’re there in person, it never gets old):
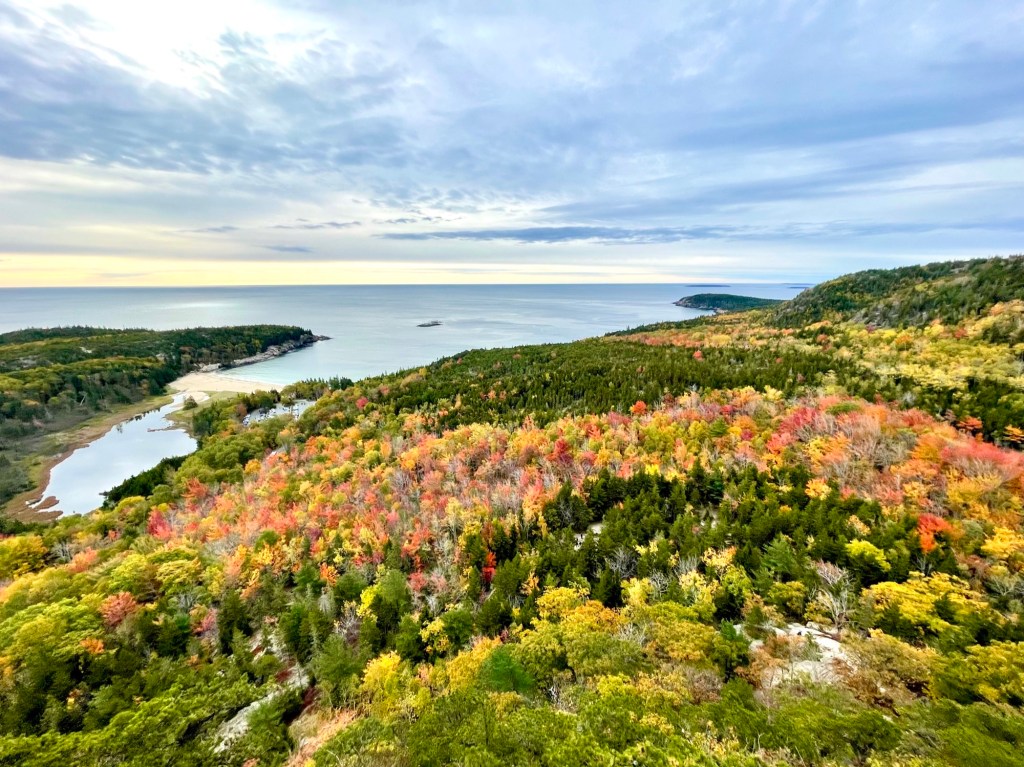
Our first views of Sand Beach inlet as we emerge from the trees and up the first set of rocks:


*This is the first view of the ocean that you’ll see after emerging from the trees. If you’re scared of heights, there’s still time to turn around at this point before it becomes too difficult to turn back. The views at the top is similar but at a higher vantage point (see the photos below).
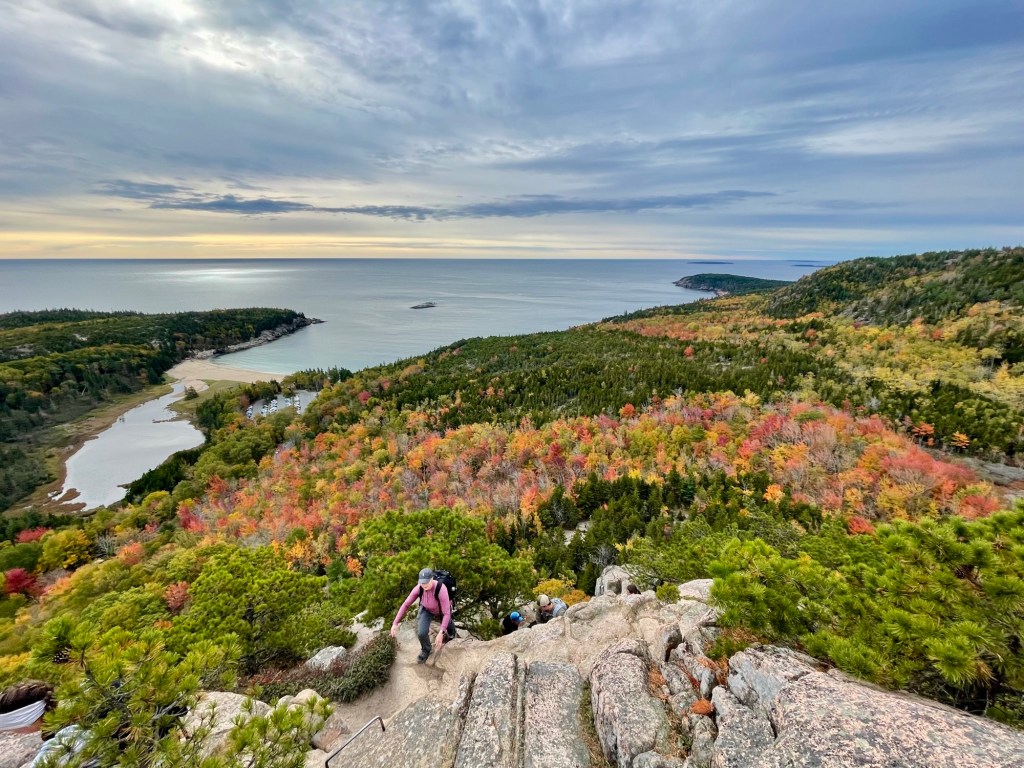
As we continue to climb higher, the views open up a little more with fewer trees obstructing the view:


Then the path gets a little more tricky with metal gates and iron rungs. The photos make it seem scarier in photos than it actually was. At no point did I feel like I was going to fall off the side of the mountain or feel like I couldn’t make the climb up. This is where the line started for us as people take they time with the obstacles, but no matter, we’re still loving the views:
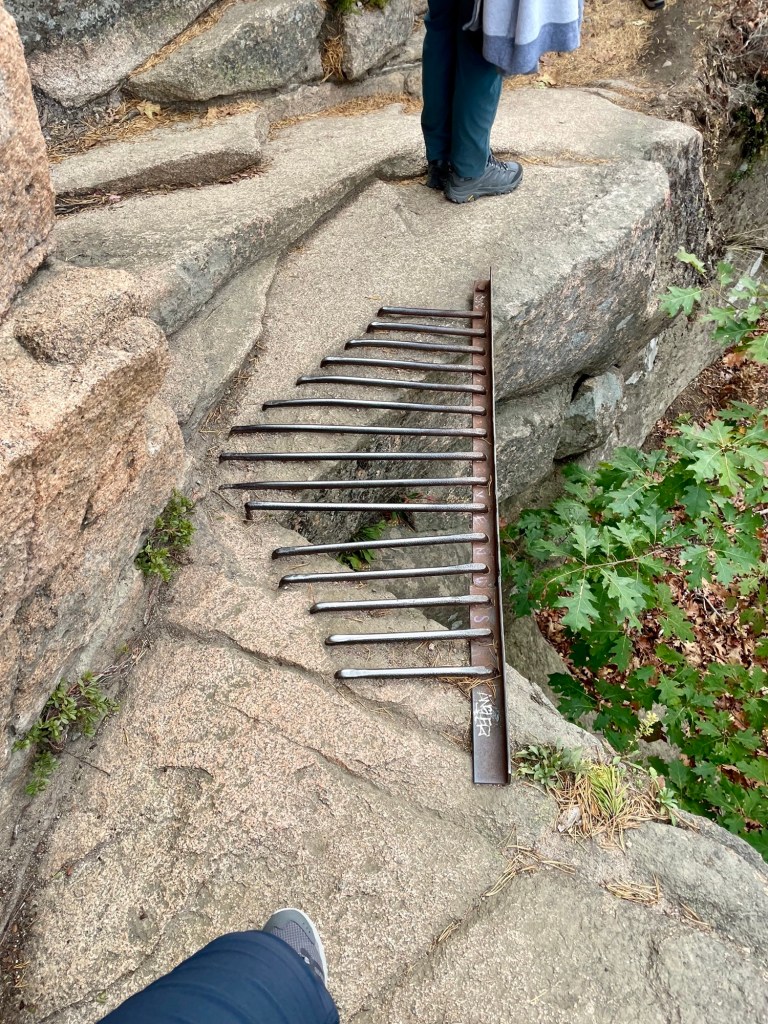

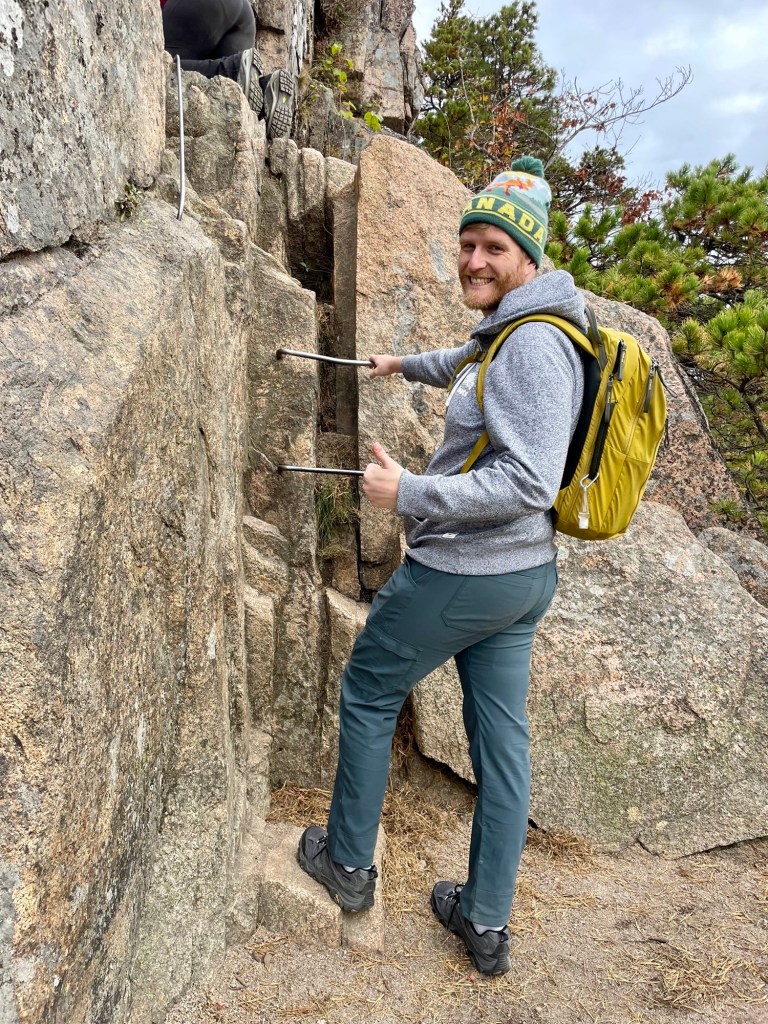
Encountered the iron rungs, which were a lot easier than I expected. There’s never more than 3-4 at a time:
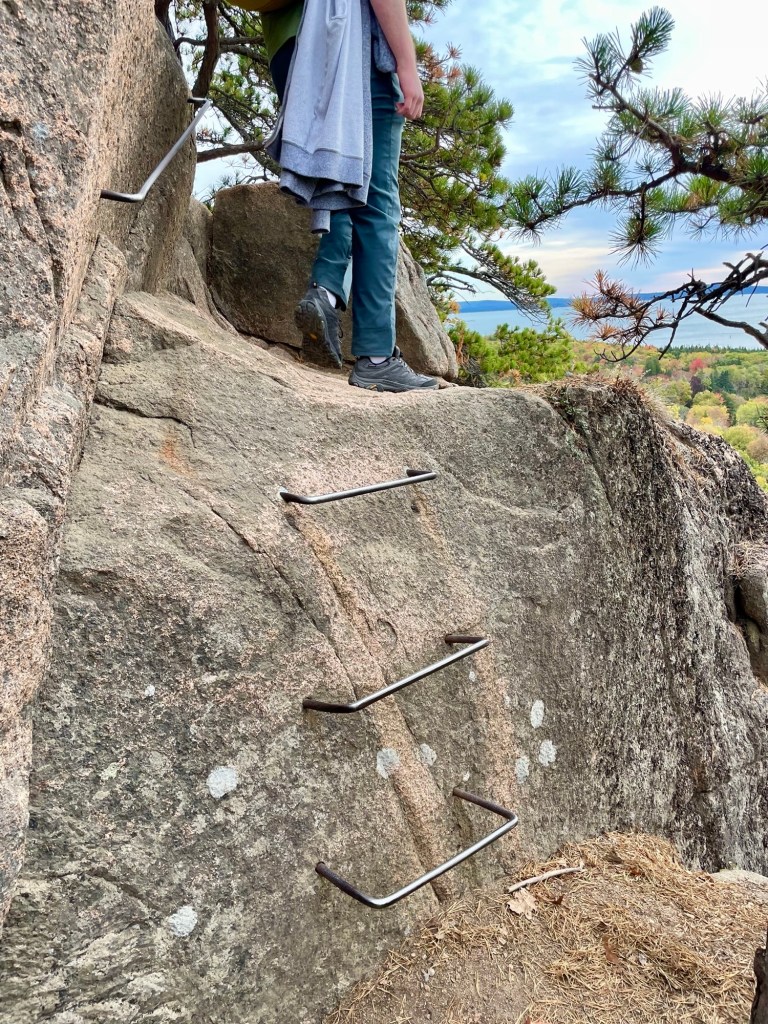


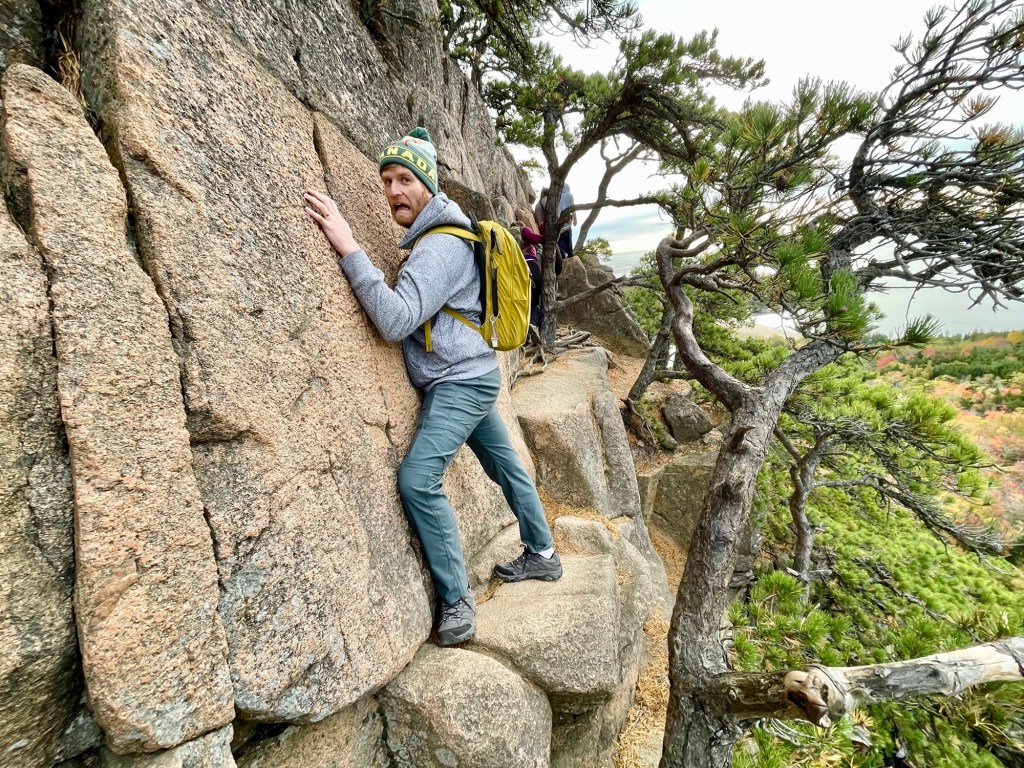
This is probably the most common photo I’ve seen that shows how close to the edge you are, however…

…when taken at a different angle you can see that you’ve got the tree beside you with branches so smooth where thousands have people have grabbed onto for support. It didn’t feel scary at all.

Still slowly waiting in line to make our way up, but still enjoying the views every step of the way:


As we got closer to the top it became more steep:

5. Reach the summit and take in the views
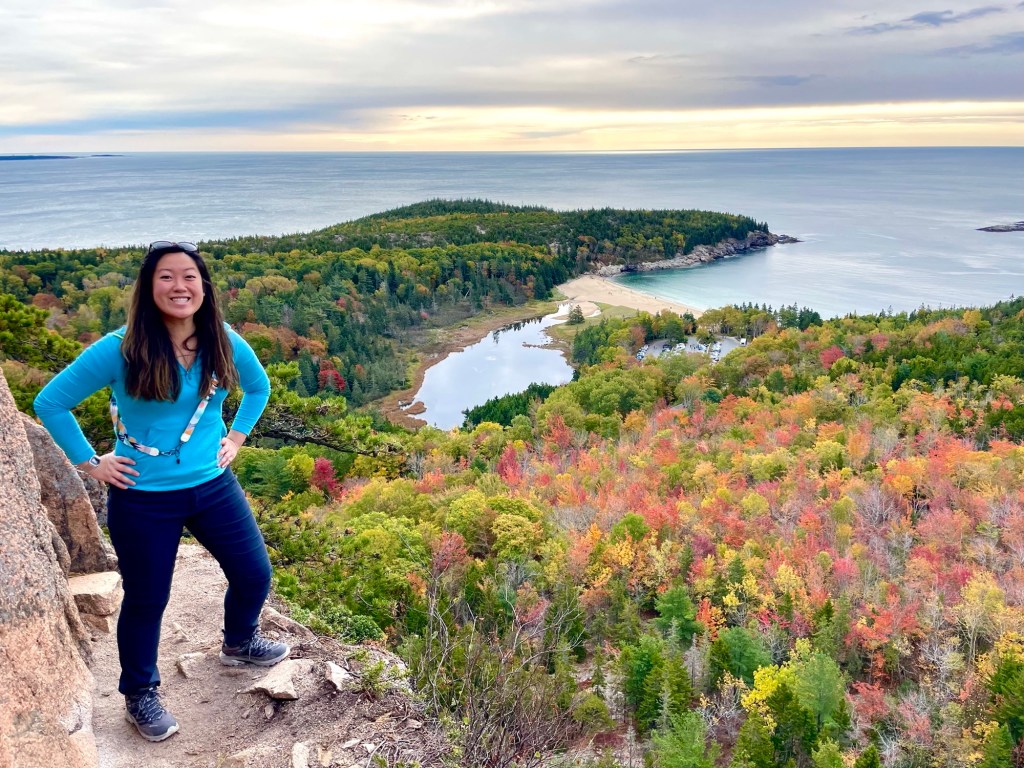
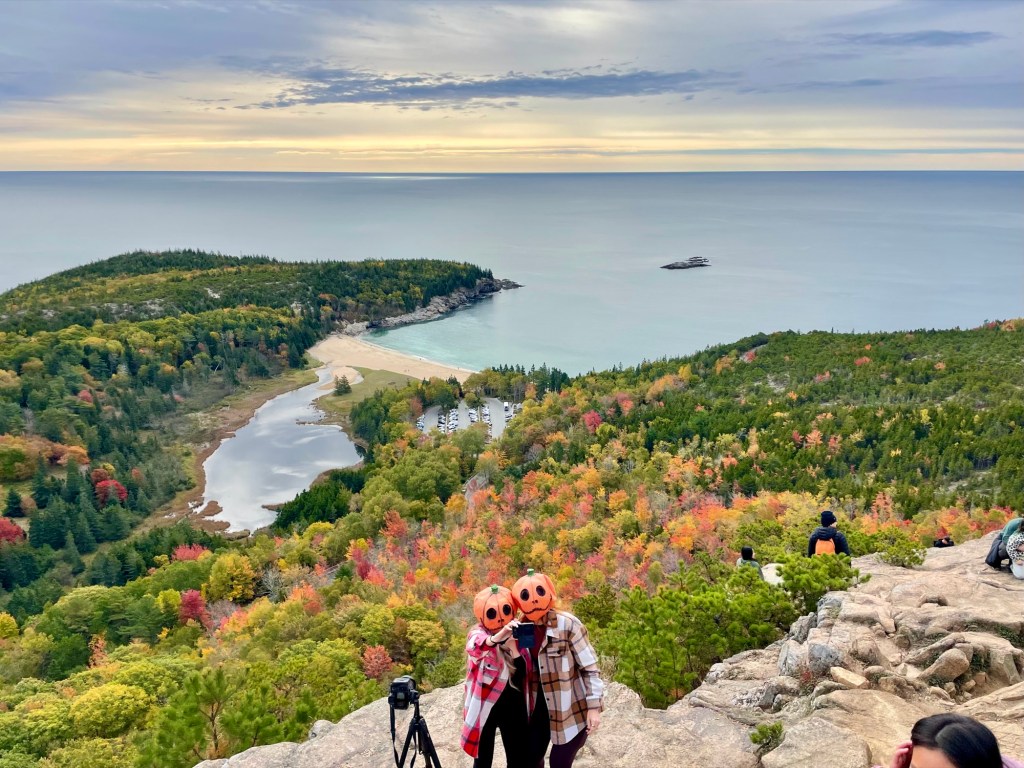
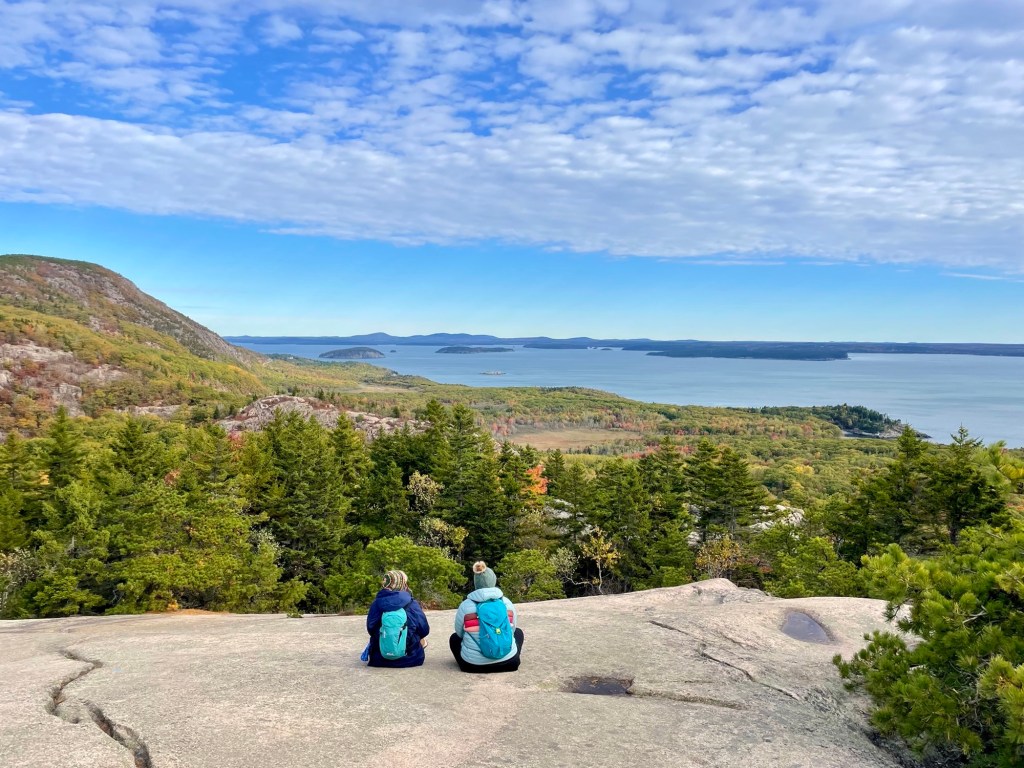
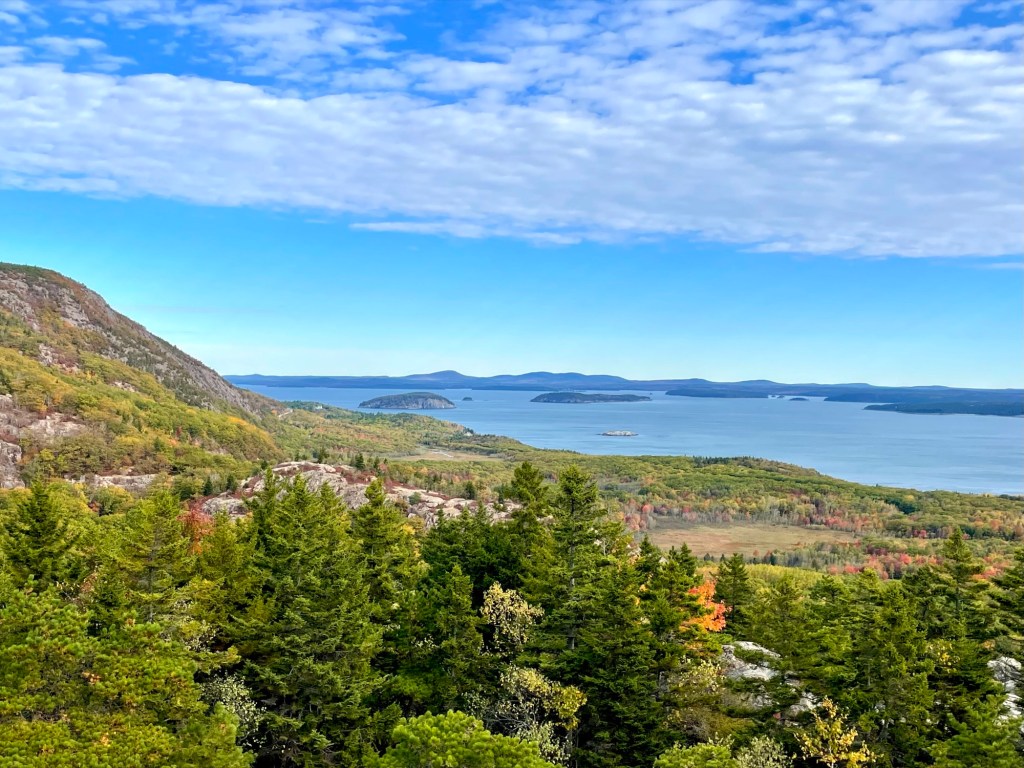
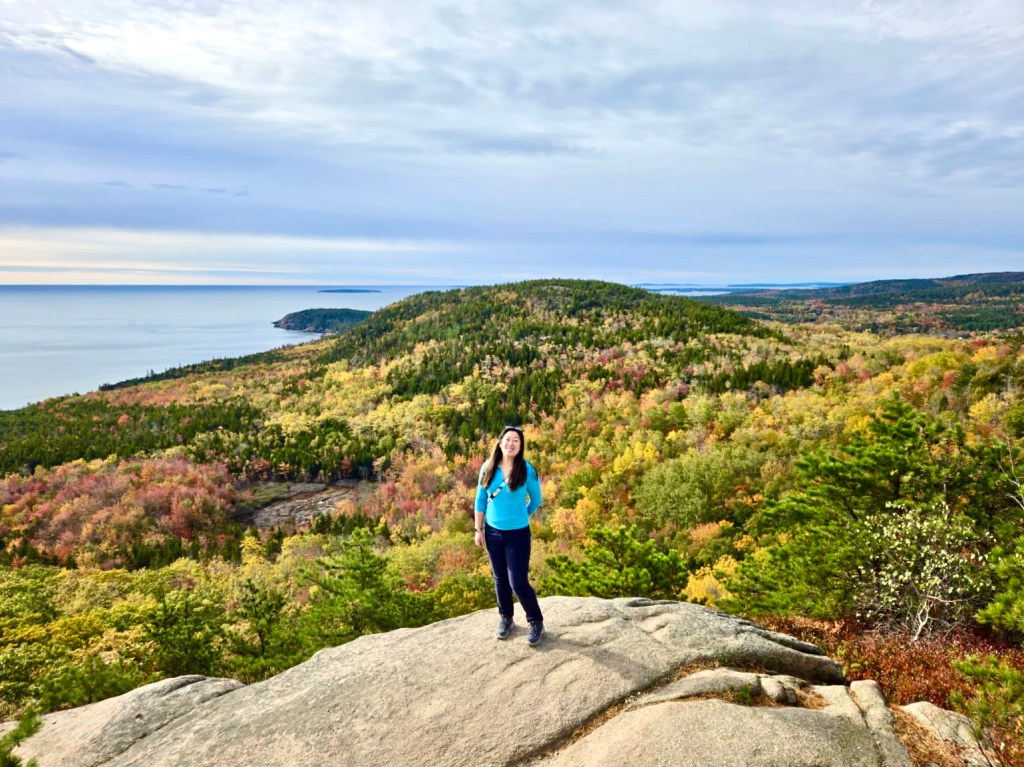
The final push to the top was just climbing over rocks but the view at the top was absolutely worth it. I can see how it is one of the most popular hikes in this park!


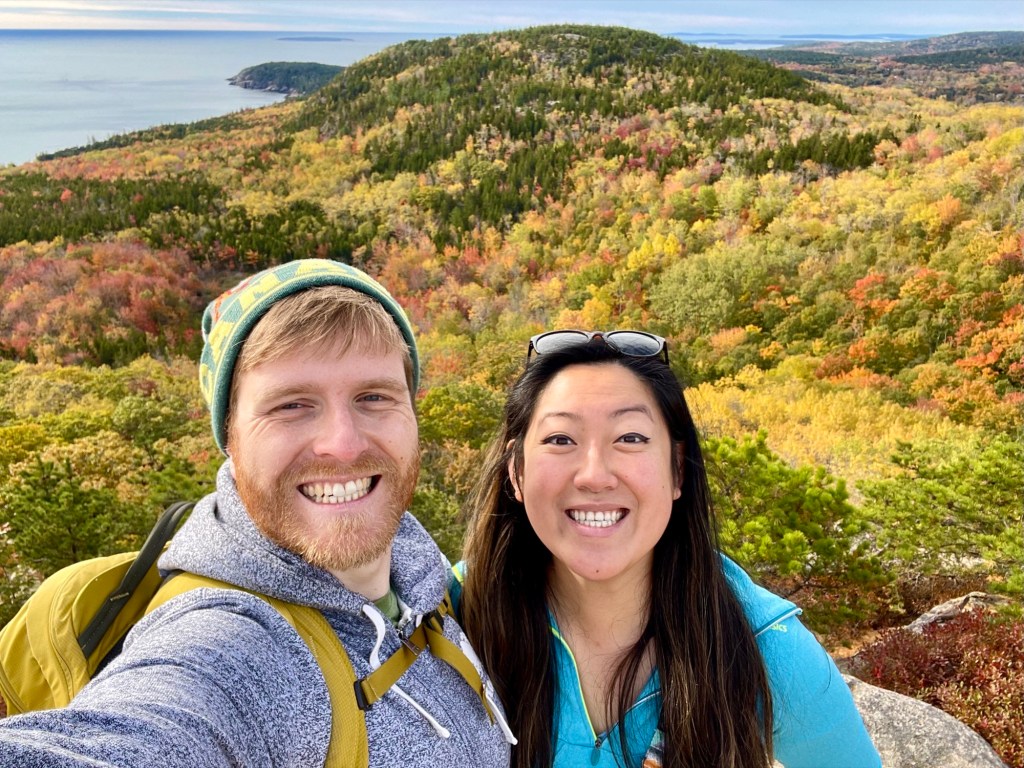
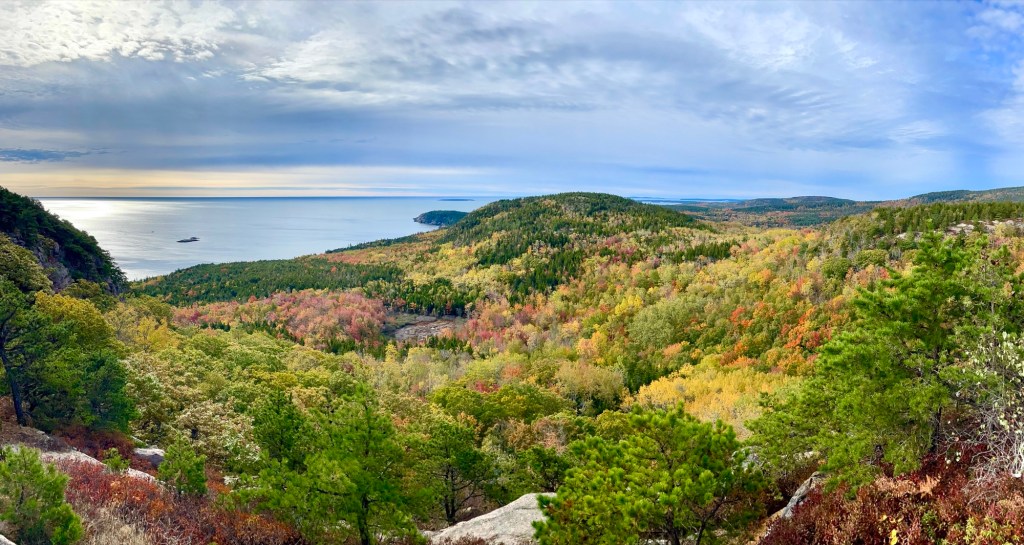
Take a breather and soak in the view. It’s the same view as what you see on the way up, but higher and more grand with sweeping views of the forest and ocean around you.

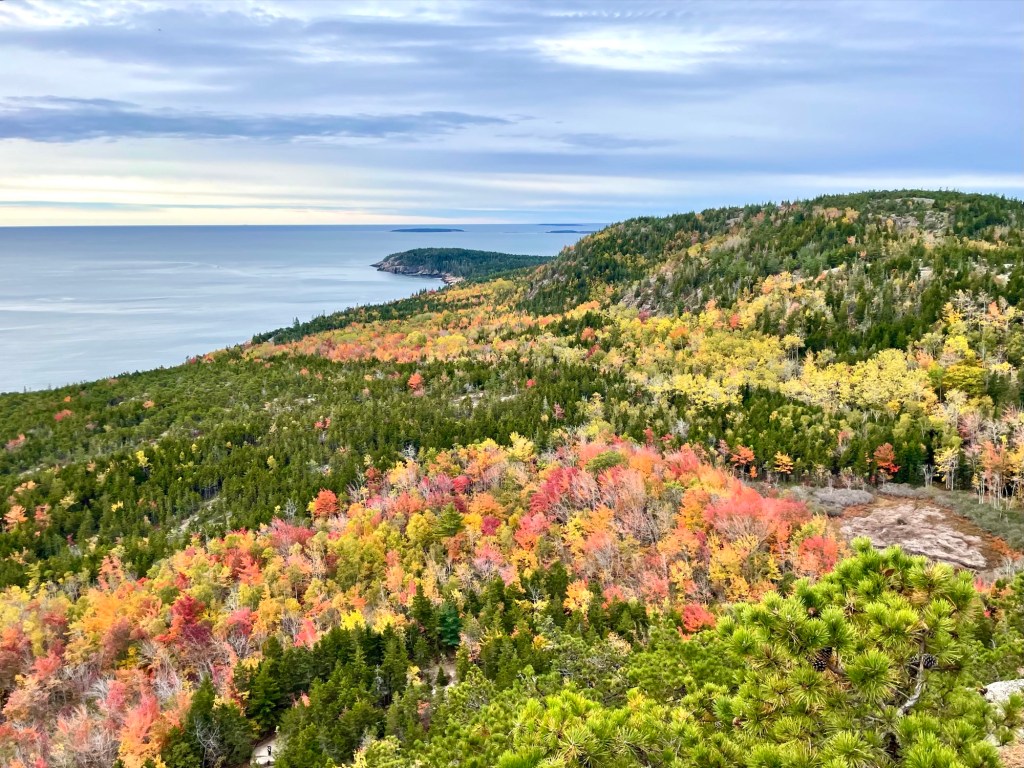
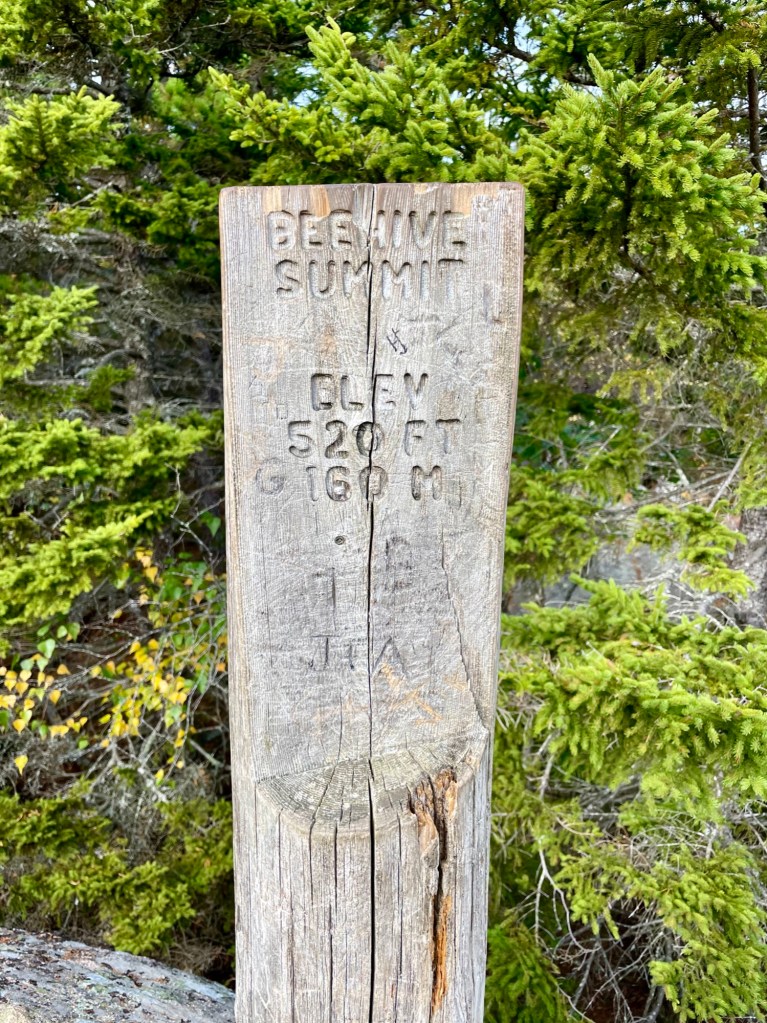
But the views don’t stop here. Continue following the blue trail markers to the other side of the mountain. Here you’ll see a sign that marks the actual summit of the mountain and you’ll get more ocean views with the small islands in the distance.


6. Make your way down the mountain
Continue following the blue markers to make your way down the mountain. You’ll get panoramic views of the beautiful trees below before you reach the trail path again.


As you make your way down, you’ll eventually be amongst trees again and climbing down big boulders, but then it gets easier as the ground plateaus and the path is much smoother.


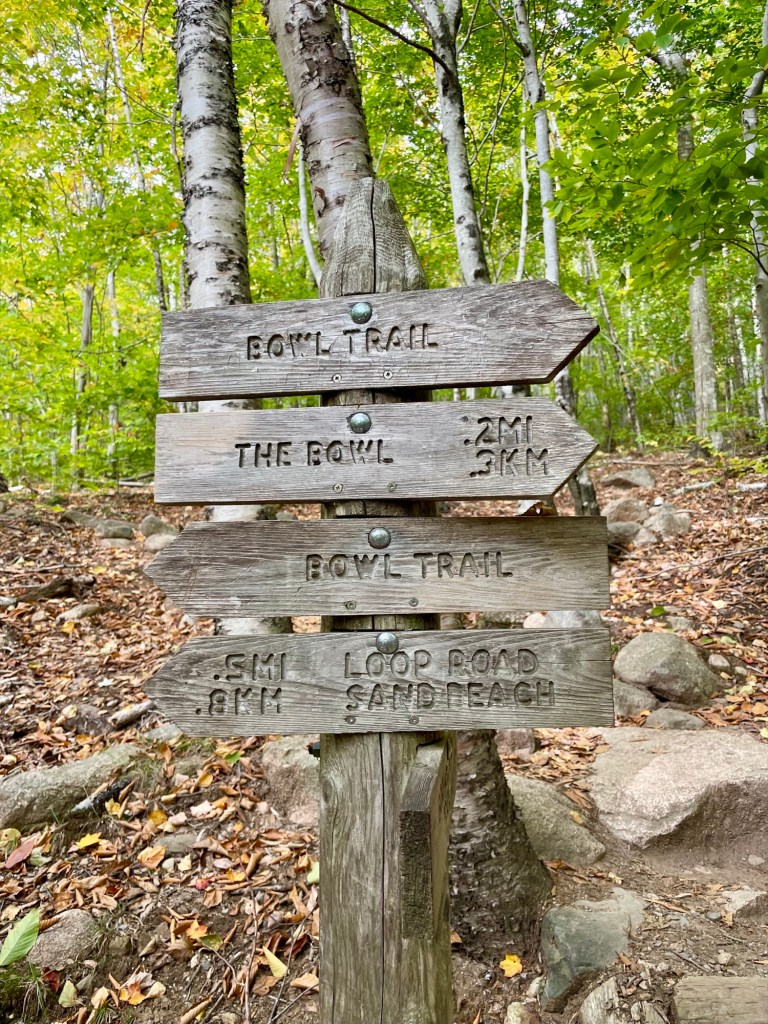
7. Reach another crossroad: Continue on to The Bowl or take the shortcut
You’ll reach another intersection with trail signs that point to The Bowl. Continue on this path to reach views of The Bowl, or take the shortcut and continue the path back to the parking lot. We didn’t have time to make it to The Bowl so we took the shortcut back.

As you make your way back, you’ll eventually meet up with the original trail again and climb down the large rocks back to the parking lot.

By the time we met up with the starting trail, there were SO MANY more people and the line was MUCH longer. The ranger was telling people to do the loop backwards via the Bowl Trail avoid the line going up the Beehive Trail.
8. Get back to the parking lot and be glad you started early
By the time we got back to the parking lot, the lot was completely full with a very long line of cars parked along the road. You can see the top of the Beehive Trail from the parking lot with the many many single-file people slowly making their way up the mountain. Although we had to wait in line ourselves, we were SO happy that our line was no where as long as the one that was forming when we finished!


Some final thoughts
- Get here early.
- Get here early.
- Get here early.
- The views are amazing and worth the time and effort.
- Wear good hiking shoes for good traction getting up rocks.
- Consider skipping this hike if it’s raining.
When you get back to the parking lot, there are a few things you can do:
- Check out Sand Beach, a short walk to this beautiful inlet beach
- Walk Ocean Path – a flat easy path along the coast with beautiful views along the way
- Thunder Hole – a 10-15 min walk along Ocean Path to this narrow inlet where rushing water creates loud thundering sounds and big high splashes of water into the air (come 1-2 hours prior to high tide for the experience)
