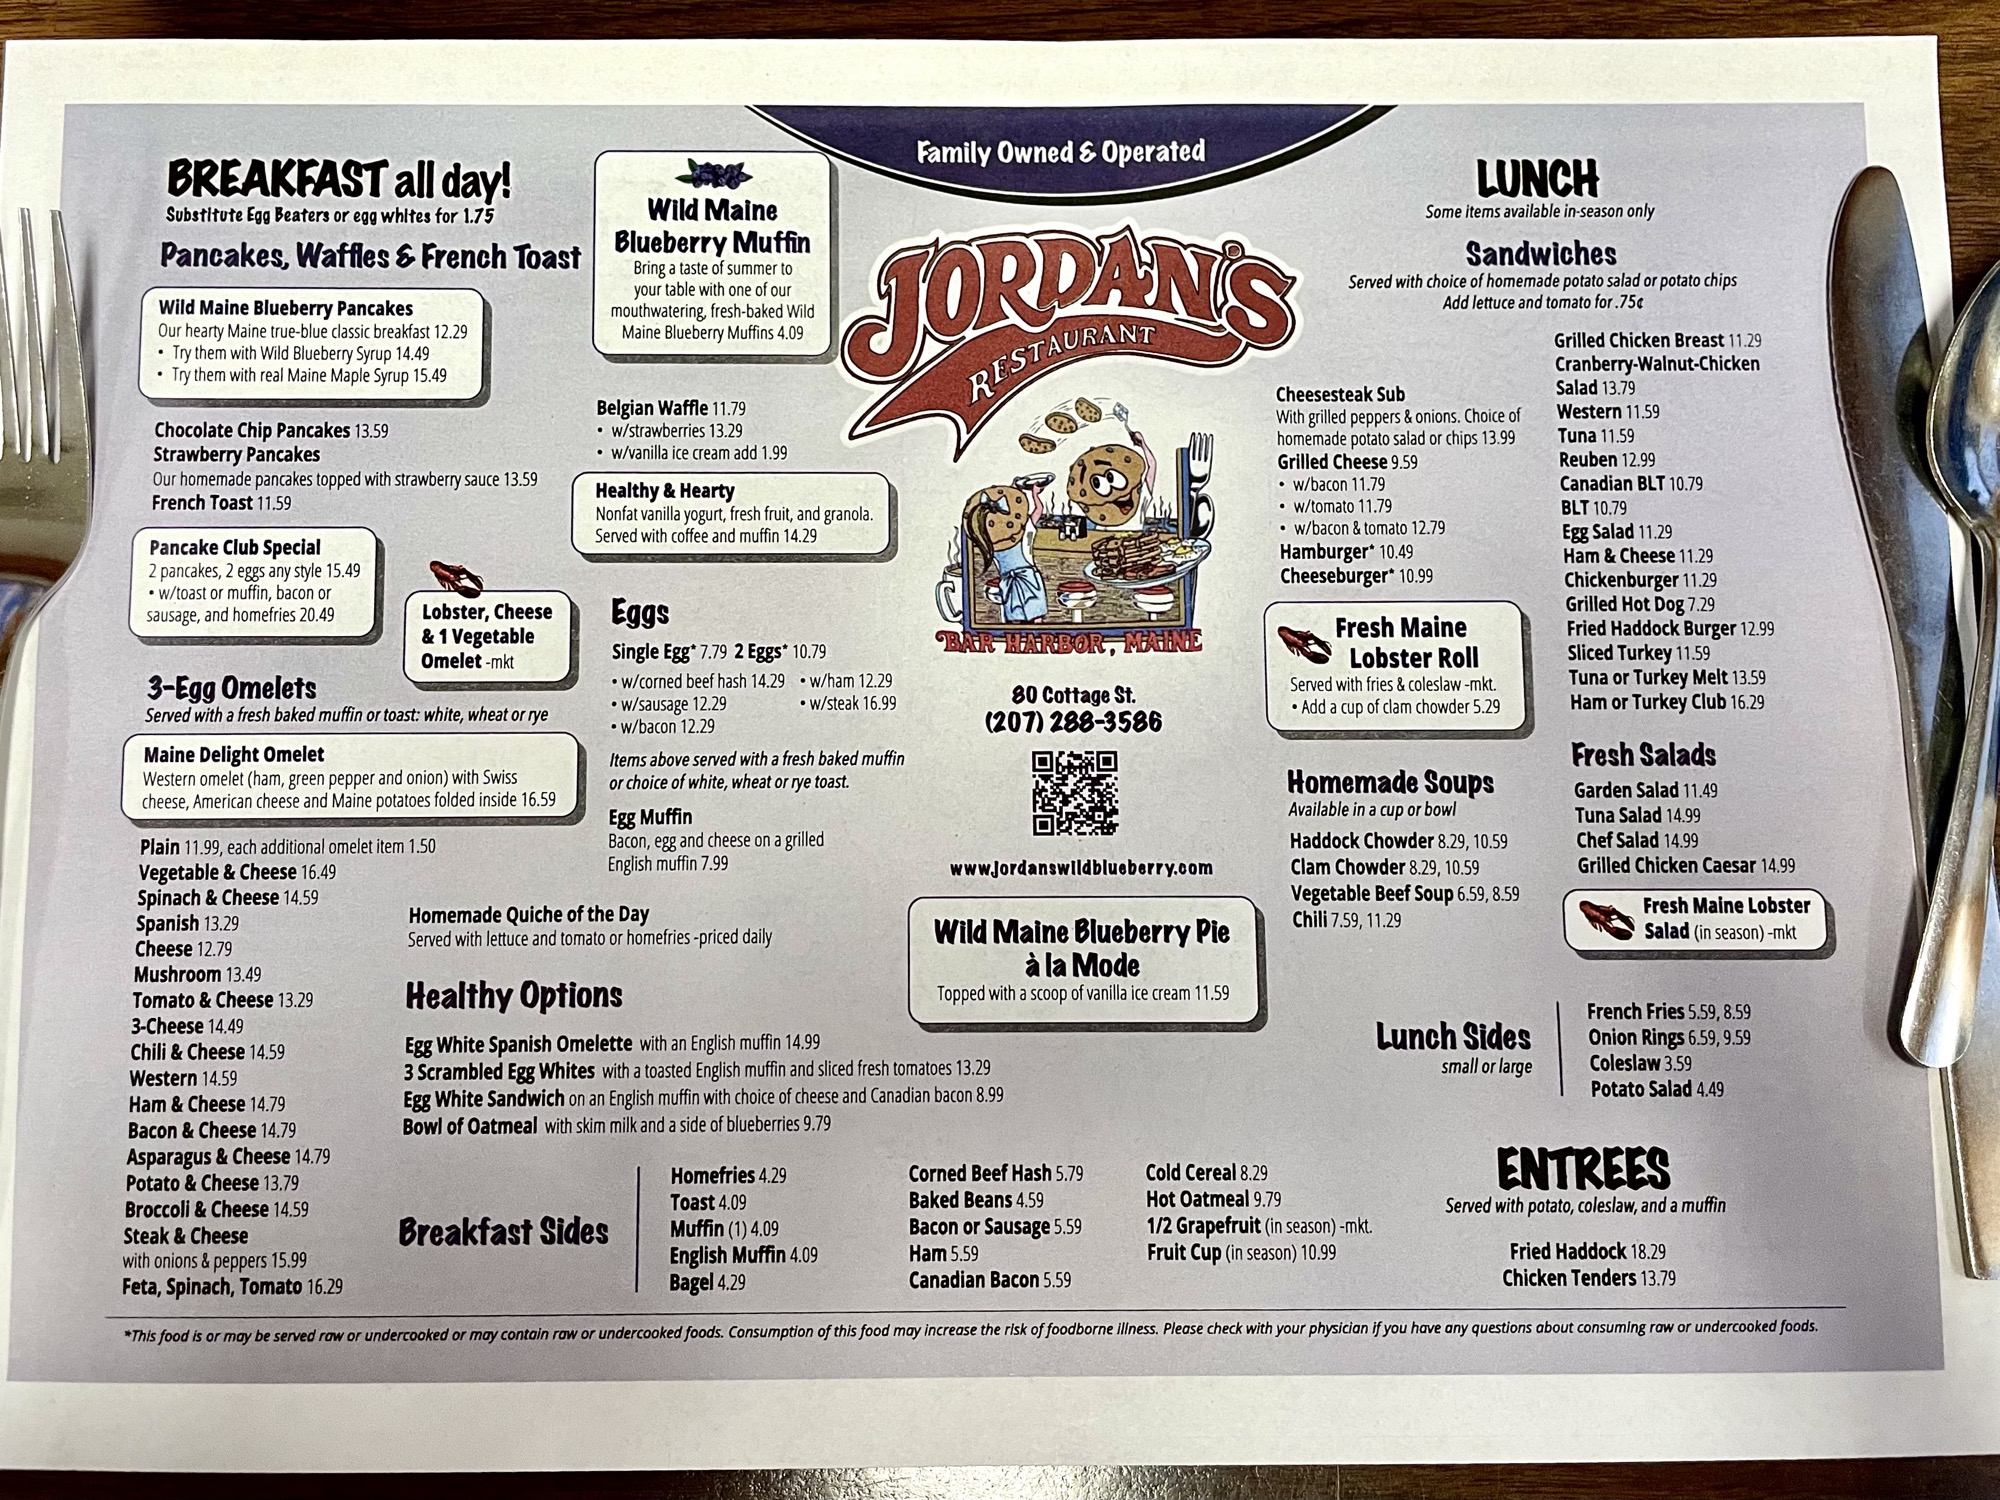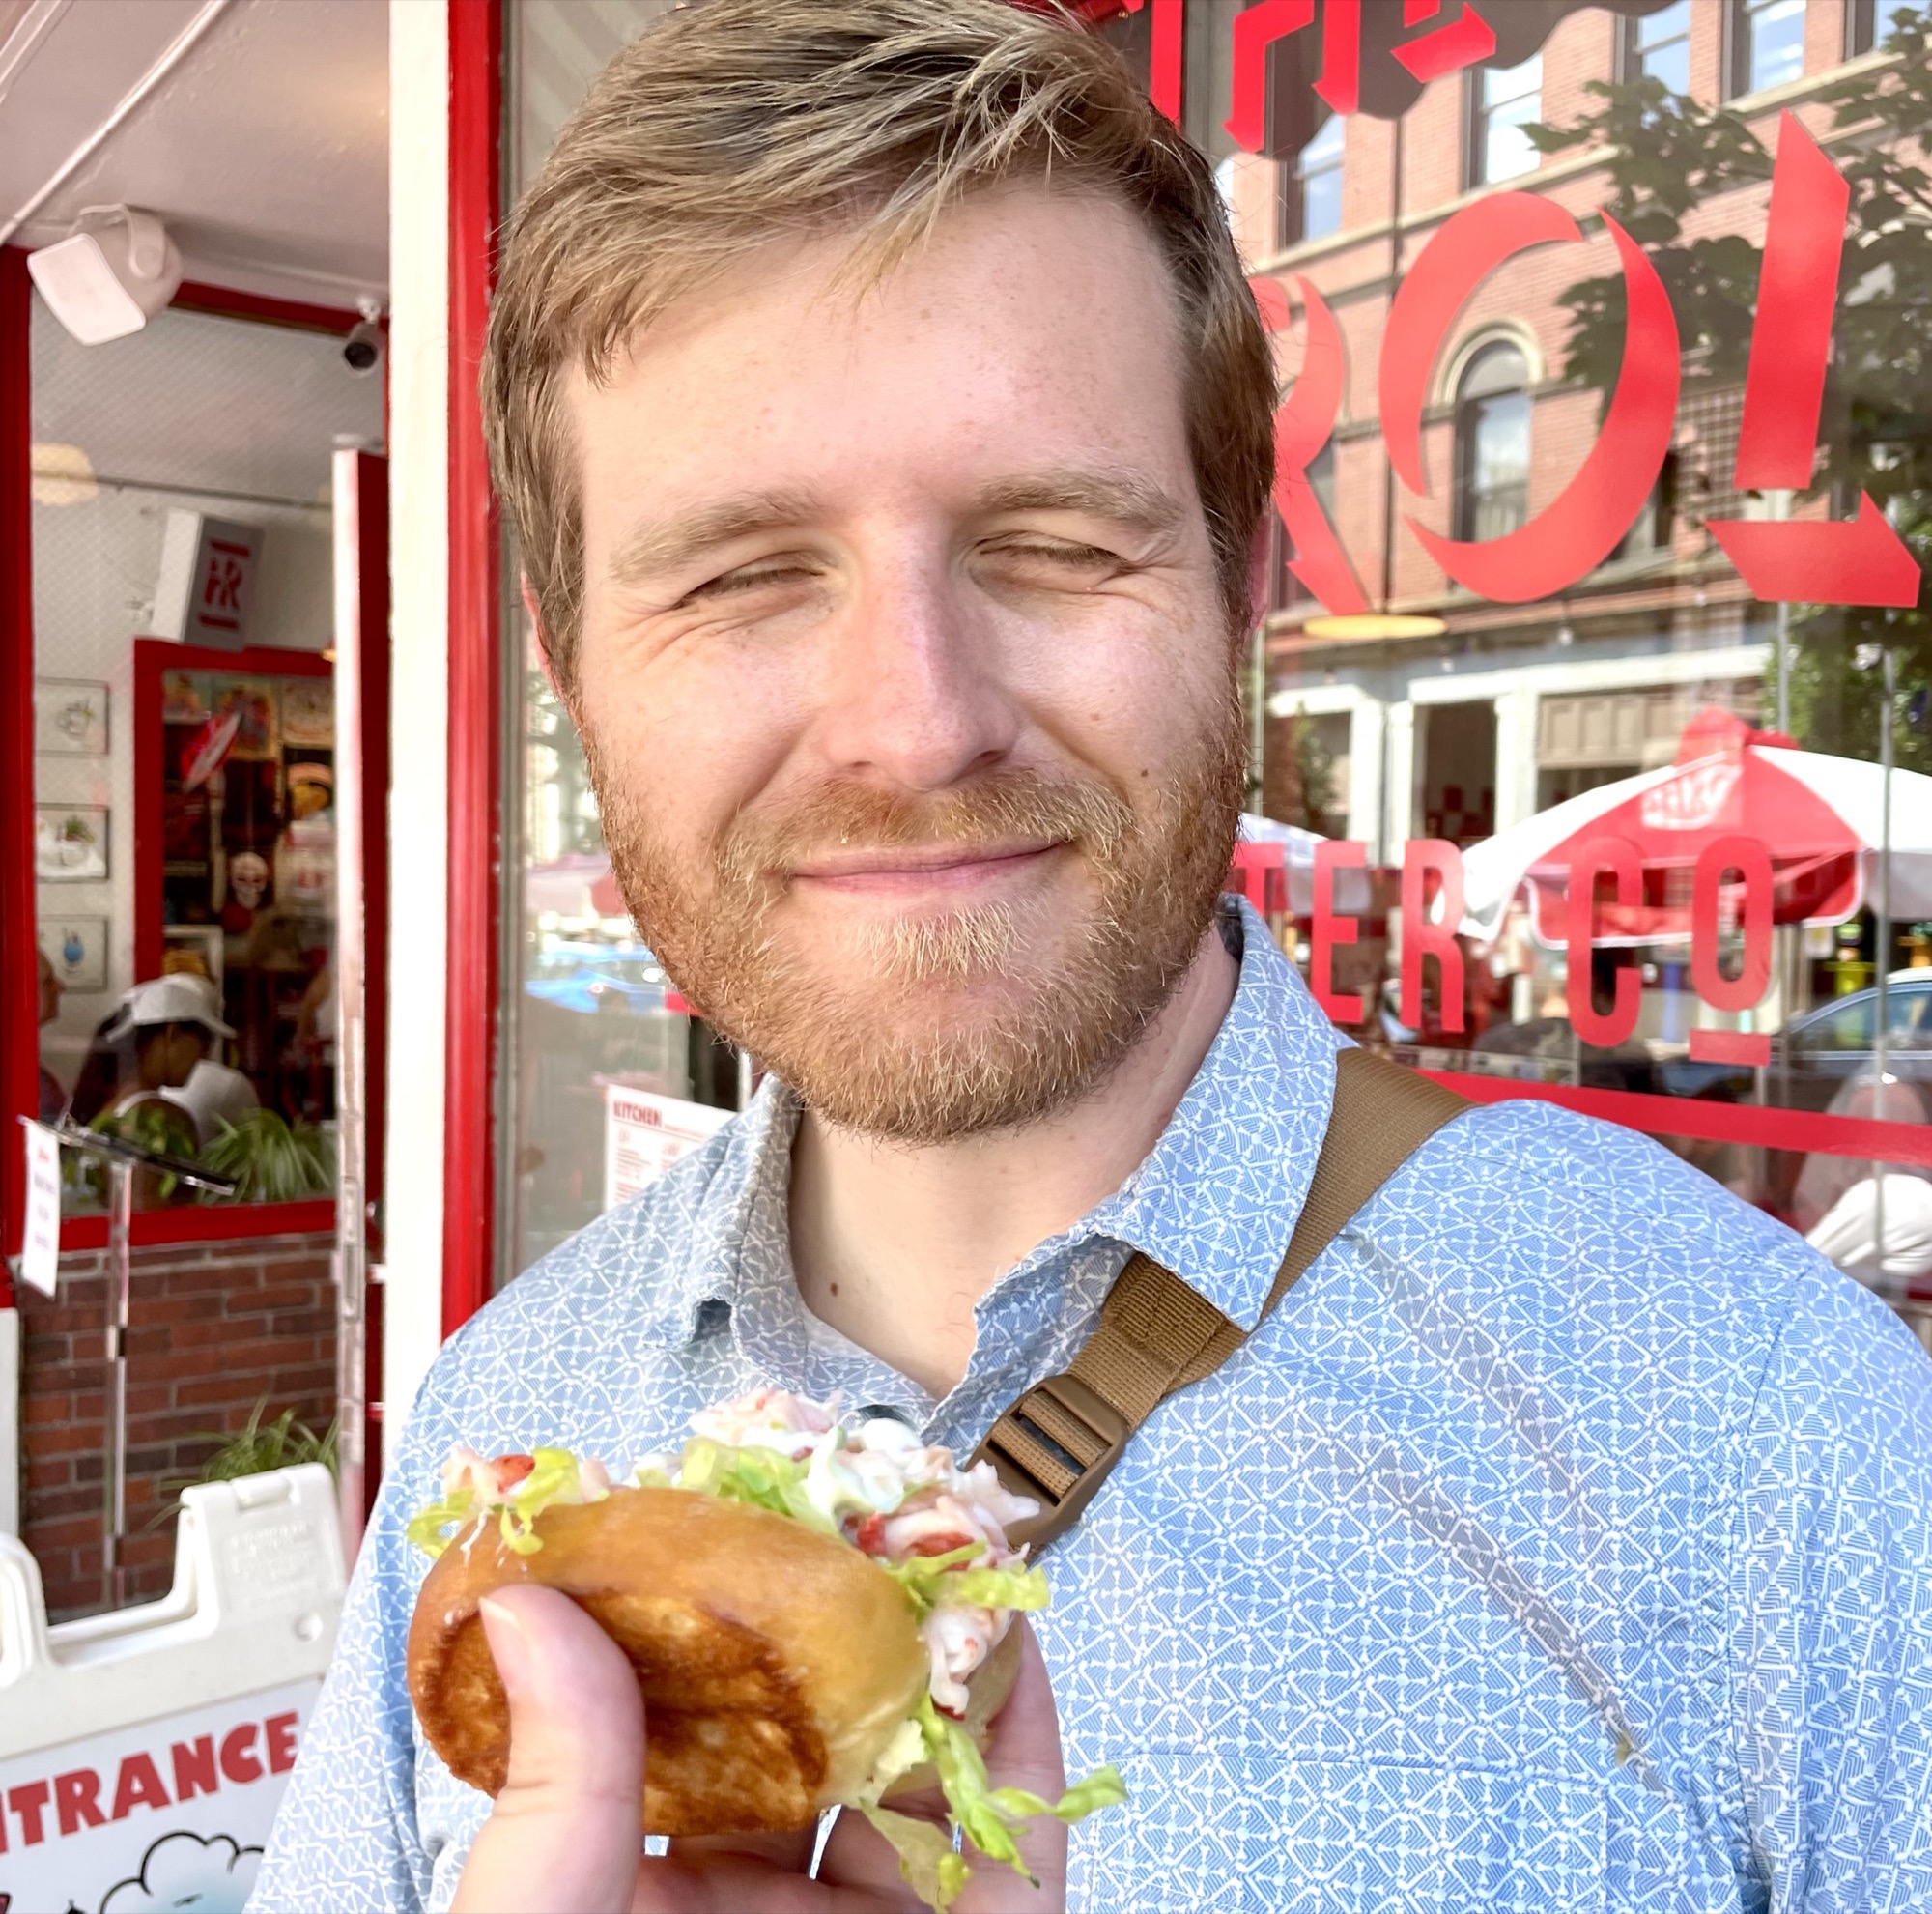
Date Published: March 25th, 2025 | Last Updated: Sept 8th, 2025
Author: Abby | Category: Travel, USA
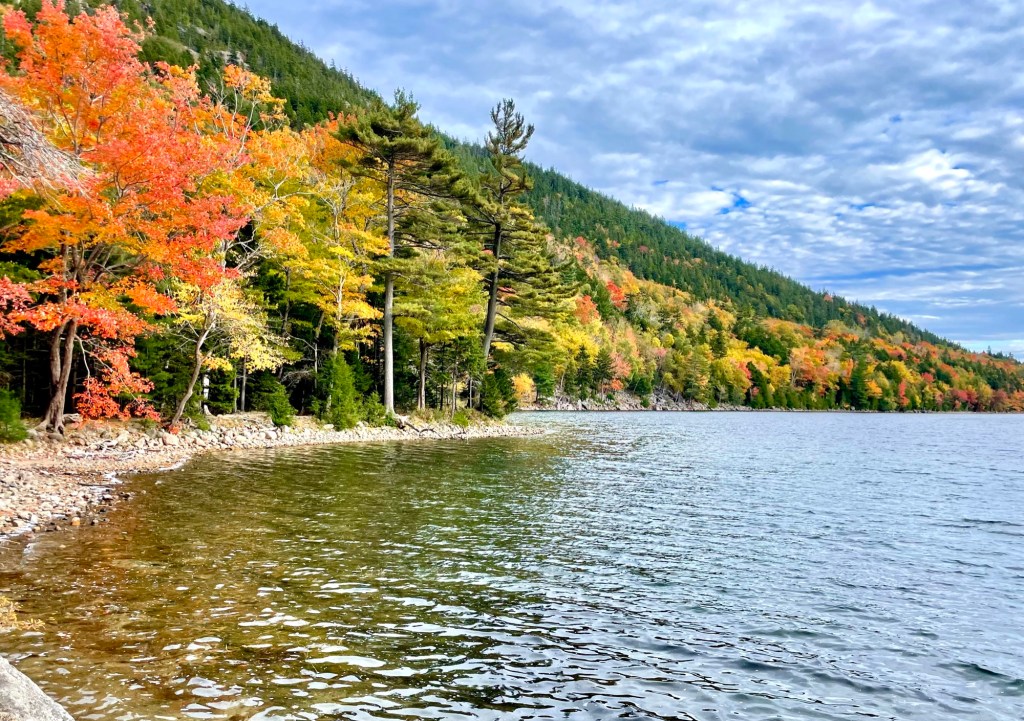
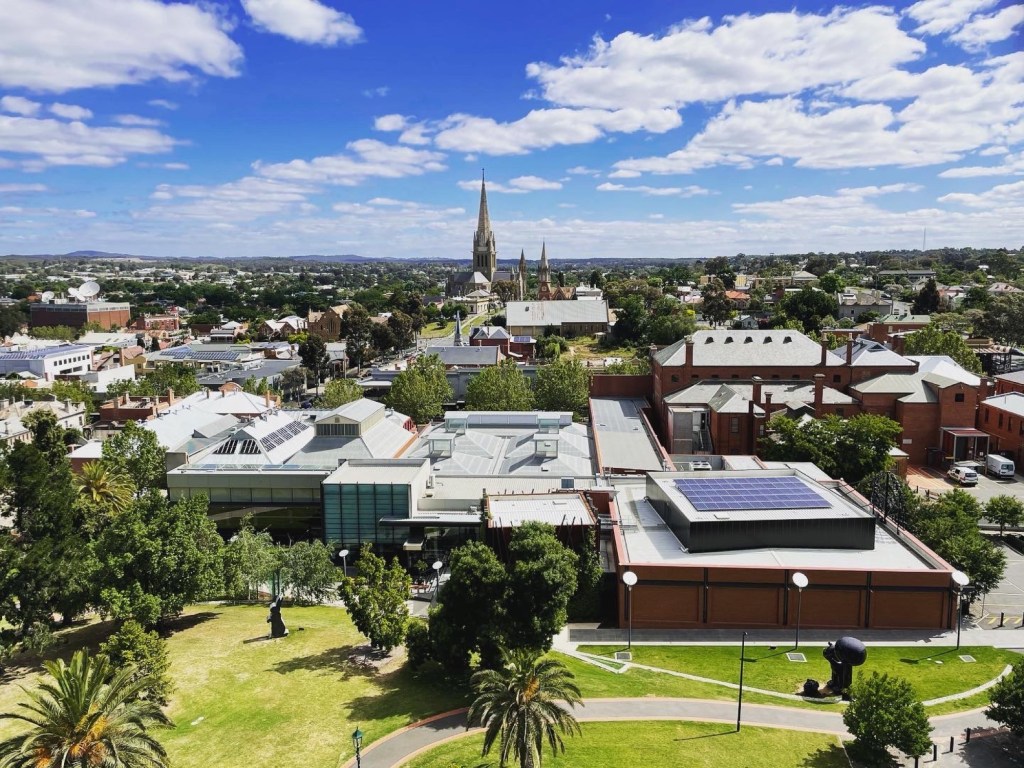
Since moving to Brooklyn 2 years ago, Toby and I have made numerous weekend trips to explore the city of Philadelphia. There’s so much rich history and interesting things to see there, but of course being a foodie, the highlight of every trip for me is the Philly Cheesesteak. Every time we think about making a trip, the first thing on my mind is which cheesesteak are we going to try this time? You could call it an unhealthy obsession. To tide me over between our Philly trips, I’ve come up with my own Philly Cheesesteak recipe that you can check out here.
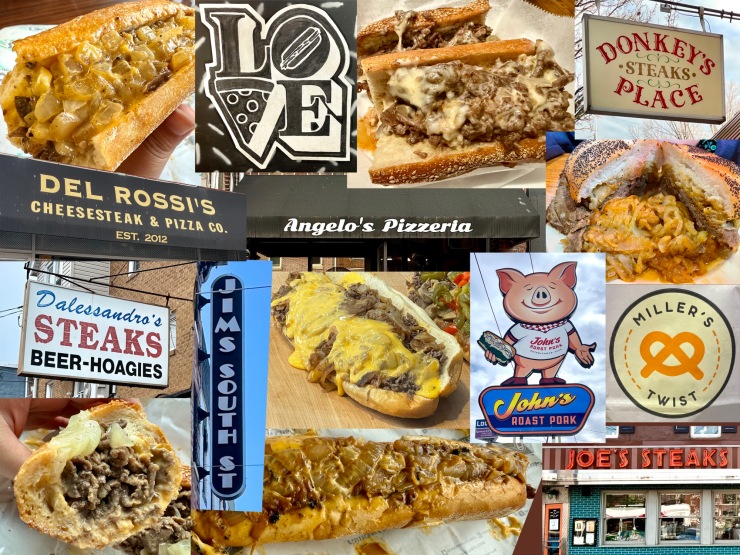
I’ve made it my personal mission to try as many popular cheesesteak spots as I can find through online research, word of mouth, and local reviews. This post is my personal take on these popular spots. I know there will be a lot of differing opinions and I’ve seen heated debates on who has the best cheesesteak, and at the end of the day the answer will depend on individual preference. There’s no one right answer – it’s like asking a New Yorker who has the best pizza. Everyone will have their own favourite and this post highlights some of my favourites and thoughts on these popular joints.
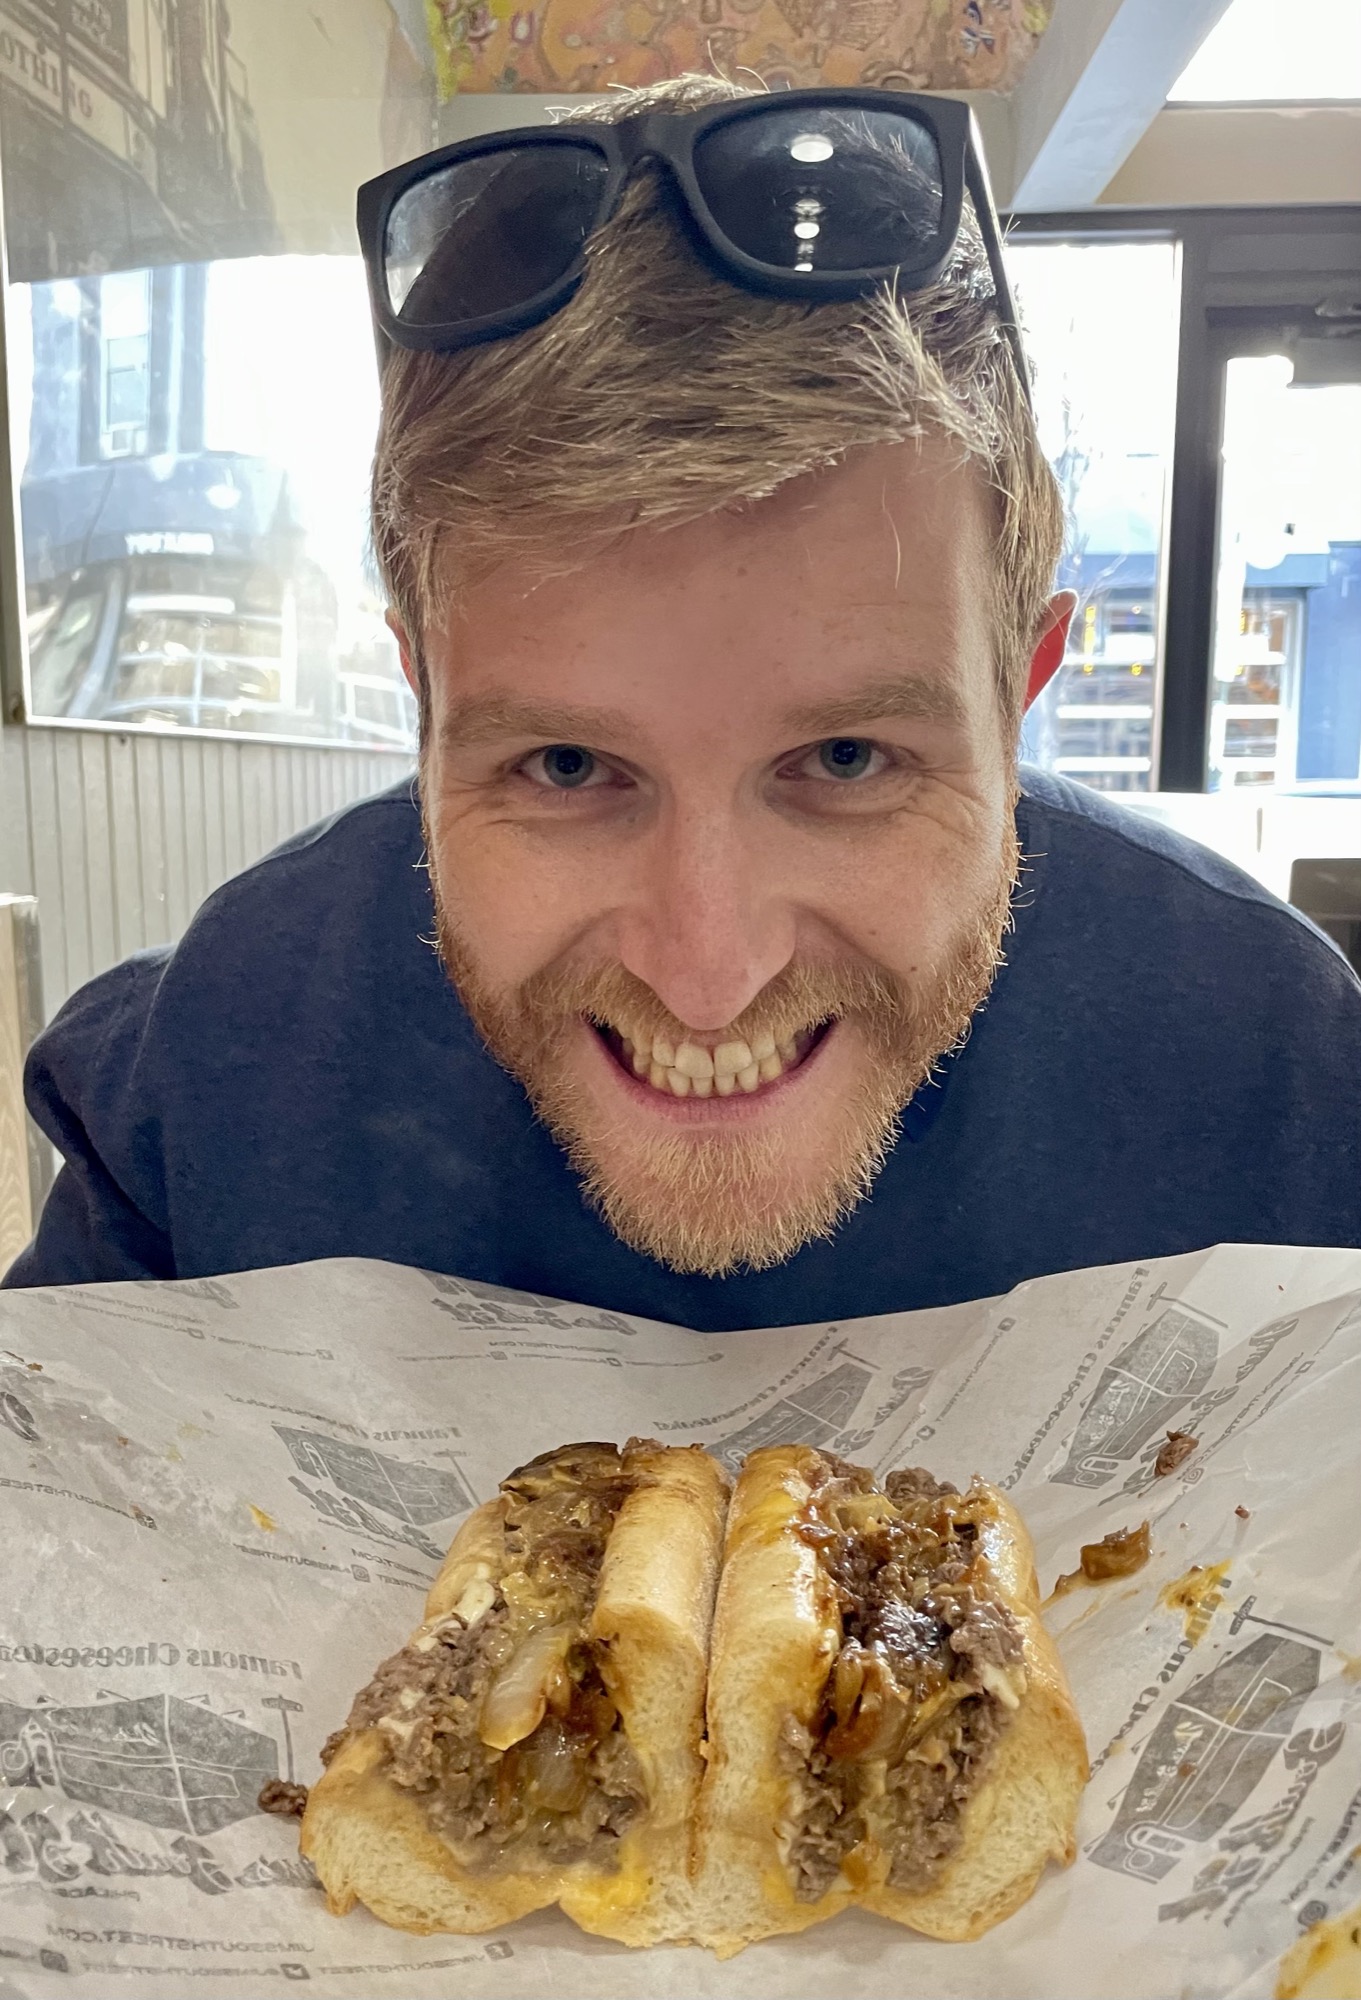
My go-to order: Whiz Wit with extra onions (cheesesteak with Cheez Whiz and extra onions). I keep my order consistent every time (where I can help it) so I have a standard of comparison between cheesesteak shops.
To skip this long detailed post, here’s a summary of my preferences:
- Best overall: Jim’s South St.
- Best onions: Donkey’s Place
- Best bread: Del Rossi’s (Angelo’s comes a close second)
- Best steak: Jim’s South St.
Keep checking back, I’ll be updating this post as we continue to eat our way through this great city!
Contents:
- What is a Philly Cheesesteak? What makes it so special?
- Dissecting the Philly Cheesesteak:
- Philly Cheesesteak Spots
- #1: Jim’s South St.
- #2: Dalessandro’s Steaks
- #3: Del Rossi’s Cheesesteak & Pizza CO.
- #4: Donkey’s Place (across the river in Camden, NJ)
- #5: Miller’s Twist – a pretzel cheesesteak
- #6: Angelo’s Pizzeria
- #7: John’s Roast Pork
- #8: Joe’s Steaks + Soda Shop
- #9: Sonny’s Famous Steaks
- #10: Woodrow’s Sandwich Shop
- #11: Campo’s Philly Cheesesteaks
- Pat’s and Geno’s – #12 & 13
- A note on Fedoroff’s Roast Pork (Williamsburg, NYC)
What is a Philly Cheesesteak? What makes it so special?
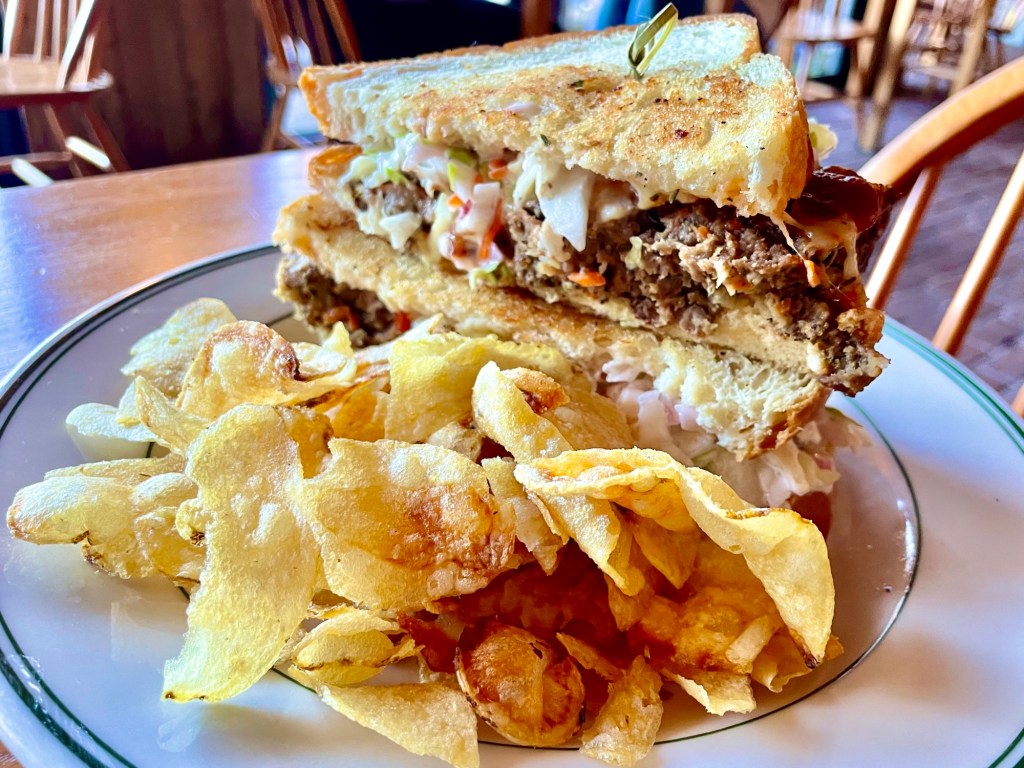
A Philly Cheesesteak is a sandwich that is essentially bread, cooked steak, and cheese. The combination of these 3 ingredients don’t sound like much, but it’s the quality of the bread, the tenderness and juiciness of the beef, and the cheesy goodness all combined together that makes this sandwich magical. There’s no fancy truffle aioli, or a complex combination of marinades and spices. It’s just simple ingredients made well. Also be prepared – a good cheesesteak tends to be pretty greasy so pack your wet wipes!
Dissecting the Philly Cheesesteak:
Bread:
The traditional sandwich bread for a cheesesteak is a long Italian roll. It should be soft and chewy on the inside but with a light crust on the outside. The bread roll should have enough structure to hold up your sandwich while absorbing the delicious dripping juices without it being too soggy. It also shouldn’t be too tough that it becomes difficult to bite through.
Steak:
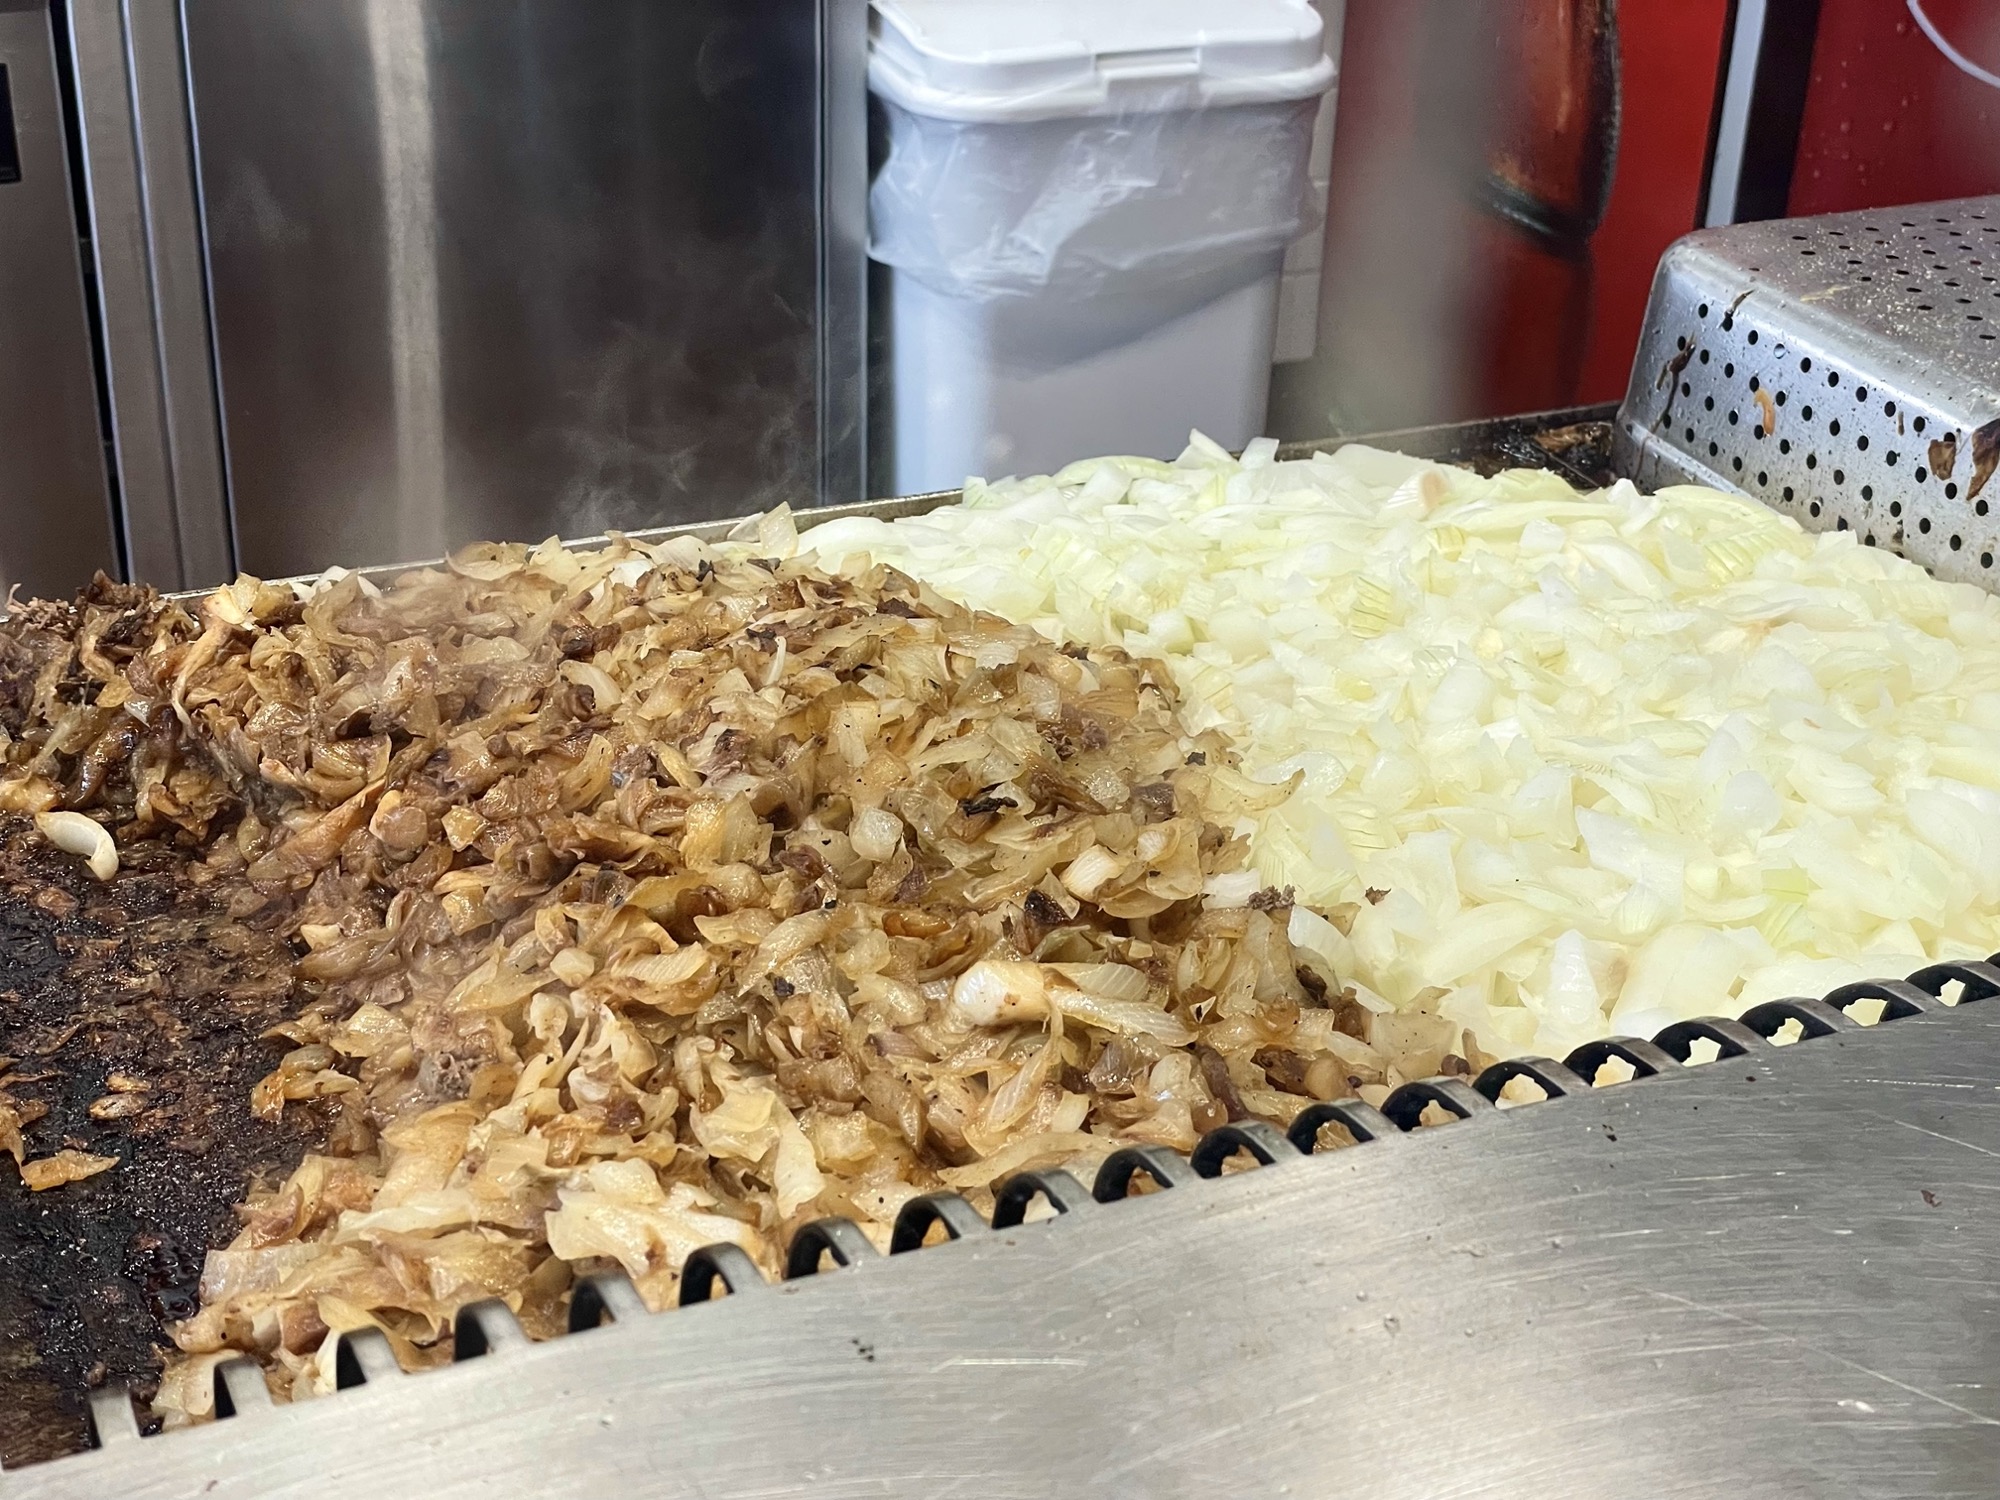
Rib eye is usually the go-to meat for a cheesesteak. It’s tender, somewhat fatty, and flavourful all at the same time. It’s sliced super thin before cooking on a flat top grill and comes out looking almost like ground beef (depending on how thin they slice it) with little folds that hold in all the juices. The first sounds you hear when walking into a cheesesteak shop is usually the clanging and banging of the metal spatulas on the flat top grill as they cook up the steak.
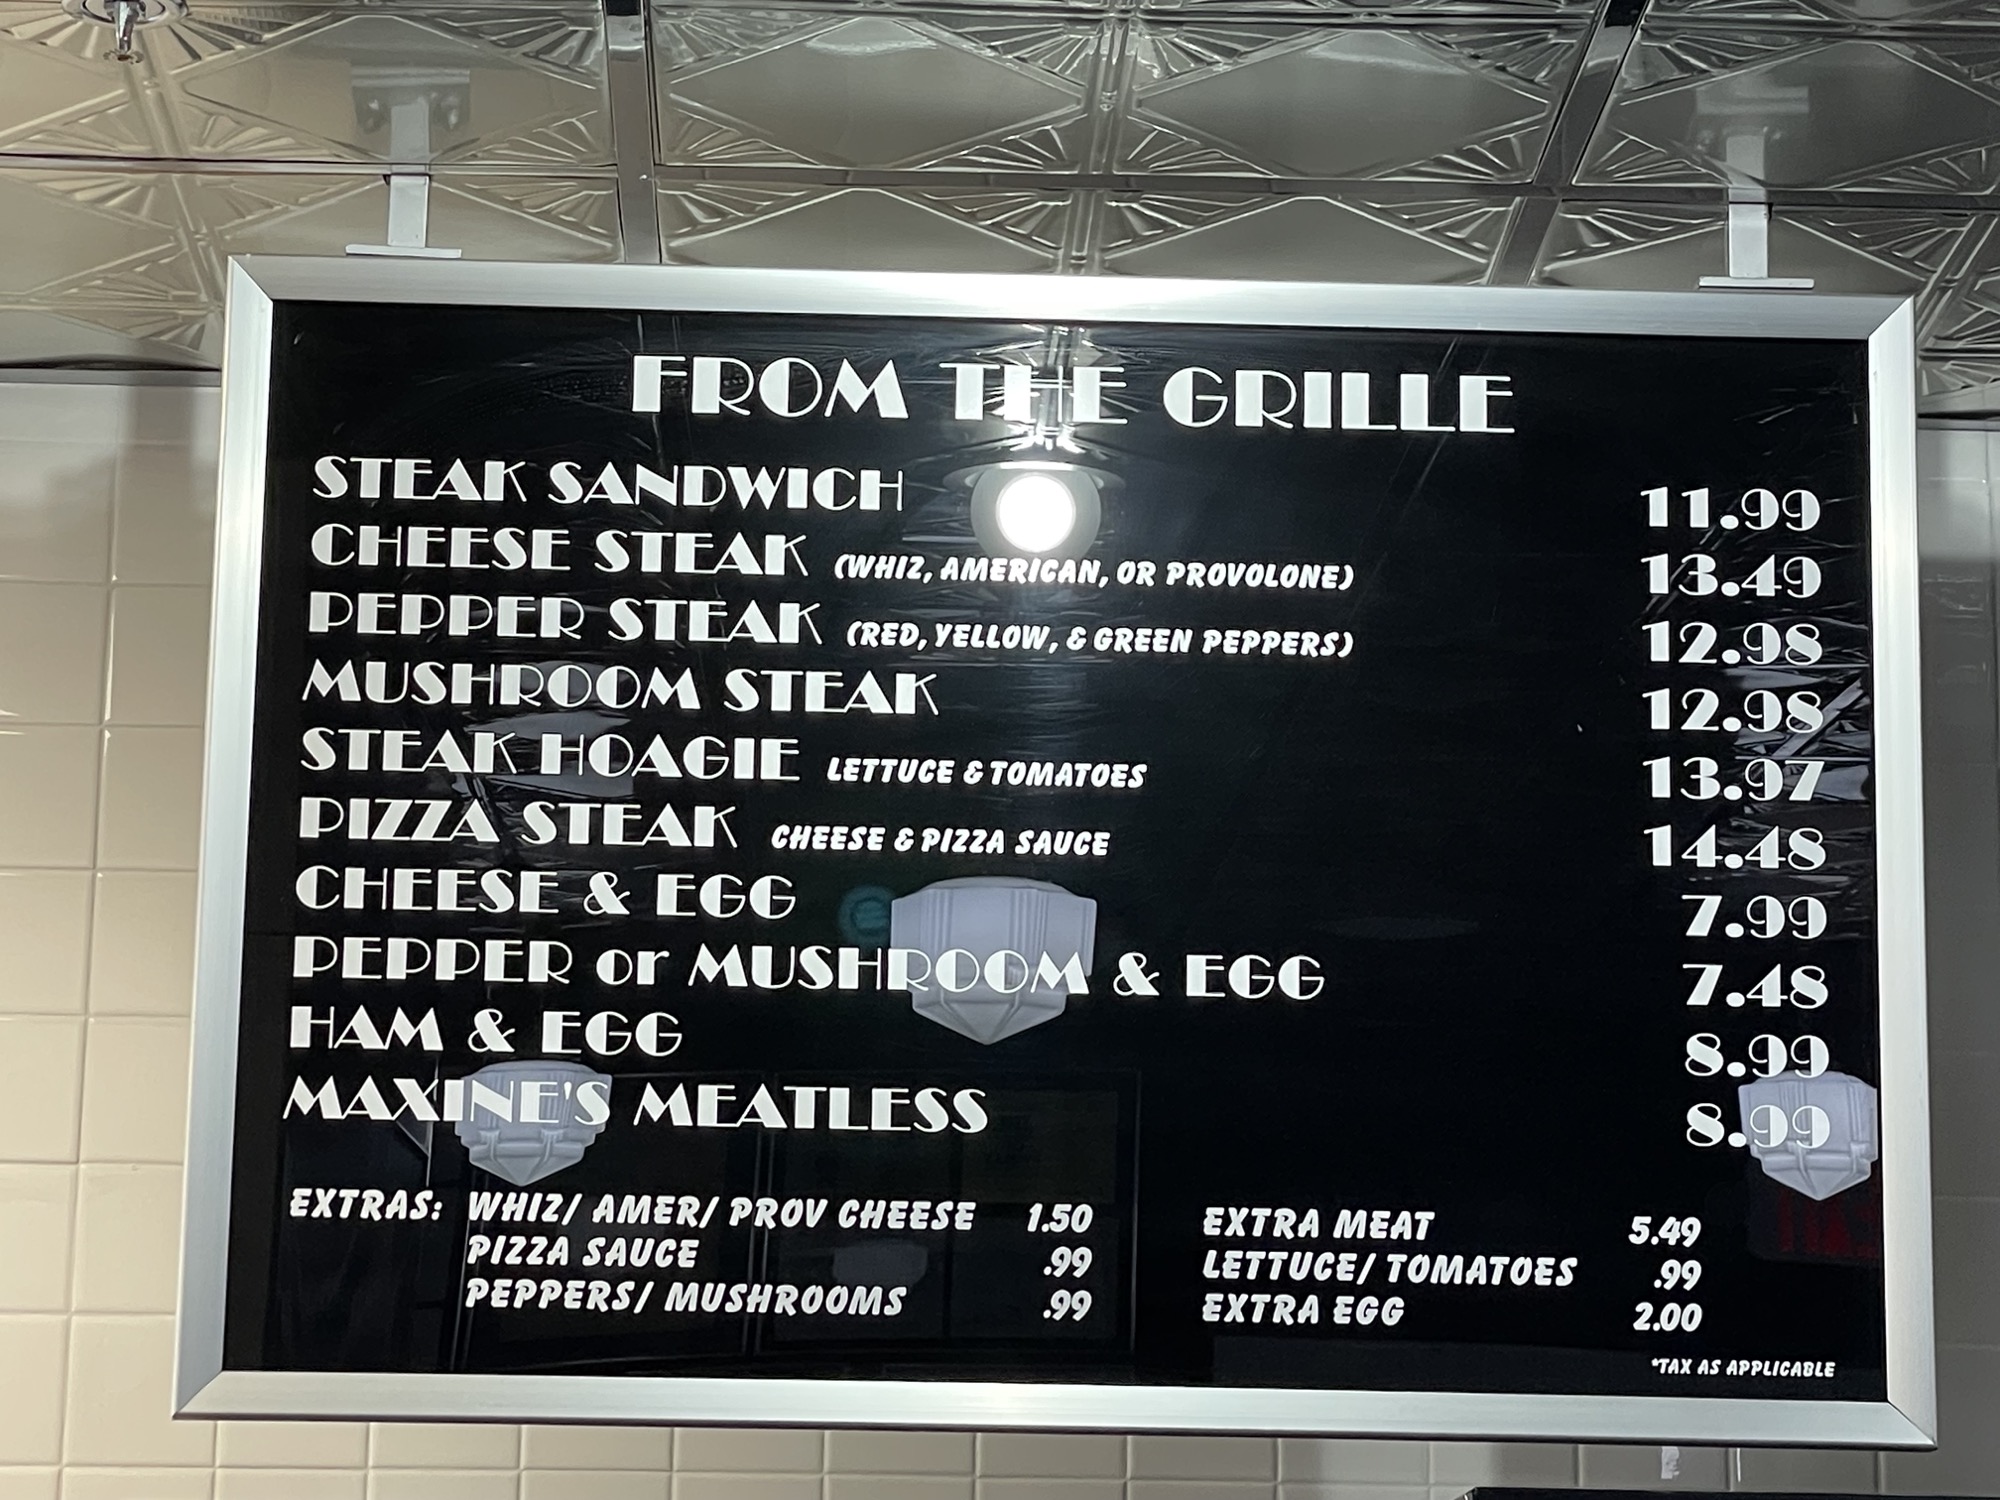
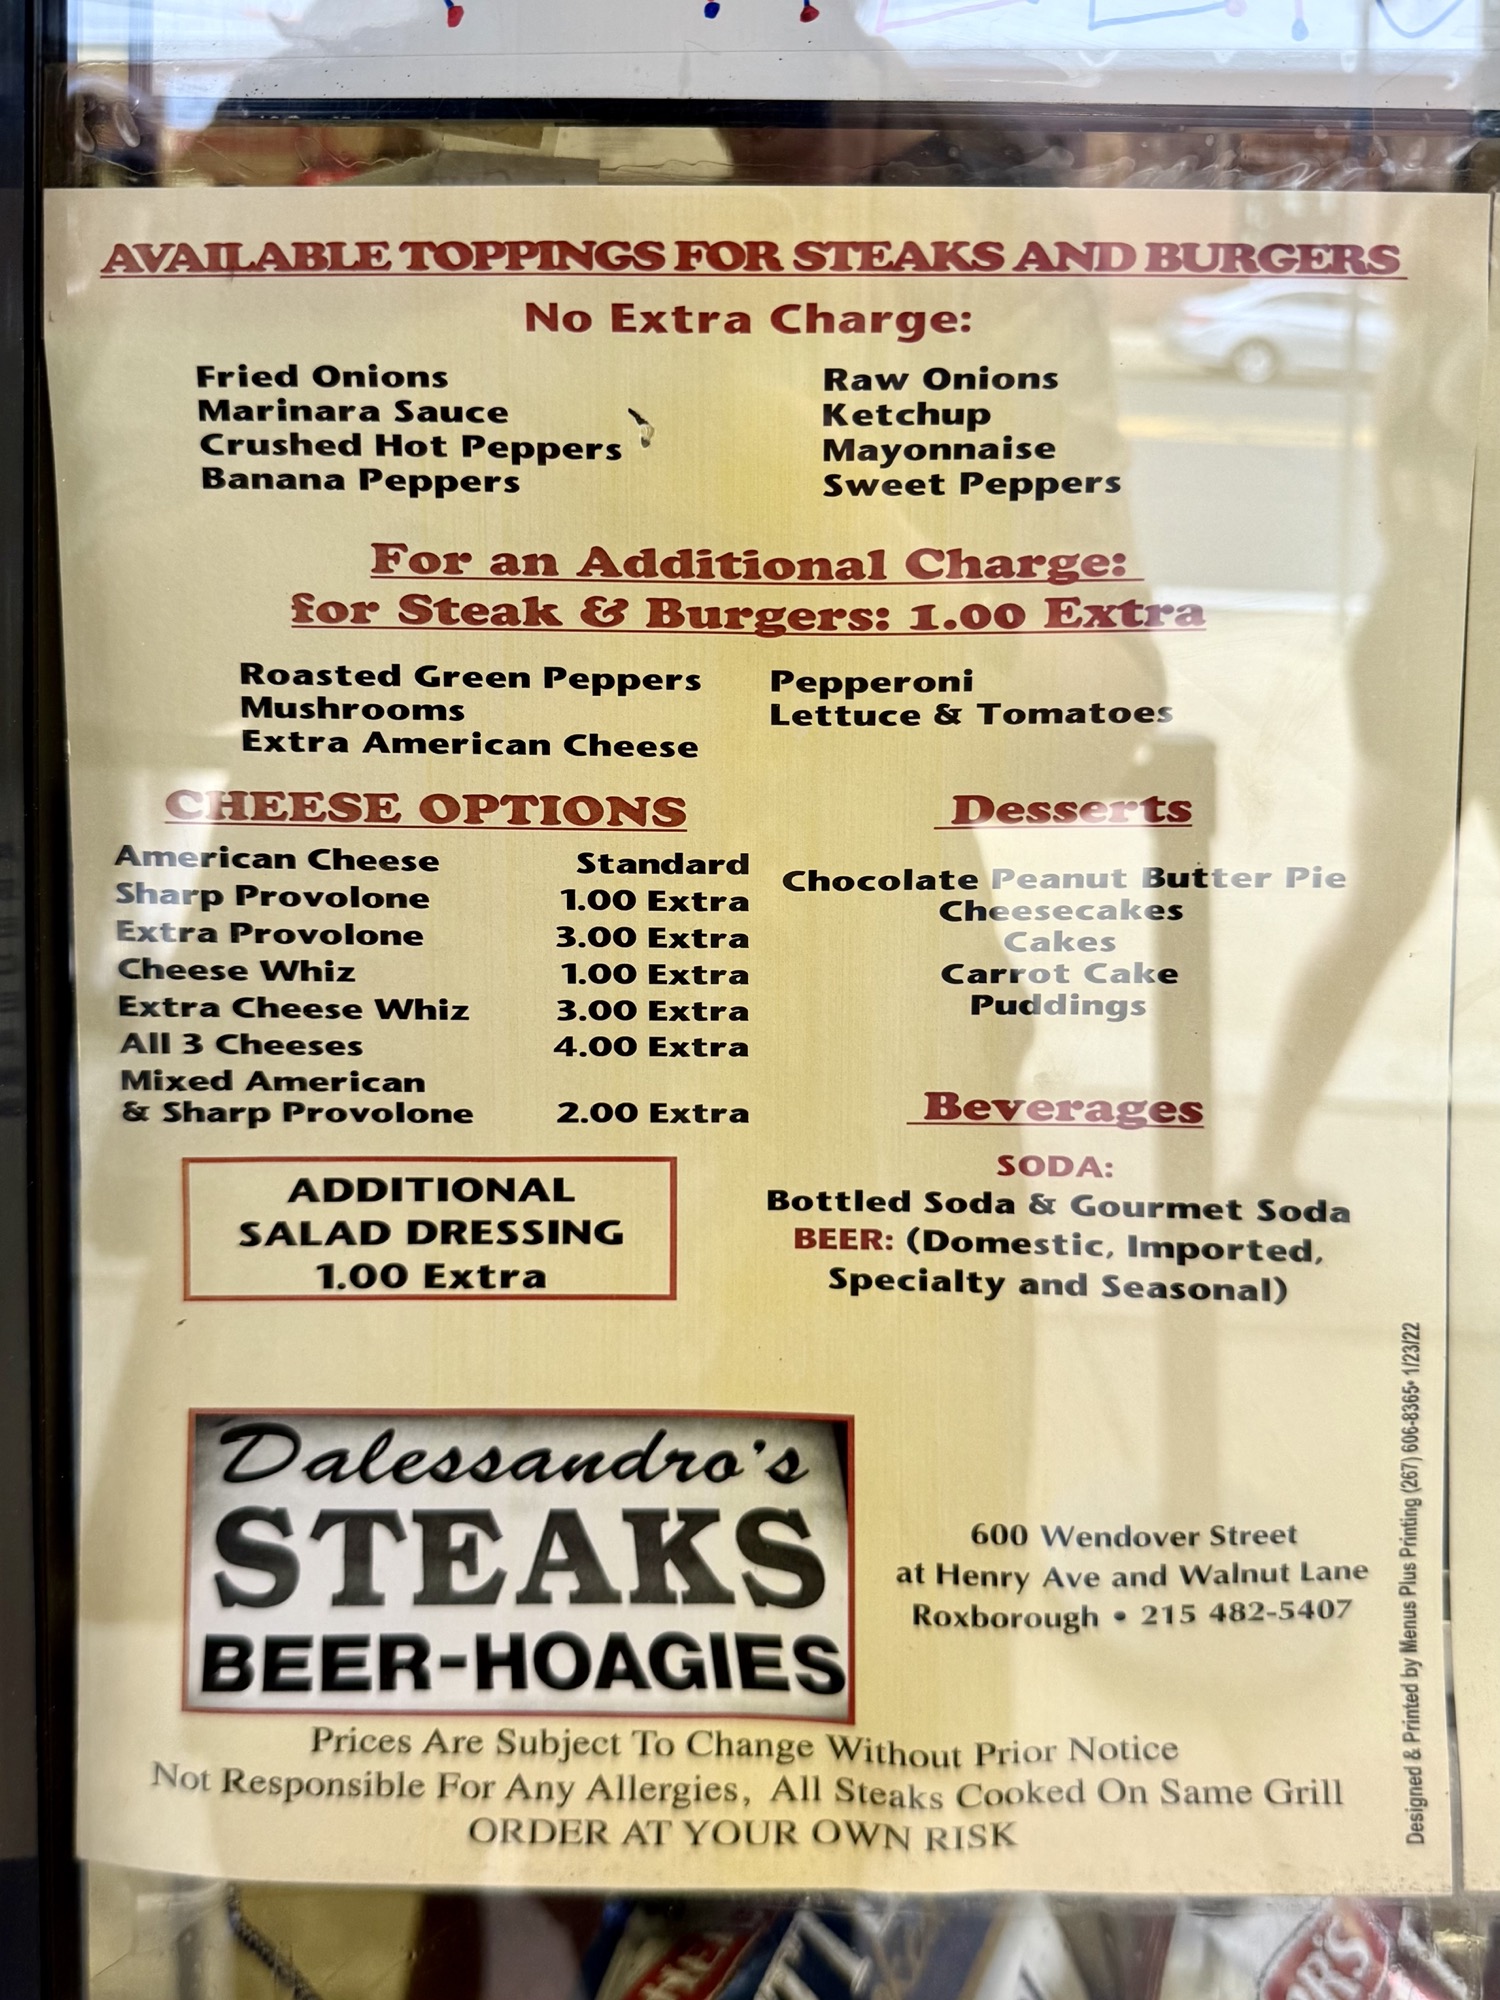
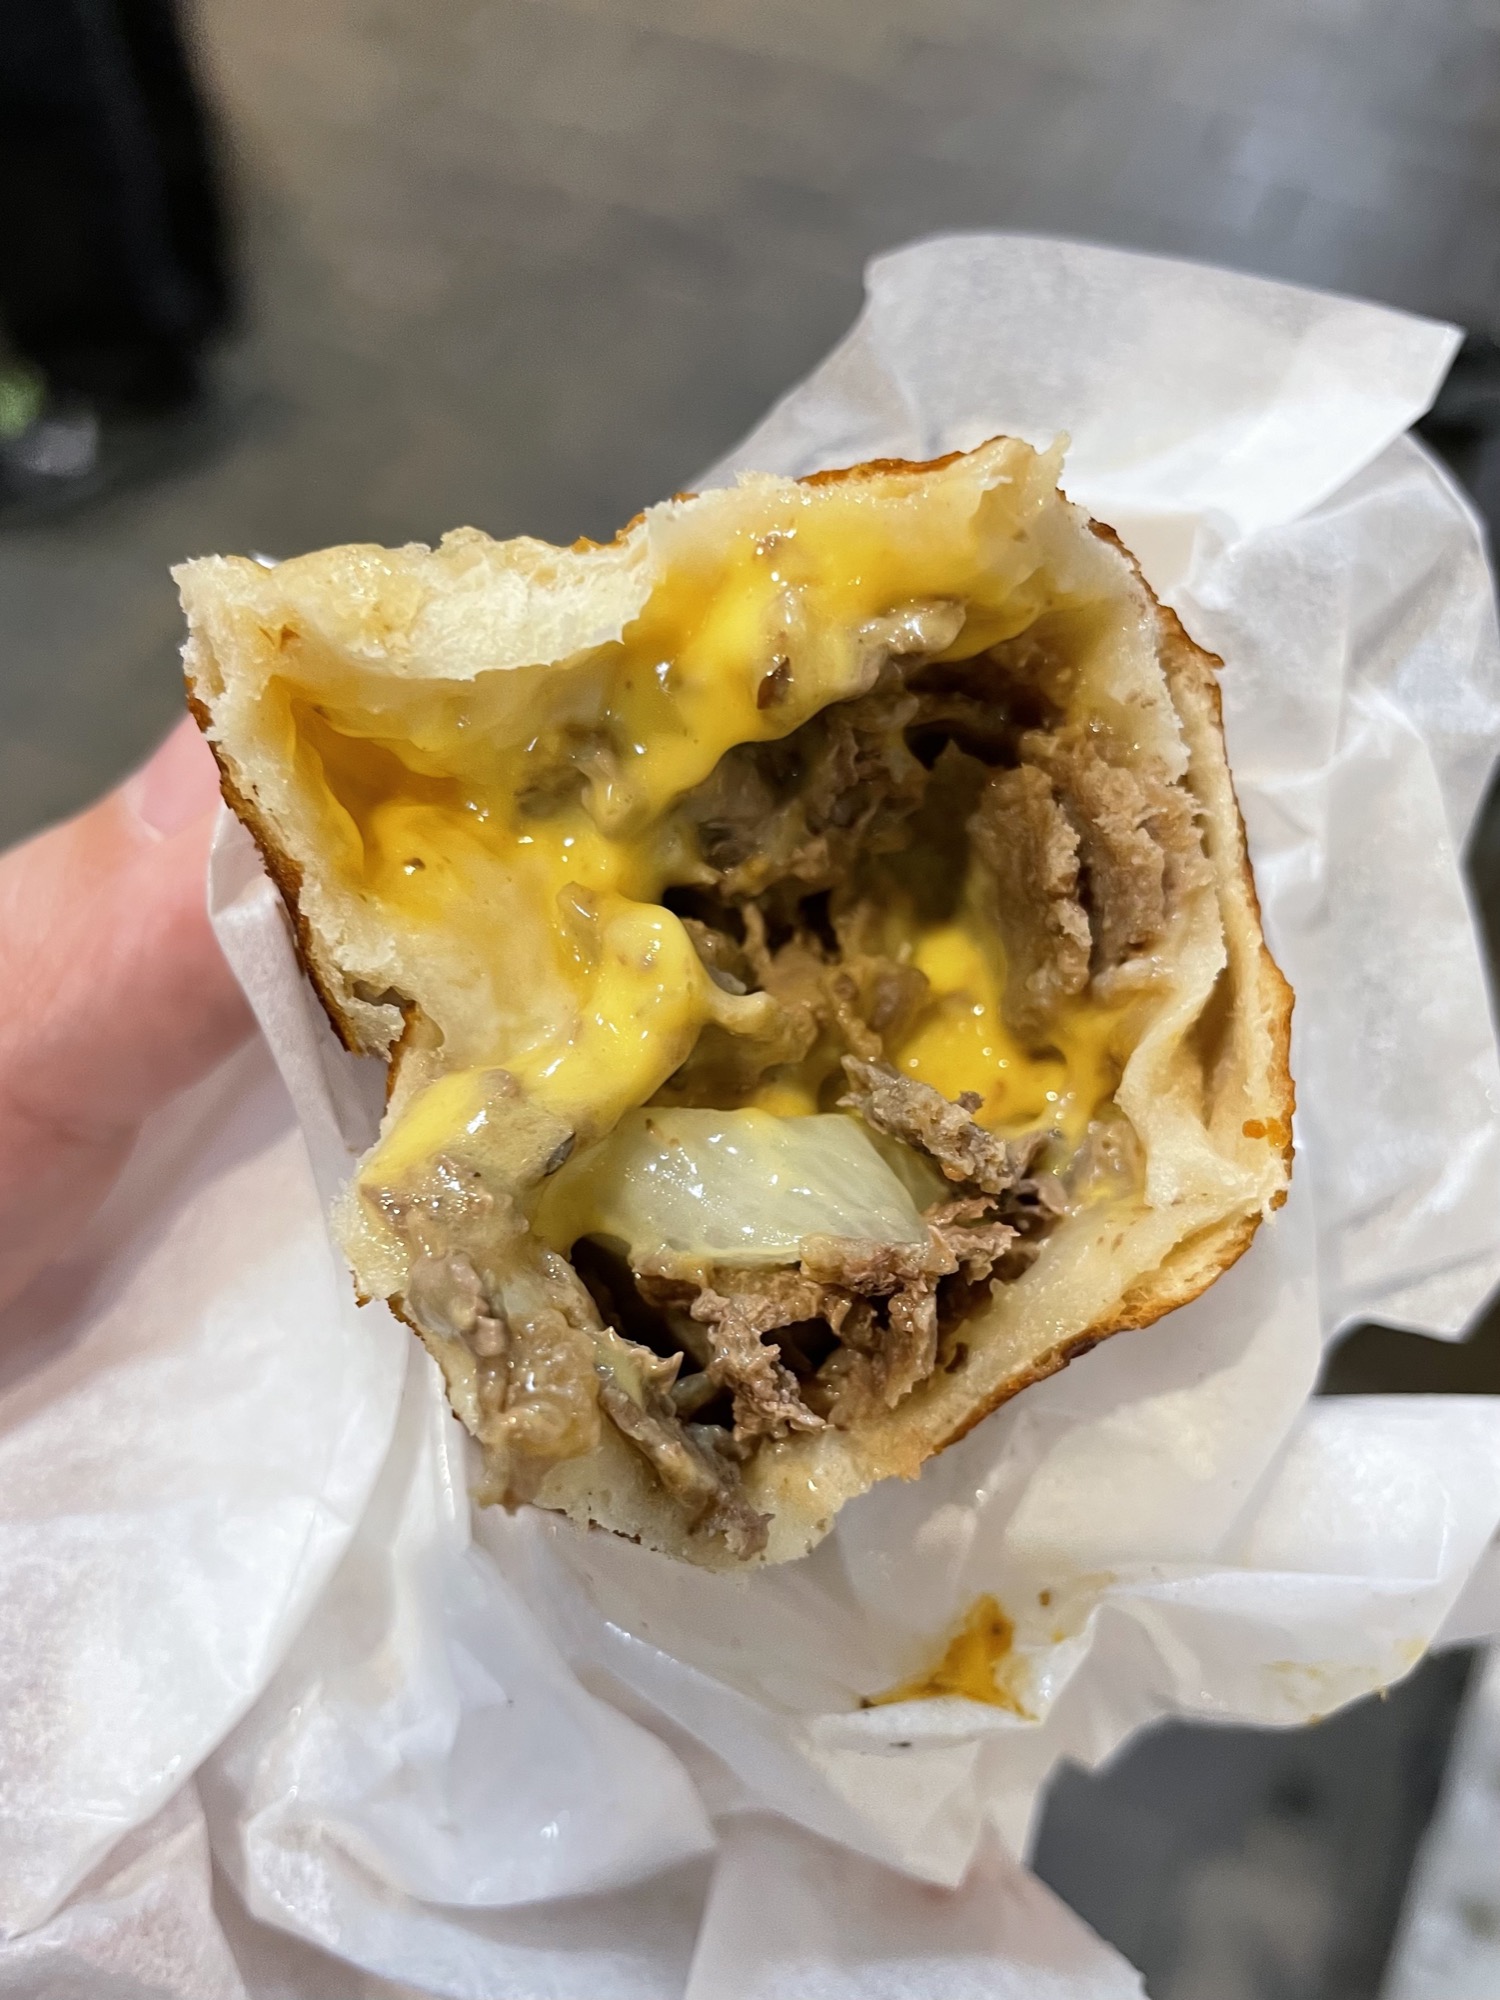
Cheese: Provolone, Cheez Whiz, American Cheese, or Cooper Sharp?
For the readers that are unfamiliar to the cheesesteak life, when you order a cheesesteak, you have to choose what kind of cheese you want. The 3 options are usually Provolone, Cheez Whiz, or American Cheese. Of these 3, provolone is the only “real” non-processed cheese, but I find it to be the most subtle in flavour compared to the others. American Cheese is processed cheddar slices (ie. Kraft singles), and Cheez Whiz is a processed liquid “cheese” sauce that tastes like a melty version of American cheese to me. In more recent years, Cooper Sharp has entered the cheesesteak game which is also another type of processed cheese but has a sharp bold flavour and melts well. Of all these options, Provolone and Cheez Whiz seem to be the two most popular choices. I’m team Cheez Whiz all the way (with Cooper Sharp coming in at a close second), but lately Toby has been leaning towards the provolone. If you’ve never had a cheesesteak before, I’d recommend getting one of each and trying it out for yourself!
Fun fact: The local Philly slang for a cheesesteak with cheez whiz and onions is called a “whiz wit”.
My first cheesesteak side story: When Toby and I went to order our first ever Philly Cheesesteak, we had no idea that there were cheese options! The guy at Jim’s didn’t specifically ask us what cheese we wanted. He instead asked “Provolone?”. In a moment of panic, we just said “yes”. Surely provolone is the most popular option, otherwise he would’ve led with a different cheese choice, right? Sad to report, I was disappointed by the provolone because I couldn’t really taste it and I expected a cheesesteak sandwich to be cheese-forward in flavour – after all, it’s in the name. Maybe we chose the wrong cheese? Maybe we should get extra cheese? After polishing off our sandwich, Toby went right back in line and ordered another one, this time with Cheez Whiz – the gooey orange cheese that you see in so many iconic photos of a cheesesteak. After taking the first bite, we were in love! This was it. The Cheez Whiz made all the difference. This gooey fake cheese product penetrated through the layers of the beef and onions and melded the flavours together into a mess of greasy cheesy delicious goodness. Ever since that visit, Cheez Whiz has been my go-to, although I was also quite impressed by Cooper Sharp at Del Rossi’s.
Optional Toppings:
Onions are optional, but essential in my opinion. They’re usually cooked to just browned and softened with a bit of a bite. I prefer the cheesesteak joints that take it a little further and slightly caramelize the onions to add a bit of sweetness to contrast the heavy sandwich. Some places will offer fried or even raw onions.
Sautéed bell peppers are another popular add-on, but I find it too distracting from the rest of my sandwich so I tend to skip it.
Sautéed mushrooms are not as popular of a topping and not always offered, but I just love mushrooms in general and I find that it adds a nice texture to the sandwich. Toby prefers it without.
Other common toppings: hot banana peppers, relish, ketchup, mayonnaise, and mustard. Some places will have a side stand of these extra toppings to add on yourself. I prefer my cheesesteak with just onions and mushrooms, but Toby will sometimes add relish for a bit of sweet vinegary kick.
Philly Cheesesteak Spots
Without further ado, here’s a list of popular cheesesteak spots around Philly that we’ve tried and my honest opinions about them. With such limited ingredients in a cheesesteak, a good cheesesteak needs to be on point with all 3 ingredients: bread, steak, and cheese.
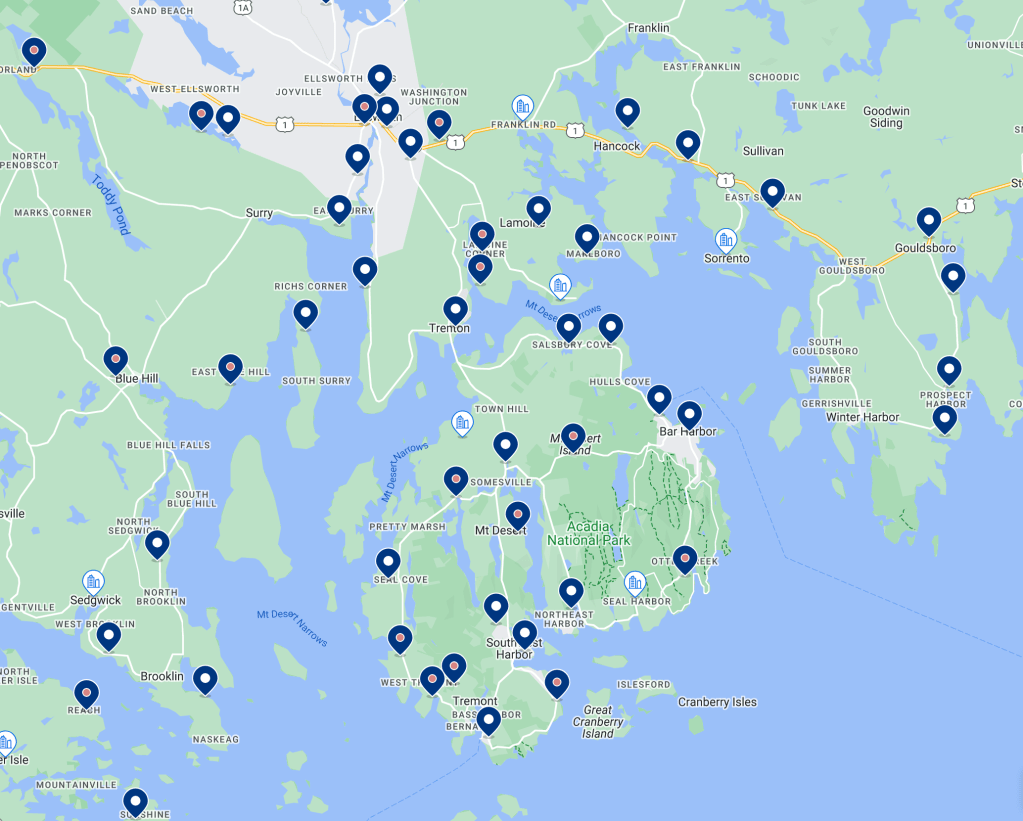
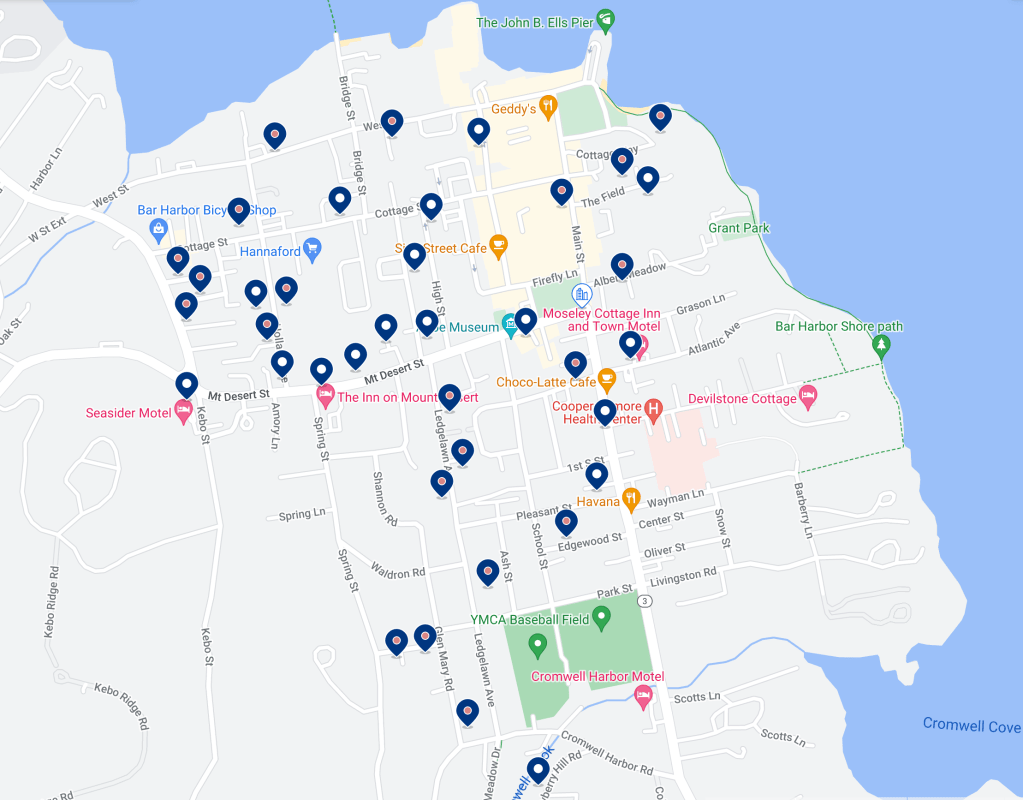
I’ve ranked them from our favourite to least. Keep checking back, I’ll be updating this list and re-ranking as we continue to check out more cheesesteak spots! I’ve also made a handy-dandy map for an overall view of where all these spots are located. 😊
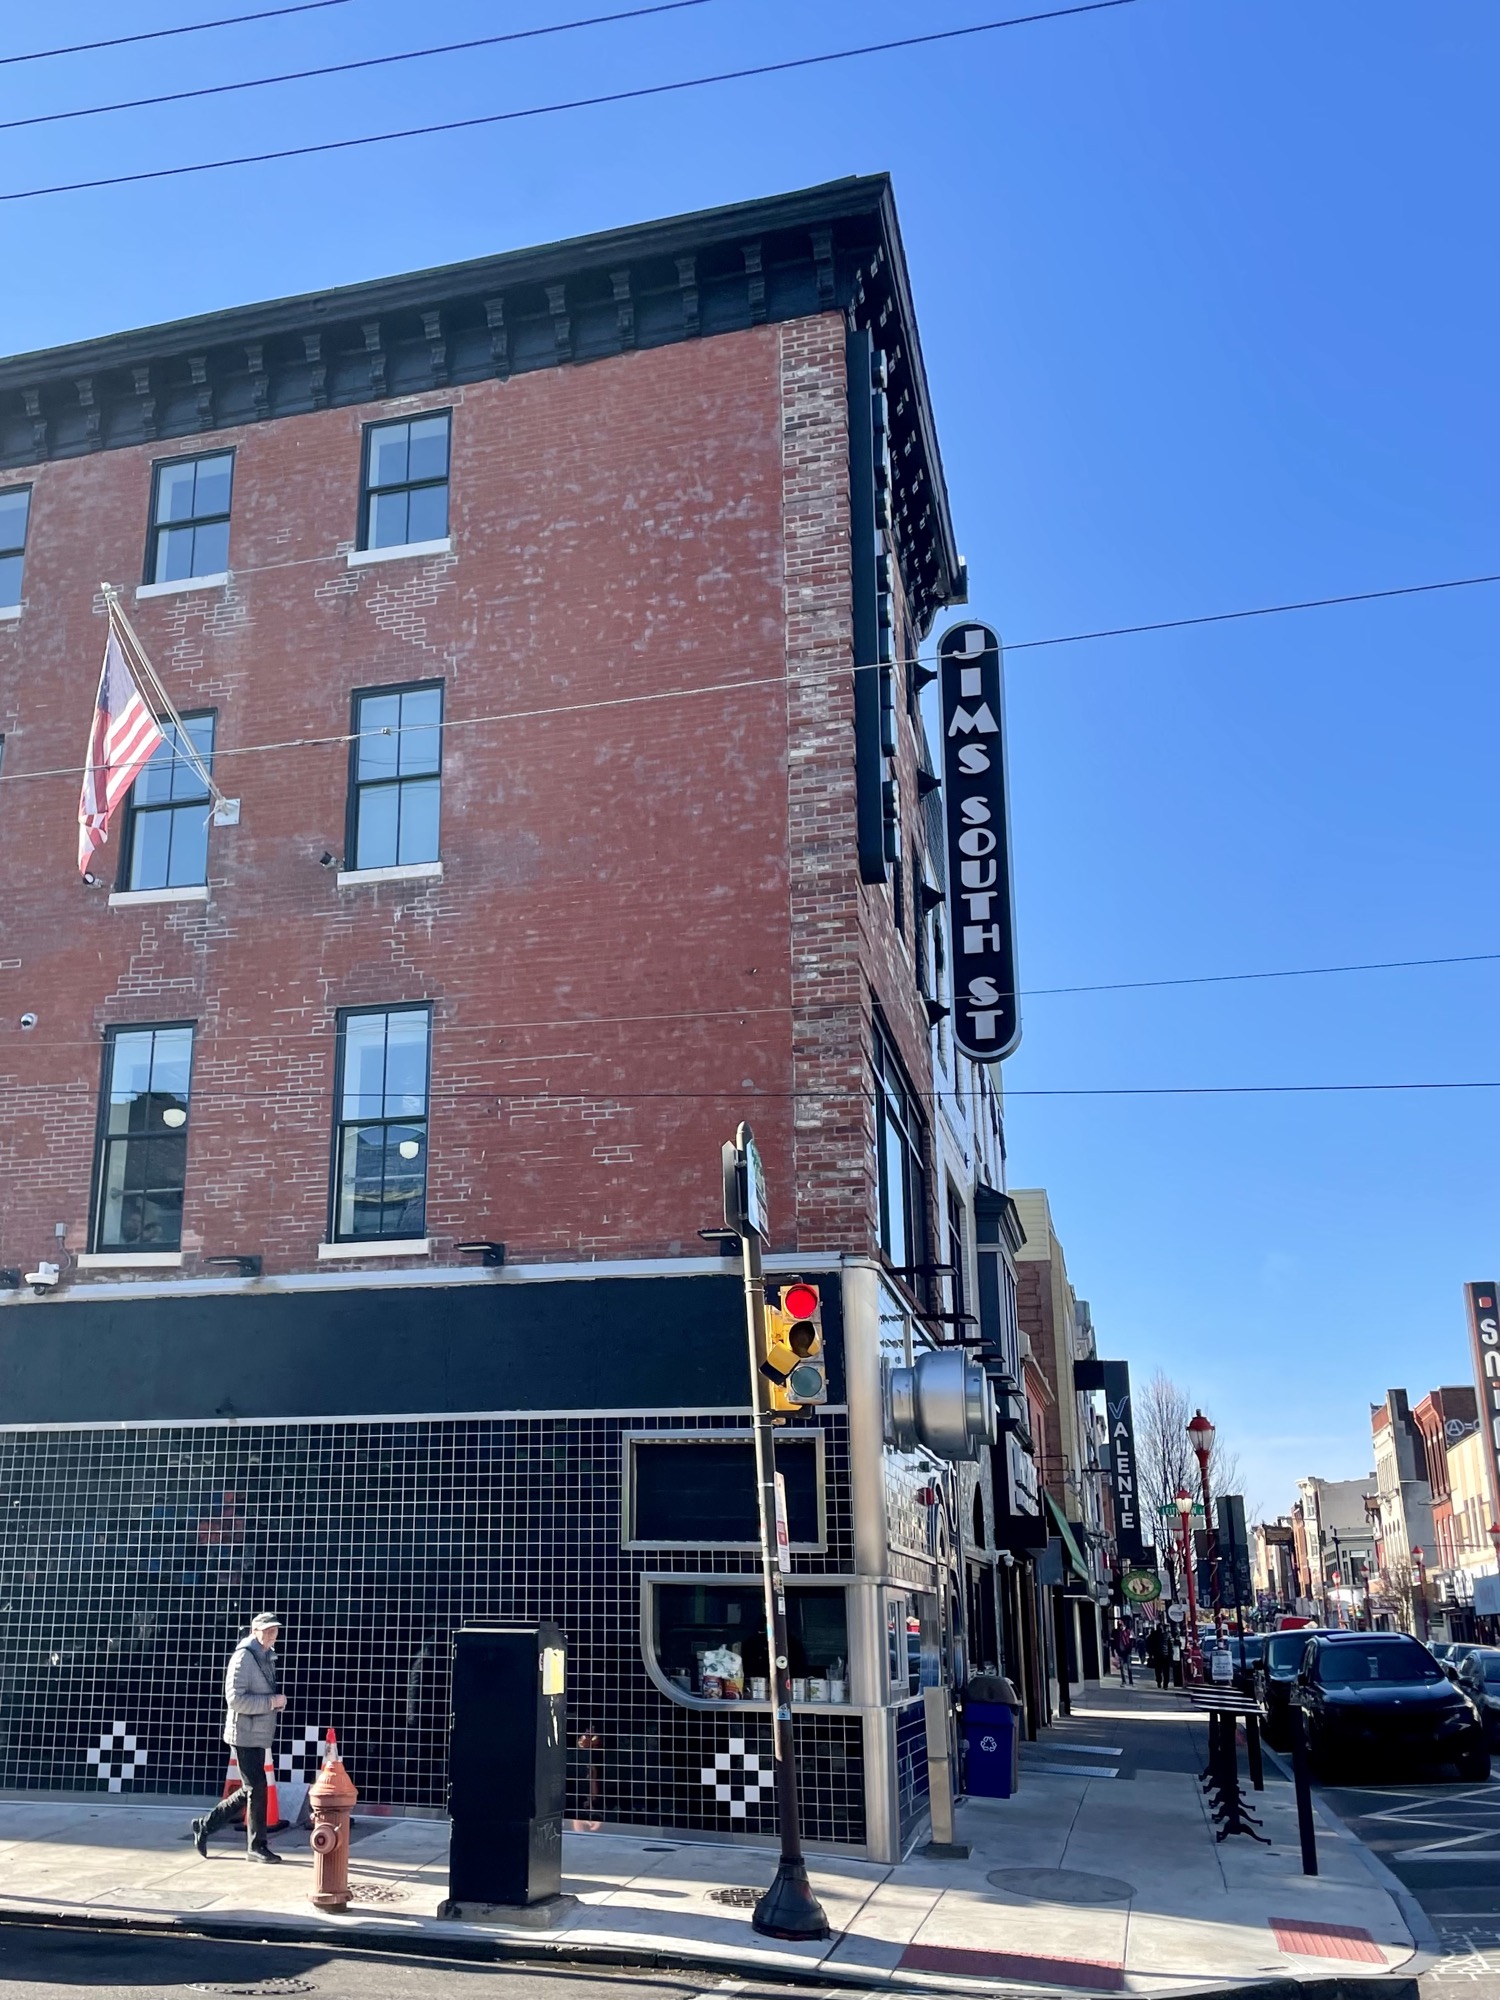
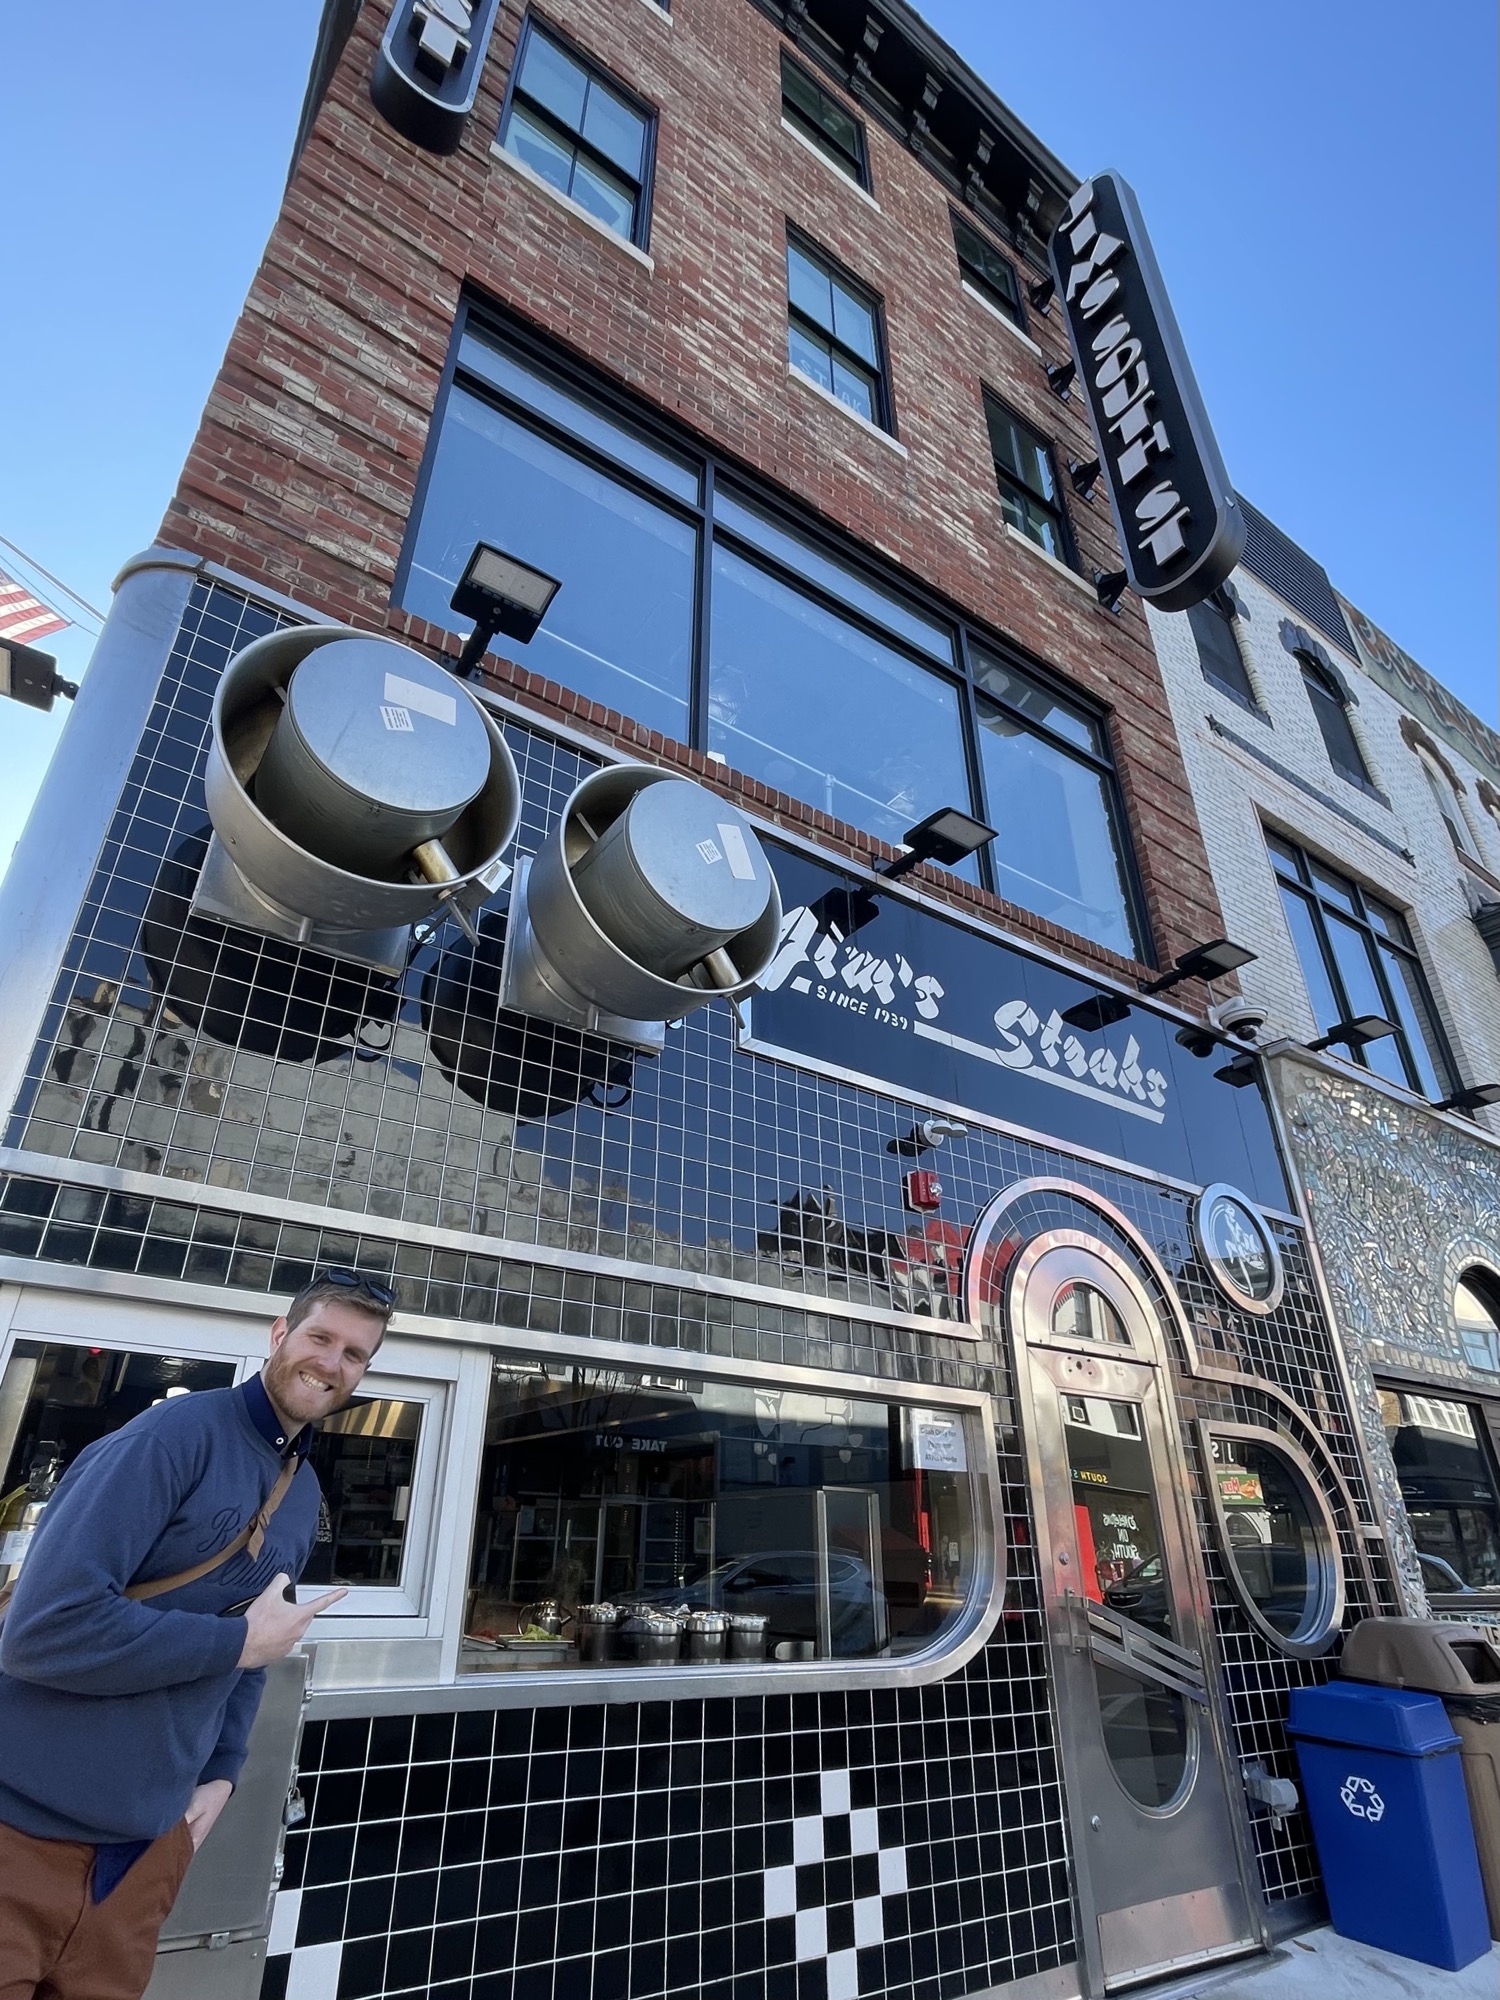
#1: Jim’s South St.
Address: 400 South St, Philadelphia, PA 19147
Website: https://jimssouthstreet.com/
Hours: 11am-12am most days (check the website for updated hours)
Cheesesteak: $13.49 (before tax)
Pros:
- Always consistent
- Moist juicy cheesesteak
- Good pricing
- Good location for tourists, about a 15 minute walk from the Liberty Bell
- Onions are lightly caramelized giving it extra flavour
- Indoor seating available
- Takes both cash and card
Cons:
- Smaller size sandwich (however $2-3 cheaper than most places)
Jim’s South Street is an easy local favourite. Throughout my research of finding the best cheesesteak in Philly, Jim’s came up again and again. It’s easily accessible and is located on the busy South Street with plenty of other restaurants and bars on this strip. Jim’s first opened up in 1939 and has been serving quality cheesesteaks since.
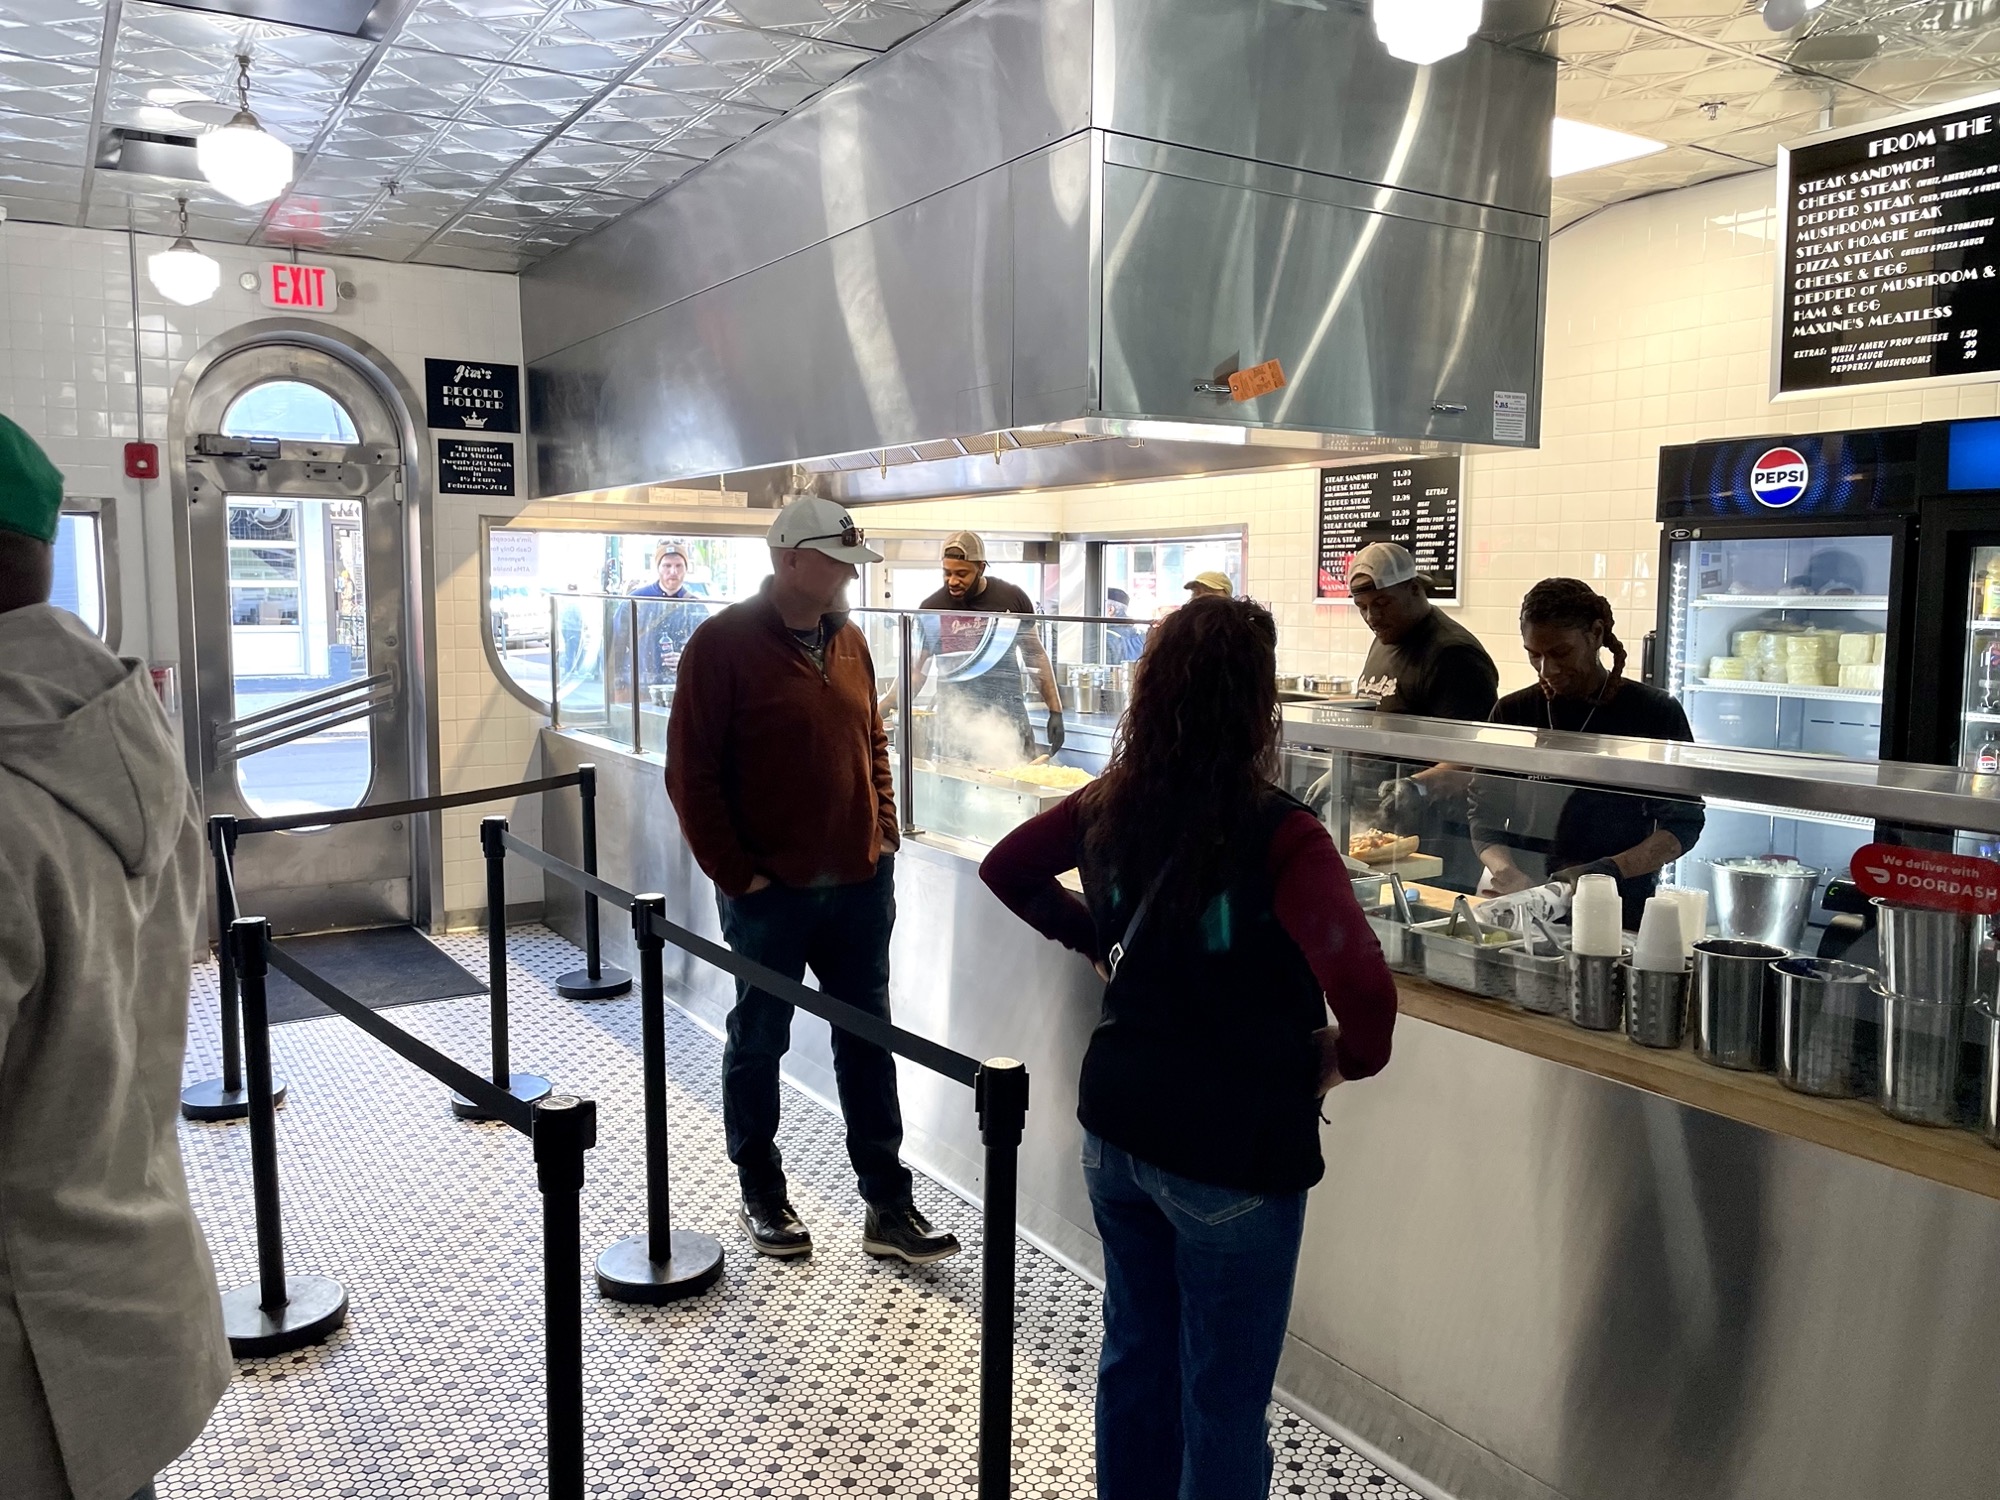
This was mine and Toby’s very first cheesesteak experience. It was everything I expected and more! We arrived at 12:45pm on a Monday in mid November and there was thankfully no line. Even if there was a line, I’m sure it’d move quick since they made our sandwich in record time. As soon as you walk in, you’re hit with the amazing aroma of caramelized onions and beef and the sounds of the banging and clanging on the flat top. Even if you weren’t hungry, watching the meat sizzle in front of you would get you salivating. The shop itself has a retro vibe with some seating available.
We got 2 cheesesteaks here: first with provolone which I struggled to find the provolone flavour, then with Cheez Whiz which made allllll the difference. The onions were perfectly cooked the way I like it – slightly caramelized for a bit of sweetness but with a bite and the steak was so juicy that it was a bit of a dripping mess, but the bread held up well without getting soggy. Delicious!
Update April 1st, 2025: After a string of disappointing cheesesteaks around Philly, we came back to Jim’s again to make sure I wasn’t overhyping this place since it was our very first cheesesteak afterall. I’m glad to report it was just as delicious as I remember it! I was watching the man behind the stove and noticed a few things that makes Jim’s stand out from the rest:
- They double layer their cheese – on the bread, then add the beef and toppings, and finish it with more cheez on top so you get a good amount of cheez whiz in every bite.
- Their onions are perfectly caramelized which adds so much more flavour with a slight sweetness. Most places will have softened onions without caramelizing them.
- This man has a literal kettle of melted beef oil that he pours on the beef while he cooks it to keep it moist and extra juicy as he cooks it.


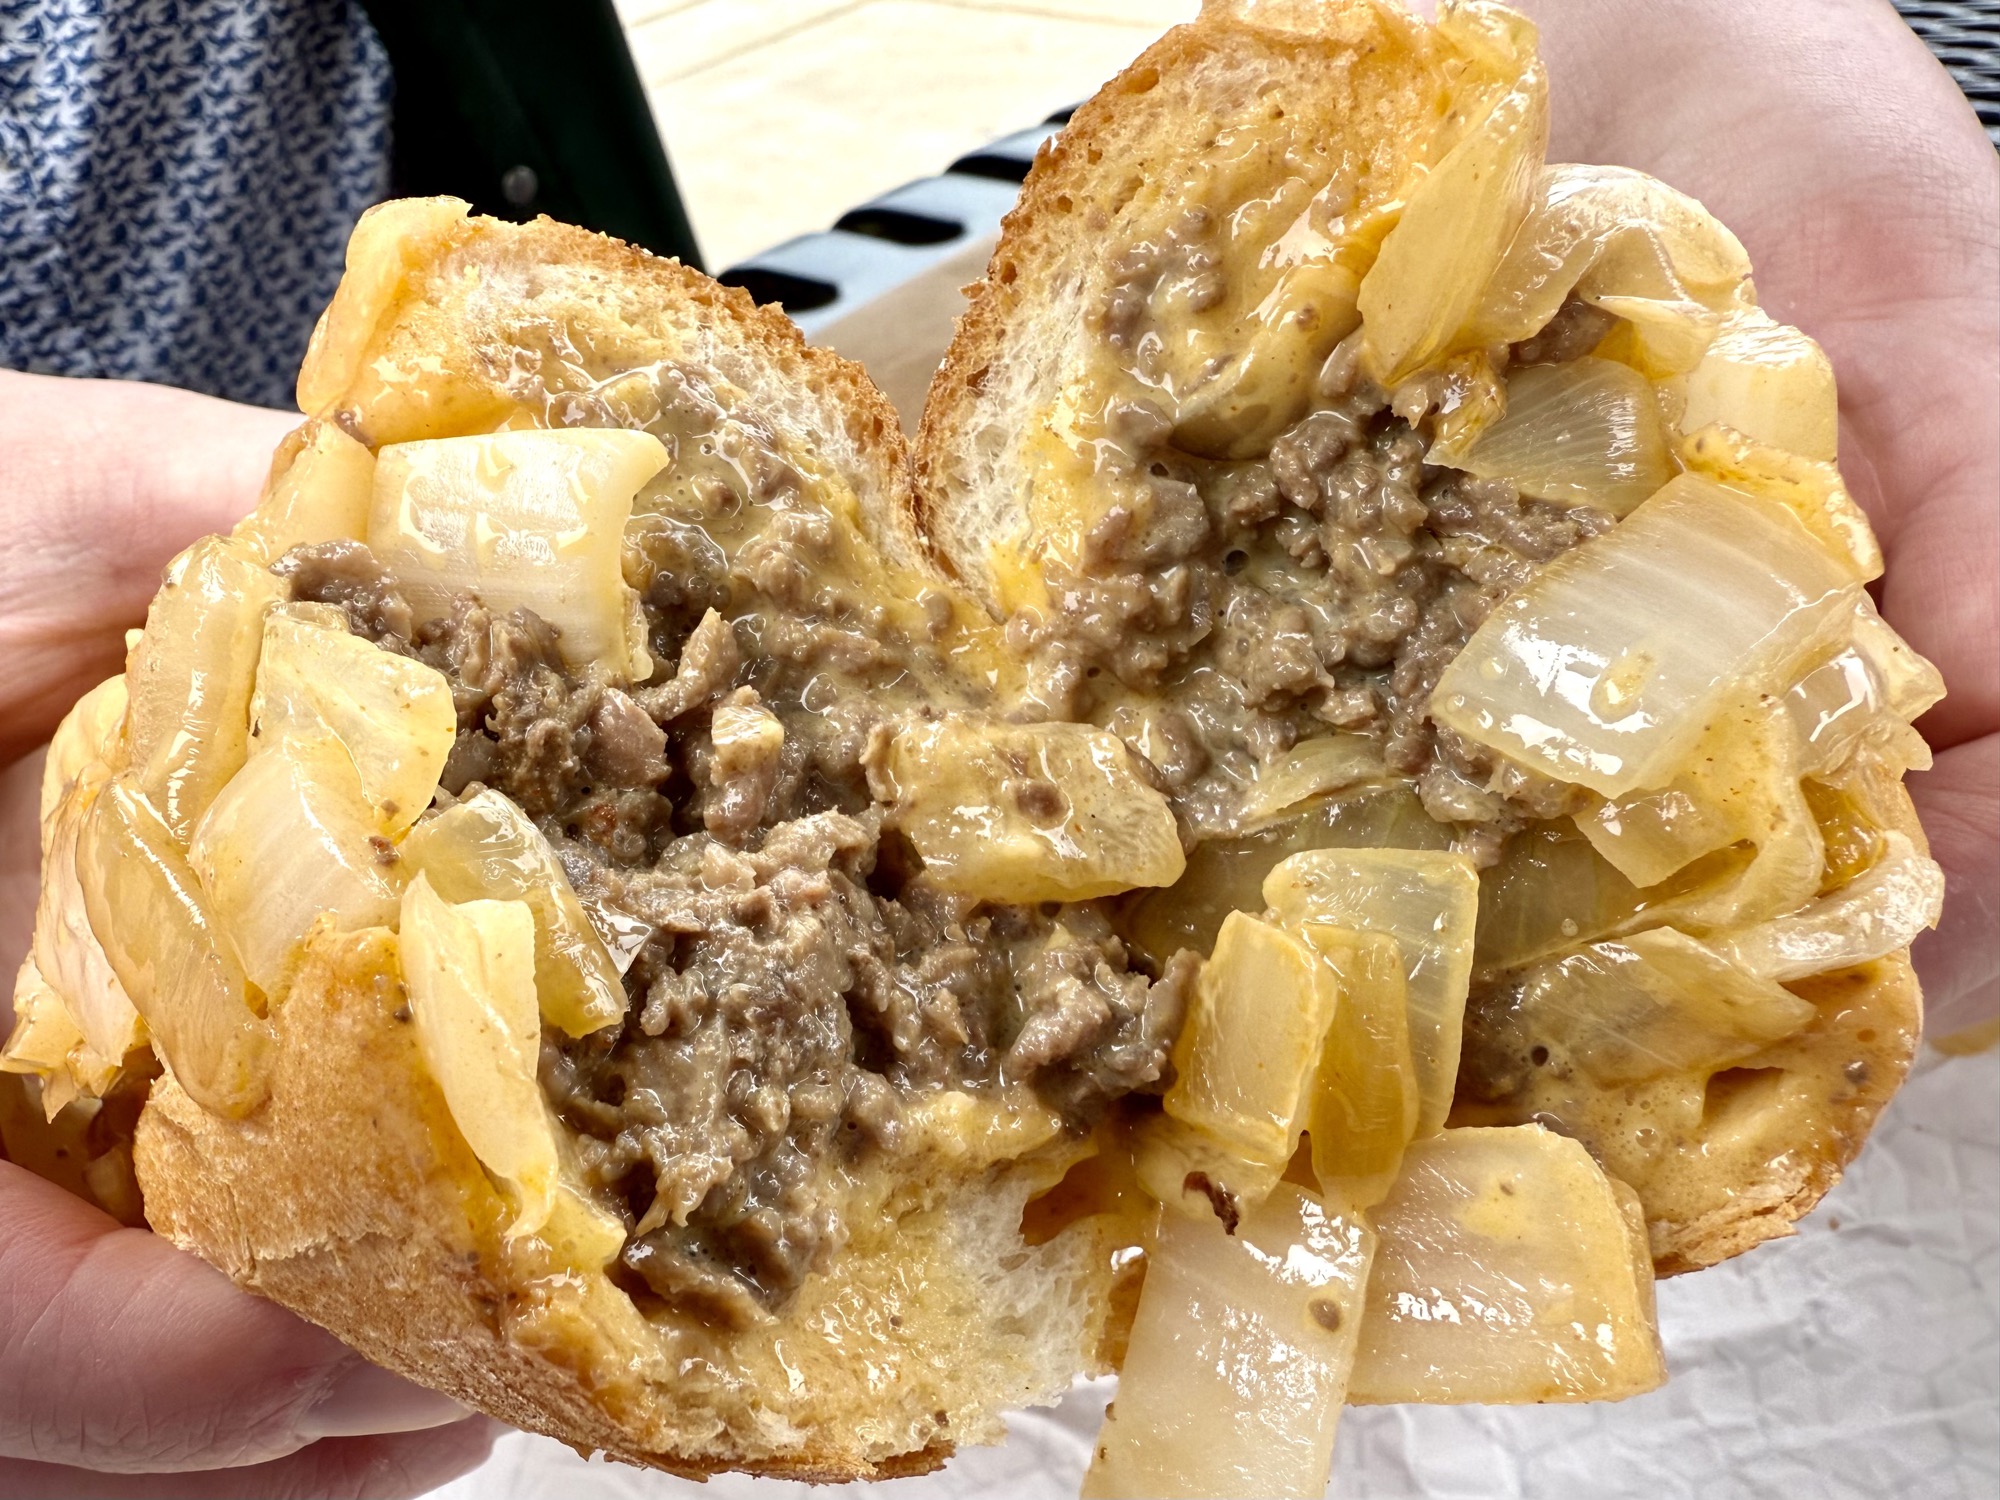
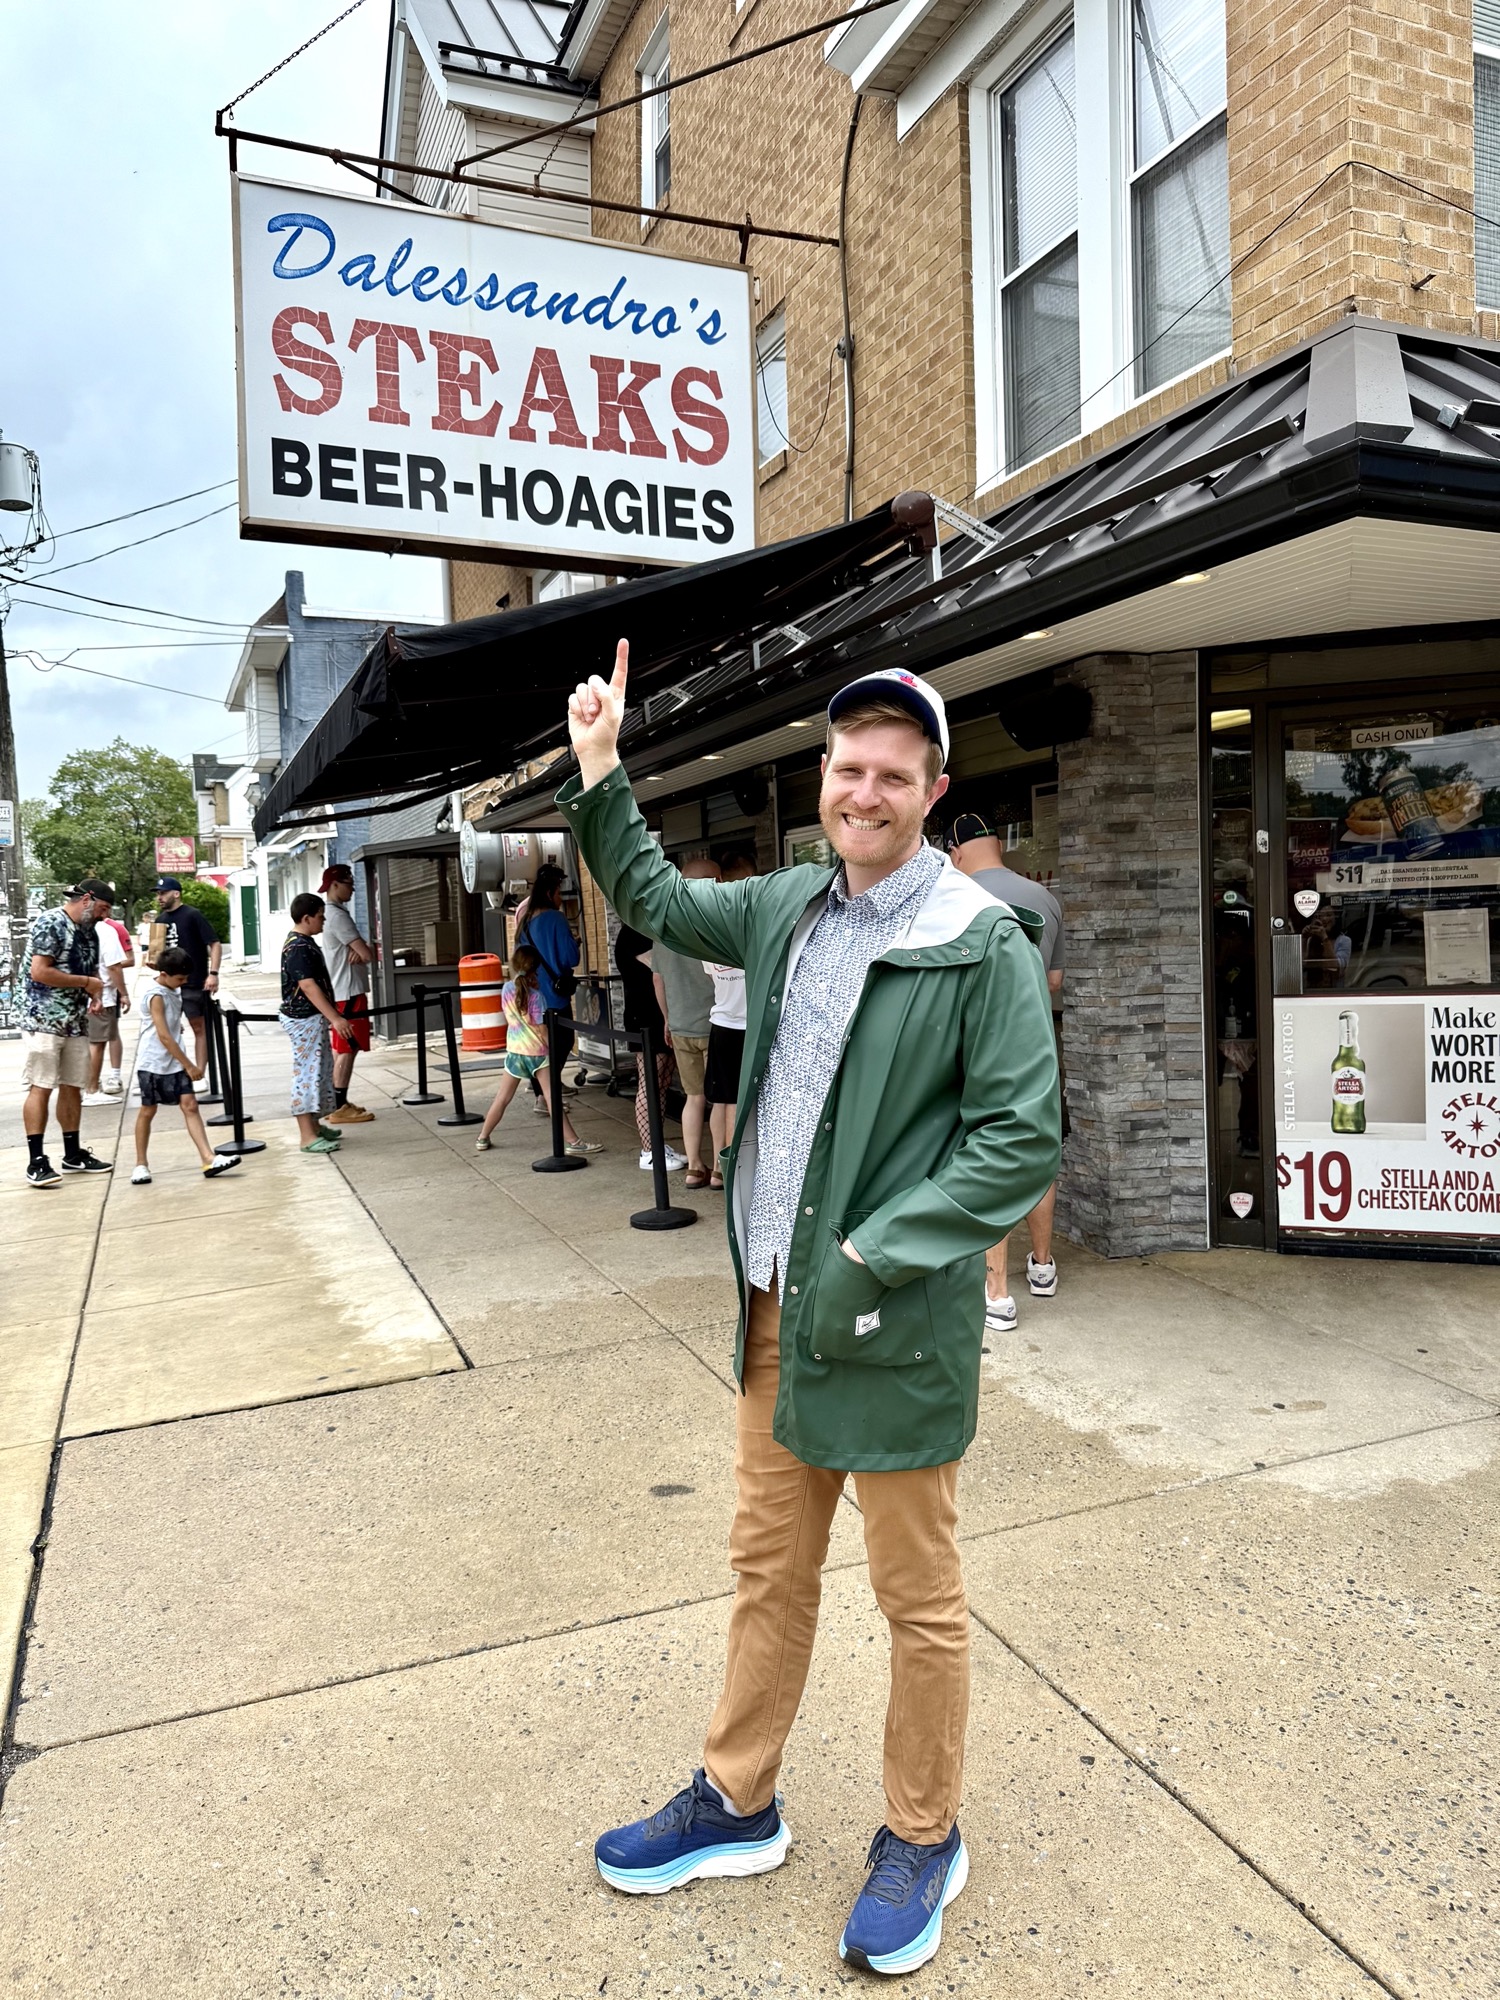
#2: Dalessandro’s Steaks
Address: 600 Wendover St, Philadelphia, PA 19128
Website: https://dalessandros.com/
Hours: 11am-9/10pm most days (check the website for updated hours)
Cheesesteak with onions: $16.00 (cash only, ATM on site)
Pros:
- Great sandwich size
- Good amount of steak and cooked really well, not dry at all
- No extra charge for onions
Cons:
- Out of the way from downtown and old town/tourist areas
- Onions very bland and not enough of it
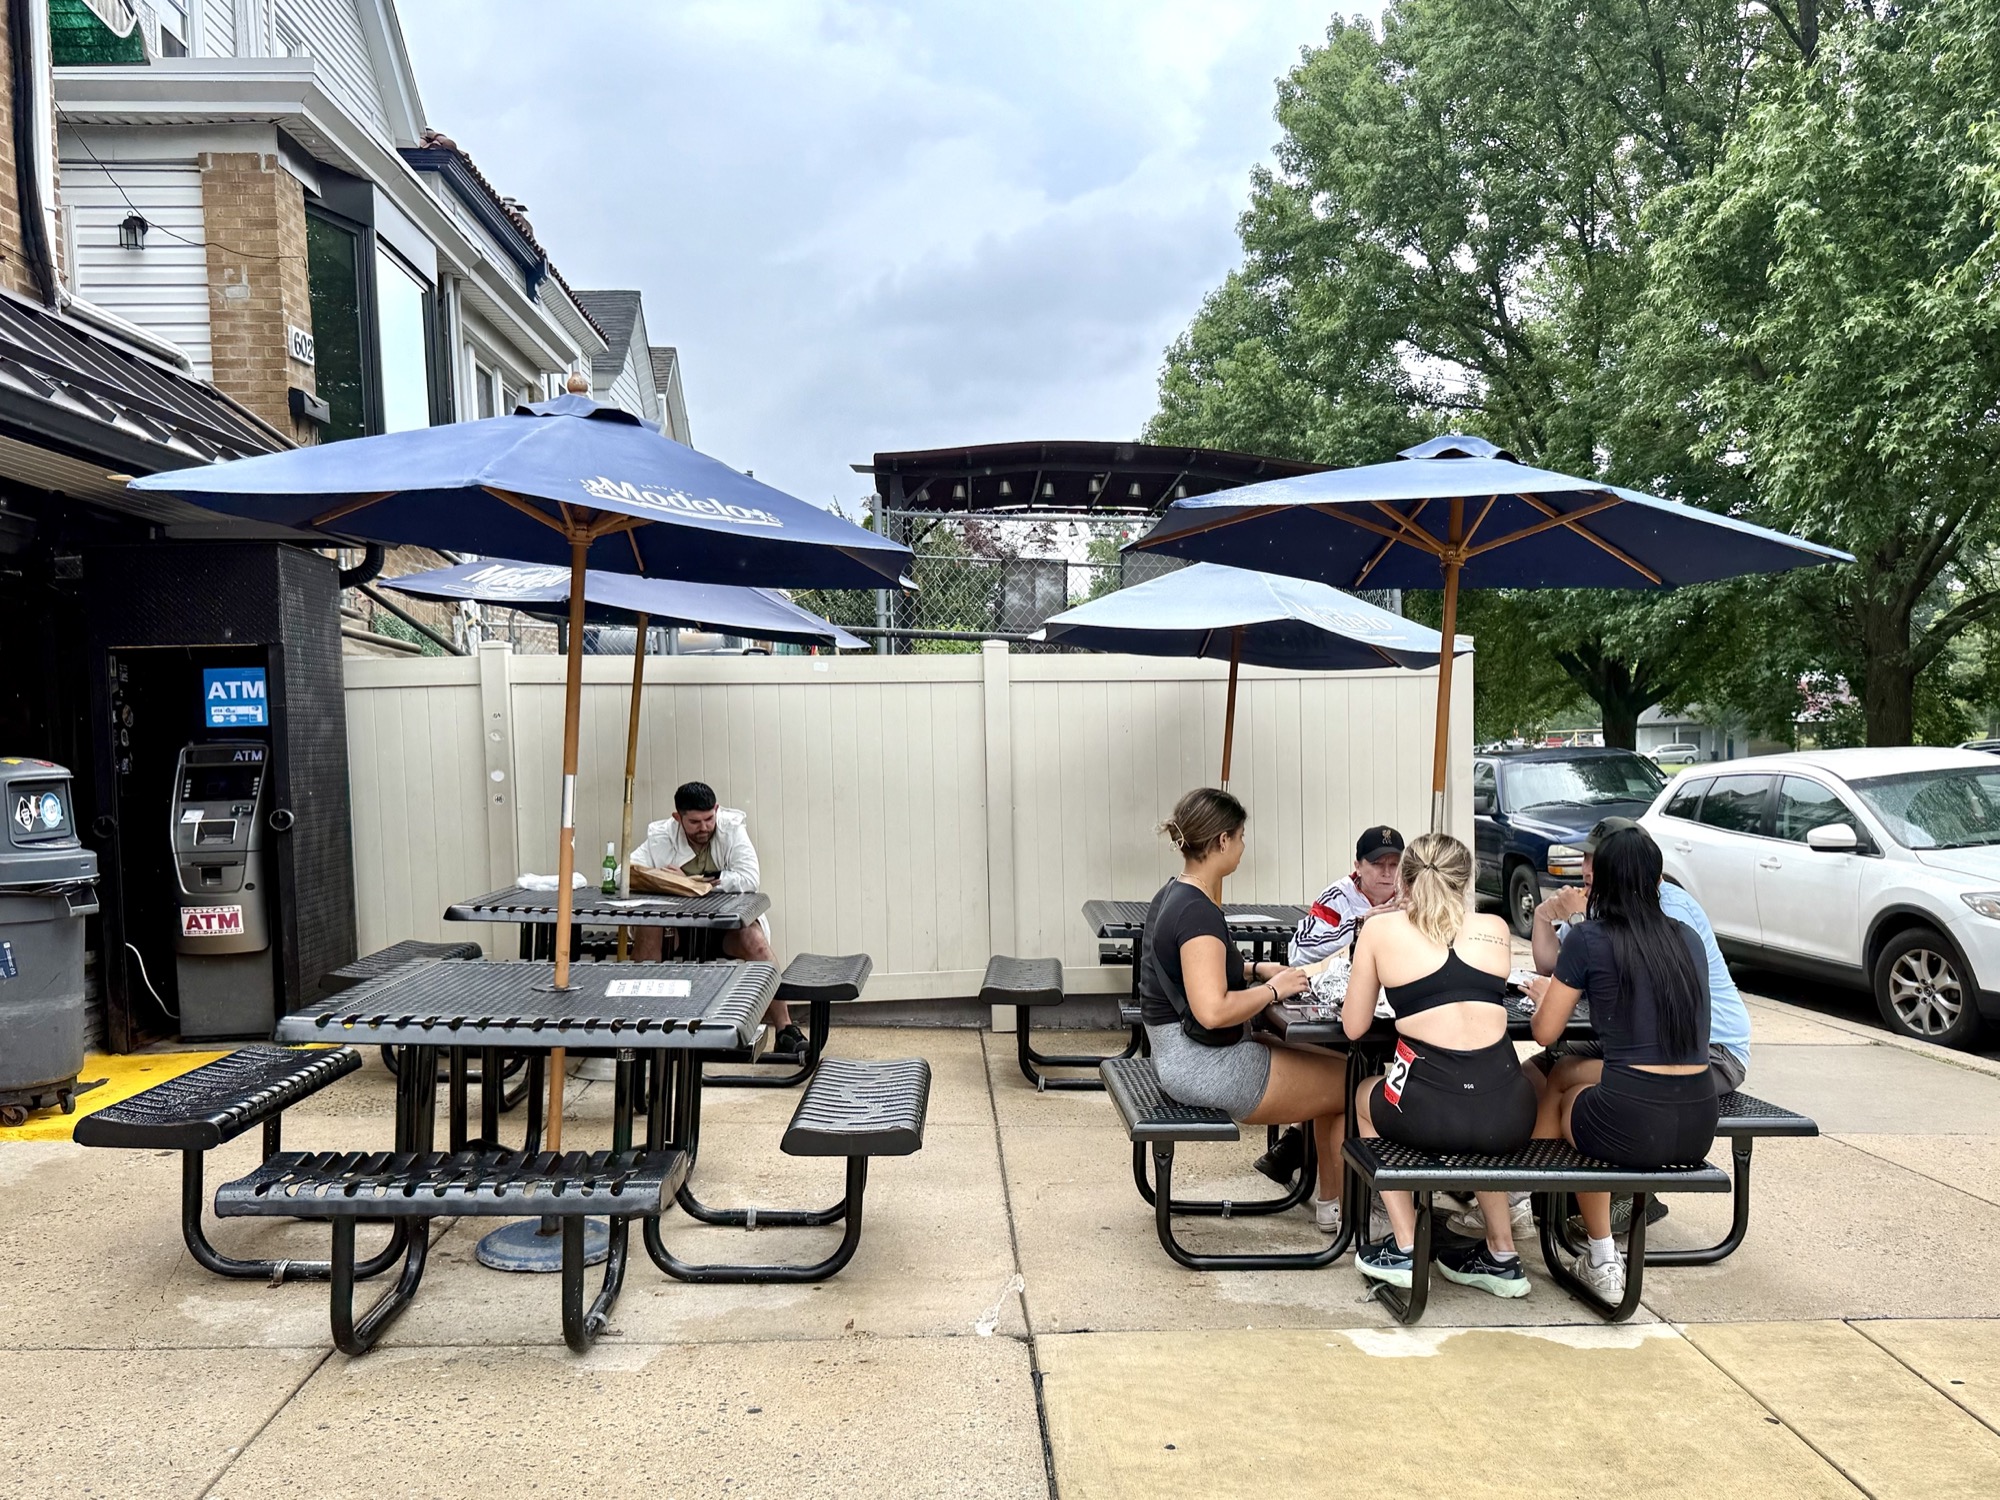
- Limited seating – only 4 picnic tables outside, no indoor seating
- Cash only (ATM on site)
- Limited street parking
Dalessandro’s was actually one of the first cheesesteak spots recommended to us from a Philly local but due to its location all the way on the other side of the city, it took us a while to make it here since it never seemed to fit into our Philly itinerary.
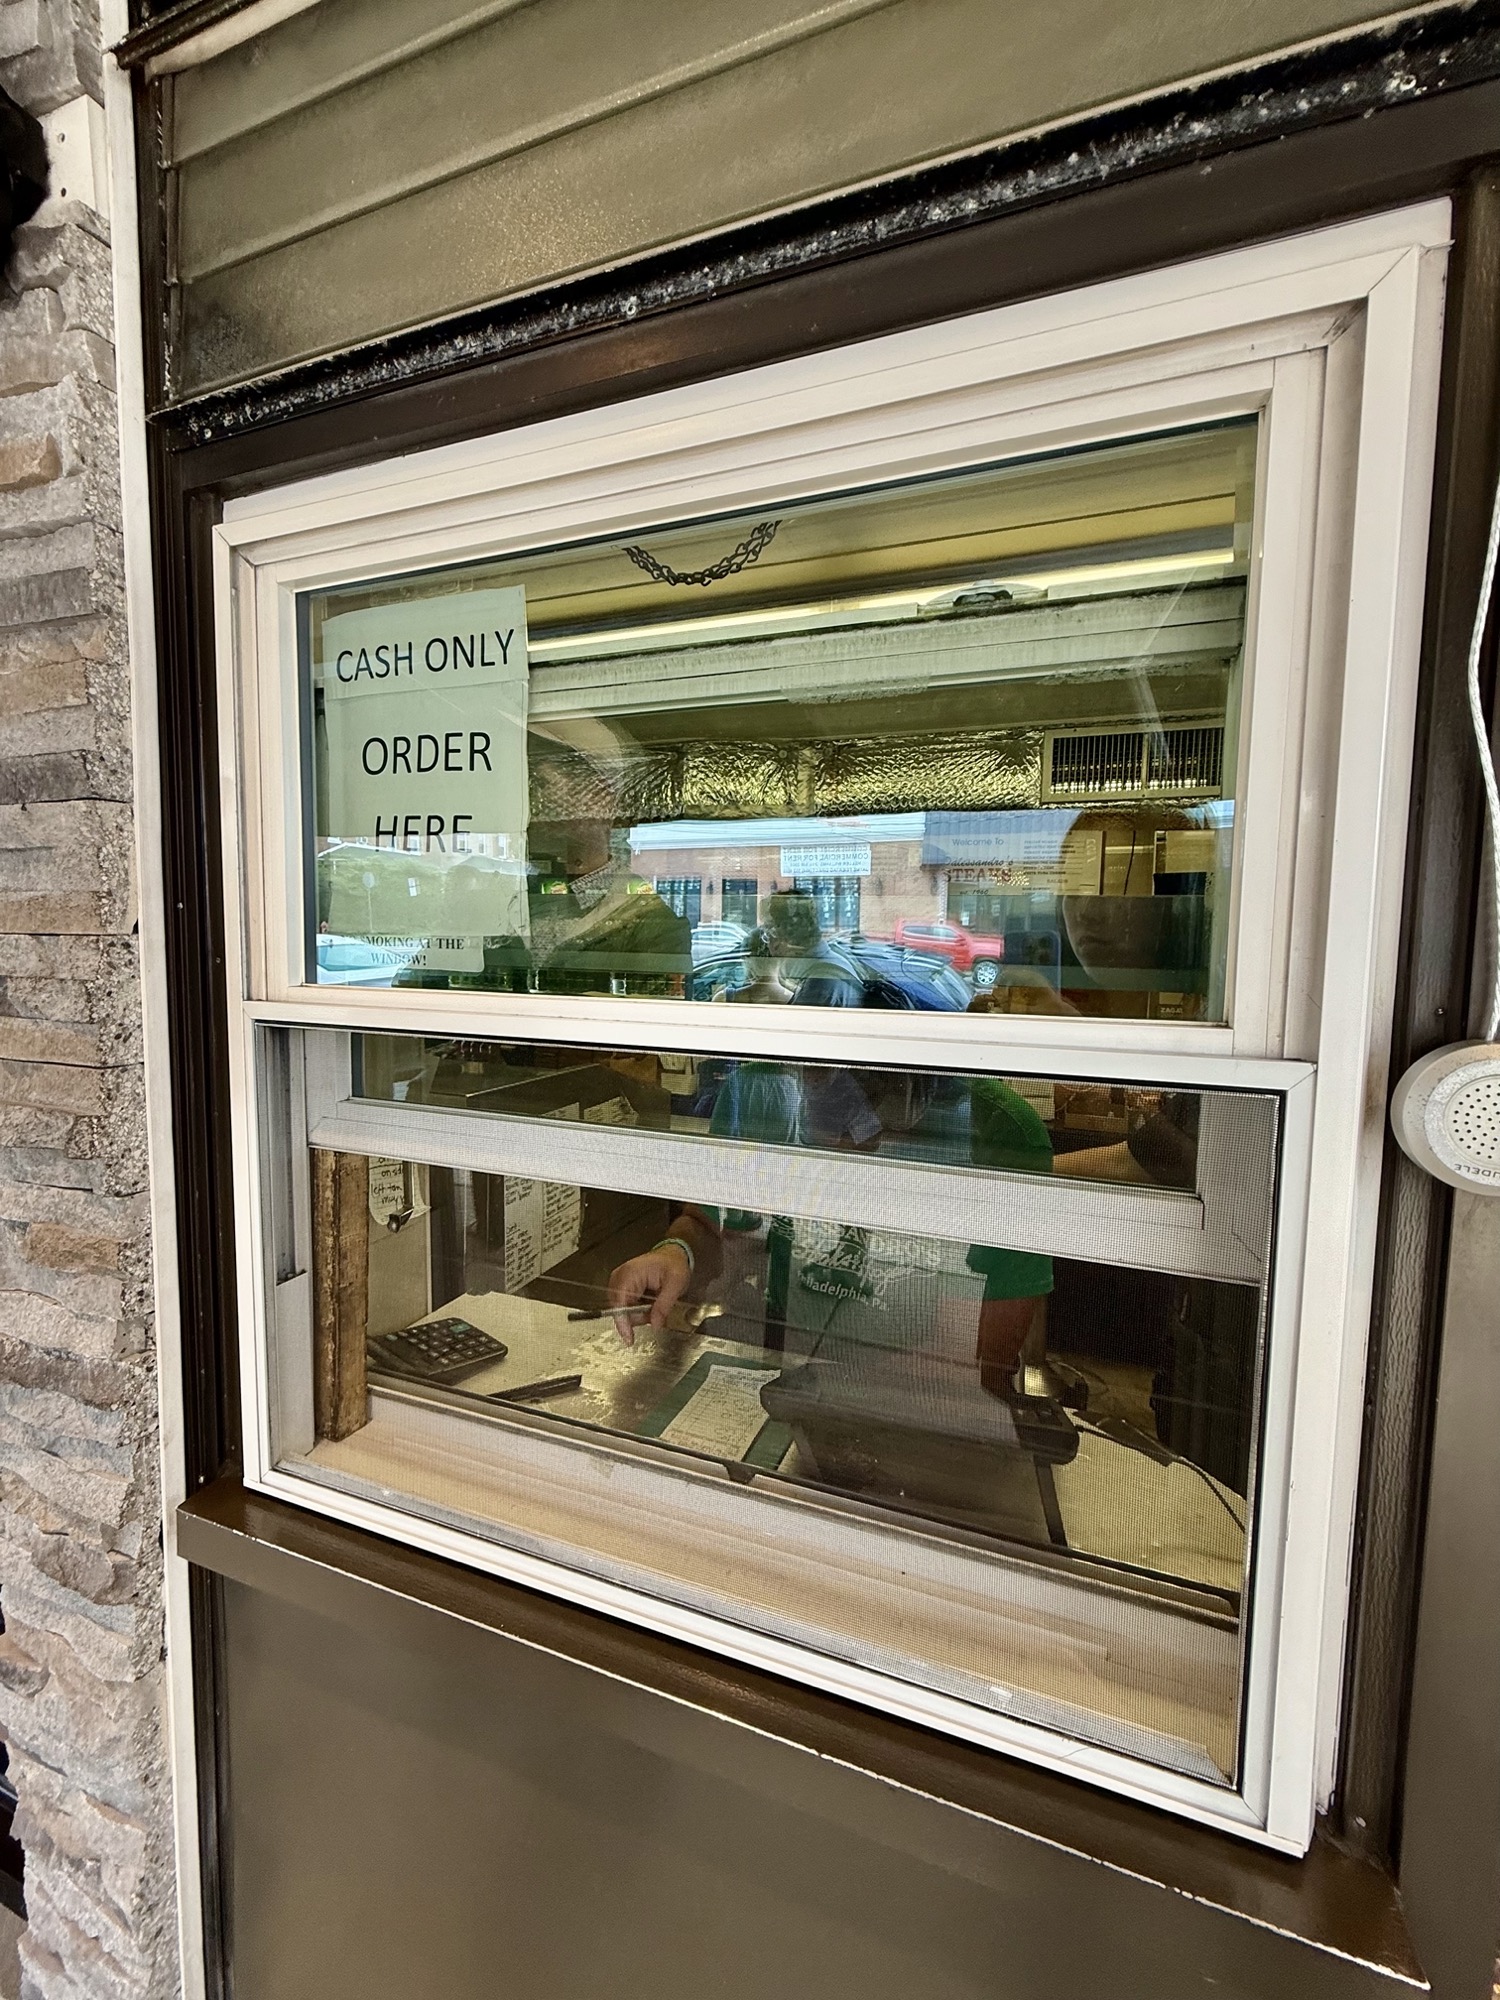
We came on a Saturday lunch hour in the first week of June and although it was busy, the line went relatively quickly and it took about 10 minutes to get our sandwich. It’s a window-order and pick-up set up that takes cash only (ATM on site). Once you place your order, there’s an automated voice over a speaker and a large screen that calls you when your order is ready and you pay on pick up. There are only 4 picnic-style tables outside and no indoor seating, but luckily we were able to snag a tablet just as someone left.
At first glance, the cheesesteak was pretty hefty with a good amount of meat. The bread was soft but held up well. The steak was super juicy and cooked really well (similar to Jim’s) and there was a good amount of cheese. However, the onions were the let down for me. Even with extra onions, there wasn’t much of it and the onions themselves didn’t have much flavour – wasn’t browned, kind of just soft and bland, almost like steamed onions. Honestly, if the onions were on point, Dalessandro’s would be at the #1 spot for me purely because their cheesesteak is larger than Jim’s and everything else was great!


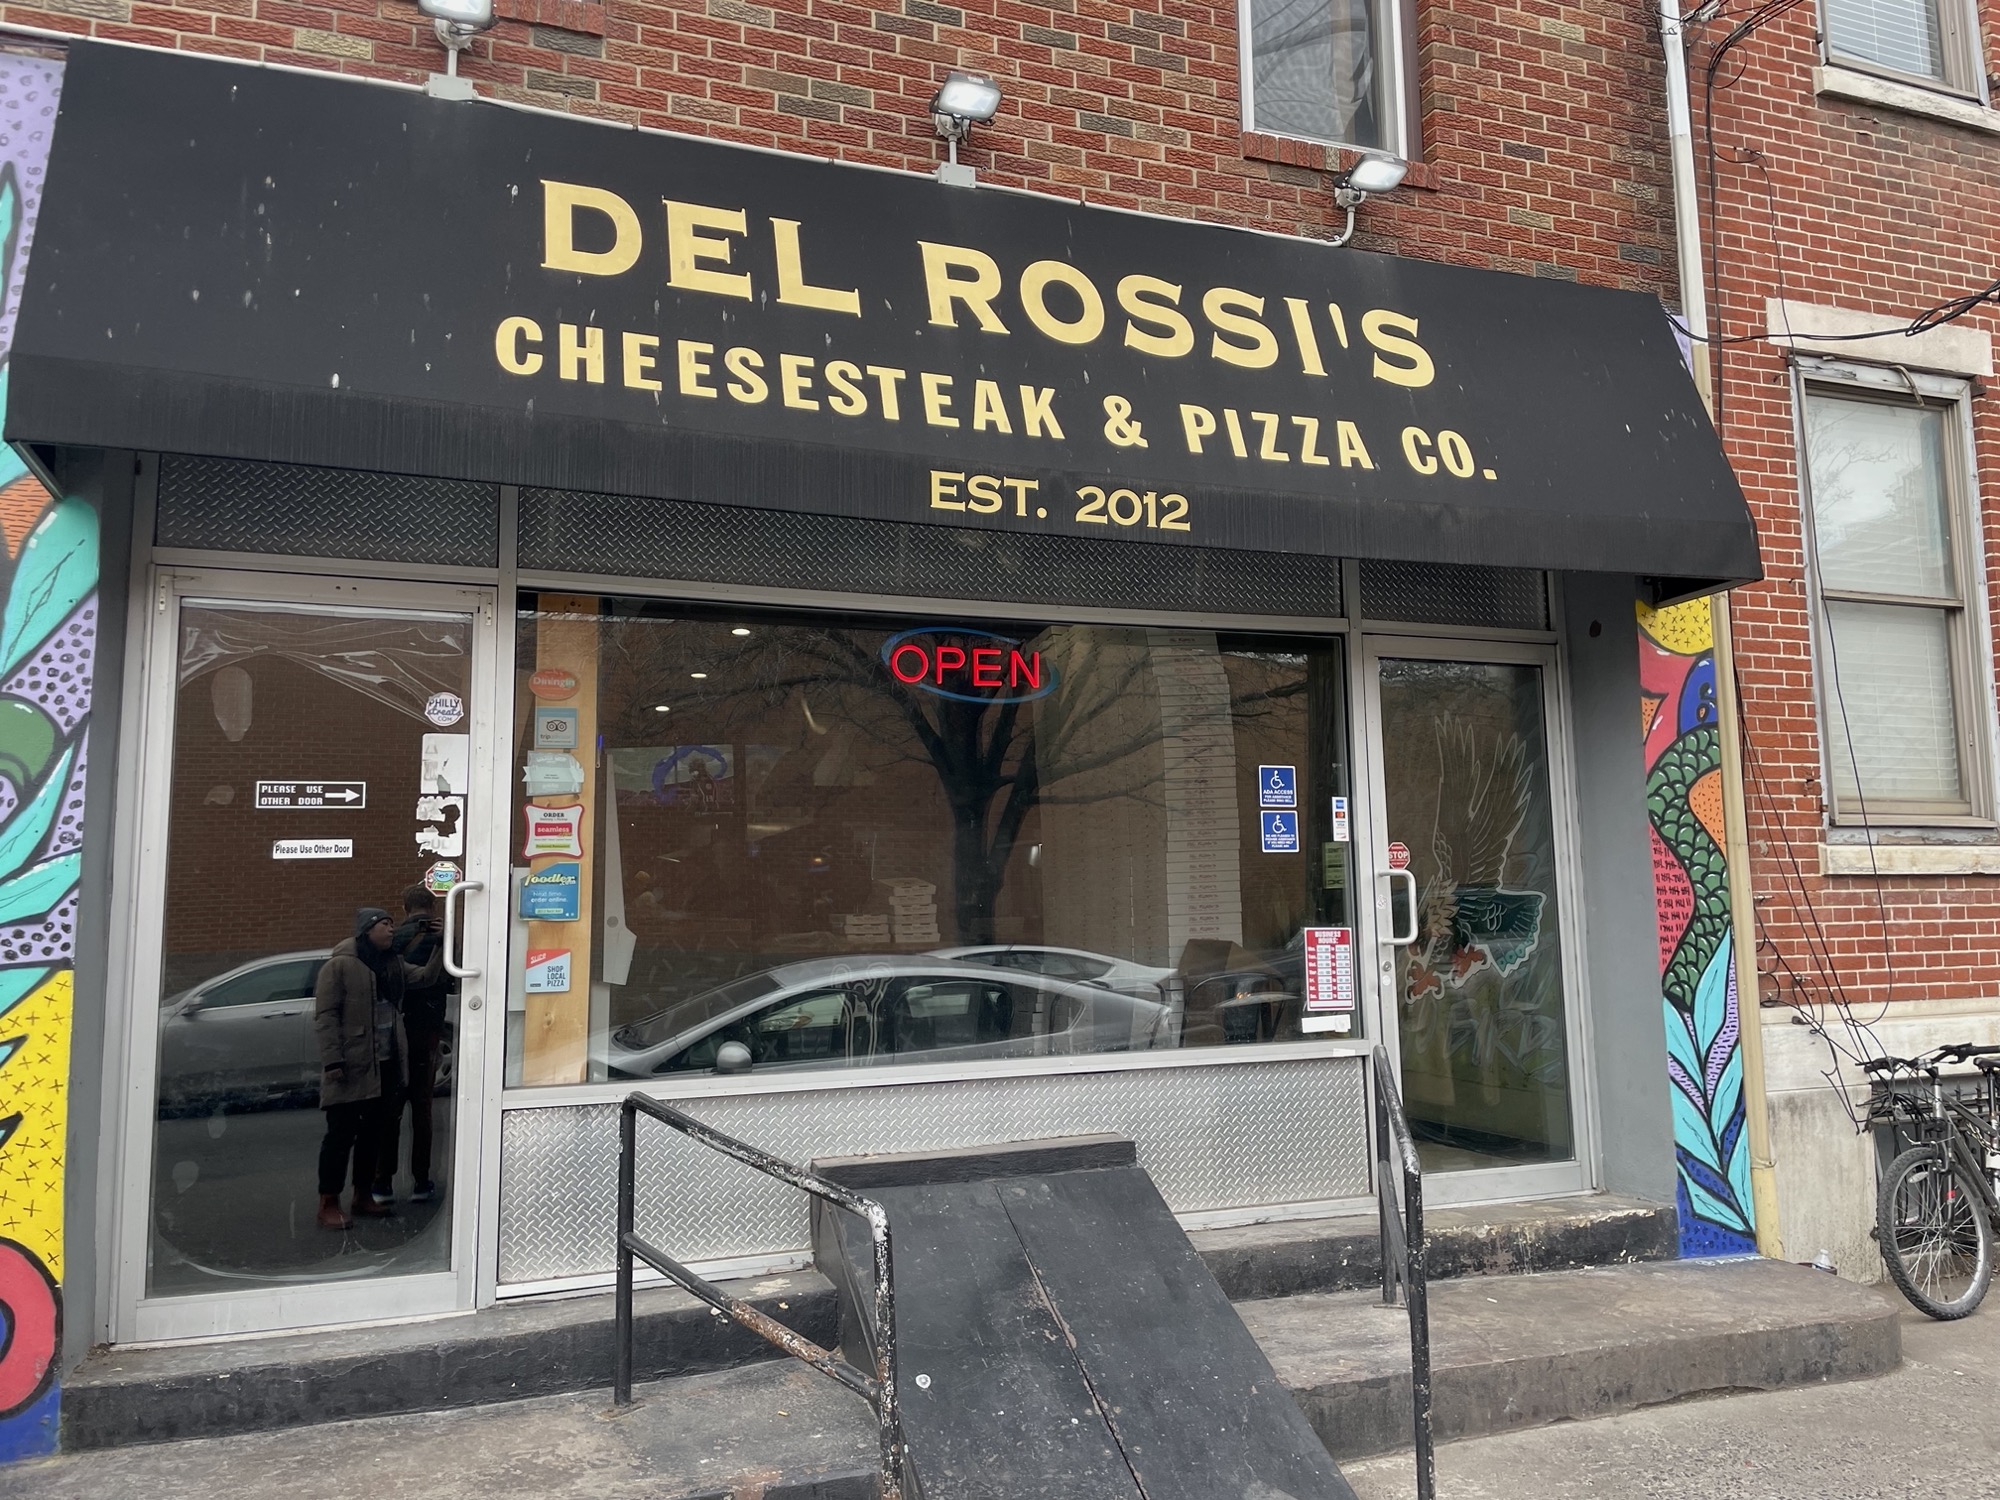
#3: Del Rossi’s Cheesesteak & Pizza CO.
Address: 538 N 4th St, Philadelphia, PA 19123
Website: https://delrossisrestaurant.com/
Hours: 11am-11pm most days (check the website for updated hours)
Cheesesteak with onions: $16.48 (before tax)
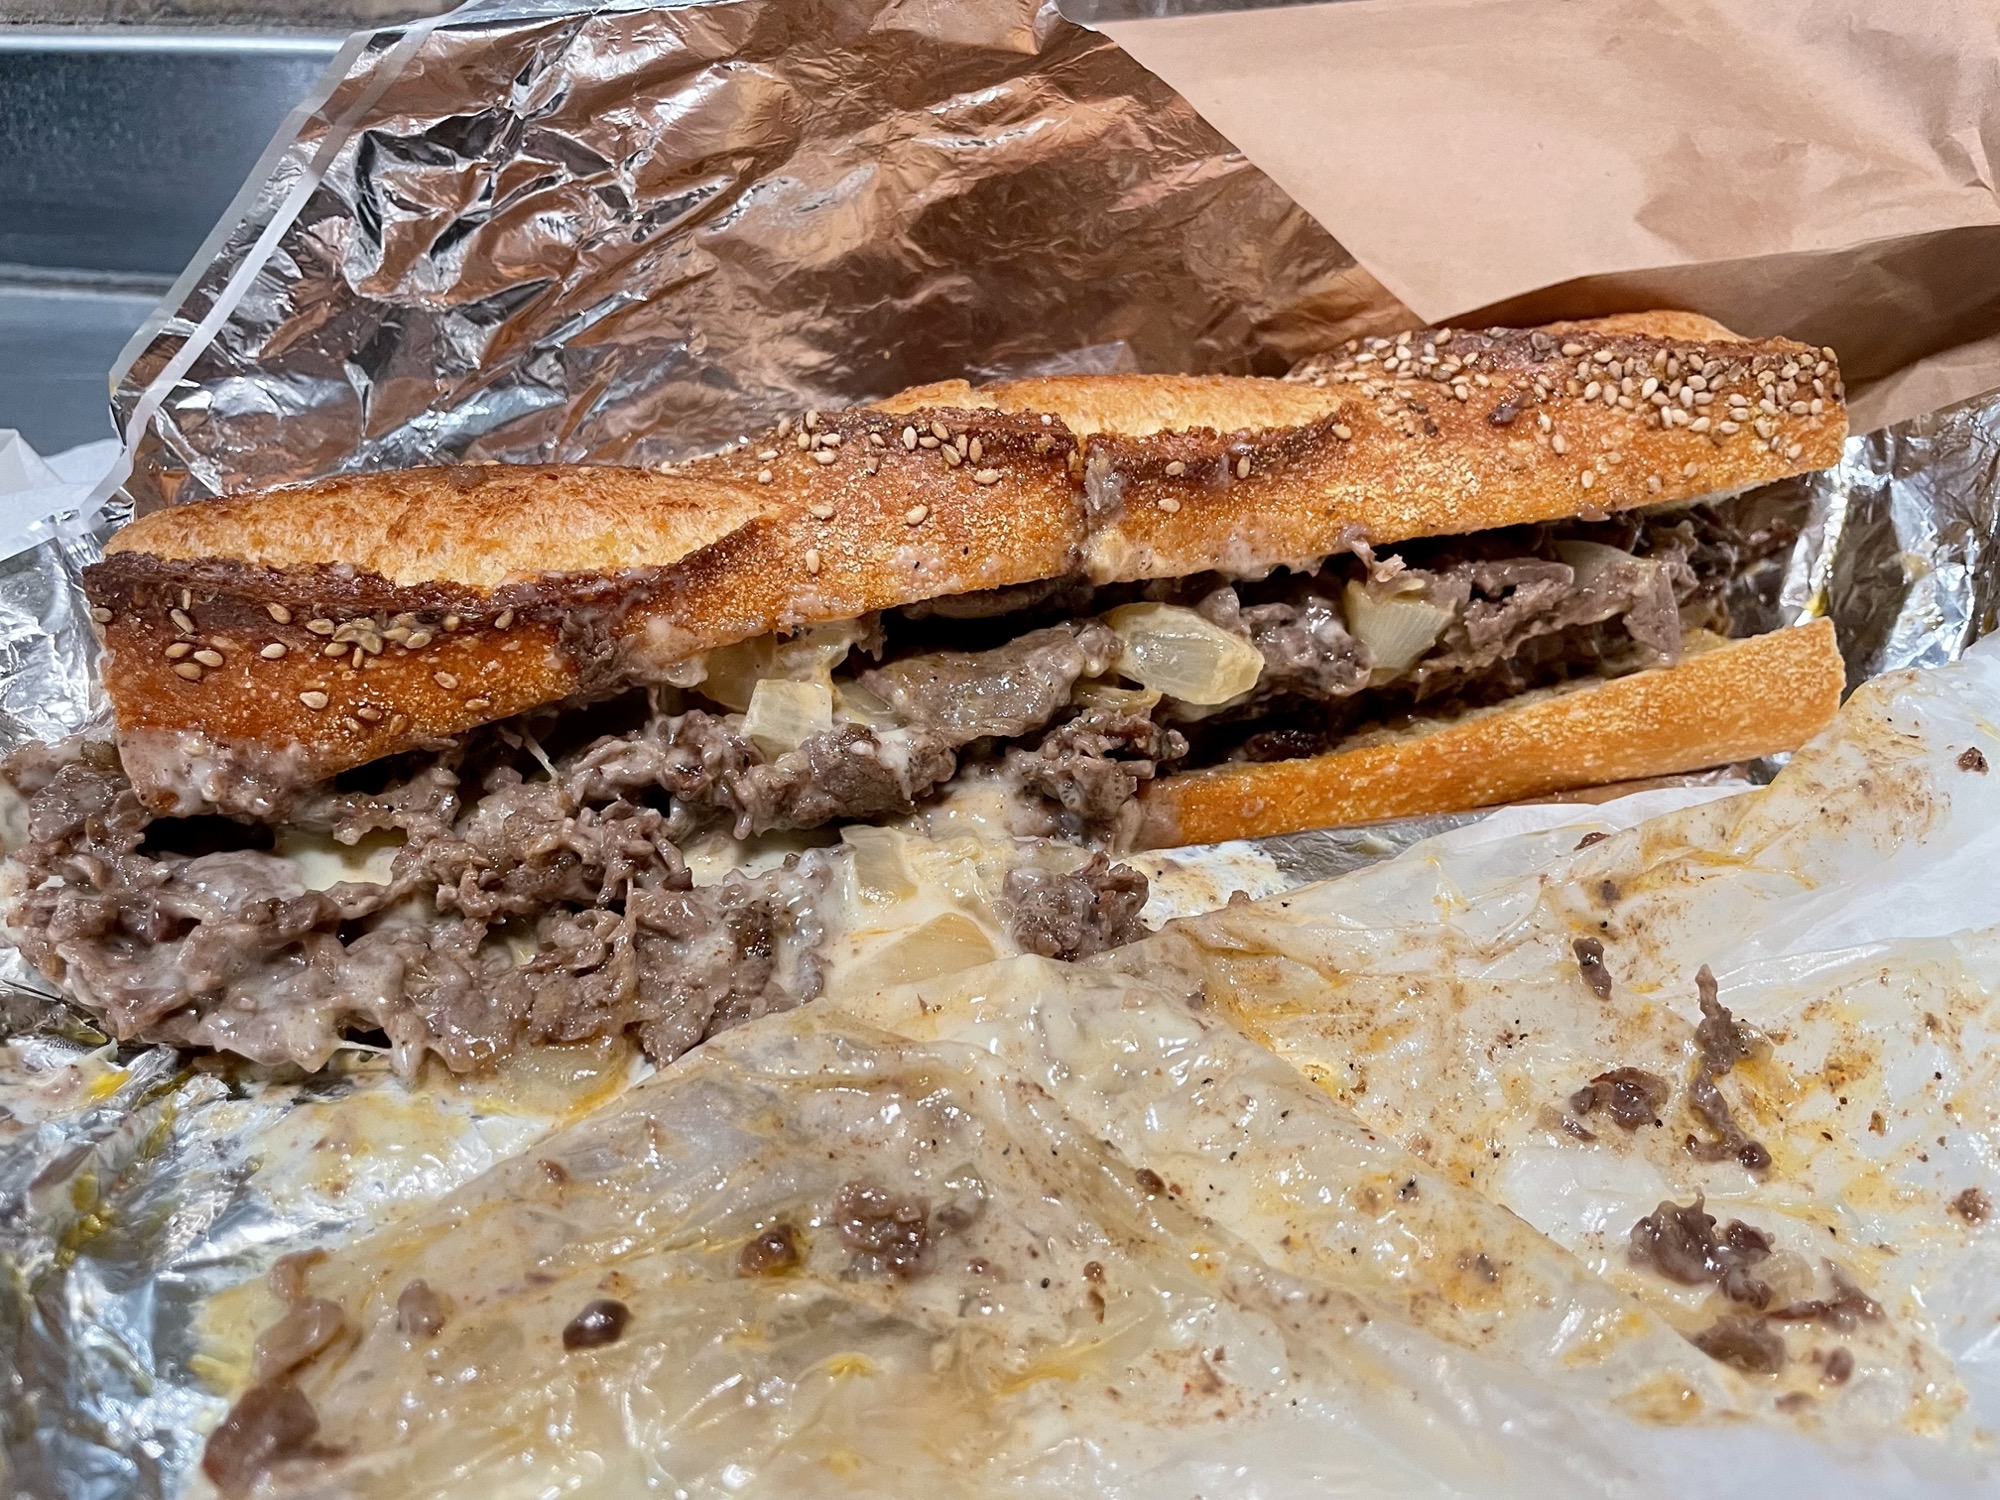
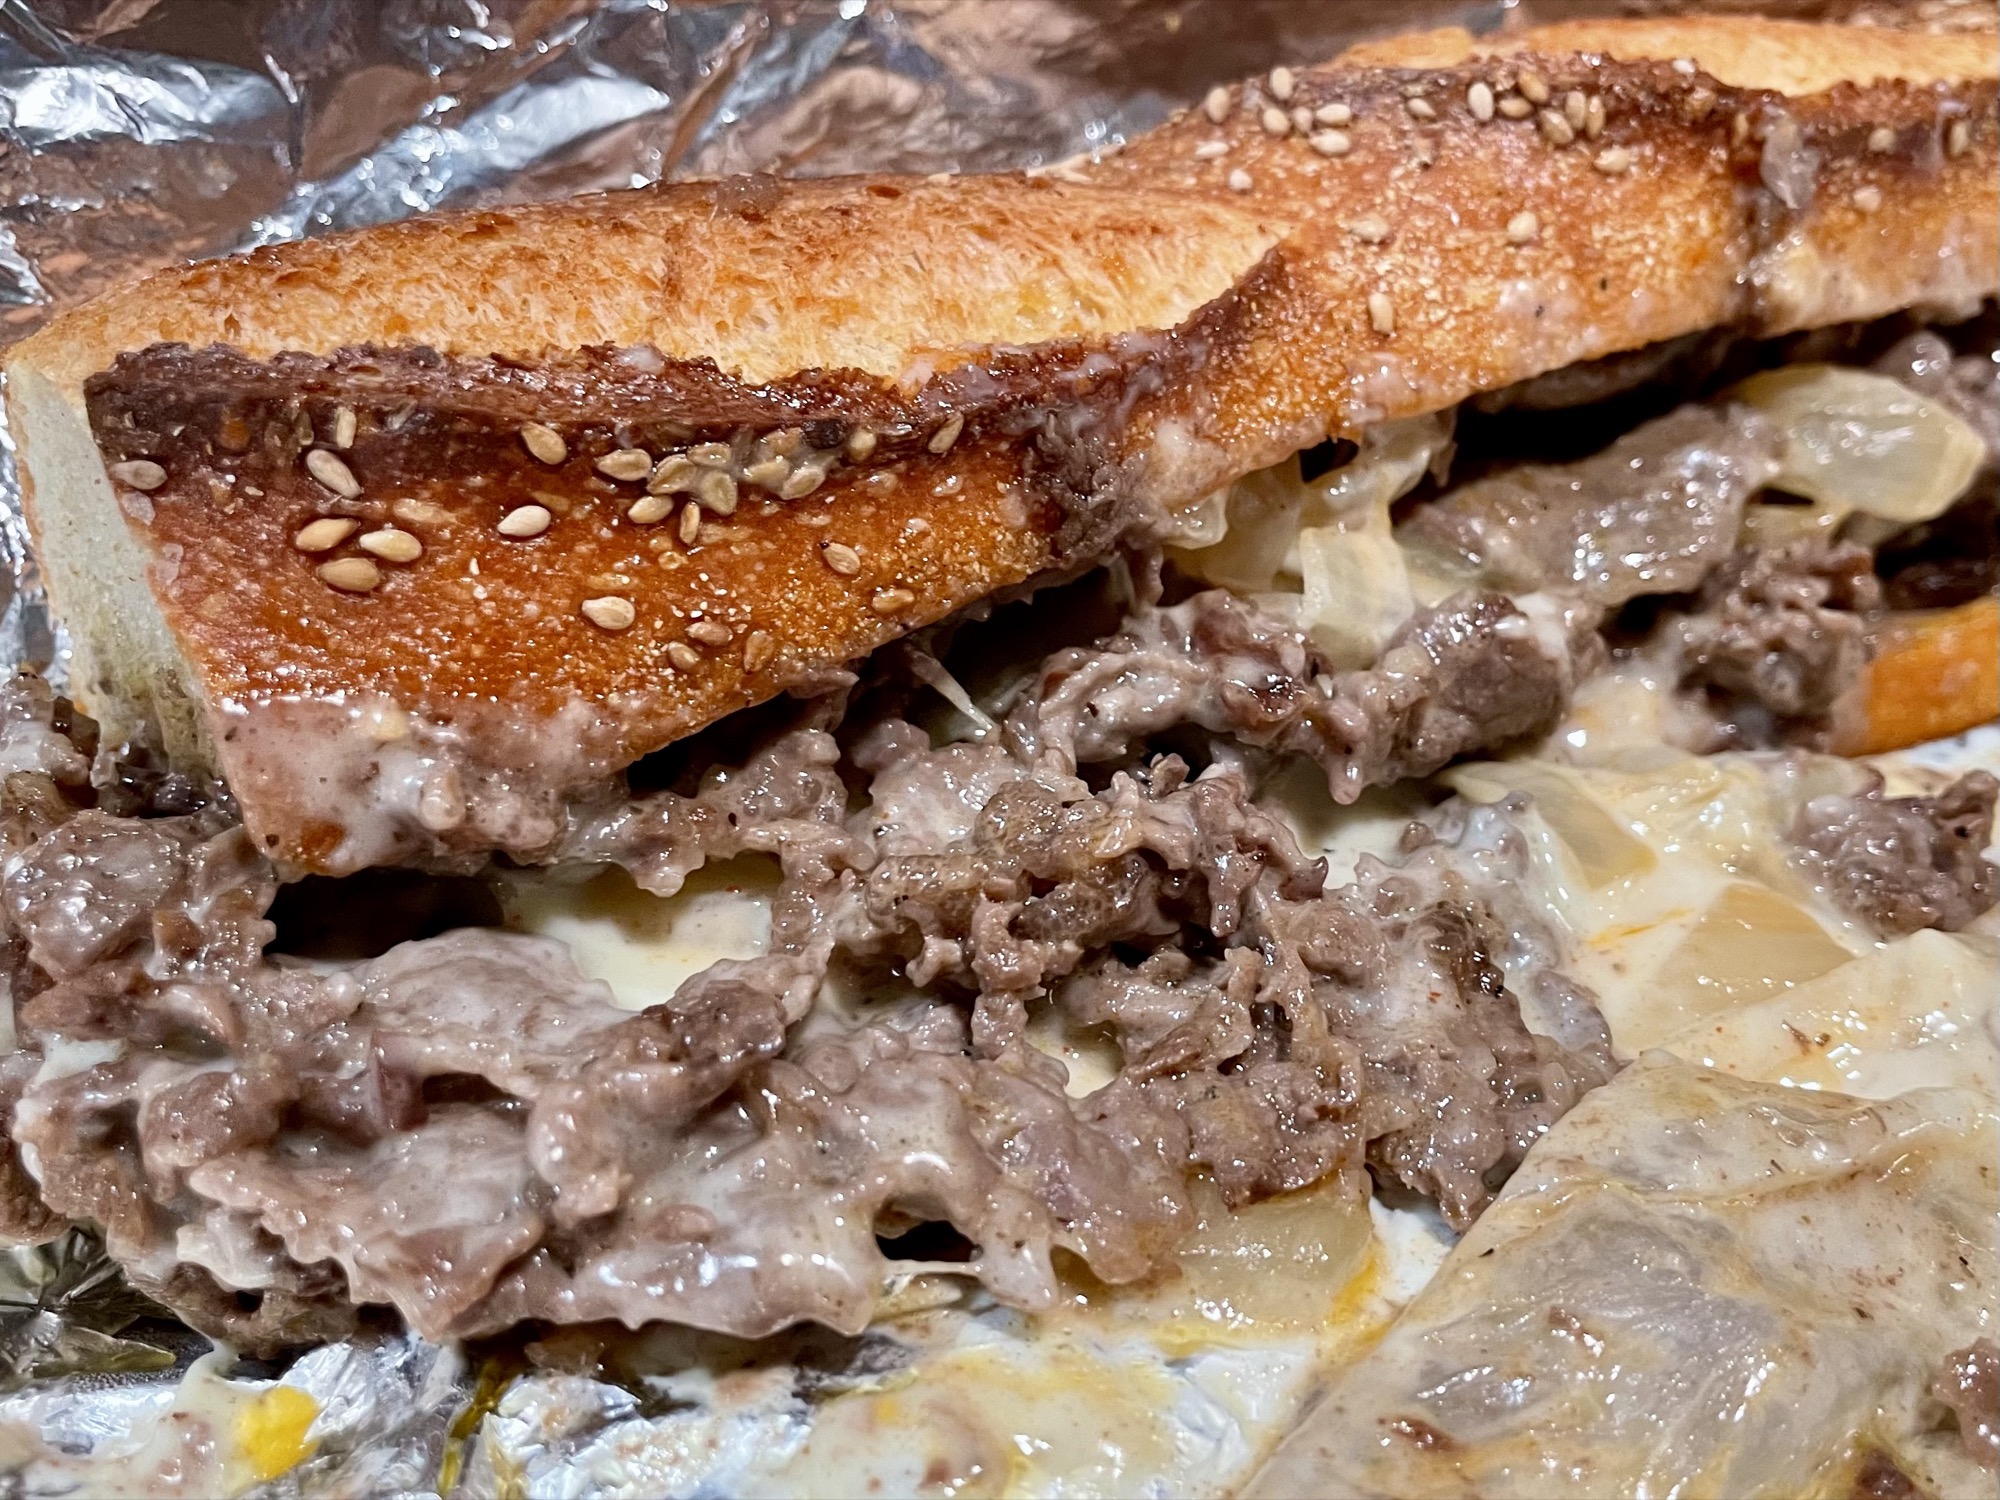
Pros:
- Fantastic bread – unique sesame artisanal bun
- Juicy meat cooked well
- Indoor-seating and they bring the food to your table
- Takes both cash and card
Cons:
- No Cheez Whiz, they carry Cooper Sharp cheese only
- Inconsistent cook with the meat between repeat visits
- Out of the way from downtown and old town/tourist areas
We came here on our latest Philly trip in February on the recommendation of some Philly native internet strangers. It is a little out of the way from the main city centre and touristy things (~6 mins north of the Liberty Bell for reference) so you’d need to either drive or Uber to get here. Upon first glance, it looked like an ordinary pizza shop with a bunch of pizza boxes piled high near the front, no signs of the large flat top or smells of a cheesesteak.
We ordered our usual “whiz wit” (cheesesteak with cheez whiz and onions) but to our surprise they only do Cooper Sharp cheese! This was the first place we’ve been to that didn’t have Cheez Whiz. It was a little hard to understand the cashier, but I think he said they used to do Cheez Whiz but it got too busy so they stopped offering different cheese options? Either way, the cashier was confident that we’d love their cheesesteak so we ordered one to share. Y’all… this cheesesteak was PHENOMENAL. It instantly became our new favourite cheesesteak. The bread was flavourful with a fantastic golden brown crust speckled with white sesame seeds that reminded me of an artisanal sourdough. It was our first time trying Cooper Sharp cheese and it was so bold and flavourful that it knocked our socks off. It also perfectly melted between the layers of the meat, making it a top contender to my beloved Cheez Whiz. The steak was also cooked well and the combination of everything was perfection. *chef’s kiss*
July 29th update: Del Rossi’s was originally my #1 pick for best cheesesteak, however after a couple more visits, although still delicious, there was inconsistency with the cook of the steak, being a little dry at times, so it’s now my #3 after Jim’s and Dalessandro’s.


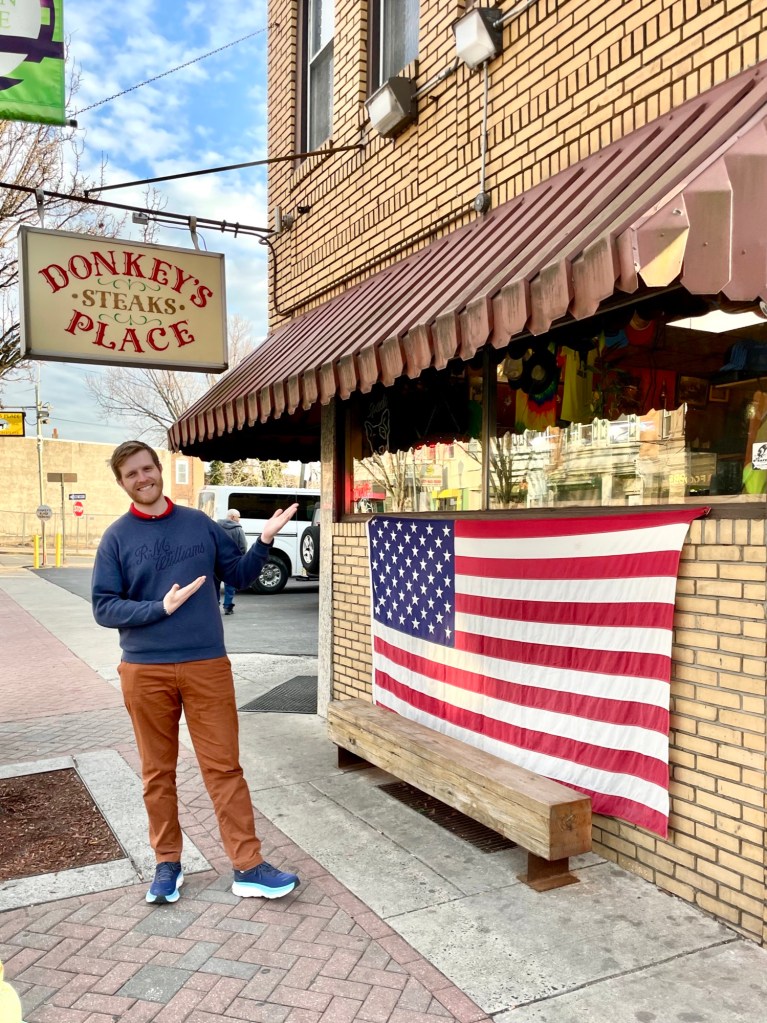
#4: Donkey’s Place (across the river in Camden, NJ)
Address: 1223 Haddon Ave, Camden, NJ 08103
Website: https://www.donkeysplacemenu.com
Hours: Mon-Fri 10am-6pm, closed Sat & Sun (check the website for updated hours)
Cheesesteak with onions: $15.50 (before tax)
Pros:
- AMAZING flavourful onions! The best onions in any cheesesteak sandwich I’ve had so far.
- Generous portion sizes
- Good amount of indoor seating in a pub setting
- Takes both cash and card
Cons:
- Located in New Jersey, across the river in a slightly dodgy neighbourhood
- Limited menu – cheesesteak, wings, fries, and onion rings (but there’s a full bar!)
Donkey’s Place was recommended by our Philly walking tour guide and claimed it to be just as good, if not better than the cheesesteaks in Philly. Although it’s not technically in Philadelphia, I’ve included it in this post anyway due to how close it is. Donkey’s Place is located in Camden, NJ, just across the river, a 10 minute drive from the Liberty Bell (the USS New Jersey is also nearby if you want to check out a battleship!). This little pub is located on a random street away from any main tourist areas in a bit of a run down neighbourhood. There’s a small parking area for 2-3 cars or street parking. There wasn’t any special advertisement or signs for their cheesesteak and just by looking at this place from the outside, you never would’ve guessed they served cheesesteaks. We hoped we were in the right place.
Upon walking in, it was a cozy bar with some friendly people. You can either grab a seat at the bar or at one of the dining tables for table service. Their little menu posted on the napkin dispenser mainly consists of pub food with the addition of a cheesesteak.
We ordered two cheesesteaks – one with American white cheddar and the other with cheez whiz (no provolone option). The cheesesteak came on an untraditional round poppy seed bun with a hefty amount of meat (I think the waitress said half a pound), and when we said ‘extra onions’, they REALLY piled on a side of caramelized onions which I’m so glad we did because it was the highlight. The sandwich was seriously SO GOOD. The bun was a bit soft for my liking, but the overall sandwich was incredible that I didn’t care. The onions were what made it for me. It had a robust rich flavour and held more moisture, not like your typical caramelized onions. My best guess is that they either cook it down with beef fat or beef stock for that flavour and moisture. I tried to ask the guy how they make their onions, but all he said was “seasoning” which seemed to be a secret. Maybe it’s beef bouillon powder 🤔.
They also had Birch beer – similar to root beer but made with birch sap and bark. A little lighter and less sweet than root beer which I appreciated.
Less traditional, but a good contender for top fave! It’s definitely worth making a trip over the bridge for this cheesesteak!
Update April 20th, 2025: I’ve recently learned that Donkey’s Place was Anthony Bourdain’s top cheesesteak pick!


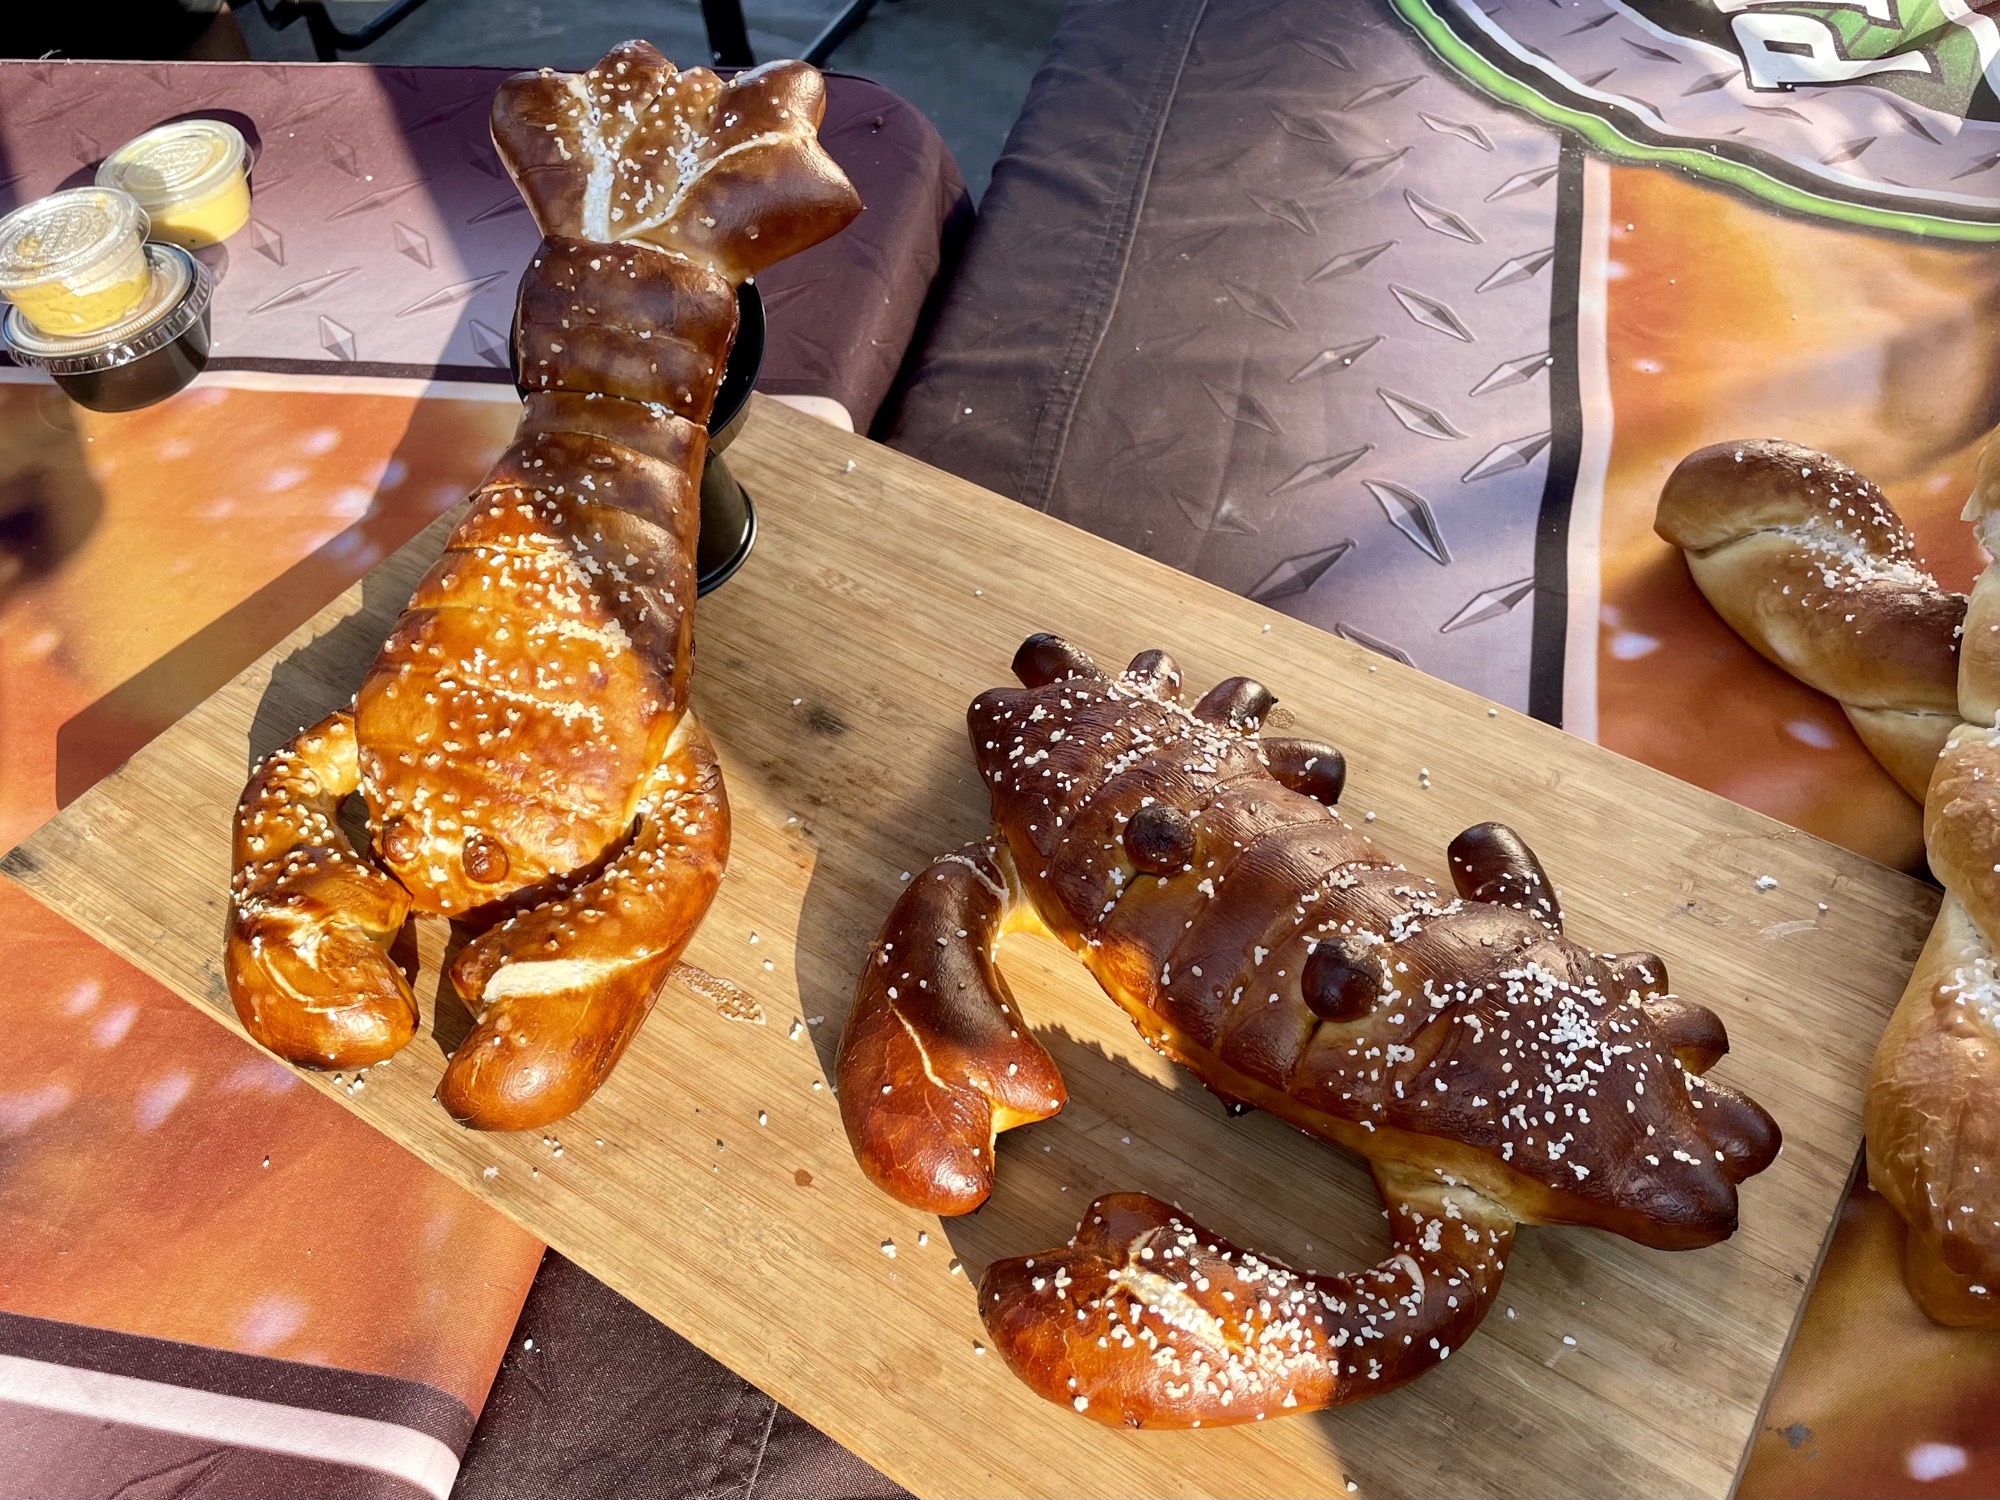
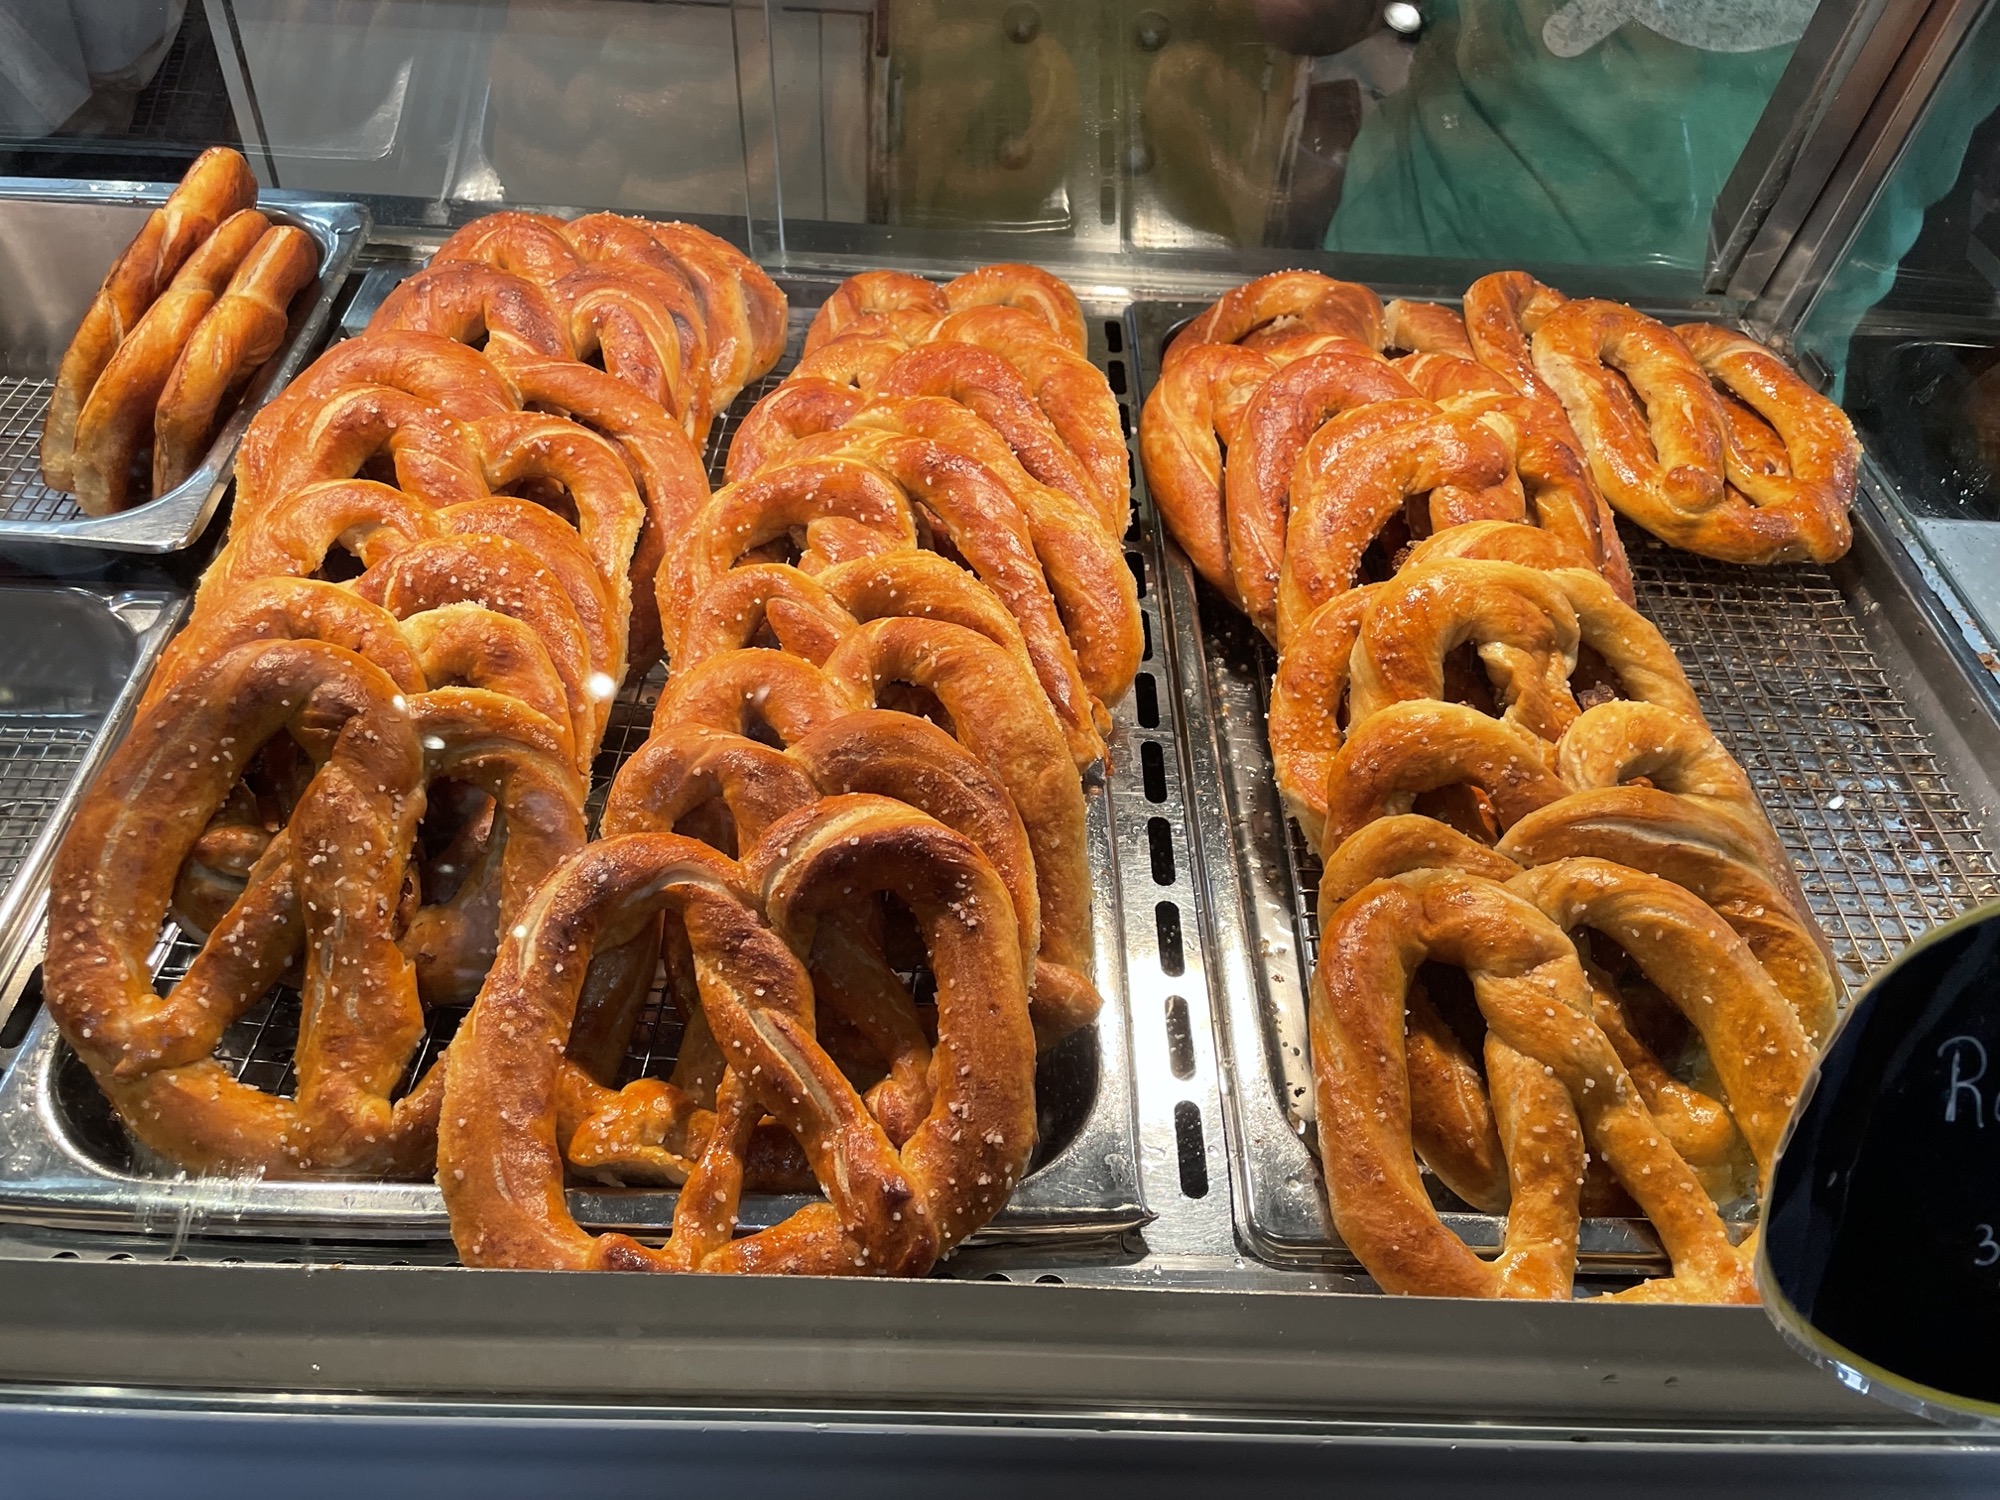
#5: Miller’s Twist – a pretzel cheesesteak
Address: 51 N 12th St, Philadelphia, PA 19107 (located in Reading Terminal Market)
Website: https://www.millerstwist.com/
Hours: Mon-Wed 8am-3:30pm, Thurs-Sat 8am-5pm, closed Sundays (check the website for updated hours)
Cheesesteak with onions: $7.50 (before tax)
Pros:
- Unique little snack-sized cheesesteak in a pretzel dough
- Takes both cash and card
Cons:
- Located inside Reading Market – paid street or garage parking only
- Closes earlier than regular cheesesteak shops
- Sells out depending on popularity
This place didn’t show up on my cheesesteak research, but it did come up during my Reading Terminal Market must-try places to eat. I’ve got a serious weakness for soft pretzels, so of course when I saw that they had a Cheese whiz and onion cheesesteak pretzel, I just had to have it. Although small, it packs a lot of flavour. It’s essentially Cheez Whiz, onions, and steak wrapped up and baked inside a soft buttery pretzel dough. It was honestly SO GOOD. Toby said it was his favourite cheesesteak that day! This place also makes pretty great regular pretzels as well – they’re soft, buttery, and everything right.


#6: Angelo’s Pizzeria
Address: 736 S 9th St, Philadelphia, PA 19147
Website: https://www.angelospizzeriasouthphiladelphia.com/
Hours: Wed – Sun 11am-7pm, closed Mon & Tues (check the website for updated hours)
Cheesesteak with onions: $16.04 for a cheesesteak (before tax, cash only, not sure if they charged for extra onions)
Pros:
- Hefty sandwich
- Nice sesame bun, baked fresh daily
Cons:
- Cash only (unsure if there’s an ATM on site)
- Long lines all the time, they can run out of bread during the day so come early
- Long waiting time – it took an hour from ordering to pick up
- No seating available
- Average cheesesteak filling
Okay, unpopular opinion here, but I think Angelo’s cheesesteak is just okay. 🫣
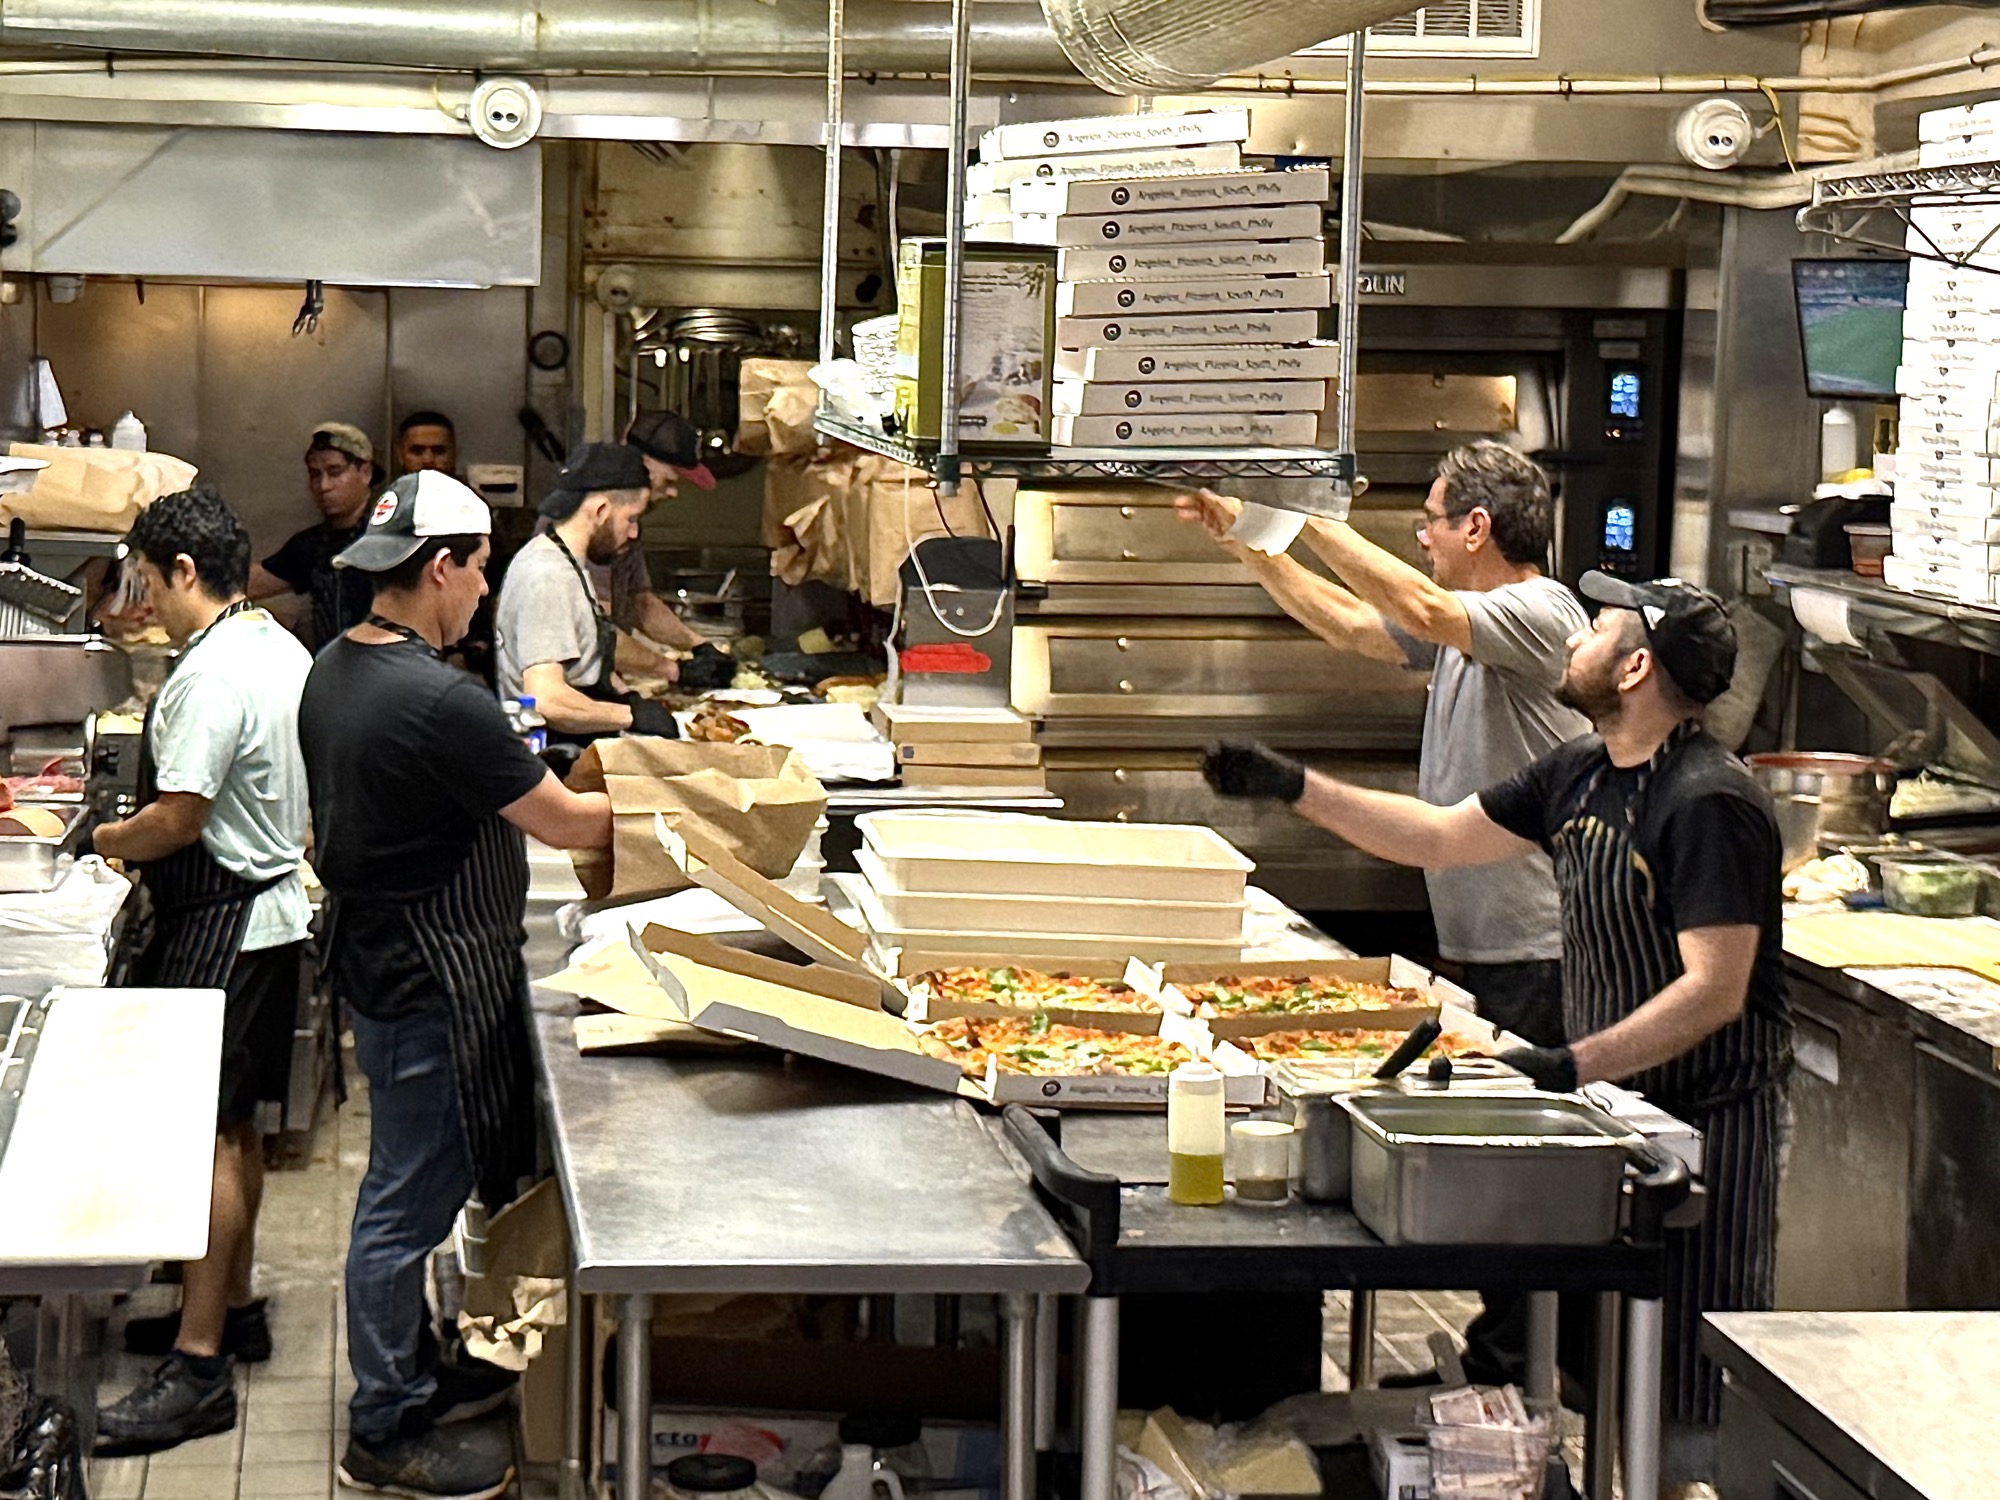
Angelo’s Pizzeria opened in their current location in 2019. They’re known for their pizza, hoagies, and the cooper sharp cheesesteak. They are praised for their unique fresh-baked sesame bun that is used in their cheesesteaks and hoagies. They often run out of bread during the day and stop serving cheesesteaks altogether, so if you want to try Angelo’s, get there early! Angelo’s reached superstar status when Dave Portnoy (the one-bite pizza review guy and founder of Barstool Sports) gave them a glowing review on their pizza in 2019, calling it “the best pizza in Philly”. Since then they’ve had a line-up out the door from opening to close! They take phone orders, but that’s only if you can get through. Apart from their pizza, their cooper sharp cheesesteak is also highly recommended by so many people. In 2024, Bradley Cooper, a Philadelphia native, teamed up with the owner of Angelo’s, Danny DiGiampietro, and opened up a cheesesteak shop in NYC called ‘Danny and Coop’s Cheesesteaks’, bringing over that famous sesame bun (which we’ve yet to visit – I’m waiting for the lines to die down).
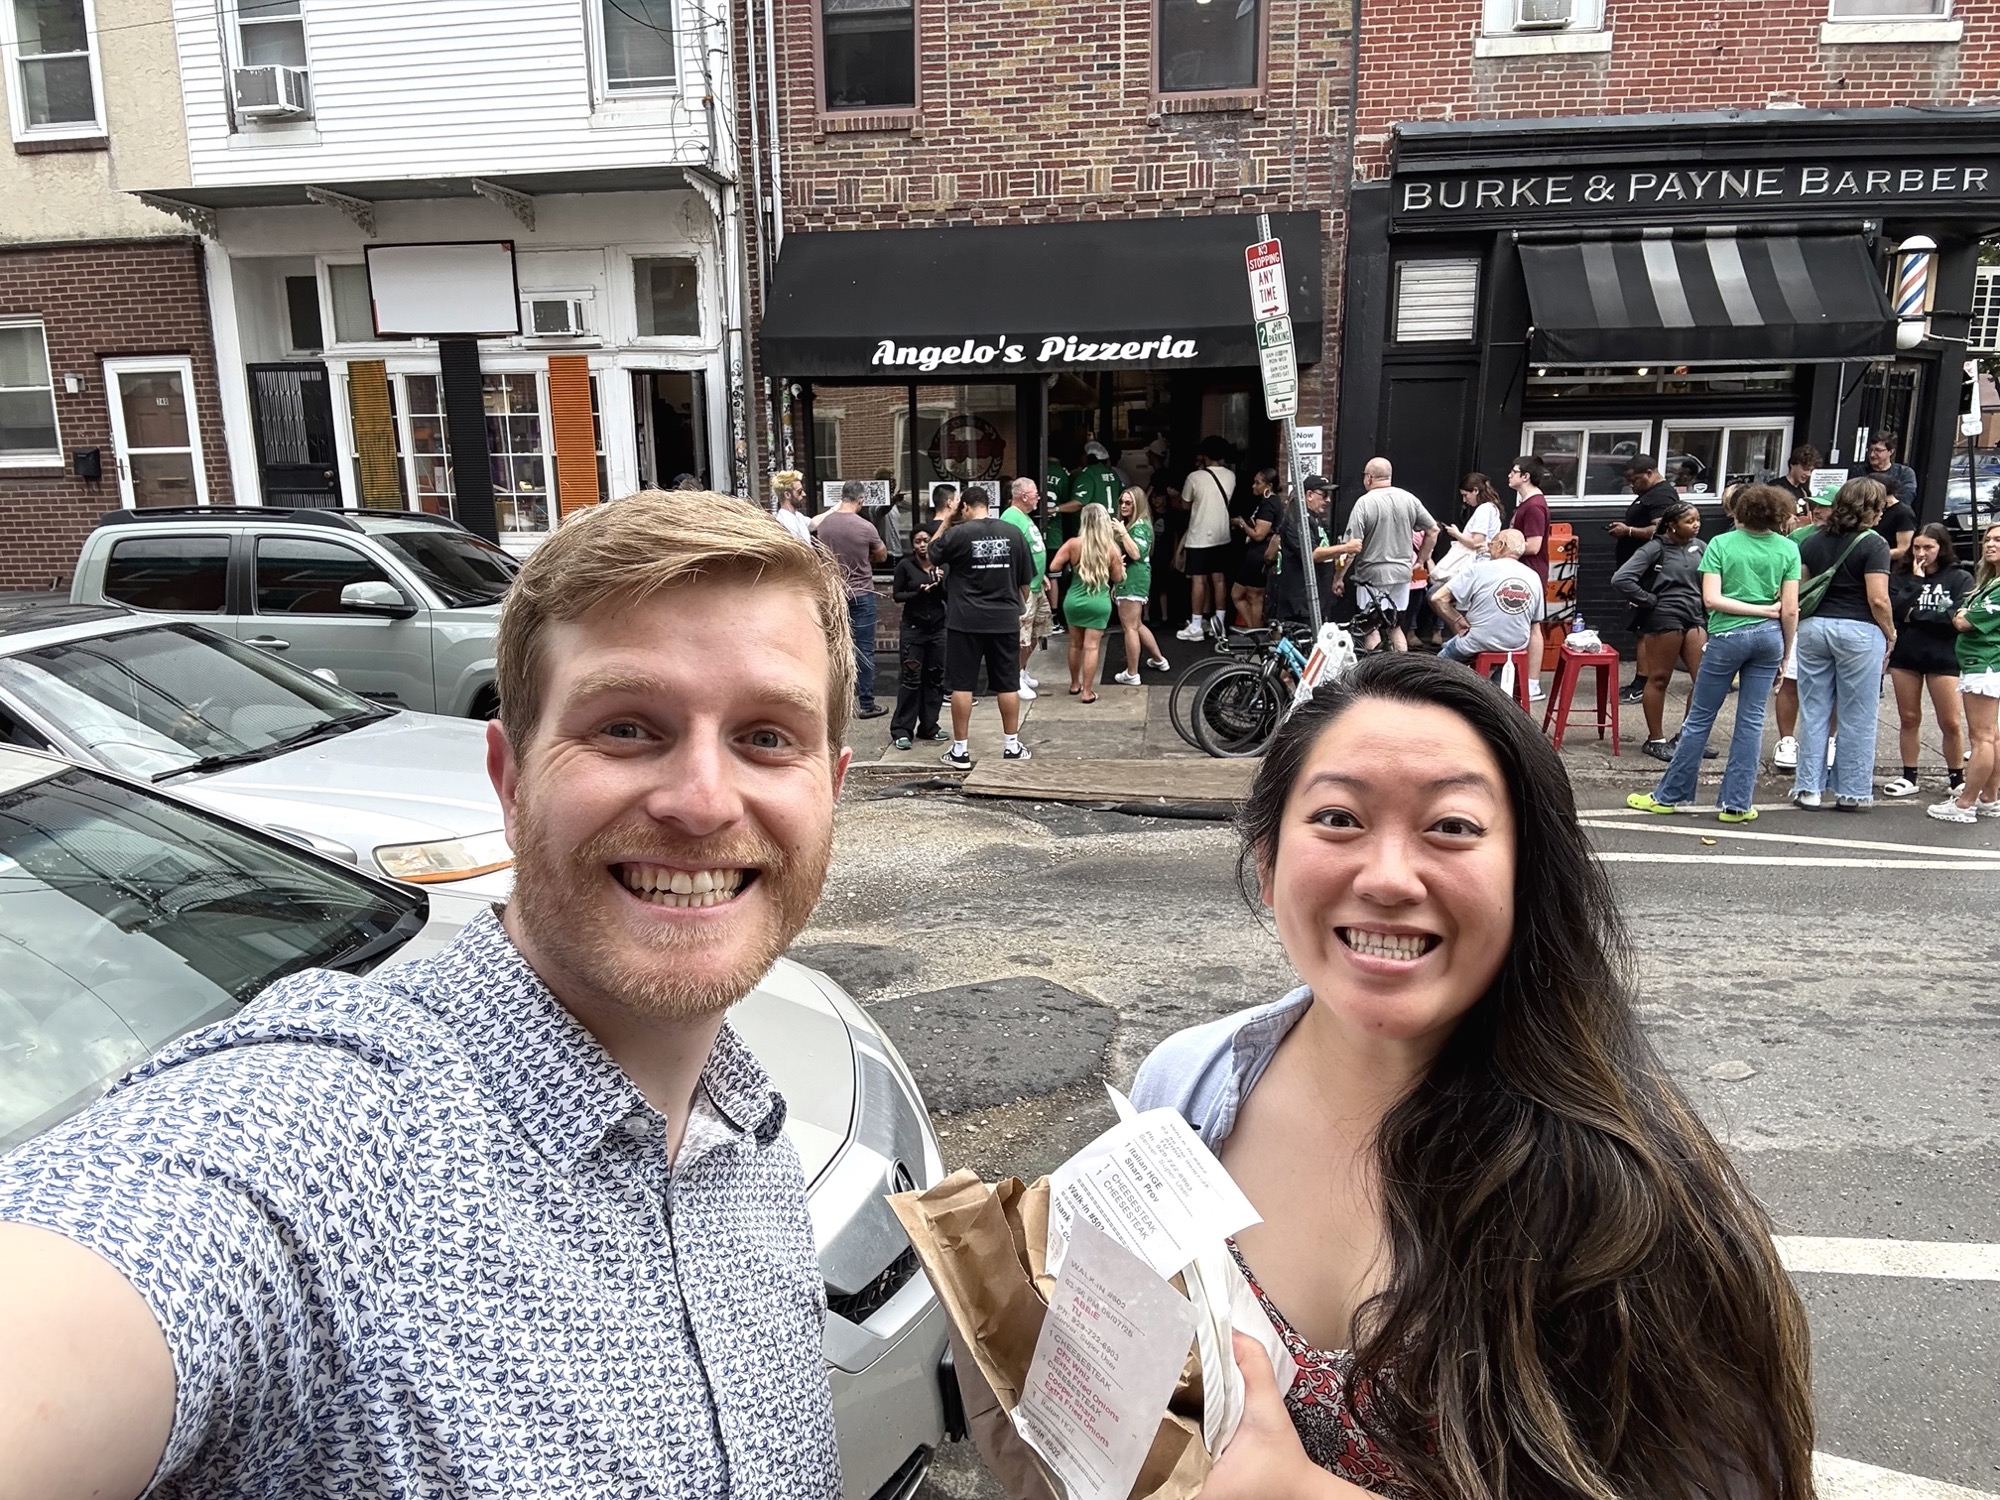
From all this hype and publicity around them, I was super excited to try Angelo’s. It took a while for us to make it here since they’re always closed Mondays and Tuesdays which are the only two days off we get off from work. We arrived here just before 4pm on a Saturday and there was already at least 20 people in front of us waiting to order. This is a takeaway shop only, which means there’s no seating anywhere. There is a park across the street with limited benches, but many people were sitting on a stoop, curb, or just standing to eat. Luckily we found a parking spot directly in front of the shop so we just ate in the car.
It was a 12 minute wait for us to get to the front of the line to put in our order (cash only, pay on pick up), and it was another 40 minutes until they texted us to pick up our order. This was definitely the longest we’ve ever waited for a cheesesteak! Good thing we weren’t starving. We went for a walk on the popular South Street until they texted us to let us know our order was ready – even then, it was another 8 minute wait in the food pick-up line.
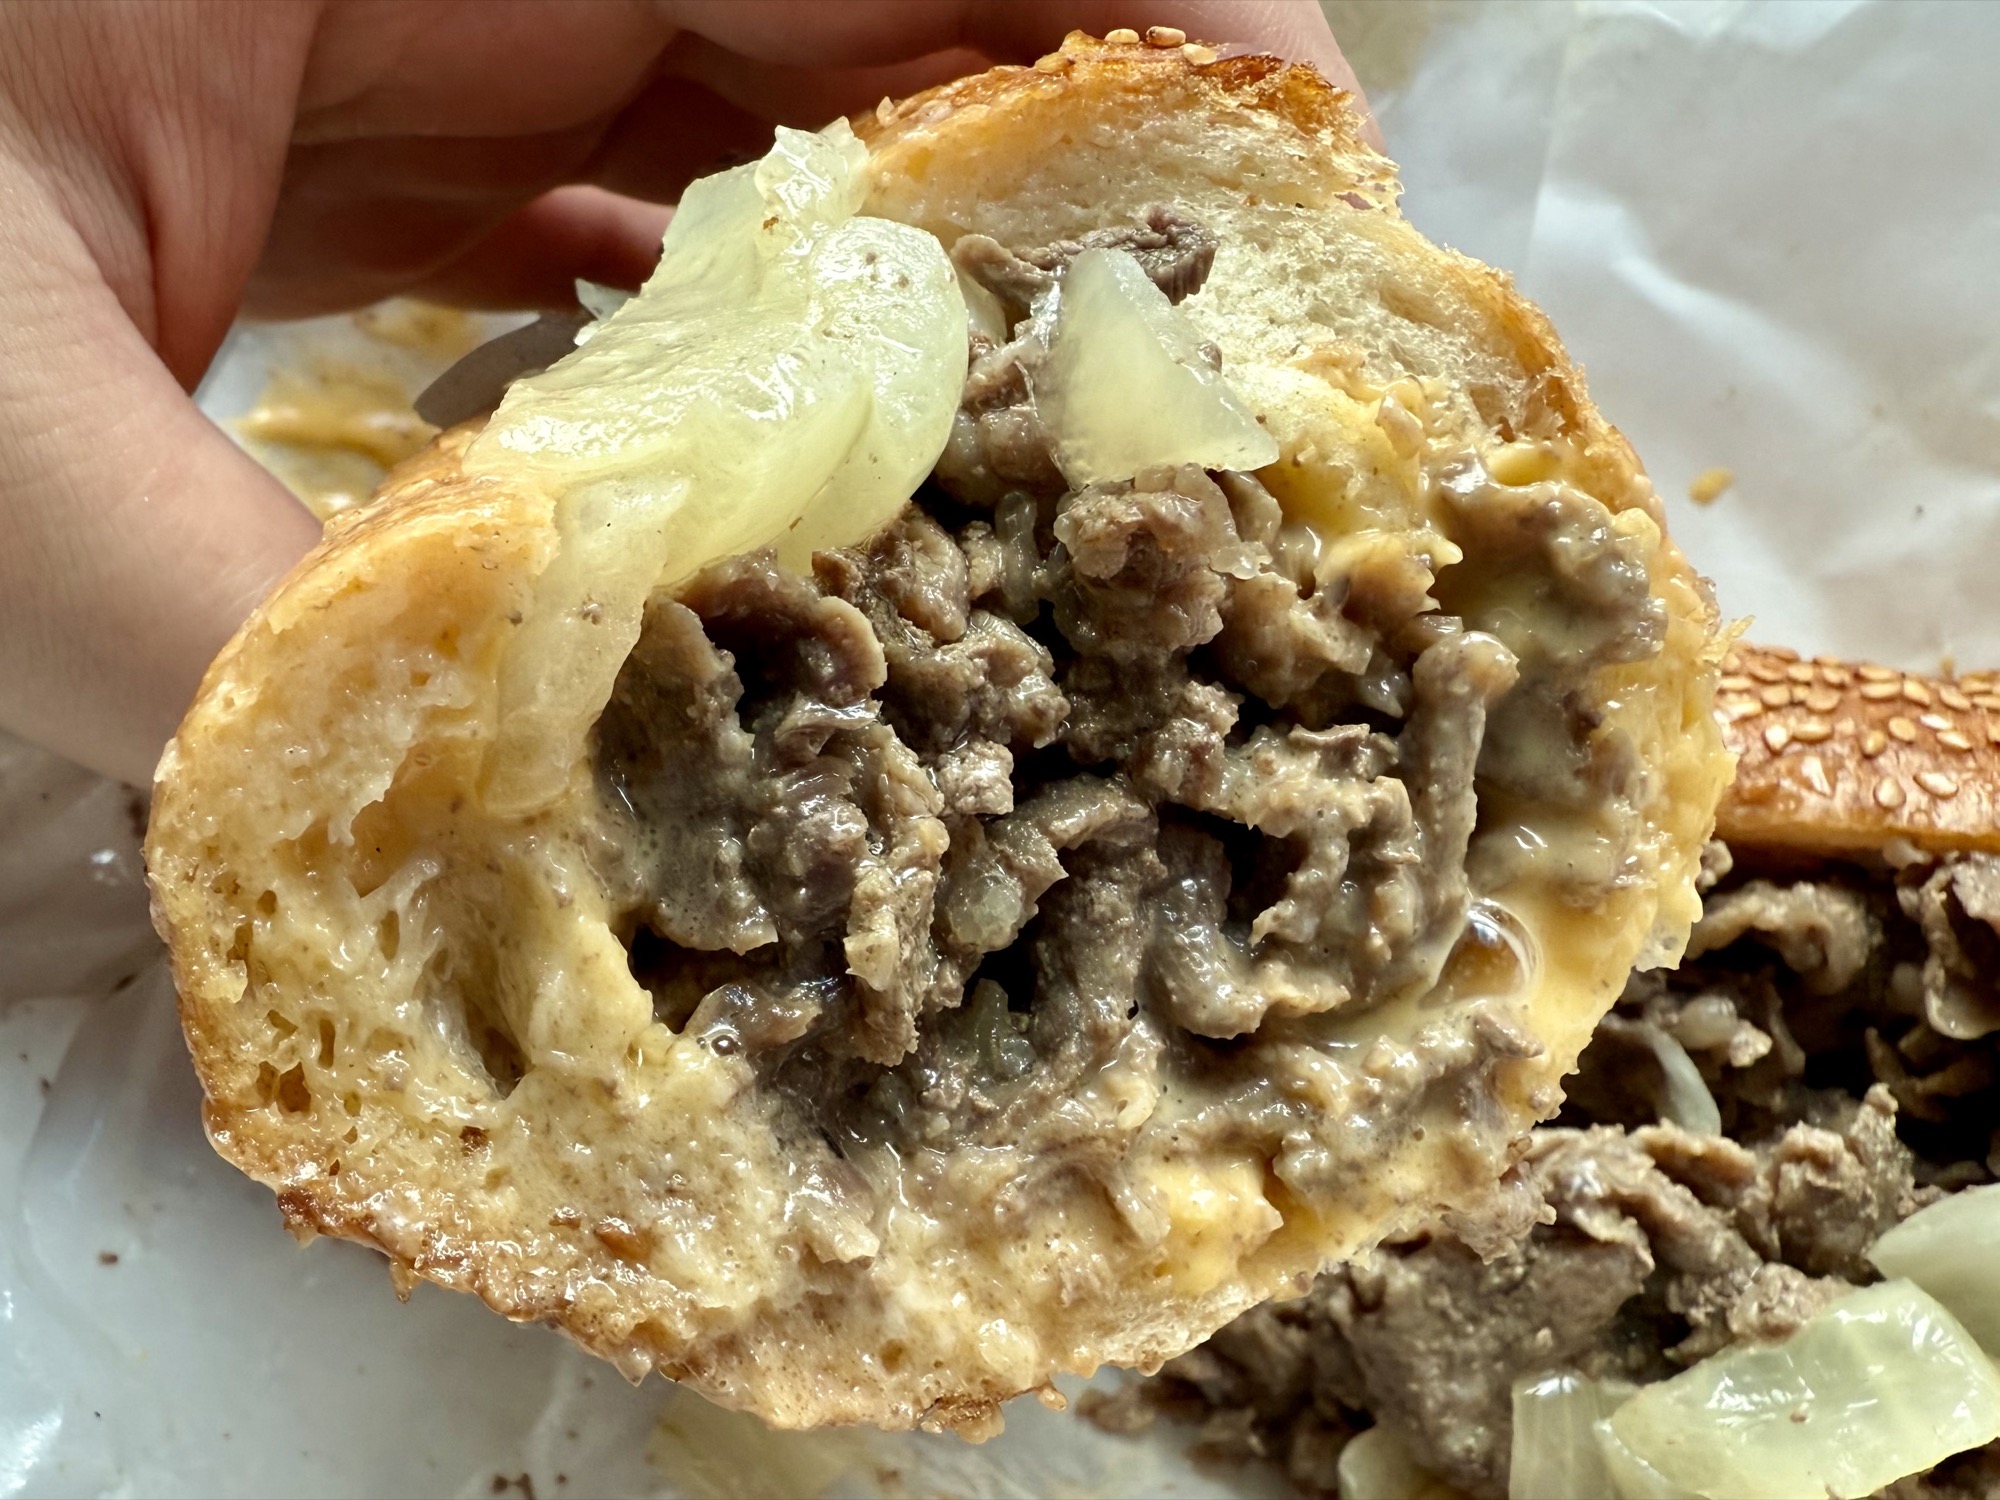
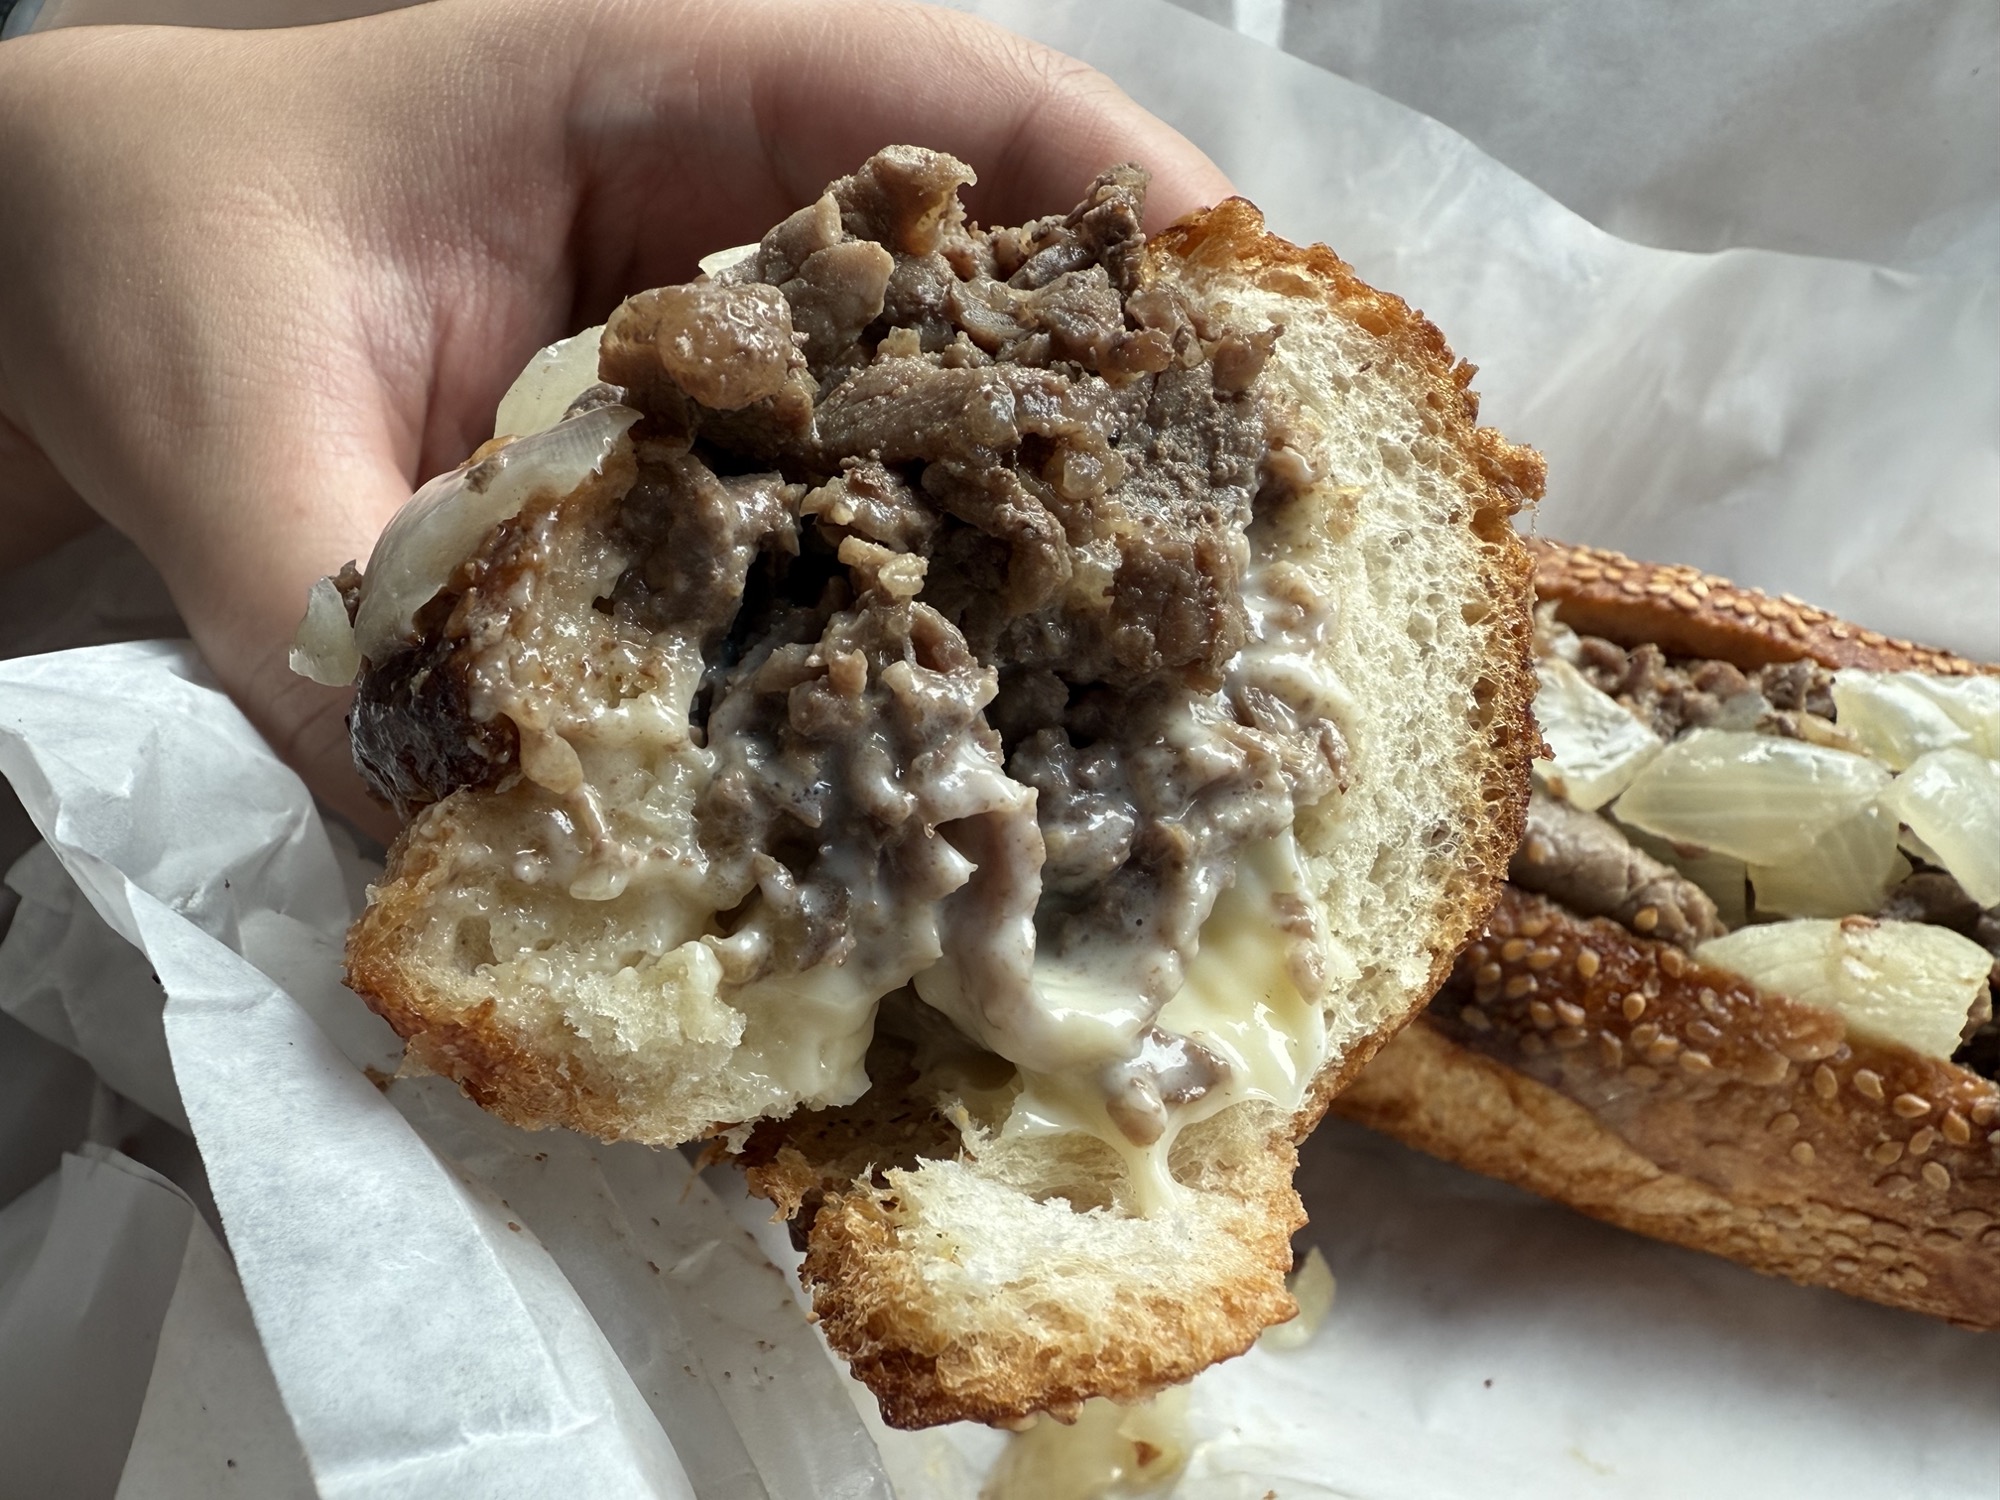
Since it took us so long to finally get here and with such a long wait, we ordered 3 sandwiches to try it all: two cheesesteaks – my classic Cheez Whiz, but since people rave so much about the Cooper Sharp, we got that one too, and also an Italian hoagie since Toby was a little sick of cheesesteaks at this point (not me, I could eat it until my dying day!). Sadly, the cheesesteaks were not worth the hype in my opinion. Although the sesame bun was good and super jam packed with sesame seeds, it wasn’t life-changing (I actually prefer the bun at Del Rossi’s better, Toby disagrees). The meat was average – not dry but not overly juicy, there wasn’t enough cheez whiz, and even though I asked for extra onions, it wasn’t enough. The onions were also kinda bland and tasted steamed rather than fried or caramelized. It was a pretty hefty sandwich though. The hoagie was also okay. Overall it wasn’t a bad cheesesteak. I’d say it was average but their sesame bread brings them up a couple points. It definitely wasn’t worth the hour-long process from ordering to pick-up. Maybe their pizzas are more worthwhile 🤷🏻♀️.


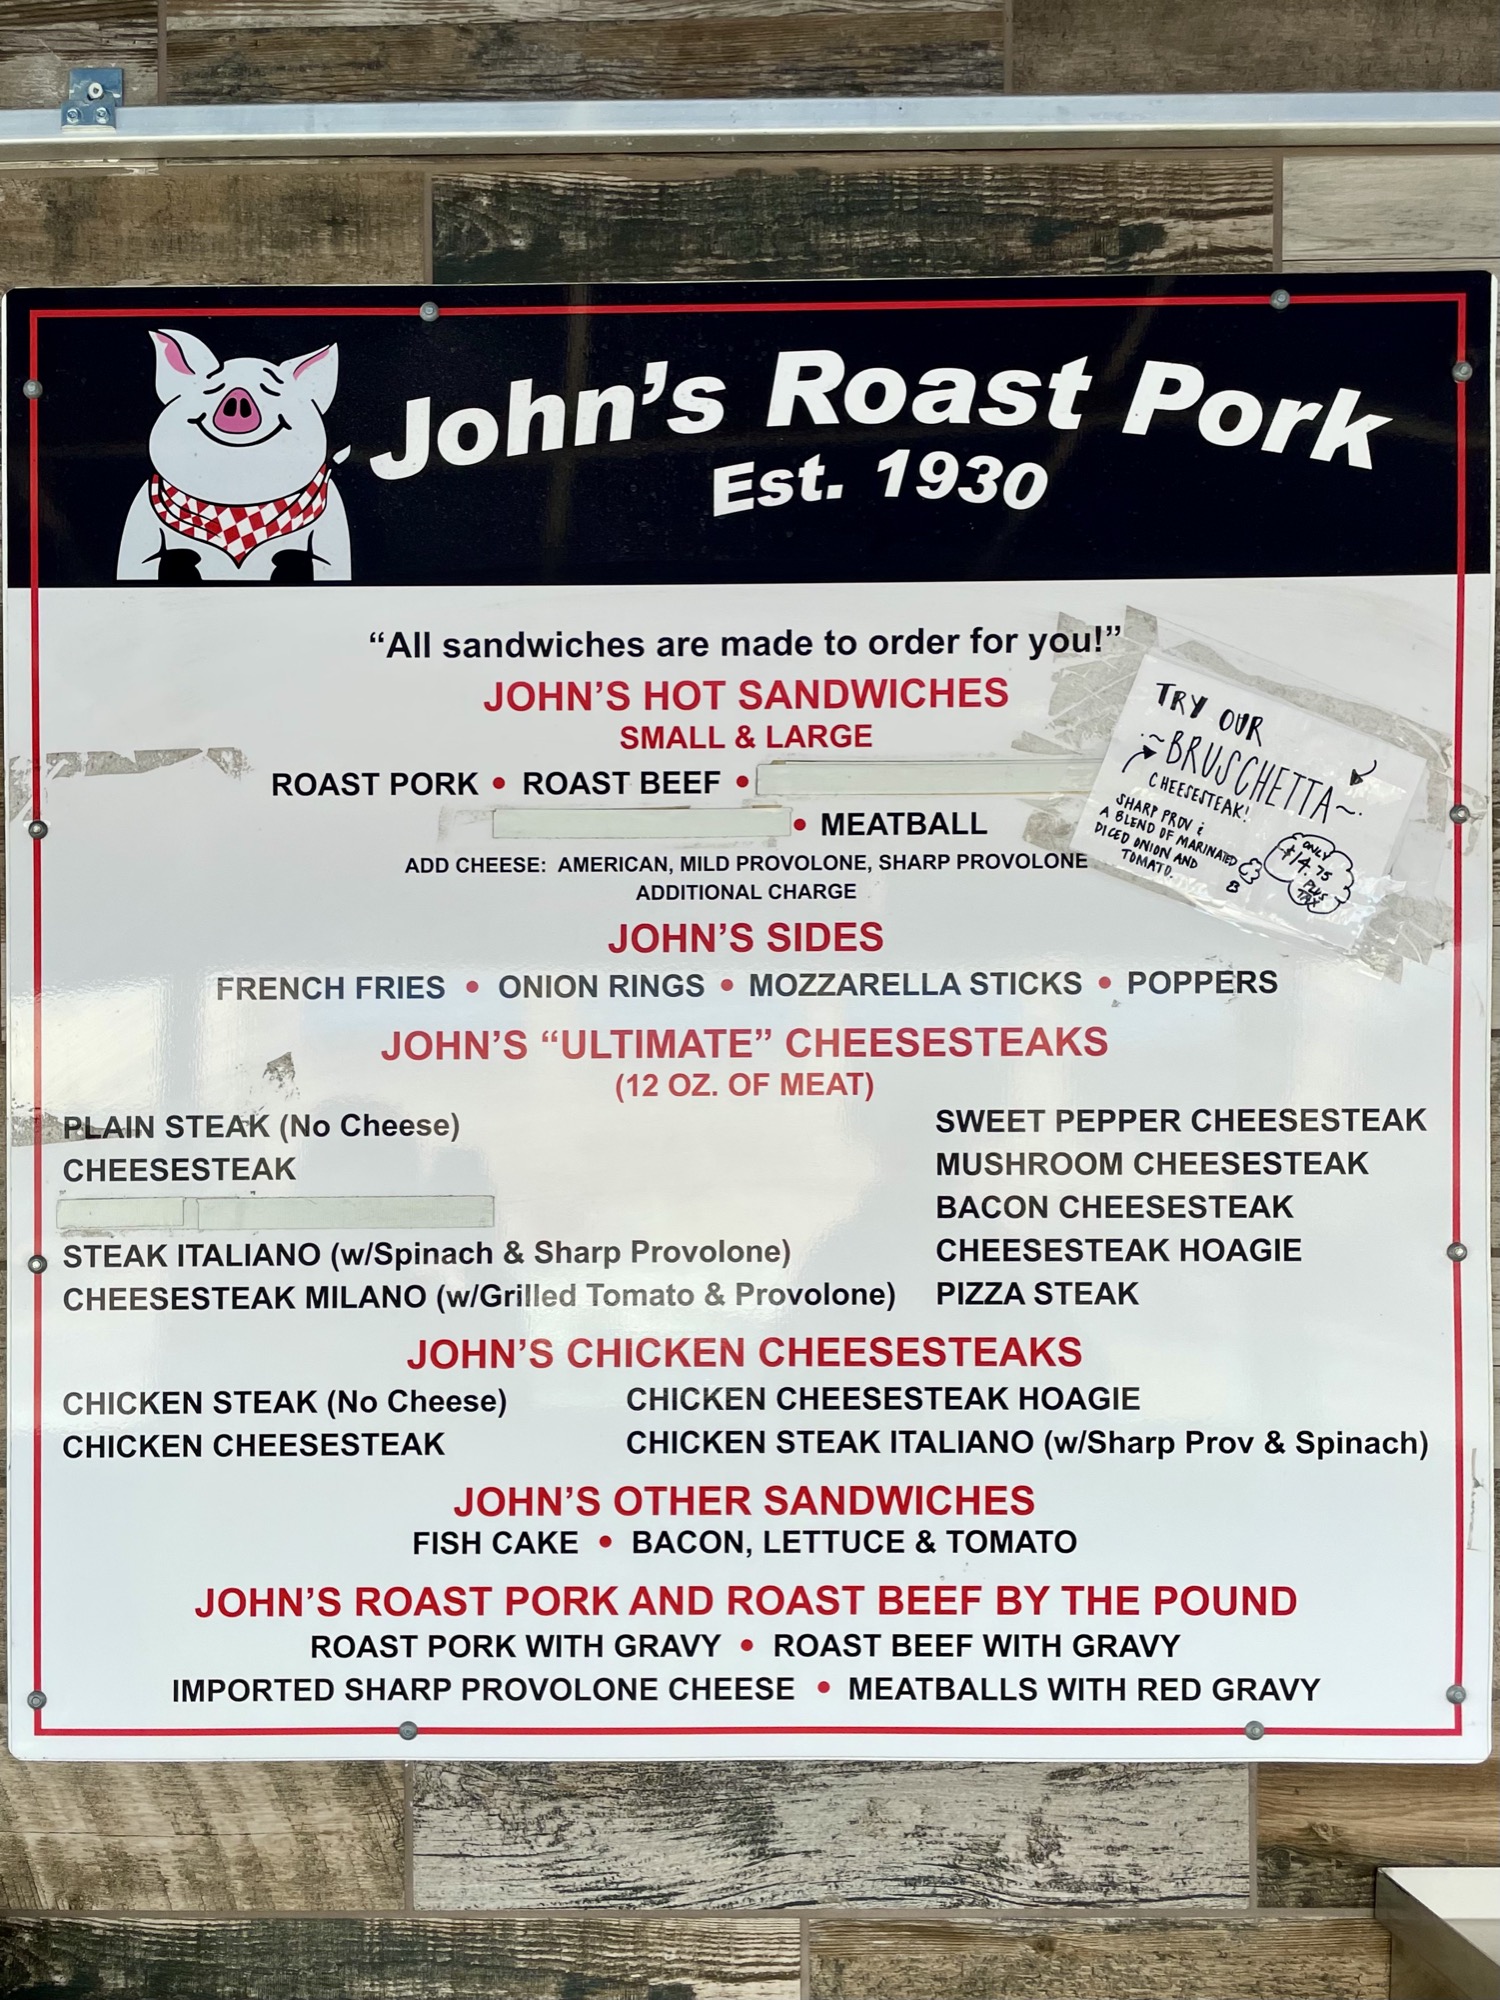
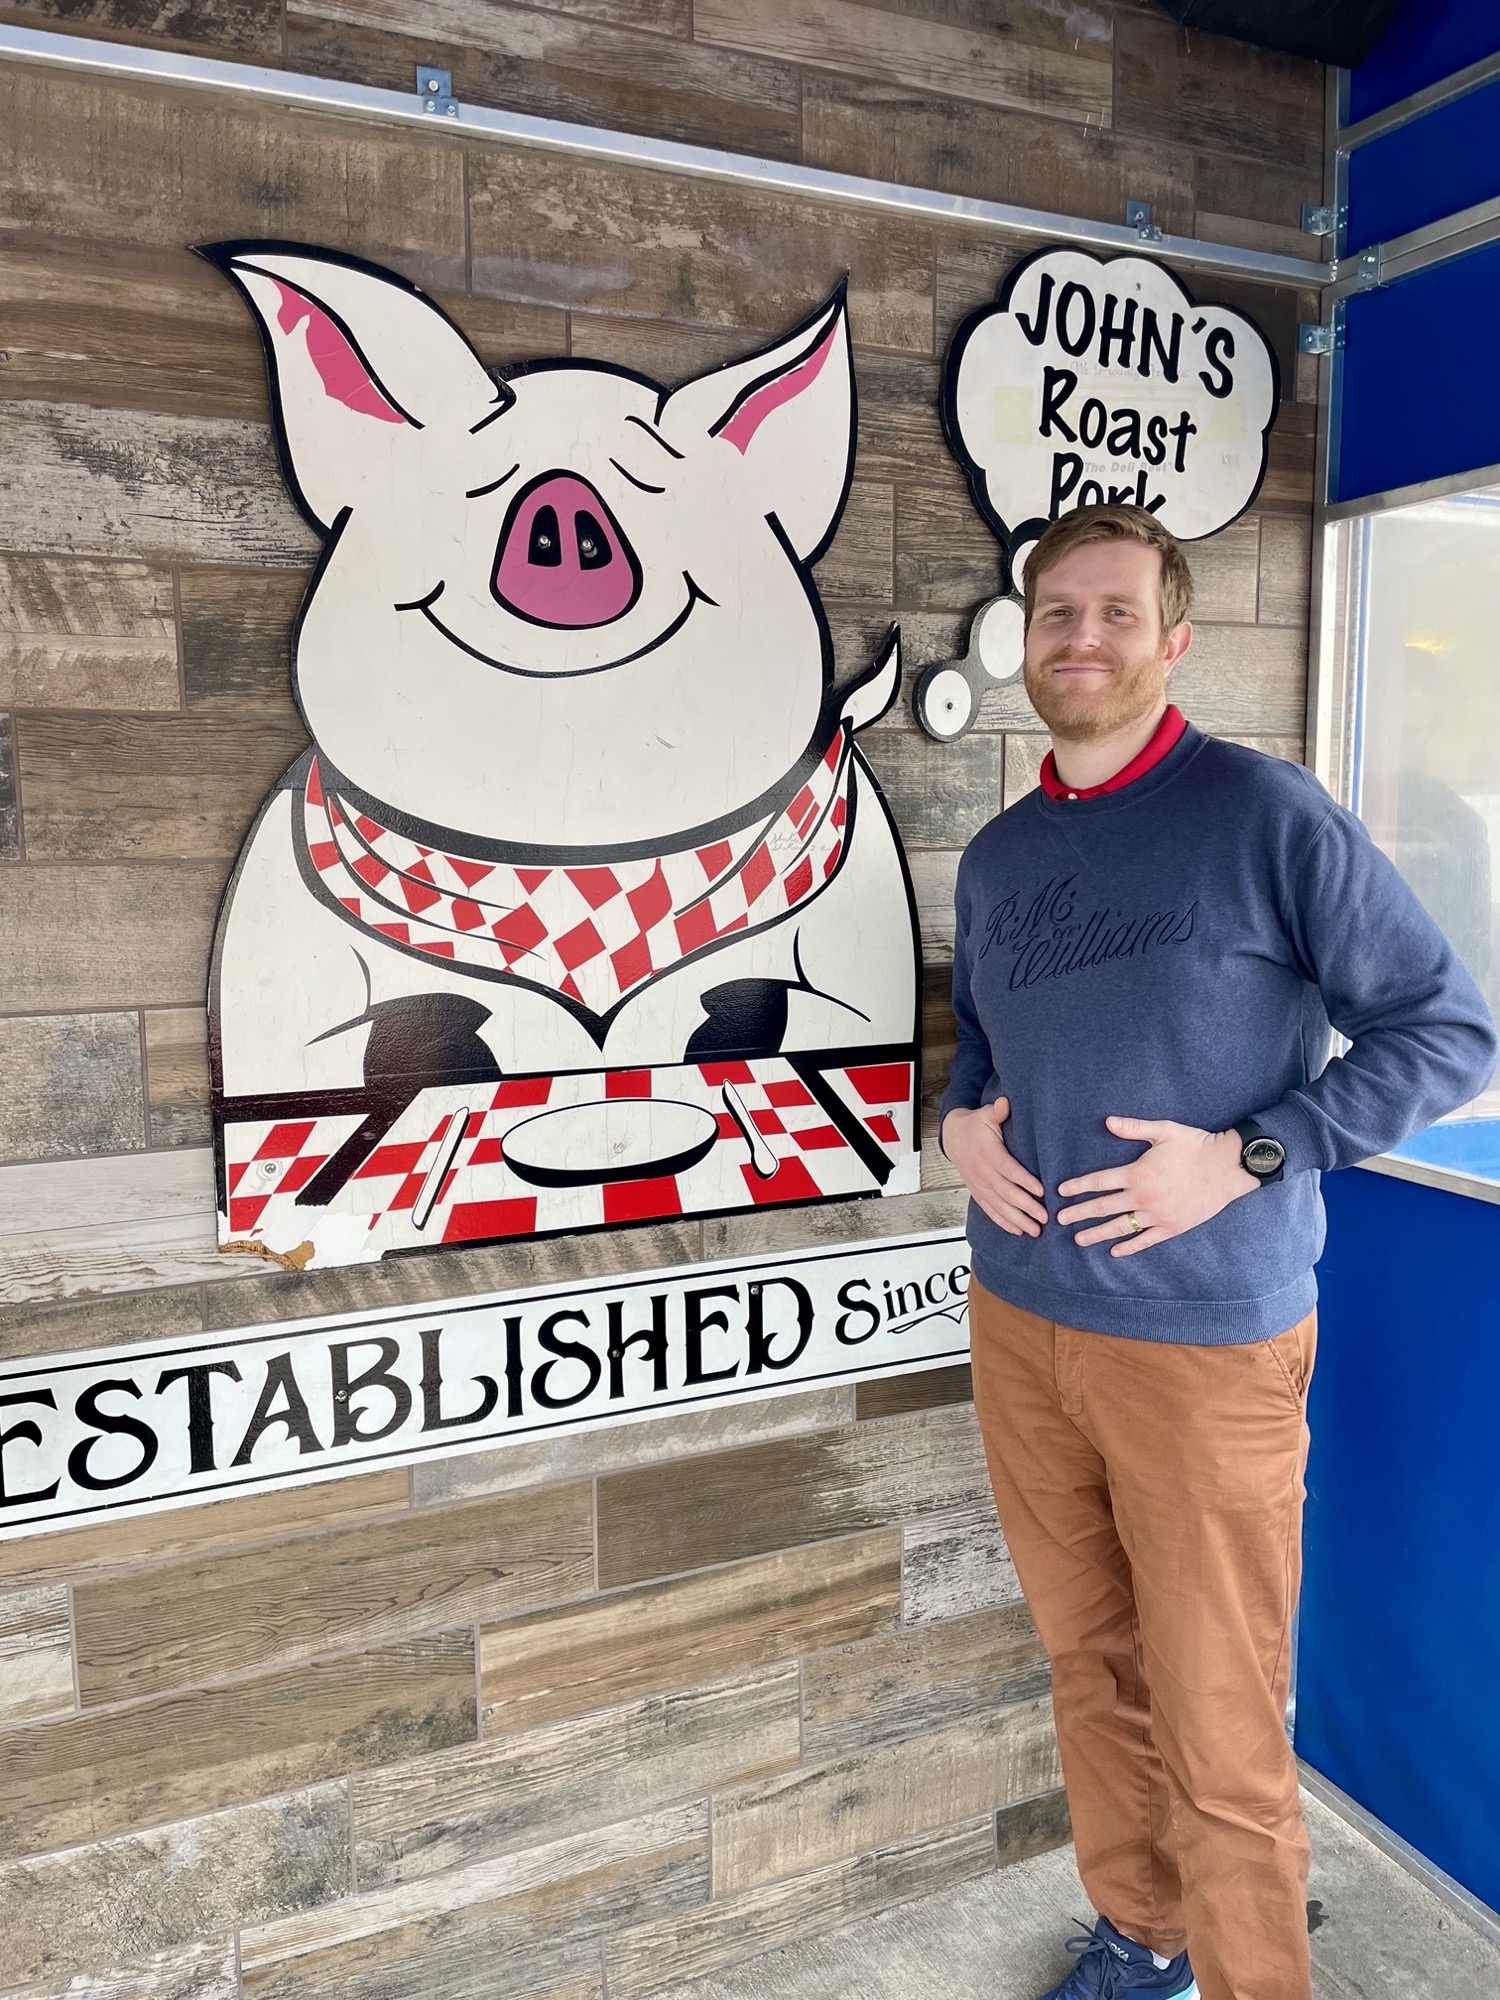
#7: John’s Roast Pork
Address: 14 E Snyder Ave, Philadelphia, PA 19148
Website: http://www.johnsroastpork.com/
Hours: Tues-Sat 10am-5pm, closed Sun & Mon (check the website for updated hours)
Cheesesteak with onions: $15-16 (I can’t remember exactly, prices weren’t posted, but we paid $18 with a soda)
Pros:
- Hefty sandwich – lots of meat
- Indoor and outdoor seating available
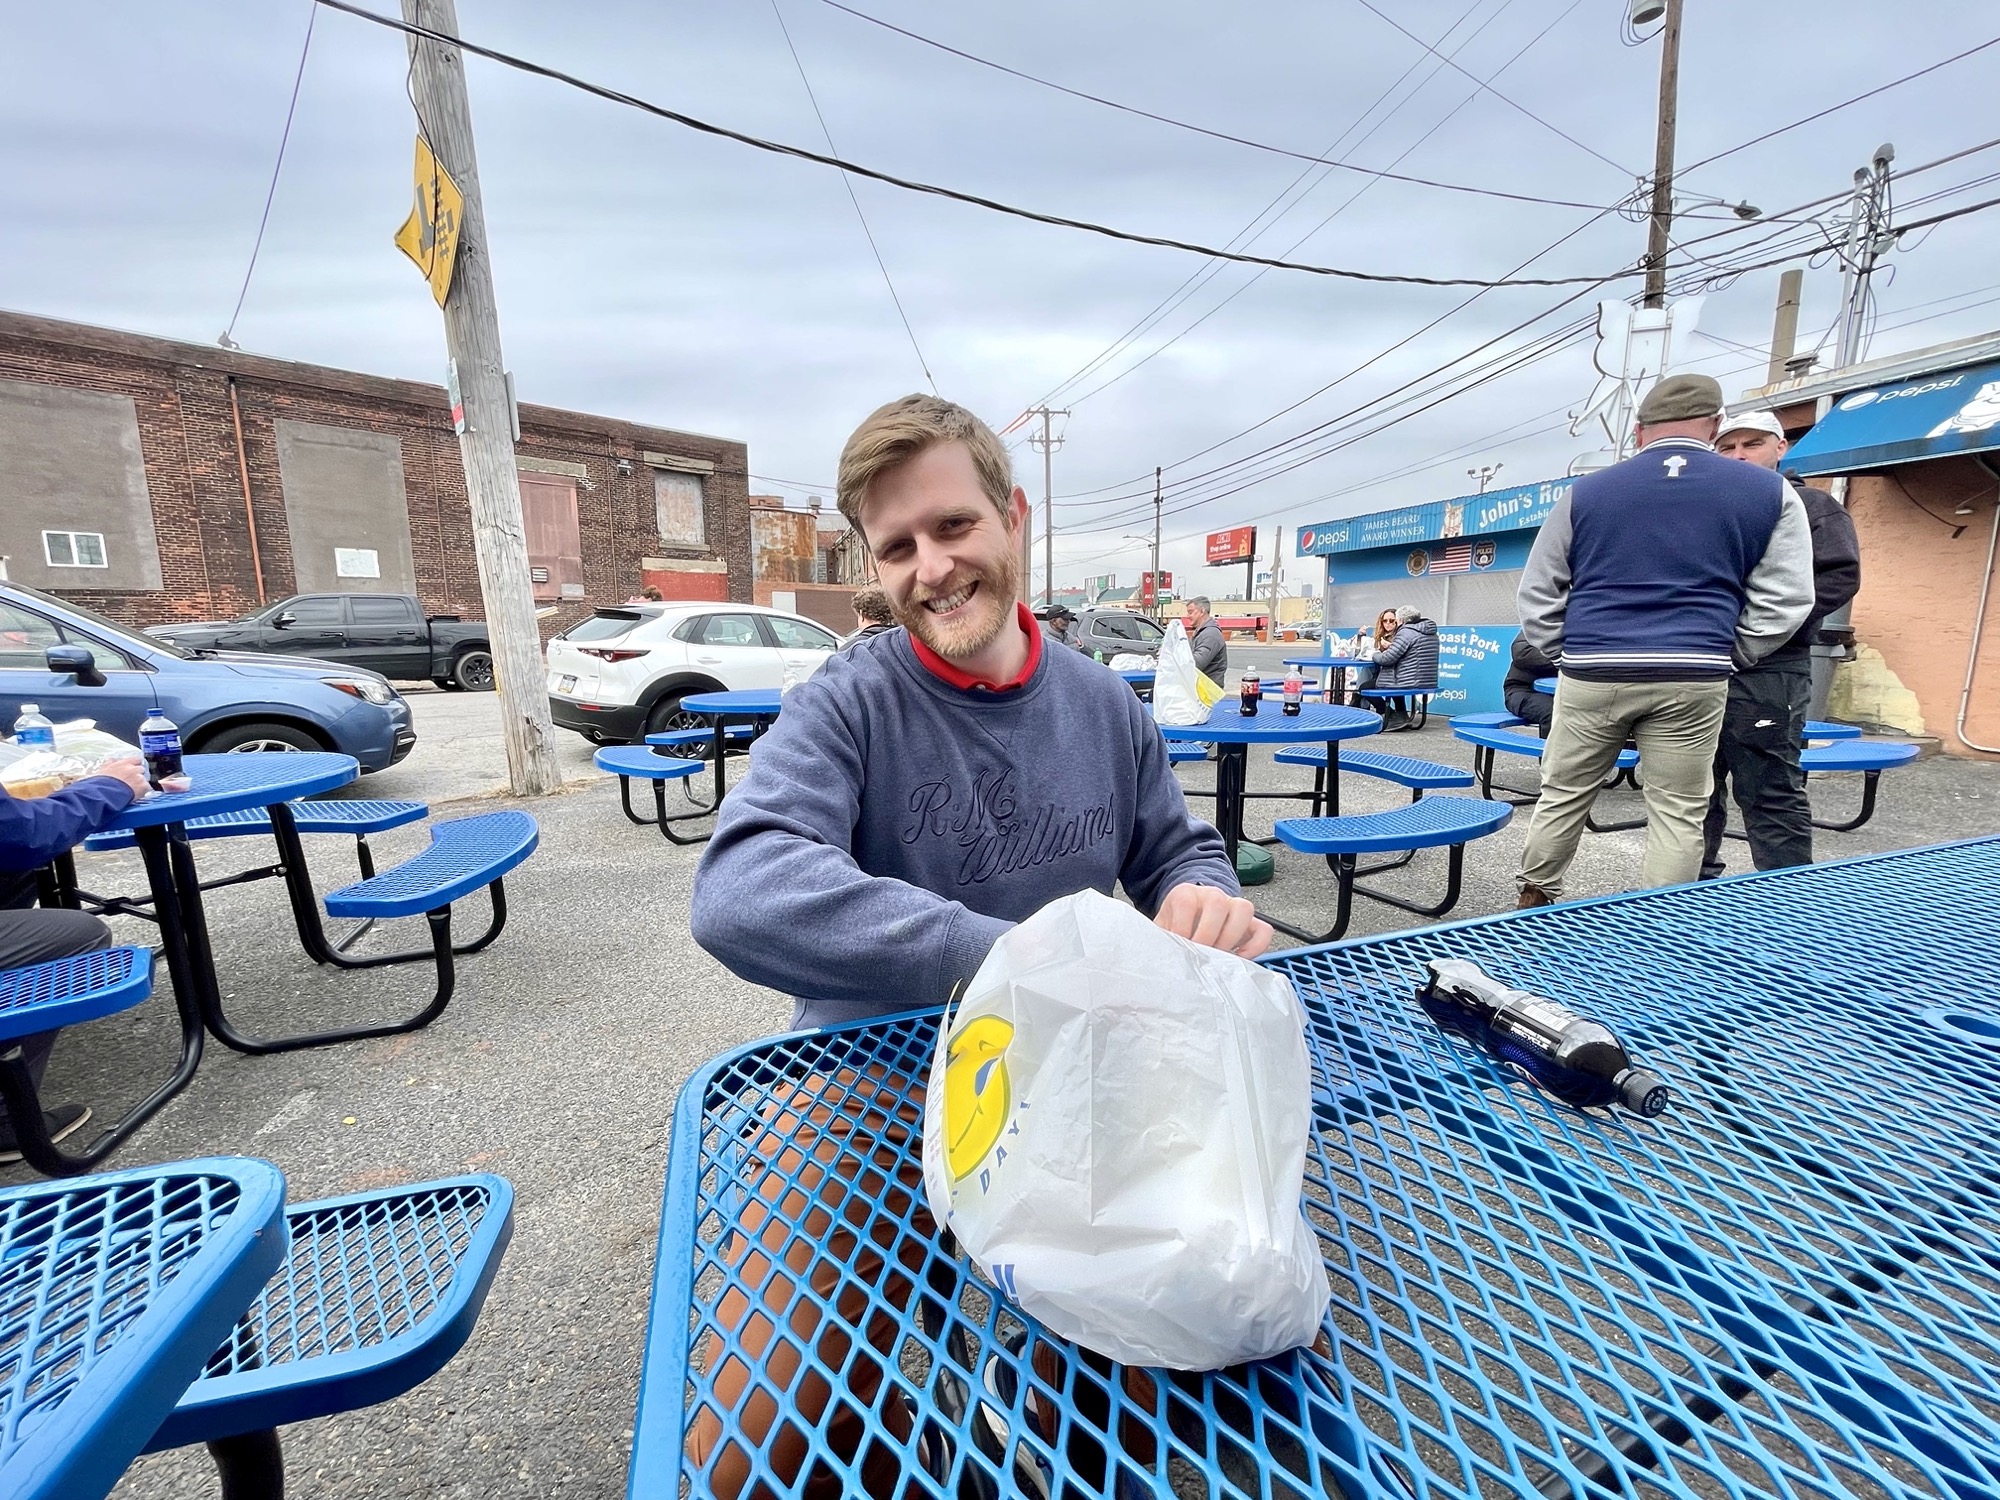
- Takes both cash and card
Cons:
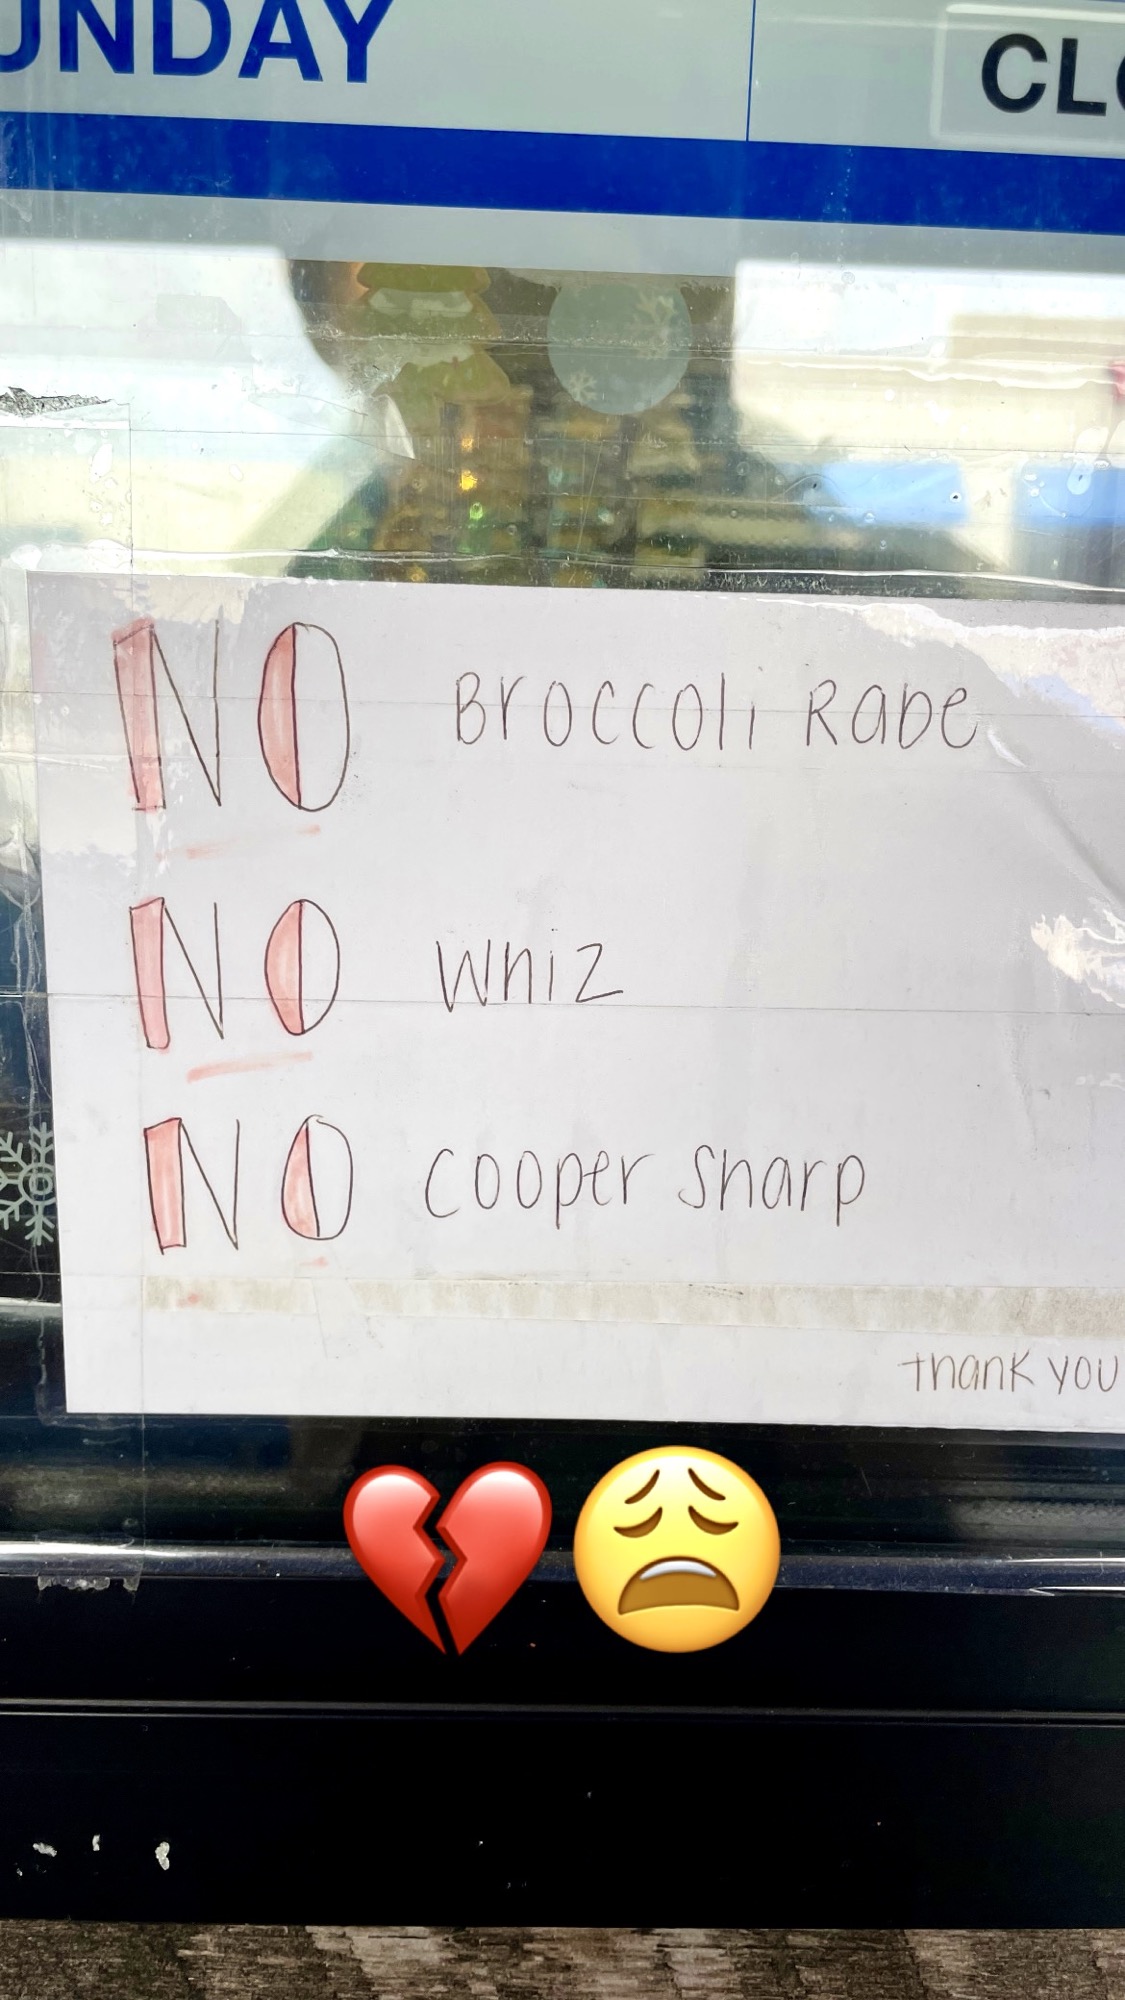
- No cheez whiz or cooper sharp, only provolone or american cheese
- Out of the way location in an industrial area with warehouses and strip clubs around
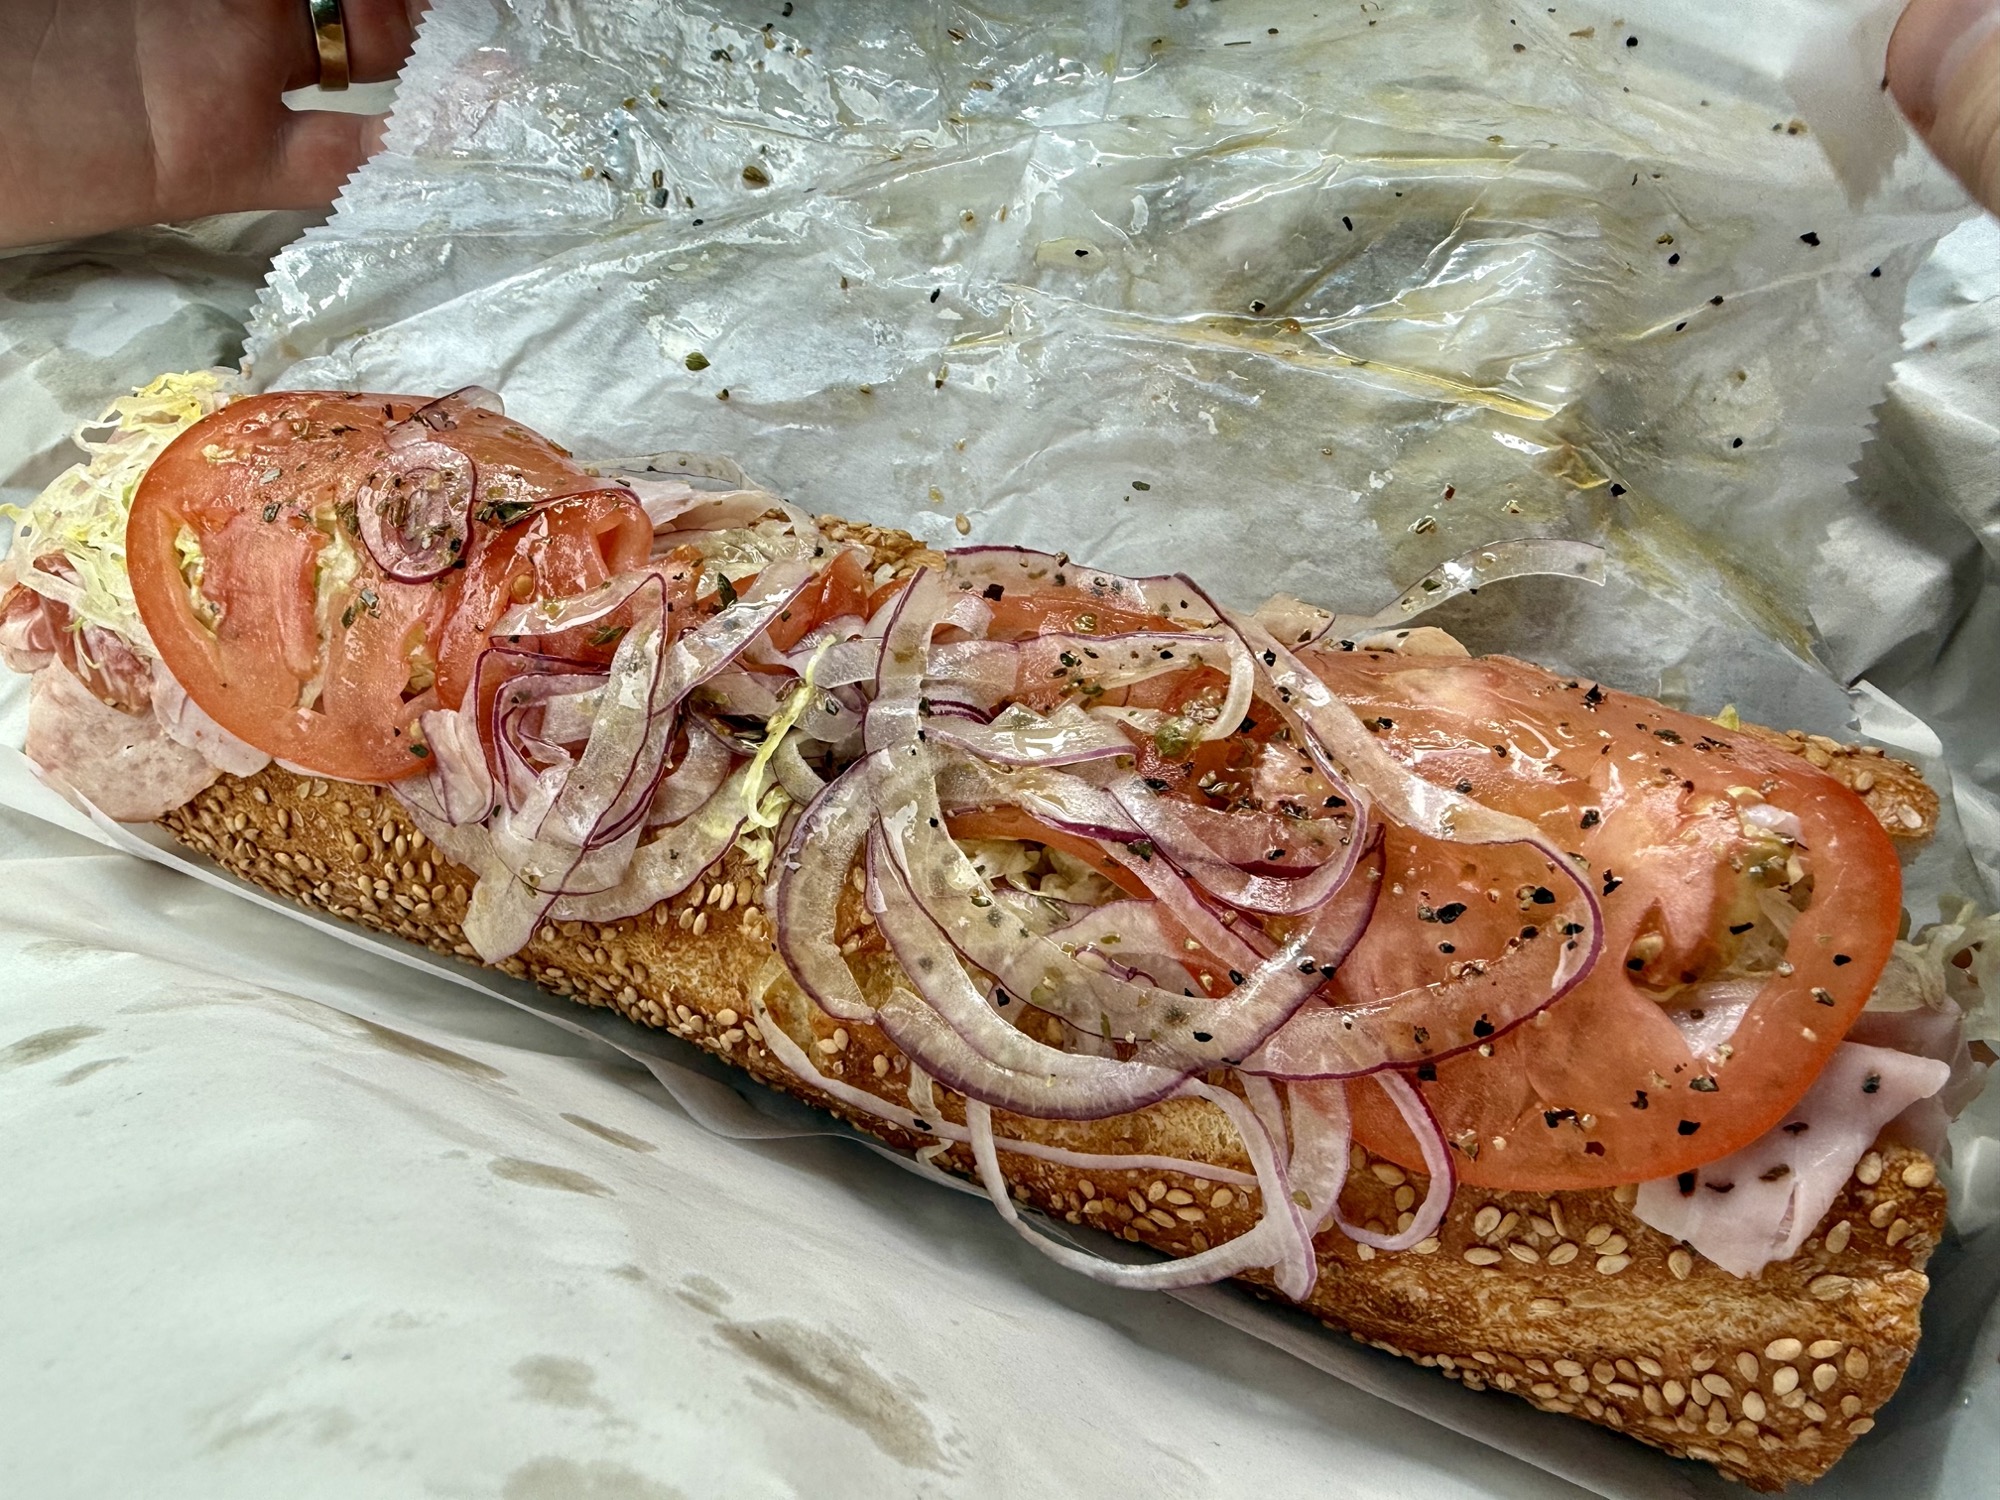
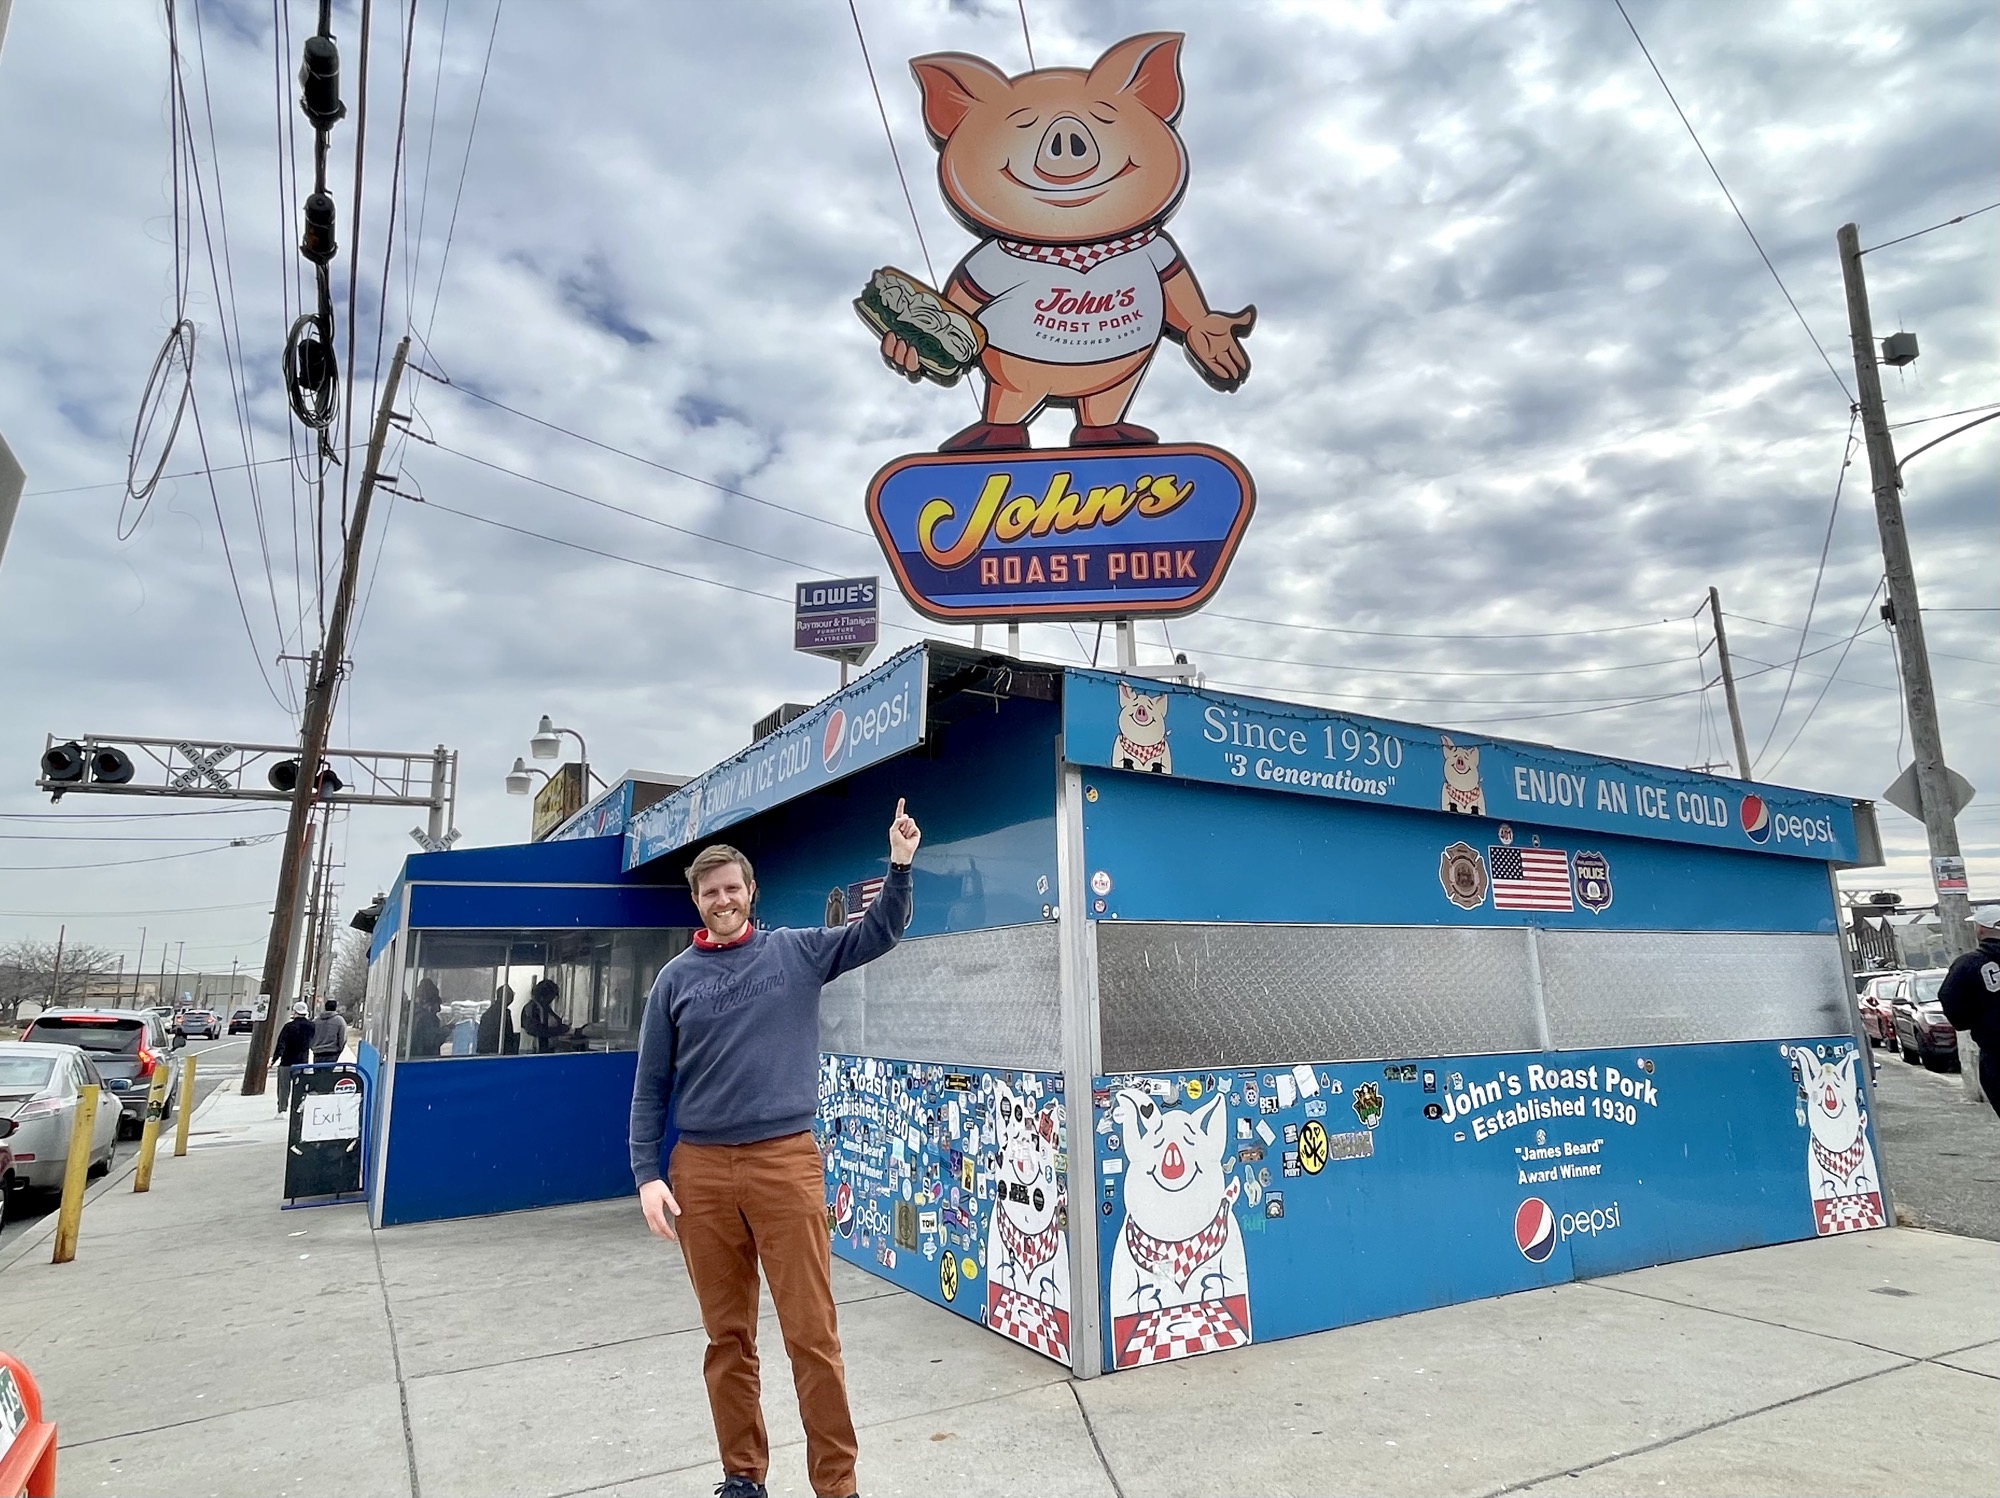
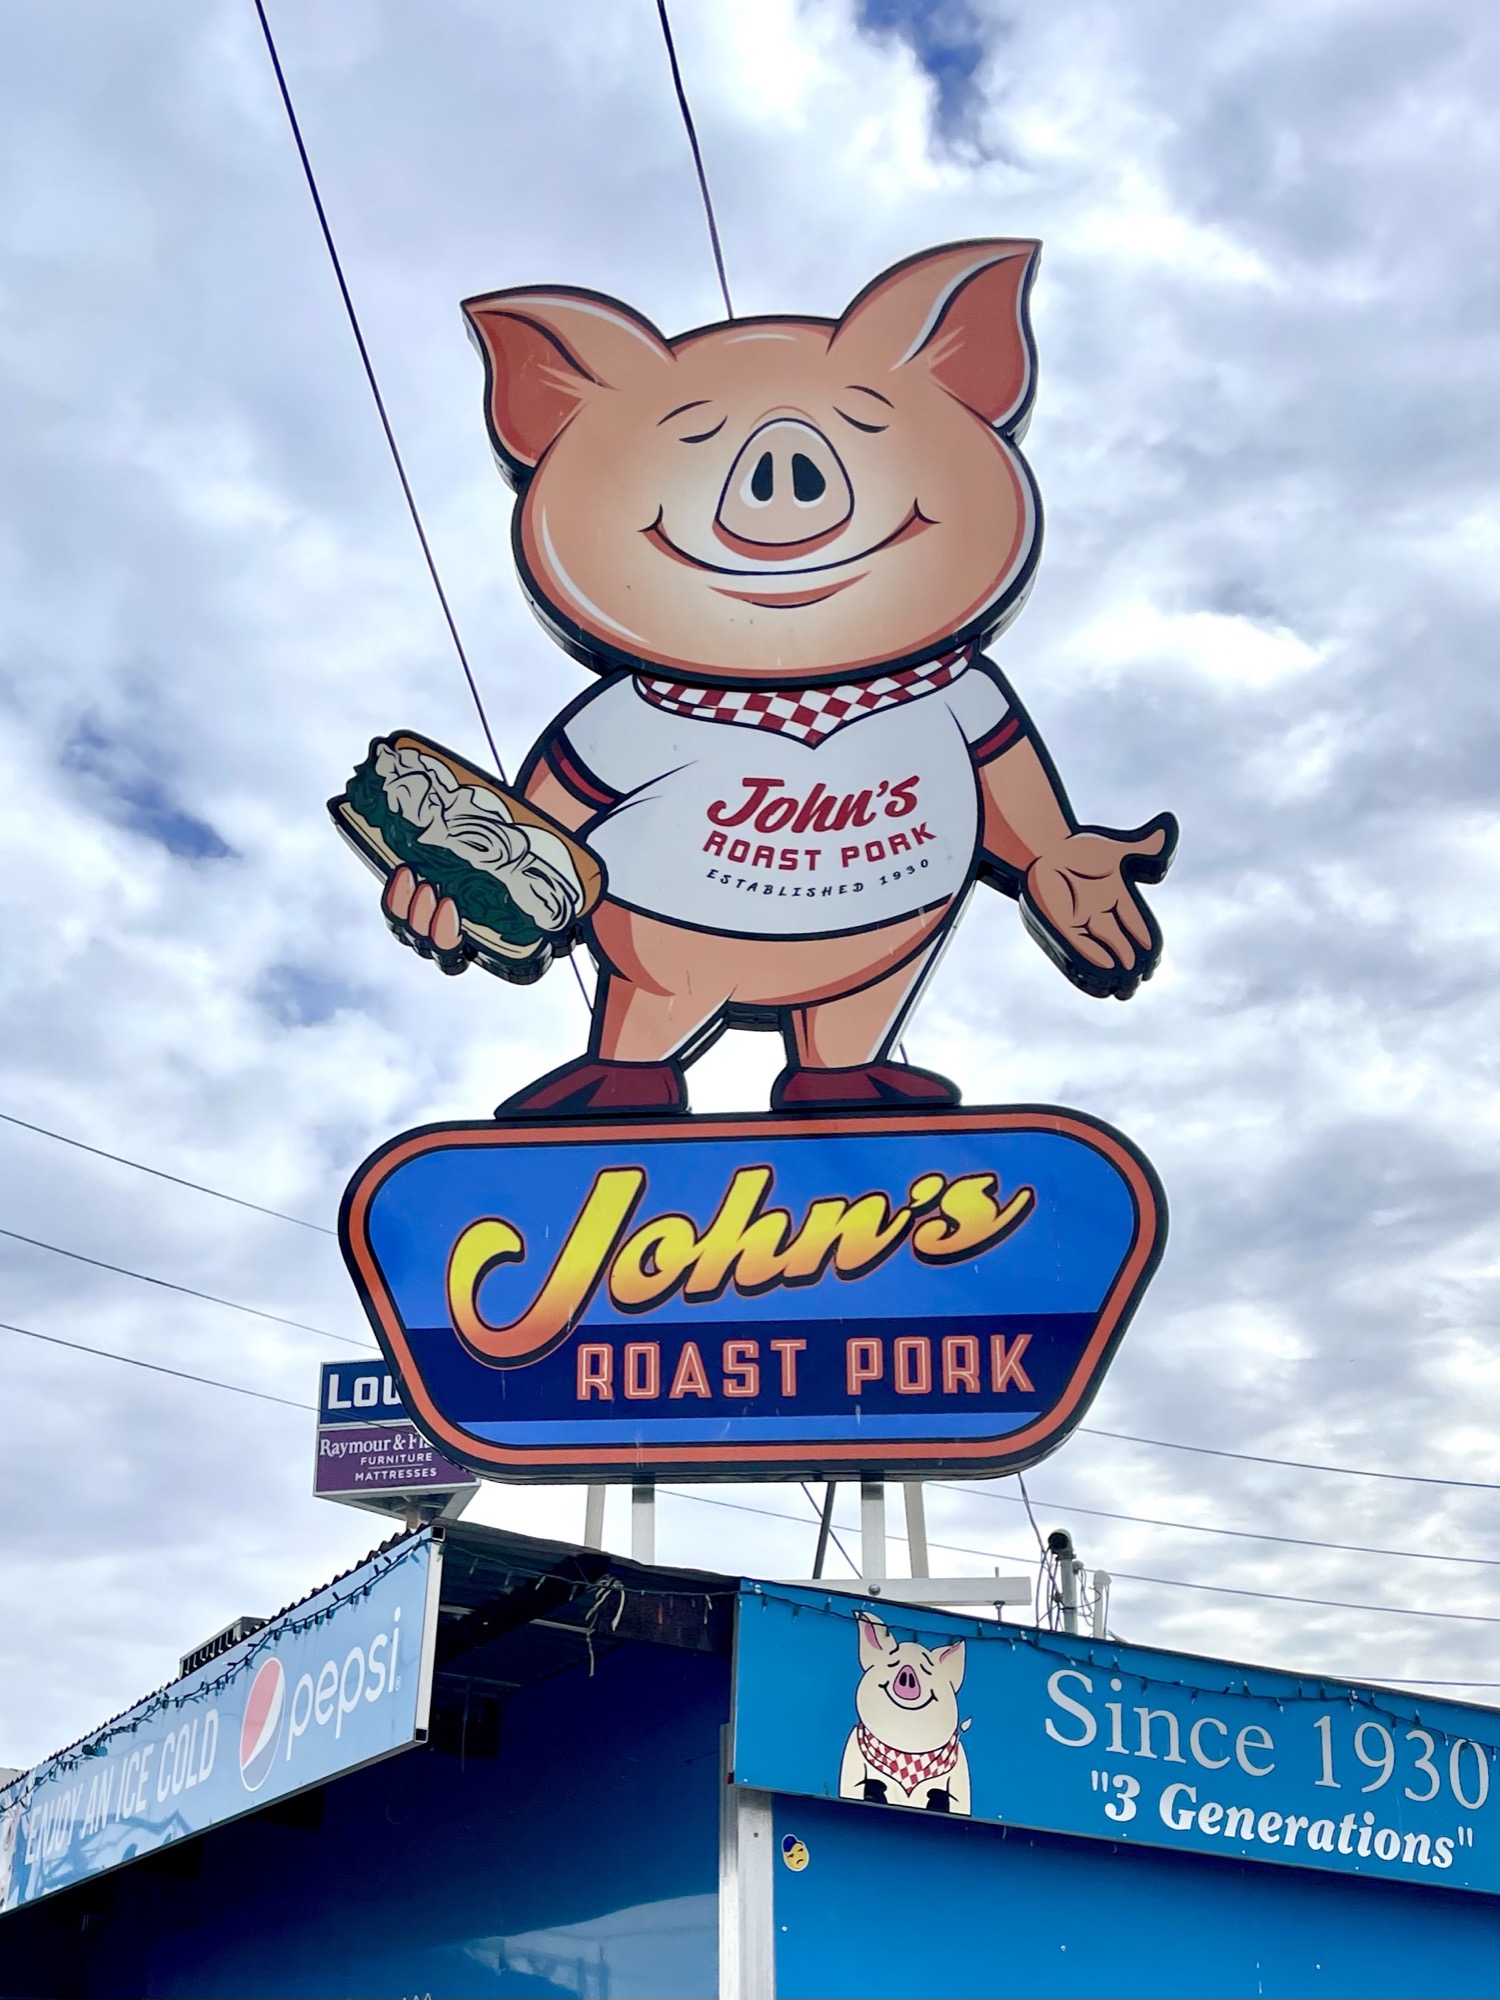
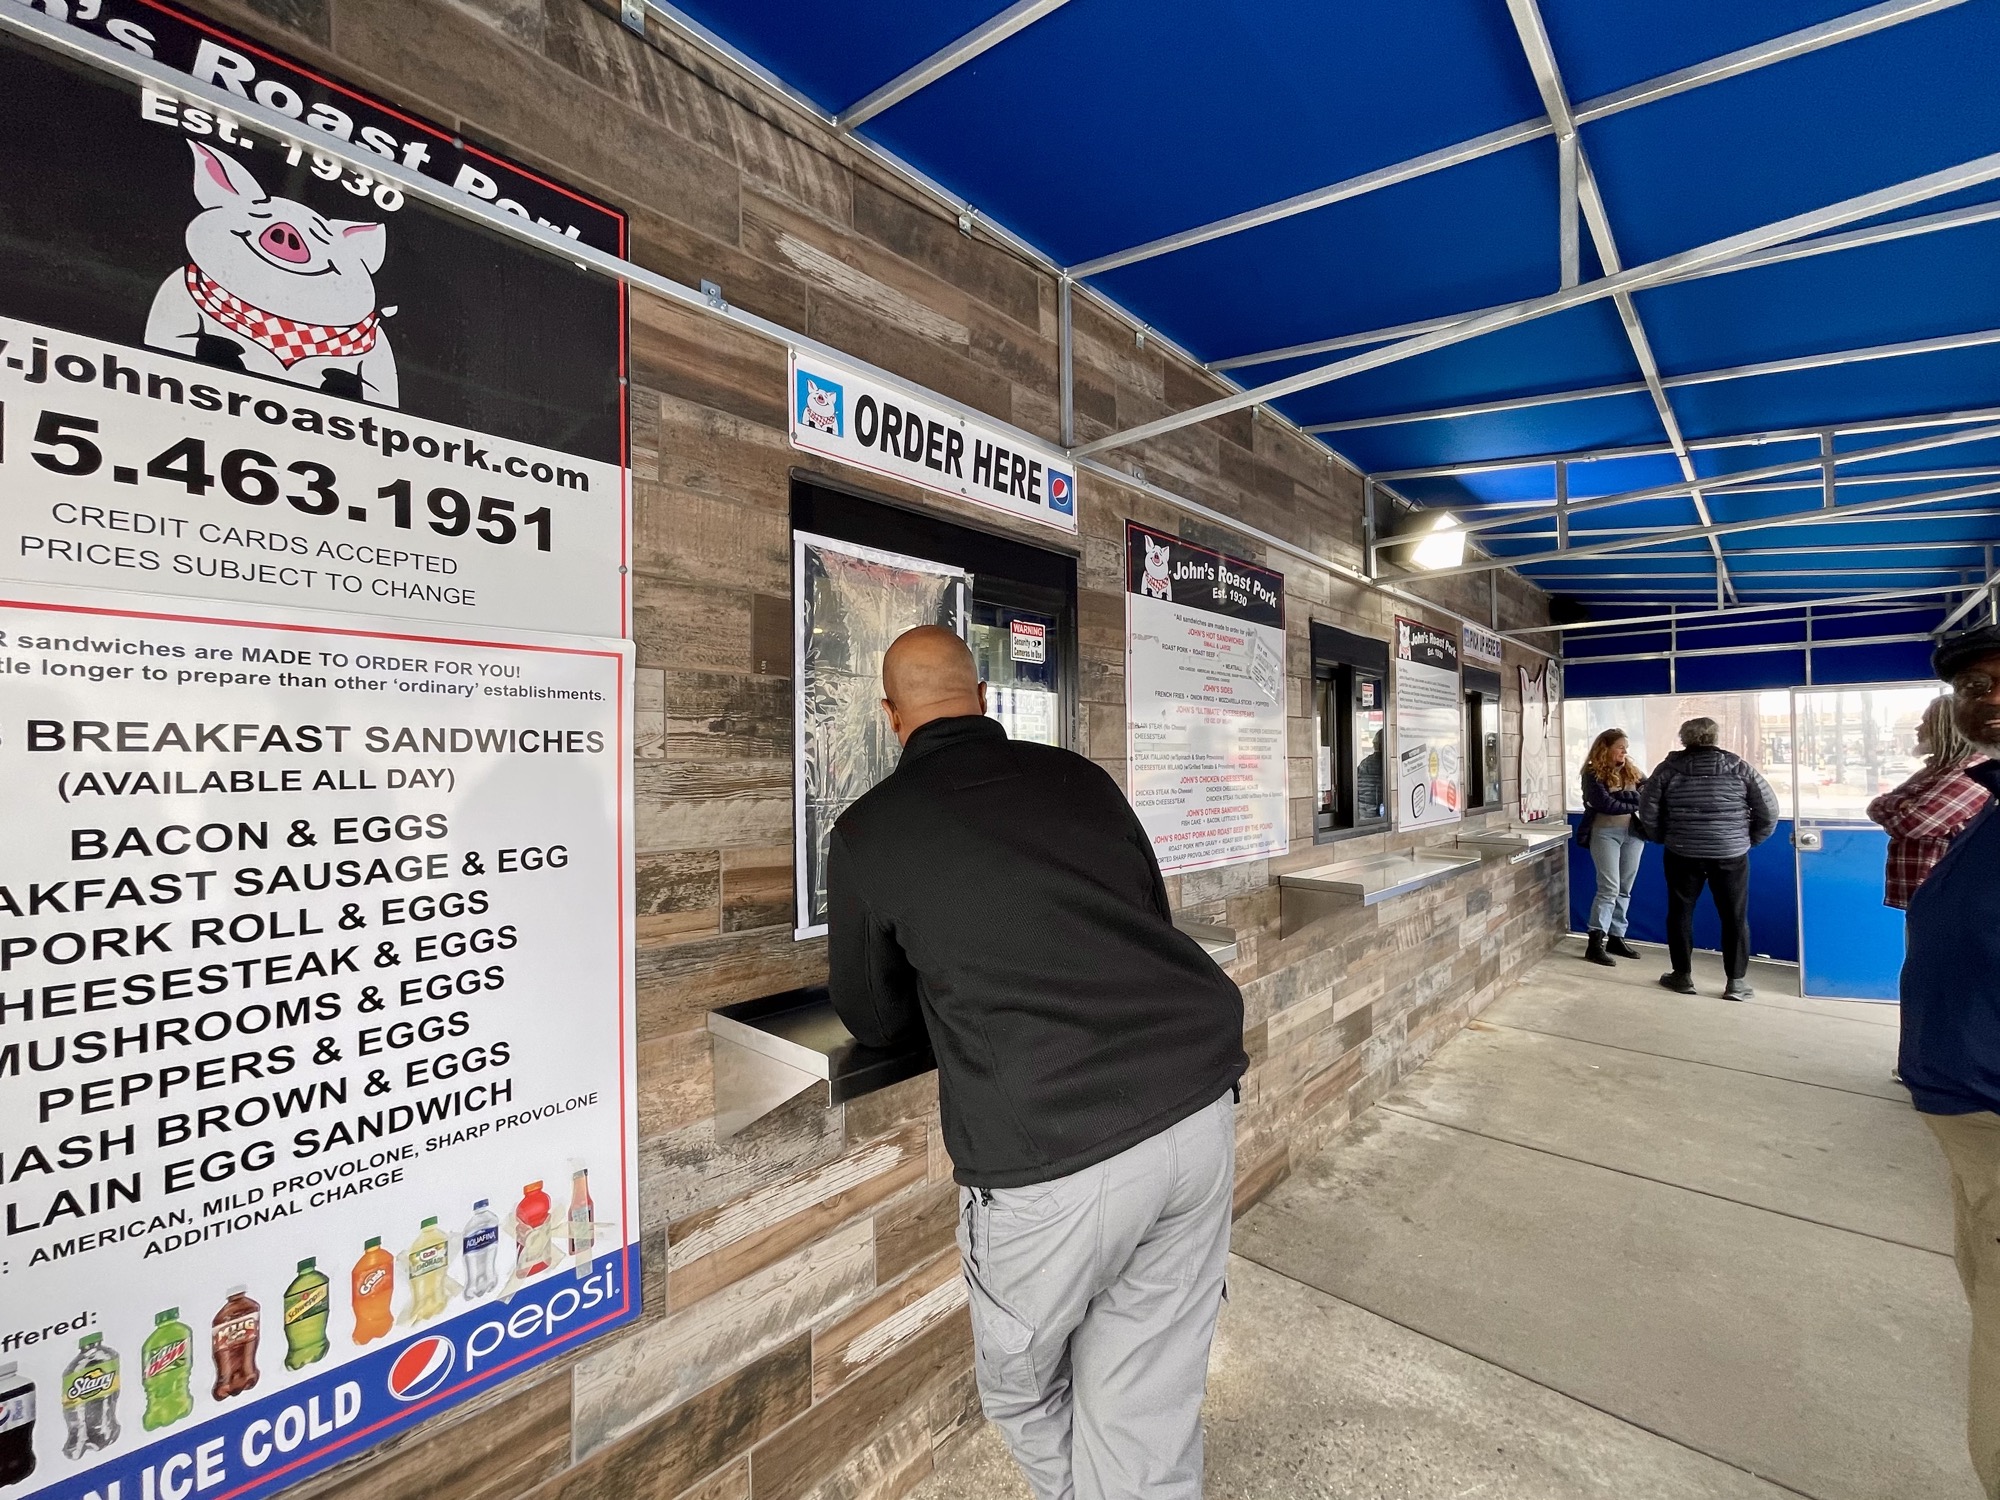
John’s Roast Pork is another popular local spot for cheesesteaks. They won a James Beard Award for their roast pork sandwich in 2006. It’s an unassuming shop located in the middle of nowhere amongst industrial buildings and strip clubs, but despite its location and it being the middle of winter, it was still pretty busy when we arrived. There was only window service with some indoor and outdoor seating available. They call their cheesesteaks “ultimate cheesesteaks” with 12oz of meat in each sandwich (I’m not sure how much meat they normally put on a cheesesteak, but it did feel more hefty compared to the others). Disappointingly they only offer sharp provolone cheese or American cheese. No whiz or cooper sharp. 💔
Overall I thought their cheesesteak was just okay – perhaps it was the lack of Cheez Whiz or perhaps we were following it straight after Del Rossi’s cheesesteak which is tough to beat. I thought the meat was decent but the sandwich wasn’t very cheese-forward in flavour probably because the provolone gets goopy when melted rather than the melty oozy cheese from Whiz or Cooper Sharp – I just don’t think I’m a provolone fan. It’s not a bad sandwich, but I thought it was just average. Toby liked it more than I did.

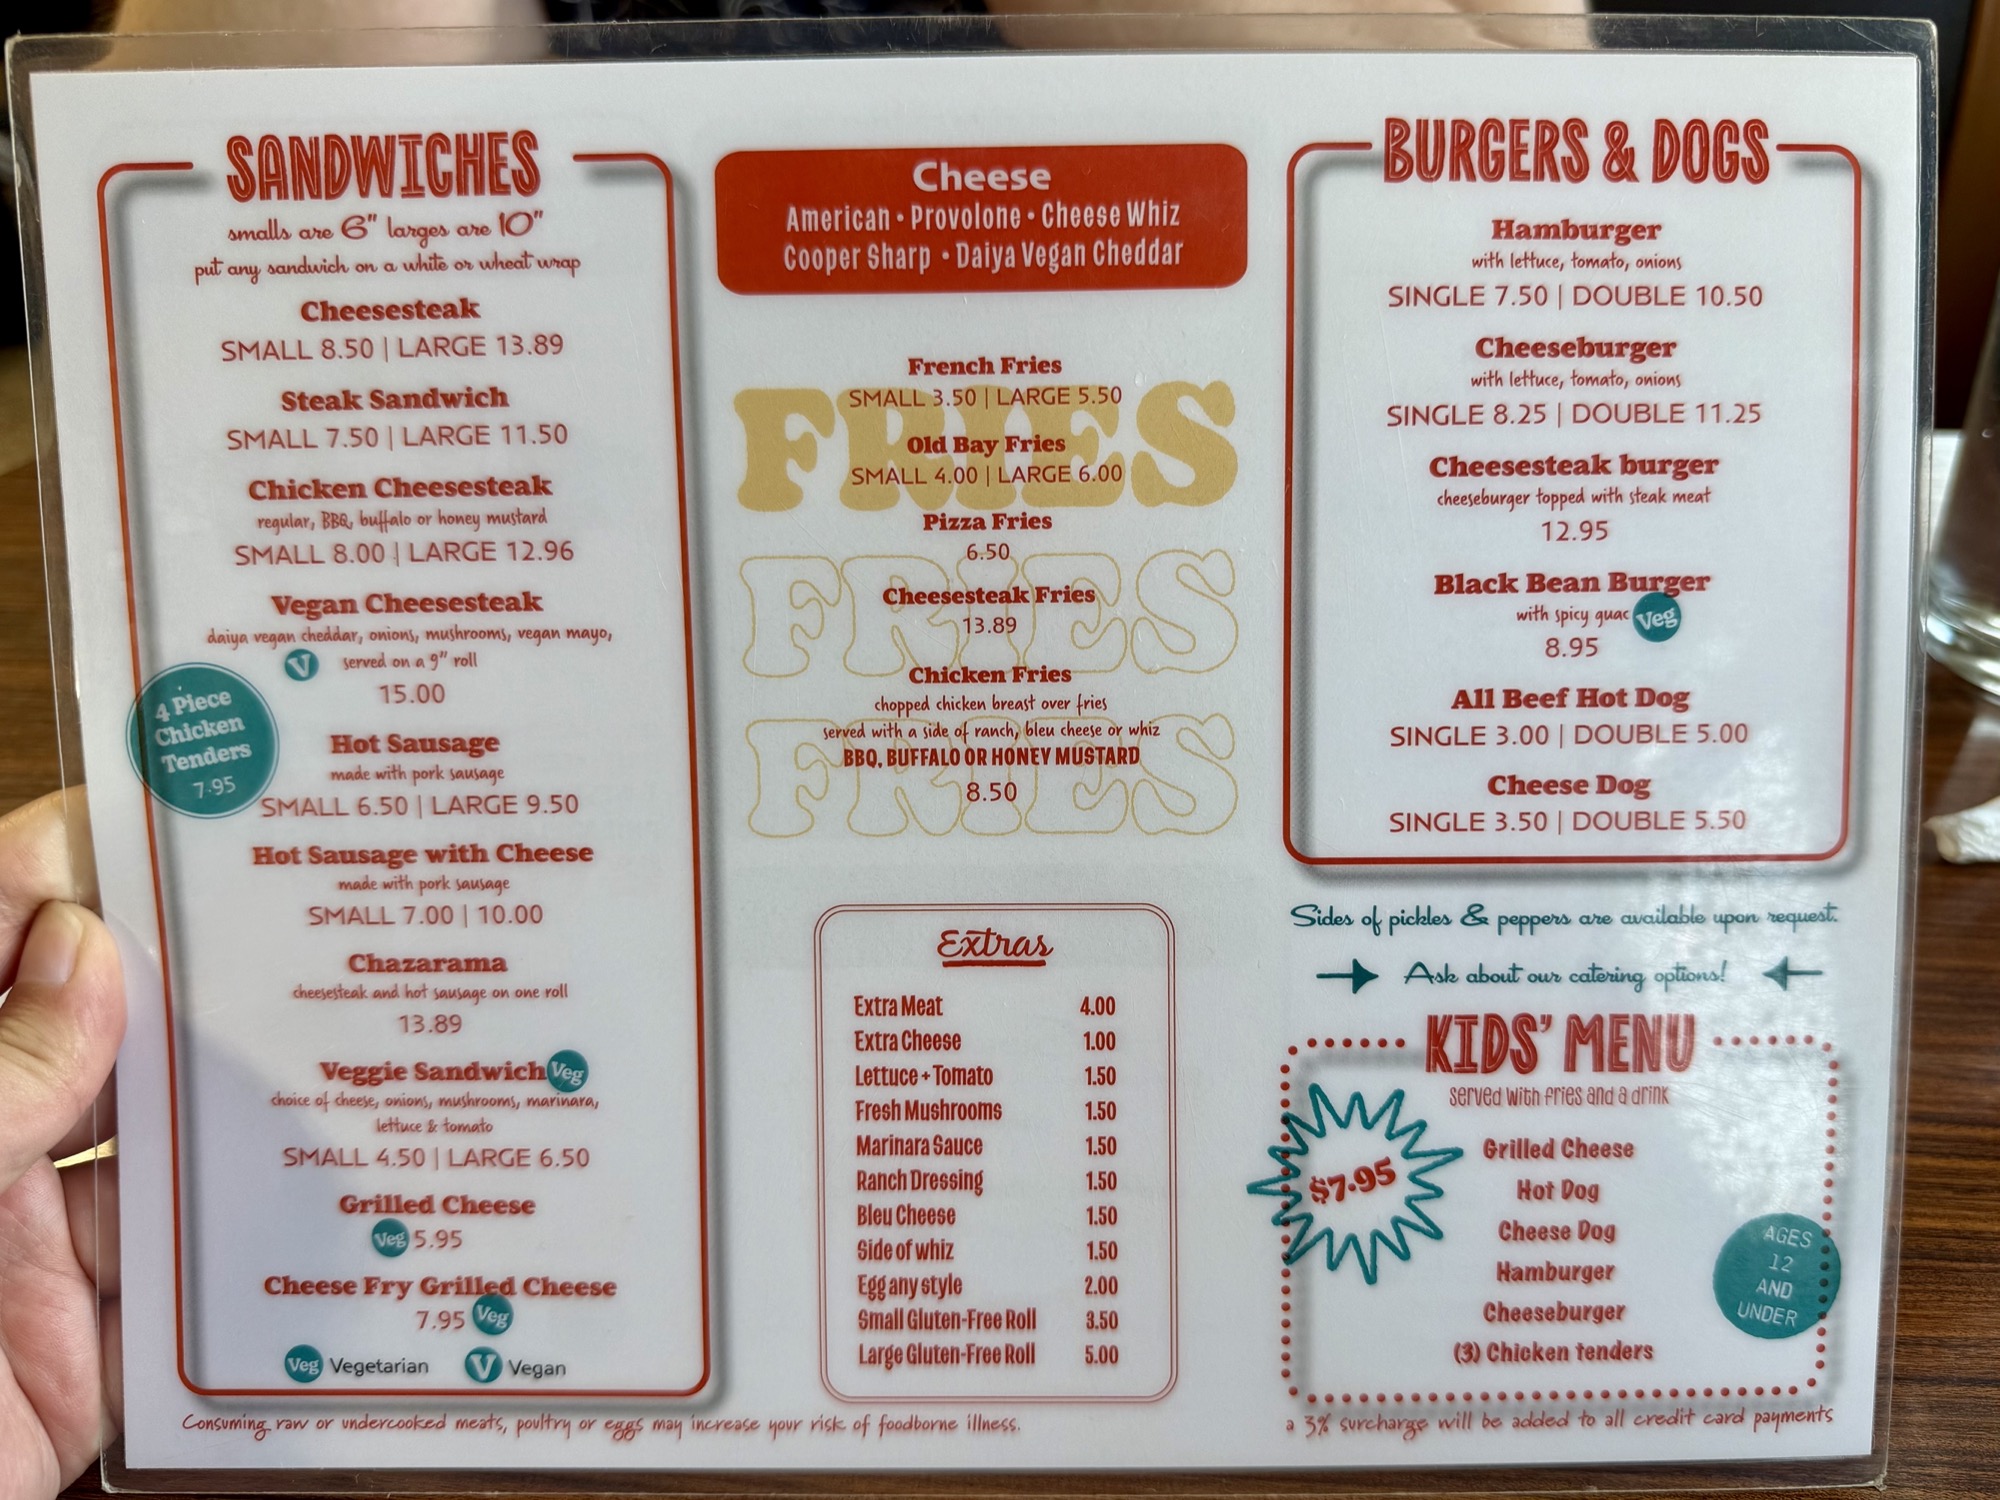
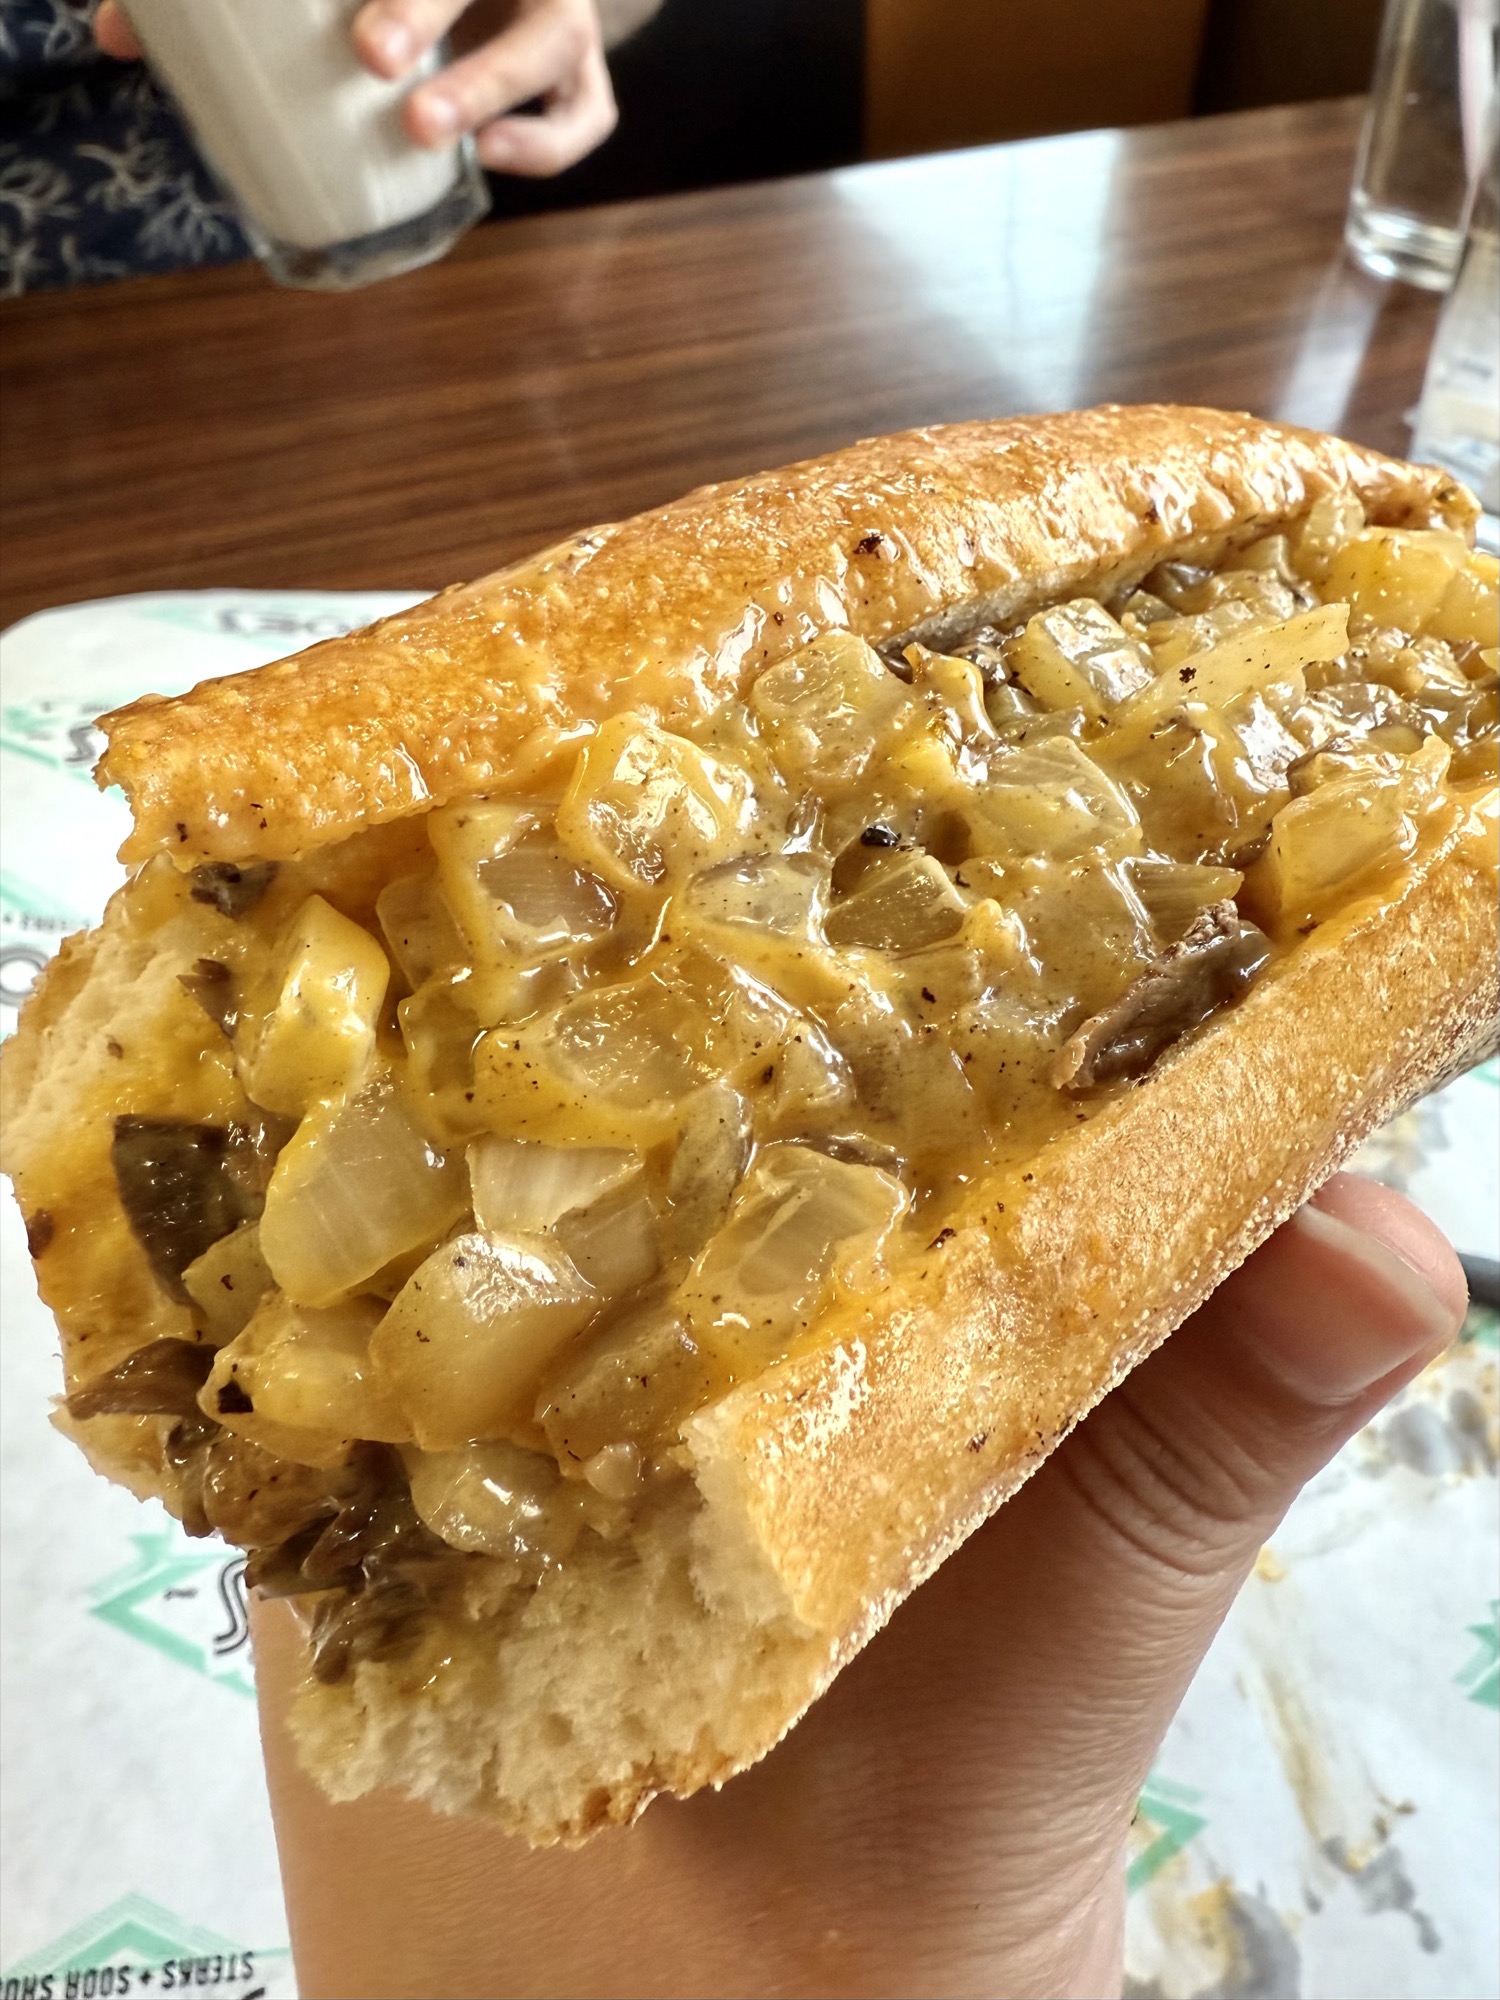
#8: Joe’s Steaks + Soda Shop
Address: 1 W Girard Ave, Philadelphia, PA 19125
Website: https://www.joessteaks.com/
Hours: 11am-9pm most days, until 1am on Fri & Sat (check the website for updated hours)
Cheesesteak with onions: Small $8.50 / Large $13.89 (before tax) (I can’t remember if they charged extra for onions)
Pros:
- Offers both small and large cheesesteak sizes
- Fantastic milkshakes
- Table service
- Good ambience, plenty of seating
- Takes both cash and card
Cons:
- Good average cheesesteak, wasn’t overly excited by it, not bad but not great
- Farther out away from the city
- Can be difficult to find street parking
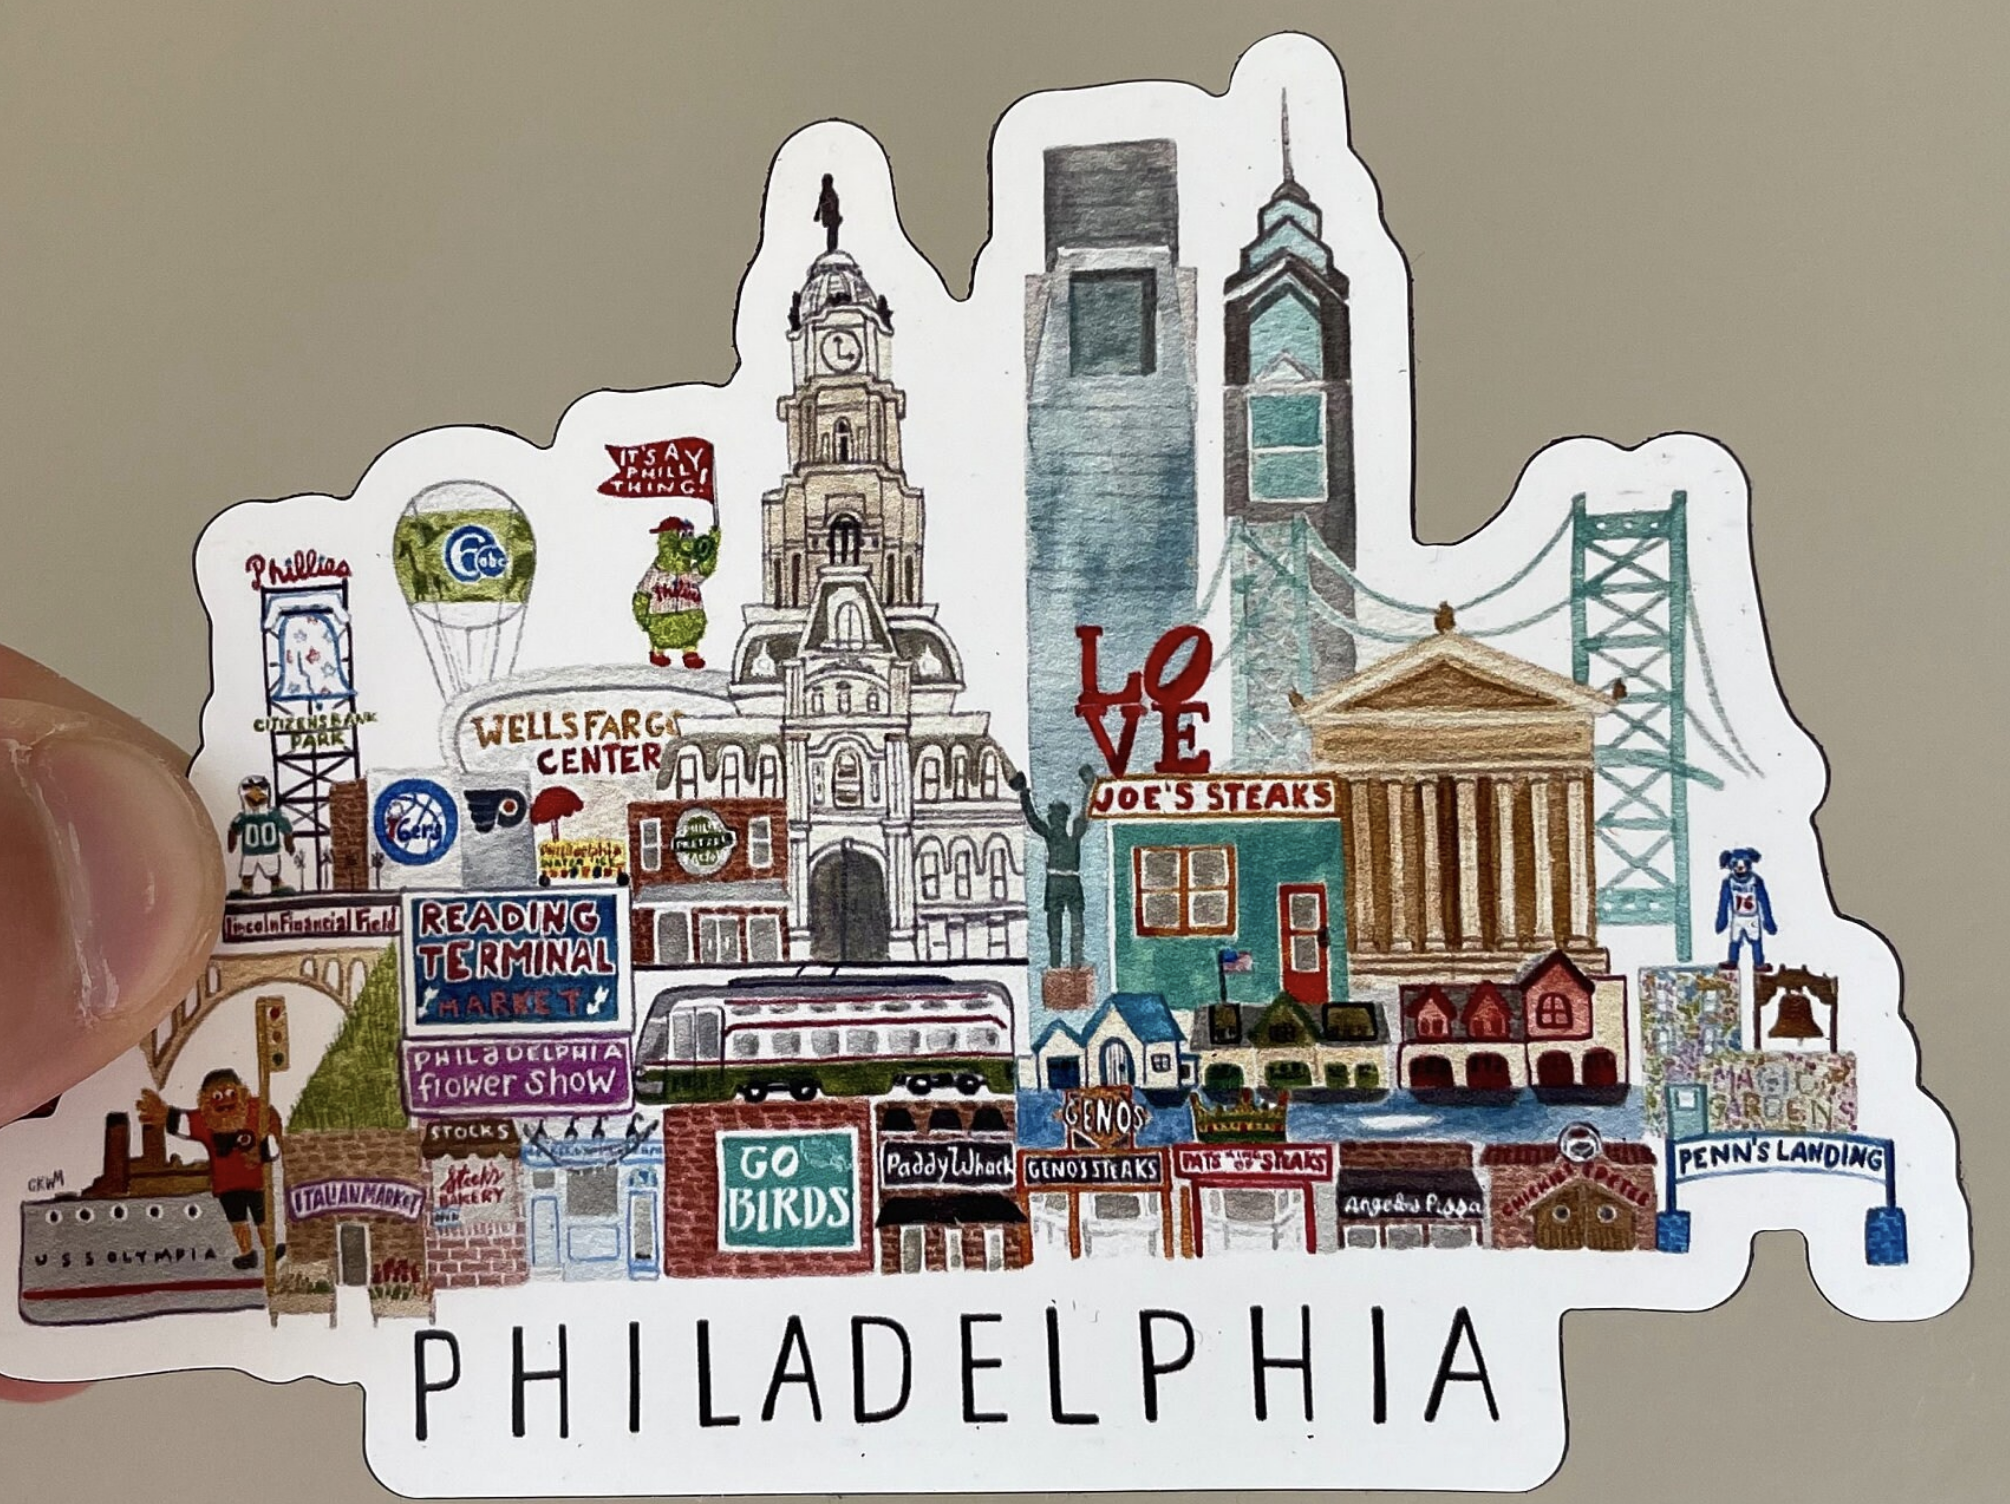
Interestingly, I didn’t hear about this place from any internet reviews or recommendations. We collect souvenir magnets for all the places we visit and on our first trip to Philly, we came across a cool Philadelphia magnet at the Christmas market at JFK Plaza. At the time I hadn’t even had an official cheesesteak yet, but here in the middle of the magnet was “Joe’s Steaks”. A quick Google search revealed Joe’s to be a locally loved and OG cheesesteak joint that’s been open for more than 70 years, so of course I had to add it to my list of cheesesteaks to try.
Opened since 1949! Originally called ‘Chink’s Steaks’ due to the non-asian owner’s nickname for having “almond eyes”, the current owner took over in 1999 and after much debate, he renamed it ‘Joe’s Steaks’ in 2013 to get with the times and drop the racial slur. Keeping the same recipe over 70 years, this place has been a local staple.
This shop is located in the Northern suburbs in Fishtown. We thought it’d be in a random quiet location like many other cheesesteak shops away from the city, but it was actually right smack in the corner of a pretty busy street with plenty of cool shops and restaurants. We actually struggled to find parking and had to park a bit farther away. Joe’s is in the theme of a vintage diner with retro colours and booths. It’s table service or take away and there are plenty of cheesesteak, hotdogs, and burgers on the menu. This was the first cheesesteak place in Philadelphia that we saw offer a smaller or large size, which was nice considered we weren’t that hungry.
The cheesesteak came out quickly and overall was good, but not spectacular. The meat, cheese, bread, onions were all good – cooked well, decent flavours, but nothing to write home about. The real star of the show was the milkshakes. Toby was OBSESSED with the cookies and cream malted milk shake. Overall, the servers were lovely and the ambience was great, but I probably wouldn’t make an extra trip just for Joe’s (I’m sure Toby would say otherwise just for their milkshakes 😅).


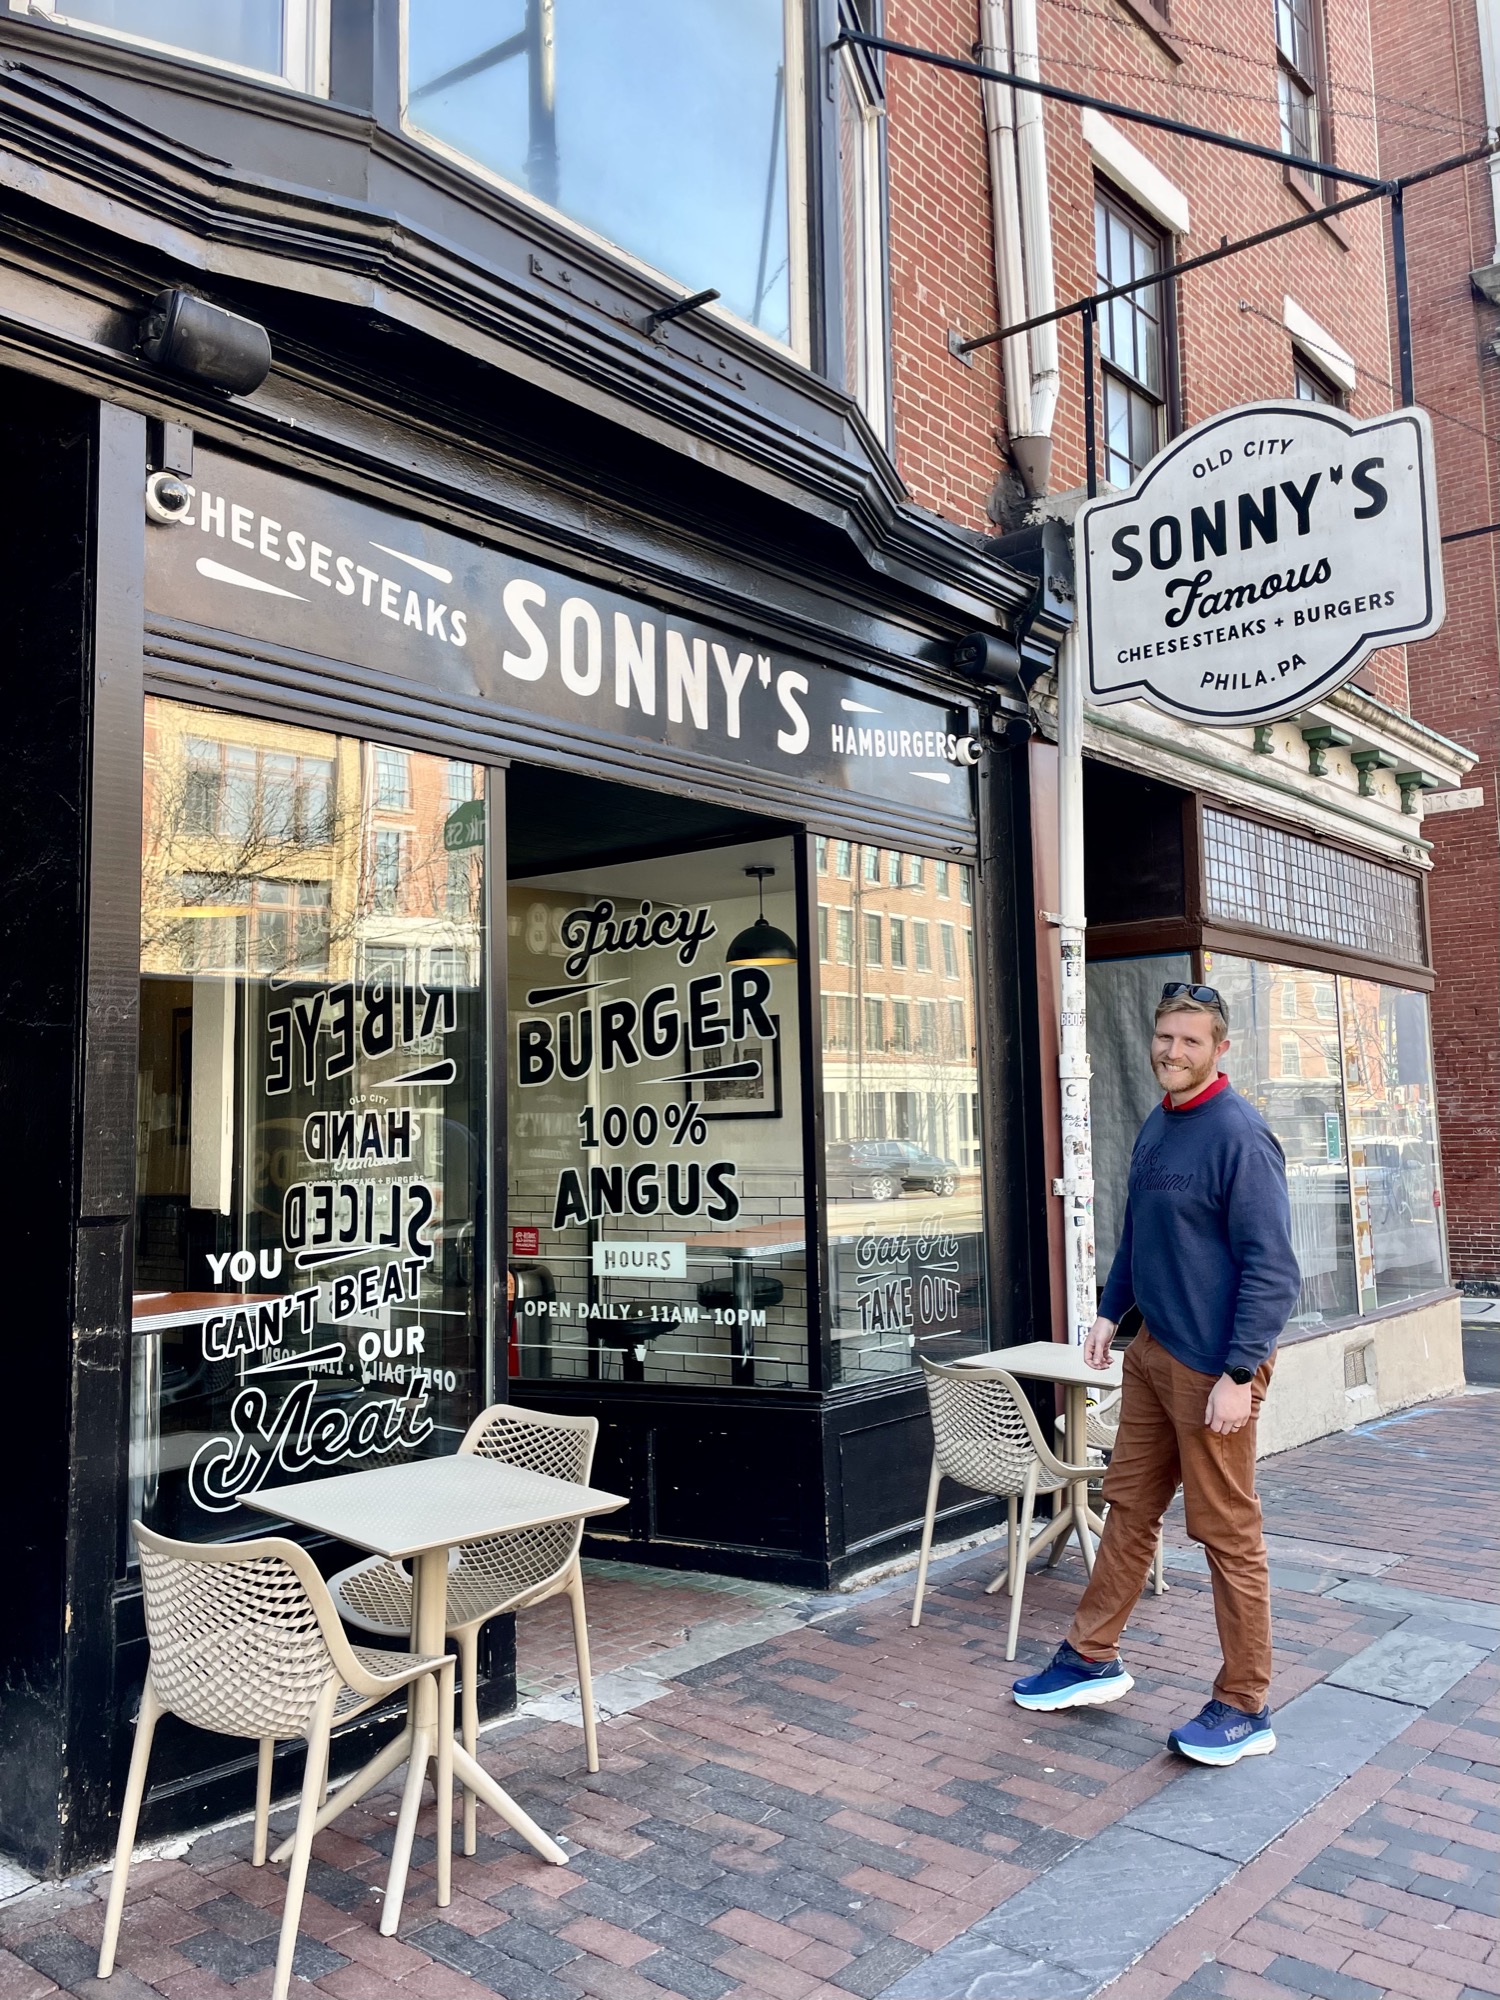
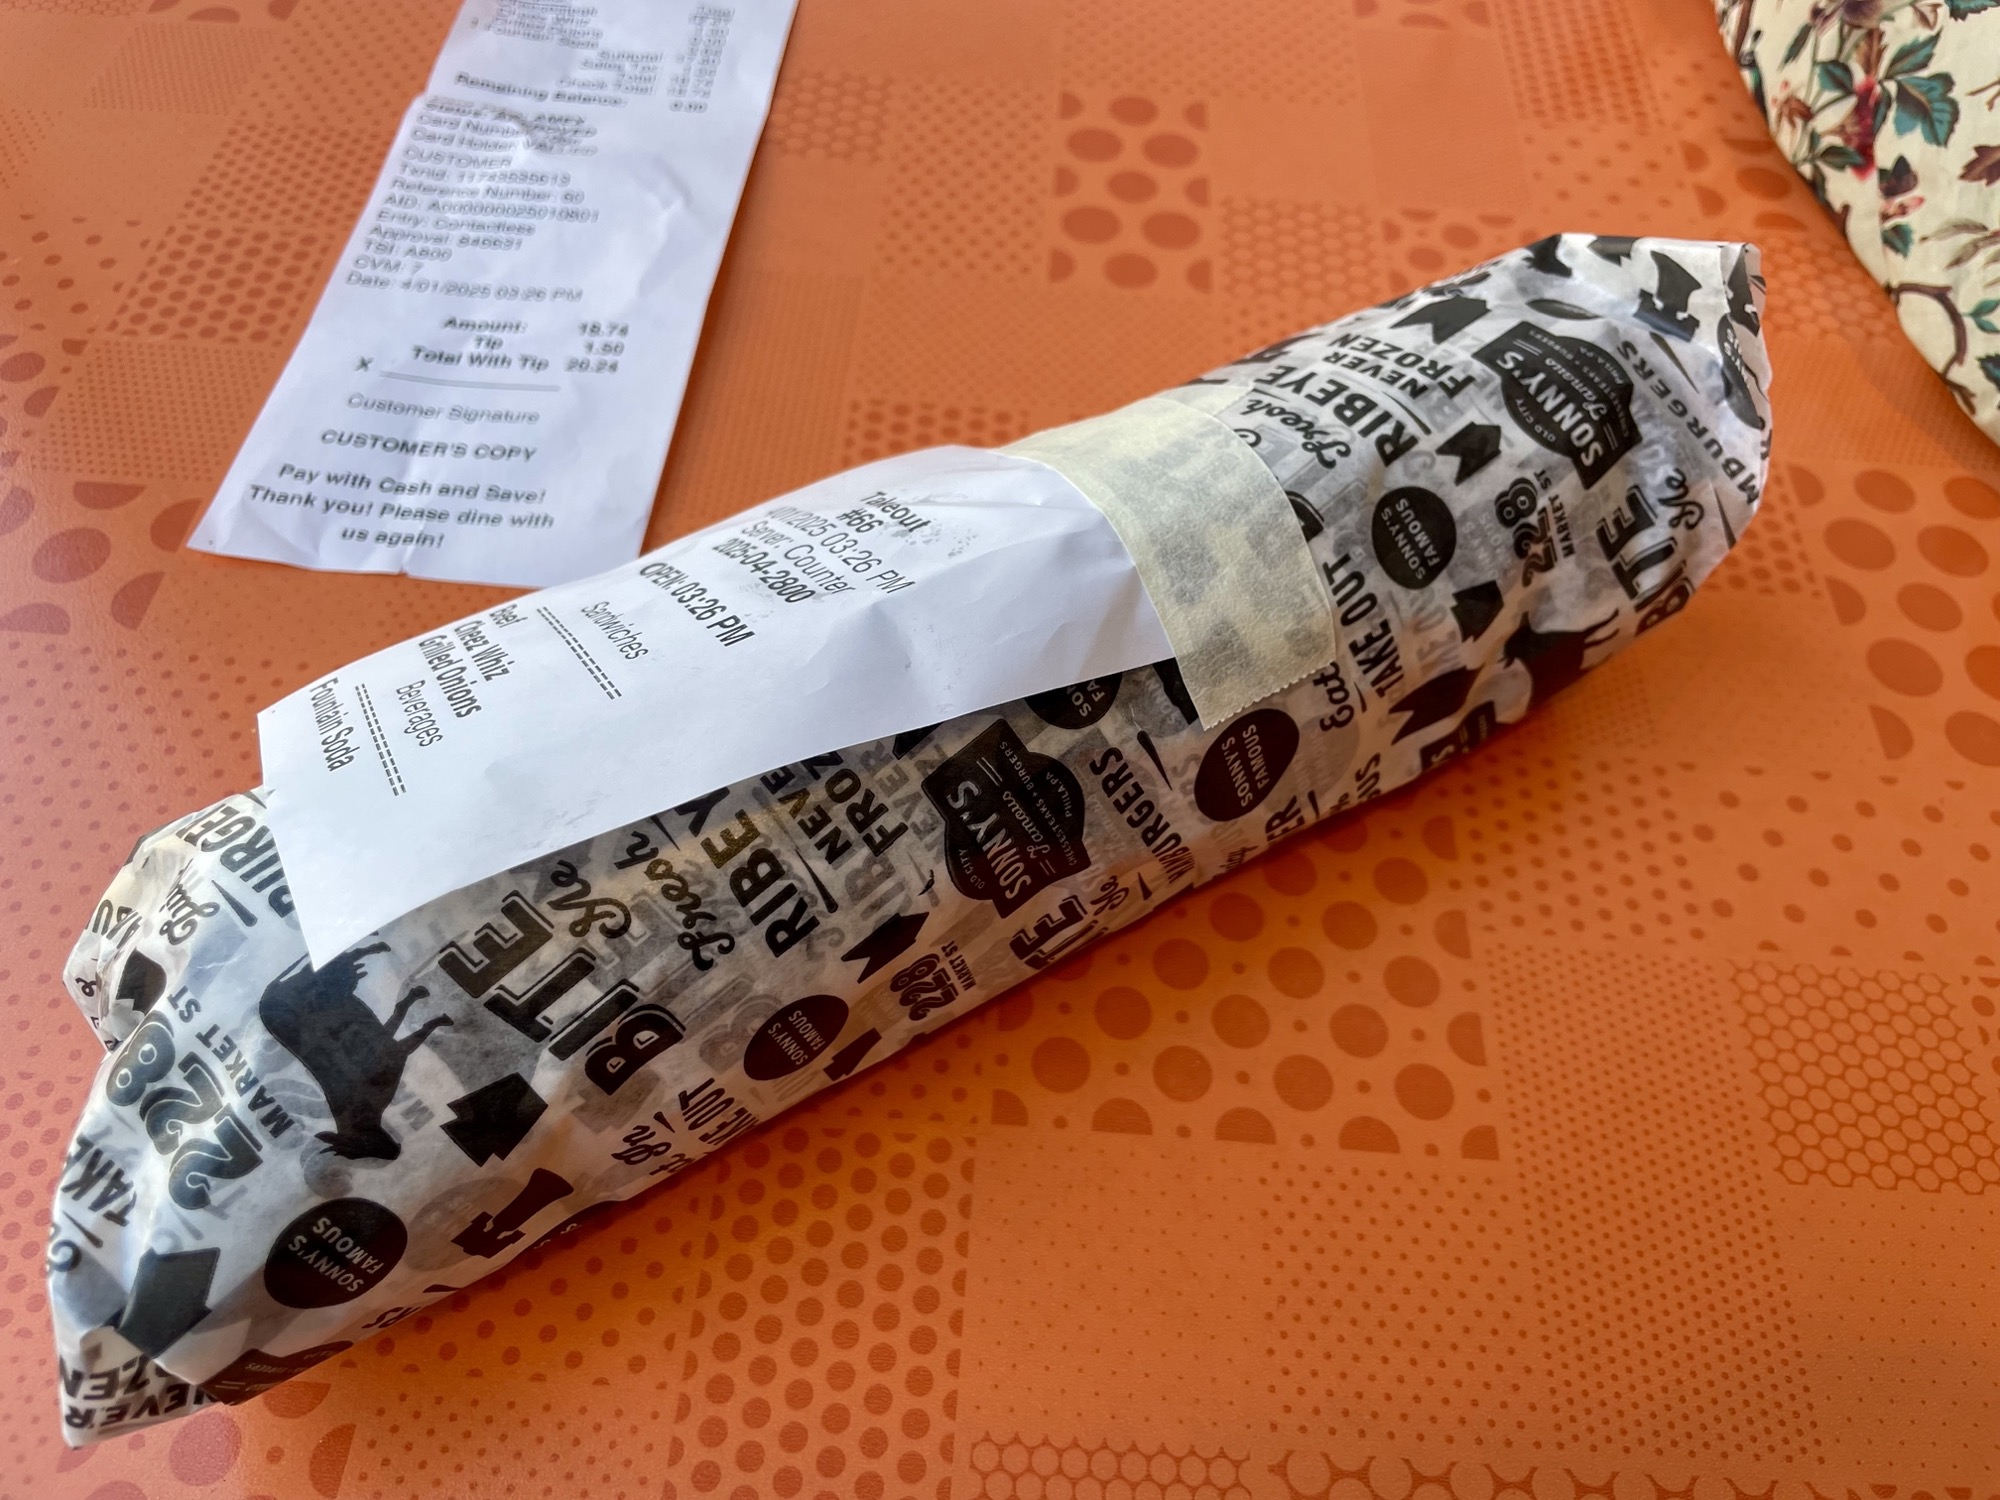
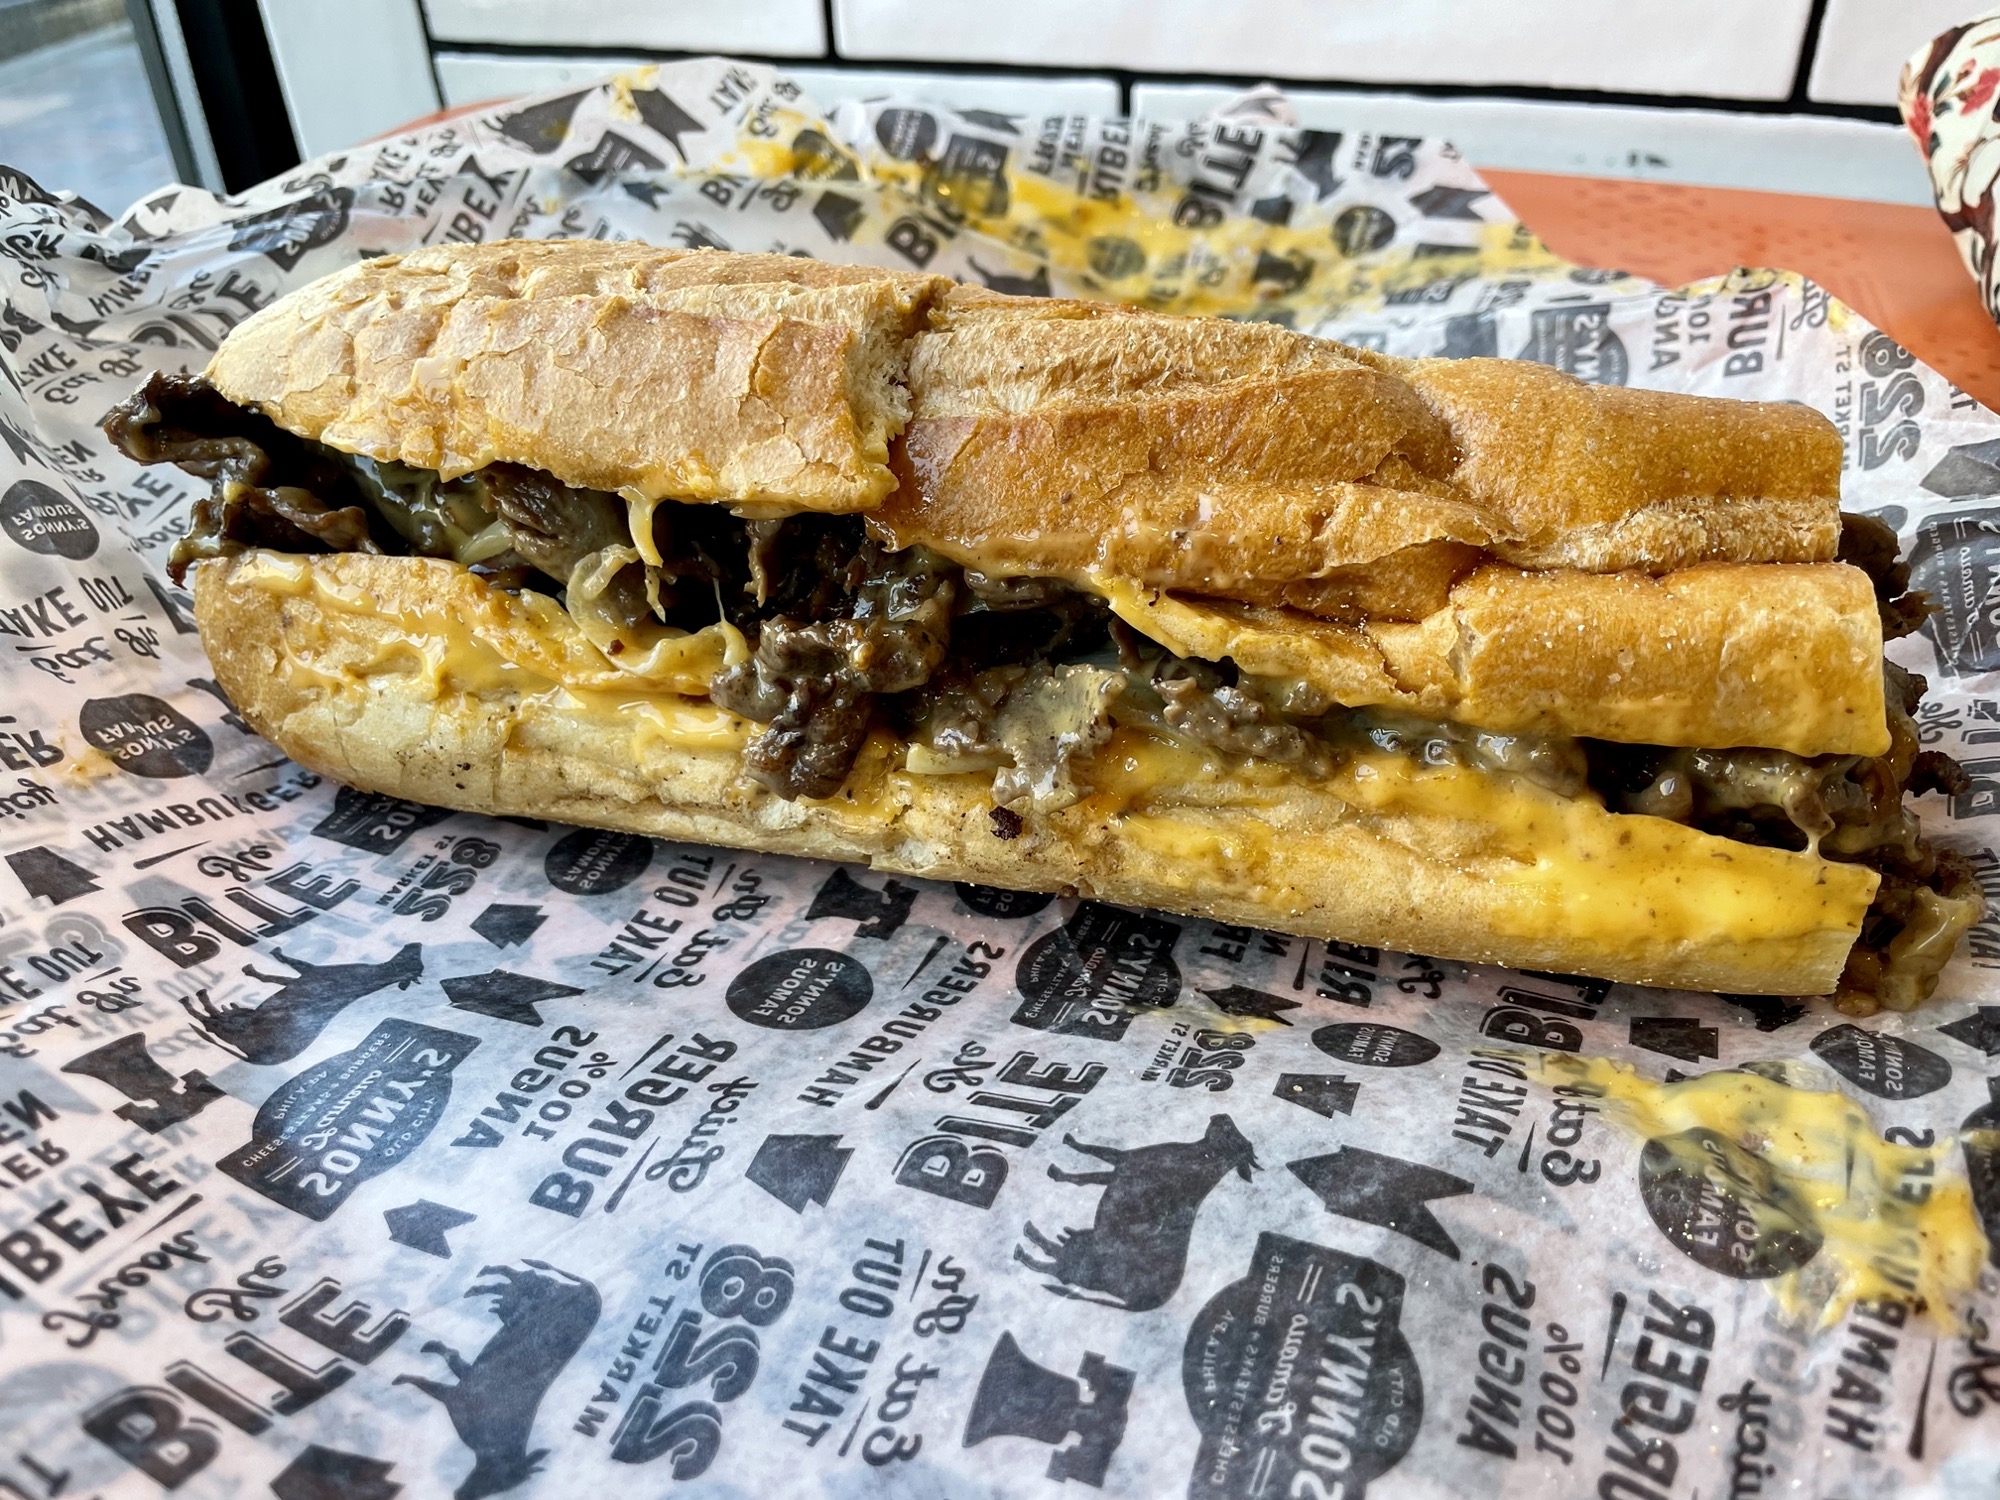
#9: Sonny’s Famous Steaks
Address: 228 Market St, Philadelphia, PA 19106
Website: https://sonnyscheesesteaks.com/
Hours: 11am-10pm daily (check the website for updated hours)
Cheesesteak with onions: $13.77 (before tax)
Pros:
- Great location for tourists, right in old town across the street from many sites
- Good amount of cheese
- Nice flavour on the steak with a slight char
Cons:
- Good average cheesesteak, wasn’t overly excited by it, not bad but not great
Sonny’s is located on Market Street, which is conveniently close to old down and just down the block from the Benjamin Franklin Museum. GQ magazine named it their top pick for Philly Cheesesteaks, however looking at the 10 places they tried, neither Del Rossi’s nor Jim’s was on their list, so did they really sample the best? 😜
We came on a Tuesday afternoon and there was no line. We ordered our usual whiz wit. The bread was average, the steak was cooked well with a nice char (not the juiciest, but still good), and the cheez whiz shone through the layers. Overall it’s a good sandwich with a great location, but there’s better out there. If you’re a visiting tourist without much time to travel further, then Sonny’s is a good choice for a cheesesteak and within walking distance to the heart of Phildaelphia Old Town tourism.


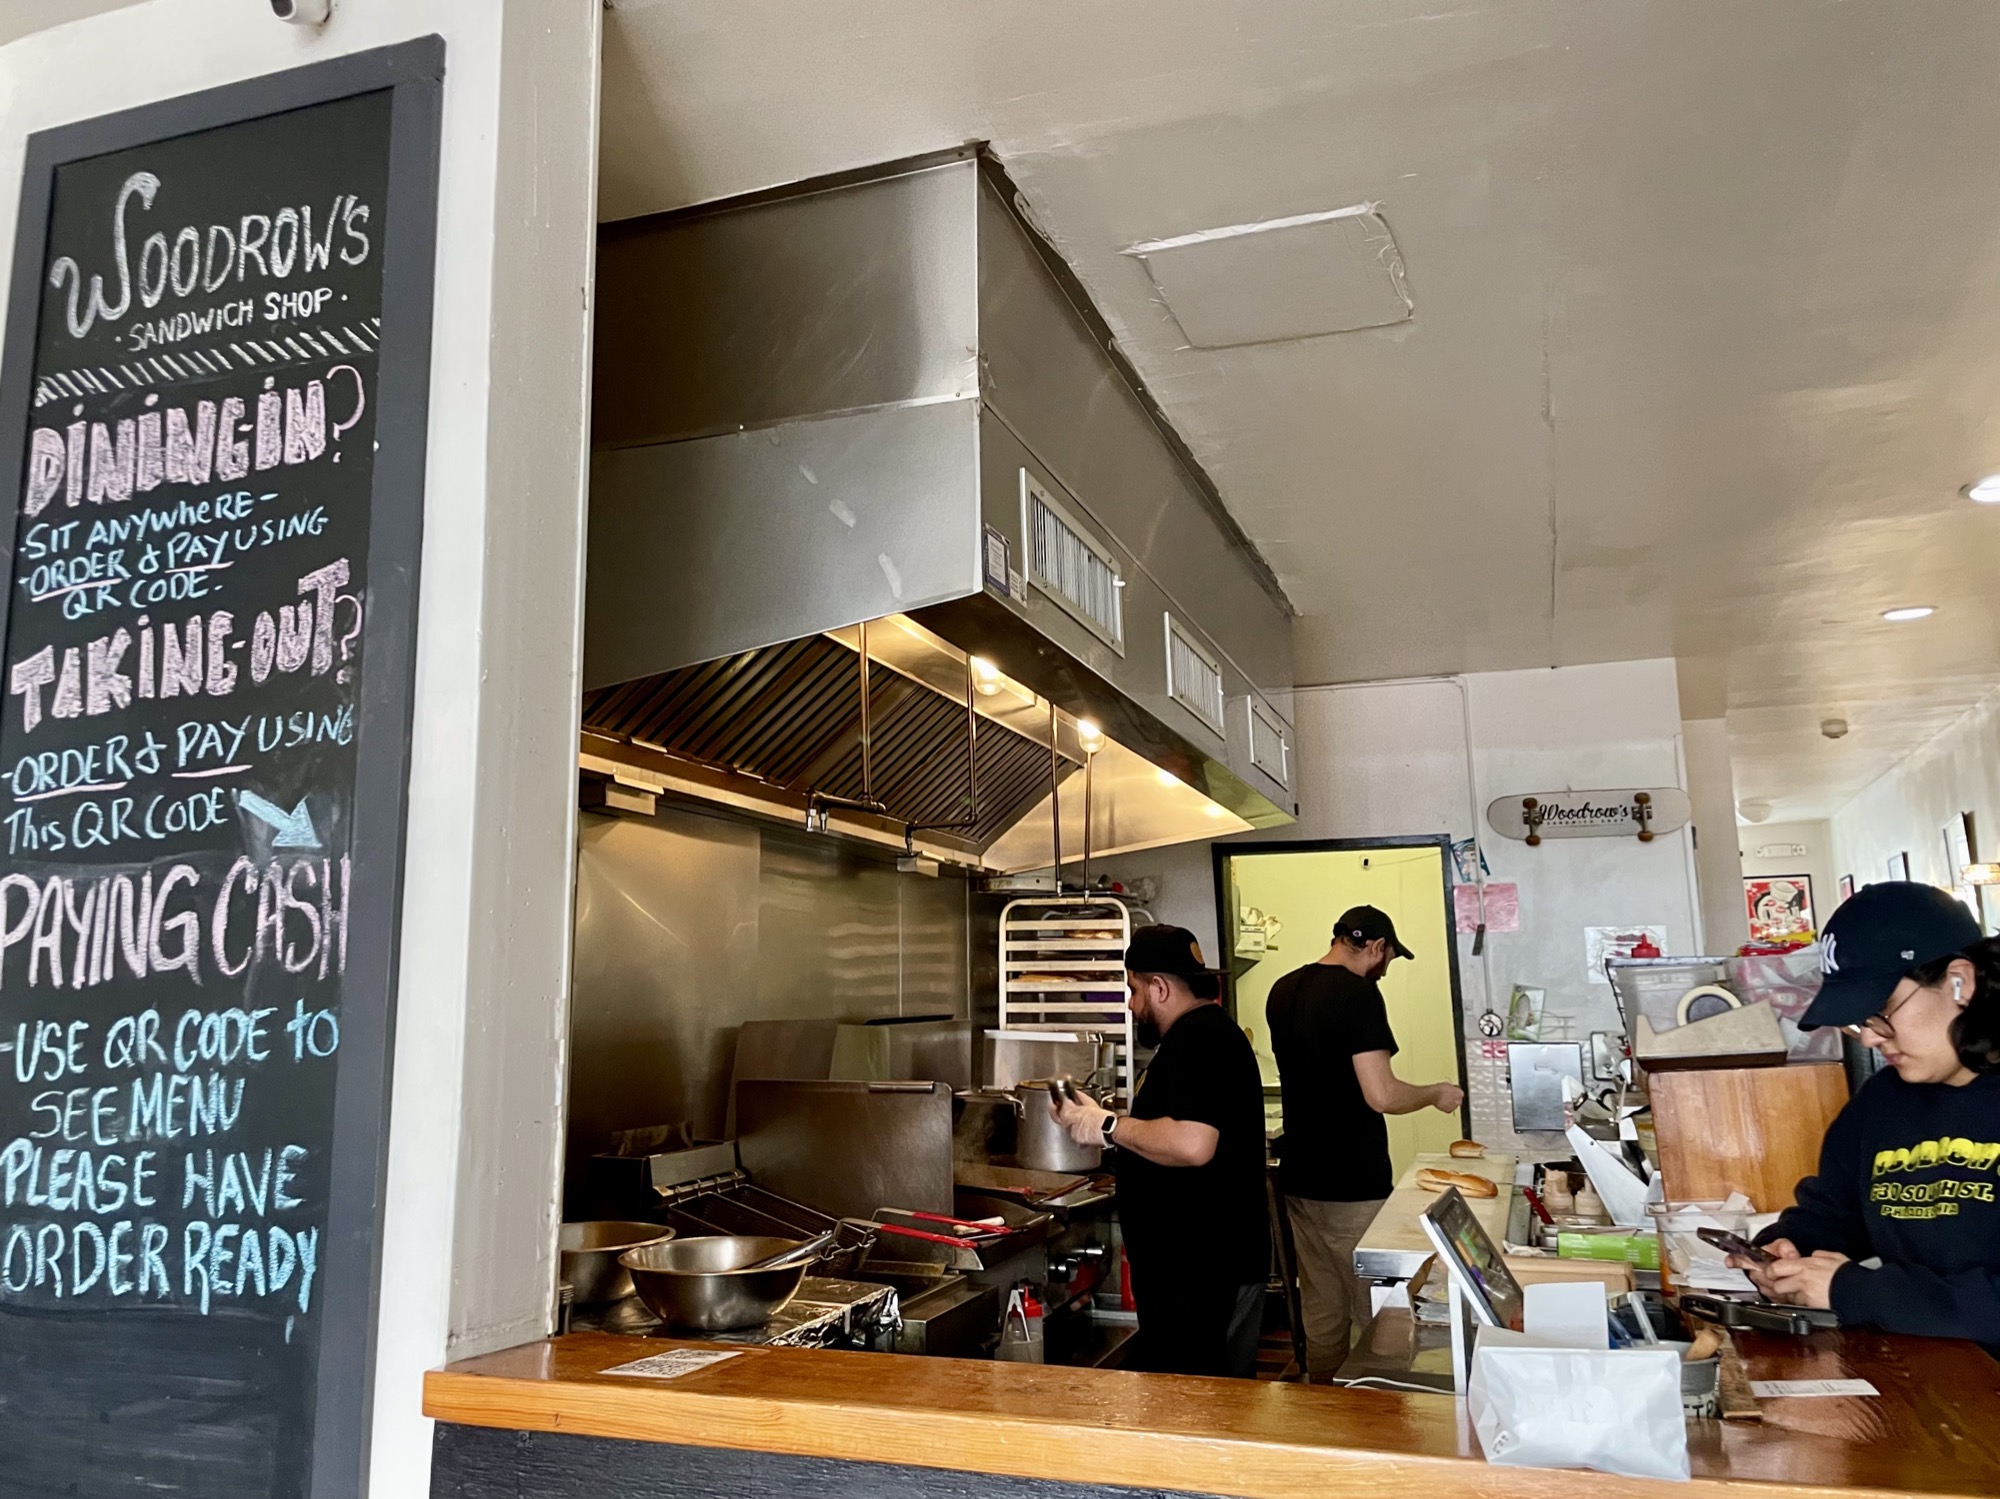
#10: Woodrow’s Sandwich Shop
Address: 630 South St, Philadelphia, PA 19147
Website: http://www.woodrowsandwich.com/
Hours: 11am-8pm daily (check the website for updated hours)
Cheesesteak with onions: $15 (online QR code ordering already – careful it automatically adds 20% tip even if takeaway)
Pros:
- Good location on the popular South Street
- Unique truffle cheese with good truffle flavour
Cons:
- Grainy texture of the truffle cheese
- Only truffle cheese option – soz if you don’t like truffle
- Steak was a little dry
- QR code ordering only even if no one else is there and the staff are not doing anything
- 20% tip default added on unless you change it
I’ve seen Woodrow’s occasionally mentioned here and there but not consistent enough to make it on the top 10 list, however I just HAD to try it when I heard that they have a truffle cheesesteak. I’m OBSESSED with truffle and I can never pass up anything truffle-related on a menu, so when you mention truffle and cheesesteak together, I’m there.
Located on South Street near Jim’s Steaks, we came on a Tuesday afternoon in April and there was no one else there at the time. Annoyingly, they only do QR code ordering. All 3 staff members there were standing around waiting for me to process my order before anything was started. Had I known, I would’ve just done this from my car instead of 3 people silently and awkwardly waiting for me. Be careful when checking out. My $15 sandwich suddenly jumped up to $19 as the total and I realized that they default add a 20% tip – I nearly missed it in my rush of checking out quickly. Even if you’re ordering for takeaway, 20% is added on (which is crazy because there’s literally zero service – they won’t even take your order at the counter 😂).
Ordering complaints aside, I was still excited to try my truffle cheesesteak. Interestingly they ONLY have a truffle cheese option, no regular cheese. The sandwich didn’t take long to make and we ate it in our car to save money on street parking, lol. Overall it was a tasty sandwich and the truffle flavour definitely comes through, BUT the cheese itself was grainy. They pride themselves on making their own truffle cheese in house and not from a can which I do commend and the flavour of the truffle cheese was actually quite nice, but the graininess was very distracting and kind of ruined it for me. It was kind of like the graininess you’d get from melting pre-shredded cheese that have added caking agents instead of using blocks of fresh cheese (pro-tip: you should never make mac & cheese with pre-shredded cheese for this exact reason). Apart from the grainy cheese, the meat was also a little dry. The bread and onions were average.


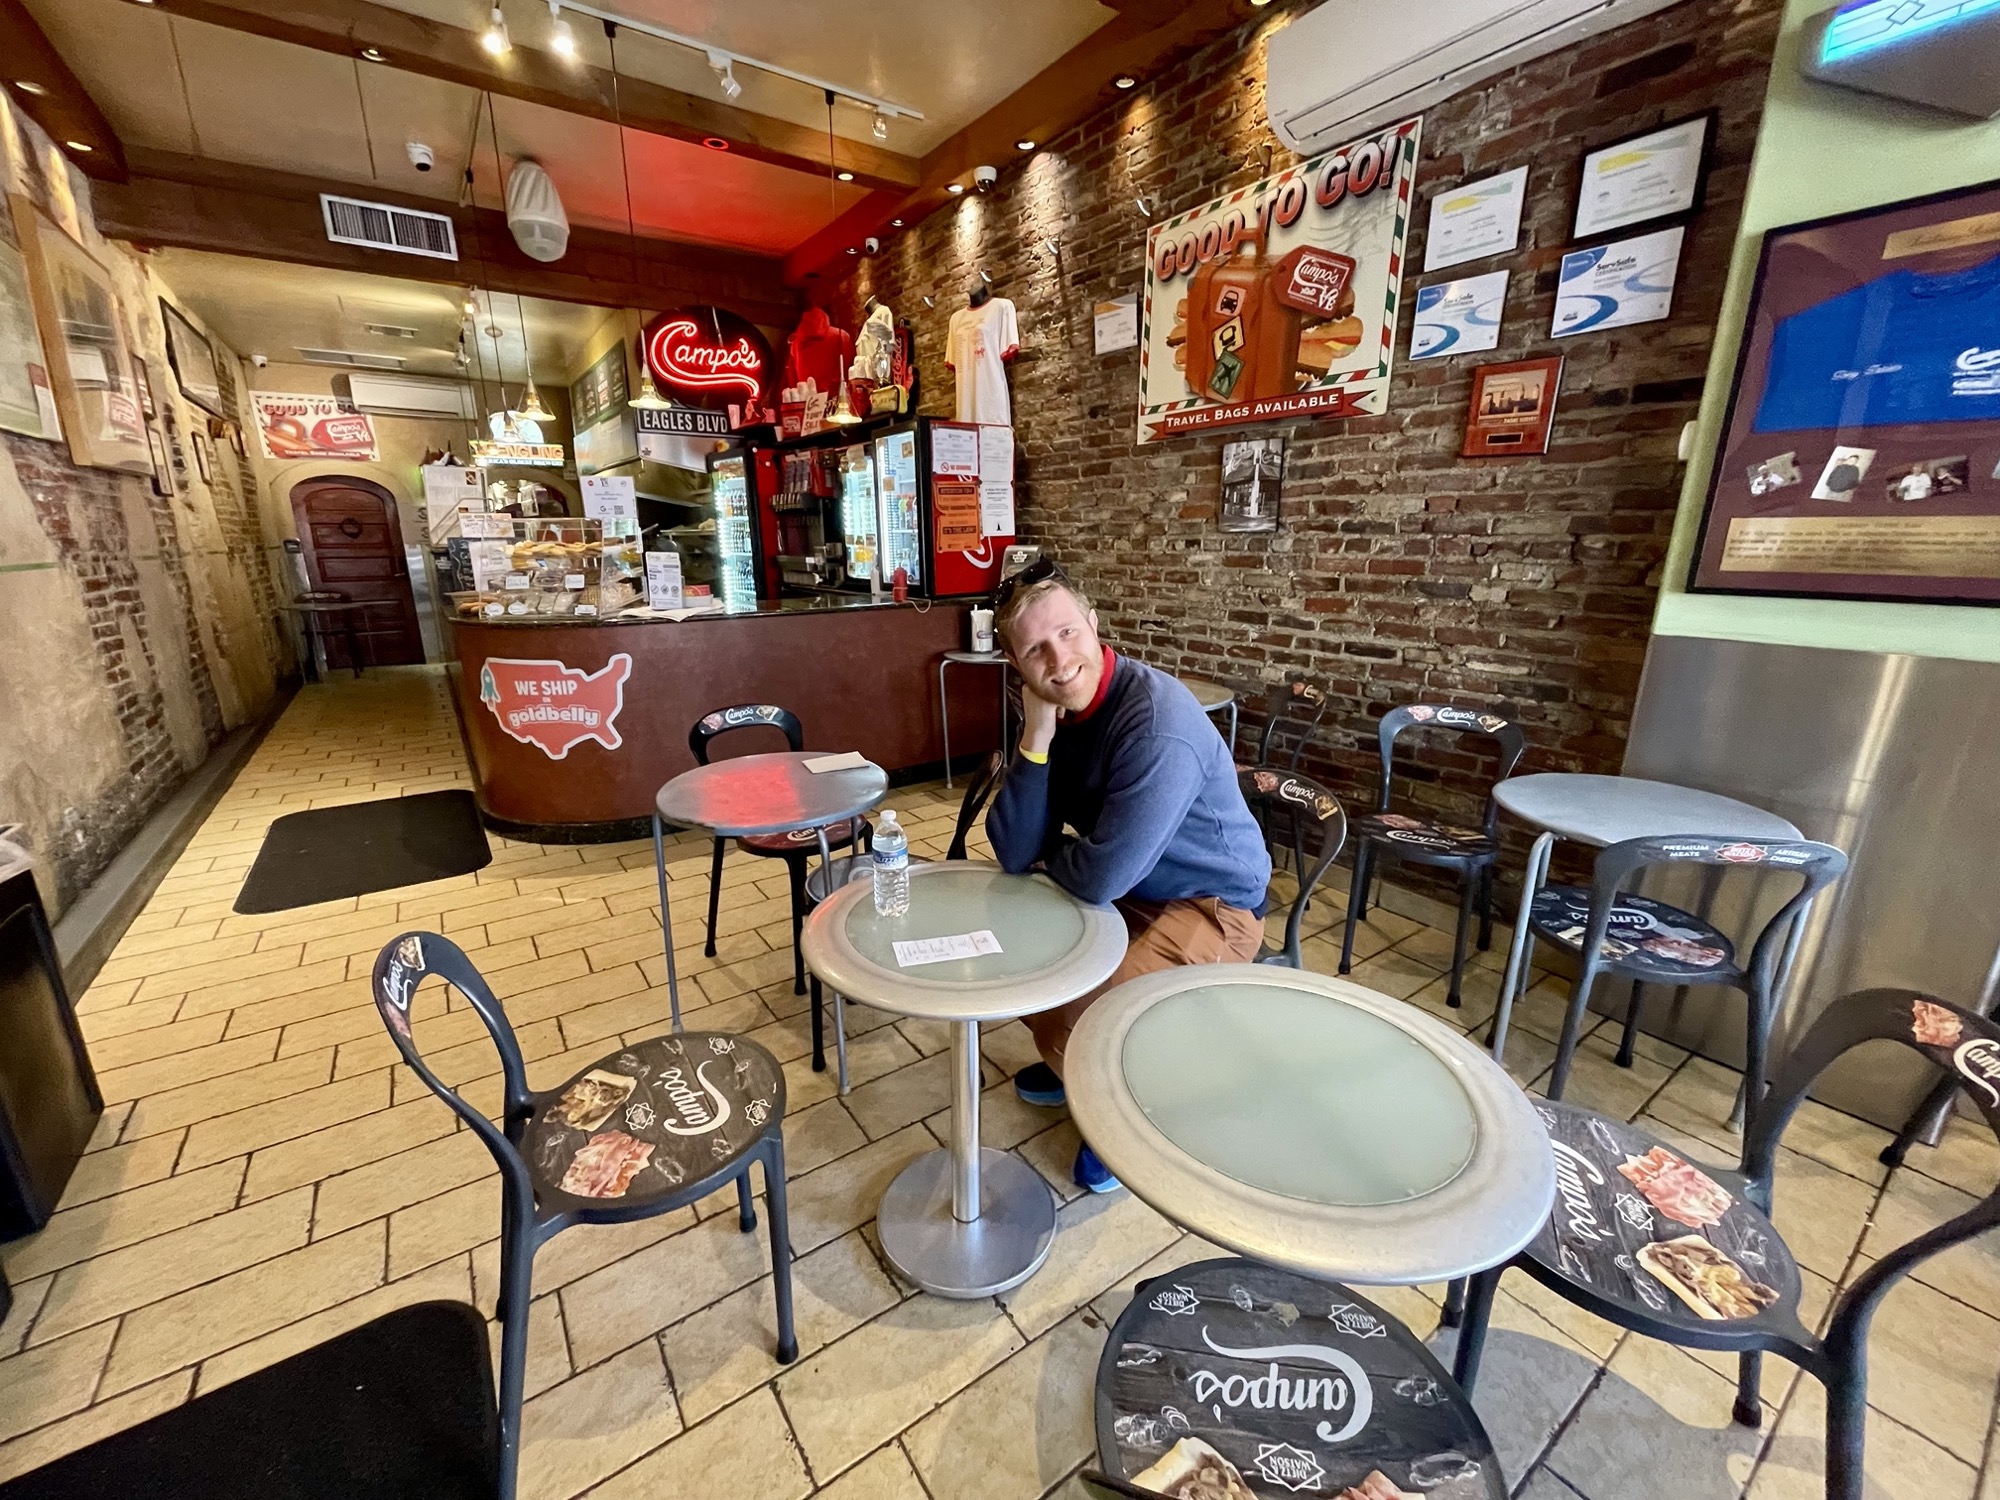
#11: Campo’s Philly Cheesesteaks
Address: 214 Market St, Philadelphia, PA 19106
Website: https://camposdeli.com/
Hours: 9am-10pm daily (check the website for updated hours)
Cheesesteak with onions: $14.85 (before tax, extra surcharge with card payment)
Pros:
- Great location right near old town and all the touristy things
Cons:
- Short and blunt counter service
- Surcharge on credit card
- Lack of cheese flavour – I can see it, but couldn’t really taste it
- Average steak, cheese, and onions
Also located on Market Street just a few doors down from Sonny’s Famous Steaks, we visited on a Tuesday afternoon in April. There was no one else there at the time so our sandwich was made relatively quickly. The counter service was short and blunt and there was a surcharge if you’re paying with card.
I really wanted to like this place due to its great location next to old down, but unfortunately the sandwich let me down. We ordered our usual Whiz Wit. The bread was average, the onions were soft without much flavour, the beef was cooked well and juicy however there wasn’t much char or flavour on it, but the biggest disappointment was the lack of cheese flavour. I couldn’t taste it at all and actually thought maybe they forgot to put in the cheez whiz and was about to go back to the counter to check before Toby pointed out the opaque colour within the sandwich. Cheez Whiz has quite a strong flavour that’s hard to miss – perhaps they have a watered down version or a different brand or maybe they’re just skimping, but I couldn’t taste it at all and a cheesesteak is supposed to be cheese-forward in flavour – it’s in the name! If you’re looking for a convenient cheesesteak on Market Street, go to Sonny’s instead.


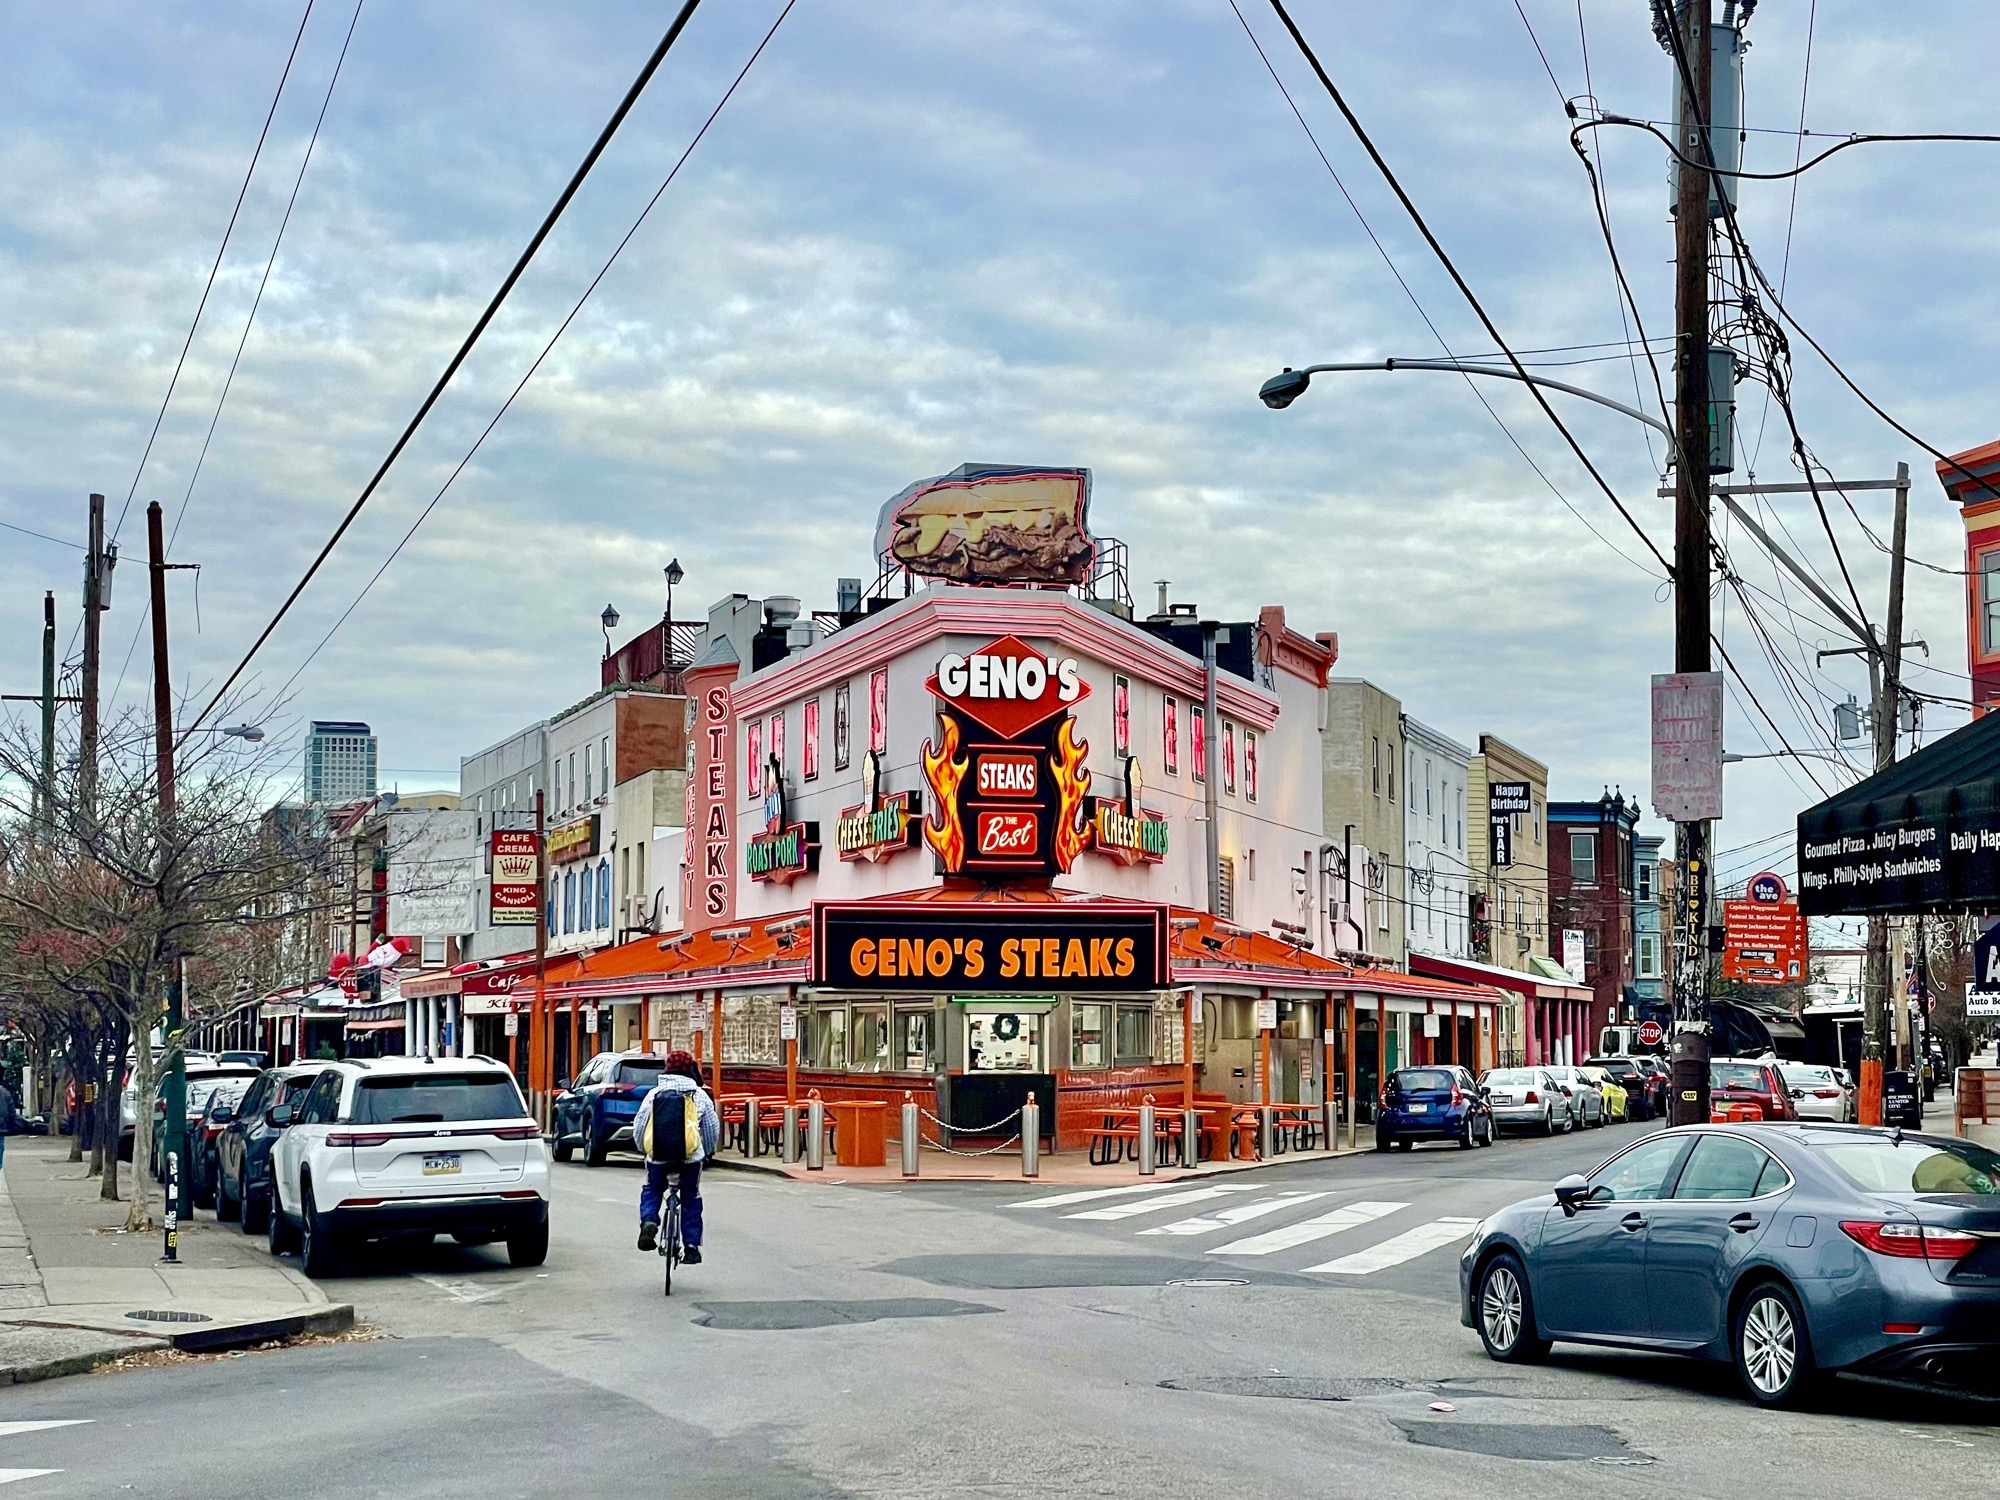
Pat’s and Geno’s – #12 & 13
Pat’s King of Steaks and Geno’s Steaks are two cheesesteak shops located across the street from each other at the south end of 9th Street in South Philly. Due to their location and how often they’re mentioned together, I’ve grouped them together here and compared them side by side. They both have impressive shop fronts with neon lights on the outside that make you think you’re in Vegas. When you research “Philly cheesesteaks”, undoubtedly these two shops will pop up again and again in travel guides, probably due to their close vicinity to the popular nearby Italian Market along 9th Street, but be warned, even though they both have 4+ stars on Google reviews with an impressive 10K+ reviews, they have a reputation of being tourist traps. I decided to try them both out to judge for myself – after all, a guide to Philly cheesesteaks wouldn’t be complete without at least mentioning these two places due to their popularity!

Both shops have outdoor only seating with speedy window service and both are open 24 hours. In order to fit this into our packed Philly day, we ended up coming here at 8am. Although it wasn’t busy, we were surprised how many other people also got cheesesteaks for breakfast.
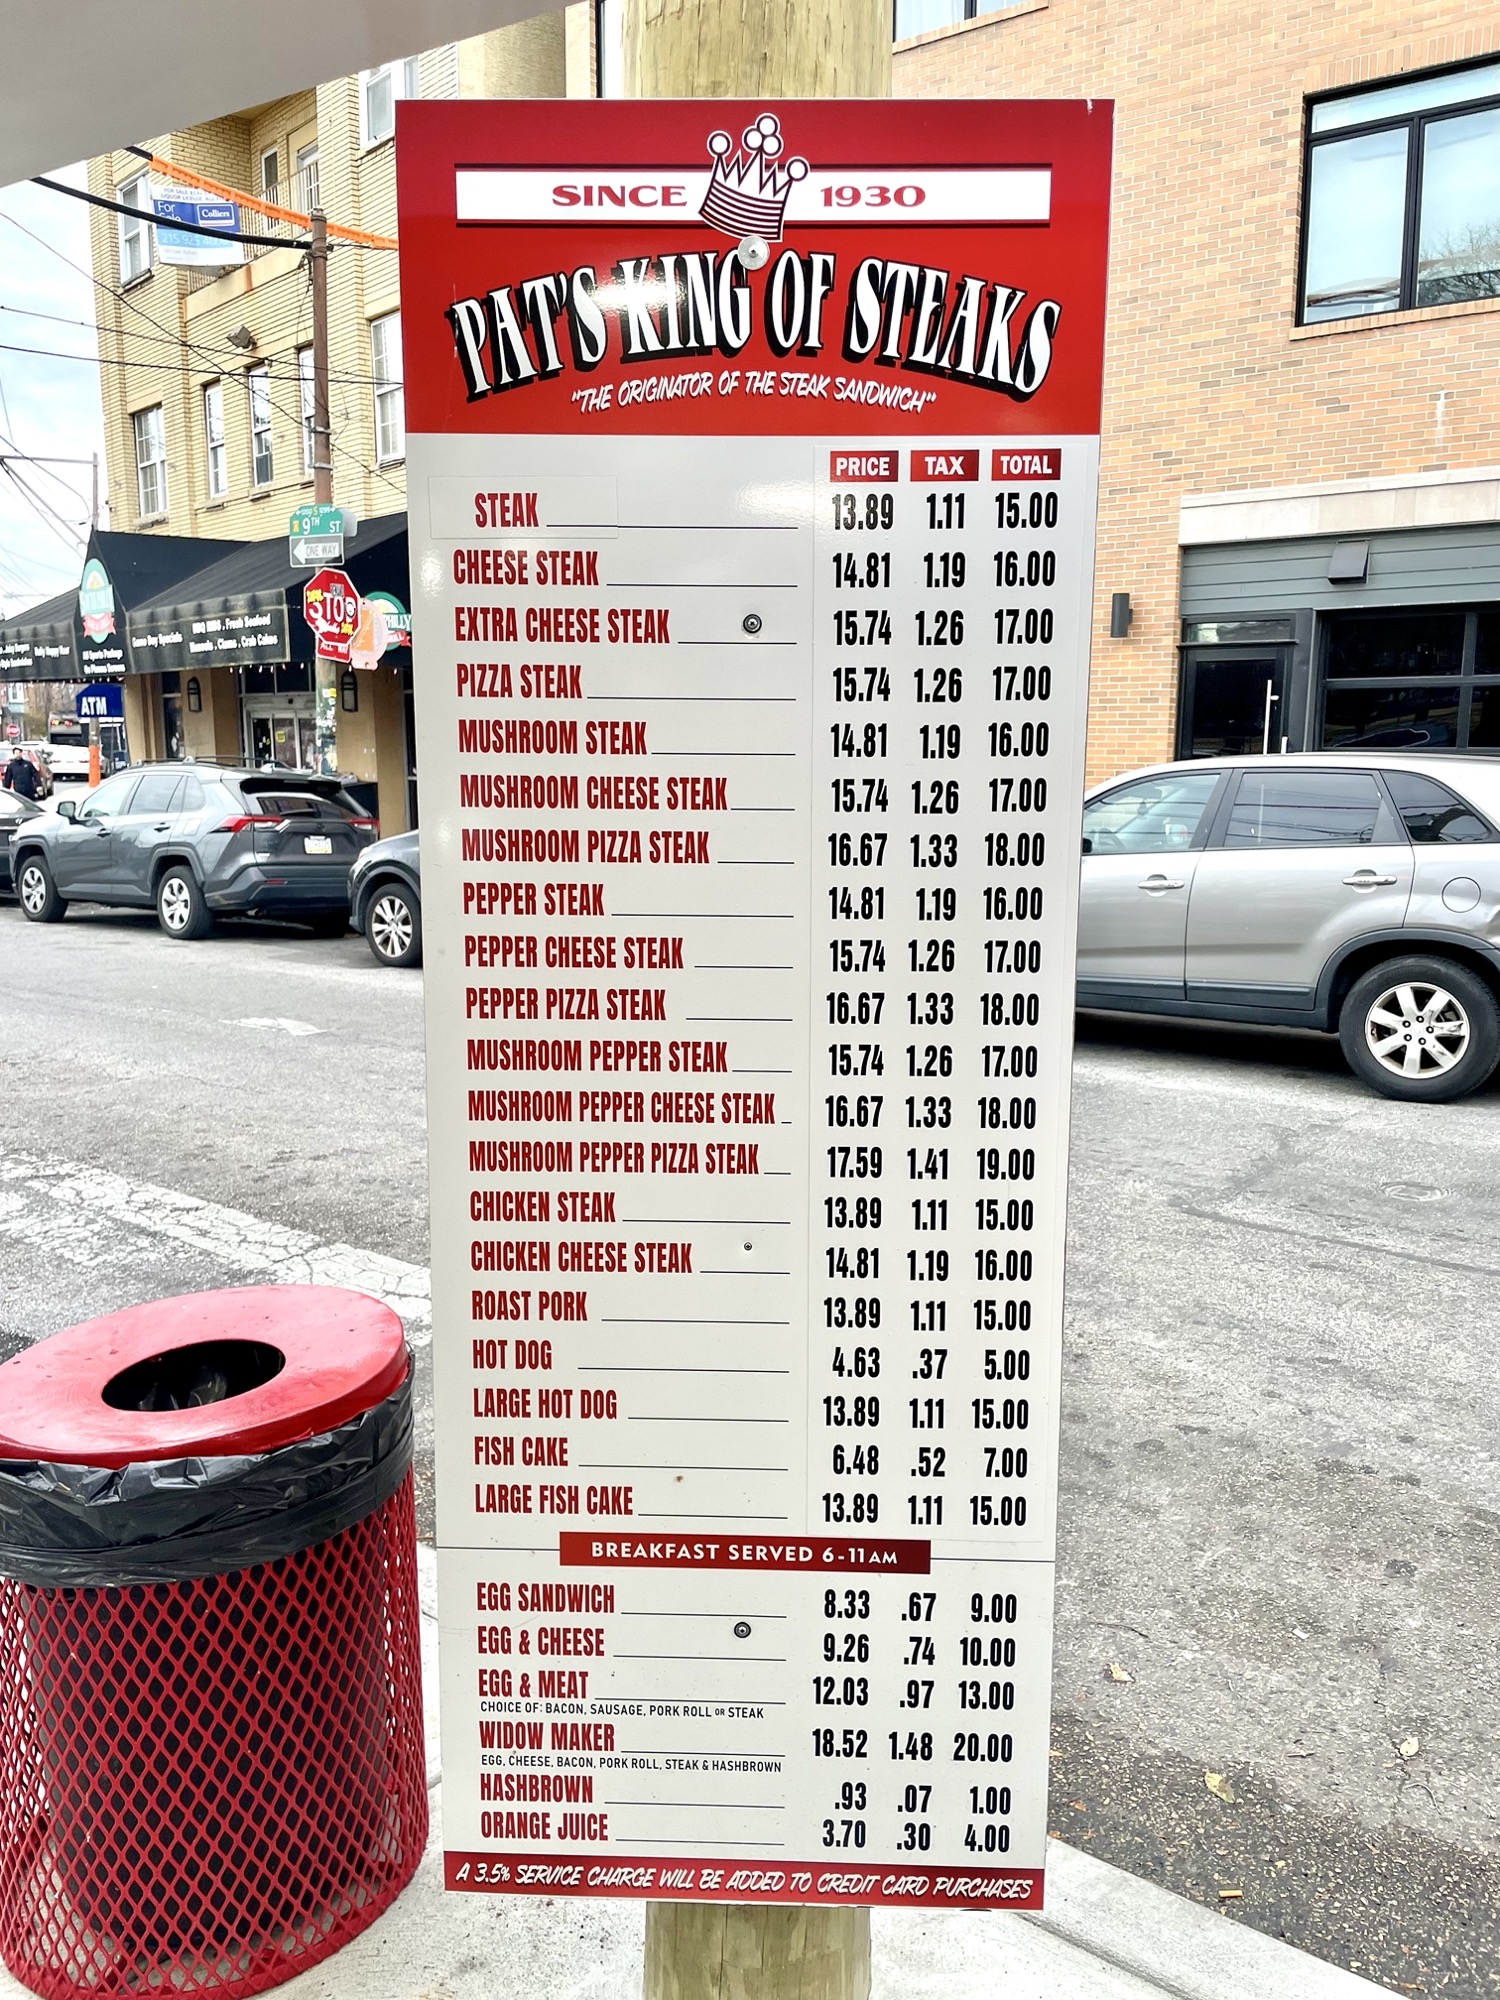
#12: Pat’s King of Steaks
Address: 1237 E Passyunk Ave, Philadelphia, PA 19147
Website: http://www.patskingofsteaks.com/
Hours: 24 hours (check the website for updated hours)
Cheesesteak: $14.81 (before tax)
Pros:
- Quick service
- Lots of covered outdoor seating (no indoor seating)
Cons:
- Slightly stale, tough, chewy bread
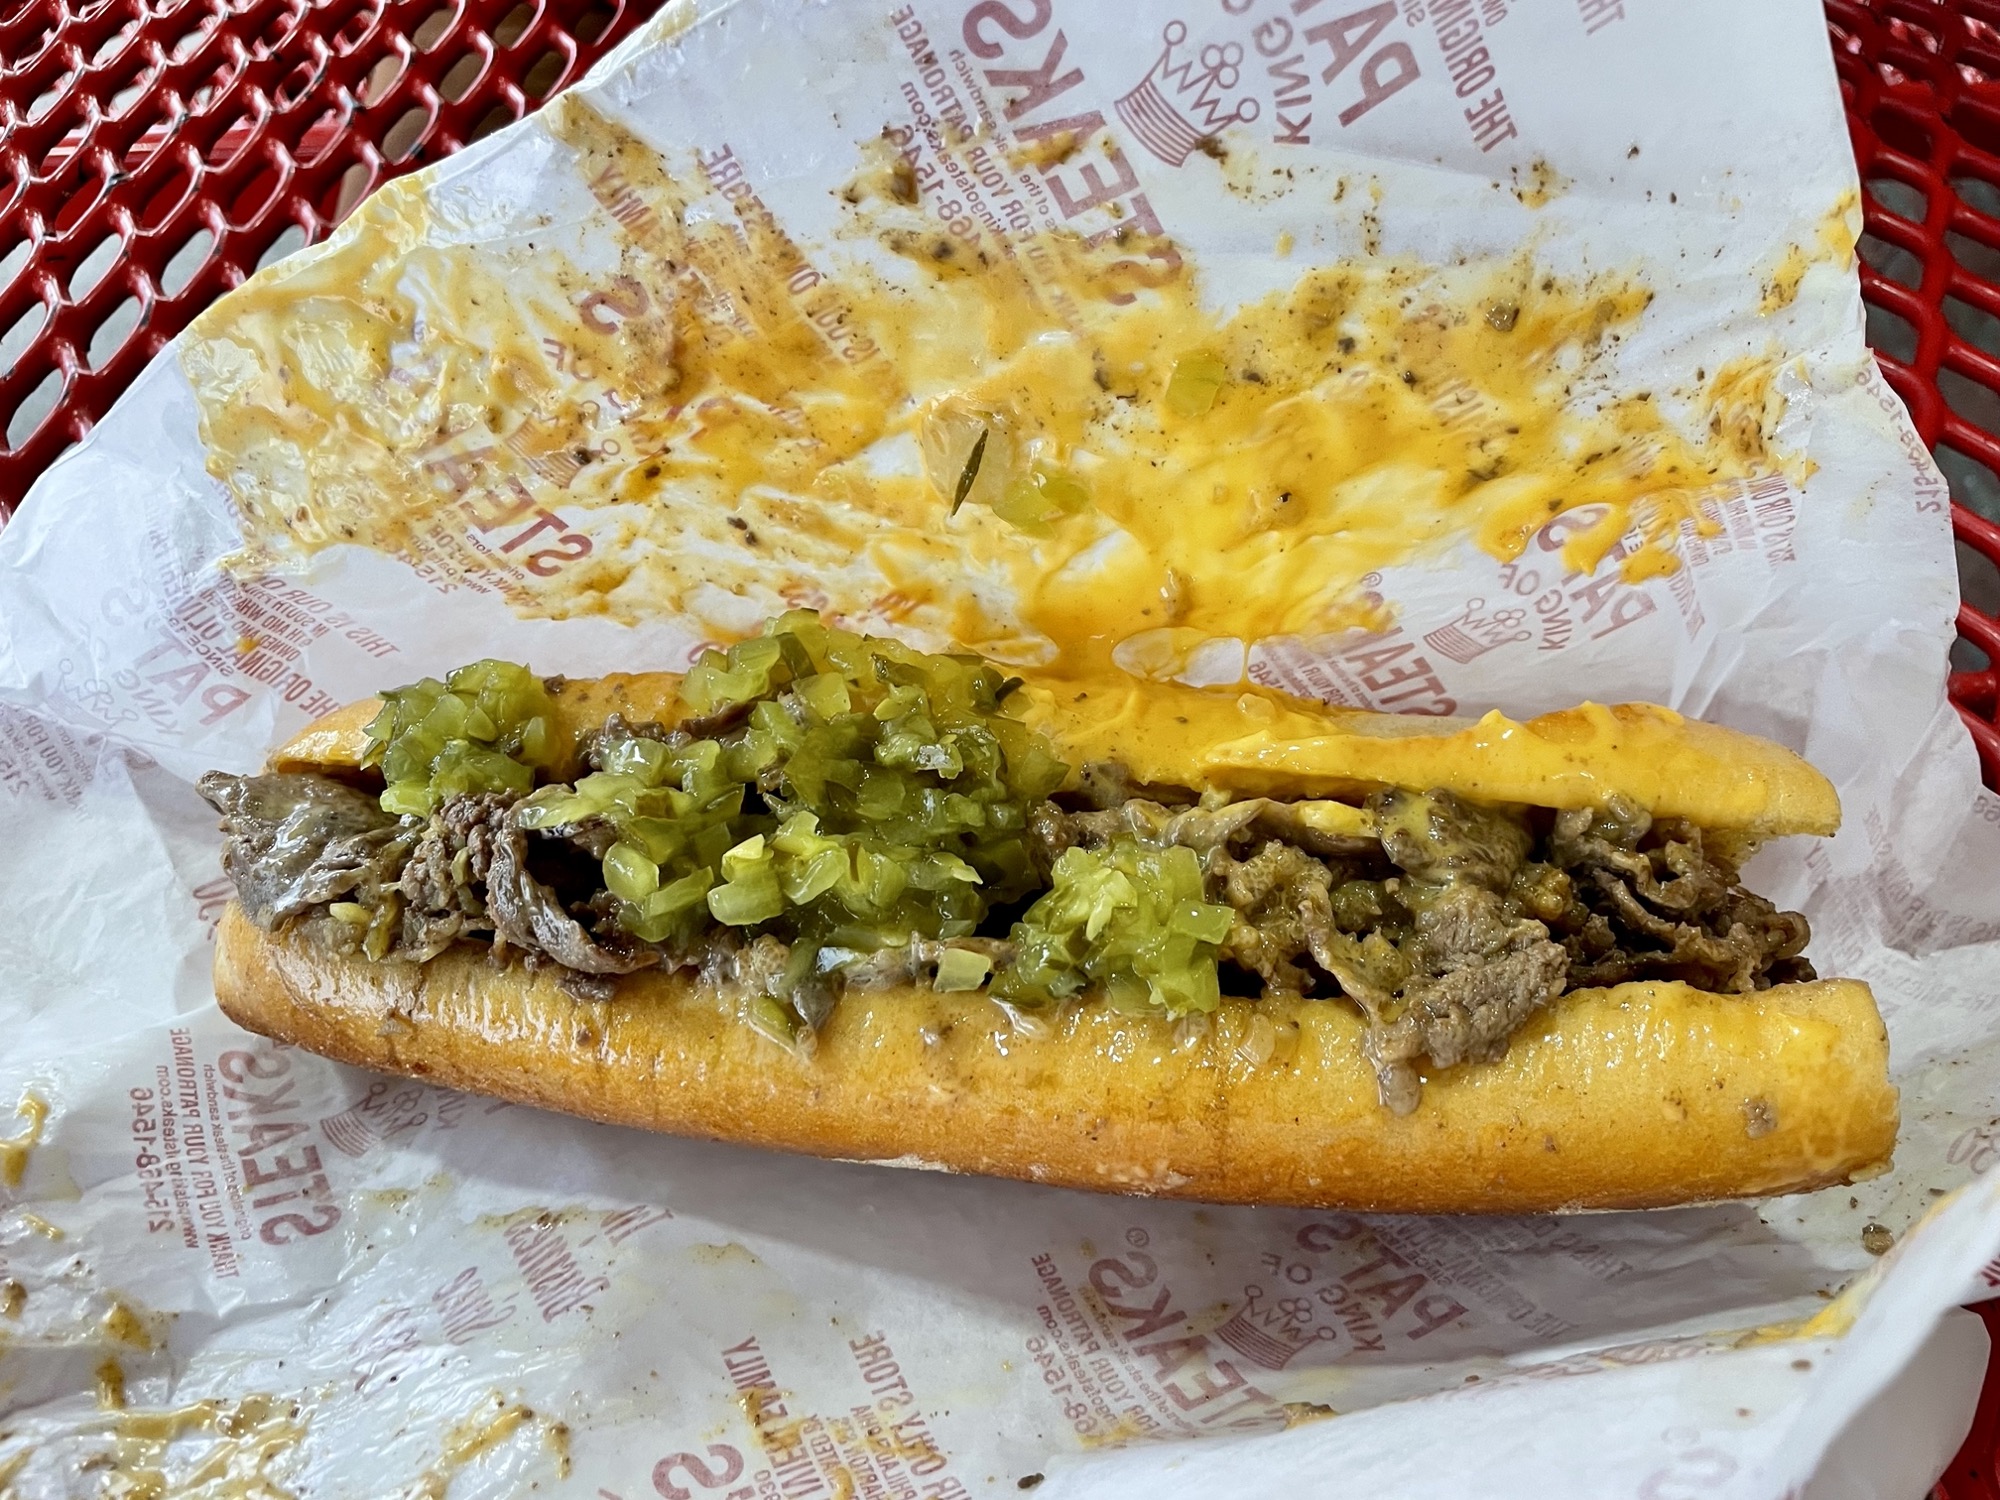
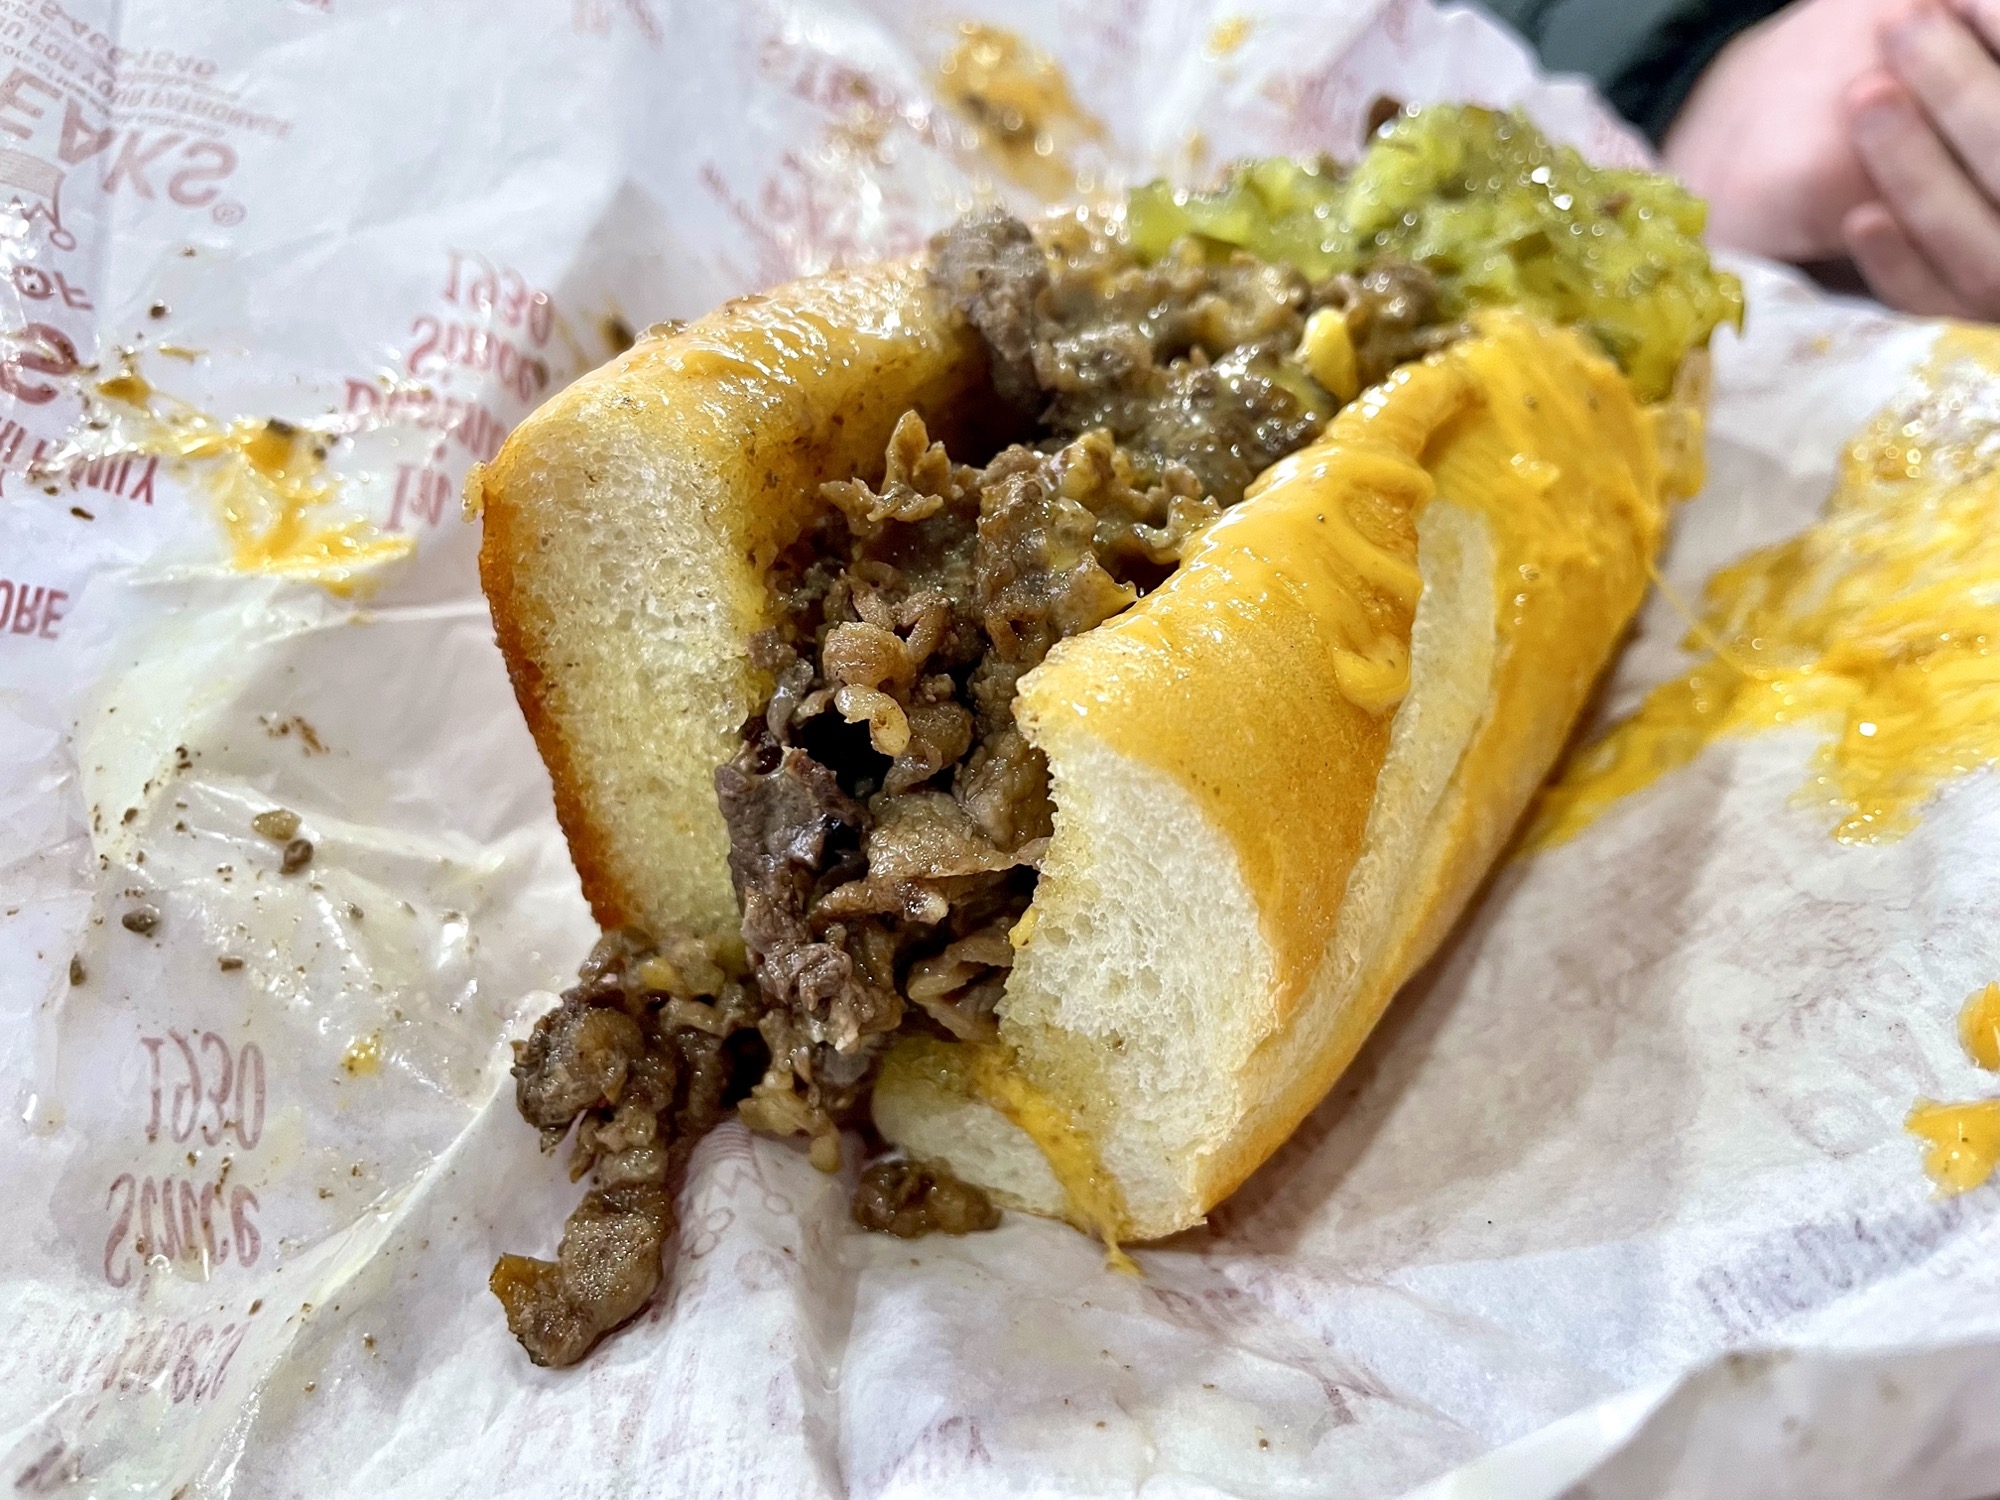
First up was Pat’s. The sandwich was made quickly and served hot. The flavours were actually decent and the meat was juicy and not overcooked. The big let down was the bread. It was a bit tough and chewy, almost a little stale. Overall it’s not bad a bad sandwich if you wanted a middle of the night cheesesteak, but if you’re looking for the best of Philly, this unfortunately doesn’t cut it. Next is Geno’s.


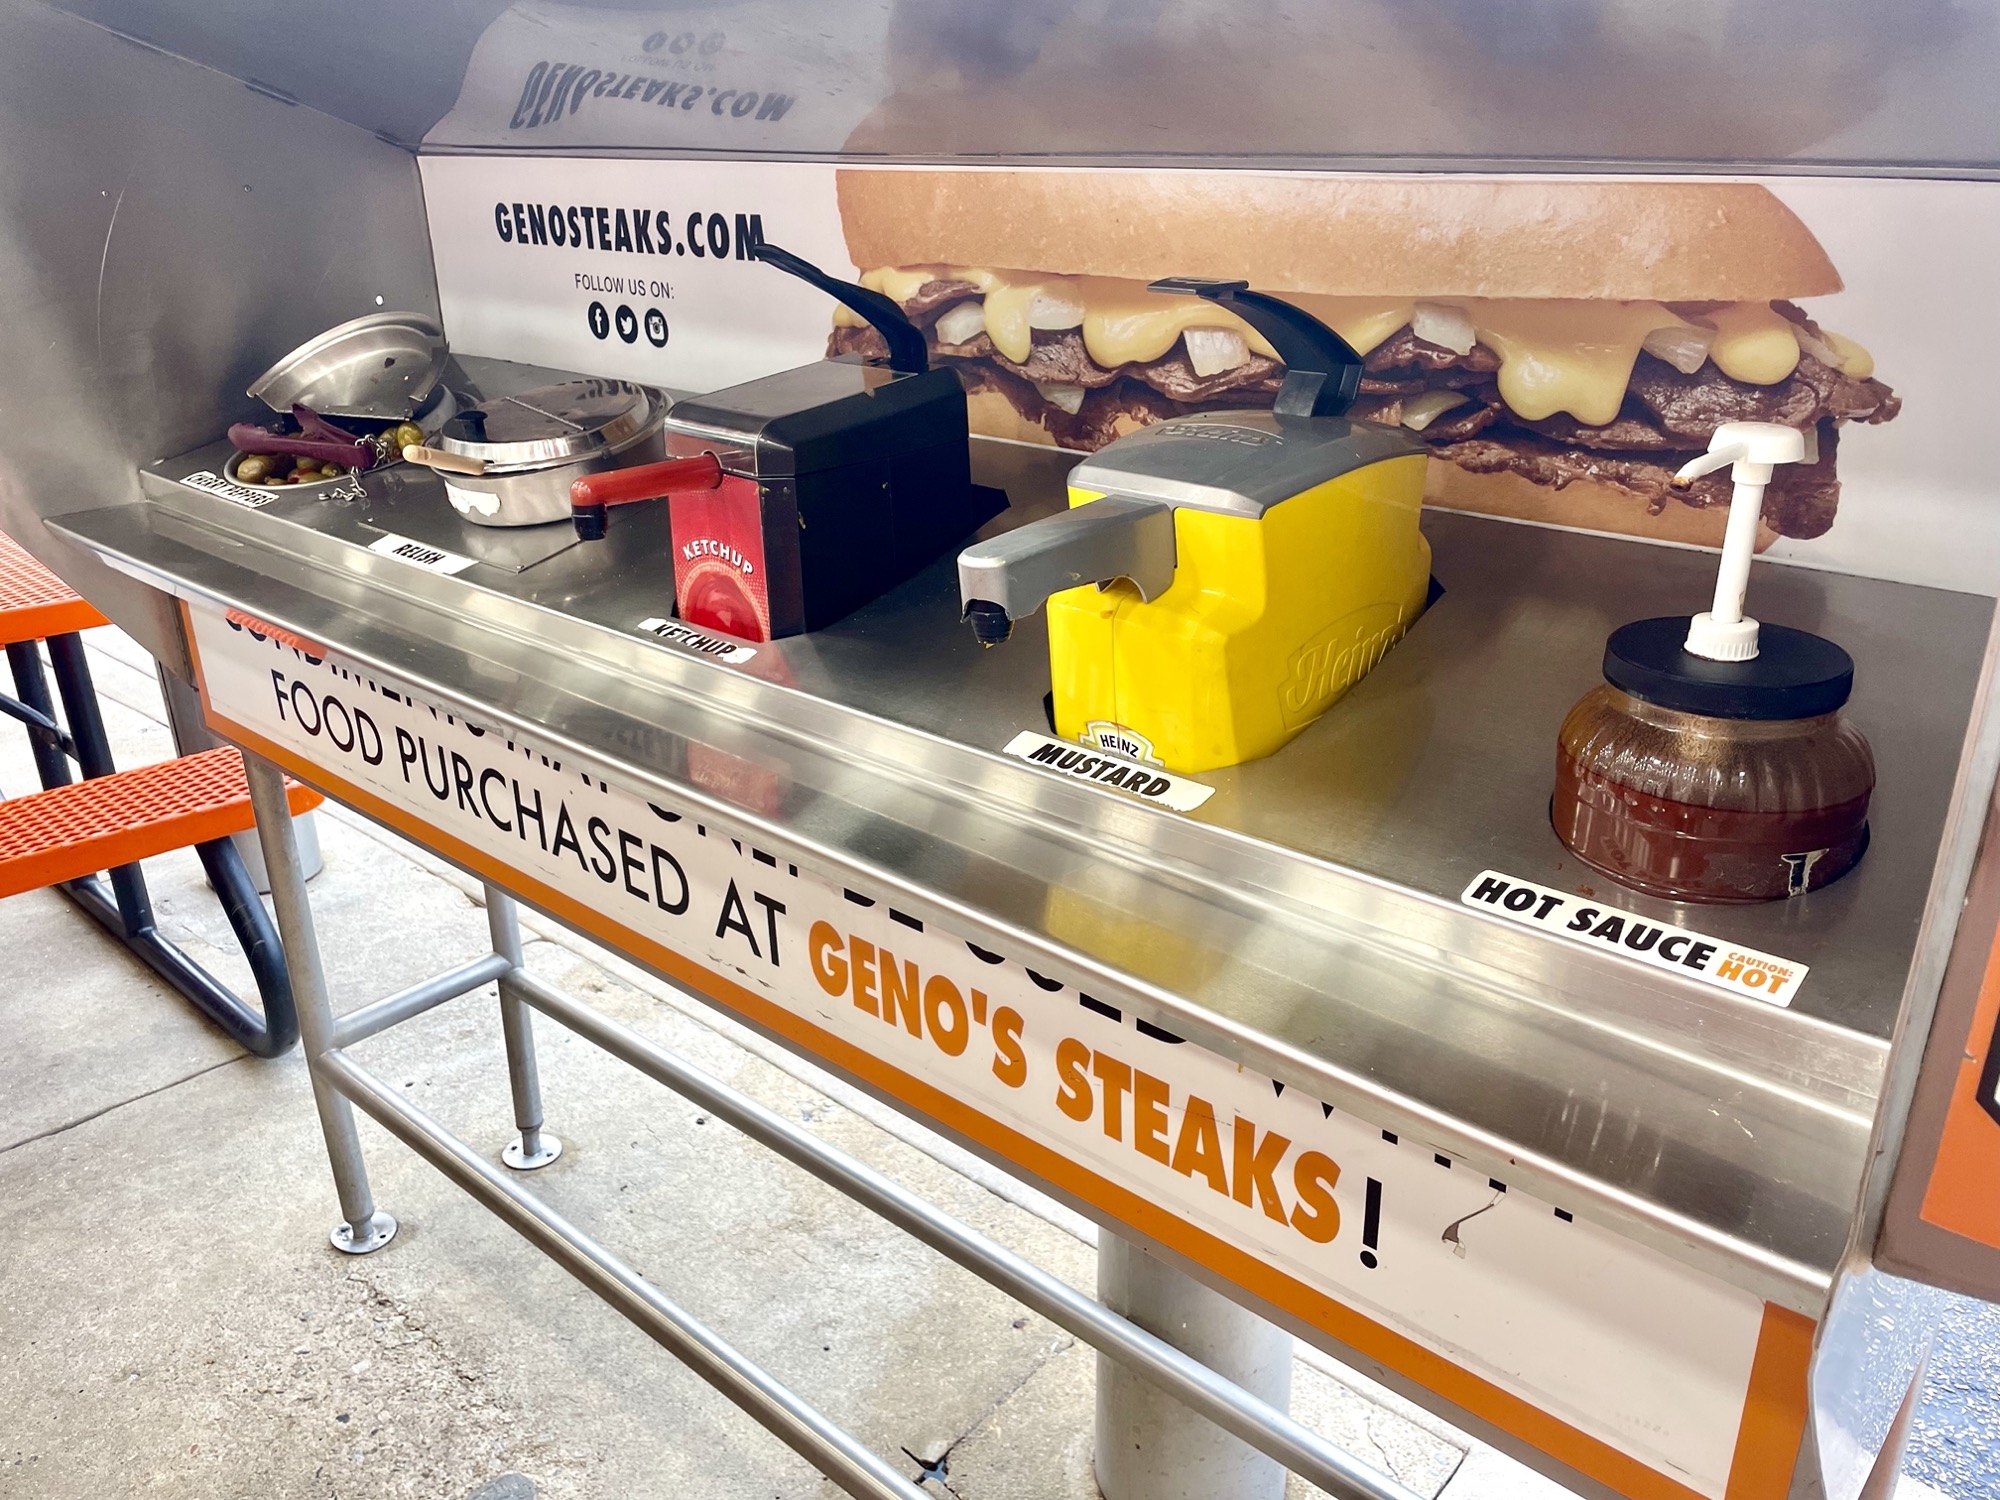
#13: Geno’s Steaks
Address: 1219 S 9th St, Philadelphia, PA 19147
Website: https://www.genosteaks.com/
Hours: 24 hours (check the website for updated hours)
Cheesesteak with onions: $13.89 (before tax) – cash only
Pros:
- Quick service
- Lots of covered outdoor seating
Cons:
- Cash only
- Meat very overcooked, dry, and tough
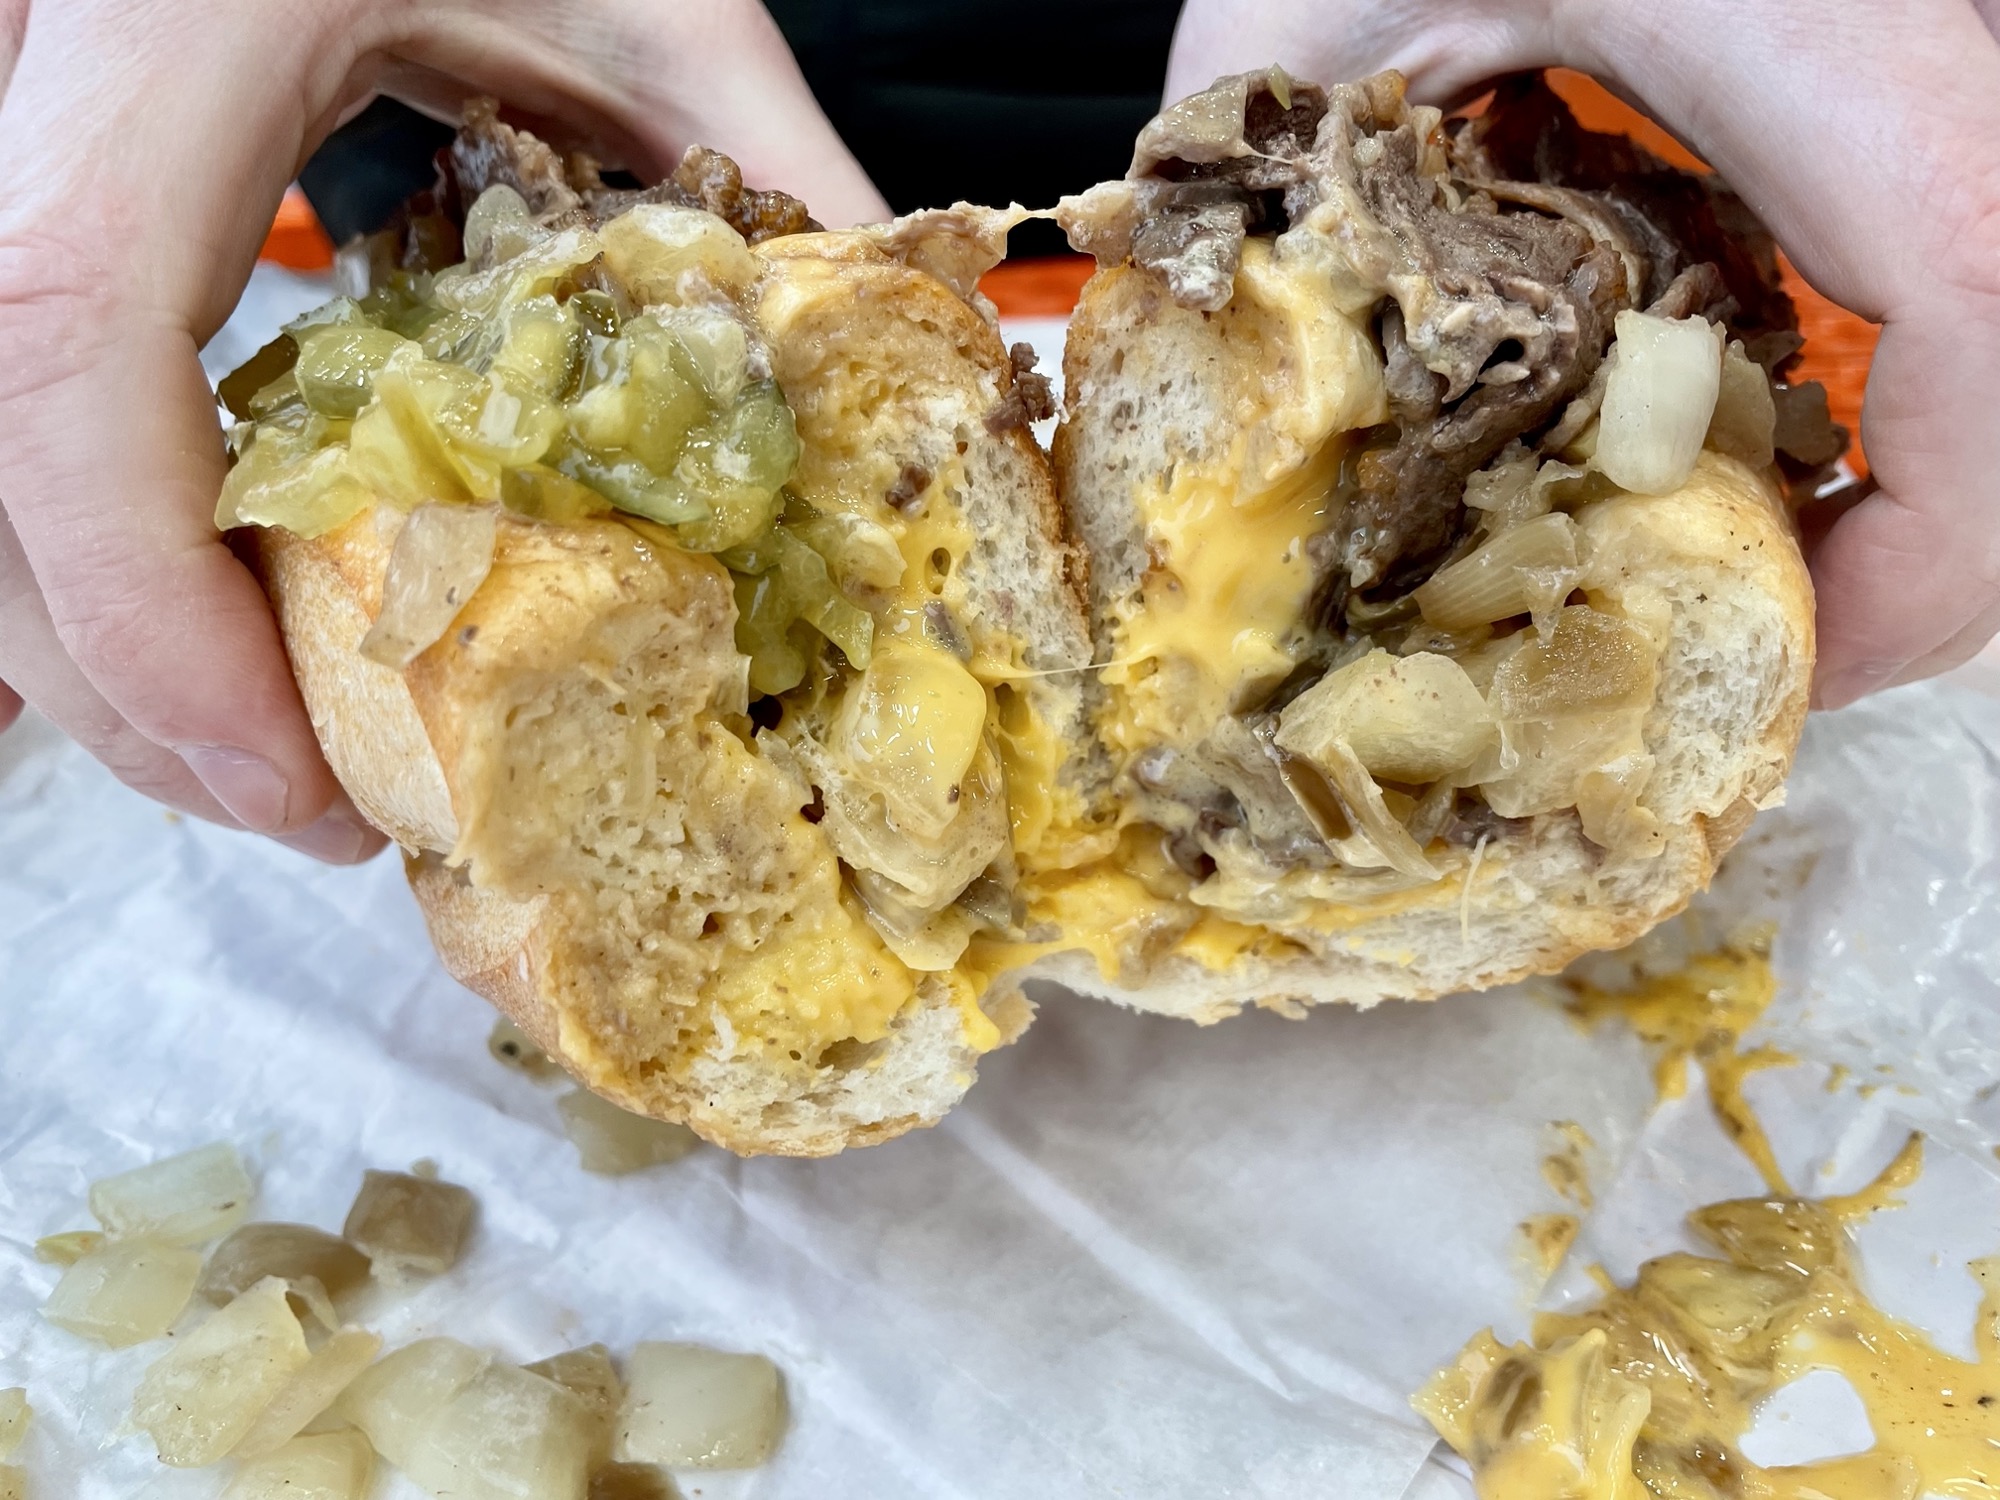
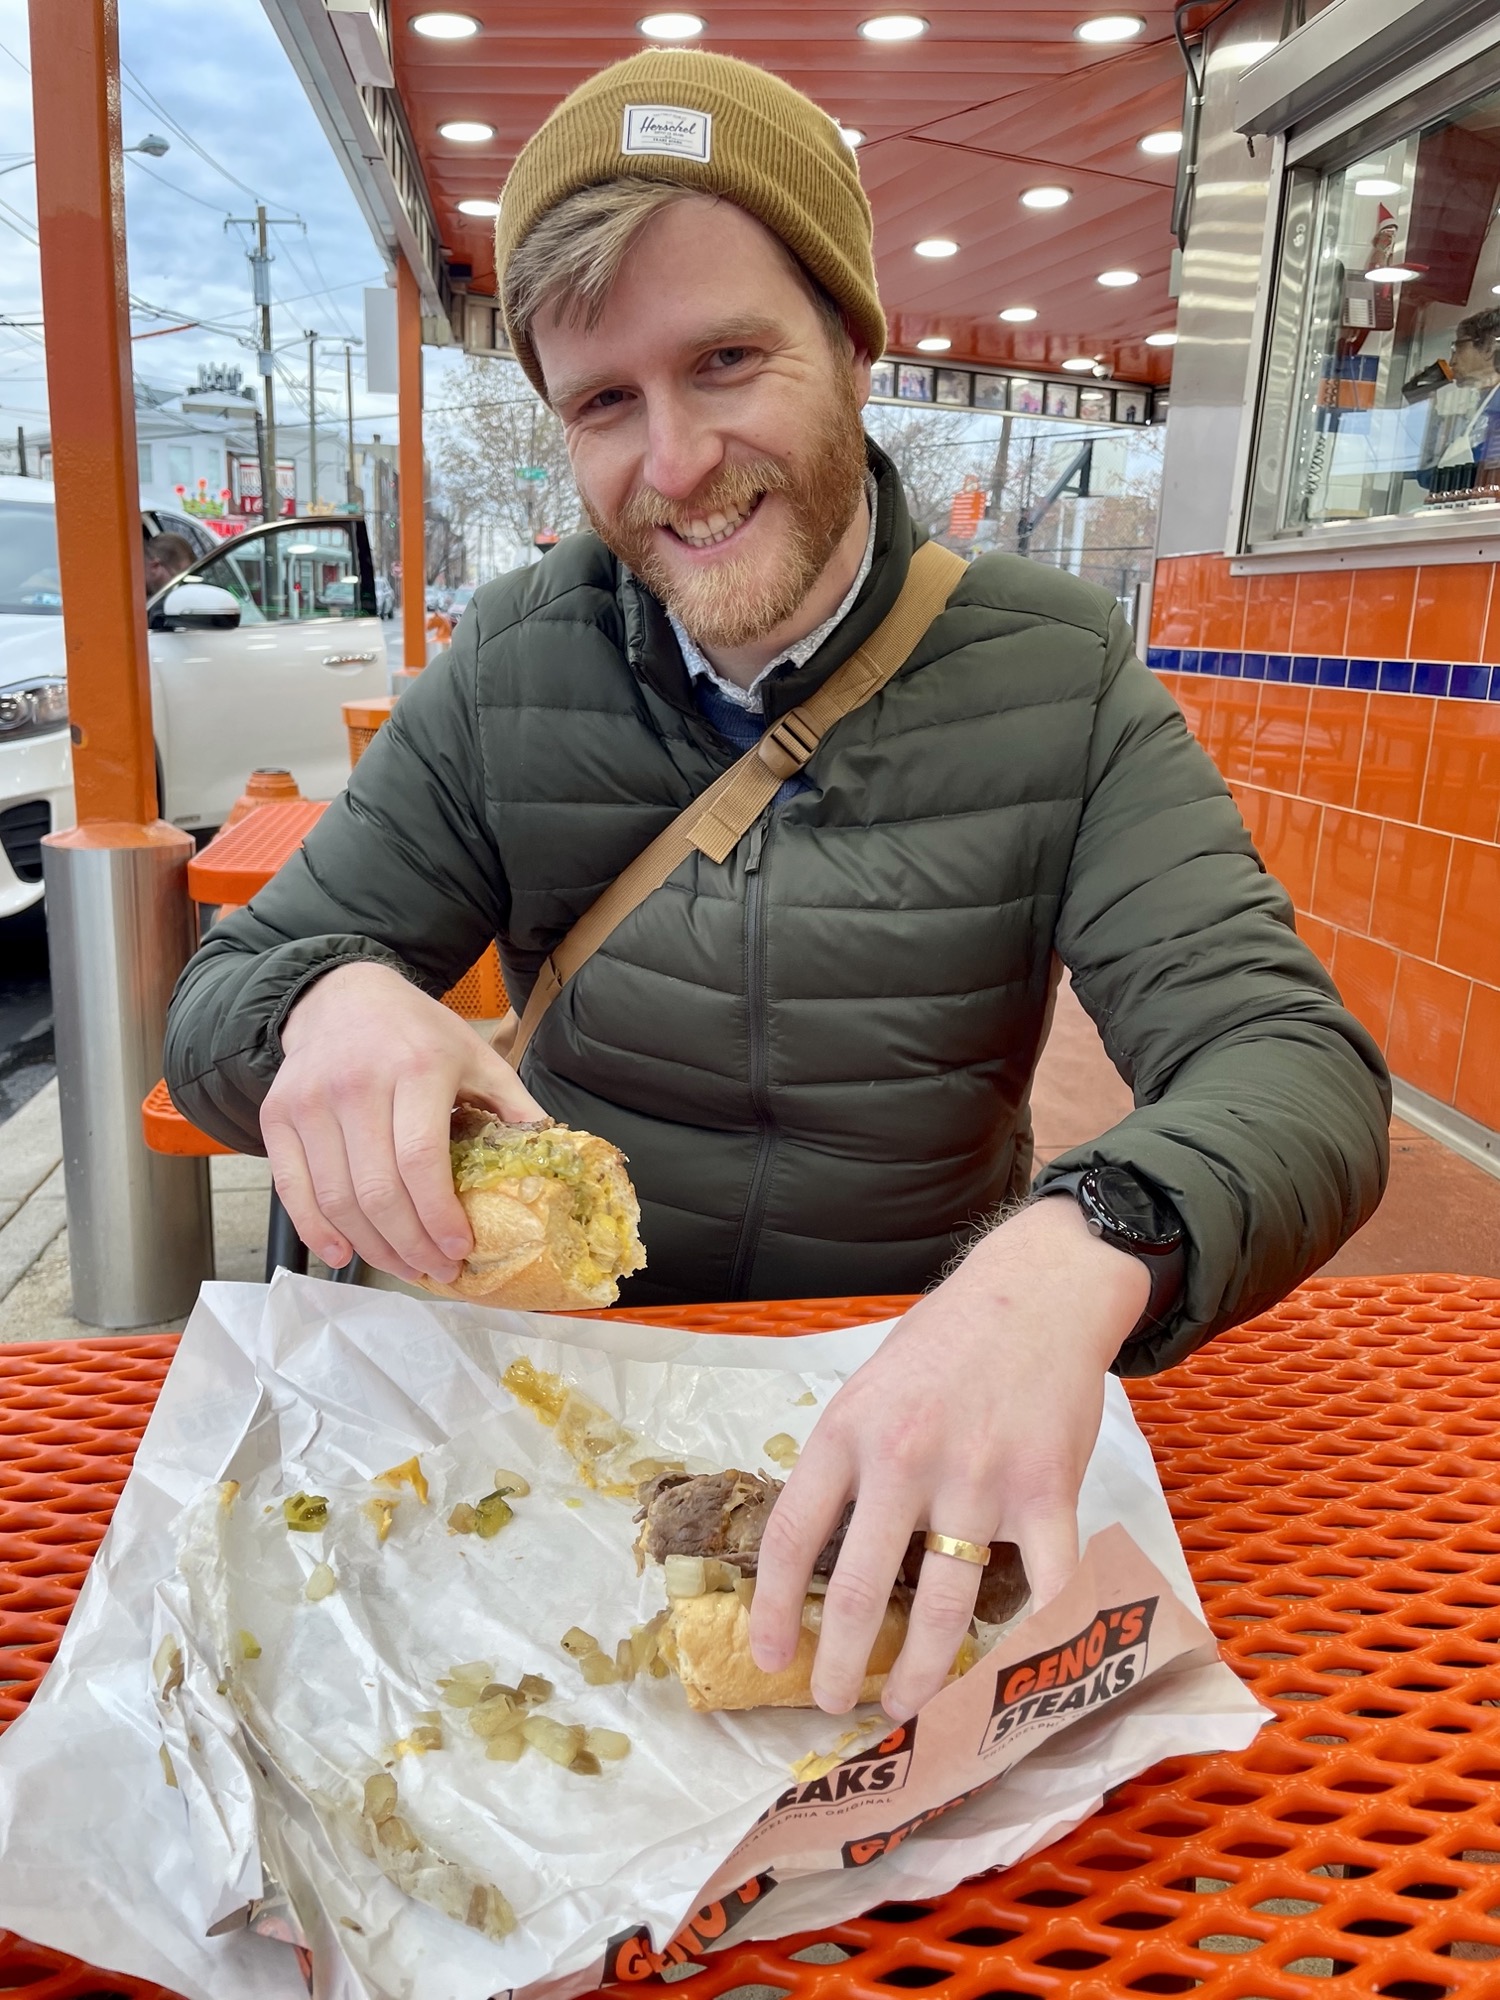
Geno’s is just across the street from Pat’s, also covered in neon lighting. It was a similar set up with window service and outdoor seating. The cheesesteak here is $1 less than at Pat’s, but they take cash only. Our sandwich was again made in record time, but sadly we did not like Geno’s at all. The meat was sliced thicker and was overcooked, making it dry and tough. The onions were not cooked enough for my taste with barely any browning. It was overall very disappointing and not worth the calories, making Geno’s last on my cheesesteak list.


Cheesesteak Spots on our list to try for our next Philly trip:
- Shay’s Steaks
- Cafe Carmela
- Stella’s
I hope you enjoyed my rambling on cheesesteaks across Philly. Keep checking back for updates and let me know in the comments if there’s a cheesesteak spot you think we should try!
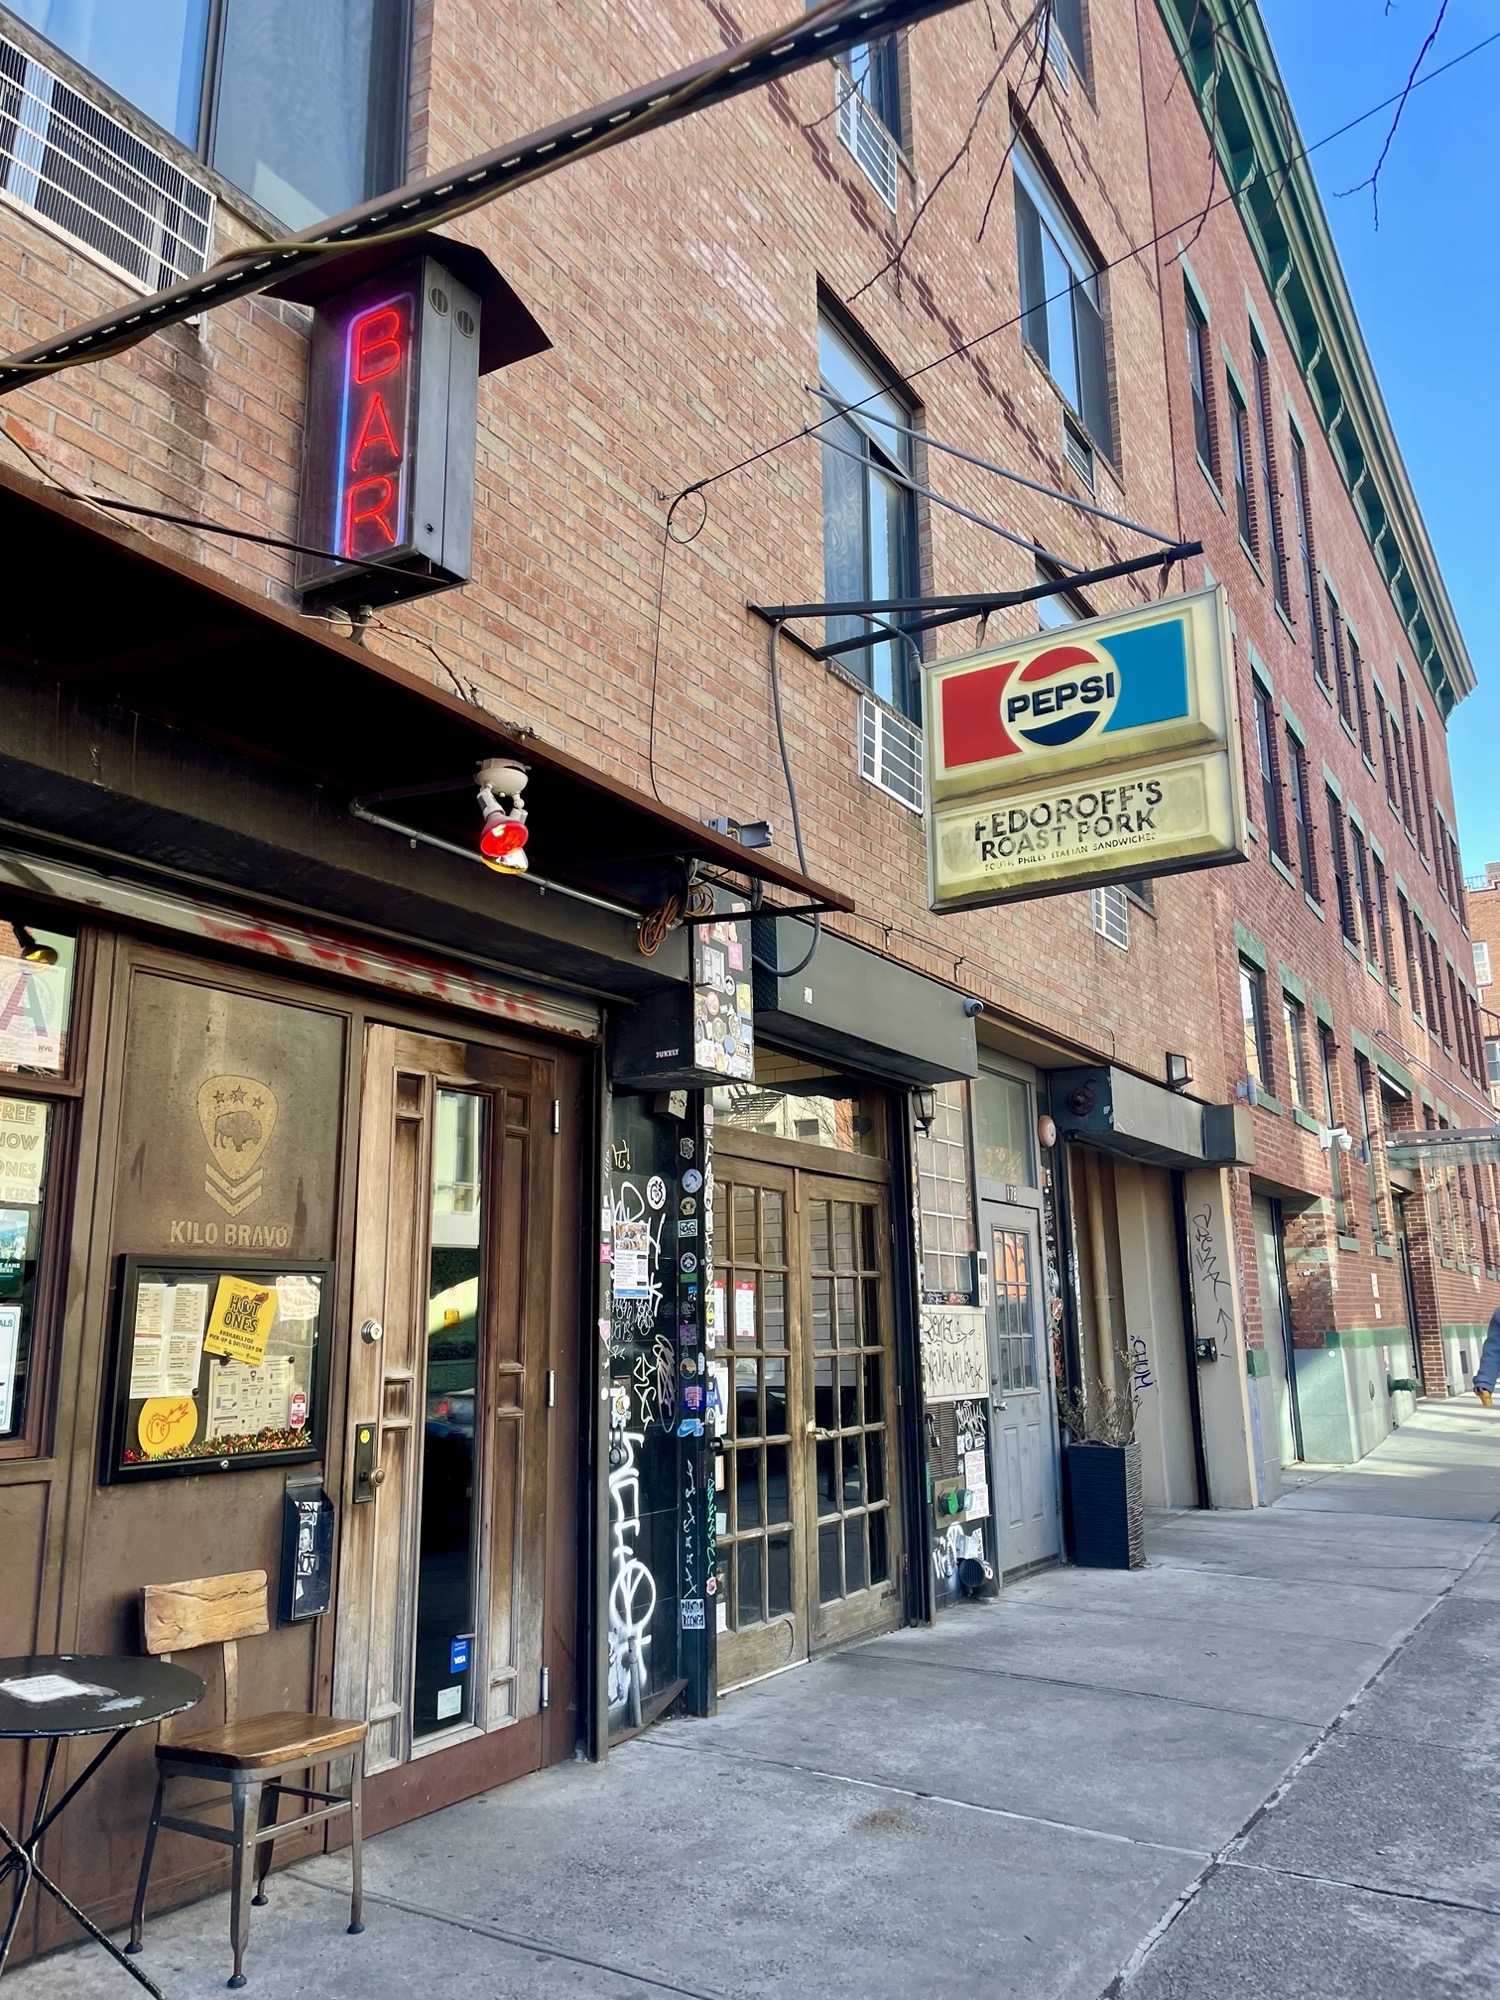
A note on Fedoroff’s Roast Pork (Williamsburg, NYC)
Address: 178 N 10th St, Brooklyn, NY 11211
Website: www.fedoroffs.com
Hours: Mon-Sun 10am-10:30pm (check the website for updated hours)
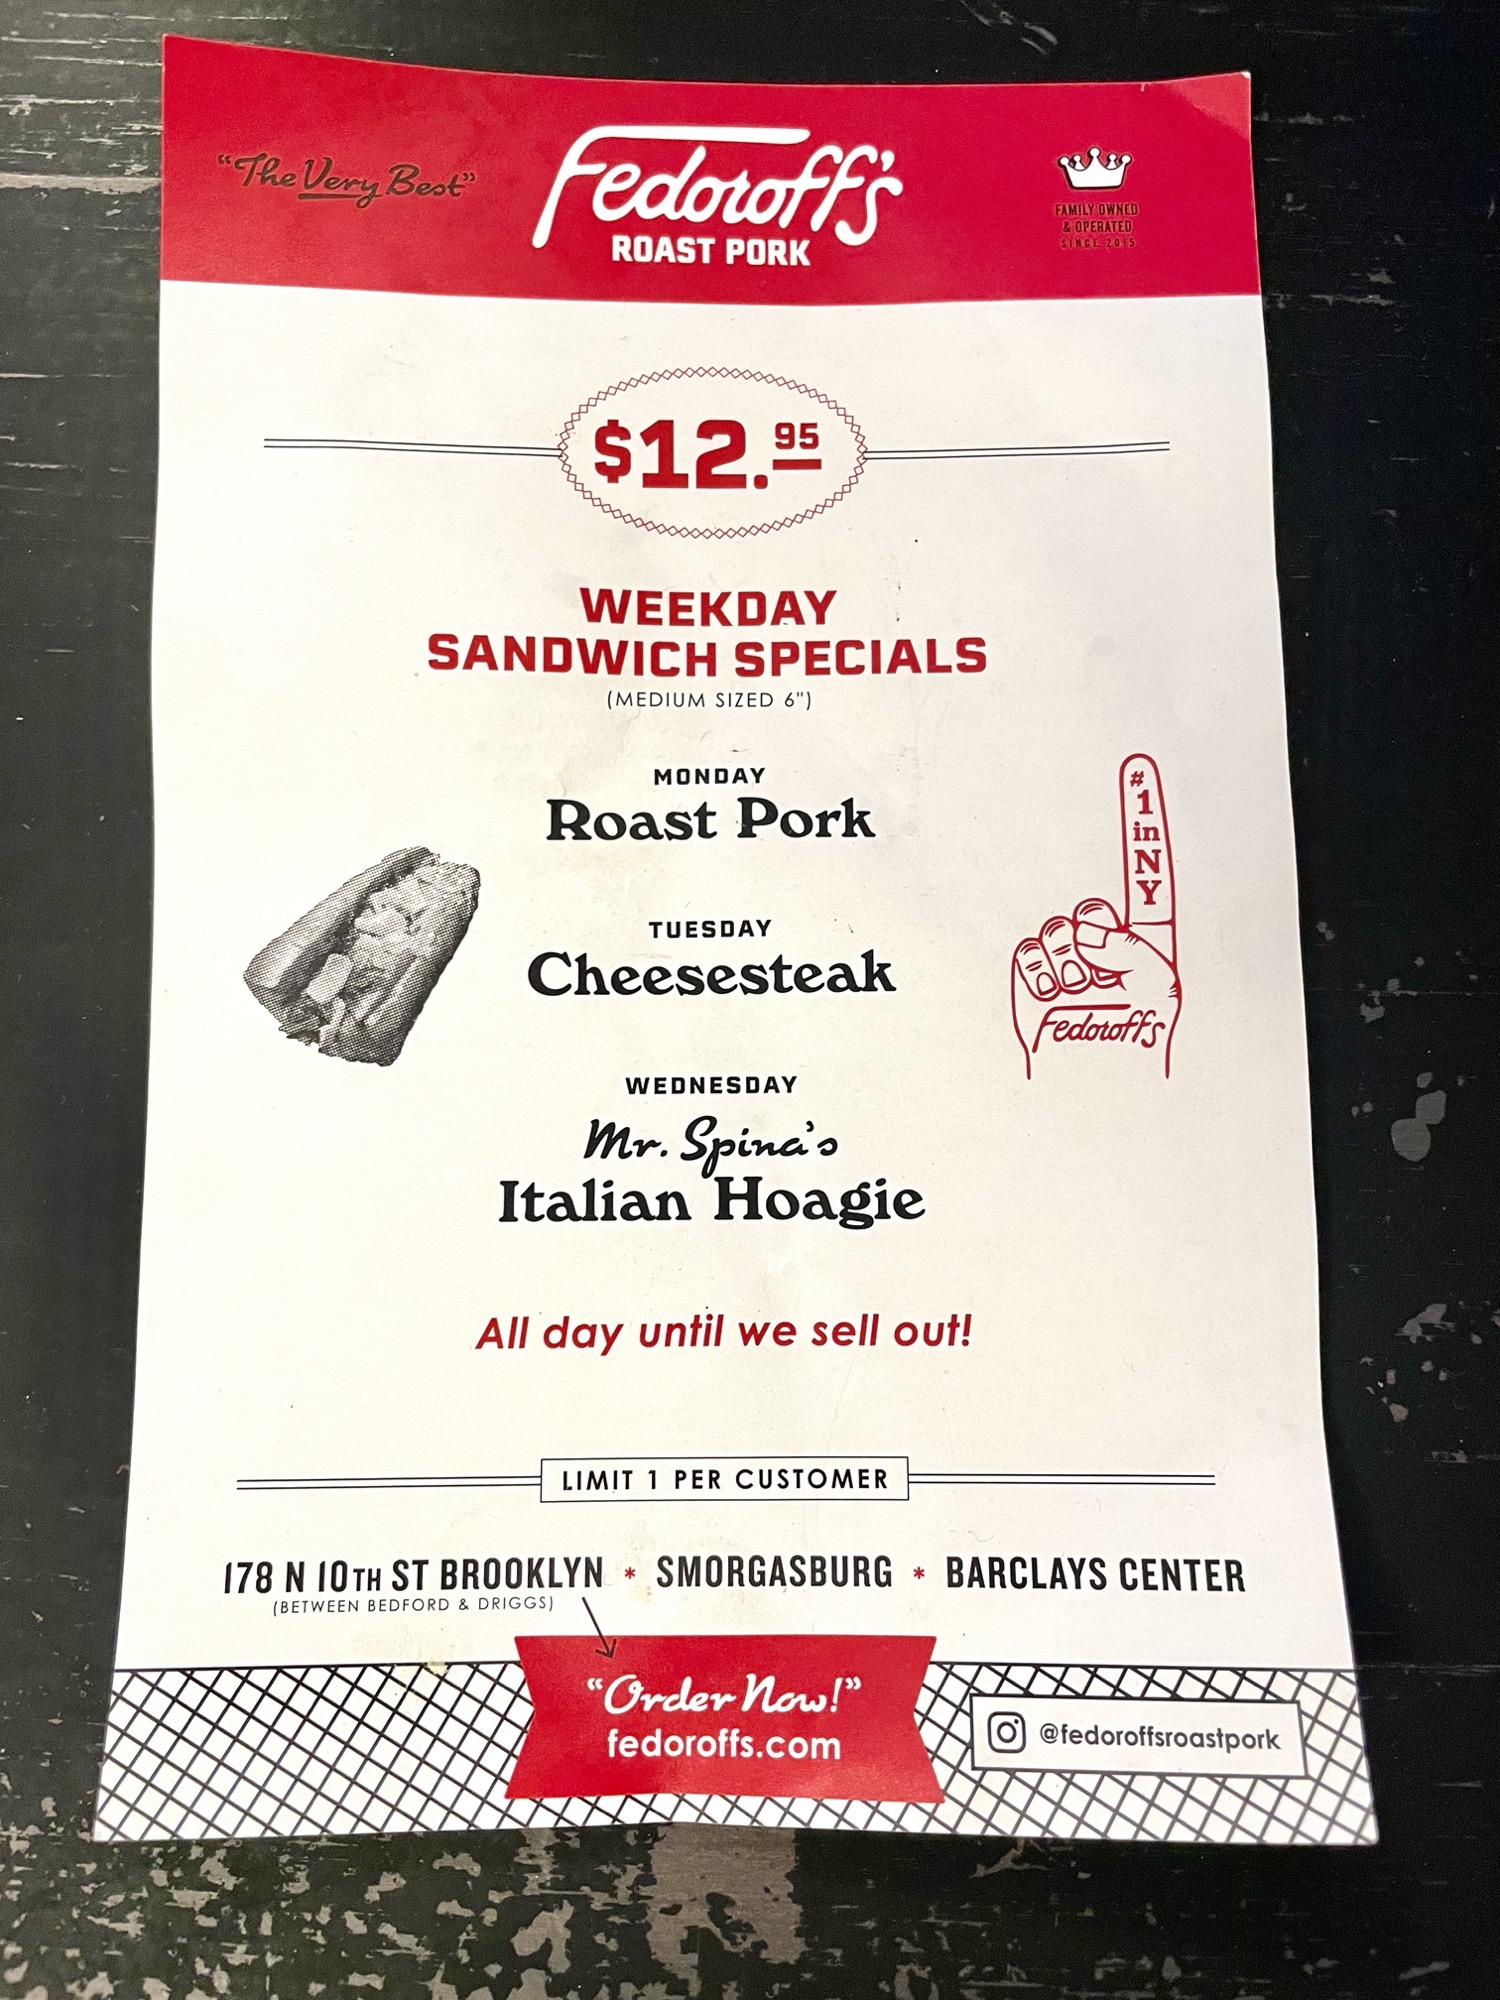
Cheesesteak with onions: $18.95 medium 6″; $21.95 large 8″ (before tax)
Although Philadelphia is only less than 2 hours away from NYC, I scoured online reviews to find a local fix between our trips and found Fedoroff’s Roast Pork in Williamsburg, NYC. Since this is a cheesesteak post, I figured that I should include it if not for other New Yorkers, but maybe more for myself to rant into the void of the internet. This is hands down THE unanimous go-to spot for cheesesteaks in NYC…according to everyone else.
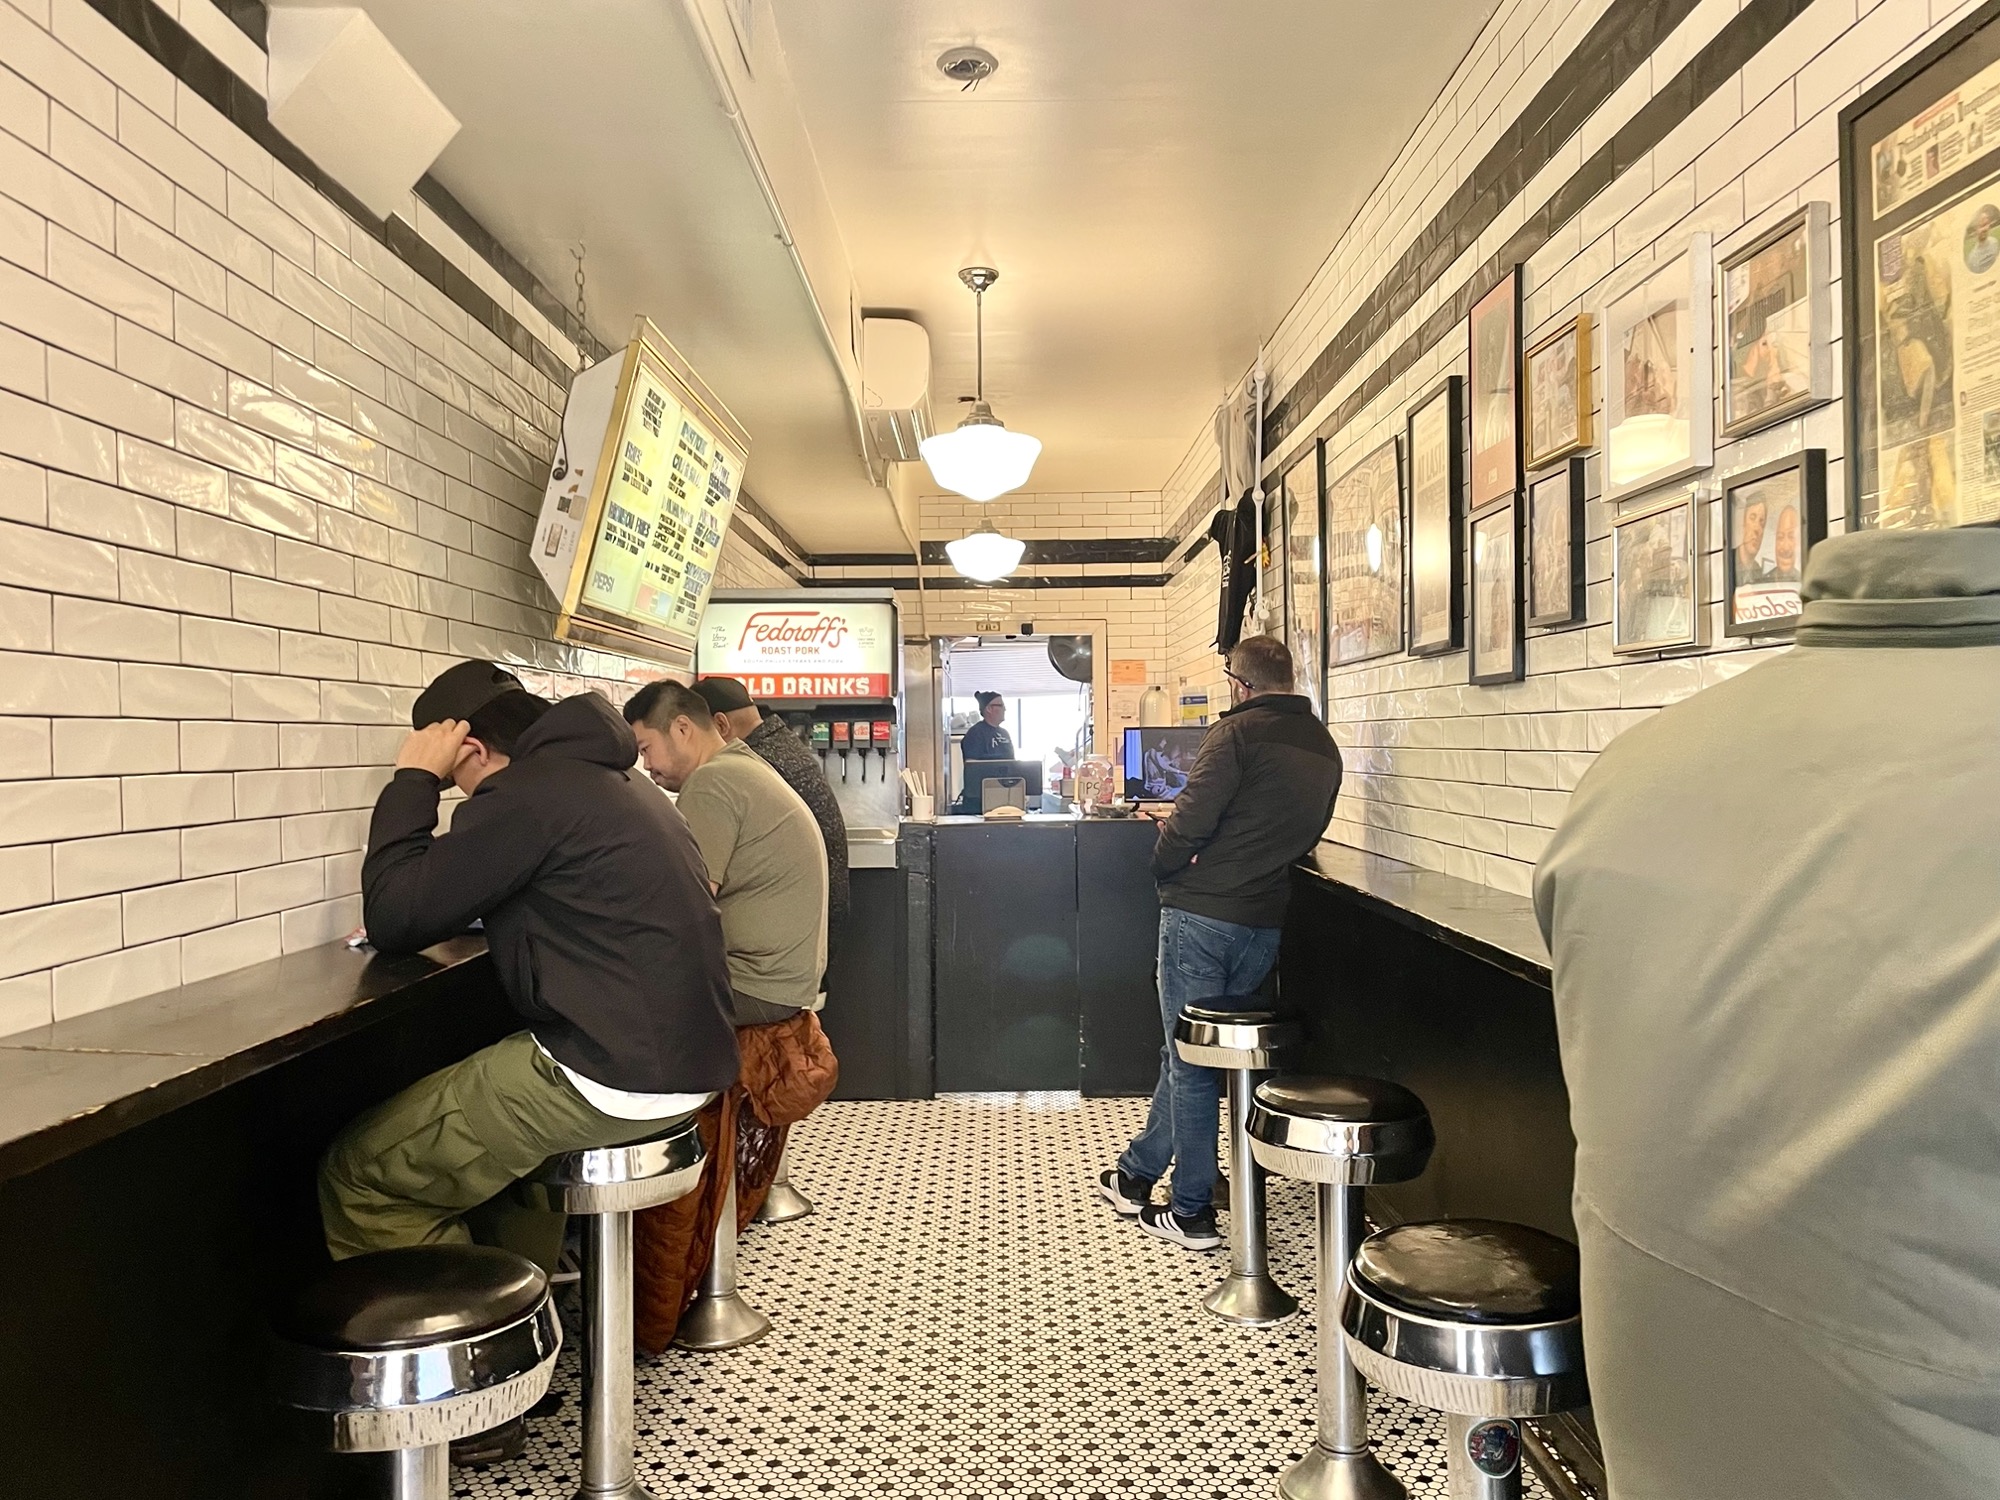
I came with an open-mind, making the trek from Park Slope to Williamsburg (which is no easy feat considering how congested the BQE always is or how long the subway ride takes). I was craving a cheesesteak and I was excited. On first impressions, it’s a small shop with really old signage that made it seem like this place has been here for a long time (odd choice since they only opened in 2016).
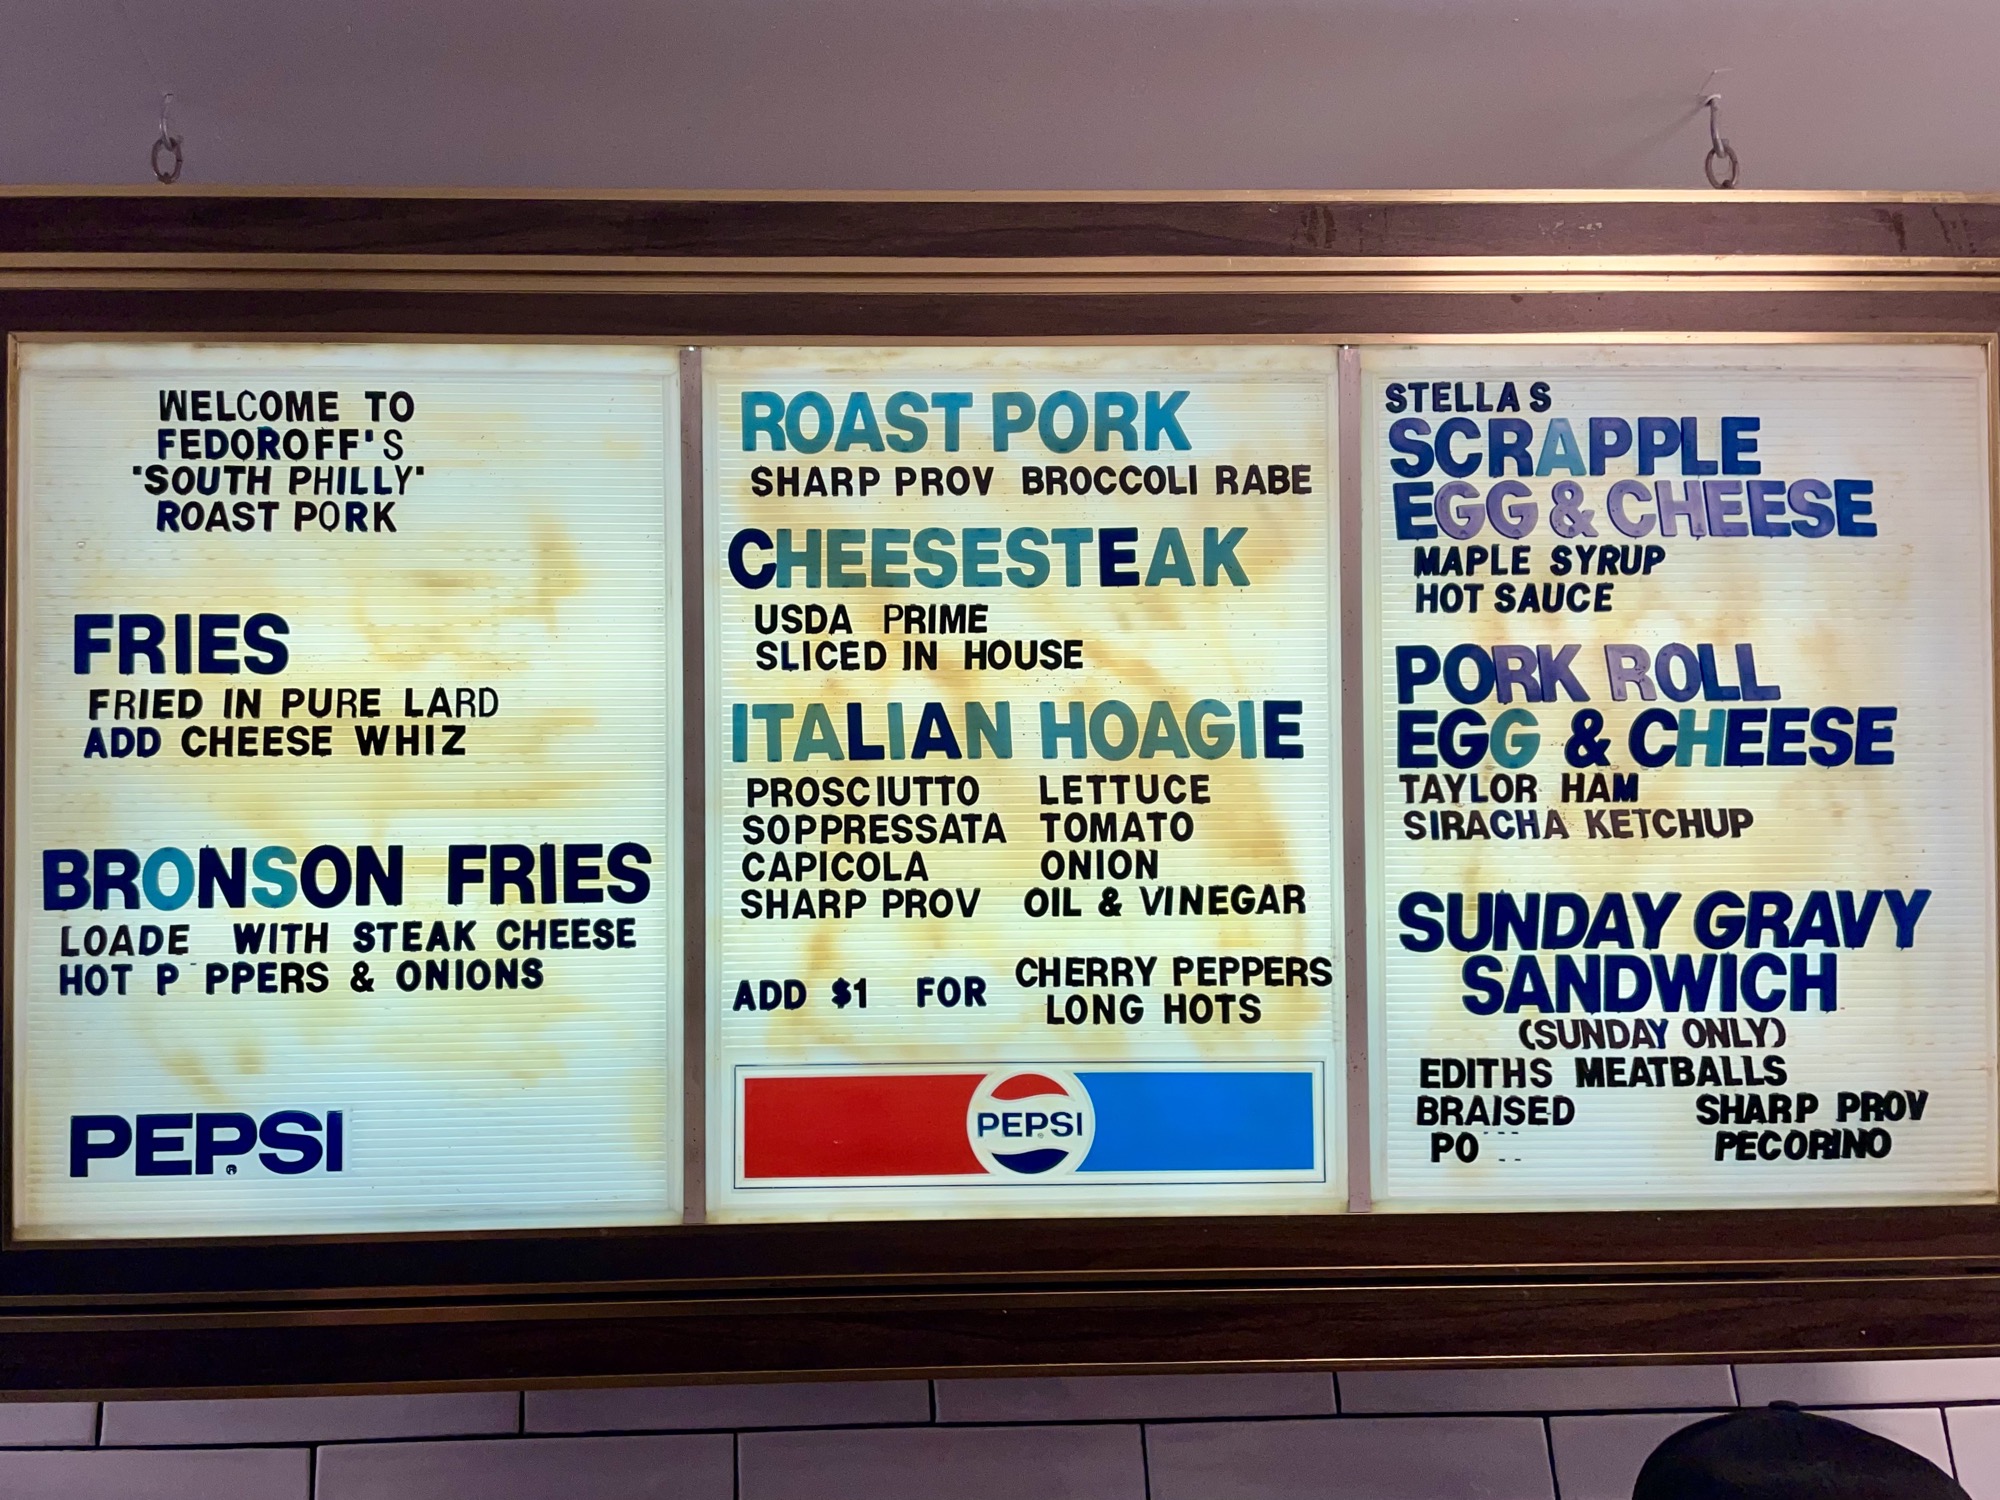
This place is incredibly expensive. Cheesesteaks usually come in one size and often a 12 inch roll for about $13-16. At Ferdoroff’s you have a choice of “medium” (which is 6 inches) for $18.95, or “large” (which is 8 inches) for $21.95. First of all, it baffles me why a sandwich shop would even bother carrying two different sizes of bread that is only 2 inches in difference 🤨. Second of all, I get that NYC is expensive, but $19 for a sandwich that’s literally half the size as a regular cheesesteak in Philly that’s made of sliced meat, cheez whiz, and onions is beyond me. What’s even more annoying is that they don’t even post the prices on their try-too-hard-to-look-vintage sign. I had to ask the cashier when we went to order. Luckily we went on a Tuesday where they happened to have a cheesesteak special for $12.95 for a medium 6″ sandwich. The server bro asked us if we wanted to upgrade to a large 8″ for $21.95…An extra $9 for 2 inches of sandwich? – I’m good.
Despite this, I still kept an open mind and ordered my medium 6″ cheesesteak. Maybe this sandwich will be so incredible that it’ll be worth the money – after all, it’s so highly reviewed.
It definitely wasn’t worth the wait or the money. It sounds stupid, but I have seriously never been more annoyed eating a sandwich than at Fedoroff’s 😂. Their bread is so thin and soft, that it might as well not have been there. The filling was average, nothing special, but the bread was constantly falling apart and getting mushy. I couldn’t even hold onto it properly. With every bite I was dropping more and more food from my hands and by the end I felt like a child with cheese sauce all over my hands and face. It was a huge mess. It was ridiculous.
I really struggle to see why people like Fedoroff’s. They boast themselves on being the only cheesesteak shop in NYC owned by South Philadelphia natives, yet their website says they pay tribute and get inspiration to the great cheesesteaks in Philly including Pat’s and Geno’s…🤨. I’d rank Fedoroff’s even below Geno’s. At least with Geno’s you know what you’re getting at a fair price. Fedoroff’s make it seem like they’re the only legit spot for cheesesteaks in NYC, but the combination of the high prices, poor product, try-too-hard-to-look-old, and suspicious history makes this place just feel scammy. Highly do not recommend. /rant


Looking For More Ultimate Food Guides? Check out these below!

Best Places for Crab Cakes in Maryland: A Complete Guide to Local Favourites
Unleash your inner seafood lover with Maryland’s iconic crab cakes! Follow this post for a review of the top local favourites in Maryland, from Pappa’s to Kocos!

The Ultimate Guide to a Manhattan Chinatown Food Crawl – bring cash!
Manhattan Chinatown is full of amazing authentic Asian food but in a neighbourhood full of Chinese signage and shop keepers that barely speak English, it can be daunting to find the best food spots amongst the literal hundreds of restaurants in this neighbourhood. This food guide highlights some of my favourite places to eat in Chinatown…