Date Published: July 21st, 2020 | Last Updated: July 24th, 2020
Author: Abby |Category: snacks, quick and easy, < 15mins
Serves: 2 | Prep time: 10 mins | Cook time: 10 mins
Jump to recipe |
Grilled cheese (or toasties in Australia), are THE ultimate comfort food. It’s quick, easy, and indulgent. Nothing beats the ooey-gooey cheesiness of a good crisp grilled cheese. Nearly a decade ago I came upon an article on gourmet grilled cheese sandwiches – this was before I had an interest in cooking and was still in the world of processed Kraft cheese for my toasties. My world was forever changed when I read about the different types of cheeses and flavour combinations that people use with sweet and savoury ingredients. It amazed me how many different ways you can make a grilled cheese! I’ve since been experimenting with different ingredients for different types of grilled cheese and also stumbled across some really great recipes.
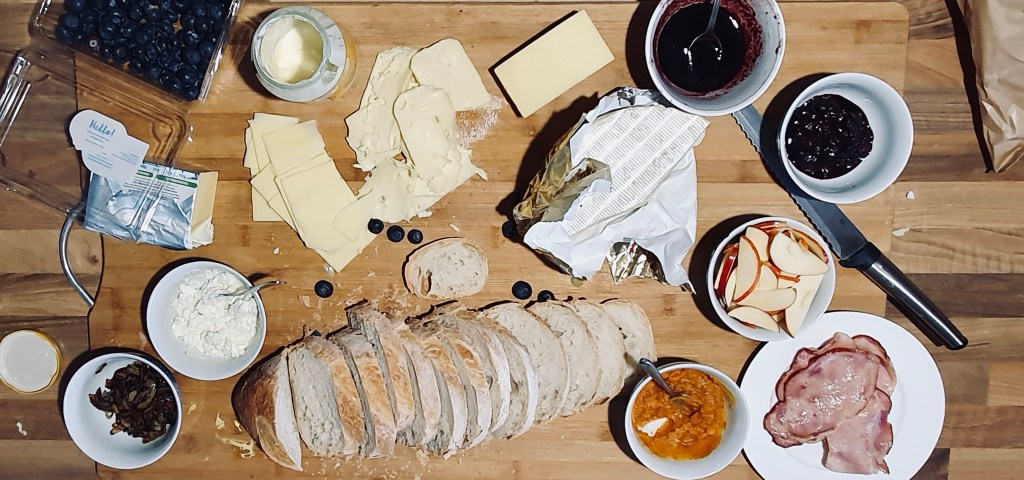
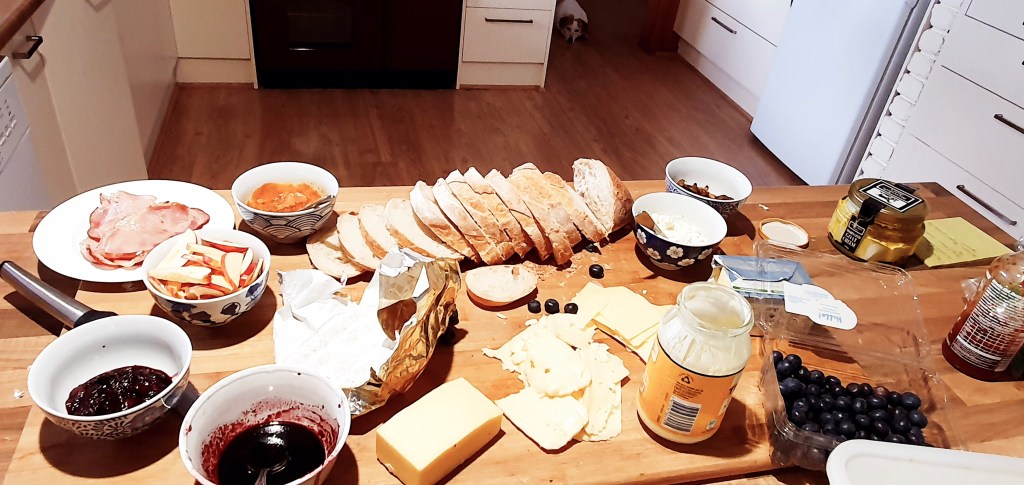
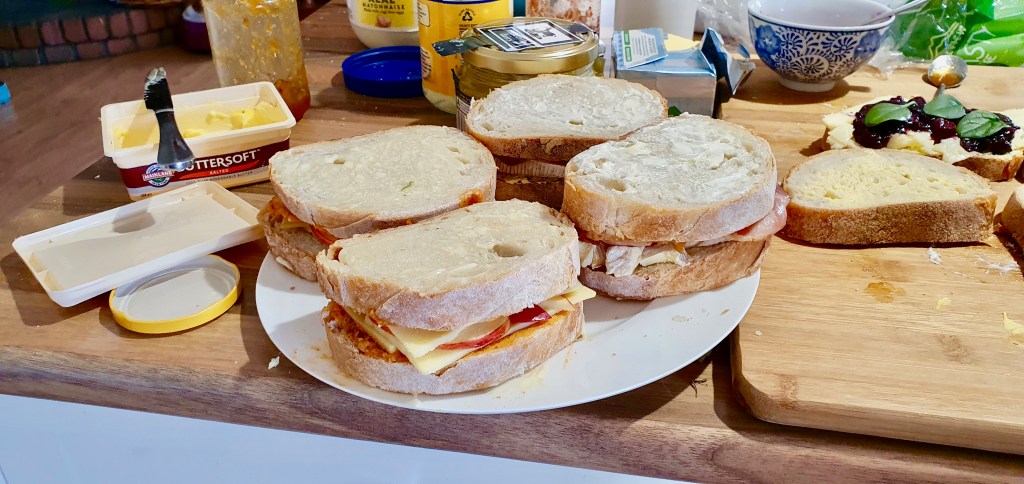
Since being in lockdown (thanks to ‘rona), Toby and I have been making lunch everyday for ourselves and his parents. Last week after a few big laborious cooks, we decided to take it easy and make a simple lunch with grilled cheese. Of course knowing me, if given the opportunity I always like to go all out and make everything ‘extra’. So instead of a quick and easy lunch, we ended up making 4 different flavours of gourmet grilled cheese sandwiches served with a roasted pumpkin soup (which also turned out amazing and I should remind myself to post the soup recipe later). We all stuffed ourselves silly, but there’s no room for regrets when eating grilled cheese.

We made:
- Sriracha butter apple grilled cheese (this recipe)
- Spinach Balsamic Blueberry grilled cheese
- Goat cheese caramelized onions and fig grilled cheese
- Bacon Brie and Apricot grilled cheese
Don’t worry, I’ll be posting the recipe to all 4 grilled cheeses above – just give me a little time :). Our grilled cheese marathon made me think that I should have a separate section on this website just for grilled cheeses because there’s no doubt going to be a lot recipes on them here – thoughts?
Unlike my other recipes, I didn’t make a video for these sandwiches since the instructions are fairly straightforward (let me know in the comments if you’d like me to make a video). I was also a little too excited when making these sandwiches and forgot to take some photos of the process 😅. I’ll update this post with more photos the next time I make them again (which probably won’t be long).
Anyways, without further ado, here’s the recipe! I’m starting off with the sriracha butter apple grilled cheese because it’s the easiest (and my favourite) out of all 4 of them and you can quickly put it together.
This grilled cheese is one of my favourite and most frequently made fancy grilled cheeses because not only does it packs a punch, it’s also so easy with minimal “cooking” required. The heavy cheese and kick of the sriracha butter is offset by the refreshing crisp apple to balance it out. If you’re a fan of sriracha and grilled cheese, you’ve got to try this sandwich!
Ingredients you’ll need:
- 1 Tbsp (14g) butter, softened – you can use melted butter as well, but be sure you toast the sandwich soon after or else the bread might get a little soggy
- 1 Tbsp sriracha hot sauce – or to taste. I aim for a 1:1 ratio with the sriracha and butter, but occasionally I like a stronger kick and will ramp it up. Make it to your preference.
- Mayonnaise for spreading – this is the secret to a crisp golden grilled cheese! Mayo gives a nicer crisp and colour compared to butter.
- 4 slices of white bread (I like to use sourdough, but whatever white bread you’ve got works)
- Cheddar cheese – shredded or sliced (I prefer a stronger tasting cheese in this sandwich like an aged cheddar or parmesan so it’s not lost amongst the other strong flavours in this sandwich compared to a lighter tasting white cheese like mozzarella)
- 1 apple, sliced and cored – I usually slice them into 2mm thickness so I’m not overwhelmed by too much apple crunch vs cheesiness.
Directions:
Make the sriracha butter: combine the butter and sriracha together. Adjust to your taste, but I prefer a 1:1 ratio. Add more sriracha if you want a stronger sriracha flavour in your sandwich. If you’re unsure, you can also add sriracha to your sandwich after you make it. Set aside.
Spread mayonnaise on one side of each slice of bread (this will be the outside of the sandwich that you will toast to get that crisp golden colour). Spread the sriracha butter on the other side of the bread.
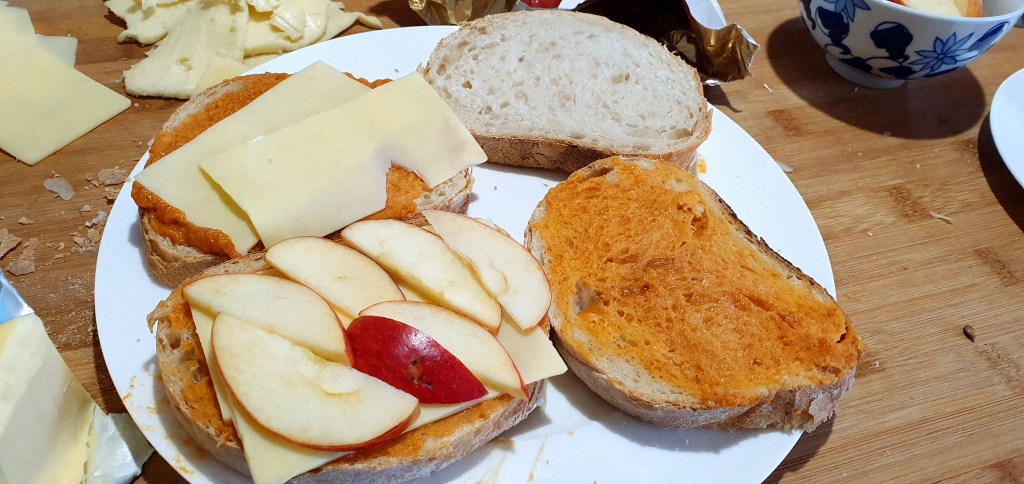
Assemble your grilled cheese with the mayonnaise side facing the outside and sriracha butter on the inside. Layer with cheese, then sliced apples, then more cheese, then your other slice of bread. (Incase that sentence was confusing, your layers should be: mayonnaise + bread + sriracha butter + cheese + apples + cheese + sriracha butter + bread + mayonnaise).

Get a pan on the stove on medium heat and once your pan is heated, place your sandwich in the pan (you don’t need any oil in the pan because the mayonnaise on the outside of your sandwich will act as your oil base).
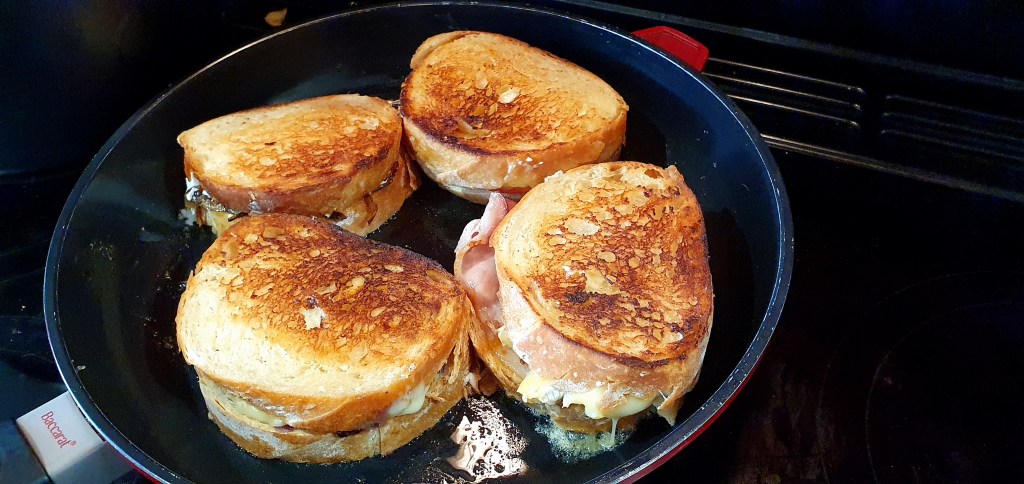
Toast your sandwich until the bread is a beautiful crisp golden brown and the cheese is melty (~3-5mins), then carefully flip your sandwich over and toast the other side. (Tip: if your sandwich is quite tall, you can gently flatten your sandwich as your cheese melts. This will help compact your sandwich and make it less messy to eat.) Once your second side is toasted and your cheese is melted, repeat with your second sandwich and serve immediately! Enjoy!!

If you have any comments or suggestions, I’d love to hear from you in the comment section. You can follow me on instagram, youtube and facebook to see all the recipes I post!
Happy cooking!
Summarized Recipe:
Sriracha Butter apple grilled cheese
Date Published: July 21st, 2020 | Last Updated: July 21st, 2020
Author: Abby |Category: snacks, quick and easy, <15mins
Serves: 2 | Prep time: 10 mins | Cook time: 10 mins
Ingredients:
- 1 Tbsp (14g) butter, softened
- 1 Tbsp sriracha hot sauce – or to taste
- Mayonnaise for spreading
- 4 slices of white bread (I like to use sourdough, but whatever white bread you’ve got works)
- Cheddar cheese – shredded or sliced (or any strong cheese – see notes above)
- 1 apple, cored and sliced to 2mm thickness
Directions:
- Make the sriracha butter: combine the butter and sriracha together. Set aside.
- Spread mayonnaise on one side of each slice of bread (this will be the outside of the sandwich that you will toast to get that crisp golden colour). Spread the sriracha butter on the other side of the bread.
- Assemble your grilled cheese with the mayonnaise side facing the outside and sriracha butter on the inside. Layer with cheese, then sliced apples, then more cheese, then your other slice of bread (again mayo side facing out).
- Get a pan on the stove on medium heat and once your pan is heated, place your sandwich in the pan. Toast your sandwich until the bread is a beautiful crisp golden brown and the cheese is melty (~3-5mins), then carefully flip your sandwich over and toast the other side. Once your second side is toasted and your cheese is melted, repeat with your second sandwich and serve immediately. Enjoy!!