Explore Sun Studio: Rock and Roll’s Birthplace


Date Published: April 29th, 2025 | Last Updated: April 29th, 2025
Author: Abby | Category: Travel, USA
Date of travel: April 13th, 2025

Address: 706 Union Avenue, Memphis, TN 38103
Website: https://www.sunstudio.com/
Cost: $20 per adult
Hours: 10am – 5:15pm, daily

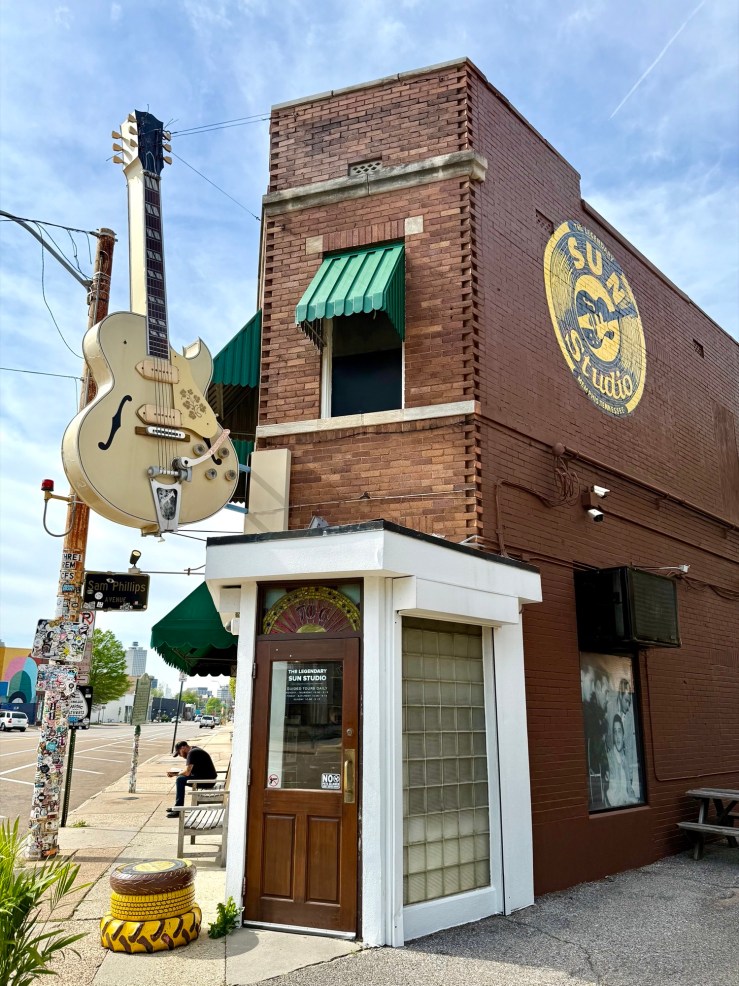
Started by Sam Phillips, Sun Studio is a historic recording studio where it all began for many great musicians including Elvis Presley, Johnny Cash, Jerry Lee Lewis, Carl Perkins, and B.B. King. It is also credited for recording the very first rock and roll single, Rocket ’88 and the site of recording the Million Dollar Quartet. No musical tour of Memphis is complete without checking out Sun Studios!

How to get here:

Travelling here by car is the easiest way. There’s a small parking lot behind the building. You can also get here by public transport or bundled as part as a few Memphis local music tours.

How much time do I need?

Although mammoth in reputation, Sun Studio is actually quite small. You can only visit with a guided tour that lasts about 45 minutes to 1 hour with a gift shop in the lobby. They give you a bit of extra time at the end of the tour to take in the studio surroundings and to ask any questions you may have.

Tickets & Cost?

Annoyingly, you cannot reserve tickets ahead of time. Ticket purchases are only made in-person on a first come first serve basis. From their website they mention that it’s not uncommon for people to stop by earlier in the day to purchase a ticket for later in the day. Tickets for the day open up at 10am and you can buy a ticket for any time that day.

You can only see the studio as part of a guided tour and the tours are run every hour. From their website, these are the current tour times: Monday – Sunday 10:30, 11:30, 12:30, 1:30, 2:30, 3:30 and 4:30. Double check their website for the most up to date times before you travel.

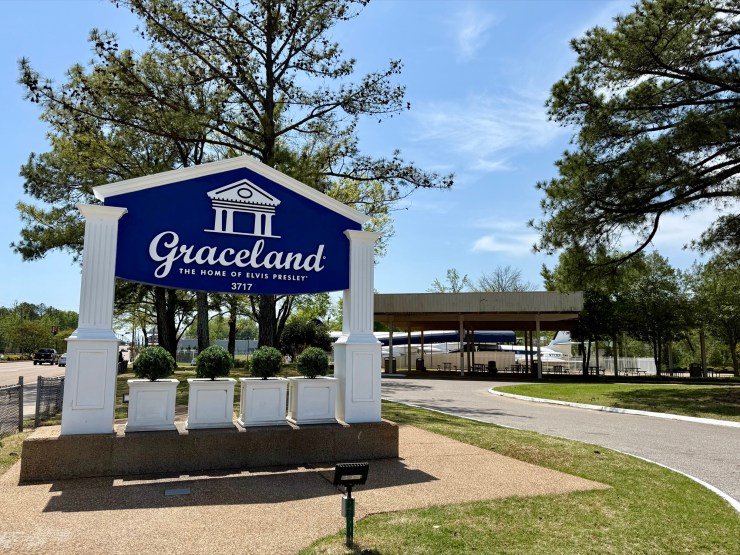
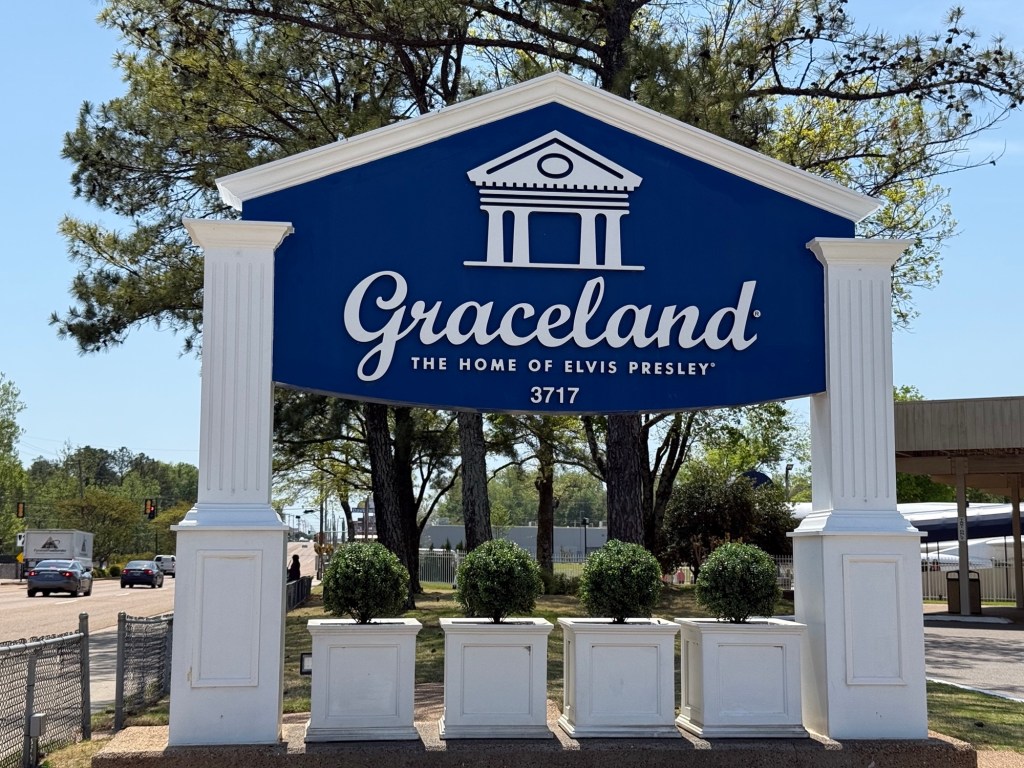
We came in the middle of April which wasn’t quite peak tourist season yet and we were also arriving in Memphis in the evening so we were able to walk in a purchase a ticket for the 4:30pm tour without having to wait. I can see this being a problem in peak tourist season – the space isn’t very big so there’ll be a limit on the number of people they can fit in a tour group, and considering this is the #2 tourist attraction (second to Graceland) in Memphis, I can imagine it would get quite busy and sell out early!

One way to avoid the hassle of coming in early in hopes to get a ticket is to book a Memphis Tour that has the Sun Studio tour included in the ticket. We went on Backbeat Tours and there was an option for the tour to drop you off at Sun Studio and get picked up later.

The Guided Tour

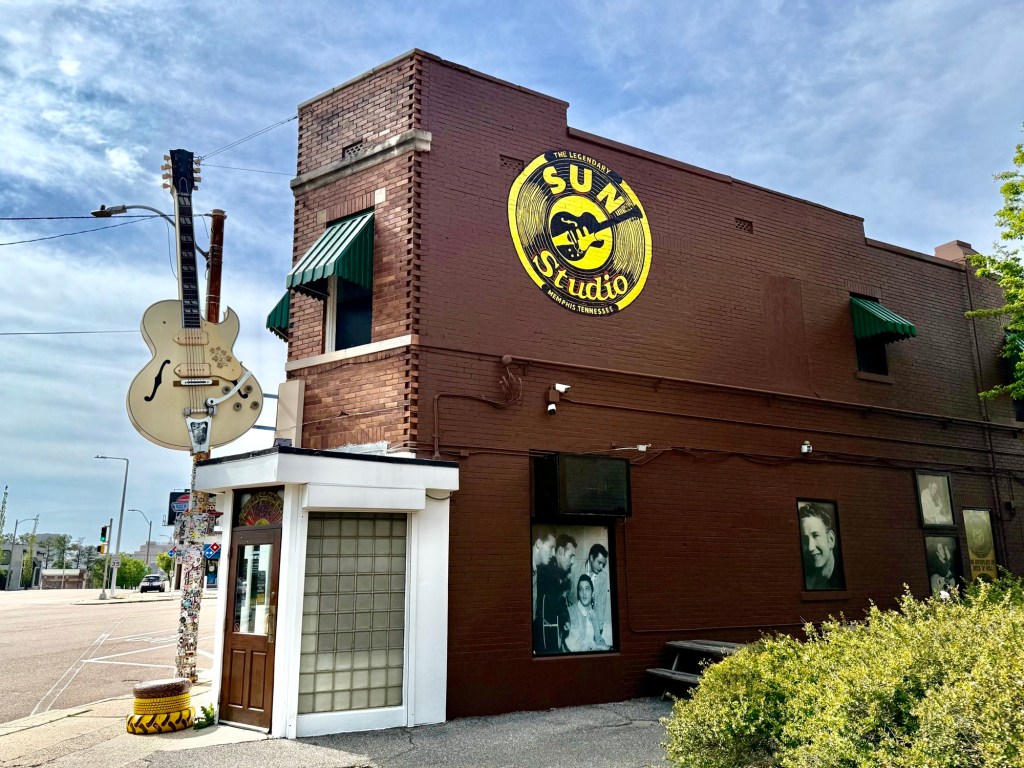
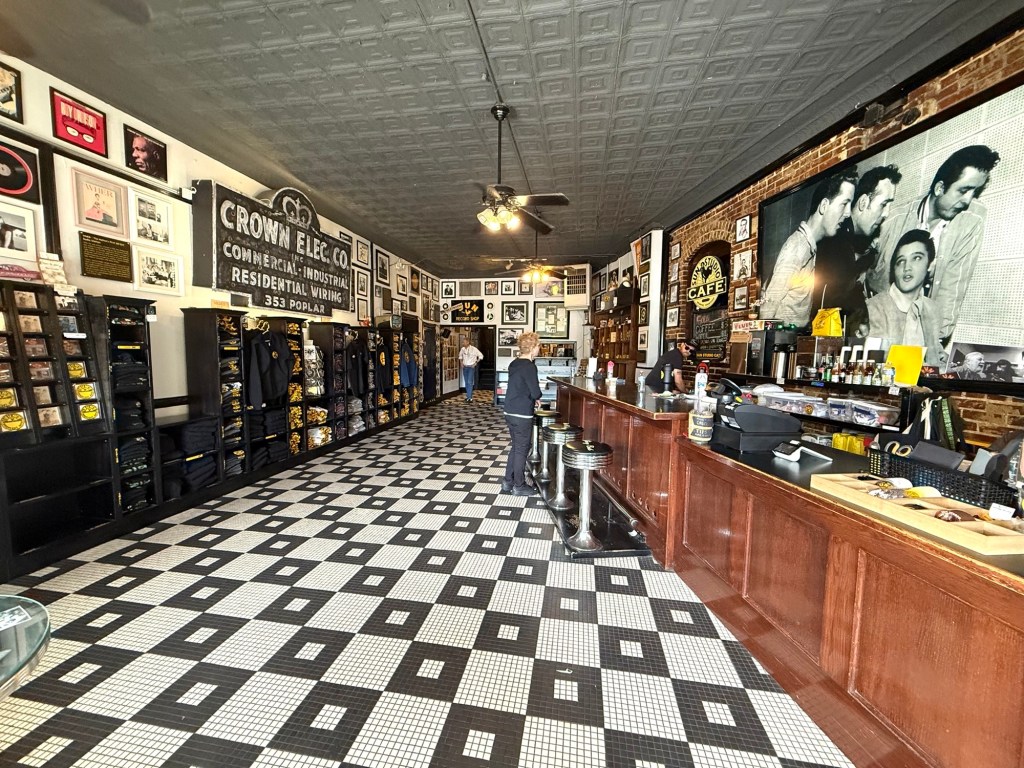
Upon arrival of this small brown brick building, snap a few photos outside then head inside to the retro vintage style lobby. Here is where you’ll buy tickets and there’s also a small counter where you can purchase a cup of pour-over coffee while waiting for the tour to start.

Take a gander around the various items displayed and check out the small record shop in the back. There’s also many photos and memorabilia on the walls as well – even in the bathroom!

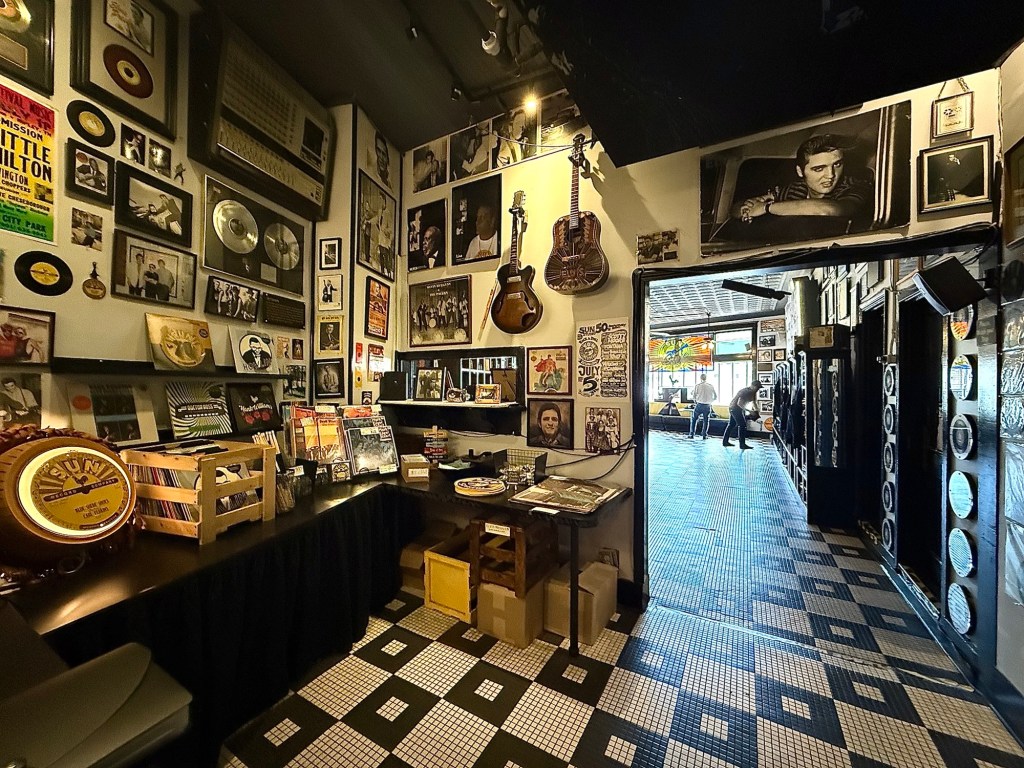
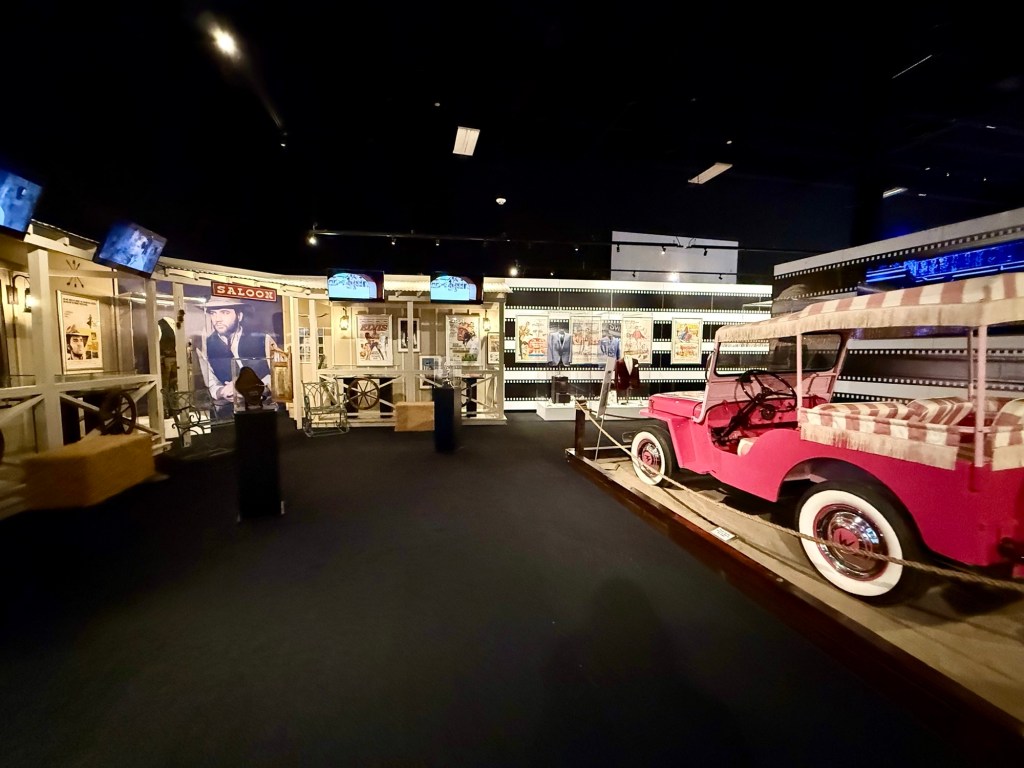
The tour will start at the back where you’re led up a narrow set of stairs to a room full of memorabilia. Our guide was a musician and knew plenty about the history of Sun Studio and also played some original tunes recorded right there! He started off with how Sun Studio started and went along the wall and pointed out important items throughout history.

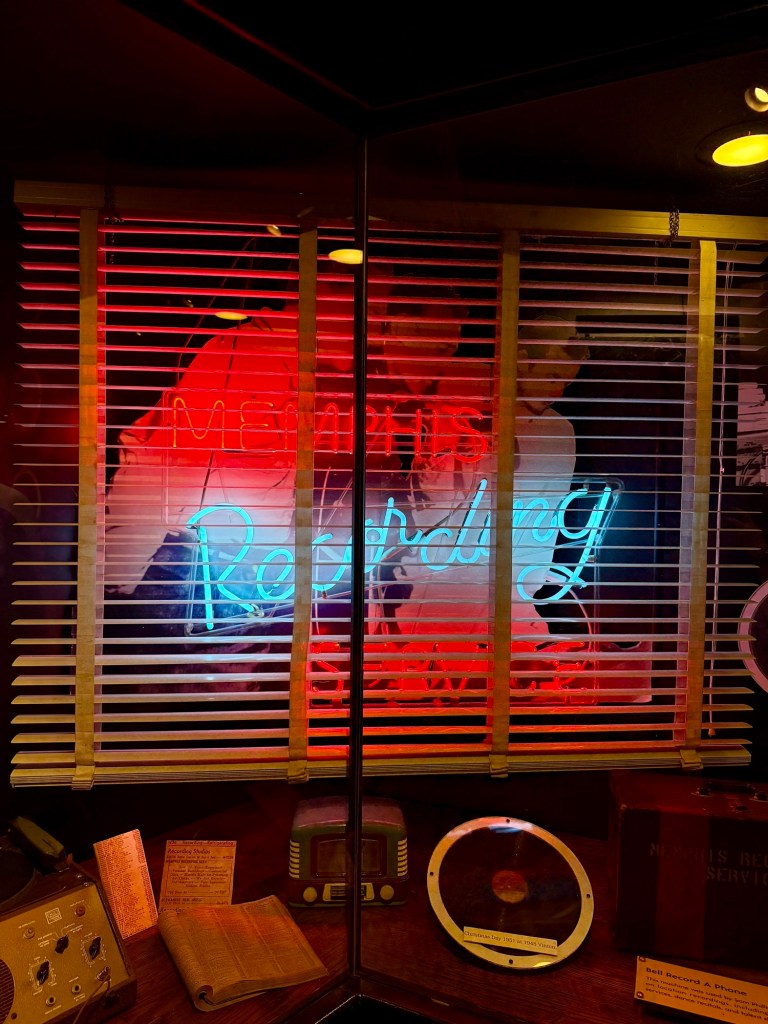
Sam Phillips disliked pop music and wanted to start a recording company that recorded the less popular non-pop music, mainly the blues. He started off as the Memphis Recording Service. To generate revenue, he’d record anything for anyone with a portable device in a suitcase and would travel to church events, weddings…etc. His slogan was “We Record Anything, Anywhere, Anytime”. He had an open door policy where anyone could come in and record what they wanted for a small fee.

Memphis Recording Service is credited for recording “Rocket ’88”, what music historians would deem as the very first rock and roll song due to the distortion in the guitar. The distortion is due to an amplifier that broke while the band was on their way to the recording studio and an attempted repair was made by stuffing wadded newspapers to make it work. The result produced a distorted sound that Sam Phillips loved and kept the recording as-is. The band then brought this record to Chess Records for release. It became the third-biggest R&B single in jukebox plays of 1951.

Memphis Recording Service was only a recording service where people would come to lay down their track then leave with a record where they would bring to record labels. Sam Phillips wanted a bigger piece of the picture and thus started Sun Studio, his own record label.

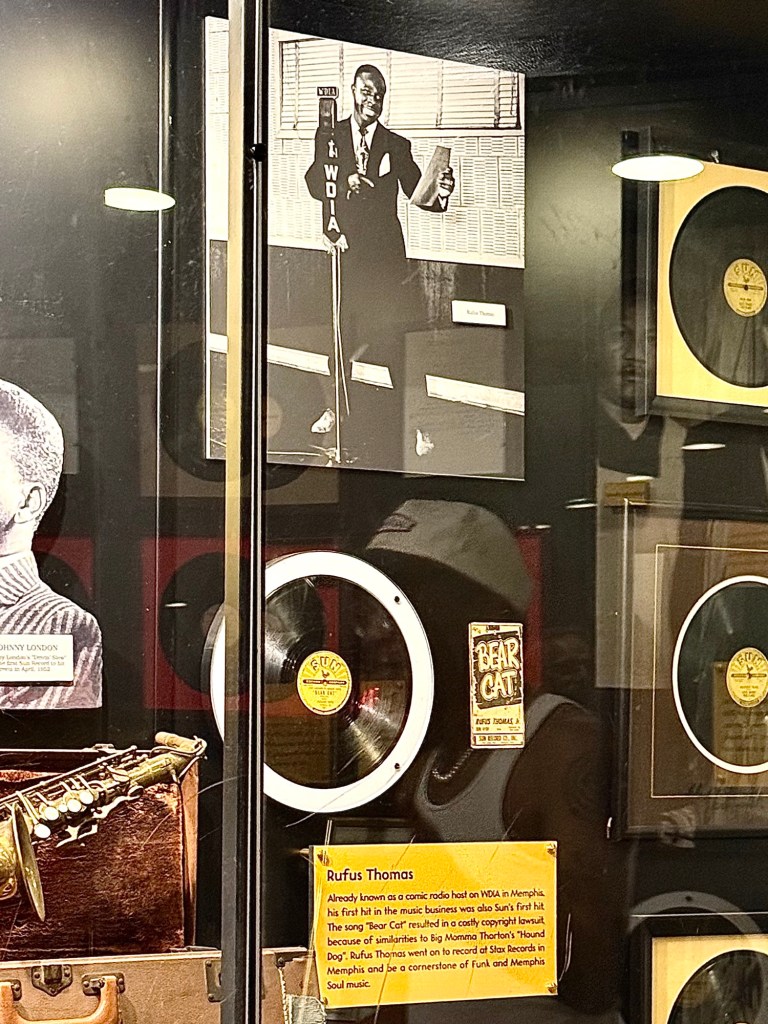
He signed many artists that would go on to have successful careers including B.B. King, Rufus Thomas, and Howlin’ Wolf. Despite his success, he was struggling to keep the business afloat and the copyright infringement lawsuit for the release of Rufus Thomas’ “Bear Cat”, a response song to Big Mama Thornton “Hound Dog” (later re-recorded by Elvis) nearly bankrupted the business. Phillips continued on and had more hits from artists such as The Prisonaires, a group of 4 incarcerated men that were so popular that they were given special permission to temporarily leave prison to record a single.

Sun Studio gained a reputation and would draw in artists from all over. One of those artists was Elvis Presley. Elvis came to impress Sam Phillips, but on the day he arrived to record “My Happiness”, Sam Phillips was out of town and he met Sam’s assistant Marion Keisker instead who recorded his songs for him. After his performance, Marion was so impressed that she made an extra copy of the recording to give to Sam upon his return. Sam did not like the recording at all – he wasn’t into pop music, but he brought in Elvis along with two local musicians to record a ballad demo he had acquired to test it out. The session was unfruitful and Sam was unimpressed with Elvis as a ballad singer. As the musicians were packing up, Elvis was losing his big chance with Sam and just started playing and singing. As guitarist Winfield “Scotty” Moore recalled: “All of a sudden, Elvis just started singing this song, jumping around and acting the fool, and then Bill picked up his bass, and he started acting the fool, too, and I started playing with them. Sam, I think, had the door to the control booth open … he stuck his head out and said, ‘What are you doing?’ And we said, ‘We don’t know.’ ‘Well, back up,’ he said, ‘try to find a place to start, and do it again.'” Although Sam wasn’t impressed with Elvis as a ballad singer, he loved Elvis as a blues/rockabilly singer.

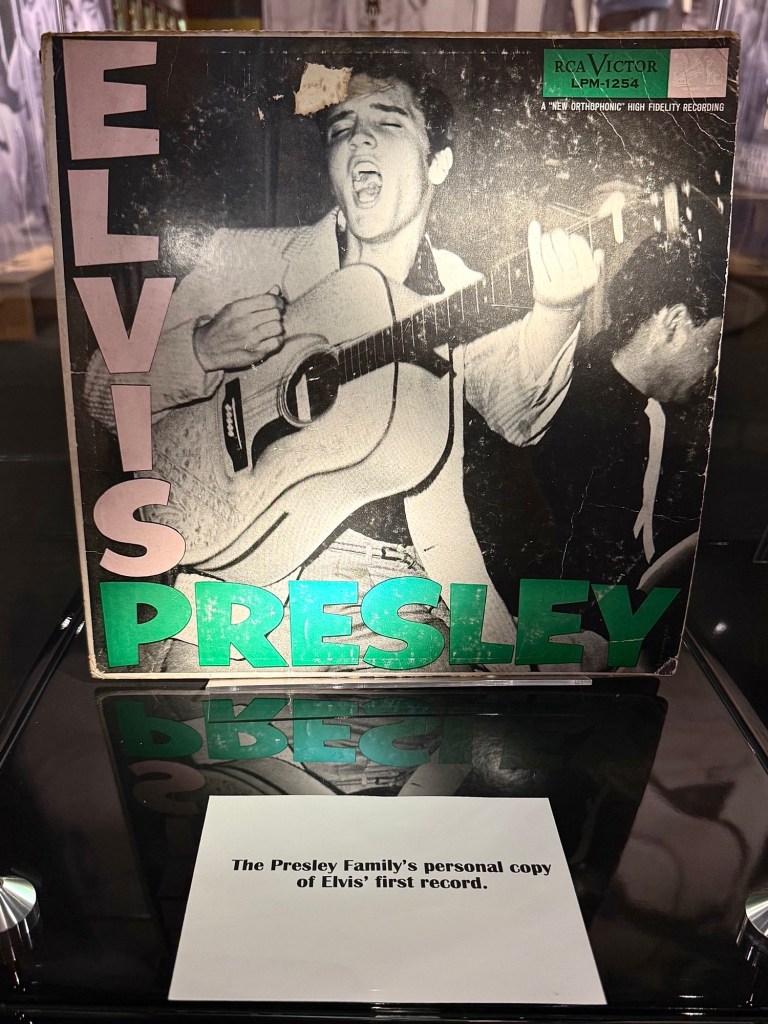
3 days later the record was played on Memphis DJ Dewey Phillips’ radio show, Red, Hot, and Blue where he famously smashes records of songs he did not like. Listeners kept phoning in to find out about Elvis and his record was played again and again on the radio. The success of Elvis tied into the ongoing success of Sun Studio. Phillips realized that his label wasn’t big enough for the rapid popularity of Elvis and wouldn’t be able to break him out across USA, so for the betterment of Elvis, Phillips sold his contract for an unprecedented amount to RCA. The money he got for selling Elvis’ contract helped settle his debts and provided the financial roads to launch other famous artists including Roy Orbison, Johnny Cash, Carl Perkins, and Jerry Lee Lewis.

Dewey Phillips’ DJ desk with smashed records on the ground

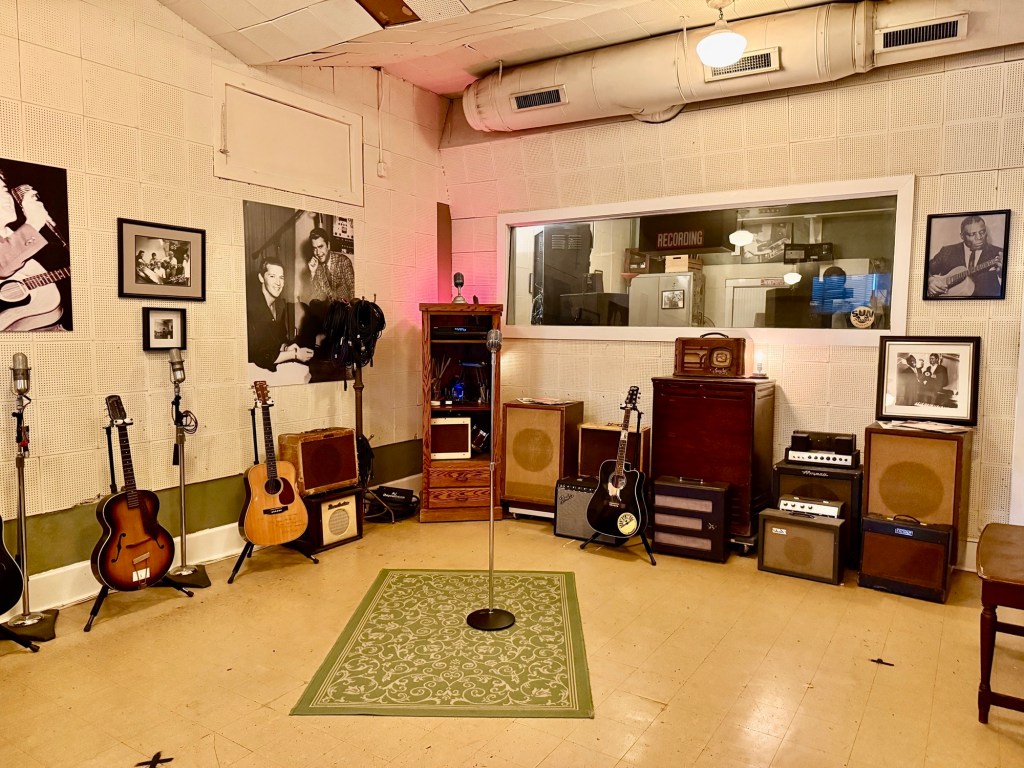
After some time in the memorabilia room, we were then led downstairs to THE famous studio room where so many stars have stood and played before. This was the exact room where Elvis took a chance a sang out the blues to impress Sam Phillips.

The original reception/waiting area of Sun Studio

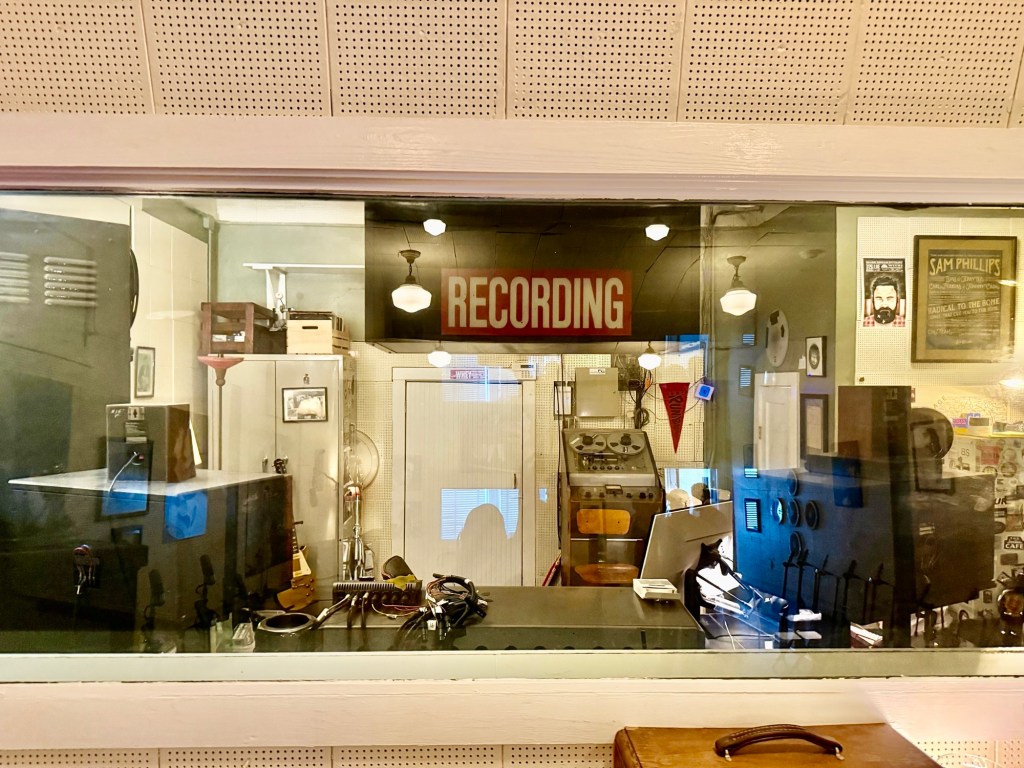
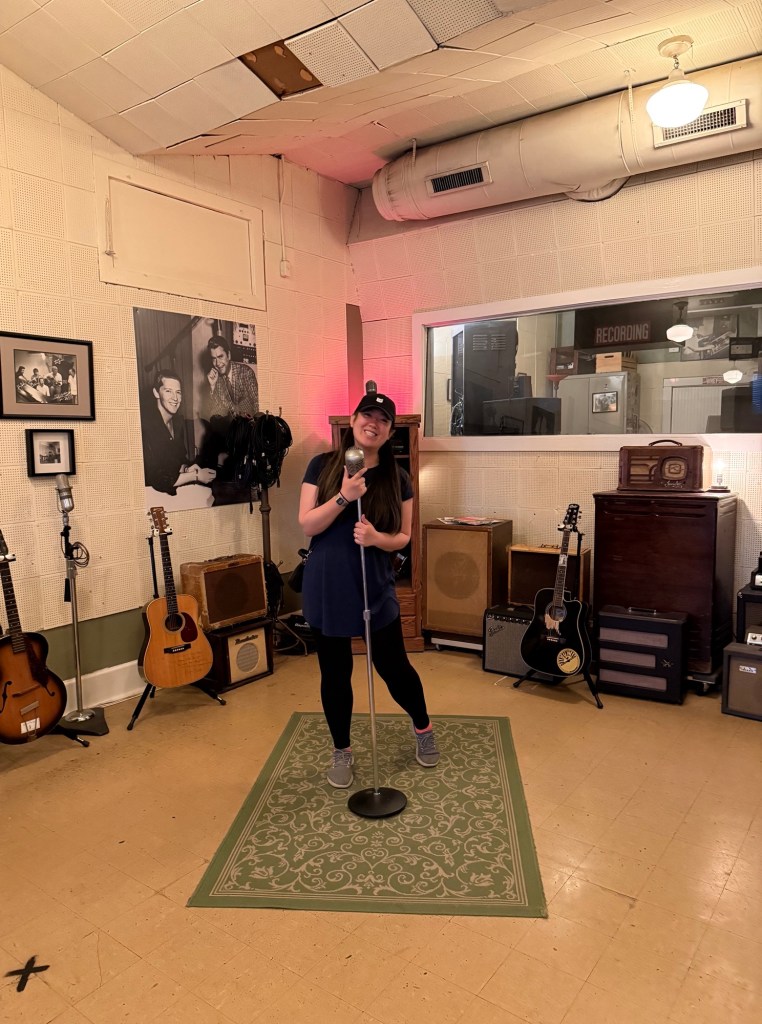
Sam donated most of the original recording equipment so you can see what it was like back in the days. The ‘X’ marker tape is still on the ground where the artists would have stood during their recording session. They even left the original microphone in the room so you can touch a piece of history and take a few photos. 🙂

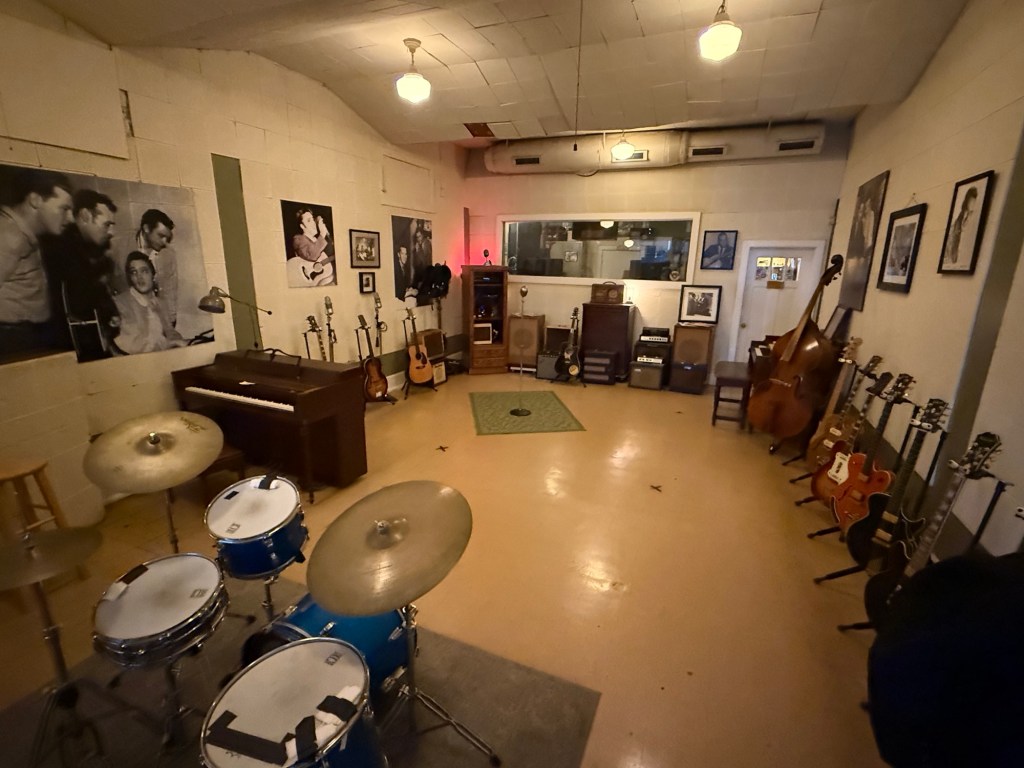
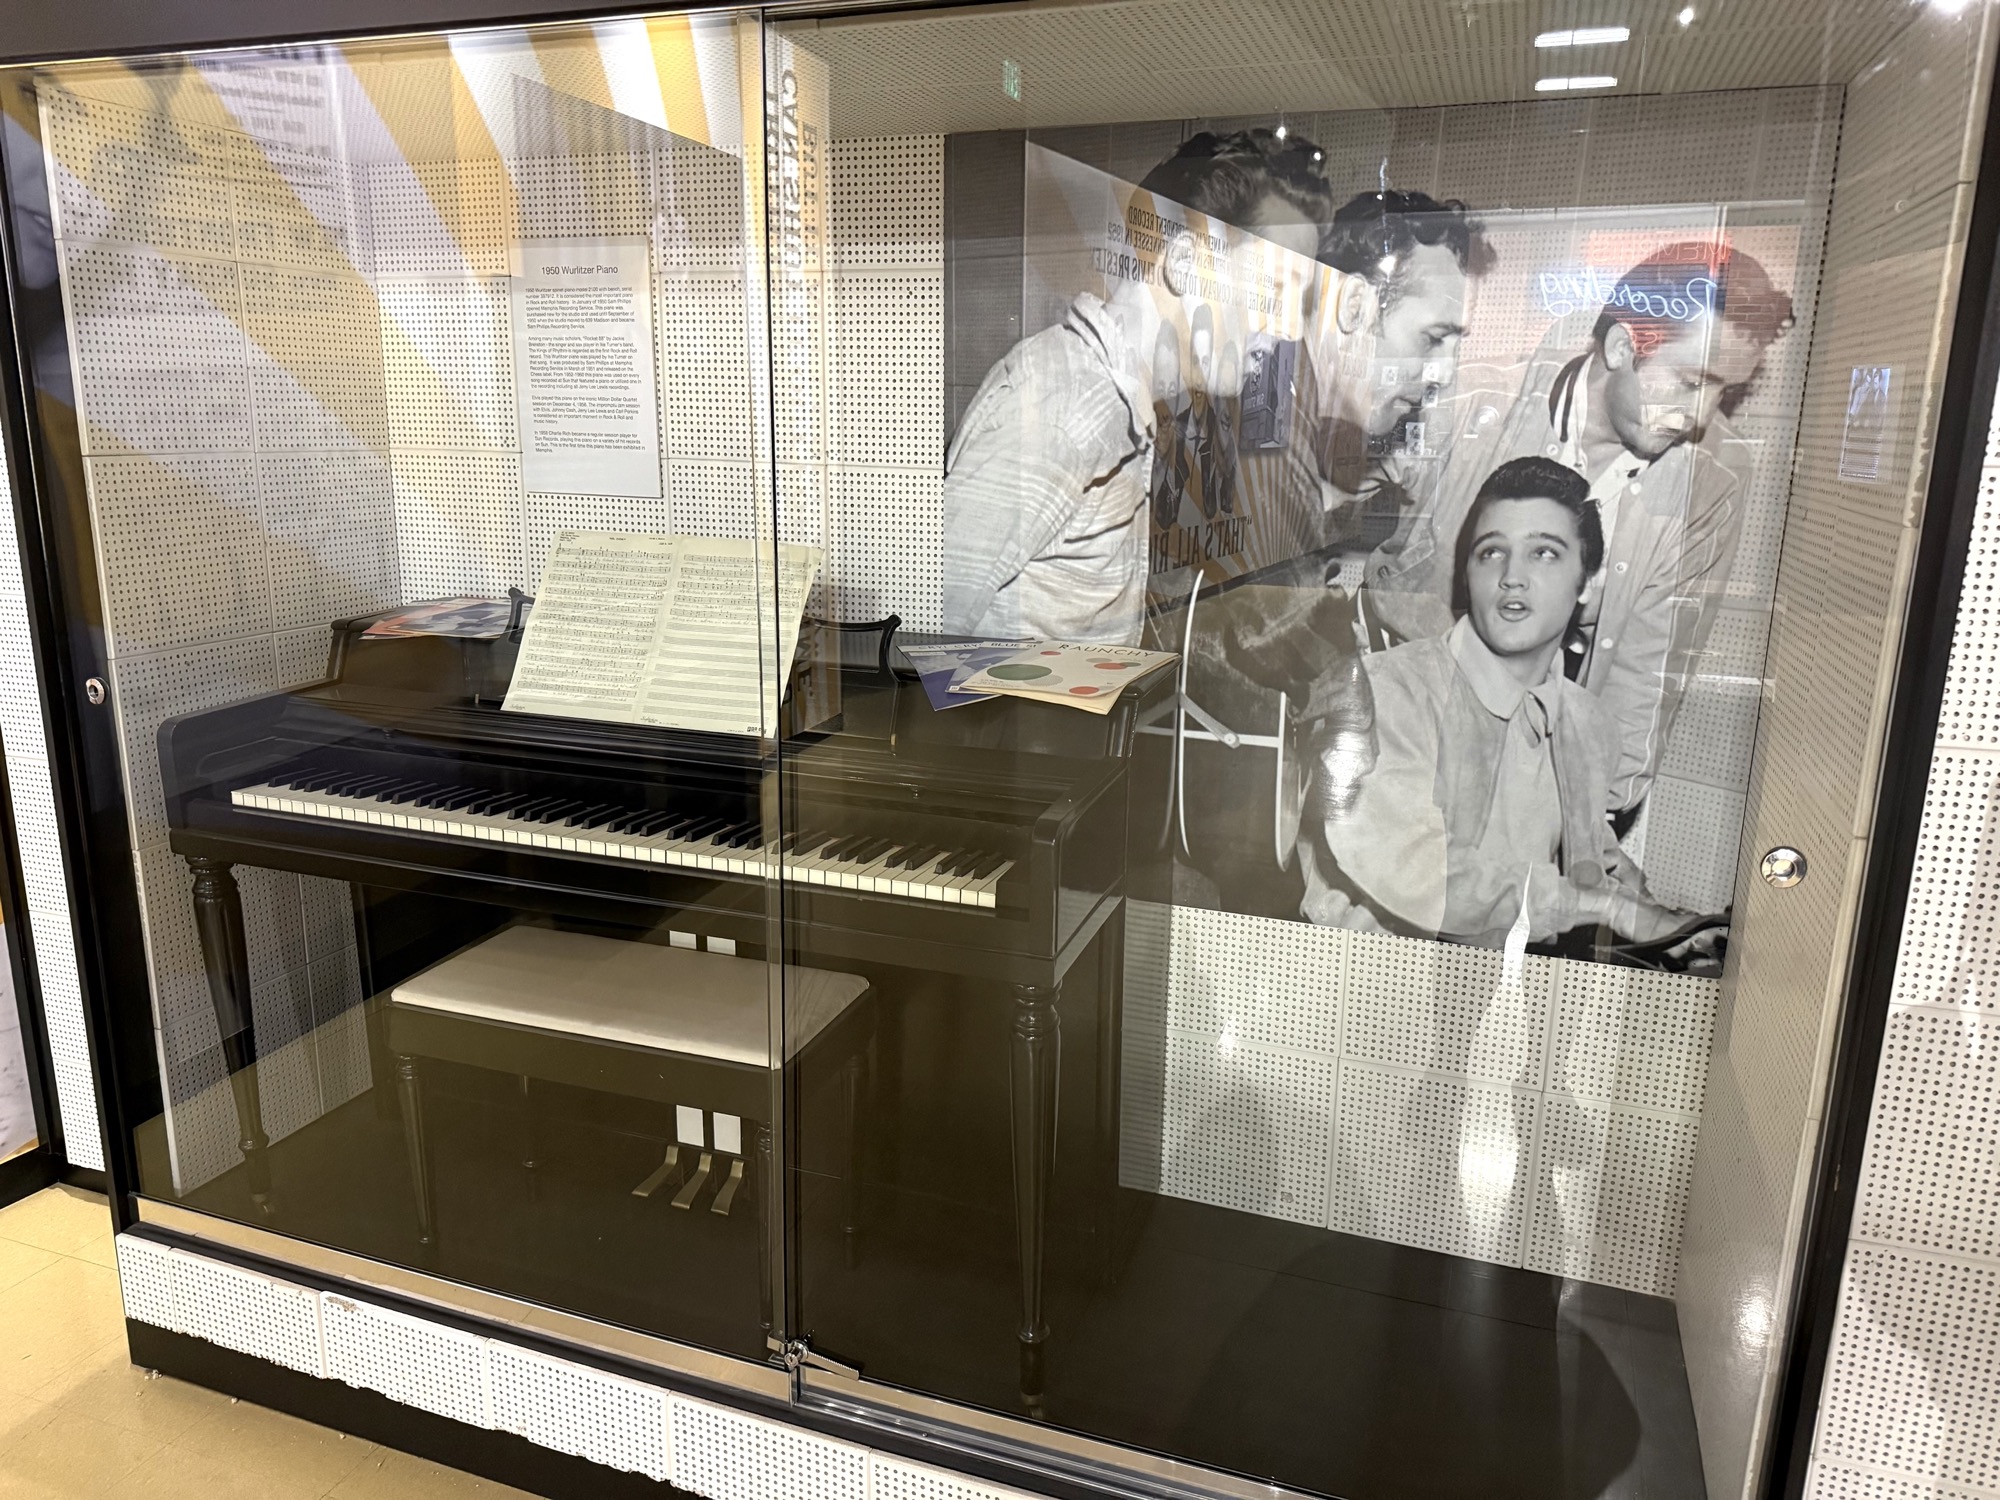
The Million Dollar Quartet happened right here in this studio as an impromptu jam session between Carl Perkins, Jerry Lee Lewis, Elvis Presley, and Johnny Cash. It started off with Jerry Lee Lewis playing piano for a recording session with Carl Perkins, then Elvis walks in for an unexpected visit (he was already signed to RCA at this point and no longer with Sun Studios). Sam Phillips called in Johnny Cash to join the session (although Cash’s version of the story said he was already there to listen in on the Perkins session) and all 4 of them were jamming together. The engineer behind the booth that day decided to record the session without any of them knowing. Phillips saw this as a chance for good publicity and called in a journalist that snapped the infamous photo and the next day coined the term “Million Dollar Quartet” in the papers.

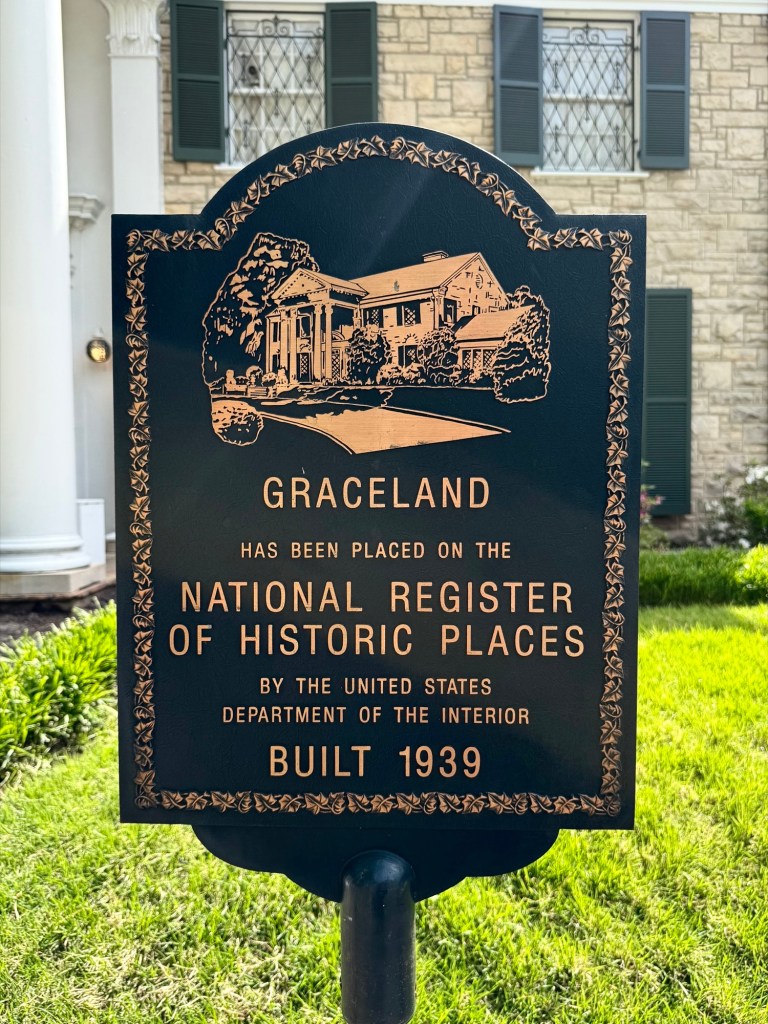
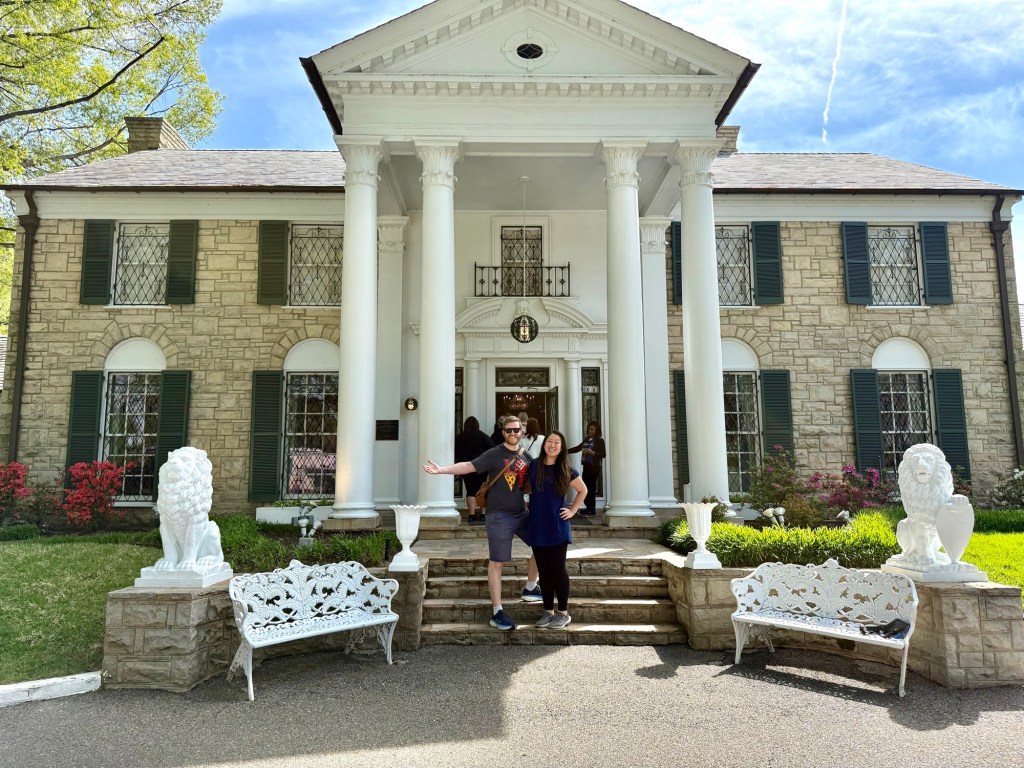
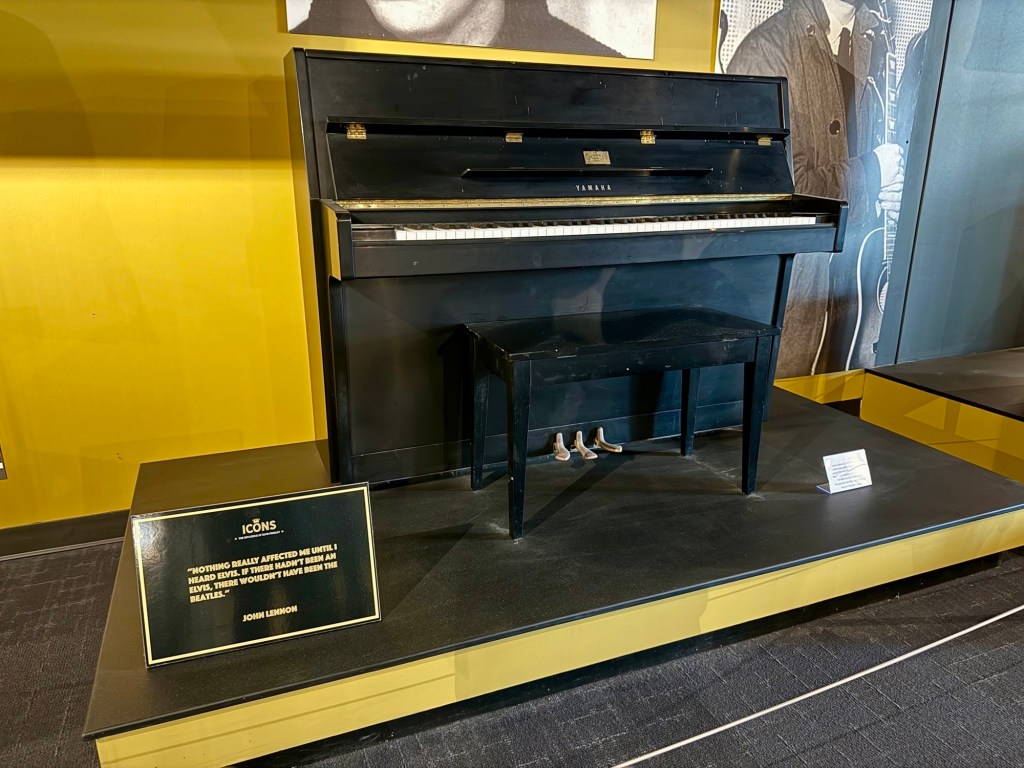
The piano in the studio is not the original piano they played on that day, however it is a piano where Jerry Lee Lewis played and you can see a cigar burn on the keys. The original piano is on display at Graceland.

The tour ends after the studio. They gave us a bit of extra time at the end to look through everything and take some extra photos or ask questions. Overall it was a great tour and super cool to be in the presence of rock history and be able to see and touch where so many famous artists have been before!

Graceland: A Complete Guide to Visiting Elvis Presley’s Home


Date Published: April 28th, 2025 | Last Updated: April 28th, 2025
Author: Abby | Category: Travel, USA
Date of travel: April 14th, 2025

Address: 3717 Elvis Presley Blvd.,Memphis, TN 38116
Website: https://www.graceland.com/
Hours: 9am – 4pm, daily
Cost: $84/adult for standard admission (multiple packages available for an additional cost)

Graceland is a 13.8 hectare property in Memphis, Tennessee, and was once the home of the one and only Elvis Presley. He lived here with his parents Gladys and Vernon from 1957 until his death in 1977. Graceland was declared a National Historic Landmark and is open as a museum that houses everything Elvis, from grade school report cards to his massive collection of beaded shiny jumpsuits. This is Memphis’ top tourist attraction and has everything you need to know about the King! For die-hard fans, you can even stay the night in the “guest house” behind the property which is done up like a resort.

Toby and I came in the middle of April and although it was busy, it wasn’t insane. I’d recommend coming early in the morning to get ahead of the crowds and to go through the exhibit without too many people squeezing around you. Even if you’re not a big fan, Graceland is still a neat place to visit to immerse yourself in Rock n’ Roll history and learn about the icon himself.

How much time do I need?

You’ll need at least 3-4 hours here to get through most of it, but if you want to read through the description of every piece of memorabilia or artifact, then expect to be here for much longer. We got here at 9am when they opened and didn’t leave until 1pm, and we still didn’t have enough time to see his planes! We were going at a moderate pace, reading most things, but not everything. You could seriously spend a whole day here if you add on dining at one of his restaurants on site.

To break it down:

  • The star attraction is the mansion itself, which wasn’t as big as I was expecting (however, we did just recently come from visiting the Biltmore Estate in Knoxville, TN 😂). The self-guided tour of the home took about 1.5 hours. You go through the house in groups, so there can be a bit of a wait to get into the actual house depending on how busy it is.
  • The majority of the Elvis memorabilia and artifacts are inside the Entertainment Complex, which is the building that’s connected to the visitor’s centre. You get access to this area after coming back from the mansion. This took us 2 hours to get through. The exhibits just kept coming and coming!
  • There are a couple of themed restaurants and multiple gift shops around, so add on another 30 minutes to 1.5 hours if you plan on staying for a meal and doing some shopping.
  • To see the planes, you’ll need at least another 30 minutes or so.
  • *Allow for even more time if you decide to get an upgraded ticket package!
https://assets.speakcdn.com/assets/2597/elvispresley-2dmap-20-print.jpg

Getting Here

Getting here by car is the best way to reach Graceland. There’s plenty of parking here and it’s only a short 15-minute drive from downtown Memphis. You can also Uber/Lyft here to save on driving.

There are also options of public transport, tourist busses, and shuttles, however from my research none of them seemed straightforward and I struggled to find costs and timings for these services. Best to just drive or ride share to get a better sense of timing (you should arrive 15 minutes before the start of your timed ticket).

Cost of Tickets

There are a few options for ticket packages that I’ve screenshotted from their website below.

We went for the standard admission (“Elvis Experience“), it’s $84 per adult. Pretty steep, but it includes the self-guided tour of the mansion, the “entertainment complex” (where all the Elvis items are on display including his car collection), and his custom jet plane. These 3 alone will take you at least 4 hours and will give you more than enough everything Elvis.

Entertainment Complex/Visitor’s Center – the start of the journey

Get here 15 minutes prior to the start of your timed ticket to have enough time to find parking, walk up to the massive building that is the Entertainment Complex, and join the line to watch a short intro video that wasn’t all that exciting. Our tour time was 9am, so there was plenty of parking when we arrived at 8:45am.

They didn’t seem to check ticket times, so don’t stress too much if you’re running late. The times are only to ensure there’s not a massive rush of people all at the same time. When you show up, you just join the line to go into the intro video theatre and when it’s full, they’ll close it and open the next one. They’ll scan your ticket right before going into the theatre.

After the short intro video, you’ll get herded out the back door and into another line to collect your iPad for the self-guided tour (audio guide by John Stamos!) and the line to get on the shuttle bus to take you to the mansion that’s located across the road (see map above to get your bearings). You can only access the mansion through their shuttlebus.

The Mansion

The short shuttle bus ride will drop you off directly in front of the mansion. Here, they’ll usher you to the front door and go over some brief rules before entering the house and instructions on how to start your audio guide.

First Floor of the Mansion

Entryway

You’re immediately greeted by a set of white stairs when you enter the front door. The entire second level was Elvis’ private space and only his closest confidantes were allowed in this space. They’ve kept the upstairs closed off to the public out of respect for him. Too bad, it sure would’ve been cool to see how he would’ve decorated his own bedroom given his eclectic taste for the rest of the house!

If you look closely, there’s a mirror at the top of the stairs to the left. One of the guides said that it was Elvis’ way to look down the stairs without actually coming down to see who was here and if he wanted to hang out with them. 😂

Living Room/Music Room

This is the living room/music room where they would gather, entertain, and sing gospel songs on the white grand piano. The beautiful stain glass peacocks are the Christian symbol for eternity and resurrection.

Gladys & Vernon’s Bedroom

Elvis’ parents Gladys and Vernon had their bedroom on the main floor. Gladys was largely involved in decorating this room, including choosing the poodle wallpaper in the bathroom!

Dining Room

This is the formal dining room where Elvis would sit at the head of the table by the window and entertain guests. Behind him would also be where they would set up their Christmas tree. It was common to have dinner served at 9-10pm at night!

Kitchen

As a foodie and an avid cook, I was quite disappointed by the kitchen. I expected it to be grand with elegance! This kitchen was last redone in the mid-70s. Elvis had cooks and maids on staff at all hours of the day in 8-hour shifts so meals are usually cooked to order! Common dishes would be simple Southern cooking including: fried chicken, steaks, pork chops, meat loaf, and many cheeseburgers. Elvis also loved homemade banana pudding so it was always made available.

The Jungle Room/Den

In 1974, Polynesia/Tiki furniture was popular and Elvis decorated this room with these furniture pieces to remind him of his favourite Hawaiian vacation. Check out the floor to ceiling green shag carpeting in this room. The immersive carpeting resulted in fantastic acoustics in this room and Elvis recorded 2 of his records with RCA in this very room!

Basement Level of the Mansion

The stairs leading to the basement was lined with mirrors!

TV Room

Elvis loved football and would watch 3 different games at the same time on 3 TVs. There’s also a pull down projector screen where he could play movies and a jukebox that could hold 100 singles with speakers wired throughout the house.

Pool Room

This is my favourite room of the house due to its beautifully colourful interior and unique wall and ceiling panelling!

Back of the Mansion

As you finish touring the main house, the trail leads out the back of the house over to the unattached smaller buildings on the property grassy areas where they could ride their horses. There’s also a kidney-shaped pool.

Vernon’s Office & the Smokehouse

Vernon Presley, Elvis’ father managed Elvis’ personal affairs including all of his fan mail and the running of Graceland. He had his own office on the property in the back. There’s also an old smokehouse that was once used as a firing range.

Trophy Building

This building was built as an expansion to the home and was also where Elvis and Priscilla had their wedding reception. It has since been renovated to tell Elvis’ personal story and contain artifacts from his family and youth. Here you’ll find old family photos, his first bicycle, a police badge collection (Elvis would have been a policeman if his music career didn’t take off!), and even his grade school report card! The items on display here is in contrast to the memorabilia on display at the Entertainment Complex that focuses on Elvis’ music career rather than personal life.

Interesting fact: Did you know that Elvis was born as the second twin? Unfortunately the first twin Jesse Garon Presley was a stillborn. Gladys and Vernon didn’t even know they were expecting twins until Elvis showed up just 30 minutes later. John Stamos’ character ‘Jesse’ in the show Full House was named as a tribute to Elvis’ brother.

Racquetball Building

Elvis enjoyed racquetball so much that he had a racquetball court built on his property. This was the last room that he was seen alive after playing a game with some friends and singing his last songs on the piano in this room. He retired upstairs to his comfort room and was later found dead.

Meditation Garden

The Meditation Garden was said to be one of Elvis’ favourite places on the property. It was a place for meditation, reflection, and quiet contemplation. Gladys and Elvis was originally buried at Forest Hill Cemetery, but for security purposes, Vernon had them moved here on Graceland. The Meditation Garden is the final resting place for Vernon, Gladys, Elvis, and Minnie Mae (Elvis’ maternal grandmother). There’s also a small plaque here for his brother, Jesse. Lisa Marie (Elvis’ daughter) and Benjamin (Elvis’ grandson) are also buried here.

The self-guided tour of the mansion ends after the Meditation Garden but there’s still TONS to see. You’ll line up to get back on the shuttle bus to go back across the street to the Entertainment Complex, where the visitor centre was.

Back to the Entertainment Complex

The Entertainment Complex is a HUGE building with seemingly endless exhibits on Elvis. It starts off with his car collection and continues on to more artifacts from his personal life including his passion for karate, his army years, his influence on other celebrities, his television and film work, awards, and of course his many MANY bejewelled jumpsuits.

Cars, Motorcycles, and Boats

Elvis’ Army Days, Karate, and the Graceland Archives

Despite being a rockstar, Elvis received no special treatment while in the army (according to the posters, anyway 🤫). This exhibited highlighted his time in the army and his duties.

Elvis was also really into karate. He trained and competed, and earned an 8th degree black belt. I know nothing about the karate world, but it sounds impressive.

There are over 1.5 million items in the Graceland Archives and on display or just a few of these items of Elvis memorabilia. For an upgraded ticket package tour, you can speak to an archivist!

Elvis’ Influence on Other Celebrities

It’s insane how much influence Elvis had to the music industry. This exhibit highlights some of the biggest stars that have drawn inspiration from Elvis in one way or another.

Music and Film Memorabilia

The famous million dollar quartet piano that was at Sun Studio!

Costumes and Accessories

The Glorious Jumpsuits!

Awards

Giftshops

There are many gift shops sprinkled throughout the Entertainment Complex, some are between exhibits. Each one is a little different and annoyingly they don’t all carry the same things. The largest gift shop that will carry most things will be the one at the entrance to the right of the ticketing area, so I wouldn’t bother going through each one unless you really want to.

Check out this replica jumpsuit you can buy for $5000!

Dine, Shop, Check out the Planes, or Back to the Parking Lot

Once you’ve finished going through the exhibits in the massive Entertainment Center (congratulations on your legs for lasting this long), you’re done the majority of it. There are a couple of Elvis themed restaurant options and a few more gift shops before you head back to the parking lot.

But before you get into your car, you’ll see a walkway that leads to his custom planes. Unfortunately we were on a time constraint (who would’ve guessed that 4 hours wasn’t enough?! 😜) and had to leave to make it on time for our Memphis tour so we couldn’t see the planes. I took a quick snapshot photo of the planes from the outside below:

I hope you enjoyed my picture-filled recount of our visit to Graceland! It’s definitely worth a visit!

A Day in Princeton & Beyond – University, Grounds for Sculpture, & Trenton


Date Published: April 21st, 2025 | Last Updated: April 21st, 2025
Author: Abby | Category: Travel, USA
Date of travel: March 1st, 2025

Princeton, New Jersey is roughly a 1.5 hour drive from NYC which makes it a great day trip away from the big city. In fact, it is exactly halfway between Philadelphia and New York, which were the two wealthiest cities back in the days and as a result, Princeton was a popular stop for stage coaches to let their horses rest. You can still find old stone horse troughs still around town!

Princeton is of course home to the famous Princeton University. The main highlight of this town is to tour the campus but there are some cool shops around this town as well to check out. This post will highlight a tour around the college campus, some famous houses, and the nearby Grounds for Sculpture and Trenton, the capital of New Jersey.

How many days do I need?

There’s not all that much “to do” in Princeton, so a half a day will be enough to see the highlights and check out the campus. Make it a full day if you want to visit Grounds for Sculpture.

Parking:

The best parking will be at Spring Street Garage (24 Spring St, Princeton, NJ 08542) which has very reasonable rates and is conveniently located in the middle of town.

Book a walking tour

Booking a walking tour is the best way to explore both the town of Princeton and Princeton University. There are so many notable buildings with a unique history that it’s easy to miss if you walk around yourself. The university campus is also quite large and can be easy to get lost. In this blog post I’ve highlighted some notable places, but they were all covered on our walking tour.

We booked our walking tour with this company. It was reasonably priced and informative. The guy that did our tour seemed to be new 😅 but we still hit all the spots.

Nassau Street is the main street of Princeton with shops and restaurants. Although we didn’t have time to grab a bite, our tour guide recommended Winberie’s Restaurant & Bar and Triumph Restaurant & Brewery off of Palmer Square.

Apparently most of the nightlife here is targeted to the undergrads.

Nassau Street
An old stone water trough for stage coach horses back in the day (now filled in with concrete)

Across from Princeton University at the corner of Nassau Street and Witherspoon Street is a tudor style building called Lower Pyne (now home to Hamilton Jewelers). This beautiful building was built in 1896 and was used for commercial shops on the ground level and student dormitories above. In 1950 the dormitories were converted to office spaces. You’ll see this iconic building on many post cards of Princeton.

The campus grounds of Princeton University is open to all and you can freely walk around and explore, but access into the buildings is restricted.

For prospective students, you can book a free university tour with admissions information.

For tourists that just want to learn the history of this famous campus, the university runs historical tours with limited dates in the fall or you can book a third party tour company like we did that will not only explore the campus but around the actual town as well.

I’ve highlighted some interesting spots around campus below:

FitzRandolph Gate is located just off of Nassau Street, across the street from the Lower Pyne building and infront of Nassau Hall. It is the official entrance to the Princeton University campus. It was erected in 1905 and named after Nathaniel FitzRandolph, who was instrumental in raising the money and land needed to build the college.

The gate was originally always kept closed and locked except for special occasions such as graduation, but the class of 1970 ensured that the gate would always remain open “in a symbol of the University’s openness to the local and worldwide community”.

There is a local superstition that if you exit from FitzRandolph Gate before graduation, you will never graduate from Princeton. You can enter the campus through the gates, but not leave unless you’ve graduated. This includes babies and children that may wish to attend Princeton in the future 😂. Our tour guide was a graduate of Princeton and says that this superstition is still very much alive to this day.

Princeton University had a couple of different locations (including Newark, NJ) before settling into its current location. At the time, Aaron Burr Senior (father of Aaron Burr Jr. – the guy who shot Alexander Hamilton, for you Hamilton fans) was the president of the college. The small yellow building below is where Aaron Burr Sr. lived at the time as he oversaw the building of this new campus.

Where Aaron Burr Sr lived

Nassau Hall is the first building of the college and also the oldest building on campus. It’s the first building you’ll see through FitzRandolph Gate and its covered with ivy around the majority of the building.

Throughout the years they’ve had many university presidents that kept dying from random things. The university was in a poor state with debt and poor instruction. John Witherspoon came on as the university’s 6th president and was monumental in saving the school from closing down. He travelled to New England and the South and recruited the wealthy to join the school. He updated the curriculum and turned Princeton from a place that predominantly trained clergymen into a place equipped to produce the future leaders of tomorrow.

Although Witherspoon is credited for the expansion and progression of the university, his racist roots in slave ownership has been a topic of heavy controversy. There have been petitions to remove his statue outside of East Pyne Hall, pictured below.

Statue of John Witherspoon in front of East Pyne Hall

East Pyne was built in the late 1800s as an extension to the Chancellor Green Library next door. When entering the middle gates, you’re inside an enclosed square with beautiful architecture surrounding you. This site has been a popular choice for filming movies including the latest movie Oppenheimer.

The Princeton University Chapel sits in the middle of the campus and was built in the 1920s to replace the previous chapel that had burned down. Its gothic architecture has a hidden surprise – the 5 stone makers hid their faces into the outside of this building (see if you can spot one in the photos!). Inside this beautiful building are impressive stain glass that lines the walls and is said to be the most valuable stain glass in the Western Hemisphere! The pews are carved from wood that was intended for Civil War gun carriages.

It’s a highly sought after place to get married. Our tour guide told us there’s about a 5 year waiting list to get married here! 😮

Across the chapel is the Princeton University Library. This enormous library holds over 7 million books including many rare books. It is one of the largest libraries in the world by number of volumes. There’s no public access to the library.

Across the chapel is Prospect House, built in 1851 and housed the university’s presidents for about 100 years, until they were relocated to the Walter Lowrie House (which was originally used as a guest house). I can’t quite find the exact reason why they relocated from this beautiful mansion, but online sources say it coincided with renovations to the building and turning it into a faculty club. Our tour guide says that in the 60s there were protests that a president shouldn’t live so lavishly in the centre of the campus. Whatever the reason, it’s currently the staff and faculty dining area. It’s a pretty nice building. People who get married at the chapel will usually also have their wedding reception here. There’s also a nice garden in the summer.

Witherspoon Hall was the most modern and elegant dormitory when it was first built in 1877. It was the first to have electricity and indoor plumbing. This is the first building you come upon when entering the campus by stage coach and has been purposefully made to attract a more “affluent” student population (aka them rich kids to bring their money to the school). There are even dumbwaiters and special corridors and rooms for servants!

Witherspoon Hall

The Princeton University Art Museum has an impressive collection that has been mentioned time and time again as a “must do” when visiting Princeton. Unfortunately they are currently in the works of opening up a new building that’s not set to open until October 2025. It’s located near Prospect House.

Princeton University Art Museum

Address: 112 Mercer Street, Princeton, New Jersey

Albert Einstein lived here in the final 22 yrs of his life. He was invited to Princeton to be the first to join a think tank – the Institute for Advanced Study (IAS, the one they featured in Oppenheimer). He was never employed by the university while he lived in Princeton. The house is now a private residence even though it is owned by the IAS. There’s no place markers for this house, but the home next door has a sign 😉.

Library Place is a street where all the fancy houses are with many of them belonging to celebrities or have had a famous person live there. It’s a lovely quiet street to walk down and gawk at all the beautiful houses. 82 Library Place was the former home of President Woodrow Wilson. This man was super racist even for his time, but his house was damn beautiful. There were a few other famous houses on this street, but this was the only one I could remember 😂.

Woodrow Wilson’s house

On Boudinot Street sits Peter Benchley’s former home, the author of Jaws. It sold for 2.5 million in 2012.

Benchley Home

Morven Museum & Garden on Stockton Street was the home Richard Stockton, a signer of the Declaration of Independence. This home is now a museum and garden.

Morven

This park is just outside of town. It’s a big field with a monument and is the site where the Battle of Princeton was fought. Unfortunately we didn’t have time to stop here.

Address: 80 Sculptors Way, Hamilton Township, NJ 08619
Cost: $25 per adult

A 15 minute drive from Princeton is Grounds for Sculpture. It is a massive outdoor area with multiple small trails that lead to random sculptures. It’s a pretty cool place with some nice scenery along the water and amongst the tress. Toby and I aren’t big sculpture people but we found some that were pretty neat. There’s a restaurant here called Rat’s Restaurant that has good reviews – we didn’t have time to go, but it looked like a cool place to hang out by the water. It took us about 1 hour to walk through it all, but some people recommend spending at least 2-3 hours, especially if you plan to go to the cafe (reservations recommended).

Trenton is New Jersey’s capital city. We’ve made it our goal to try and hit as many capital cities as we can, even if they’re not that popular. Trenton is only a short 20 minute drive away from Princeton so we figured we’d check it out. The downtown area looked decent with tree-lined streets and nice shop front buildings, but on closer look many of them looked suspicious or run down and none of them were any I’ve ever heard of and many were vacant. There were also many questionable characters around town. I’ve read that there are some nice museums and restaurants in the area, but the few streets we drove down didn’t make us want to get out of the car.

Trenton Farmer’s Market: I love a good farmer’s market, so we headed to the Trenton Farmer’s Market that was only a few minutes away. The outside did not look nice at all. Unfortunately the inside wasn’t much of an improvement either. The market barely had any produce (perhaps we were in the wrong season) and the produce they did have did not look great and some were more expensive than prices in Manhattan! The shops were kinda junky, with old “antiques”, some handmade items, and a few homemade jam stalls. It took us 10 mins to walk through it all. Although I will say, there were a couple of decent looking meat, sausage and cheese shops, but that was it.

BAPS Swaminarayan Akshardham – The Largest Hindu Temple Outside of Asia


Date Published: April 20th, 2025 | Last Updated: April 20th, 2025
Author: Abby | Category: Travel, USA
Date of travel: March 1st, 2025

Location: 112 N Main Street, Robbinsville, NJ 08561 USA
Opening hours: Wednesday to Monday 9am – 7:30pm (closed Tuesdays), gets busy – come early!
Website: https://usa.akshardham.org/
Entry fees: FREE, but you need to reserve a timed ticket on the weekends and on holidays
Time needed: at least 2 hours to walk through everything, more if you want to check out the cafe

BAPS Swaminarayan Akshardham is the largest Hindu temple outside of Asia and it is SERIOUSLY impressive and a MUST visit in New Jersey. It opened only in October 2023 and took 7 years to build with 12000+ volunteers. Some parts are still under construction.

BAPS stands for Bochasanwasi Shri Akshar Purushottam Swaminarayan Sanstha and it is a socio-spiritual Hindu faith that was revealed by Bhagwan Swaminarayan (1781-1830) in the late 18th century and established in 1907 by Shastriji Maharaj (1865-1951). Founded on the pillars of practical spirituality, the BAPS reaches out far and wide to address the spiritual, moral and social challenges and issues we face in our world. Its strength lies in the purity of its nature and purpose.https://www.baps.org/About-BAPS/WhoWeAre.aspx

There are multiple BAPS temples globally and more than one location in New Jersey, so make sure you’re inputting the right one when travelling here!

Visitor Etiquette & Dress Code

This beautiful temple is a place of quiet worship and there are a few rules when visiting. The most important is the dress code. Your shoulders and knees need to be covered – if you forget, there may be some shawls or coverings available on the day but you’ll need to ask the information desk.

They will ask you to remove your shoes when entering the temple so be prepared to walk either barefoot or in socks for the majority of your visit. There are shoe shelves at the entrance of each temple.

Respect the silence. People worship here. You can spend as long as you like inside the temples, but be mindful of the volume of your voice.

How much time do I need?

You need at least 2 hours to walk through it all, more if you want to go to the cafe or shop at their grocery store.

Get here early!

Although this temple only opened less than 2 years ago and it’s not quite a tourist hot spot (yet), it still gets busy as the day goes on. I’d recommend coming early in the morning when it’s quieter and feels more serene and there’s also the added bonus of fewer people in your photos and better parking.

When you arrive:

Here’s an overview of the grounds from their website: https://usa.akshardham.org/explore

When you arrive, you’ll see the building from the parking lot. You’ll first walk through the garden area with large golden statue of the child yogi Nilkanth Varni, later known as Bhagwan Swaminarayan and see his 7 year path across the Indian subcontinent during his youth. Bhagwan Swaminarayan is seen as the reincarnation of God and was a spiritual leader and credited for being the founder of the BAPS religion. This statue stands 49 feet tall, to represent his 49 years on earth.

As you walk through the area, you’ll get a great view of the temple with a pool of water in front known as the Brahma Kund. Water represents life and in this pool there’s a mix of water brought from 108 holy rivers and lakes around India and also water from all 50 states in the USA!

Welcome Center

When you reach the Welcome Center on the right side of the temple, this is where they’ll scan your reserved ticket (on weekends or holidays). You’ll go through security then meet some lovely greeters that will give you a map of the grounds and explain the lay of the land.

Guided tours are offered every hour and subject to availability. Check with the information desk if you’re interested. There are also wheelchairs available if needed.

You’ll start your visit at the orientation theatre where they’ll play a 7 minute long video that gives you an overview of this place and areas to visit. There are multiple theatres here so you’re never waiting long for the next video to start. After the video, appreciate the architecture and artwork within this beautiful building.

Mandir

From the Welcome Center you’ll next come across the Mandir. The Mandir is considered the house of the god to whom it is dedicated and is a space for individual worship and personal prayers. There are no photos allowed in here, but there are beautiful marble paintings and carved marble columns similar to the inside of the Akshardham (the main temple). Their website will have photos of the inside if you’re interested in taking a peak, but I highly recommend experiencing the space yourself.

The Mandir is closed at certain times of the day, so keep an eye on the time when you visit. You can always explore the rest of the grounds and come back. It’s a smaller space, takes about 15 minutes to walk through, but there are colourful marble walls here that make it unique compared to the Akshardham.

Akshardham – the main temple

From the Mandir, walk through the centre of the campus and head straight towards the Akshardham – the main temple. You can take plenty of photos on the outside, but no photos are allowed inside.

You will need to take off yours shoes in the Akshardham at the designated shoe shelves. It takes about 30 minutes to walk through it all. The inside is full of amazing intricately carved marble everywhere you turn, including the beautiful ceilings. You get a sense of serenity in this place. The carvings are done by master carvers in India and is then shipped to the USA piece by piece and assembled like a puzzle.

Parikrama – Red corridor walkway

Surrounding the Akshardham are carved red corridor walkways called the Parikrama. These beautiful carved gates creates a trippy effect when you look through. You’ll come across these right at the start of the visit and you could have walked through them clockwise to reach the Akshardham instead of through the middle, but you’ll also come across it when you exit the Akshardham back towards the Welcome Center.

Shayona Cafe, Gift Shop, Back to the Welcome Center

Lastly you’ll enter a building next to the Akshardham that contains the gift shop, cafe, then back to the Welcome Center. There’s an express cafe that’s not always open but the main cafe is the Shayona Cafe which doesn’t open until 11am. They serve both Indian and American food (see photo below of their menu). It looks pretty nice but unfortunately we had lunch plans already so didn’t stay for a bite. Across from the cafe is also a food shop where you can pick up some groceries.

I hope you enjoyed scrolling through our trip to this amazing temple! I highly recommend anyone to visit – it’s such a unique gem in New Jersey!

Beef Bulgogi


Date Published: April 18th, 2025 | Last Updated: April 18th, 2025
Author: Abby |Category: mains, asian, quick, easy,
Serves: 4 | Prep time: 12 hours (marinate overnight) | Cook time: 10 minutes

Jump to recipe |

Bulgogi is a Korean dish that consists of thinly sliced meat (most commonly beef, but you can find pork and chicken variations too) marinated in soy sauce, sugar, sesame oil, garlic and ginger. Once marinated, this dish is so quick to cook that it only takes a few minutes on the grill, perfect for a busy quick weeknight dinner if you marinate the meat the night before. Serve it over rice, lettuce wraps, or perilla leaves with a side of veggies. This flavourful dish will surely be a hit!

3 Methods for thinly sliced beef:

  1. For best and most uniform results: Freeze the raw steak for 20-30 minutes until semi-firm, then use a meat slicer to slice as thin as possible. I have this model of meat slicer that I chose for the decent price and its relatively small size.

2. Freeze the raw steak for 20-30 minutes until semi-firm, then use a sharp knife to slice as thin as possible.

3. Buy pre-sliced frozen beef from the hotpot section of most asian grocery stores. This will be the easiest method but will also likely be more expensive.

Anyways, without further ado, here’s the recipe! If you have any comments or suggestions, I’d love to hear from you in the comment section! You can follow me on instagram, youtube and facebook to see all the recipes I post!

Happy cooking!

Ingredients you’ll need:

  • Marinade:
    • 3 cloves garlic, minced
    • 2 tsps freshly grated ginger
    • 4 green onions, sliced to 4cm pieces
    • 1/2 small pear (80g), peeled and coarsely grated
    • 1/4 cup (66g) soy sauce (Kikkoman is fine)
    • 1/4 cup (40g) brown sugar
    • 2 Tbsps (30g) toasted sesame oil
    • 1.5 Tbsps (30g) gochujang (Korean red chilli paste)
  • 700g/1.5 pounds boneless rib eye steak, sliced thinly (for cheaper options, flank steak or skirt steak will also do)
  • Garnish: chopped green onion and sesame seeds

Directions:

Put all the marinade ingredients in a bowl and mix well: 3 cloves minced garlic, 2 tsps grated ginger, 4 green onions sliced to 4cm pieces, 1/2 of a pear, grated (80g), 1/4 cup (66g) soy sauce, 1/4 cup (40g) brown sugar, 2 Tbsps (30g) toasted sesame oil, 1.5 Tbsps (30g) gochujang.

Add the thinly sliced steak into the marinade and massage well. Pour the contents into a resealable bag and marinate in the refrigerator overnight.

Take out the marinated steak 20 minutes prior to cooking to let the meat come to room temperature.

When ready to cook, use a flat skillet or grill pan on MED-HIGH heat and add a drizzle of oil. Add the marinated steak and cook for roughly 2-3 minutes per side until slightly charred and cooked. Done!

Serve with rice. Garnish with more green onion and sesame seeds.

Summarized Recipe:

Beef Bulgogi

Date Published: April 18th, 2025 | Last Updated: April 18th, 2025
Author: Abby |Category: mains, asian, quick, easy,
Serves: 4 | Prep time: 12 hours (marinate overnight) | Cook time: 10 minutes

Ingredients:

  • Marinade:
    • 3 cloves garlic, minced
    • 2 tsps freshly grated ginger
    • 4 green onions, sliced to 4cm pieces
    • 1/2 small pear (80g), peeled and coarsely grated
    • 1/4 cup (66g) soy sauce (Kikkoman is fine)
    • 1/4 cup (40g) brown sugar
    • 2 Tbsps (30g) toasted sesame oil
    • 1.5 Tbsps (30g) gochujang (Korean red chilli paste)
  • 700g/1.5 pounds boneless rib eye steak, sliced thinly (for cheaper options, flank steak or skirt steak will also do)
  • Garnish: chopped green onion and sesame seeds

Directions:

  1. Put all the marinade ingredients in a bowl and mix well: 3 cloves minced garlic, 2 tsps grated ginger, 4 green onions sliced to 4cm pieces, 1/2 of a pear, grated (80g), 1/4 cup (66g) soy sauce, 1/4 cup (40g) brown sugar, 2 Tbsps (30g) toasted sesame oil, 1.5 Tbsps (30g) gochujang.
  2. Add the thinly sliced steak into the marinade and massage well. Pour the contents into a resealable bag and marinate in the refrigerator overnight.
  3. Take out the marinated steak 20 minutes prior to cooking to let the meat come to room temperature.
  4. When ready to cook, use a flat skillet or grill pan on MED-HIGH heat and add a drizzle of oil. Add the marinated steak and cook for roughly 2-3 minutes per side until slightly charred and cooked. Done! Serve with rice. Garnish with more green onion and sesame seeds.

Soondubu Jjigae (Korean Soft Tofu Soup)


Date Published: April 12th, 2025 | Last Updated: April 12th, 2025
Author: Abby |Category: soup, asian, easy, healthy, low cal, mains, quick
Serves: 4 | Prep time: 15 mins | Cook time: 30 mins

Jump to recipe |

What is Soondubu/Sundubu Jjigae?

Soondubu or Sundubu or Soon tofu is an extra soft type of tofu that is very fragile when handled, but has a lovely soft texture.

Soon tofu

Jjigae = Korean style stew usually made with meat, seafood, or vegetables. There are a variety different ‘jjigae’ out there, named according to what their ingredients are. This dish is called a ‘soondubu jjigae’ because it’s made with the classic soft tofu.

A Soondubu jjigae is a healthy and easy to make Korean soup made with bonito soup stock (fish based) and kimchi (fermented Korean cabbage) as the main flavours of the dish which results in a savoury but slightly acidic soup. The ingredients of the soup can vary from place to place but commonly you’ll find tteok (Korean rice cakes), seafood or meat (or both in this case), and of course the soft tofu. I’ve also added two types of mushrooms to mine for added texture but feel free to leave them out.

Bonito Soup Stock

Bonito is a type of fish that is in the same family as mackerel and tuna. One of the most common forms of bonito is bonito flakes which are the thin brown flakes sprinkled on top of okonomiyaki or takoyaki. Bonito stock, also known as dashi, is a Japanese soup stock made from bonito flakes, kelp, and other ingredients. It packs tons of umami flavour and is a key component of many Japanese dishes, including miso soup. HonDashi is the most popular brand of bonito soup stock/dashi that you’ll find in most Asian grocery stores and it comes in a powder/fine pellet form packaged in small glass jars (as pictured), or in packets. They usually need to be kept refrigerated once opened.

What are Garaetteok/Tteok (Korean rice cakes)?

Garaetteok/tteok are Korean rice cakes that are made from non-glutinous rice flour and come in skinny long cylinders. On their own they don’t have much flavour so they’re often added to a flavourful saucy dish (such as this dak galbi recipe) or a soup. They have a soft and chewy texture once cooked and make a great textural addition to many dishes. You’ll most commonly see garaetteok/tteok served in a dish called tteokbokki which is a spicy rice cake dish.

You can find these vacuum-sealed in the refrigerated section of most Asian grocery stores. They will be very hard coming out of the package and need to be soaked for at least 10 minutes in warm water to slightly soften before cooking them. If you’re lucky and your Asian grocer have these fresh, you can put them directly into the dish without soaking.

Don’t worry if you can’t find any garaetteok/tteok. Simply omit them from the recipe altogether. It won’t change the flavour of the dish. It’s mainly to add an extra textural component.

A Quick Note on Gochugaru – Korean Chilli Powder

This recipe uses Gochugaru, a Korean chilli powder, which is not too spicy and it gives the dish a deeper orangey/red colour. It can be easily found in most Asian grocery stores, but if you don’t have any, a good substitute is Kashmiri chilli powder (an Indian variety). Do NOT substitute with cayenne pepper which is a MUCH spicier chilli powder. If you absolutely can’t find Gochugaru or Kashmiri chilli powder, then you can substitute with 1 part cayenne powder: 3 parts paprika, or consider skipping it altogether.

Anyways, without further ado, here’s the recipe! If you have any comments or suggestions, I’d love to hear from you in the comment section! You can follow me on instagram, youtube and facebook to see all the recipes I post!

Happy cooking!

Ingredients you’ll need:

  • 300g chuck steak, sliced into 3-4 cm long strips
  • 6 cloves garlic, minced
  • 1 small onion, diced
  • 1 cup (~250g) kimchi, chopped with juices
  • 1 Tbsp Korean chili powder
  • 400g button mushrooms, sliced
  • 1 bunch enoki mushrooms (optional)
  • 2.5 tsps Hondashi bonito stock powder
  • 2 cups water
  • 1 handful of tteok (Korean rice cakes), rinsed
  • 150g raw shrimp, deveined and deshelled, cut in half width-wise
  • 2 x 313g/11oz packages of soft soon tofu (extra soft Korean tofu), halved and sliced
  • For garnish: 1 green onion, sliced fine

Directions:

In a medium sized soup pot (enough to accommodate 6 cups) on HIGH heat, add a drizzle of oil and quickly sauté the steak until just browned on the outside – do not cook all the way through (2-3 minutes). Remove from the pot and set aside.

In the same pot on MED-HIGH heat, add another drizzle of oil and sauté the garlic and onion for 30 seconds or until fragrant. Then add in the 1 cup chopped kimchi, 1 Tbsp chili powder, button mushrooms, and enoki mushrooms. Continue to sauté for another few minutes until the onion softens.

Dissolve the 2.5 tsps bonito stock powder into 2 cups of water and add it to the pot along with the tteok. Bring to a boil and simmer for 2-3 minutes.

Add in the shrimp, tofu, and sautéed steak (from step 1) into the pot and carefully mix it around without breaking the tofu. Let the soup simmer until the shrimp is cooked and the tteok is soft (~another 3-4 minutes), then turn off the heat.

Taste and adjust salt or sugar as needed (the amount of adjustment will depend on the type of kimchi you’ve used). Garnish with chopped green onion. Enjoy! Serve with a side of white rice.

Optional: crack an egg at the surface while the shrimp is cooking at the same time for 3-4 minutes, or otherwise poach an egg separately and add it to the bowl when serving.

Summarized Recipe

Soondubu Jjigae (Korean Soft Tofu Soup)

Date Published: April 12th, 2025 | Last Updated: April 12th, 2025
Author: Abby |Category: soup, asian, easy, healthy, low cal, mains, quick
Serves: 4 | Prep time: 15 mins | Cook time: 30 mins

Ingredients:

  • 300g chuck steak, sliced into 3-4 cm long strips
  • 6 cloves garlic, minced
  • 1 small onion, diced
  • 1 cup (~250g) kimchi, chopped with juices
  • 1 Tbsp Korean chili powder
  • 400g button mushrooms, sliced
  • 1 bunch enoki mushrooms (optional)
  • 2.5 tsps Hondashi bonito stock powder
  • 2 cups water
  • 1 handful of tteok (Korean rice cakes), rinsed
  • 150g raw shrimp, deveined and deshelled, cut in half width-wise
  • 2 x 313g/11oz packages of soft soon tofu (extra soft Korean tofu), halved and sliced
  • For garnish: 1 green onion, sliced fine

Directions:

  1. In a medium sized soup pot (enough to accommodate 6 cups) on HIGH heat, add a drizzle of oil and quickly sauté the steak until just browned on the outside – do not cook all the way through (2-3 minutes). Remove from the pot and set aside.
  2. In the same pot on MED-HIGH heat, add another drizzle of oil and sauté the garlic and onion for 30 seconds or until fragrant. Then add in the 1 cup chopped kimchi, 1 Tbsp chili powder, button mushrooms, and enoki mushrooms. Continue to sauté for another few minutes until the onion softens.
  3. Dissolve the 2.5 tsps bonito stock powder into 2 cups of water and add it to the pot along with the tteok. Bring to a boil and simmer for 2-3 minutes then add in the shrimp, tofu, and sautéed steak (from step 1) into the pot and carefully mix it around without breaking the tofu. Let the soup simmer until the shrimp is cooked and the tteok is soft (~another 3-4 minutes), then turn off the heat. Taste and adjust salt or sugar as needed (the amount of adjustment will depend on the type of kimchi you’ve used). Garnish with chopped green onion. Enjoy! Serve with a side of white rice.
    • Optional: crack an egg at the surface while the shrimp is cooking at the same time for 3-4 minutes, or otherwise poach an egg separately and add it to the bowl when serving.

Dubai Chocolate Bars


Date Published: April 6th, 2025 | Last Updated: April 6th, 2025
Author: Abby |Category: snacks, dessert
Makes: 6 chocolate bars (in the specified molds) | Prep time: 15 mins | Total time: 1 hour

Jump to recipe |

My coworker Joe was the one that put me on the viral Dubai Chocolate Bars. I’m not much of a TikTokker so I had never heard of them until he brought it up, and then suddenly within the next two weeks I was seeing these chocolate bars everywhere. An NYC nut shop was importing them from Dubai and was selling them for $16 for 1 bar! It was insane. It was ridiculous, but out of curiosity we got suckered into the hype and bought a bar. Not many things live up to the craze, but this chocolate bar was SERIOUSLY SO GOOD. I’m not sure if it was $16 good, but it was pretty close.

A Dubai Chocolate Bar is a milk chocolate bar with a crunchy pistachio paste filling. After some googling, I found a few vague copycat recipes and decided to try my own hand at it. It was a messy process (when is it ever not when working with melted chocolate 🥲) but after a few tweaks and portioning, it came out perfect! I had some leftover store-bought $16 Dubai Chocolate Bar and compared it with my own homemade version and in a blind taste test, Toby picked my version! 😁 I’d say that’s a pretty big win. So here I am, sharing the recipe with you all!

Some tools you’ll need:

Chocolate mold

Chocolate mold – you can use any kind of silicon chocolate mold you wish. I used this one from Amazon which makes 6 medium-sized bars at a time. If you choose to use a larger mold to make larger chocolate bars, keep in mind that you will have to increase the portions in the recipe to account for the difference.

Metal rack – to allow for excess chocolate to drip out of your molds. Any kind of rack will do.

A Breakdown of the Ingredients:

Kataifi pastry, milk chocolate melts, and pistachio cream

Kataifi pastry is essentially shredded or spun phyllo dough that gives a lovely crunch and holds its texture even when sitting within a paste for long periods of time. It actually looks just like dried rice vermicelli to me. It’s a common ingredient used in Middle Eastern desserts and can be found in specialty grocery stores. I used the Alkis brand that can be found here.

Pistachio Cream or Pistachio Spread is blended pistachios in a paste form with added ingredients to make it smooth and creamy. I like to use the Pisti Pistachio Cream that’s imported from Italy, but sometimes this can be a bit hard to find so I’ve also shared a recipe to make your own that can be found here. It’s not quite the same but will yield equally delicious results. Whichever kind of pistachio cream you use, make sure it’s good quality that’s strong in pistachio flavour.

Milk Chocolate – whatever brand you choose, treat yourself and get a higher grade milk chocolate. You can use chocolate chips, but I prefer chocolate melts for easier melting. My go-to brand for this recipe is the Ghirardelli milk chocolate wafers – it tends to be more expensive but it’s soooo good 😬.

Tahini is a paste made from sesame seeds. It’s used in this recipe to add extra richness and fluidity of the filling due to the natural oils from the sesame seeds. It can be found in most grocery stores these days but if you can’t seem to find it, you can make it yourself by blending up toasted white sesame seeds with a neutral oil in a 2:1 ratio with a pinch of salt in a high speed blender until you get a smooth paste.

Anyways, without further ado, here’s the recipe! If you have any comments or suggestions, I’d love to hear from you in the comment section! You can follow me on instagram, youtube and facebook to see all the recipes I post!

Happy cooking!

Tools you’ll need:

  • Chocolate mold – I use this one
  • Cooling rack with a tray below

Ingredients you’ll need:

  • 50g of kataifi pastry – I use this one
  • 20g unsalted butter
  • 400g of milk chocolate – I use this one
  • Pinch of salt
  • 120g Pistachio cream or spread – I use this one or you can make your own here
  • 7g tahini

Directions:

Prepare the kataifi pastry:

Place the kataifi pastry in a bowl and crush it by hand until you have small pieces, roughly 3mm long.

Melt the 20g of butter in a pan on MED heat and add in the kataifi pastry. Stir and toast the pastry until golden brown (~5 mins). Turn off the heat and place the toasted pastry in a bowl until cooled and ready to use.

Prepare the chocolate mold:

Melt/temper the chocolate by putting it on a double boiler: In a small sauce pan, fill up 1/3 of the pan with water and let it come to a boil. Fit a glass or heat-proof bowl over top the boiling water and add in the chocolate. Whisk until the chocolate has completely melted and it reaches 100˚F/38˚C.

Alternatively, you can also microwave the chocolate 30 seconds at a time until it reaches 100˚F/38˚C.

Pour chocolate into the molds, making sure you cover all edges and the sides as well.

Prepare a clean rack over a tray and flip the chocolate-coated mold upside down on the rack to let the excess chocolate drip out. Let it drip for a few minutes then turn back over. Keep the excess chocolate for the final step.

Let the chocolate set in the fridge for 10-15 minutes until solidified.

After setting in the fridge

Make the filling: In a mixing bowl, mix together the pistachio cream, tahini, and a pinch of salt. Then add in the cooled toasted kataifi pastry. Mix thoroughly.

Spoon the filling into the solidified chocolate molds, spreading it evenly to the edges.

Melt/temper the excess chocolate (from step 2) again by either putting it on a double boiler or microwave 30 seconds at a time until it reaches 100˚F/38˚C. Pour it into the mold over the filling and spread out evenly. Lightly bang the mold on the table to release any air bubbles, then refrigerate until solid. (20-25mins).

Once the chocolate has solidified, gently remove them from the molds. Clean up any edges with a knife.

Done! Eat immediately or keep refrigerated.

Summarized Recipe:

Dubai Chocolate Bars

Date Published: April 6th, 2025 | Last Updated: April 6th, 2025
Author: Abby |Category: snacks, dessert
Makes: 6 chocolate bars (in the specified molds) | Prep time: 15 mins | Total time: 1 hour

Tools you’ll need:

  • Chocolate mold – I use this one
  • Cooling rack with a tray below

Ingredients:

  • 50g of kataifi pastry – I use this one
  • 20g unsalted butter
  • 400g of milk chocolate – I use this one
  • Pinch of salt
  • 120g Pistachio cream or spread – I use this one or you can make your own here
  • 7g tahini

Directions:

  1. Prepare the kataifi pastry: Place the kataifi pastry in a bowl and crush it by hand until you have small pieces, roughly 3mm long. Melt the butter in a pan on MED heat and add in the kataifi pastry. Stir and toast the pastry until golden brown (~5 mins). Turn off the heat and place the toasted pastry in a bowl until cooled and ready to use.
  2. Prepare the chocolate mold:
    • Melt/temper the chocolate by either putting it on a double boiler or microwave 30 seconds at a time until it reaches 100˚F/38˚C.
    • Pour chocolate into the molds, making sure you cover all edges and the sides as well. Bang the mold on the table to release any bubbles and to ensure even distribution.
    • Prepare a clean rack over a tray and flip the chocolate-coated mold upside down on the rack to let the excess chocolate drip out. Let it drip for a few minutes then turn back over. Keep the excess chocolate for the final step.
    • Let the chocolate set in the fridge for 10-15 minutes until solidified.
  3. Make the filling: In a mixing bowl, mix together the pistachio cream, tahini, and a pinch of salt. Then add in the cooled toasted kataifi pastry. Mix thoroughly.
  4. Spoon the filling into the solidified chocolate molds, spreading it evenly to the edges.
  5. Melt/temper the excess chocolate (from step 2) again by either putting it on a double boiler or microwave 30 seconds at a time until it reaches 100˚F/38˚C. Pour it into the mold over the filling and spread out evenly. Lightly bang the mold on the table to release any air bubbles, then refrigerate until solid. (20-25mins).
  6. Once the chocolate has solidified, gently remove them from the molds. Done! Eat immediately or keep refrigerated.